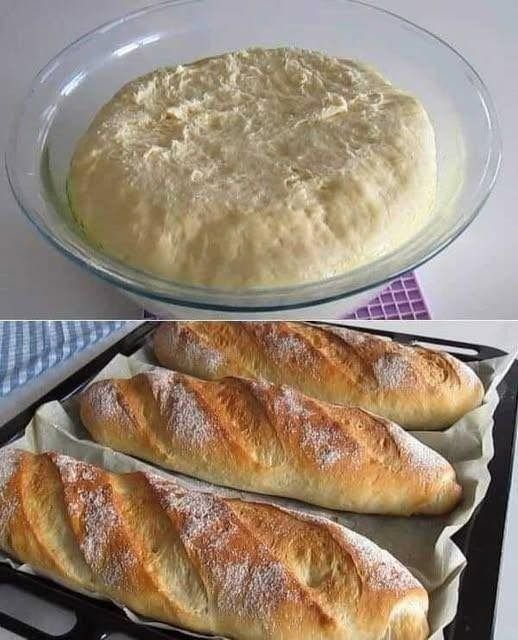
After trying this recipe, you’ll never want to buy bread again — you’ll bake it fresh at home instead
 Homemade White Bread
Ingredients
For the Bread:
- 4 cups all-purpose flour
- 2 teaspoons instant yeast
- 2 teaspoons salt
- 2 tablespoons sugar
- 2 tablespoons unsalted butter, softened
- 1 ½ cups warm water
For the Topping (optional):
- 1 tablespoon milk
- 1 tablespoon unsalted butter, melted
Instructions
Step 1: Activate the Yeast
In a small bowl, stir together the warm water, sugar, and yeast. Let it rest for 5–10 minutes, until the mixture becomes foamy and active.
Step 2: Make the Dough
In a large mixing bowl, combine the flour, salt, softened butter, and the yeast mixture. Knead the dough on a lightly floured surface for about 10 minutes, or until it’s smooth and elastic.
Step 3: First Rise
Place the dough into a greased bowl, cover it, and set it in a warm area for 1–2 hours, or until it doubles in volume.
Step 4: Shape the Loaf
Gently punch down the dough to release trapped air. Form it into a loaf shape and place it in a greased bread
Step 5: Second Rise
Cover and let the shaped dough rise again for 30–45 minutes, until it puffs up nicely.
Step 6: Preheat & Prepare the Topping
Preheat your oven to 375°F (190°C). If you’re adding the topping, mix the milk and melted butter together.
Step 7: Bake
Brush the loaf with the milk-butter mixture if desired. Bake for 30–35 minutes, or until the top is golden brown and the loaf sounds hollow when tapped.
Step 8: Cool & Serve
Let the bread cool in the pan for a few minutes, then transfer it to a wire rack to cool completely. Slice and enjoy your homemade loaf fresh or toasted!


 Look At The Recipe
 Ingredients Needed
 How To Make Our SmartPoints Chicken Salad
 Storage & Serving Suggestions
 Tips & FAQs