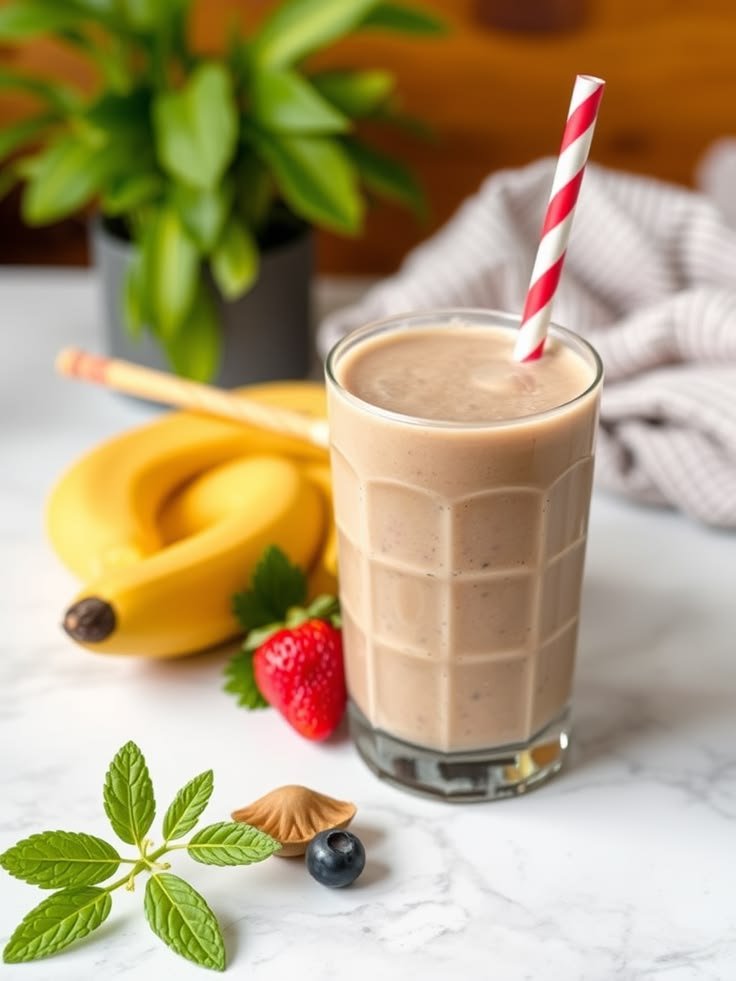
Banana Breakfast Smoothie Recipe

Banana Breakfast Smoothie Recipe

Ingredients

1 ripe banana (frozen bananas make for a creamier, colder texture)


1 cup milk (dairy or your favorite plant-based alternative like almond or oat)


2 tbsp rolled oats (adds fiber and keeps you full longer)


1 tbsp peanut butter (provides healthy fats and protein)


1 tsp honey (optional, for a touch of natural sweetness)


Optional Garnish: A sprinkle of chia seeds, extra oat flakes, or banana slices.


Instructions

Prep the Banana: Peel the banana. If you have time, slicing and freezing it beforehand will give the smoothie a milkshake-like consistency without needing ice.


Combine: Add the milk to your blender first (this helps the blades spin more easily), followed by the banana, oats, peanut butter, and honey.


Blend: Pulse until the oats are fully broken down and the mixture is completely smooth. This usually takes about 45 to 60 seconds depending on your blender’s power.


Adjust: If the smoothie is too thick, add a splash more milk. If it’s too thin, add a few more oats or a couple of ice cubes and blend again.


Serve: Pour into a tall glass. Top with a few banana slices and a pinch of oats or chia seeds as shown in the image for that “cafe-style” look.


Pro Tips

Boost the Protein: You can add a scoop of vanilla protein powder or 1/4 cup of Greek yogurt for an extra protein kick.


Make it Vegan: Simply use a plant-based milk and swap the honey for maple syrup or a pitted date.

🍪 Healthy Pumpkin Seed Oat Cookies (Kid-Approved!)

These crispy-chewy cookies are naturally sweetened, packed with nutrients, and perfect for lunchboxes or guilt-free snacking. The best part? Kids love them—and they’ll never guess they’re actually healthy!


🧾 Ingredients

  • 1 ½ cups rolled oats
  • ½ cup pumpkin seeds
  • ¼ cup sesame seeds
  • ½ cup honey
  • ¼ cup coconut oil (melted)
  • 1 tsp vanilla extract
  • 1 tsp cinnamon
  • Pinch of salt

👩‍🍳 Step-by-Step Instructions

1. Prep Your Oven

  • Preheat oven to 180°C (350°F)
  • Line a baking tray with parchment paper

2. Mix Dry Ingredients

  • In a large bowl, combine:
    • Rolled oats
    • Pumpkin seeds
    • Sesame seeds
    • Cinnamon
    • Salt
  • Stir well so everything is evenly distributed

3. Add Wet Ingredients

  • Pour in:
    • Honey
    • Melted coconut oil
    • Vanilla extract
  • Mix until everything is fully coated and sticky

4. Shape the Cookies

  • Scoop about 1–2 tablespoons of mixture
  • Place on tray and flatten with a spoon or your fingers
  • Keep them thin for extra crispiness

5. Bake to Perfection

  • Bake for 10–15 minutes
  • Edges should turn golden brown
  • Let them cool completely (they’ll crisp up more!)

🔥 Pro Tips (Secret to Perfect Cookies)

  • For crunchier cookies: bake a little longer
  • For softer cookies: reduce baking time slightly
  • Add-ins idea:
    • Raisins 🍇
    • Dark chocolate chips 🍫
    • Chopped nuts 🌰

💪 Why These Cookies Are Healthy

  • Oats → fiber for digestion
  • Pumpkin seeds → rich in protein & magnesium
  • Sesame seeds → healthy fats & calcium
  • Honey → natural sweetener (no refined sugar!)

👶 Kid-Friendly Hack

Tell your kids they’re “energy cookies” or “superhero snacks” — works every time 😄


🧊 Storage Tips

  • Store in an airtight container:
    • Room temp: up to 5 days
    • Fridge: up to 10 days
  • You can also freeze them for 1 month

🍌 Chocolate Chip Banana Bread Recipe

🍌 Chocolate Chip Banana Bread Recipe

Ingredients

Bananas: 3 large ripe bananas (the spottier, the better!)


Butter: 1/2 cup unsalted butter, melted and slightly cooled


Sugar: 3/4 cup granulated sugar (or brown sugar for a richer flavor)


Egg: 1 large egg, beaten


Vanilla: 1 teaspoon vanilla extract


Baking Soda: 1 teaspoon


Salt: A pinch of salt


Flour: 1 1/2 cups all-purpose flour


Chocolate Chips: 1/2 cup semi-sweet chocolate chips (plus extra for sprinkling on top)


Instructions

Preheat & Prep: Preheat your oven to 350°F (175°C). Grease a 4×8-inch loaf pan with butter or non-stick spray.


Mash: In a large mixing bowl, mash the ripe bananas with a fork until smooth.


Mix Wet Ingredients: Stir the melted butter into the mashed bananas. Add the sugar, beaten egg, and vanilla extract. Mix until well combined.


Add Dry Ingredients: Sprinkle the baking soda and salt over the mixture and stir. Gently fold in the flour until just combined.


Tip: Don’t overmix! Overmixing makes the bread tough instead of fluffy.


Fold: Gently fold in the chocolate chips.


Bake: Pour the batter into your prepared loaf pan. Bake for 50 to 60 minutes, or until a toothpick inserted into the center comes out clean.


Cool: Let the bread cool in the pan for 10 minutes, then remove it and place it on a wire rack to cool completely before slicing.


💡 Pro-Tips for the Best Loaf

The Bananas: If your bananas aren’t ripe enough, you can bake them (in their peels) at 300°F for about 15 minutes until they turn black and soft.


Add-ins: If you want some crunch like the loaf in the photo, you can add 1/2 cup of chopped walnuts or pecans.


Storage: Wrap the cooled bread in plastic wrap; it actually tastes even better the second day as the flavors settle!

Mediterranean Burger Bowl Recipe (Healthy Greek-Style Bowl)

🥗 The Ultimate Mediterranean Burger Bowl

High-Protein | Low-Carb | 30-Minute Meal

The Components

Part Key Ingredients
The Patties Ground turkey, spinach, feta, garlic, oregano, and cumin.
The Base Chopped Romaine or Mixed Greens.
The Toppings Cucumber, cherry tomatoes, red onion, and Kalamata olives.
The Sauce Greek yogurt, fresh dill, lemon juice, and garlic.

Quick Execution Guide

  1. Mix & Prep: Combine patty ingredients gently (don’t overwork the meat!). Form 4 patties with a thumbprint dimple in the center.

  2. The “Zing” Sauce: Whisk the yogurt, dill, and lemon. Let it chill in the fridge—it tastes better the longer it sits!

  3. Sear: Cook patties in olive oil for 5–6 minutes per side (until internal temp hits 165°F).

  4. Assemble: Layer greens → veggies → warm patty → huge dollop of tzatziki.

💡 Pro-Tip: If you are meal-prepping this, keep the warm patties and the cold yogurt sauce in separate containers. Nothing ruins a good bowl faster than wilted lettuce from a hot burger!


Customization Ideas

  • The “Keto” Flip: Add half an avocado and an extra drizzle of extra virgin olive oil.

  • The “Gourmet” Flip: Swap the turkey for ground lamb for an even more authentic Greek taverna flavor.

  • The “Crunch” Factor: Add a tablespoon of toasted pine nuts on top.

3-Ingredient Weight Watchers Blueberry Cobbler

3-Ingredient Weight Watchers Blueberry Cobbler

Estimated Points: Approx. 4–5 Points per serving (depending on your specific plan)

Ingredients:

  • 2 cups Fresh or frozen blueberries (Zero Points!)

  • 1 box Sugar-free or “Light” Yellow Cake Mix (like Pillsbury Sugar-Free)

  • 1 can (12 oz) Diet Lemon-Lime Soda (Zero Points!)

  • Optional: A dash of cinnamon or lemon zest for extra zing.

Instructions:

  1. Preheat your oven to 350°F (175°C).

  2. Layer the Berries: Spray a baking dish with non-stick spray and spread the blueberries evenly across the bottom.

  3. Add the Mix: Sprinkle the dry cake mix evenly over the top of the berries. Do not stir!

  4. The Soda Trick: Slowly pour the diet soda over the cake mix. Try to cover as much of the dry powder as possible. Again, do not stir—the bubbling soda reacts with the mix to create that “cobbler” texture.

  5. Bake: Pop it in the oven for 35–45 minutes until the top is golden brown and the blueberries are bubbling through.


Pro-Tips for Your Next Batch:

  • The “Crunch” Factor: If you like a little crunch, you can spray the top of the cake mix lightly with some zero-point butter spray before baking.

  • The Scoop: Pair it with a scoop of Fat-Free Cool Whip or Halo Top Vanilla to keep that “delish” feeling without the guilt.

Creamy Chicken & Garlic Cannelloni

Creamy Chicken & Garlic Cannelloni

Prep time: 20 mins | Cook time: 30 mins | Serves: 4


Ingredients

The Filling:


2 cups cooked chicken, shredded or finely chopped (rotisserie works great)


1 cup Ricotta cheese


1 cup Shredded Mozzarella


1/4 cup Grated Parmesan


1 tsp Italian seasoning


12-14 Cannelloni tubes (or manicotti)


The White Garlic Sauce:


3 tbsp Butter


3 cloves Garlic, minced


3 tbsp All-purpose flour


2 ½ cups Whole milk


½ cup Heavy cream


½ cup Parmesan cheese


Salt & Pepper to taste


Topping:


1 cup Shredded Mozzarella (for that golden crust)


Fresh parsley, chopped (for the garnish seen in your photo)


Instructions

Prep the Sauce: In a saucepan, melt the butter over medium heat. Add the garlic and sauté for 1 minute until fragrant. Whisk in the flour to form a paste (roux) and cook for 1 minute. Slowly whisk in the milk and cream. Simmer until thickened, then stir in the Parmesan until melted. Set aside.


Make the Filling: In a large bowl, mix the shredded chicken, ricotta, mozzarella, Parmesan, and Italian seasoning. Season with a pinch of salt and pepper.


Stuff the Tubes: Transfer the chicken mixture into a piping bag (or a sturdy plastic bag with the corner snipped off). Pipe the filling into the uncooked cannelloni tubes.

The Ultimate Peanut Butter Banana Smoothie

The Ultimate Peanut Butter Banana Smoothie

Prep time: 5 minutes


Servings: 1 large glass


Ingredients

Category Ingredient Quantity

The Base Frozen Bananas (peeled before freezing) 2 medium

Protein/Fat Creamy Peanut Butter 2 tbsp

Liquid Almond milk (or milk of choice) 1 cup

Sweetener Honey or Maple Syrup (optional) 1 tsp

Texture Greek Yogurt (plain or vanilla) 1/4 cup

Toppings Fresh banana slices, crushed peanuts, extra peanut butter drizzle As desired

Instructions

Prep the Glass: For that professional “dripping” look shown in your photo, take a spoonful of room-temperature peanut butter and swirl it around the inside rim of your glass, letting it naturally drip down the sides. Place the glass in the freezer for 2 minutes to “set” the drips.


Blend: Add the frozen bananas, 2 tablespoons of peanut butter, milk, and yogurt into a high-speed blender.


Adjust Consistency: Blend until completely smooth. If it’s too thick, add a splash more milk. If you want it thicker (like a milkshake), add a few ice cubes or another half of a frozen banana.


Assemble: Pour the mixture into your prepared glass.


Garnish: Top with fresh banana slices and a sprinkle of crushed peanuts for that satisfying crunch.


Pro Tips for the Best Result

Use Overripe Bananas: The spottier the banana, the sweeter the smoothie!


Frozen is Key: Using frozen bananas instead of ice ensures the flavor isn’t “watered down” and creates that creamy, soft-serve texture.


Add a Boost: Want more protein? Toss in a scoop of vanilla protein powder or a tablespoon of chia seeds.

🥤 The Ultimate Blueberry Swirl Milkshake

🥤 The Ultimate Blueberry Swirl Milkshake

Prep time: 10 mins | Servings: 1


Ingredients

Component Items Needed

The Base 2 cups Vanilla bean ice cream, 1/2 cup Frozen blueberries, 1/4 cup Whole milk (or heavy cream for extra thickness)

The Swirl 2 tbsp Blueberry jam or a quick homemade reduction

Toppings Whipped cream (stiff peaks), Fresh blueberries, 1 Mint sprig

Instructions

Prep the Glass:

Take a spoon and drizzle the blueberry jam or syrup around the inside walls of your glass. Place the glass in the freezer for 5 minutes so the “swirl” stays in place when you pour the shake.


Blend the Shake:

In a high-speed blender, combine the vanilla ice cream, frozen blueberries, and milk.


Tip: Start with less milk. You want it thick enough that it doesn’t immediately collapse. Blend until completely smooth and a deep lavender color.


The Assembly:

Remove your chilled glass from the freezer. Pour the blended mixture into the glass, leaving about an inch at the top.


The “Soft Serve” Top:

To get that perfect swirl on top like the photo, use a piping bag with a large star tip filled with either extra-thick whipped cream or slightly softened blueberry-tinted ice cream.


Garnish:

Drop a few fresh blueberries into the folds of the cream, add a tiny bit more syrup, and finish with a fresh mint leaf and a clear straw.


Pro-Tips for the Best Texture

The Temperature: Use a chilled glass! It prevents the shake from melting against the sides, keeping those purple streaks sharp and beautiful.


The Color: If your blueberries aren’t giving you that “electric” purple, a tiny splash of beet juice or a purple food-grade tint works wonders without changing the flavor.

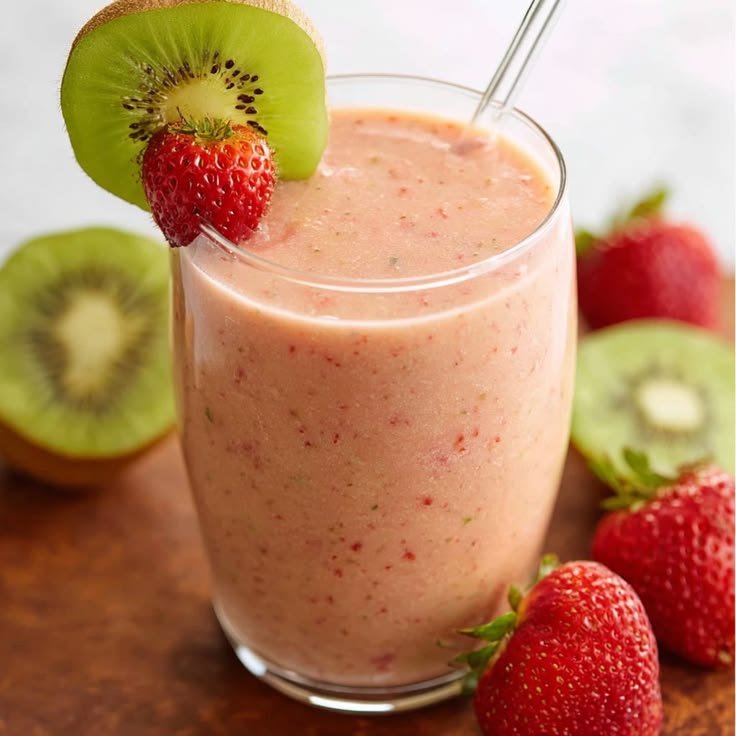
🍓 Creamy Strawberry Smoothie Recipe

🍓 Creamy Strawberry Smoothie Recipe

Ingredients

Frozen Strawberries: 2 cups (using frozen is key for that thick, frosty texture).


Milk of Choice: 1 cup (Whole milk, almond, or oat milk all work great).


Greek Yogurt: 1/2 cup (Vanilla or Plain) for creaminess and protein.


Sweetener: 1–2 tablespoons of honey, maple syrup, or agave (adjust to your preference).


Vanilla Extract: 1/2 teaspoon for a “strawberries and cream” flavor.


Optional: 1 scoop of vanilla protein powder for an extra boost.


Instructions

Layer the Liquid First: Pour the milk, yogurt, sweetener, and vanilla extract into your blender. Adding liquids first helps the blades move more easily.


Add the Fruit: Add the frozen strawberries on top of the liquid base.


Blend: Start on a low speed to break up the frozen berries, then increase to high.


Check Consistency: * Too thick? Add a splash more milk.


Too thin? Add a few more frozen berries or a handful of ice.


Serve: Pour into a tall glass or clear plastic cup. To get the “swirled” look on top like the photo, use a spoon to gently peak the surface of the smoothie before putting on the lid.


Pro-Tips for the Best Result

The “Swirl” Effect: If you want that thick, soft-serve look shown in the image, use slightly less milk. You may need to stop the blender and stir it a few times to get it perfectly smooth.


Fresh Garnish: Keep a few fresh strawberries aside to place around your glass for that professional aesthetic!

Strawberry Banana Bliss Smoothie


Strawberry Banana Bliss Smoothie

Serves: 1


Prep time: 5 minutes


Ingredients

1 cup fresh or frozen strawberries


1 medium banana


1 cup milk of your choice (dairy or plant-based like almond, oat, or soy)


1 tablespoon honey (optional, for added sweetness)


1/2 cup ice cubes (optional, for a thicker, chilled texture)


Instructions

Prep the Fruit: If using fresh strawberries, remove the green stems. Peel the banana (you can break it into chunks to help your blender out).


Layer the Blender: To ensure a smooth blend, add your liquid (milk) first, followed by the honey, then the fruit and ice.


Blend: Secure the lid and blend on high until the mixture is completely smooth and creamy.


Adjust: If the smoothie is too thick, add a splash more milk. If it’s too thin, add a few more ice cubes or frozen fruit and blend again.


Serve: Pour into a glass and enjoy immediately.


Pro-Tip

For an extra creamy texture without using ice, try using a frozen banana. Just peel and freeze your overripe bananas ahead of time!

🥣 Berry Smoothie Power Bowl Recipe

🥣 Berry Smoothie Power Bowl Recipe

🌟 Ingredients

For the smoothie base:


1 cup frozen blueberries


1 cup frozen strawberries


½ banana (for natural sweetness and creaminess)


½ cup yogurt (plain or vanilla)


¼–½ cup milk (dairy or plant-based like almond or oat)


For the toppings:


Fresh strawberry slices


Fresh blueberries and raspberries


Chia seeds


Hemp seeds


Flax seeds


Chopped pecans and walnuts


Coconut flakes


A drizzle of mango puree or honey (optional)


🥄 Instructions

1. Prepare the smoothie base

Add the frozen blueberries, frozen strawberries, banana, yogurt, and milk to a blender. Blend until the mixture becomes thick, smooth, and creamy. The consistency should be thicker than a regular smoothie so it holds toppings well.


If it is too thick, add a small amount of milk. If it is too thin, add a few more frozen fruits and blend again.


2. Pour into a bowl

Once blended, pour the smoothie mixture into a wide bowl. Use a spoon to gently smooth the surface so it is even and ready for decorating with toppings.


3. Add the toppings

Arrange the toppings in neat rows or sections for a colorful and appealing look:


Place sliced strawberries on one side


Add blueberries and raspberries next to them


Sprinkle chia, hemp, and flax seeds in small lines


Add nuts and coconut flakes for crunch


Finish with a light drizzle of mango puree or honey for natural sweetness


🍽️ Serving Tips

Serve immediately while the smoothie is cold and thick. This bowl is perfect for breakfast, a light lunch, or a refreshing snack on warm days. It is packed with fiber, vitamins, healthy fats, and natural energy to keep you feeling satisfied. 💪✨

10-Minute Yogurt Flatbread (No-Oven Recipe)

10-Minute Yogurt Flatbread (No-Oven Recipe)

This quick and versatile flatbread is a perfect solution for busy days. Using just a few simple ingredients, you can create a soft, chewy bread that pairs beautifully with savory dishes or works perfectly as a stand-alone snack.


Ingredients

Yields 6–8 Flatbreads

  • 4 cups (480g) Flour (All-purpose or whole wheat)

  • 1 cup (220g) Plain Yogurt (Unsweetened)

  • 1 cup (200ml) Water

  • 1 tbsp Oil (Optional, for added softness)

  • A pinch of Salt


Step-by-Step Instructions

  1. Prepare the Dough: In a large mixing bowl, combine the flour, yogurt, and water. Add the salt and oil if using. Mix until a cohesive dough forms.

  2. Knead: Transfer the dough to a lightly floured surface. Knead for 5–7 minutes until the texture is smooth and elastic. If the dough feels too sticky, add a tablespoon of flour at a time; if too dry, add a splash of water.

  3. Shape: Divide the dough into 6–8 equal-sized balls. Use a rolling pin to flatten each ball into a thin, round circle.

  4. Cook: Heat a non-stick pan or a cast-iron skillet over medium-high heat. Place one flatbread in the pan and cook for 2–3 minutes. Once golden-brown spots appear on the bottom, flip and cook the other side for another 2 minutes. Use a spatula to press down gently, ensuring even browning.

  5. Serve: Remove from the heat and keep the cooked bread wrapped in a clean kitchen towel to maintain softness. Serve warm.


Pro-Tips for Success

  • Flavor Variations: To elevate the taste, try kneading fresh herbs (like rosemary or cilantro), garlic powder, or a pinch of paprika directly into the dough.

  • Storage: Store leftovers in an airtight container at room temperature for up to 3 days. These also freeze exceptionally well; simply reheat in a dry pan for a few seconds to restore the texture.

  • Flour Choice: Using whole wheat flour will provide a heartier texture and increase the fiber content, while all-purpose flour yields a lighter, more classic “café-style” flatbread.


Nutritional Highlights

  • High Protein: The inclusion of yogurt adds a boost of protein and promotes a softer crumb.

  • No Added Sugar: A clean, simple alternative to store-bought breads.

  • Digestive Friendly: Using yogurt as a base introduces beneficial cultures to the dough.

Triple Fruit Smoothie Recipe (Green, Berry, and Tropical)

Triple Fruit Smoothie Recipe (Green, Berry, and Tropical)

Ingredients

1. Green Smoothie (Spinach–Kiwi)

1 cup fresh spinach


1 ripe banana


1 kiwi, peeled


1 cup milk or yogurt


1 teaspoon chia seeds (optional)


3–4 ice cubes


2. Pink Berry Smoothie (Strawberry–Banana)

1 cup fresh or frozen strawberries


1 ripe banana


1 cup milk or yogurt


1 teaspoon honey or dates for natural sweetness


3–4 ice cubes


3. Yellow Tropical Smoothie (Mango–Orange)

1 cup chopped mango


½ cup fresh orange juice


½ banana


½ cup yogurt


3–4 ice cubes


Instructions

Step 1: Prepare the Fruits

Wash all fruits thoroughly. Peel the banana, kiwi, and mango. Chop them into smaller pieces so they blend smoothly.


Step 2: Blend the Green Smoothie

Add spinach, banana, kiwi, milk, and ice into a blender. Blend for 30–40 seconds until smooth and creamy. Pour into a jar and set aside.


Step 3: Blend the Pink Smoothie

Add strawberries, banana, milk, honey, and ice to the blender. Blend until the mixture turns smooth and slightly thick. Pour into another jar.


Step 4: Blend the Yellow Smoothie

Add mango, orange juice, banana, yogurt, and ice into the blender. Blend until creamy and bright yellow in color.


Serving

Pour each smoothie into separate jars or glasses. You can garnish with:


sliced strawberries


chia seeds


small spinach leaves or fruit slices


Serve immediately while chilled for the best taste and texture.


Tips for Best Results

Use frozen fruits if you prefer thicker smoothies.


Yogurt makes the texture creamier and adds protein.


You can replace dairy milk with almond, soy, or oat milk for a lighter option.


These three smoothies provide a great mix of vitamins, fiber, and natural sweetness—perfect for breakfast, a refreshing snack, or a post-exercise drink. 🌈

Naturally Sweet Oatmeal, Apple & Carrot Bake

Naturally Sweet Oatmeal, Apple & Carrot Bake

This wholesome bake is a nourishing, flourless, and sugar-free treat. The sweetness is derived entirely from the natural sugars in the apples, carrots, apricots, and raisins, making it an excellent choice for a clean-eating lifestyle. It is soft, filling, and perfect for breakfast, snacks, or a healthy dessert.


Ingredients

Serves 6–8

  • 2 cups (200g) Rolled Oats (pulsed in a blender)

  • 1 tsp Baking Powder

  • 1 cup (240ml) Milk (unsweetened)

  • 1 large Carrot (finely grated)

  • 1 Apple (grated with peel for extra fiber)

  • 9 Dried Apricots (rinsed with hot water and chopped)

  • 4 tbsp Raisins (rinsed with hot water)

  • Optional: A pinch of cinnamon or a splash of vanilla extract (ensure they are sugar-free)


Step-by-Step Instructions

  1. Preparation: Preheat your oven to 180°C (350°F). Lightly grease a round baking tin or a rectangular baking dish with a small amount of oil or butter.

  2. Prepare the Oats: Place the rolled oats in a blender and pulse briefly until they reach a coarse, meal-like consistency. Do not blend them into a fine flour; keeping some texture is key for this bake.

  3. Mix Dry Ingredients: In a large mixing bowl, whisk together the pulsed oats and the baking powder until well combined.

  4. Add Wet & Fruit Ingredients: Stir in the milk, grated carrot, and grated apple. Add the chopped apricots and raisins.

  5. Combine: Mix all ingredients thoroughly. The batter should be thick, heavy, and moist.

  6. Bake: Pour the mixture into your prepared dish, smoothing the top with a spatula. Bake for 35–40 minutes, or until the bake is firm to the touch and the edges are lightly golden.

  7. Cool & Serve: Allow the bake to cool significantly before slicing. The texture improves and firms up as it cools, making it easier to serve.


Chef’s Notes for Best Results

  • The “Rinse” Secret: Rinsing the dried apricots and raisins in hot water before adding them to the batter softens the fruit and draws out their natural sweetness, which helps flavor the entire bake.

  • Texture: Ensure you grate the apple and carrot finely. This distributes moisture evenly so every bite is soft rather than chunky.

  • Storage: Store leftovers in an airtight container in the refrigerator to keep the bake moist. It can be enjoyed cold or gently reheated.


Health Benefits

  • Whole Oats: High in fiber to support digestion and heart health.

  • Carrots & Apples: Rich in vitamins and essential antioxidants.

  • No Added Sugar: A balanced option for those monitoring sugar intake or following specific nutritional programs.

Ginger Cinnamon Lemon Infusion

Ginger Cinnamon Lemon Infusion

This warm herbal drink combines fresh ginger, cinnamon, and lemon for a naturally aromatic and refreshing beverage. While it is a wonderful way to stay hydrated and support digestion, it is important to remember that no single drink can “guarantee” a flat stomach or spot-reduce fat. A balanced lifestyle and consistent nutritional habits are what truly lead to long-term results!


Ingredients

Yields 1 Cup

  • 1½ cups Water

  • 1 inch Fresh Ginger Root (thinly sliced) or ½ tsp Ground Ginger

  • 1 Cinnamon Stick or ½ tsp Ground Cinnamon

  • Juice of ½ Fresh Lemon

  • 1 tsp Honey (optional, for natural sweetness)


Equipment

  • Small saucepan

  • Knife and cutting board

  • Strainer

  • Mug


Step-by-Step Instructions

  1. Boil the Water: Pour the water into a small saucepan and bring it to a rolling boil over medium heat.

  2. Add Aromatics: Carefully add the sliced ginger and the cinnamon stick to the boiling water.

  3. Simmer: Reduce the heat to low. Let the mixture simmer gently for 10 to 15 minutes. This slow simmer is essential to allow the flavors and natural oils from the ginger and cinnamon to fully infuse into the water.

  4. Strain: Remove the saucepan from the heat. Use a fine-mesh strainer to pour the tea into your mug, removing the ginger pieces and the cinnamon stick.

  5. Final Touch: Stir in the fresh lemon juice. If you prefer a bit of sweetness, add the honey and mix well until dissolved.

  6. Serve: Enjoy this infusion while it is warm.


Optional Variations

  • Fresh Aroma: Add a few fresh mint leaves during the simmering process.

  • Warmth Boost: Add a small piece of fresh turmeric or a pinch of ground turmeric for extra depth of flavor.

  • Citrus Swap: Use fresh orange juice instead of lemon for a sweeter, milder citrus profile.


Storage

  • Freshness: This drink is best enjoyed immediately after preparation.

  • Refrigeration: You can store any leftovers in the refrigerator for up to 24 hours. Reheat it gently on the stovetop or in the microwave before serving.

Mediterranean Swirled Garlic & Herb Cheese Bread

Prep Time: 25 minutes

Rise Time: 1 hour

Bake Time: 25–30 minutes

Total Time: About 2 hours

Serves: 8–10 slices


This Mediterranean Swirled Garlic & Herb Cheese Bread is a golden, buttery loaf packed with layers of melted cheese, fragrant herbs, and rich garlic flavor. It’s soft inside with a slightly crisp crust, making it perfect as a side for soups, pasta, or even as a stand-alone snack. The Mediterranean twist comes from aromatic herbs like oregano and parsley, paired with a touch of garlic and creamy cheese for that irresistible pull-apart texture.

Ingredients

For the Dough:

3 cups all-purpose flour

1 packet (2 ¼ tsp) instant yeast

1 tbsp  sugar

1 tsp salt

¾ cup warm milk (about 110°F / 43°C)

2 tbsp olive oil


1 egg


For the Garlic Herb Cheese Filling:


1 ½ cups shredded cheddar cheese (or mozzarella, or a mix)


3 tbsp unsalted butter, melted


3 garlic cloves, minced


1 tsp dried oregano

½ tsp dried parsley

Instructions

Prepare the dough:
In a large mixing bowl, combine the flour, yeast, sugar, and salt. Stir to mix evenly.

Add wet ingredients:
Pour in the warm milk, olive oil, and egg. Mix until a soft dough forms. Knead for 7–8 minutes (by hand or mixer) until smooth and elastic. If the dough feels too sticky, add 1–2 tablespoons of flour.

First rise:
Place the dough in a lightly oiled bowl, cover it with a damp towel or plastic wrap, and let it rise for about 1 hour or until doubled in size.

See also  Crispy Cauliflower Fritters with  Lemon Tahini Sauce

Make the filling:
In a small bowl, mix melted butter, minced garlic, oregano, and parsley. Set aside.

Shape the dough:
Once risen, punch down the dough and roll it out on a floured surface into a large rectangle (about 12×16 inches). Brush the garlic herb butter evenly over the dough, then sprinkle the shredded cheese on top.

Form the swirl:
Roll the dough tightly from the long side into a log. Slice the log lengthwise down the middle (leaving one end attached if you want a braid-style loaf). Twist or braid the two halves together, keeping the cut sides facing up to show the layers.

Second rise:

Transfer the shaped dough into a greased loaf pan or line it on parchment paper for a free-form loaf. Cover and let it rise again for 20–30 minutes.


Bake:

Preheat the oven to 180°C (350°F). Bake for 25–30 minutes, or until golden brown and the cheese is bubbling.


Finish:

Brush with a little melted butter after baking for extra softness and shine. Let cool for at least 10 minutes before slicing.


Tips:

Check your yeast: Make sure your yeast is active and not expired. If in doubt, dissolve it in warm milk with a pinch of sugar before adding it to the flour.

Warm milk temperature: The milk should be warm to the touch but not hot (about 110°F / 43°C). Too hot will kill the yeast.

Proper kneading: Knead the dough until it’s smooth and elastic. This helps the bread rise evenly and stay soft.


Don’t overload with cheese: Use the listed amount or slightly less. Too much cheese can make the bread heavy and affect rising.


See also VEGAN BBQ PULLED CARROTS

Braid neatly: When twisting or braiding the dough, keep the cut layers facing up for that beautiful cheesy swirl on top.


Avoid overbaking: Once golden brown and firm on top, remove the bread from the oven. Overbaking can dry it out.


Variations:

Cheese options: Swap cheddar for mozzarella, feta, provolone, or a Mediterranean cheese blend.


Add herbs: Mix in fresh basil, thyme, or rosemary for more aroma.


Garlic lovers: Add roasted garlic to the filling for a sweeter, mellow flavor.


Spicy version: Sprinkle chili flakes or add a bit of harissa paste to the garlic butter for a Mediterranean heat.


Stuffed loaf twist: Add chopped sun-dried tomatoes or olives between the layers for extra Mediterranean flair.


Mini rolls: Roll the dough into smaller pieces before baking for individual servings — great for parties or side baskets.


Serving Suggestions:

Serve warm with olive oil for dipping or alongside soups and stews.


Pair with pasta dishes like creamy Alfredo or tomato-based sauces.

Toast leftovers and top them with avocado or poached eggs for a flavorful breakfast.


Q&A

Q: Can I make this bread ahead of time?

A: Yes. You can prepare the dough, shape it, and refrigerate it overnight before baking. Let it come to room temperature and rise for about 30 minutes before putting it in the oven.


Q: Can I use whole wheat flour instead of all-purpose flour?

A: You can substitute up to half the flour with whole wheat. The texture will be slightly denser but still soft and flavorful.


Q: What’s the best way to store it?

A: Keep the bread wrapped in foil or an airtight container at room temperature for up to 2 days. For longer storage, freeze it for up to 2 months and reheat in the oven before serving.


See also Mediterranean Baked Orzo and Meatballs

Q: Can I make it without eggs?

A: Yes. Replace the egg with 3 tablespoons of milk or plain yogurt. The texture will still be soft, though slightly less rich.


Q: How do I make it extra cheesy?

A: Mix a bit of grated parmesan into the dough or sprinkle extra cheese on top before baking for an extra golden crust.


Nutrition

(per slice, based on 10 servings)

Calories: 265


Protein: 9g


Fat: 12g


Carbohydrates: 29g


Fiber: 1g


Sugar: 3g


Sodium: 340mg


(Values are approximate and may vary depending on cheese type and butter amount.)


Conclusion

This Mediterranean Swirled Garlic & Herb Cheese Bread is the perfect balance of soft, cheesy comfort and Mediterranean charm. The warm layers of garlic, herbs, and melted cheese make every slice rich and aromatic. It’s versatile enough to pair with your favorite pasta, soups, or salads — or to simply enjoy on its own, fresh from the oven.

Whether you bake it for a family dinner or a weekend treat, this bread is sure to impress with its beautiful swirled design, golden crust, and irresistible aroma. It’s the kind of recipe that turns simple ingredients into something truly special.

Honey Lemon Turmeric Gummies

Honey Lemon Turmeric Gummies

These bright golden gummies are a soothing, nutrient-dense treat. Packed with turmeric, lemon, and honey, they offer natural anti-inflammatory benefits and a comforting citrus sweetness. They are easy to prepare and store beautifully in the fridge.


Ingredients

Yields 30–40 Gummies

  • 1 cup Water

  • 1 cup Fresh Orange Juice (or additional lemon water for extra citrus flavor)

  • 2–3 tbsp Fresh Lemon Juice

  • 2–3 tbsp Honey (use 3 tbsp if you prefer a sweeter taste)

  • 1 tbsp Ground Turmeric

  • 1/2 tsp Ground Ginger (optional, for added warmth and digestive support)

  • 1/8 tsp Black Pepper (essential for increasing turmeric absorption)

  • 3 tbsp Unflavored Gelatin (grass-fed recommended)

  • 1/2 tsp Vanilla Extract (optional, for a smoother finish)


Step-by-Step Instructions

  1. Warm the Base: In a small saucepan, combine the water, lemon juice, orange juice, turmeric, ginger, and black pepper. Place the pan over low heat and stir gently. Warm the mixture for 2–3 minutes. Do not let it boil, as high heat can reduce the natural nutrients in the lemon and turmeric.

  2. Add Honey: Remove the saucepan from the heat and let it sit for about 1 minute so it is warm but not hot. Whisk in the honey until it is fully dissolved. Adding honey at a slightly lower temperature helps keep its natural properties intact.

  3. Bloom the Gelatin: Slowly sprinkle the gelatin over the warm liquid while whisking continuously to prevent lumps. Let the mixture rest for 1 minute to “bloom,” then whisk again until the gelatin is completely smooth and melted. This step ensures a firm, springy texture without any graininess.

  4. Pour into Molds: Carefully pour the mixture into silicone molds (such as squares, hearts, or bears) or into a shallow glass baking dish.

  5. Chill: Place the molds or dish in the refrigerator for at least 2 hours, or until the gummies are fully set and firm to the touch.

  6. Unmold and Serve: Pop the gummies out of the silicone molds. If you used a glass dish, slice the set mixture into small, even cubes.


Storage & Benefits

  • Storage: Keep gummies in an airtight container in the refrigerator for up to 10 days. They can also be frozen and will thaw very quickly at room temperature.

  • Why it Works: The combination of turmeric and black pepper significantly increases the bioavailability of curcumin. The gelatin provides a gut-friendly protein source, while the lemon and honey offer a natural boost of Vitamin C and antioxidants.

Fluffy 3-Ingredient Breakfast Soufflé Bake

Fluffy 3-Ingredient Breakfast Soufflé Bake

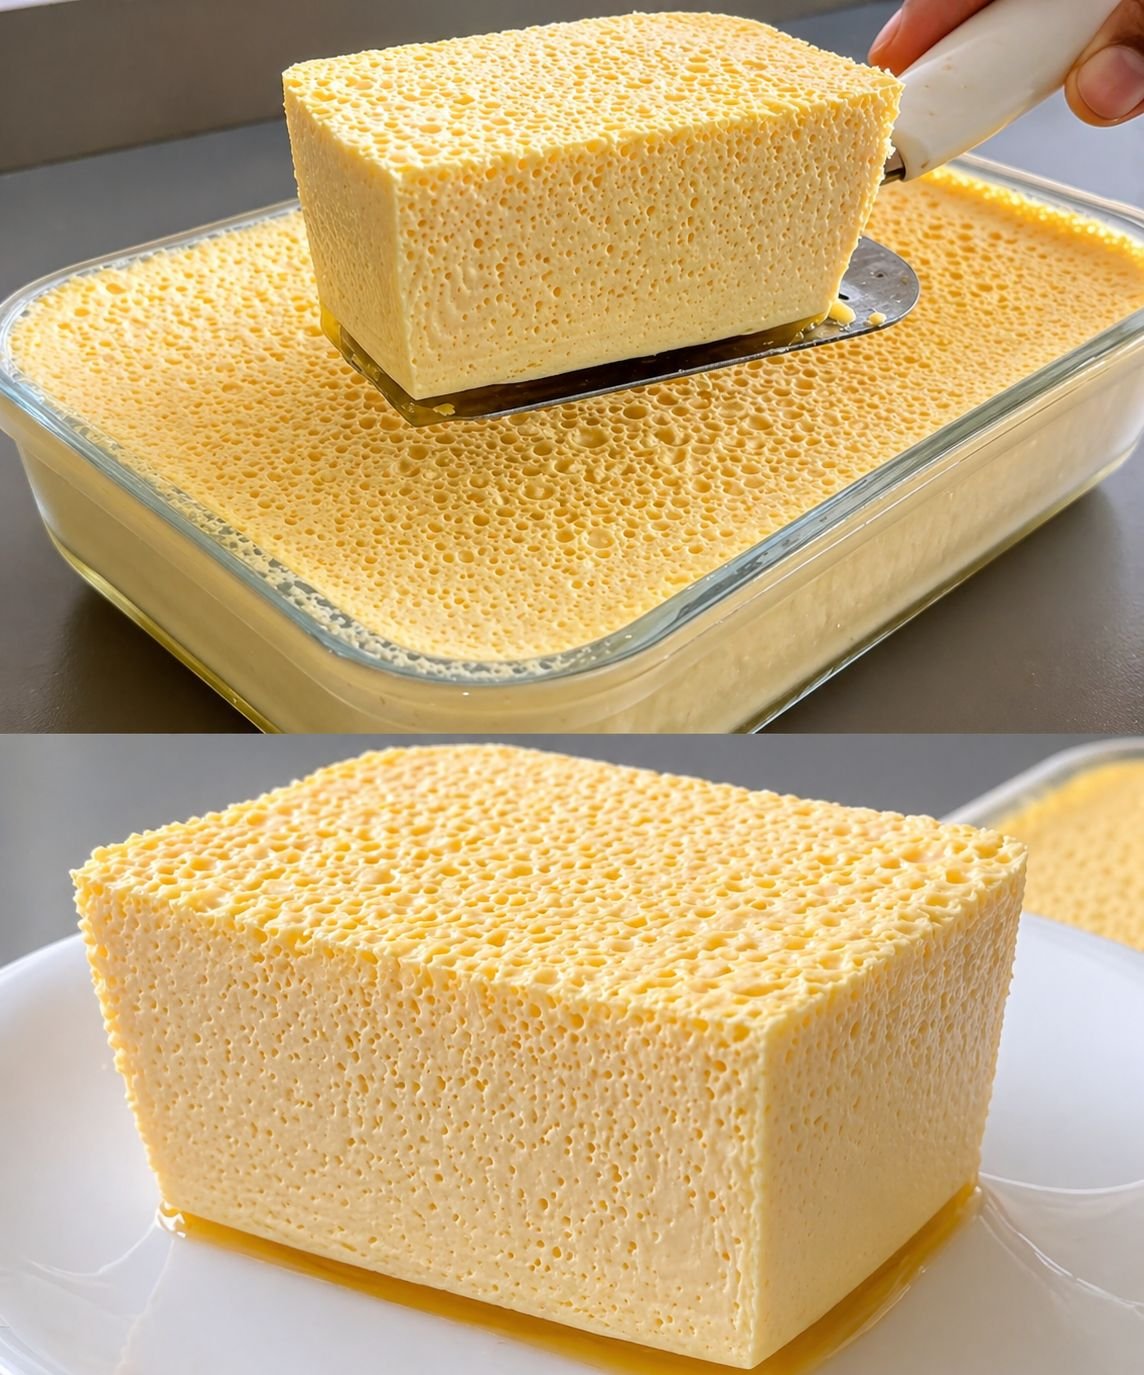
This high-protein, flourless breakfast uses the natural structure of eggs to create a tall, cloud-like texture that is both savory and satisfying.


Ingredients

  • 6 Large Eggs

  • 1 cup Greek Yogurt (Plain, full-fat or non-fat)

  • 1 cup Shredded Cheese (Cheddar, Mozzarella, or Gruyère)

  • Seasoning: A pinch of salt and black pepper


Step-by-Step Instructions

  1. Preparation: Preheat your oven to 375°F (190°C). Lightly grease a glass baking dish (approximately 8×8 inch or a similar small casserole dish) with a light coating of oil or butter.

  2. Separate and Whip: Carefully separate the egg whites from the yolks. Place the whites in a large, very clean glass or metal bowl. Use a hand mixer to beat the whites until they form stiff peaks. This aeration is the secret to achieving the impressive height seen in the photo.

  3. Mix the Base: In a separate bowl, whisk together the egg yolks, Greek yogurt, and half of the shredded cheese until the mixture is smooth. Stir in your salt and pepper.

  4. The Fold: Gently fold about a third of the whipped egg whites into the yolk mixture to lighten it. Then, using a spatula, very carefully fold in the remaining egg whites. Work slowly to avoid deflating the air bubbles that create the “poof.”

  5. Bake: Pour the mixture into your prepared dish and sprinkle the remaining half of the cheese over the top. Bake for 20–25 minutes until the top is a deep golden brown and the center has risen significantly.

  6. Serve: Like any soufflé-style dish, it is most impressive right out of the oven. Serve immediately while it is at its tallest and most fluffy.


Cooking Tips

  • The Yogurt: It provides a slight tang and a creamy density that keeps the eggs moist and prevents them from becoming rubbery.

  • The Cheese: Reserving half of the cheese for the top creates that beautiful, browned crust that seals in the heat.

Discover the Magic of Ginger & Lemon for Weight Loss

Believe it or not, some people are shedding those extra pounds without the need for strict dieting. They are doing it by incorporating a simple, natural blend of ginger and lemon into their daily routine. This dynamic duo not only boosts metabolism but also reduces bloating, supporting natural fat burning. And the best part? It’s easy to make, tastes refreshing, and can easily become your new daily habit!

The Winning Combination of Ginger and Lemon

✅ Ginger works wonders by speeding up your metabolism, curbing your appetite, and enhancing digestion.


✅ Lemon, on the other hand, is packed with vitamin C, aids in flushing out toxins, and helps break down fat.


Together, these two powerhouses assist your body in burning more calories, staying energized, and trimming down, especially around the belly area!

Morning & Night Fat-Burning Drink (Lemon & Ginger Water)

Ingredients:


1–2 slices of fresh ginger (or ½ tsp grated)

Juice from ½ fresh lemon

1 cup hot (not boiling) water

Optional: 1 tsp raw honey or a pinch of cinnamon

Instructions:


Add ginger to a cup of hot water. Let it steep for 5–10 minutes.

Mix in the lemon juice.

Optional: For added flavor and benefits, include honey or cinnamon.

Enjoy it warm.

When to Enjoy It

✅ Morning (before breakfast):

Jumpstarts your metabolism and aids digestion.


✅ Evening (before bed):

Supports overnight fat burning, aids digestion, and helps in detoxification.


You can also drink it between meals to curb cravings and reduce bloating.


Witness the Transformation Over Time

When paired with:


Consistent water intake

Lighter meal choices

Some light movement or a casual walk

This simple drink can assist you in naturally shedding those unwanted pounds without the need for starvation or calorie counting.


Numerous individuals have reported losing up to 5–10 kg in just a month by staying dedicated!


Final Words

Bid farewell to strict diets and pills! This ginger and lemon drink serves as a natural, healthy, and sustainable way to aid weight loss while improving your overall well-being. Simply sip, stay active, and allow your body to work its wonders.

Give it a try for 30 days, and witness the fantastic transformation your body undergoes!


Enjoy the journey to a healthier, happier you!

Peanut Butter Lasagna

Ingredients

Base Layer

  • 36 Oreo cookies finely crushed
  • ¼ cup unsalted butter melted

Peanut Butter Cream Layer

  • 8 oz 225g cream cheese, softened
  • 1 cup creamy peanut butter
  • 1 cup powdered sugar
  • 1 tsp vanilla extract
  • 1 ½ cups whipped topping Cool Whip or homemade

Chocolate Layer

  • 1 ½ cups semi-sweet chocolate chips
  •  cup heavy cream

Instructions

  • Prepare the Base
  • Mix crushed Oreos with melted butter until evenly coated.
  • Press firmly into the bottom of a 9×13-inch baking dish.
  • Chill in the refrigerator while preparing the next layers.
  • Make the Peanut Butter Cream
  • In a bowl, beat cream cheese and peanut butter until smooth.
  • Add powdered sugar and vanilla extract, mixing well.
  • Fold in whipped topping gently until fully combined.
  • Spread the peanut butter mixture evenly over the chilled cookie base.
  • Prepare the Chocolate Topping
  • Heat heavy cream in a small saucepan until just simmering.
  • Pour over chocolate chips in a bowl. Let sit 1–2 minutes.
  • Stir until smooth and glossy.
  • Pour chocolate evenly over the peanut butter layer.
  • Chill and Set
  • Refrigerate for at least 4 hours, preferably overnight, to firm up.
  • Serve
  • Slice into squares or rectangles.
  • Optional: top with chopped peanuts or whipped cream for extra flair.

Loaded Bacon Chicken Alfredo Stuffed Breadstick Bombs

Ingredients

For the Filling

1 ½ cups cooked chicken breast finely diced or shredded

6 slices bacon cooked crispy and crumbled

¾ cup thick Alfredo sauce store-bought or homemade

1 cup shredded mozzarella cheese

¼ cup freshly grated Parmesan cheese

½ teaspoon garlic powder

½ teaspoon Italian seasoning

¼ teaspoon black pepper

For the Dough

1 can 16 oz refrigerated breadstick dough (8 breadsticks)

or 1 lb pizza dough divided into 8 portions

For the Topping

2 tablespoons melted butter

½ teaspoon garlic powder

2 tablespoons grated Parmesan

1 tablespoon chopped fresh parsley optional

Instructions

Preheat oven to 375°F (190°C). Line a baking sheet with parchment paper.

Make the filling:

In a bowl, combine chicken, crumbled bacon, Alfredo sauce, mozzarella, Parmesan, garlic powder, Italian seasoning, and black pepper. Stir until well mixed.

Prepare the dough:

Separate breadsticks or divide pizza dough into 8 equal pieces. Flatten each piece into a small circle (about 3–4 inches wide).

Fill and seal:

Spoon 2–3 tablespoons of filling into the center of each dough round. Carefully pull edges up and pinch tightly to seal, forming a smooth ball. Place seam-side down on baking sheet.

Add topping:

Mix melted butter with garlic powder. Brush over each stuffed dough ball. Sprinkle with Parmesan.

Bake:

Bake for 18–22 minutes, or until golden brown and cooked through.

Finish:

Let cool for 5 minutes. Garnish with parsley if desired. Serve warm.

Natural Green Detox Drink (Gut-Friendly)

Natural Green Detox Drink (Gut-Friendly)

📝 Ingredients

  • 1 cup fresh spinach or mint leaves
  • ½ cucumber (chopped)
  • 1 green apple (for natural sweetness)
  • 1 tbsp lemon juice
  • 1 cup water or coconut water
  • ½ tsp grated ginger
  • (Optional) 1 tsp honey

👩‍🍳 Step-by-Step Recipe

1️⃣ Wash & Prepare

Wash all ingredients thoroughly.

Chop cucumber and apple into small pieces.

2️⃣ Add to Blender

Put spinach/mint, cucumber, apple, ginger, and water into a blender.

3️⃣ Blend Smoothly

Blend for 30–60 seconds until smooth.

4️⃣ Add Lemon

Add fresh lemon juice and blend again for a few seconds.

5️⃣ Strain (Optional)

If you prefer a smooth juice, strain it.

If you want more fiber (better for digestion), drink it as is.

6️⃣ Serve Fresh

Pour into a glass and drink immediately for maximum benefits.

💡 How It Helps

  • Supports digestion
  • Keeps you hydrated
  • Provides fiber for gut health
  • Helps reduce bloating (mild effect)

❓ Q & A

Q1: Can this clean my colon in 10 minutes?

👉 No. That claim is false. Your body naturally cleans itself. This drink only supports digestion, not instant cleansing.

Q2: When should I drink it?

👉 Best time: Morning on an empty stomach or between meals.

Q3: Can I drink it daily?

👉 Yes, 3–4 times a week is ideal.

Q4: Can I skip apple?

👉 Yes, but taste will be less sweet. You can replace with a little honey.

Q5: Does it help in weight loss?

👉 It can support weight loss when combined with a healthy diet, but it’s not a magic solution.

Q6: Who should avoid it?

👉 People with sensitive stomachs, ulcers, or kidney issues should consult a doctor before regular use.

🍂 Creamy Chicken with Orzo and Herbs (One-Pan Comfort Meal)

🍂 Creamy Chicken with Orzo and Herbs (One-Pan Comfort Meal)

https://images.openai.com/static-rsc-4/m4IKfZMtriz9N5Y-_pvr_WuufWSbWUMxMd9aiQvxyf3efqAHS6tuvJFd3gJ7lEpJGzXHNndoVzpzc20LTmAuEvJvD-2v43F8jgKM8Hj4MuFzka5u7ATxuubakVnqdL1Ud28P4fesBWv1WRSqSwNUxu2X6JnyKHi7bFjIwP3j2JmjYYxmVZ31eVSLRz8tpWIa?purpose=fullsize
https://images.openai.com/static-rsc-4/NMKR_zneaZJM___yxPSCb2Fe84OdEsSc-KHBBzZ-P5hoUtEvNE1K45XkU4gAW4kEhzf8BnupJjrlEEpGU-YaUvO1llxCek7rpX-aY-PKA66rpQEU2-H-xQdviNOuGIAbRFdh-gOc5DEAAHyCDTPUZvgYWDKZaq2Urn2ak0EH_rMUhfJmf6iwD3MKRBLWJJgp?purpose=fullsize
https://images.openai.com/static-rsc-4/RfBMV5MkxD7IpoIW7TDxFMJKR1rTfV20Qta_piAbTC7Ck-g3r4qxFiNOtBws6YbxI00PiNvHReG6Bux8RYINgpdrH4mXOO3mKYmczXgncFm0PX2_m6xlWCw_Ar8aoPOLMEfzcfDYy4lo9LBeHsunIhLrr46uqJY_c8nCqL0kvLL2bvFeurg_Ox6RwteaOmdm?purpose=fullsize
https://images.openai.com/static-rsc-4/nTZ_-OHxEAkNxqpG4wR3xD8JtuO5GRnrfX6bXYOz7SLykkkpUZgXYN8BvXym0lyp7EGhrgfwxf6GJKRu-S9FI0hrlaycEp18nNbY0f9eZteRrDZrHETN4F7OuKyIQ8d1d5vNc0HLsOtG5ViHURyHCFc2V0Go-Joa86b6h-ngooRMkb_YgE7hZkq-tyyTa8jU?purpose=fullsize
https://images.openai.com/static-rsc-4/GVbhkZk-zDH6bNJXE7kgdIwK5L51_NCtivtn32uQZKVcsTB2nyFQ9nrD9mTtXgL-74aPLvAXm9rYZaASHtkVhDomIaksUQR18zmSKrmRzdD-4h_A6aoPVF5wicK2LdAGWxTNb4nwPx9Cww4qxuerJRtSiiTB_7HWCpevhA9OHk5th0iTIxbVi424M_CCR3Dt?purpose=fullsize
https://images.openai.com/static-rsc-4/NF9i2EX7c50I9PNAVPYdZSdRoC7ycDVpbYuv5zfFc6JzA_9we9jssWxEW5-FRbPtFbDBg6FVmwqWzRnAd3Tr-EpZ0PeRVJTmjcqTJxb8DDcXXM_dDBpxxJqhzURzLvJ1I4P_dm43a-uuJK5JPOWJVswUp7Ev69jIS4ObxwubUcfEBXOOweoL51745thgSh7e?purpose=fullsize
https://images.openai.com/static-rsc-4/p8TKAShTsRV1SpjQDKNxuLta8wVVB9OROWkqVIW2emKCtwWFbOIOAmb5WcmehjcOywdAajEFci41dY0SNO1iEs12a9hJ7sULZs3NzNaavhSpYjlpkXqZ8D0YJSn0EJMzAWu5-6VT4K0NgjqI7kvfFksWfQg1APvlNyzGsY1Be8RsNNsK5FMT_moIofBQMfPK?purpose=fullsize
https://images.openai.com/static-rsc-4/pqNhb5YO5-1l2DUYQJzJQfS6Du7NwFOTTheyZ_PFhnGTD73VZz-wy3xphUX-8_Z7EBIhOThgyVe5pVYSFwF5HnZi9jBSKwr5cAYVeTjQjwlY2JoQX_5AVPVu4IFbUnG_fgZ3xcUAlI8cdYvXlHtkMecgQ7y48ROsuAdVA-W0k4UGnwtyjFJG3Ld2NbGu32zV?purpose=fullsize

🕒 Time & Servings

  • Prep Time: 15 minutes
  • Cook Time: 30–35 minutes
  • Servings: 4

🛒 Ingredients

🍗 Main

  • 2 tablespoons extra virgin olive oil
  • 1 pound (450g) boneless chicken breasts or thighs, cut into bite-sized pieces
  • 1 teaspoon yellow curry powder
  • Salt and black pepper, to taste

🧅 Base & Flavor

  • 1 medium yellow onion, finely chopped
  • 3 cloves garlic, minced

🍝 Orzo & Liquid

  • 1 cup orzo pasta
  • 2 cups chicken broth
  • 1 cup heavy cream (or half & half for lighter version)

🌿 Herbs & Finish

  • 1 teaspoon dried thyme
  • 1 teaspoon dried oregano
  • ½ cup grated Parmesan cheese
  • 1–2 tablespoons fresh parsley, chopped
  • Juice of ½ lemon (optional, for freshness)

👩‍🍳 Instructions

1️⃣ Sear the Chicken

Heat olive oil in a large skillet over medium heat.
Add chicken, season with salt, pepper, and curry powder.
Cook for 5–7 minutes until golden and cooked through.
Remove and set aside.


2️⃣ Cook the Aromatics

In the same pan, add chopped onion. Cook for 3–4 minutes until soft.
Add garlic and cook for 30 seconds until fragrant.


3️⃣ Toast the Orzo

Add orzo to the skillet and stir for 1–2 minutes to lightly toast it.
(This adds a deeper flavor!)


4️⃣ Simmer

Pour in chicken broth and bring to a gentle simmer.
Cook for 8–10 minutes, stirring occasionally, until orzo is tender.


5️⃣ Make it Creamy

Reduce heat to low. Stir in heavy cream, thyme, oregano, and Parmesan cheese.
Mix until smooth and creamy.


6️⃣ Combine Everything

Return cooked chicken to the skillet.
Simmer for another 3–5 minutes until everything is well combined.


7️⃣ Finish & Serve

Turn off heat and add fresh parsley and a squeeze of lemon juice (optional).
Serve warm and enjoy the creamy goodness! 🍲✨


💡 Tips for Best Results

  • Use chicken thighs for extra juicy flavor
  • Don’t overcook orzo—it should be tender, not mushy
  • Add spinach or mushrooms for extra nutrition
  • Adjust cream for desired thickness

🥄 Serving Ideas

  • Pair with a fresh green salad 🥗
  • Serve with warm garlic bread 🥖
  • Add chili flakes for a spicy kick 🌶️

❤️ Storage

  • Store in fridge for up to 3 days
  • Reheat with a splash of milk or broth to keep it creamy

🍯 The General “Immunity” Tonic Recipe

🍯 The General “Immunity” Tonic Recipe

This ratio is flexible, but here is a standard way to prepare this mixture:

  • 1/2 cup Grated Ginger: High in gingerol; adds heat and zing.

  • 1/2 cup Finely Chopped Onion: Contains quercetin; red onion provides the most.

  • 1/4 cup Minced Garlic: Best if allowed to “rest” for 10 minutes after chopping to activate allicin.

  • Juice of 2 Lemons: Provides acidity and Vitamin C.

  • Raw Honey: Enough to submerge all the solids (usually 1–2 cups).

Preparation Steps

  1. Sanitize: Ensure your glass jar is bone-dry and very clean.

  2. Layer: Pack the grated ginger, onion, and garlic into the jar.

  3. Acidify: Pour the lemon juice over the top. The acidity helps preserve the mixture.

  4. Submerge: Pour the honey over everything. Use a clean spoon to poke out air bubbles. Crucial: Every bit of onion and garlic must be fully submerged under the honey.

  5. Infuse: Let it sit in a cool, dark place for 2–4 weeks. The honey will become very runny as it draws the juices out of the vegetables.


⚠️ Important Safety Tips

  • Storage: While many people keep this on the counter, storing it in the refrigerator is the safest way to prevent unwanted bacterial growth (like mold or botulism).

  • The “Bubbles” Check: If you see active bubbling, a foul smell, or a bulging lid, the mixture may have fermented improperly or grown bacteria. Toss it.

  • Infant Warning: Never give honey (or honey-based tonics) to infants under 1 year old due to the risk of botulism.

  • Not a Cure: This is a great supplement for a scratchy throat or a cold, but it doesn’t replace professional medical advice for serious infections!


🧂 Variation: The Savory “Fire Cider”

If you find the honey version too sweet, many people substitute the honey for Apple Cider Vinegar (with “the mother”). It creates a spicy, sour tonic that is great for digestion.

Fruit Salad and Poppy Seed Dressing

Ingredients Breakdown

Based on the photo, here is what you have:

  • Strawberries: Halved or quartered.

  • Blueberries: Whole.

  • Kiwi: Peeled and sliced into wedges.

  • Pineapple: Cut into bite-sized chunks.

  • Grapes: Red or purple, kept whole.

  • Mandarin Oranges: Peeled segments.


The Secret Sauce: Poppy Seed Dressing

The liquid being poured looks like a classic sweet-and-tangy dressing. Here is a quick ratio to recreate it:

Ingredient Amount
Honey (or Agave) 1/4 cup
Lime Juice (fresh) 2 tbsp
Poppy Seeds 1 tsp
Fresh Mint (optional) 1 tbsp, chopped

Pro-Tips for the Best Fruit Salad

  1. Add Citrus Last: The acid in lime or lemon juice helps prevent fruits like apples or bananas from browning, but it can also make softer berries get “mushy” if they sit too long.

  2. Drain the Juice: If using canned pineapple or oranges, drain them well so the salad doesn’t become a “fruit soup.”

  3. Chill Before Serving: Let the dressed fruit sit in the fridge for about 30 minutes to allow the flavors to meld.