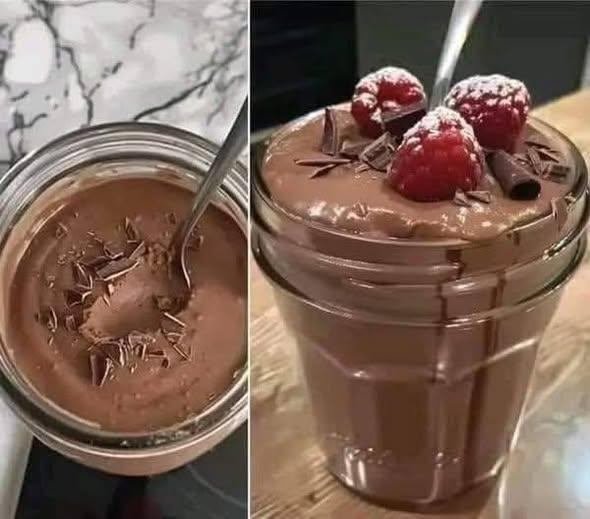
Silky Cottage Cheese Chocolate Mousse
This recipe creates a smooth, whipped texture that feels like a classic gourmet mousse.
Ingredients
-
1 cup cottage cheese
-
2-3 tablespoons unsweetened cocoa powder
-
2-3 tablespoons sweetener of choice (such as maple syrup, honey, or a sugar-free alternative)
-
1 teaspoon vanilla extract
-
A pinch of salt
-
Optional Toppings: Fresh raspberries, shaved chocolate, or crushed nuts
Instructions
-
Blend: Place the cottage cheese, cocoa powder, sweetener, vanilla extract, and salt into a high-speed blender or food processor.
-
Pro Tip: Ensure you blend long enough (about 1–2 minutes) until the “curd” texture of the cheese completely disappears and the mixture looks like liquid velvet.
-
-
Taste and Adjust: Taste a small spoonful of the mousse. If you prefer a deeper chocolate flavor, add an extra tablespoon of cocoa powder. If you’d like it sweeter, add a bit more of your chosen sweetener and pulse again to combine.
-
Portion: Spoon the mixture into small jars or ramekins.
-
Set: For the best experience, place the jars in the refrigerator for at least 30 minutes. This allows the mousse to firm up and the flavors to deepen.
-
Garnish and Enjoy: Just before serving, top with your favorite garnishes. Fresh raspberries provide a beautiful tart contrast to the rich chocolate, while chocolate shavings add a nice bit of crunch.
Why this works:
-
The Texture: When blended, cottage cheese loses its grainy texture and becomes incredibly thick and creamy, much like a traditional mousse base.
-
The Protein: Unlike traditional mousse which relies on heavy cream, this version is naturally satiating.


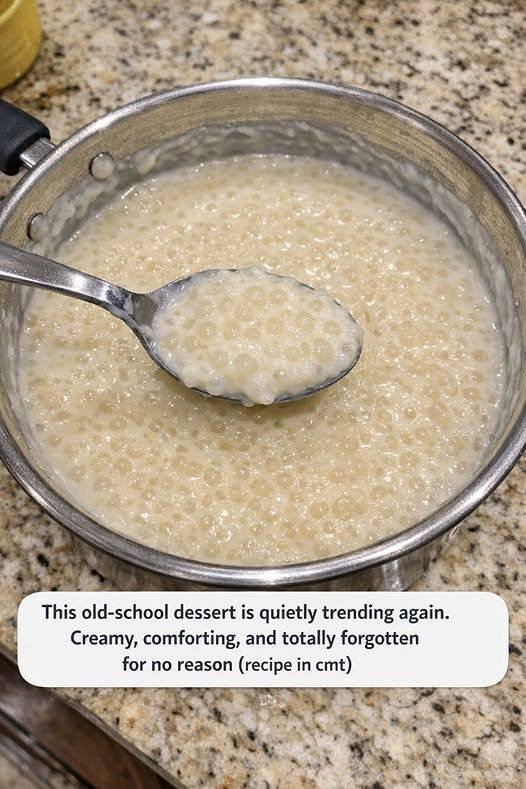
 4-Ingredient Stovetop Tapioca Pudding
 Ingredients
 Directions
 Simple, nostalgic, and endlessly comforting—this classic tapioca pudding shows that the best desserts are often the easiest.