Chicken Salad Biscuit Cups

Creamy Chicken Biscuit Cups 🥐

Looking for the ultimate crowd-pleaser for your next family gathering, brunch, or party? These Creamy Chicken Biscuit Cups are flaky, buttery, and packed with a rich, savory chicken salad that everyone will love!

They are incredibly easy to make, look fantastic on a platter, and disappear in minutes.

🛒 Ingredients

  • 1 can refrigerated biscuit dough

  • 2 cups cooked chicken (shredded)

  • 1/4 cup mayonnaise

  • 2 tbsp sour cream

  • 2 tbsp celery (finely chopped)

  • 2 tbsp red onion (finely chopped)

  • 2 green onions (sliced)

  • Salt & black pepper to taste

👩‍🍳 Step-by-Step Instructions

Step 1: Prepare the Biscuit Cups

  1. Preheat your oven to 375°F (190°C) and lightly grease a standard muffin tray.

  2. Flatten each individual biscuit gently with your hands or a rolling pin.

  3. Press the flattened biscuits into the muffin cups, molding them against the bottom and sides to create small pastry bowls.

Step 2: Bake

  1. Bake for 10–12 minutes until the biscuit cups are beautifully golden brown and fluffy.

  2. Remove from the oven and let them cool slightly in the pan before filling.

Step 3: Make the Filling

  1. In a medium mixing bowl, combine the shredded chicken, mayonnaise, sour cream, finely chopped celery, red onion, and sliced green onions.

  2. Mix thoroughly until the filling is creamy and smooth.

  3. Season with salt and black pepper to taste.

Step 4: Assemble

  1. Spoon a generous amount of the creamy chicken mixture into each baked biscuit cup.

  2. Garnish with a few extra sliced green onions on top for a pop of color.

Step 5: Serve

  • Serve these fresh and warm, or chill the filling ahead of time for a cool, refreshing crunch!

💡 Top Tips for Success

  • Time Saver: Use shredded rotisserie chicken to cut down on prep time and add extra savory flavor!

  • Stay Crisp: To keep the biscuit cups perfectly flaky and crisp, spoon the filling into the cups just before you serve them.

  • Cheesy Twist: Stir a handful of finely shredded cheddar or mozzarella cheese into the chicken mixture for an extra layer of richness.

❓ Frequently Asked Questions

Can I make these ahead of time? Absolutely! You can prepare the creamy chicken filling a day in advance and store it in the fridge. Just bake the biscuit cups and assemble right before your guests arrive.

Can I use another protein? Yes! This recipe is incredibly versatile. Leftover turkey or canned tuna both make fantastic substitutes for the chicken.

How do I store leftovers? If you have assembled leftovers, store them in an airtight container in the refrigerator for up to 2 days.

Cheesy Garlic Bread

Cheesy Garlic Bread

Ingredients

  • 1 large loaf French bread or Italian bread (cut in half lengthwise)

  • ½ cup (1 stick) unsalted butter, softened at room temperature

  • 3-4 cloves garlic, finely minced

  • 1 tbsp fresh parsley, finely chopped (plus extra for garnish)

  • 1 ½ cups shredded Mozzarella cheese

  • ¼ cup grated Parmesan cheese

  • A pinch of salt

Instructions

  1. Prep the Oven: Preheat your oven to 400°F (200°C) and line a large baking sheet with aluminum foil.

  2. Make the Garlic Butter: In a small bowl, thoroughly mix the softened butter, minced garlic, chopped parsley, and a pinch of salt until smooth and creamy.

  3. Spread: Place the bread halves cut-side up on the prepared baking sheet. Evenly spread the garlic butter mixture over the entire surface of both halves.

  4. Bake First Stage: Bake in the preheated oven for 8–10 minutes until the bread is warm and slightly toasted.

  5. Add Cheese: Remove the bread from the oven. Generously sprinkle the shredded mozzarella and grated parmesan cheese across the top of both halves.

  6. Melt and Crisp: Return the bread to the oven for another 5–6 minutes until the cheese is completely melted and bubbly. For a golden-brown top, switch the oven to broil for the last 1–2 minutes, watching it closely so it does not burn.

  7. Slice and Serve: Garnish with extra fresh parsley, slice into thick pieces, and serve immediately while warm.

Vibrant Dragon Fruit Smoothie

Vibrant Dragon Fruit Smoothie

Ingredients

  • 1 cup frozen red dragon fruit (pitaya) cubes

  • 1 cup frozen strawberries or mango chunks

  • 1 ripe banana (sliced)

  • ¾ cup milk of your choice (dairy, almond, or coconut milk)

  • 1 tbsp honey or maple syrup (optional, for sweetness)

  • Fresh mint leaves for garnish

Instructions

  1. Load the Blender: Add the frozen dragon fruit, strawberries, and banana slices into your blender.

  2. Add Liquid: Pour in your preferred milk and the honey or maple syrup if you like a sweeter taste.

  3. Blend: Secure the lid and blend on high speed for 60 seconds until the mixture is completely smooth, thick, and creamy. If it is too thick, simply splash in a little more milk.

  4. Serve: Pour the vibrant pink smoothie into a tall glass. Garnish with a fresh sprig of mint, pop in a straw, and enjoy immediately while chilled!

Creamy Cherry Smoothie

Creamy Cherry Smoothie

Ingredients

  • 1.5 cups frozen sweet cherries (pitted)

  • 1 cup milk of your choice (whole milk, almond, or oat)

  • 1/2 cup plain or vanilla Greek yogurt

  • 1 ripe banana (sliced and frozen)

  • 1 tbsp honey or maple syrup (optional, for extra sweetness)

Instructions

  1. Add to blender: Place the frozen cherries, frozen banana slices, Greek yogurt, milk, and sweetener (if using) into a high-speed blender.

  2. Blend until smooth: Secure the lid and blend on high for 60 to 90 seconds until the mixture is completely creamy, thick, and smooth.

  3. Adjust consistency: If the smoothie is too thick, add a little more milk and blend for a few more seconds. If it’s too thin, add a few more frozen cherries.

  4. Serve immediately: Pour the vibrant pink smoothie into glasses. Top with a fresh cherry on top and enjoy cold with a straw!

Banana Breakfast Smoothie Recipe

Banana Breakfast Smoothie Recipe

This quick and creamy smoothie is the perfect healthy breakfast to kickstart your day.

Ingredients

  • 1 ripe banana (peeled and sliced)

  • 1 cup milk (dairy or any plant-based alternative)

  • 2 tablespoons oats (rolled or instant)

  • 1 tablespoon peanut butter * 1 teaspoon honey (optional, for extra sweetness)

Instructions

  1. Prep the Base: Place your sliced ripe banana and oats into a blender.

  2. Add Liquids & Nut Butter: Pour in the milk, then add the peanut butter and honey.

  3. Blend: Secure the lid tightly and blend on high speed for 30 to 60 seconds, or until the mixture is completely smooth and creamy.

  4. Serve: Pour the smoothie into a tall glass. If desired, top with a sprinkle of extra oats or a few banana slices, insert a straw, and enjoy immediately!

Pro-Tip: For a colder, thicker smoothie, use a frozen banana or toss a few ice cubes into the blender before mixing!

Creamy Shrimp and Corn Chowder

Creamy Shrimp and Corn Chowder

Ingredients

  • 1 lb (450g) large shrimp, peeled and deveined

  • 3 cups corn kernels (fresh, frozen, or canned)

  • 4 cups chicken or vegetable broth

  • 1 cup heavy cream (or whole milk)

  • 2 tbsp butter

  • 1 small onion, finely diced

  • 2 cloves garlic, minced

  • 2 tbsp all-purpose flour

  • Salt and black pepper to taste

  • Sliced green onions for garnish

Instructions

  1. Sauté the Aromatics: Melt the butter in a large pot over medium heat. Add the diced onion and cook for 3 to 4 minutes until soft and translucent. Stir in the minced garlic and cook for another 30 seconds until fragrant.

  2. Build the Base: Sprinkle the flour over the onion and garlic mixture. Stir constantly for about 1 minute to cook out the raw flour taste.

  3. Simmer the Soup: Slowly pour in the broth while whisking continuously to prevent lumps. Add the corn kernels. Bring the mixture to a gentle boil, then reduce the heat to low and let it simmer for 10 minutes to let the flavors blend.

  4. Add the Shrimp: Stir in the shrimp and heavy cream. Simmer gently for 4 to 5 minutes, or just until the shrimp turn pink and opaque. Avoid overcooking the shrimp so they stay tender.

  5. Season and Serve: Season the chowder with salt and black pepper to your preference. Ladle into bowls, top with fresh green onions, and serve warm!

Soft Vanilla Cupcakes

Soft Vanilla Cupcakes

These cupcakes are soft, fluffy, light, and perfect for birthdays, tea time, or simple homemade desserts.

Ingredients

  • 2 cups all-purpose flour
  • 1 cup sugar
  • 2 tsp baking powder
  • 1/2 cup milk
  • 1/2 cup butter (melted)
  • 3 eggs
  • 1 tsp vanilla extract

Step-by-Step Instructions

Step 1: Prepare the Oven

  • Preheat oven to 350°F (175°C).
  • Line a cupcake tray with cupcake liners.

Step 2: Mix Dry Ingredients

  • In a large bowl, combine:
    • flour
    • sugar
    • baking powder
  • Mix well.

Step 3: Add Wet Ingredients

  • Add:
    • milk
    • melted butter
    • eggs
    • vanilla extract
  • Whisk until smooth and creamy.
  • Do not overmix.

Step 4: Fill the Cupcake Liners

  • Pour batter into cupcake liners.
  • Fill each liner about 3/4 full.

Step 5: Bake

  • Bake for 18–22 minutes until golden on top.
  • Insert a toothpick into the center — it should come out clean.

Step 6: Cool

  • Remove cupcakes from the tray.
  • Let cool on a wire rack before serving.

Tips

  • Use room-temperature eggs for softer cupcakes.
  • Do not overbake to keep them moist.
  • Add chocolate chips or sprinkles for variation.

Q/A

Can I add frosting?

Yes, buttercream or whipped cream frosting works perfectly.

Can I store them?

Store in an airtight container for up to 3 days.

Can I freeze them?

Yes, freeze unfrosted cupcakes for up to 2 months.

Blueberry & Blue Cheese Salad

Blueberry & Blue Cheese Salad

Ingredients

  • 4 cups Mixed salad greens (spinach, arugula, and baby lettuce)

  • 1 cup Fresh blueberries

  • ½ cup Blue cheese, crumbled or cubed

  • ⅓ cup Pecans or walnuts, toasted

  • ¼ cup Dried cranberries (optional)

  • Dressing: 2 tablespoons olive oil, 1 tablespoon balsamic vinegar, salt, and pepper to taste.

Instructions

  1. Prep the Greens: Wash and thoroughly dry the mixed salad greens. Place them into a large serving bowl.

  2. Assemble: Scatter the fresh blueberries, crumbled blue cheese, toasted pecans, and dried cranberries evenly over the top of the greens.

  3. Dress and Serve: In a small small bowl, whisk together the olive oil and balsamic vinegar. Drizzle the dressing over the salad just before serving, toss gently to combine, and enjoy immediately!

Frozen Avocado Scoops

Frozen Avocado Scoops
Makes 12 scoops | 5 min prep + 2 hr freeze | Keto, dairy-free, high fat snack

Think of these as creamy, fudgy bites that melt in your mouth. Great for killing sweet cravings without spiking blood sugar.

Ingredients
Ripe avocados: 2 large, ∼300g flesh. They should give slightly when pressed
Coconut cream or full-fat coconut milk: ¼ cup, 60ml. Makes them creamy and helps them freeze solid
Sweetener: 2-3 tbsp erythritol, monk fruit, or maple syrup. Taste and adjust
Lemon or lime juice: 1 tbsp. Stops browning and balances richness
Vanilla extract: 1 tsp
Pinch of salt
Optional add-ins: 2 tbsp cocoa powder for chocolate, 1 tbsp peanut butter, 2 tbsp sugar-free chocolate chips, pinch of cinnamon

Method

Blend
Add avocado, coconut cream, sweetener, lemon juice, vanilla, and salt to a blender or food processor. Blend until completely smooth. No green chunks.

Scoop & freeze
Line a tray with parchment. Use a small cookie scoop or spoon to drop 12 mounds onto the tray.
If using chocolate chips or nuts, press them on top now.

Freeze
Freeze 2 hours until solid. Transfer to a freezer bag or container. They keep 2 months.

How to eat them
Eat straight from the freezer like ice cream bites. Let sit 1-2 min if you want them softer.
They’re rich, so 2-3 scoops is usually enough.

Tips & Swaps
No coconut? Use ¼ cup Greek yogurt + 1 tbsp MCT oil or heavy cream. Texture changes slightly but still works.
Chocolate version: Add 2 tbsp cocoa powder and 1 extra tbsp sweetener. Tastes like avocado chocolate mousse bites.
Don’t skip the acid: Lemon/lime keeps them green and cuts the avocado flavor so they taste neutral/sweet.
Texture tip: If they’re icy, blend 1 tbsp more coconut cream next time. Fat = creaminess.

Rough per scoop: ∼65 cal, 1g protein, 6g fat, 2g carbs, 1g net carbs

Creamy Bacon Pea Salad

A creamy, crunchy, cheesy salad loaded with peas, crispy bacon, ham, and cheddar cheese. Perfect for BBQs, brunch, potlucks, or an easy side dish.

Ingredients

  • 3 cups green peas (fresh or thawed frozen peas)
  • 1 cup diced ham
  • 6 slices bacon (cooked crispy)
  • 1 cup cheddar cheese (shredded)
  • 1/2 cup mayonnaise
  • 1/4 cup sour cream
  • 1 tsp garlic powder
  • Salt & black pepper to taste

Step-by-Step Instructions

Step 1: Cook the Bacon

  • Fry bacon until crispy and golden brown.
  • Place on paper towels to remove extra oil.
  • Chop into small pieces.

Step 2: Prepare the Salad Base

  • In a large bowl, combine:
    • green peas
    • diced ham
    • shredded cheddar cheese
  • Mix gently until evenly combined.

Step 3: Make the Dressing

  • In a separate bowl, whisk together:
    • mayonnaise
    • sour cream
    • garlic powder
    • salt and black pepper
  • Stir until smooth and creamy.

Step 4: Combine Everything

  • Pour the dressing over the salad mixture.
  • Toss gently until everything is coated evenly.
  • Sprinkle crispy bacon pieces over the top.

Step 5: Chill & Serve

  • Refrigerate for 30 minutes before serving.
  • Serve cold for the best flavor and texture.

Tips

  • Use sharp cheddar for extra flavor.
  • Thaw and dry frozen peas before mixing.
  • Add chopped onions for extra crunch if desired.

Q/A

Can I make this ahead of time?

Yes, it tastes even better after chilling for a few hours.

Can I replace the ham?

Yes, turkey or chicken works well too.

How long does it last?

Store in the refrigerator for up to 3 days.

Quick Pickled Red Onions

Ingredients

  • 2 medium red onions (thinly sliced)
  • 1 cup vinegar
  • 1/2 cup water
  • 1 tbsp sugar
  • 1 tsp salt
  • 1 tsp chili flakes
  • 1 tsp mustard seeds
  • 1 garlic clove (minced)
  • 1 small green chili (optional)

👩‍🍳 Step-by-Step Instructions

🔪 Step 1: Slice the Onions

➡️ Peel the red onions and slice them into thin rings.

➡️ Separate the onion layers gently for better flavor absorption.


🥣 Step 2: Make the Pickling Liquid

➡️ In a bowl or saucepan, combine:

  • vinegar
  • water
  • sugar
  • salt

➡️ Stir until the sugar and salt dissolve completely.


🌶️ Step 3: Add Flavor

➡️ Add chili flakes, mustard seeds, garlic, and green chili.

➡️ Mix well to create a spicy tangy brine.


🫙 Step 4: Combine Everything

➡️ Place sliced onions into a clean glass jar or bowl.

➡️ Pour the pickling liquid over the onions until fully covered.

➡️ Press onions down gently with a spoon.


❄️ Step 5: Let Them Pickle

➡️ Let sit for 30 minutes for quick pickles.

➡️ For deeper flavor, refrigerate for 4–24 hours.

✨ The onions will turn vibrant pink and beautifully tangy.


💡 Tips

✅ Use apple cider vinegar for a slightly sweeter taste.
✅ Thin slices pickle faster and stay crisp.
✅ Store in the fridge for up to 1 week.


❓Q/A

❓ Why are my onions not bright pink?

➡️ Red onions become brighter after chilling for a few hours.

❓ Can I make them less spicy?

➡️ Yes, reduce or skip the chili flakes.

❓ What can I serve them with?

➡️ Tacos, burgers, sandwiches, salads, grilled meat, and rice bowls.


🌿 Nutritional Benefits

  • Red onions contain antioxidants 🧅
  • Vinegar may help digestion ✨
  • Low-calorie flavorful topping for meals 🌮

Mixed Berry Cheesecake

Ingredients

For the Crust

  • 2 cups crushed graham crackers or digestive biscuits
  • 6 tbsp melted butter

For the Cheesecake Filling

  • 500g cream cheese (softened)
  • 1 cup sugar
  • 1 tsp vanilla extract
  • 3 eggs
  • 1 cup heavy cream
  • 2 tbsp cornstarch

For the Berry Topping

  • 1 cup strawberries
  • 1/2 cup blueberries
  • 1/2 cup raspberries
  • Powdered sugar for garnish

👩‍🍳 Step-by-Step Instructions

🥣 Step 1: Prepare the Crust

➡️ Preheat oven to 325°F (160°C).

➡️ Mix crushed biscuits with melted butter until it looks like wet sand.

➡️ Press the mixture firmly into the bottom of a springform pan.

➡️ Bake for 8 minutes, then let it cool.


🧀 Step 2: Make the Cheesecake Filling

➡️ In a large bowl, beat cream cheese until smooth and creamy.

➡️ Add sugar and vanilla extract. Mix well.

➡️ Add eggs one at a time, mixing gently after each egg.

➡️ Pour in heavy cream and cornstarch. Mix until silky smooth.

⚠️ Do not overmix, or the cheesecake may crack.


🍰 Step 3: Bake the Cheesecake

➡️ Pour filling over the crust.

➡️ Tap the pan lightly on the counter to remove air bubbles.

➡️ Bake for 50–60 minutes until edges are set but center still jiggles slightly.

➡️ Turn off oven and leave cheesecake inside for 30 minutes with the door slightly open.

➡️ Chill in refrigerator for at least 6 hours or overnight.


🫐 Step 4: Decorate

➡️ Carefully remove cheesecake from the pan.

➡️ Smooth sides gently with a warm spatula if needed.

➡️ Pipe whipped cream around the edges.

➡️ Top with mixed berries and dust powdered sugar on top.


💡 Tips

✅ Use room-temperature cream cheese for a smooth texture.
✅ Chill overnight for the best flavor and clean slices.
✅ Wipe knife after every slice for bakery-style cuts.


❓Q/A

❓ Why did my cheesecake crack?

➡️ Overmixing or sudden temperature changes can cause cracks.

❓ Can I use frozen berries?

➡️ Yes, but thaw and dry them first to avoid extra moisture.

❓ How long does cheesecake last?

➡️ Store in fridge for up to 5 days.


🍓 Small Nutritional Benefits

  • Berries are rich in antioxidants and vitamin C 🍓
  • Cream cheese provides calcium. 🧀
  • Homemade cheesecake has fresher ingredients and no preservatives. ✨

Delicious Potato Onion Bake with Cheese & Garlic 🥔🧄🧀

Delicious Potato Onion Bake with Cheese & Garlic 🥔🧄🧀

This cheesy potato onion bake is crispy on the edges, soft in the center, and packed with comforting garlic flavor. Perfect as a side dish or cozy dinner!

🛒 Ingredients

  • 2 cups potatoes, diced
  • 1 cup onions, chopped
  • 1 cup shredded cheese
  • 2 garlic cloves, minced
  • ¼ cup olive oil
  • 1 tsp salt
  • ½ tsp black pepper

👩‍🍳 Step-by-Step Instructions

1️⃣ Prep the Ingredients

  • Preheat oven to 375°F (190°C).
  • Wash, peel, and dice potatoes into small cubes.
  • Chop onions and mince garlic.

2️⃣ Cook the Vegetables

  • Heat olive oil in a skillet over medium heat.
  • Add potatoes and cook until lightly golden.
  • Stir in onions and garlic.
  • Season with salt and black pepper.
  • Cook until onions become soft and fragrant.

3️⃣ Add Cheese & Bake

  • Transfer mixture to a baking dish.
  • Sprinkle shredded cheese evenly on top.
  • Bake for 15–20 minutes until cheese is melted and bubbly.

4️⃣ Serve Hot

  • Garnish with parsley if desired.
  • Serve warm with salad, grilled chicken, or garlic bread.

💡 Tips

  • Use cheddar or mozzarella for the best melt.
  • Add paprika or chili flakes for extra flavor.
  • For extra crispiness, broil for 2 minutes at the end.

❓Q&A

Q: Can I make it ahead?

Yes! Prepare everything and refrigerate before baking.

Q: Can I use sweet potatoes?

Absolutely — they add a slightly sweet flavor.

Q: How do I store leftovers?

Keep in an airtight container in the fridge for up to 3 days.

🥗 Nutritional Benefits

  • Potatoes provide energy and fiber.
  • Garlic supports immunity.
  • Cheese adds calcium and protein.

✨ Crispy, cheesy, and full of comforting flavor — this potato onion bake is the kind of recipe everyone asks for again!

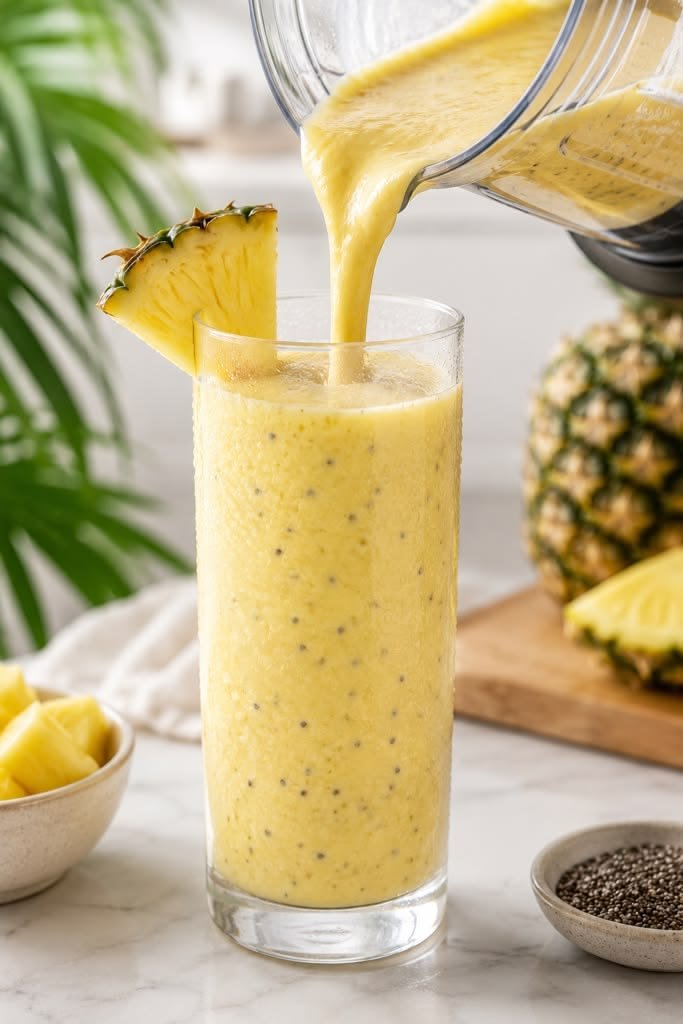
Tropical Green Smoothie

Tropical Green Smoothie

Ingredients

  • 1 cup fresh spinach leaves (for that beautiful green color)

  • ½ cup pineapple chunks (fresh or frozen)

  • ½ cup mango cubes (fresh or frozen)

  • 1 ripe banana (sliced)

  • ½ kiwi (peeled and sliced)

  • 1 tablespoon chia seeds (plus a little extra to sprinkle on top)

  • 1 cup liquid of your choice (water, coconut water, or almond milk work great)

  • Optional: A few ice cubes if using all fresh fruit

Instructions

  1. Layer the Ingredients: Add the liquid to your blender first (this helps everything blend smoothly). Next, add the spinach, followed by the banana, pineapple, mango, kiwi, and chia seeds.

  2. Blend: Turn the blender on low, then gradually increase to high speed. Blend for about 45 to 60 seconds until the mixture is completely smooth and creamy with no remaining spinach bits.

  3. Adjust Thickness: If the smoothie is too thick, add a splash more liquid. If you prefer it thicker, add a few ice cubes or a couple more frozen fruit chunks and blend again.

  4. Serve: Pour the smoothie into a tall glass. Sprinkle a small pinch of chia seeds on top for a beautiful garnish, just like in the picture. Enjoy immediately!

French Onion Stuffed Chicken

French Onion Stuffed Chicken.

  • Prep time: 20 minutes

  • Cook time: 35 minutes

  • Servings: 2 large portions

Ingredients

The Caramelized Onions & Sauce

  • 2 large yellow onions, thinly sliced

  • 2 tablespoons unsalted butter

  • 1 tablespoon olive oil

  • 2 cloves garlic, minced

  • ½ cup beef broth (or chicken broth)

  • ¼ cup dry white wine (optional, substitute with more broth and a splash of apple cider vinegar)

  • 1 teaspoon fresh thyme leaves (plus a sprig for garnish)

  • Salt and freshly cracked black pepper to taste

The Chicken

  • 2 large, thick chicken breasts (boneless, skinless)

  • 1 teaspoon garlic powder

  • 1 teaspoon paprika

  • 4 slices Gruyère cheese (Swiss or Provolone also work beautifully)

  • 1 tablespoon olive oil (for searing)

Step-by-Step Instructions

1. Caramelize the Onions

  1. Heat the butter and 1 tablespoon of olive oil in a large, oven-safe skillet (like cast iron) over medium heat.

  2. Add the sliced onions and a pinch of salt. Cook, stirring occasionally, for about 15 to 20 minutes until they turn a deep, golden-brown color.

  3. Stir in the minced garlic and fresh thyme, cooking for 1 more minute until fragrant.

  4. Remove about half of the onions from the skillet and set them aside on a plate to cool slightly (these will go inside the chicken). Leave the remaining onions in the pan.

2. Prepare and Stuff the Chicken

  1. Pat the chicken breasts dry with a paper towel.

  2. Using a sharp knife, slice a pocket horizontally into the thickest part of each chicken breast, being careful not to cut all the way through.

  3. Season the outside and inside of the chicken breasts evenly with salt, black pepper, garlic powder, and paprika.

  4. Stuff each chicken pocket with a slice of Gruyère cheese and a generous spoonful of the cooked onions you set aside. Use toothpicks to seal the edges if needed.

3. Sear the Chicken

  1. Preheat your oven to 400°F (200°C).

  2. Push the remaining onions in the skillet to the outer edges. Add another drizzle of olive oil to the center of the pan over medium-high heat.

  3. Add the stuffed chicken breasts. Sear for about 4 to 5 minutes on each side until they develop a beautiful, golden-brown crust.

4. Create the Pan Sauce

  1. Pour the beef broth and white wine (if using) directly into the skillet around the chicken, stirring it into the onions on the sides to deglaze the pan. Let it simmer for 2 minutes to reduce slightly.

5. Bake and Melt

  1. Top each chicken breast with the remaining caramelized onions and another layer of Gruyère cheese.

  2. Transfer the entire skillet into the preheated oven. Bake for 10 to 12 minutes, or until the chicken is cooked through (internal temperature reaches 165°F / 74°C).

  3. Turn the oven to “Broil” for the last 1 to 2 minutes to get the cheese bubbly and golden-brown, just like the picture.

Chef’s Tip: Let the chicken rest for 5 minutes before slicing. This keeps all the juices inside the meat and prevents the melted cheese from running out too quickly! Garnish with a fresh sprig of thyme before serving.

Blueberry Cream Cheese French Toast Rolls

Blueberry Cream Cheese French Toast Rolls

Ingredients

  • 8 slices soft white bread

  • 1 cup cream cheese, softened

  • 1/3 cup powdered sugar

  • 1 teaspoon vanilla extract

  • 3/4 cup fresh blueberries

  • 2 eggs

  • 1/4 cup milk

  • 1 teaspoon cinnamon

  • 2 tablespoons butter

Topping

  • Extra blueberries

  • Powdered sugar

  • Whipped cream

  • Fresh mint leaves (optional)

Instructions

  1. Trim the crusts from the bread slices and gently flatten each slice with a rolling pin.

  2. In a bowl, mix the cream cheese, powdered sugar, and vanilla until smooth and creamy.

  3. Spread a spoonful of the cream cheese mixture onto each bread slice. Add a few blueberries on top.

  4. Roll the bread tightly into small rolls and press gently to keep them sealed.

  5. In another bowl, whisk together the eggs, milk, and cinnamon.

  6. Heat a pan over medium heat and melt the butter.

  7. Dip each roll into the egg mixture, coating all sides lightly.

  8. Place the rolls in the warm pan and cook for 2–3 minutes on each side until golden and slightly crisp.

  9. Remove from the pan and let them cool for a minute.

  10. Dust with powdered sugar and top with whipped cream, extra blueberries, and mint leaves.

Serving Suggestion

Serve warm with maple syrup, honey, or a cup of coffee for a cozy breakfast or dessert.

Prep Time

  • Prep Time: 15 minutes

  • Cook Time: 10 minutes

  • Total Time: 25 minutes

Crispy Fried Chicken with Fries & Coleslaw

Crispy Fried Chicken Box with Fries & Coleslaw
Ingredients

For the Chicken

  • 6 chicken pieces (drumsticks or thighs)

  • 2 cups buttermilk

  • 1 tsp salt

  • 1 tsp black pepper

  • 1 tsp paprika

  • 1 tsp garlic powder

  • 2 cups all-purpose flour

  • 1 cup cornflakes crumbs or breadcrumbs

  • Oil for frying

For the Fries

  • 3 large potatoes

  • 1 tsp salt

  • 1 tsp paprika

  • 1 tbsp oil

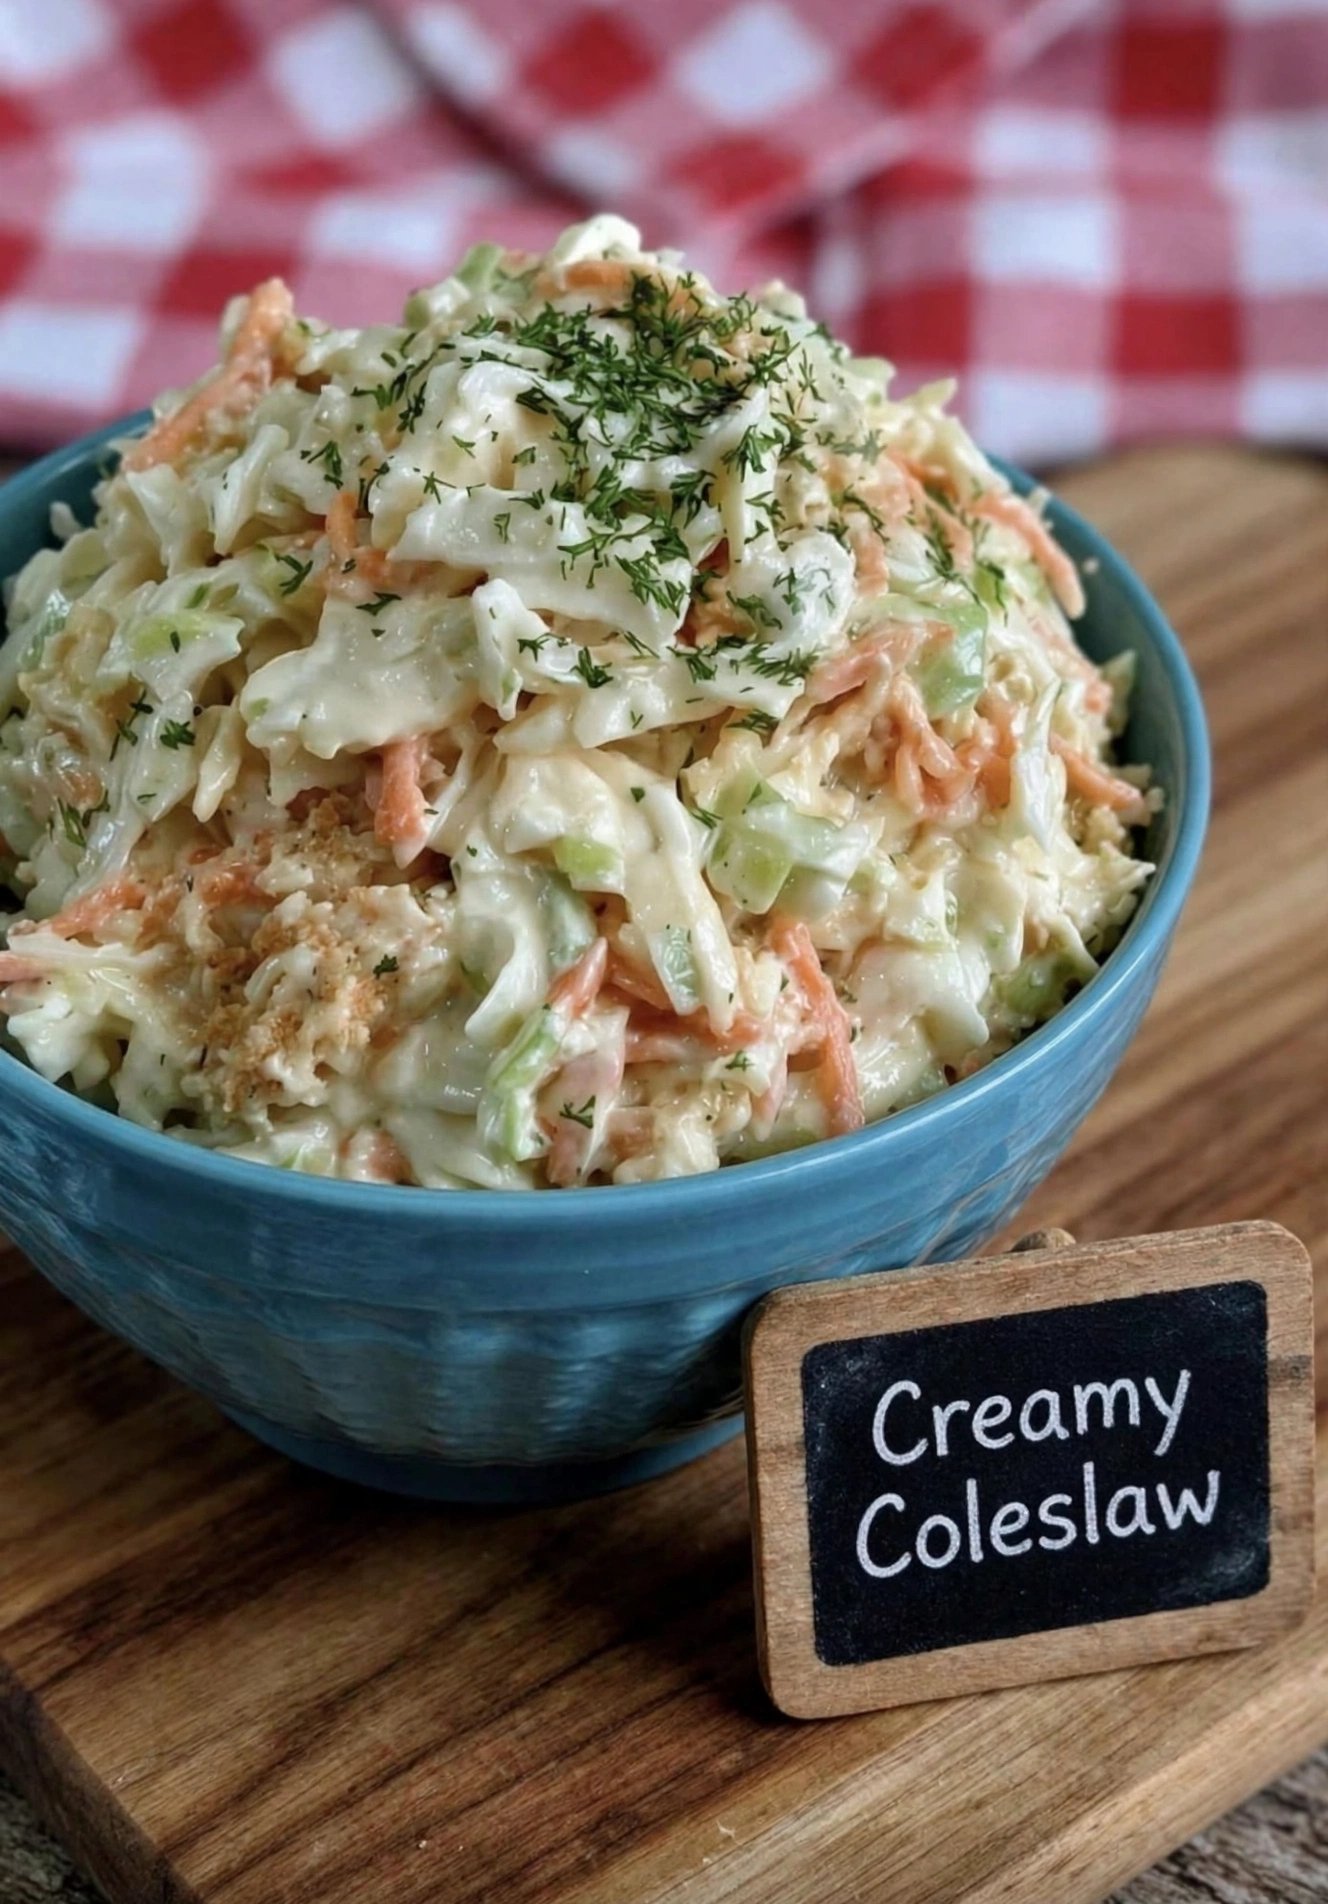
For the Coleslaw

  • 2 cups shredded cabbage

  • 1 carrot, grated

  • 3 tbsp mayonnaise

  • 1 tbsp cream

  • 1 tsp sugar

  • 1 tsp lemon juice

  • Pinch of salt and pepper

For Serving

  • Ketchup or your favorite dipping sauce

Instructions

  1. In a large bowl, mix buttermilk, salt, pepper, paprika, and garlic powder. Add chicken pieces and let them rest for at least 1 hour for extra flavor.

  2. In another bowl, combine flour and cornflakes crumbs. Coat each chicken piece well in the mixture.

  3. Heat oil in a deep pan over medium heat. Fry the chicken until golden, crispy, and fully cooked inside. Place on paper towels to remove extra oil.

  4. Cut potatoes into fries. Toss with salt, paprika, and oil. Bake in the oven at 220°C (425°F) for 30–35 minutes or air-fry until crispy.

  5. For the coleslaw, mix cabbage and carrot in a bowl. Add mayonnaise, cream, sugar, lemon juice, salt, and pepper. Stir well and chill for 15 minutes.

  6. Serve the crispy chicken with fries, coleslaw, and ketchup on the side. Enjoy this crunchy and delicious homemade meal with family and friends!

Mediterranean Hummus Toast

Mediterranean Hummus Toast

Ingredients

  • 2 slices of crusty whole-grain or sourdough bread

  • 1/2 cup classic hummus

  • 1/4 cup cherry tomatoes, quartered

  • 1/4 cup cucumber, finely diced

  • 1 tbsp olive oil

  • 1 tsp Za’atar or dried oregano

  • A pinch of red pepper flakes (optional, for mild heat)

  • Fresh parsley or cilantro for garnish

Instructions

  1. Toast the Bread: Toast your bread slices until they are golden brown and crisp enough to hold the toppings.

  2. Spread the Base: Slather a generous, thick layer of hummus evenly across each slice of warm toast.

  3. Layer the Veggies: Top the hummus with the diced cucumbers and quartered cherry tomatoes, distributing them evenly.

  4. Season and Garnish: Drizzle the olive oil over the top. Sprinkle with Za’atar, a pinch of red pepper flakes, and fresh herbs. Serve immediately while warm.

Easy Crunchy Chickpea Cucumber Salad

🥗 Easy Crunchy Chickpea Cucumber Salad

🛒 Ingredients

  • 2 cucumbers 🥒
  • 1 cup chickpeas
  • 1 carrot 🥕
  • 2 tbsp olive oil
  • 1 tbsp lemon juice 🍋
  • Salt & black pepper
  • Sesame seeds & parsley (optional)

👩‍🍳 Detailed Step-by-Step Instructions

🔪 1. Slice the Vegetables

  • Wash the cucumbers well under cold water.
  • Cut them into thin round slices.
  • Peel the carrot and shred it using a grater.

👉 Thin slices help the salad absorb more dressing and taste better.


🥣 2. Prepare the Chickpeas

  • Open the canned chickpeas and drain the water.
  • Rinse them under cold water for 30 seconds.
  • Let them sit for a minute so extra water drains away.

👉 Dry chickpeas keep the salad crunchy instead of watery.


🍋 3. Make the Dressing

  • In a small bowl, add:
    • Olive oil
    • Lemon juice
    • Salt
    • Black pepper
  • Mix well with a spoon until combined.

👉 Taste the dressing before adding it. Add more lemon if you like tangy flavor.


🥗 4. Combine Everything

  • Add cucumbers, chickpeas, and carrots into a large bowl.
  • Pour the dressing slowly over the salad.
  • Toss gently using two spoons until everything is coated evenly.

👉 Mix gently so cucumbers stay fresh and crisp.


✨ 5. Final Touch

  • Sprinkle sesame seeds and chopped parsley on top.
  • Let the salad rest for 5–10 minutes before serving.

👉 This resting time helps the flavors blend beautifully.


❓Q/A

❓Can I store this salad?

✅ Yes, keep it in the fridge for up to 2 days.

❓Can I make it spicy?

✅ Yes! Add chili flakes or black pepper for extra heat 🌶️


🌟 Tips

  • Use cold cucumbers for the freshest taste.
  • Fresh lemon juice tastes much better than bottled juice.
  • Serve chilled for the best flavor ☀️

Fresh Strawberry Juice Recipe 🍓

Fresh Strawberry Juice Recipe 🍓

Ingredients

  • 2 cups fresh or frozen strawberries
  • 2 cups cold water
  • 1–2 tbsp lemon juice
  • Ice cubes

Optional Add-ins

  • 1–2 tsp honey or maple syrup
  • 4–5 mint leaves
  • 1 inch fresh ginger
  • Pinch of sea salt
  • 1 tbsp chia seeds

Instructions

  1. Wash strawberries well and remove green tops.
  2. Add strawberries, cold water, lemon juice, and optional add-ins to a blender.
  3. Blend for 30–60 seconds until smooth.
  4. Taste and adjust sweetness or water if needed.
  5. Strain for smooth juice, or leave unstrained for more fiber.
  6. Pour over ice and garnish with mint, lemon, or strawberry slices.

Serving Idea
Rim the glass with honey and Tajín for a sweet-spicy summer drink.

Caption
Fresh, fruity, and naturally refreshing — this homemade strawberry juice is summer in a glass! 🍓✨

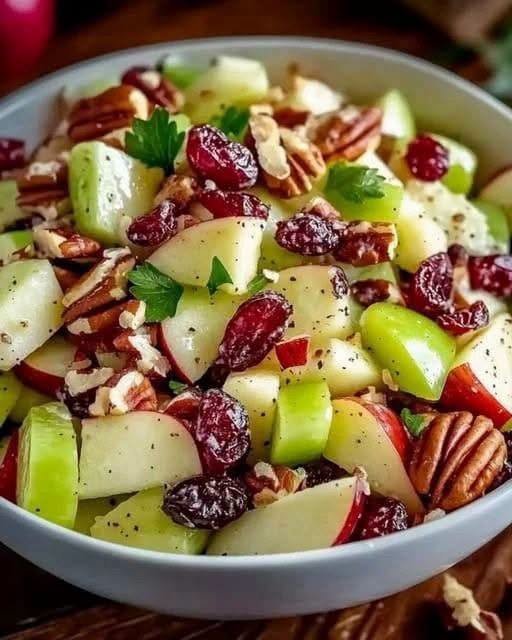
Crunchy Apple Cranberry Walnut Salad

 Crunchy Apple Cranberry Walnut Salad

sweet, tart, and crunchy. It’s great as a side or light lunch.

*RecipeServes 4-6*

*Ingredients:*

*Apples*: 3 medium, diced. Honeycrisp or Fuji work well

*Celery*: 2 stalks, diced

– *Dried cranberries*: ½ cup

*Walnuts*: ½ cup, roughly chopped and toasted

– *Fresh parsley*: ¼ cup, chopped

– *Lemon juice*: 2 tbsp

– *Olive oil*: 3 tbsp

*Honey*: 1 tbsp

– *Dijon mustard*: 1 tsp

– *Salt & pepper*: To taste

*Instructions:*

1. *Toast walnuts*: Dry toast in a skillet over medium heat 2-3 min until fragrant. Let cool.

2. *Prep fruit*: Dice apples and toss immediately with lemon juice to prevent browning.

3. *Make dressing*: Whisk olive oil, honey, Dijon mustard, salt, and pepper in a bowl.

4. *Combine*: In a large bowl, mix apples, celery, cranberries, walnuts, and parsley. Pour dressing over and toss.

5. *Serve*: Eat right away for max crunch, or chill 20 min if you want the flavors to meld.

*Tip*: Use a mix of red and green apples for color and flavor contrast. Toasting the walnuts makes a big difference, don’t skip it.


Roasted Beet and Chickpea Salad with Feta*.

Roasted Beet and Chickpea Salad with Feta

Earthy, tangy, and holds up well in the fridge.

*RecipeServes 3-4*

*Ingredients:*

– *Beets*: 3 medium, roasted and diced

– *Chickpeas*: 1 can, 15 oz, rinsed, drained, patted dry

– *Feta cheese*: 4 oz, cubed

– *Fresh parsley*: ¼ cup, chopped

– *Olive oil*: 3 tbsp

– *Lemon*: 1 large, juiced

– *Garlic*: 1 clove, minced

– *Salt & pepper*: To taste

*Instructions:*

1. *Roast beets*: Wrap whole beets in foil and roast at 400°F for 45-60 min until tender. Let cool, peel, and dice into 1-inch cubes. If you’re short on time, use pre-cooked beets from the store.

2. *Prep chickpeas*: Pat chickpeas dry so they soak up the dressing better. Toss with 1 tbsp olive oil, salt, and pepper.

3. *Make dressing*: Whisk remaining olive oil, lemon juice, garlic, salt, and pepper in a bowl.

4. *Assemble*: In a large bowl, combine beets, chickpeas, feta, and parsley. Pour dressing over and toss gently so the feta doesn’t break up too much.

5. *Rest*: Let it sit 10-15 min before serving so flavors blend.

*Tip*: Roast chickpeas 10 min in the oven at 400°F if you want them a bit crispy.

*Storage*: Keeps 3-4 days in the fridge. The beets will stain everything red, but it still tastes great.


Turkish Pogaca

Turkish Pogaca

soft, savory pastries usually stuffed with cheese and herbs. The golden tops come from an egg wash before baking.

Makes 12 pastries

*Dough:*

– *Flour*: 3 ½ cups

– *Yogurt*: 1 cup, plain

– *Vegetable oil*: ½ cup

– *Milk*: ½ cup, lukewarm

– *Egg*: 1, plus 1 egg yolk for brushing

– *Baking powder*: 2 tsp

– *Salt*: 1 tsp

– *Sugar*: 1 tsp

*Filling:*

– *Feta or beyaz peynir*: 1 ½ cups, crumbled

– *Parsley*: ½ cup, finely chopped

– *Optional*: 1 tbsp black cumin seeds or nigella seeds

*Instructions:*

1. *Make dough*: In a bowl mix yogurt, oil, milk, 1 egg, sugar, and salt. Add flour and baking powder gradually. Knead until soft and slightly sticky but not sticking to hands. Cover and rest 15 min.

2. *Make filling*: Mix crumbled cheese with parsley. Taste and adjust salt – feta is already salty.

3. *Shape*: Take a golf ball sized piece of dough. Flatten it, put 1 tbsp filling in center, then seal and shape into a ball or crescent. Place seam side down on a lined baking tray.

4. *Bake*: Brush tops with egg yolk mixed with 1 tsp milk. Sprinkle nigella seeds if using. Bake at 375°F for 20-25 min until golden brown.

5. *Serve*: Best warm when the cheese is melty.

*Tip*: Don’t overfill or they’ll burst open. The dough should be soft, not stiff – that’s what makes them fluffy inside.


Blueberry Artisan Bread

A rustic homemade blueberry bread with a crispy golden crust and juicy blueberries baked right inside. Soft, airy, and slightly sweet — perfect for breakfast or coffee time!

🛒 Ingredients

  • 3 cups all-purpose flour
  • 1½ tsp salt
  • 1 tsp instant yeast
  • 1¼ cups warm water
  • 1 cup fresh blueberries
  • 1 tbsp honey or sugar

👩‍🍳 Instructions

1️⃣ Mix the Dough

  • In a large bowl, combine flour, salt, and yeast.
  • Add warm water and honey.
  • Mix until a sticky dough forms.

2️⃣ Add Blueberries

  • Gently fold in the blueberries carefully so they don’t burst too much.
  • Cover the bowl with plastic wrap or a towel.

3️⃣ Let It Rise

  • Leave the dough at room temperature for 8–12 hours or overnight.
  • The dough should become bubbly and doubled in size.

4️⃣ Shape the Bread

  • Place parchment paper in a bowl.
  • Transfer dough onto lightly floured surface and shape into a round loaf.
  • Place it onto parchment paper and let rest 30 minutes.

5️⃣ Bake

  • Preheat oven to 450°F (230°C).
  • Place a Dutch oven or baking pot inside while heating.
  • Carefully transfer dough with parchment paper into the hot pot.

6️⃣ Final Baking

  • Cover and bake for 30 minutes.
  • Remove lid and bake another 10–15 minutes until golden brown.

7️⃣ Cool & Serve

  • Let bread cool before slicing.
  • Serve warm with butter, cream cheese, or honey.

💡 Tips

  • Frozen blueberries also work — do not thaw before using.
  • Dust blueberries lightly with flour to prevent sinking.
  • For extra flavor, add lemon zest or vanilla.

❓Q&A

Q: Can I use frozen blueberries?

Yes! Add them frozen directly into the dough.

Q: Why is my dough sticky?

This is a high-hydration artisan dough, which makes the bread soft and airy.

Q: How do I store it?

Keep in an airtight container for up to 2 days or refrigerate for longer freshness.

Strawberry Cheesecake Fluff Salad

A creamy, fluffy, no-bake strawberry dessert that tastes like cheesecake in every bite! Perfect for summer parties, potlucks, or a quick sweet treat. 💕

🛒 Ingredients

  • 2 cups fresh strawberries, chopped
  • 1 package (3 oz) strawberry gelatin powder
  • 1 cup cottage cheese
  • 1 cup whipped topping
  • 8 oz cream cheese, softened
  • ½ cup powdered sugar
  • 1 tsp vanilla extract

👩‍🍳 Instructions

1️⃣ Prepare the Strawberries

  • Wash and chop the strawberries into small pieces.
  • Set a few slices aside for topping.

2️⃣ Make the Creamy Base

  • In a large bowl, beat the cream cheese until smooth.
  • Add powdered sugar and vanilla extract.
  • Mix until creamy and fluffy.

3️⃣ Add Cottage Cheese

  • Stir in the cottage cheese gently.
  • Mix until well combined.

4️⃣ Add Strawberry Flavor

  • Sprinkle the strawberry gelatin powder over the mixture.
  • Fold gently until evenly mixed.

5️⃣ Fold in Whipped Topping

  • Add whipped topping slowly.
  • Fold carefully to keep the mixture light and fluffy.

6️⃣ Add Fresh Strawberries

  • Fold in chopped strawberries.
  • Chill in the refrigerator for 1–2 hours for best flavor.

7️⃣ Serve

  • Spoon into bowls.
  • Top with extra strawberries and small dollops of whipped cream or cottage cheese.

🍴 Tips

  • Chill overnight for an even richer flavor.
  • Add crushed graham crackers for a cheesecake-style crunch.
  • Use frozen strawberries if fresh ones are unavailable.

❓Q/A

Q: Can I make this ahead of time?

Yes! It tastes even better after chilling for several hours.

Q: Can I use Greek yogurt instead of cottage cheese?

Yes, Greek yogurt makes it extra creamy and slightly tangy.

Q: How long does it last?

Store covered in the refrigerator for up to 3 days