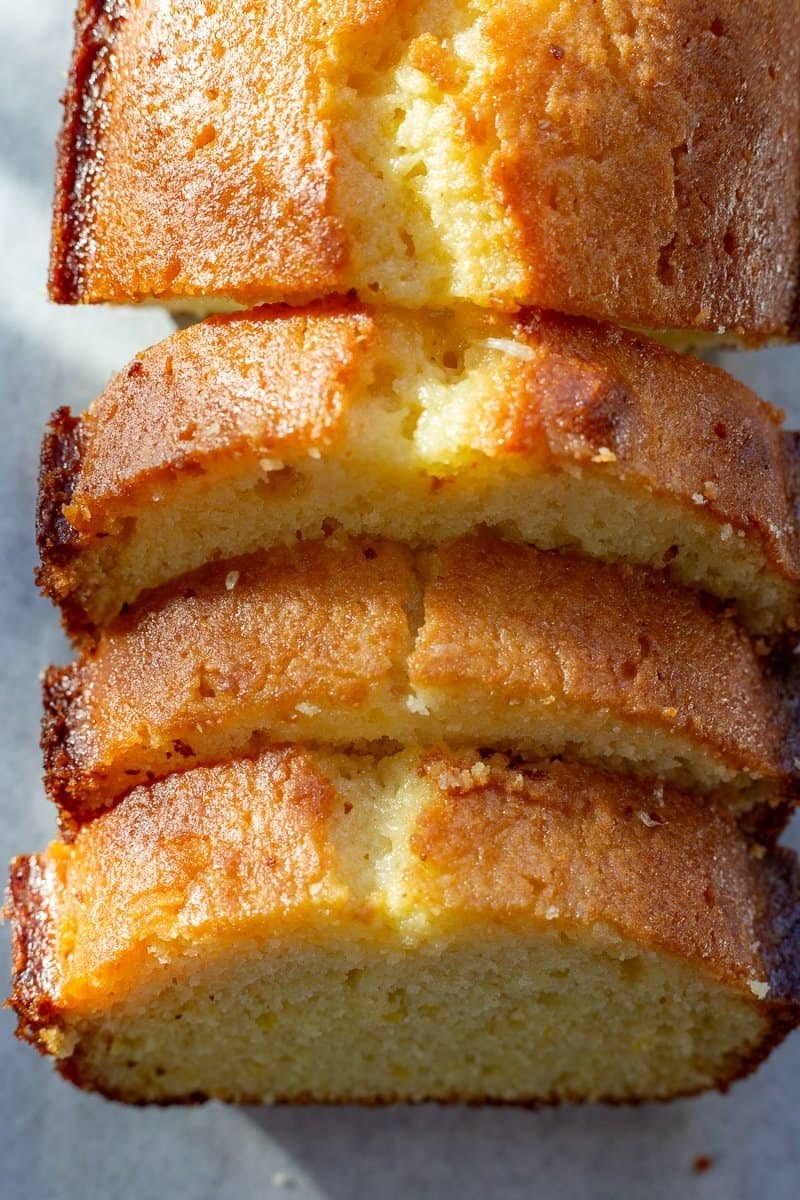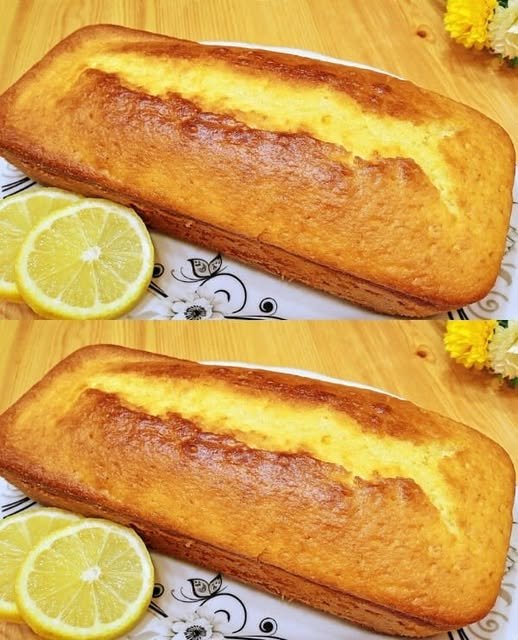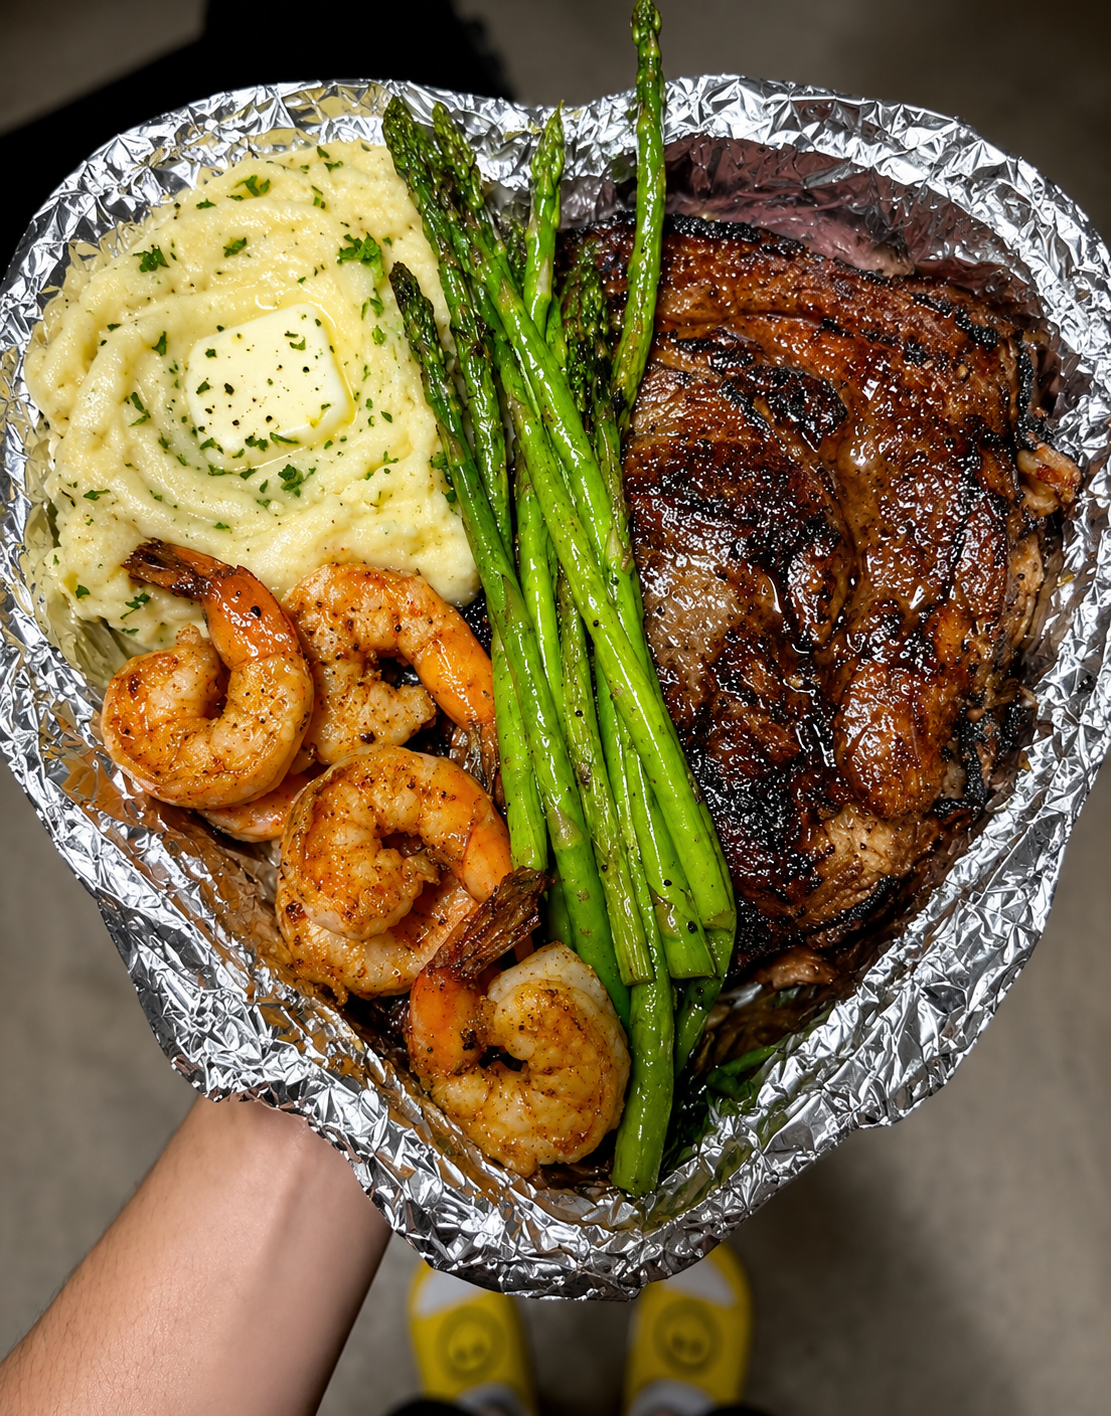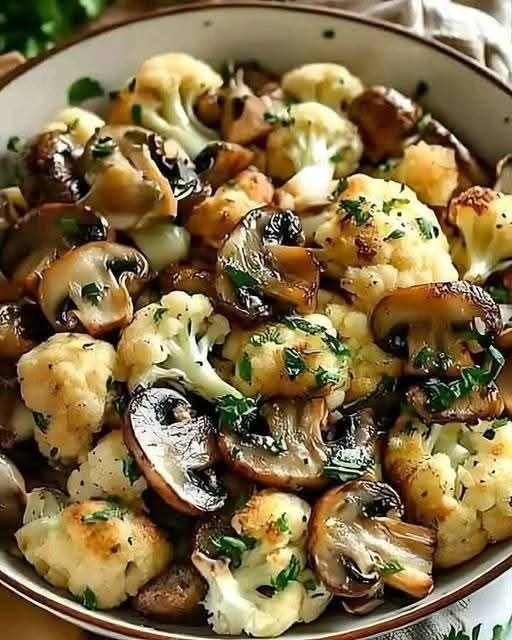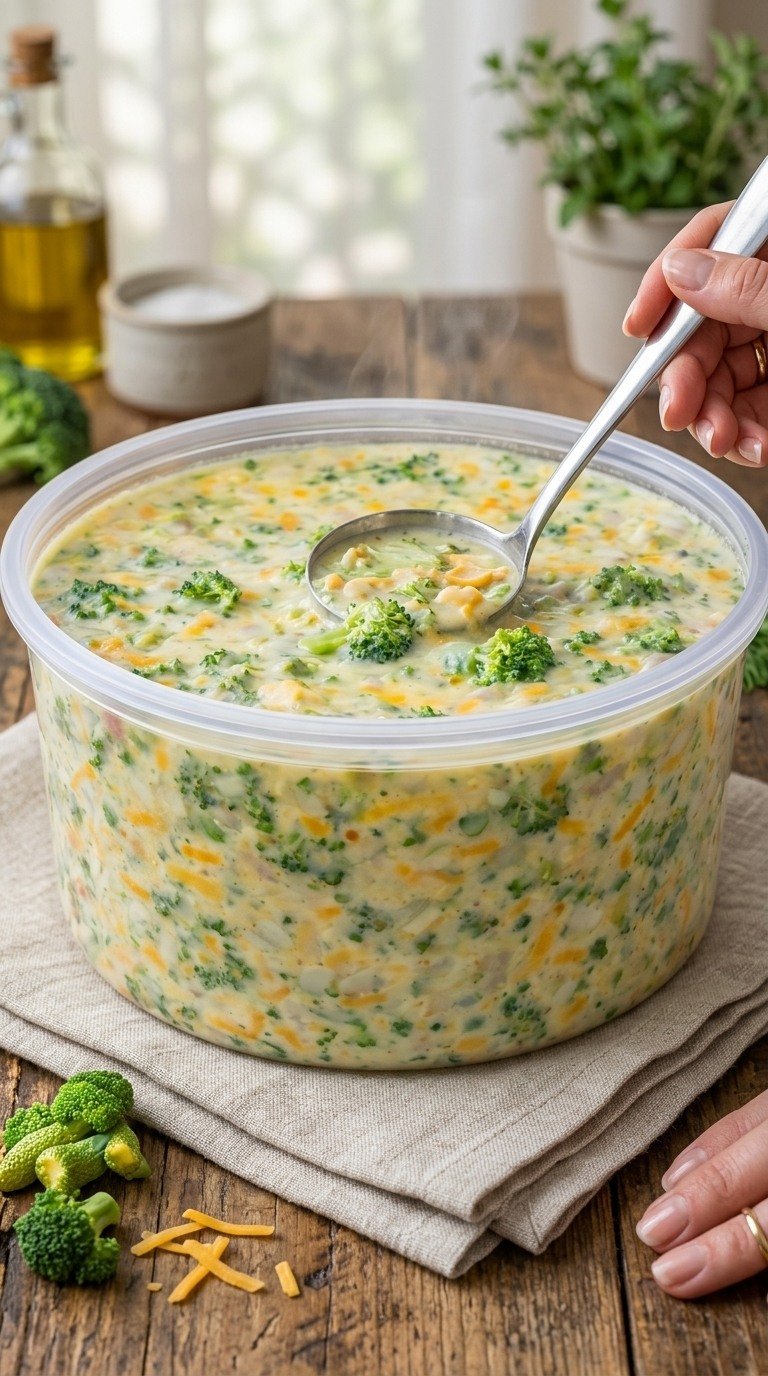
🤤 Easy Lemon Dessert With 2 Ingredients:

Easy Lemon Dessert With 2 Ingredients, In 10 Minutes

Kiwi Banana Refreshing Smoothie

Kiwi Banana Refreshing Smoothie

Ingredients

  • 2 Ripe Kiwis: Peeled and sliced (reserve one slice for garnish).

  • 1 Large Banana: Preferably frozen for a creamier texture.

  • 1/2 cup Greek Yogurt: Or a dairy-free alternative like coconut yogurt.

  • 1/2 cup Apple Juice or Coconut Water: For natural sweetness and hydration.

  • 1 tsp Honey or Maple Syrup: Optional, depending on the ripeness of your fruit.

  • Ice Cubes: A small handful if using fresh (non-frozen) fruit.


Instructions

  1. Prep the Fruit: Peel the kiwis using a spoon or vegetable peeler. Slice them into rounds. Peel your banana; if it’s fresh, break it into chunks.

  2. Combine: Place the kiwi slices, banana chunks, yogurt, and your choice of liquid (juice or coconut water) into a high-speed blender.

  3. Blend: Start on a low speed to break up the fruit, then increase to high. Blend for about 30–45 seconds until the mixture is completely smooth and those tiny black kiwi seeds are evenly distributed.

  4. Adjust: Give it a quick taste. If it’s too tart, add your natural sweetener. If it’s too thick, add a splash more liquid and pulse again.

  5. Serve: Pour into a chilled tall glass. To match the photo, cut a small slit into a kiwi slice and a banana coin, then slide them onto the rim of the glass.


Quick Tips

  • Texture: If you prefer a “slushy” vibe, use more ice. For a “velvety” drink, stick to the yogurt and frozen banana.

  • Nutritional Boost: Feel free to toss in a tablespoon of chia seeds or a handful of spinach; the kiwi will hide the “green” flavor perfectly!

Enjoy your vibrant, homemade energy boost!

Mango Strawberry Chia Smoothie

Tropical Mango Strawberry Chia Smoothie

Ingredients

  • 1 ½ cups ripe mango chunks (fresh or frozen)

  • ½ cup fresh strawberries (plus extra for garnish)

  • 1 cup unsweetened almond milk (or coconut milk for extra creaminess)

  • 2 tablespoons chia seeds

  • 1 tablespoon honey or maple syrup (optional, adjust to taste)

  • A squeeze of lime juice

  • Fresh mint for garnish


Instructions

  1. Prep the Chia Base: In a small bowl, whisk together the chia seeds and your choice of milk. Let it sit for about 10–15 minutes until it thickens into a pudding-like consistency.

  2. Blend the Fruit: Place the mango chunks, most of the strawberries, and your sweetener of choice into a blender. Blend on high until completely smooth. If you prefer a colder texture, add a handful of ice cubes before blending.

  3. Combine: Pour the mango-strawberry puree into a glass. Gently stir in the prepared chia seed mixture to create a beautiful speckled appearance.

  4. Add Texture: If desired, dice a few extra strawberries into small pieces and fold them into the drink for extra texture.

  5. Garnish: Top with a fresh strawberry, a few small mango cubes, and a sprig of fresh mint. Serve immediately with a straw.

Pro Tip: For an even richer smoothie, use frozen mango chunks instead of fresh ones—it eliminates the need for ice and creates a thicker, more luscious texture without diluting the flavor. Enjoy this refreshing treat!

Golden Scallion Omelette with Garden Sides

Golden Scallion Omelette with Garden Sides

Prep time: 5 minutes

Cook time: 5 minutes

Servings: 1

Ingredients

For the Omelette:

3 large eggs

2 scallions (green onions), finely sliced

1 tablespoon unsalted butter or vegetable oil

A pinch of salt and white pepper (or black pepper)

Optional: 1 tablespoon of milk or water (for a fluffier texture)

For the Sides:

2-3 leaves of fresh curly green lettuce

½ a medium tomato, cut into wedges

4-5 thin slices of English cucumber

Instructions

Prepare the Eggs:

In a medium bowl, crack the eggs. Add the sliced scallions, salt, pepper, and the optional tablespoon of milk/water.

Whisk vigorously with a fork until the whites and yolks are completely combined and a few bubbles form on top.

Heat the Pan:

Place a small non-stick skillet over medium heat.

Add the butter or oil. Once the butter is melted and just starting to sizzle (but not brown), swirl it to coat the entire bottom of the pan.

Cook the Omelette:

Pour the egg mixture into the center of the pan.

Let the eggs sit for about 30 seconds until the edges begin to set. Use a spatula to gently lift the edges, letting the raw egg run underneath.

Once the bottom is set and golden brown, but the top still looks slightly moist, use a large spatula to fold the omelette in half.

Let it cook for another 30–60 seconds on the folded side to ensure the center is cooked through and the outside reaches that deep golden color seen in the photo.

Plate the Dish:

Slide the omelette onto a clean white plate.

Arrange the lettuce leaves next to the omelette.

Place the tomato wedges on top of the lettuce and fan out the cucumber slices next to them.

Chef’s Tip for Color

To get the specific “seared” look in the image, don’t be afraid of the heat. While many omelette recipes call for low heat to keep them yellow, this version relies on medium to medium-high heat to create that flavorful, browned exterior. Just be sure to move quickly so the scallions don’t burn!

Blueberry Peach Feta Salad

Blueberry Peach Feta Salad

Ingredients
2 ripe peaches, sliced
1 cup fresh blueberries
4–5 cups mixed greens (arugula, spinach, or spring mix)
½ cup crumbled feta cheese
¼ cup toasted almonds or pecans (optional, for crunch)
2–3 tbsp red onion, thinly sliced (optional)

Dressing
3 tbsp olive oil
1 tbsp honey
1 tbsp balsamic vinegar (or lemon juice for a lighter taste)
1 tsp Dijon mustard
Salt and black pepper, to taste

Instructions
Make the dressing:
In a small bowl or jar, whisk together olive oil, honey, balsamic vinegar, Dijon mustard, salt, and pepper until well combined.

Assemble the salad:
In a large bowl, add the mixed greens, sliced peaches, blueberries, and red onion.

Add toppings:
Sprinkle crumbled feta and toasted nuts over the salad.
Dress and toss:
Drizzle the dressing over everything and gently toss to combine.
Serve immediately for the best texture and freshness.

Creamy Strawberry Banana Smoothie

Creamy Strawberry Banana Smoothie

Prep time: 5 minutes | Yield: 1 Large Pitcher (serves 3-4)

Ingredients

  • Strawberries: 2 cups fresh or frozen (hulled)

  • Bananas: 2 large, ripe (peeled and sliced)

  • Milk: 2 cups (dairy or plant-based like almond or oat)

  • Yogurt: 1 cup Greek yogurt or plain yogurt (adds creaminess)

  • Sweetener: 1-2 tablespoons honey or maple syrup (optional)

  • Ice: 1 cup (omit if using frozen fruit)

  • Garnish: Fresh strawberry slices and banana rounds

Instructions

  1. Prepare the Fruit: Wash the strawberries thoroughly and remove the green leafy tops. Peel the bananas and break them into smaller chunks to help your blender process them smoothly.

  2. Combine: Add the milk and yogurt to the blender base first—this helps the blades move freely. Add the strawberries, banana chunks, and your choice of sweetener.

  3. Blend: Secure the lid and blend on high speed for about 45–60 seconds until the mixture is completely smooth and no fruit chunks remain.

  4. Adjust Consistency: If the smoothie is too thick, add a splash more milk. If you prefer a frostier texture, add the ice cubes and pulse until crushed.

  5. Serve: Pour the smoothie into a large glass pitcher or individual glasses. For a professional look, slide a half-strawberry onto the rim of each glass and serve immediately while chilled.


Pro Tips

  • Freeze your bananas: Using frozen bananas creates a texture similar to soft-serve ice cream without needing extra ice.

  • Boost the nutrition: Feel free to toss in a tablespoon of chia seeds or flaxseeds for added fiber.

Creamy Broccoli & Shredded Chicken Salad

Creamy Broccoli & Shredded Chicken Salad

Ingredients

The Salad Base:

2 large heads of fresh broccoli (cut into very small florets)

2 cups Cooked chicken, shredded (rotisserie chicken works perfectly here!)

½ cup Carrots, shredded or julienned

¼ cup Red onion, finely diced

½ cup Sliced almonds, toasted (for that signature crunch)

The Creamy Dressing:

½ cup Greek yogurt (or mayonnaise for a richer taste)

1 tbsp Apple cider vinegar

1 tbsp Honey or maple syrup

1 tsp Dijon mustard

½ tsp Garlic powder

Salt & black pepper to taste

Instructions

1. Prep the Broccoli

Cut the broccoli into tiny, bite-sized florets.

Pro Tip: If you prefer your broccoli a bit softer, you can blanch the florets in boiling water for exactly 60 seconds, then immediately plunge them into ice water. Drain and pat completely dry. If you like maximum crunch (as seen in the photo), keep them raw!

2. Prepare the Chicken

Use pre-cooked rotisserie chicken or poached chicken breasts.

Shred the chicken using two forks while it’s still slightly warm; it absorbs the dressing better that way.

3. Toast the Almonds

Place the sliced almonds in a dry skillet over medium heat.

Shake the pan constantly for 2–3 minutes until they turn golden brown and smell nutty. Remove from heat immediately so they don’t burn.

4. Whisk the Dressing

In a small bowl, whisk together the Greek yogurt (or mayo), vinegar, honey, mustard, and spices until smooth.

5. Assemble

In a large mixing bowl, combine the broccoli, shredded chicken, carrots, and red onion.

Pour the dressing over the top and toss until everything is evenly coated.

Top with the toasted almonds right before serving to keep them from getting soft.

Creamy Chicken Grape Salad

Here’s a simple, fresh recipe for a creamy chicken grape salad—great for sandwiches, wraps, or just on its own:

Creamy Chicken Grape Salad
Ingredients:
2 cups cooked chicken (shredded or diced)
1 cup seedless grapes (halved, red or green)
½ cup celery (finely chopped)
¼ cup almonds or walnuts (optional, chopped)
½ cup mayonnaise
¼ cup plain yogurt (for a lighter dressing)
1–2 tsp lemon juice
1 tbsp honey (optional, for sweetness)
Salt and black pepper to taste

Instructions:
In a large bowl, combine the chicken, grapes, celery, and nuts.
In a separate bowl, whisk together mayonnaise, yogurt, lemon juice, honey, salt, and pepper.
Pour the dressing over the chicken mixture and gently toss until evenly coated.
Taste and adjust seasoning if needed.
Chill in the fridge for at least 30 minutes before serving.

Serving ideas:
On a bed of lettuce
In a sandwich or croissant
Stuffed into pita bread

Creamy Strawberry Chia Mousse

Creamy Strawberry Chia Mousse

Ingredients

  • Fresh Strawberries: 2 cups, hulled (plus extra for garnish).

  • Chia Seeds: 4 tablespoons.

  • Greek Yogurt or Coconut Cream: 1 cup (use coconut cream for a dairy-free version).

  • Liquid Sweetener: 2 tablespoons honey, maple syrup, or agave.

  • Vanilla Extract: 1 teaspoon.

  • Milk of Choice: ¼ cup (to adjust consistency).


Instructions

  1. Prepare the Base: Place the strawberries, sweetener, and vanilla extract into a blender. Pulse until completely smooth. If you prefer a bit of texture, you can leave a few small fruit chunks.

  2. Mix the Cream: In a medium mixing bowl, whisk together the Greek yogurt (or coconut cream) and the strawberry purée until the color is a uniform, soft pink.

  3. Incorporate Chia: Gently fold in the chia seeds. Stir well for about a minute to ensure the seeds are distributed evenly and don’t clump together at the bottom.

  4. The First Set: Let the mixture sit for 10 minutes, then give it one more thorough stir. This is the secret to a smooth texture!

  5. Chill and Thicken: Transfer the mixture into individual serving glasses. Cover and refrigerate for at least 4 hours, though overnight is best. The chia seeds will expand and transform the liquid into a thick, velvety mousse.

  6. Garnish and Serve: Just before serving, top each glass with a fresh strawberry and an extra sprinkle of chia seeds as seen in your image.

Pro Tip: If you want an ultra-smooth “pudding” texture without the seed crunch, blend the chia seeds directly with the strawberries in step one!

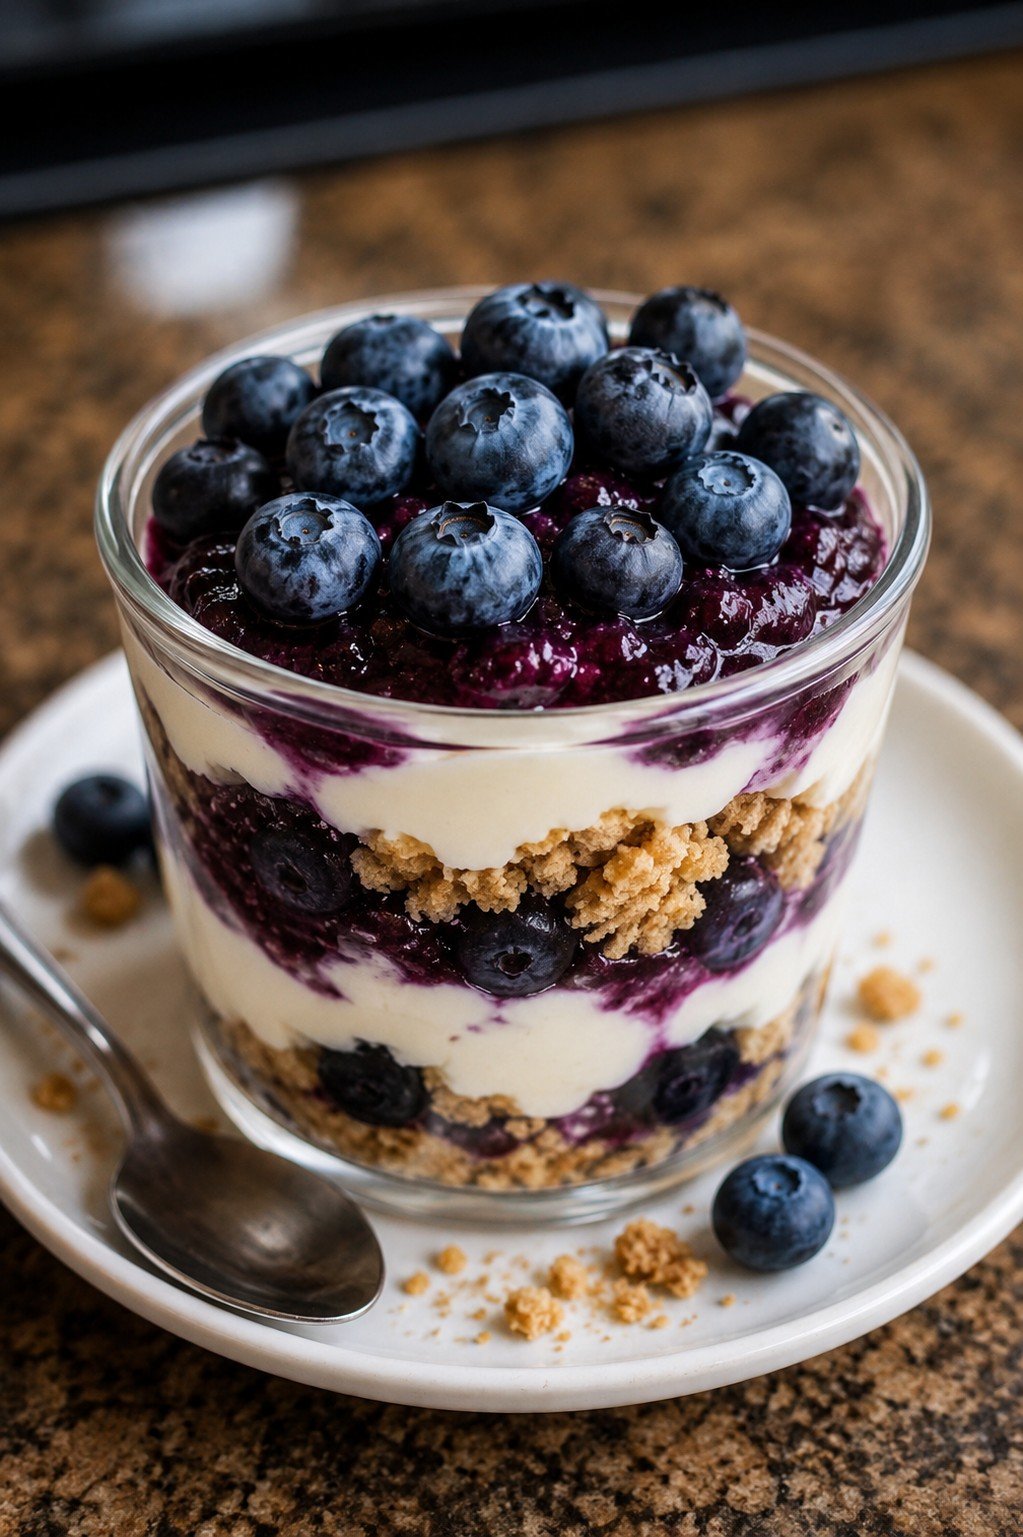
🫐🍰 Blueberry Cream Trifle

🫐🍰 Blueberry Cream Trifle
🛒 Ingredients:
🫐 2 cups blueberries (fresh or compote)
🍰 1 sponge cake (cut into cubes)
🍮 2 cups vanilla custard
🥛 1 cup whipped cream
🍪 Crushed biscuits (for topping)
🍯 2 tbsp sugar or honey
👨‍🍳 Instructions:
🫐 Start with a layer of blueberry compote at the bottom.
🍰 Add sponge cake cubes on top.
🍮 Pour a layer of creamy custard.
🔁 Repeat layers (blueberries → cake → custard).
🥛 Finish with whipped cream on top.
🍪 Sprinkle crushed biscuits and add fresh blueberries.
❄️ Chill for 1–2 hours before serving.

Honey Lemon Cough Syrup

This natural Honey Lemon Cough Syrup is a simple, effective home remedy that uses whole-food ingredients to soothe a sore throat and quiet a cough.

Ingredients

  • 1 cup Raw Honey: Acts as a natural cough suppressant and provides a thick, soothing base.

  • 1/2 cup Fresh Lemon Juice: High in Vitamin C and helps cut through mucus.

  • 1 Fresh Lemon: Sliced into thin rounds (seeds removed) to infuse the syrup with extra zest and oils.

  • Optional: 1 inch of fresh ginger, sliced (for added anti-inflammatory benefits).


Instructions

  1. Prepare the Base: In a small saucepan, combine the raw honey and lemon juice over very low heat.

  2. Infuse: Add the fresh lemon slices (and ginger if using) to the mixture.

  3. Warm Gently: Heat for 5–10 minutes, ensuring the mixture does not reach a boil. This keeps the beneficial properties of the raw honey intact.

  4. Store: Pour the syrup into a clean glass jar. Allow it to cool completely before sealing.

  5. Use: Take 1–2 tablespoons as needed to soothe a cough or stir it into a cup of warm water or herbal tea.


Pro-Tips for Content Creators

  • Aesthetic Shots: When filming, focus on the “slow-motion” pour of the honey into the jar to capture that thick, golden texture.

  • Framing: Ensure your shots are in portrait orientation to maximize engagement on Facebook Reels and Instagram.

  • Faceless Style: Keep the focus on your hands preparing the ingredients and the close-ups of the lemon slices in the jar.

  • Engagement: Instead of putting the full text in the caption, use a call-to-action like: “Type ‘HEALTHY’ if you want more natural remedy recipes!”.

crispy zucchini pancakes

Crispy Zucchini Pancakes

Table of Contents

Crispy on the outside and tender on the inside, these zucchini pancakes (similar to Greek kolokithokeftedes) are a Mediterranean favorite. They’re packed with fresh herbs, salty cheese, and light seasoning, making them both flavorful and versatile. Serve them as an appetizer, side dish, or even a light vegetarian main with a dollop of tzatziki or yogurt sauce. Perfect for using up summer zucchini, these pancakes are simple, fresh, and deeply satisfying.

Time

Prep Time: 15 minutes

Cook Time: 15 minutes

Total Time: 30 minutes

Ingredients

Zucchini: 3 medium zucchinis, grated and salted to remove excess moisture

Eggs: 2 large eggs

Flour: ½ cup all-purpose flour (or half all-purpose, half semolina)

Cheese: ½ cup crumbled feta cheese + ¼ cup grated Parmesan cheese

Herbs: 2 tbsp fresh dill, chopped; 2 tbsp fresh mint, chopped; 2–3 green onions, thinly sliced

Seasonings: ½ tsp salt (adjust, since feta is salty) and ½ tsp black pepper

Leavening Agent: 1 tsp baking powder

Optional: ¼ cup breadcrumbs for extra crispiness

For Frying: Olive oil or a mix of olive oil and vegetable oil

Instructions

Prepare Zucchini: Grate zucchini and place in a colander. Sprinkle with salt and let sit for 10 minutes to draw out moisture. Squeeze out excess liquid using a clean kitchen towel or cheesecloth.

Make Batter: In a large bowl, whisk eggs. Add grated zucchini, flour, cheeses, herbs, green onions, baking powder, breadcrumbs (if using), salt, and pepper. Mix until just combined into a thick batter.

See also  Crestless Broccoli Quiche

Heat Oil: In a large skillet, heat 2–3 tablespoons of olive oil over medium heat until hot.

Cook Pancakes: Scoop about 2 tablespoons of batter per pancake into the pan. Flatten slightly with the back of a spoon. Cook 2–3 minutes per side until golden brown and crispy. Work in batches, adding more oil as needed.

Drain & Serve: Place cooked pancakes on a paper towel–lined plate to absorb excess oil. Serve warm with tzatziki, plain Greek yogurt, or a squeeze of lemon.

Tips

Drain zucchini well: The key to crisp pancakes is removing as much water as possible. Squeeze firmly in a clean towel until almost dry.

Don’t overcrowd the pan: Fry in batches so pancakes crisp evenly instead of steaming.

Adjust flour if needed: If the batter feels too wet, add a spoonful more flour or breadcrumbs until it holds together.

Keep warm: Place cooked pancakes on a wire rack in a low oven (200°F / 95°C) to stay crisp while finishing the batch.

Use fresh herbs: Dill and mint give a signature Mediterranean flavor—fresh herbs work better than dried here.

Variations

Cheese swap: Try halloumi, pecorino, or goat cheese instead of feta.

Add vegetables: Mix in grated carrot, potato, or finely chopped spinach for extra flavor and texture.

Spice it up: Add a pinch of red pepper flakes or smoked paprika for a little heat.

Healthier baking option: Instead of pan-frying, brush patties lightly with oil and bake at 400°F (200°C) for 15–20 minutes, flipping halfway.

Mediterranean topping twist: Serve with tzatziki, hummus, or a lemon-garlic yogurt sauce. A drizzle of olive oil and fresh parsley also works beautifully.

See also  Cozy Vegetable Lasagna

Q&A

Q: How do I keep zucchini pancakes from falling apart?
A: Make sure you squeeze out as much water from the zucchini as possible. If the batter still feels loose, add a little more flour or breadcrumbs to help bind it.

Q: Can I make them ahead of time?
A: Yes. You can make the batter a few hours in advance and keep it in the fridge, or cook the pancakes and reheat them in the oven at 350°F (175°C) until crisp.

Q: Can I bake instead of fry?
A: Absolutely. For a lighter version, brush the patties with olive oil and bake at 400°F (200°C) for 15–20 minutes, flipping once. They’ll be less crispy but still flavorful.

Q: What’s the best dipping sauce?
A: Tzatziki is the classic pairing, but plain Greek yogurt, hummus, or a lemon-garlic yogurt dip also work well.

Q: Can I freeze them?
A: Yes. Cook, cool, and freeze in a single layer. Reheat in a skillet or oven until warm and crispy.

Nutrition Facts

(per pancake, based on 12 pancakes)

Calories: ~95

Protein: 4g

Fat: 5g

Carbohydrates: 8g

Fiber: 1g

Sodium: 180mg

Calcium: 90mg

(Values will vary depending on exact ingredients and frying oil absorption.)

Conclusion

Mediterranean Crispy Zucchini Pancakes are a simple yet flavorful way to enjoy fresh zucchini. With the saltiness of feta, the brightness of herbs, and the satisfying crunch from pan-frying, they’re a versatile dish that works as an appetizer, snack, or vegetarian main. Whether paired with a tangy yogurt dip or enjoyed on their own, these pancakes capture the essence of Mediterranean cooking—fresh, light, and packed with flavor.

Honey Mustard Glazed Salmon

This honey mustard glazed salmon is a perfect fit for a “set it and forget it” meal, similar to the high-protein comfort foods you often develop. It features perfectly seared fillets topped with a creamy, vibrant sauce.

Honey Mustard Glazed Salmon

Prep time: 10 minutes | Cook time: 12 minutes | Servings: 4


Ingredients

  • Salmon: 4 salmon fillets (6 oz each)

  • Seasoning: Salt and black pepper to taste, 1 tsp garlic powder, 1 tsp smoked paprika

  • The Glaze:

    • 3 tbsp Dijon mustard (or whole grain for texture)

    • 2 tbsp honey (or a sugar-free alternative to keep it low-carb)

    • 1 tbsp mayonnaise (for that creamy finish seen in the image)

    • 1 tsp lemon juice

  • Garnish: Fresh chopped parsley or green onions


Instructions

  1. Prep the Salmon: Pat the fillets dry with a paper towel. Season both sides with salt, pepper, garlic powder, and smoked paprika.

  2. Make the Glaze: In a small bowl, whisk together the mustard, honey, mayonnaise, and lemon juice until smooth.

  3. Cook (Two Options):

    • Air Fryer: Place fillets in the basket. Cook at 200°C for 8-10 minutes. Brush the glaze on generously during the last 3 minutes of cooking.

    • Pan-Seared: Heat 1 tbsp oil in a skillet over medium-high heat. Sear salmon skin-side up for 4 minutes. Flip, brush with glaze, and cook for another 3-4 minutes until flaky.

  4. Finish: Spoon any remaining glaze over the salmon before serving and top with fresh herbs.

Individual Blueberry Baked Oatmeal

Individual Blueberry Baked Oatmeal

🛒 Ingredients

  • The Dry Base: 2 cups rolled oats, 1 tsp baking powder, 1 tsp cinnamon, 1/4 tsp salt ➡️

  • The Wet Mix: 2 ripe bananas (mashed), 1 ½ cups milk of choice, 1 large egg, 1 tsp vanilla extract ➡️

  • The Fruit: 2 cups fresh blueberries (divided) ➡️

  • The Sweetener: 2 tbsp honey or maple syrup ➡️

  • Garnish: Fresh mint leaves and a sprinkle of extra oats ➡️


👩‍🍳 Step-by-Step Instructions

  1. Prep and Preheat 🌡️ Preheat your oven to 180°C (350°F). Lightly grease four to six ceramic ramekins or small glass jars with coconut oil or butter ➡️.

  2. Combine Dry Ingredients 🥣 In a medium bowl, whisk together the rolled oats, baking powder, cinnamon, and salt until well combined ➡️.

  3. Mix Wet Ingredients 🥚 In a separate large bowl, mash the bananas until smooth. Whisk in the milk, egg, honey, and vanilla extract until the mixture is uniform ➡️.

  4. Merge the Batter 🌀 Pour the dry oat mixture into the wet ingredients. Stir gently until all the oats are thoroughly moistened. Fold in half of the blueberries ➡️.
  5. Fill the Ramekins 🥄 Divide the oatmeal mixture evenly among the prepared ramekins. Leave a little space at the top as they will rise slightly while baking ➡️.

  6. Top and Bake 🔥 Press the remaining blueberries into the top of each ramekin for that beautiful “jammy” look seen in your photo. Bake for 25–30 minutes until the tops are golden brown and the centers are set ➡️.

  7. Serve Warm ✨ Let them cool for 5 minutes. Garnish with a sprig of fresh mint and a drizzle of extra honey if desired ➡️.


❓ Common Questions (Q&A)

Q: Can I use frozen blueberries? A: Yes! ❄️ Just don’t thaw them before adding to the batter, or they might turn the entire mixture purple. You may need to add 2–3 minutes to the total bake time.

Q: Is this recipe gluten-free? A: It can be! 🌾 Simply ensure you are using certified gluten-free rolled oats.

Q: Can I prepare these the night before? A: Absolutely. ⏲️ You can assemble the ramekins and keep them covered in the fridge overnight. Bake them fresh in the morning for an easy, warm breakfast.

Q: How do I store leftovers? A: These stay fresh in the refrigerator for up to 4 days. They reheat beautifully in the microwave for about 45 seconds 🧊.

Dark Chocolate Espresso Banana Marble Bread

Dark Chocolate Espresso Banana Marble Bread

🛒 Ingredients

  • The Batter Base: 3 ripe bananas (mashed), 1/2 cup melted coconut oil or butter, 1 cup sugar, 1 egg, 1 tsp vanilla ➡️

  • The Flour Mixture: 1 1/2 cups all-purpose flour, 1 tsp baking soda, 1/2 tsp salt ➡️

  • The Chocolate/Espresso Swirl: 3 tbsp dark cocoa powder, 1 tbsp instant espresso powder (dissolved in 1 tbsp hot water) ➡️

  • The Topping: 1 banana (sliced into rounds), chocolate-covered coffee beans, and a pinch of edible gold dust or coarse sugar ➡️


👩‍🍳 Step-by-Step Instructions

  1. Prep and Mash 🥣 Preheat your oven to 175°C (350°F). In a large bowl, mash the 3 ripe bananas until smooth. Whisk in the melted oil, sugar, egg, and vanilla.

  2. Whisk the Dry Ingredients 🌾 In a separate bowl, whisk together the flour, baking soda, and salt. Gently fold the dry ingredients into the banana mixture until just combined.

  3. Divide for the Marble 🌓 Transfer about 1 cup of the batter into a smaller bowl. Stir in the cocoa powder and the dissolved espresso liquid until you have a rich, dark chocolate batter.

  4. The Swirl Technique 🌀 Grease a loaf pan. Alternate large spoonfuls of the plain banana batter and the chocolate espresso batter into the pan. Use a butter knife to gently swirl the two together in a figure-eight motion.

  5. Decorate the Top ✨ Place your banana slices on top of the batter. As seen in your photo, you can also place chocolate coffee beans on top (or wait until after baking to prevent them from melting too much).

  6. Bake to Perfection 🔥 Bake for 50–60 minutes. A toothpick inserted into the center should come out clean.

  7. Cool and Garnish 🧊 Let the bread cool in the pan for 10 minutes, then move to a wire rack. Once fully cool, add your coffee bean garnishes and a sprinkle of gold dust for that professional look!


❓ Common Questions (Q&A)

Q: My banana bread always sinks in the middle. Why? A: This usually happens if the oven door is opened too early or if there is too much leavening agent. 💡 Ensure your baking soda is fresh and try not to peek until the 50-minute mark!

Q: Can I make this without the espresso? A: Absolutely! ☕ If you prefer to skip the caffeine, just use the cocoa powder. The chocolate and banana combo is still a classic winner.

Q: How do I store this to keep it moist? A: Wrap the cooled loaf tightly in plastic wrap or store in an airtight container at room temperature for 3 days, or in the fridge for up to a week. 🍱

Q: What if my bananas aren’t ripe enough? A: You can “quick-ripen” them by placing them (unpeeled) on a baking sheet in a 150°C oven for about 15 minutes until the skins turn black. 🍌

Crispy Cheesy Chicken Fritters

Crispy Cheesy Chicken Fritters

 Description

These Crispy Cheesy Chicken Fritters are golden on the outside, juicy on the inside, and packed with melty cheese in every bite. They’re quick, budget-friendly, and incredibly satisfying—perfect as an appetizer, snack, or main dish. Serve them with your favorite dip for a crowd-pleasing meal.

 Servings

Serves: 3–4 people (10–12 fritters)

 Ingredients

  • 2 cups cooked chicken (shredded or finely chopped) 🍗
  • 1 cup shredded mozzarella or cheddar cheese 🧀
  • 1/4 cup grated Parmesan cheese
  • 2 eggs 🥚
  • 1/4 cup all-purpose flour
  • 2 tbsp mayonnaise or Greek yogurt
  • 2 tbsp green onions (chopped) 🌿
  • 1 clove garlic (minced)
  • 1/2 tsp paprika
  • Salt & black pepper to taste
  • 2–3 tbsp oil (for frying)

 Instructions

  1. Prepare mixture:
    In a large bowl, combine chicken, cheeses, eggs, flour, mayo, green onions, garlic, paprika, salt, and pepper.
  2. Mix well:
    Stir until everything is fully combined into a thick batter.
  3. Heat pan:
    Heat oil in a skillet over medium heat.
  4. Form fritters:
    Scoop mixture and flatten slightly into small patties.
  5. Cook:
    Fry for 3–4 minutes per side until golden brown and crispy.
  6. Drain & serve:
    Remove and place on paper towels. Serve warm.

 Notes

  • Use finely chopped chicken for better texture
  • Don’t overcrowd the pan
  • Adjust seasoning to taste

 Tips

  • Add chili flakes for a spicy kick 🌶️
  • Use leftover rotisserie chicken for convenience
  • Serve with garlic sauce, ranch, or spicy mayo

 Nutritional Info (Approx per serving)

  • Calories: 320
  • Protein: 26g
  • Fat: 20g
  • Carbs: 8g

 Benefits

  • High in protein 💪
  • Quick and easy meal
  • Great way to use leftovers
  • Kid-friendly and satisfying

 Q&A

Q: Can I bake instead of fry?
A: Yes, bake at 375°F (190°C) for 20–25 minutes, flipping halfway.

Q: Can I freeze them?
A: Yes, freeze cooked fritters up to 1 month.

Q: Can I make them low-carb?
A: Use almond flour instead of regular flour.

Q: What dip goes best?
A: Garlic mayo, ranch, or spicy sriracha sauce.

🍞 Moist Banana Fruit & Nut Bread (Soft, Sweet & Crunchy)

🍞 Moist Banana Fruit & Nut Bread (Soft, Sweet & Crunchy)

This delicious bread is soft, naturally sweet from ripe bananas, filled with chewy dried fruits, and topped with crunchy almonds. Perfect for breakfast or tea time ☕💛


🛒 Ingredients

🥣 For the Batter:

  • 🍌 3 large ripe bananas (mashed, about 1½ cups)
  • 🌾 2 cups all-purpose flour (or gluten-free flour)
  • 🍯 ½ cup brown sugar (or maple syrup)
  • 🧈 ½ cup melted butter (or coconut oil)
  • 🥚 1 large egg (or flax egg for vegan option)
  • 🧁 1 tsp baking powder
  • 🧂 1 tsp baking soda
  • 🍦 1 tsp vanilla extract
  • 🌿 1 tsp cinnamon powder
  • 🍇 ½ cup raisins or mixed dried fruits (cranberries, apricots, figs)

🌰 For the Topping:

  • 1 cup chopped almonds
  • ✨ Optional: a little coarse sugar for extra crunch

👩‍🍳 Step-by-Step Instructions

🔥 Step 1: Prepare Oven & Pan

➡️ Preheat oven to 175°C (350°F)
➡️ Grease a 9×5-inch loaf pan
➡️ Line with parchment paper (leave edges hanging for easy removal)


🍌 Step 2: Mix Wet Ingredients

➡️ Mash bananas in a large bowl until smooth
➡️ Add melted butter, sugar, egg, and vanilla
➡️ Mix well until everything is combined


🌾 Step 3: Mix Dry Ingredients

➡️ In another bowl, add:

  • Flour
  • Baking powder
  • Baking soda
  • Cinnamon
  • Pinch of salt

➡️ Mix or sift together


🔄 Step 4: Combine Mixture

➡️ Slowly add dry ingredients into wet mixture
➡️ Gently fold using a spatula
❗ Do NOT overmix (this keeps bread soft)


🍇 Step 5: Add Fruits

➡️ Fold in raisins or dried fruits evenly


🌰 Step 6: Add Almond Topping

➡️ Pour batter into the pan
➡️ Spread chopped almonds on top
➡️ Lightly press them so they stick


🔥 Step 7: Bake

➡️ Bake for 50–60 minutes
➡️ Check with a toothpick (should come out clean)

💡 Tip: If almonds brown too fast, cover loosely with foil in last 15 minutes


❄️ Step 8: Cool & Slice

➡️ Let bread cool in pan for 10 minutes
➡️ Transfer to a wire rack
➡️ Cool completely before slicing (for neat slices)


❓ Q & A

Q1: Why use ripe bananas?
👉 They are sweeter and make the bread soft and moist.

Q2: Can I make it without egg?
👉 Yes! Use a flax egg (1 tbsp flaxseed + 3 tbsp water).

Q3: Can I skip nuts?
👉 Yes, you can skip almonds or replace with walnuts or seeds.

Q4: How to store it?
👉 Keep in an airtight container for 2–3 days at room temperature or refrigerate for longer.

Q5: Can I freeze it?
👉 Yes! Wrap slices and freeze up to 2 months.


💡 Extra Tips

✨ Use very ripe bananas (dark spots = best flavor)
✨ Do not overmix batter
✨ Add chocolate chips for extra taste 🍫
✨ Toast slices lightly before serving for amazing flavor

Mixed Berry Brioche Bread Pudding

Mixed Berry Brioche Bread Pudding

🛒 Ingredients

  • 6-8 cups Brioche bread, cut into 1-inch cubes (stale bread works best!) 🍞

  • 2 cups Mixed berries (Raspberries, Blueberries, Blackberries) 🫐

  • 4 large Eggs 🥚

  • 2 cups Whole milk (or heavy cream for extra richness)

  • 1/2 cup Granulated sugar

  • 1 tsp Vanilla extract

  • 1/4 tsp Salt

  • Optional: White chocolate chips or a drizzle of condensed milk (as seen in the image) 🥛


🥣 Step-by-Step Instructions

  1. Prep the Dish ➡️ Grease a 9×13 inch baking dish with butter.

  2. Arrange the Bread ➡️ Spread the brioche cubes evenly into the prepared dish. 🍞➡️🥘

  3. Add the Berries ➡️ Scatter 1.5 cups of the mixed berries over and between the bread cubes. Save the remaining 0.5 cup for the very top. 🍓

  4. Whisk the Custard ➡️ In a large mixing bowl, whisk together the eggs, milk, sugar, vanilla extract, and salt until completely smooth. 🥣

  5. The Soak ➡️ Pour the custard mixture slowly over the bread, ensuring every piece of brioche is coated. ➡️ Use a spatula to gently press the bread down so it absorbs the liquid. 🥛

  6. Rest Time ➡️ Let the dish sit for at least 20–30 minutes (or refrigerate overnight). This prevents the pudding from being dry in the center. 🕒

  7. Preheat & Top ➡️ Preheat your oven to 350°F (175°C). Scatter the remaining berries and optional white chocolate on top.

  8. Bake ➡️ Bake for 40–50 minutes. The pudding is done when the custard is set (no longer wobbly) and the top is golden brown and slightly crisp. 🥧🔥

  9. Cool Slightly ➡️ Let it cool for 10 minutes before serving. This allows the custard to firm up.

  10. Final Touch ➡️ Drizzle with a little extra cream, condensed milk, or maple syrup if desired. 🍯


❓ Common Questions (Q&A)

Q: Can I use frozen berries? A: Yes! Do not thaw them first, as the juice will bleed and turn the bread purple. Just toss them in straight from the freezer. ❄️🍓

Q: What if I don’t have Brioche? A: Challah, Croissants, or even thick-cut Texas Toast are great substitutes. Avoid standard sandwich bread as it can become too mushy. 🍞

Q: Can I make this dairy-free? A: Certainly! Use full-fat coconut milk or oat milk for the best texture. 🥥🥛

Q: Is it okay to make this the night before? A: Yes, it’s actually better! Assembling it at night and baking it in the morning results in a much richer, more custardy texture. 🌙➡️☀️


✨ Pro-Tips for Success

  • Stale is Better: If your bread is fresh, toast the cubes in a 300°F oven for 10 minutes to dry them out. Dry bread acts like a sponge for the custard! 🧽

  • Golden Top: If the top is browning too fast but the center is still wet, cover the dish loosely with foil for the last 15 minutes of baking. 🛡️

Fresh Creamy Cucumber & Corn Salad

Fresh Creamy Cucumber & Corn Salad
Prep time: 15 minutes | Servings: 4-6

Ingredients
The Base:

2 large English Cucumbers: Diced or sliced into half-moons (English cucumbers have thinner skin and fewer seeds).

2 cups Sweet Corn: Fresh off the cob is best, but canned (drained) or thawed frozen corn works great too.

1/2 cup Red Onion or Green Onions: Finely diced for a bit of “bite.”

1/4 cup Fresh Herbs: A mix of dill, parsley, and cilantro (as seen in the photos).

Optional: 1/2 cup crumbled Feta cheese (for the salty kick shown in the top right image).

The Creamy Dressing:

1/2 cup Greek Yogurt or Sour Cream: (Use Mayo if you prefer a richer, traditional profile).

2 tbsp Lemon Juice: Freshly squeezed.

1 tbsp Olive Oil.

1 clove Garlic: Minced.

Salt & Black Pepper: To taste.

Instructions
Prep the Veggies: If using fresh corn, you can quickly blanch it or char it in a pan for extra flavor. Slice your cucumbers; if they are very watery, you can salt them lightly in a colander for 10 minutes and pat dry to keep the salad from getting soggy.

Whisk the Dressing: In a small bowl, combine the yogurt (or sour cream), lemon juice, olive oil, minced garlic, salt, and pepper. Whisk until smooth.

Combine: In a large mixing bowl, toss the cucumbers, corn, onions, and fresh herbs together.

Dress and Serve: Pour the dressing over the vegetables and toss gently to coat. If you are using Feta, fold it in last so it doesn’t break down too much.

Chill: This salad is best served cold. Let it sit in the fridge for at least 20 minutes before serving to allow the flavors to meld.

Banana Walnut Overnight Oats

Banana Walnut Overnight Oats


Ingredients

  • 1/2 cup Rolled oats (old-fashioned work best for texture)

  • 2/3 cup Milk of your choice (dairy, almond, or oat)

  • 1/2 Ripe banana, mashed (plus extra slices for topping)

  • 1 tbsp Chia seeds (for that creamy, pudding-like consistency)

  • 1/2 tsp Cinnamon

  • 1 tsp Maple syrup or honey (optional)

  • A splash of vanilla extract

  • Toppings: Crushed walnuts, sliced bananas, and a dollop of Greek yogurt.


Instructions

  1. Mix the Base: In a glass jar or airtight container, combine the rolled oats, chia seeds, and cinnamon. Stir them together so the spices are evenly distributed.

  2. Add Wet Ingredients: Stir in your mashed banana, milk, vanilla extract, and sweetener. Give it a vigorous stir until everything is well incorporated and there are no dry clumps of oats at the bottom.

  3. The Chill: Seal the jar and place it in the refrigerator for at least 4 hours, though overnight is ideal. This gives the oats and chia seeds time to soak up the liquid and soften.

  4. The Topping: In the morning, give the oats a quick stir. If they seem too thick, add a tiny splash of milk. Top with fresh banana slices, a generous handful of crunchy walnuts, and a sprinkle of cinnamon as seen in your photo.

Pro Tip: If you like your walnuts extra crunchy, wait to add them until right before you eat! Enjoy your healthy, energizing breakfast.

Strawberry Swirl Cream Cup

Strawberry Swirl Cream Cup

Ingredients

  • Heavy Whipping Cream: 2 cups (chilled)

  • Sweetened Condensed Milk: 1 can (14 oz)

  • Fresh Strawberries: 2 cups (divided: 1 cup diced, 1 cup sliced for garnish)

  • Vanilla Extract: 1 teaspoon

  • Granulated Sugar: 1 tablespoon (for macerating diced berries)

Instructions

  1. Prepare the Strawberries: In a small bowl, toss the 1 cup of diced strawberries with the sugar. Let them sit for 15 minutes to release their natural juices. Mash them slightly with a fork to create a chunky sauce.

  2. Whip the Cream: In a large, chilled mixing bowl, whip the heavy whipping cream until stiff peaks form. Be careful not to over-whip, or it may turn to butter.

  3. Combine: In a separate bowl, whisk together the sweetened condensed milk and vanilla extract. Gently fold this mixture into the whipped cream using a spatula until fully combined.

  4. Swirl: Pour one-third of the cream mixture into your serving cups or a freezer-safe container. Drizzle some of the strawberry sauce over it. Repeat the layers, gently swirling with a knife to create a marble effect.

  5. Freeze: Cover and freeze for at least 6 hours, or until firm.

  6. Serve: Scoop the mixture into clear cups to recreate the layered look. Top with a generous amount of fresh sliced strawberries and an extra drizzle of the sauce if desired.

Pro-Tip: For the smoothest consistency, ensure your heavy whipping cream is cold straight from the refrigerator. This allows it to hold the air bubbles, resulting in a lighter, fluffier dessert. Enjoy your homemade treat!

Mango Raspberry Sunrise Chia Cups

Mango Raspberry Sunrise Chia Cups

Prep time: 15 minutes | Chill time: 2+ hours | Serves: 2

Ingredients

  • The Chia Layer: 4 tbsp chia seeds, 1 cup unsweetened almond or coconut milk, 1 tsp maple syrup, and ½ tsp vanilla extract.

  • The Mango Layer: 1 cup frozen or fresh mango chunks and a splash of lime juice.

  • The Raspberry Layer: 1 cup fresh raspberries and 1 tbsp honey or agave.

  • Toppings: Fresh raspberries, diced mango, blueberries, crushed pistachios, and extra chia seeds.


Instructions

  1. Prepare the Base: In a small bowl, whisk together the chia seeds, plant milk, maple syrup, and vanilla. Let it sit for 5 minutes, then whisk again to prevent clumping. Cover and refrigerate for at least 2 hours (or overnight) until thick and creamy.

  2. Blend the Fruit: * Mango Puree: Blend the mango chunks with a splash of lime juice until completely smooth. Set aside.

    • Raspberry Puree: Rinse the blender and pulse the raspberries with honey until smooth. If you prefer a seedless texture, press the puree through a fine-mesh sieve.

  3. Assemble the Sunrise: * Grab two clear glasses. Start by spooning the mango puree into the bottom.

    • Gently layer the chilled chia pudding over the mango. Use the back of a spoon to smooth it out.

    • Slowly pour the raspberry puree on top to create that vibrant “sunrise” contrast.

  4. Garnish: Top with diced mango, fresh berries, and a sprinkle of pistachios for a satisfying crunch.


Pro Tip: For clean, distinct layers, wipe the inside of the glass with a paper towel if any puree splashes up before adding the next layer!

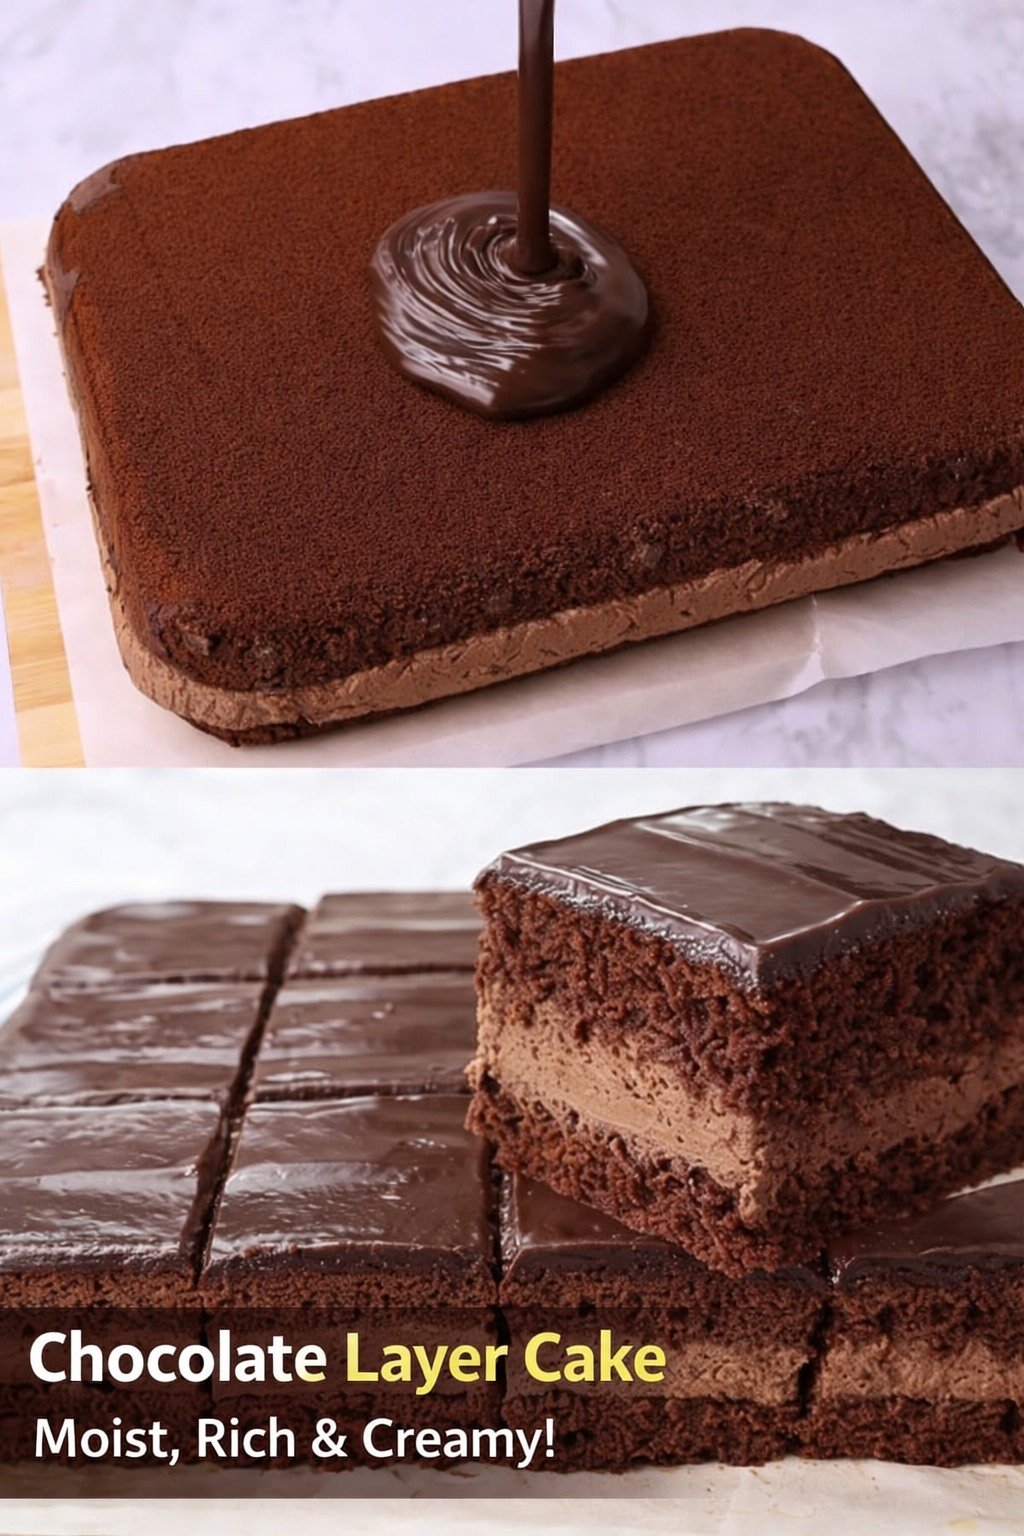
Triple Chocolate Moist Sheet Cake

Triple Chocolate Moist Sheet Cake 🍫✨

This recipe produces an incredibly soft, tender cake topped with a rich, pourable chocolate ganache and classic sprinkles. It is the perfect dessert for celebrations or a cozy weekend treat.


🛒 Ingredients

  • For the Cake:

    • 2 cups all-purpose flour 🌾

    • 2 cups granulated sugar 🍯

    • ¾ cup unsweetened cocoa powder 🍫

    • 2 tsp baking soda and 1 tsp baking powder

    • 1 tsp salt 🧂

    • 1 cup buttermilk (at room temperature) 🥛

    • ½ cup vegetable oil 🌻

    • 2 large eggs 🥚

    • 2 tsp vanilla extract

    • 1 cup hot coffee or boiling water (this “blooms” the cocoa for deeper flavor) ☕

  • For the Topping:

    • 1 cup semi-sweet chocolate chips 🍫

    • ½ cup heavy cream 🥛

    • Chocolate sprinkles 🎊


🔪 Step-by-Step Instructions

  1. Prep Work ➡️ Preheat your oven to 350°F (175°C). Grease and flour a 9×13 inch baking pan.

  2. Mix Dry Ingredients ➡️ In a large bowl, whisk together the flour, sugar, cocoa, baking soda, baking powder, and salt. 🥣

  3. Add Wet Ingredients ➡️ Add the eggs, buttermilk, oil, and vanilla extract. ➡️ Beat on medium speed for about 2 minutes until well combined.

  4. The Secret Step ➡️ Lower the speed and carefully pour in the hot coffee or boiling water. ➡️ The batter will be very thin—this is normal and ensures a moist crumb!

  5. Bake ➡️ Pour the batter into the prepared pan. Bake for 30–35 minutes, or until a toothpick inserted in the center comes out clean. ➡️ Let the cake cool completely in the pan.

  6. Prepare the Ganache ➡️ Heat the heavy cream until it just begins to simmer. Pour it over the chocolate chips in a small bowl. ➡️ Let it sit for 5 minutes, then stir until shiny and smooth.

  7. Glaze and Garnish ➡️ Pour the warm ganache over the cooled cake, spreading it to the edges. ➡️ Immediately top with a generous layer of chocolate sprinkles while the glaze is still wet.

  8. Set and Slice ➡️ Let the glaze set for at least 30 minutes before slicing into squares. 🍽️


❓ Q/A Section

Q: Can I taste the coffee in the cake? A: Not at all! ➡️ The coffee simply intensifies the chocolate flavor. If you prefer to avoid it, boiling water works perfectly fine.

Q: Why is my batter so watery? A: Don’t worry! ➡️ This high-moisture batter is exactly what makes the cake so soft and prevents it from becoming dry.

Q: Can I make this in a different pan? A: Yes! ➡️ This recipe works for two 9-inch round pans (bake for 30-35 mins) or about 24 cupcakes (bake for 18-22 mins).

Q: How should I store the leftovers? A: Cover the pan tightly with foil or plastic wrap. ➡️ It stays moist at room temperature for up to 3 days or in the fridge for up to 5 days.

Cottage Cheese Chocolate Ice Cream

Cottage Cheese Chocolate Ice Cream 🍦🍫


🛒 Ingredients

  • The Base: 2 cups full-fat cottage cheese (small curd) 🧀

  • The Flavor: ¼ cup unsweetened cocoa powder 🍫

  • The Sweetener: 3–4 tbsp honey or maple syrup (adjust to taste) 🍯

  • The Boost: 1 tsp vanilla extract

  • Optional Mix-ins: Sugar-free chocolate chips or crushed walnuts 🥜


🔪 Step-by-Step Instructions

  1. Blend the Base ➡️ Add the cottage cheese, cocoa powder, sweetener, and vanilla to a high-speed blender or food processor.

  2. Make it Smooth ➡️ Blend on high for 1–2 minutes until the mixture is completely smooth and no cheese curds remain. ➡️ The consistency should look like a thick chocolate pudding.

  3. Fold in Extras ➡️ If you are using chocolate chips or nuts, stir them in by hand now. 🥣

  4. Transfer ➡️ Pour the mixture into a shallow, freezer-safe container or a loaf pan. Smooth the top with a spatula. ➡️

  5. Freeze ➡️ Place in the freezer for 3–5 hours. ❄️

  6. The “Soft Serve” Check ➡️ If you prefer a soft-serve texture, check it at the 2-hour mark. For scoopable ice cream, let it freeze until firm.

  7. Temper ➡️ If the ice cream has been in the freezer overnight, let it sit on the counter for 10–15 minutes before scooping. ➡️ This makes it much easier to get those perfect round scoops!

  8. Serve ➡️ Scoop into chilled bowls and enjoy! 🍨


❓ Q/A Section

Q: Does it actually taste like cottage cheese? A: Not at all! ➡️ Once blended, the “cheesy” texture disappears, leaving behind a rich, tangy creaminess that tastes very similar to a chocolate cheesecake.

Q: Can I use low-fat cottage cheese? A: You can, but for the best results, use full-fat. ➡️ Higher fat content results in a creamier mouthfeel and prevents the ice cream from becoming too icy in the freezer.

Q: How do I keep it from getting too hard? A: High-protein ice creams can freeze quite solid. ➡️ To help with this, you can add 1 tablespoon of vegetable glycerin or a splash of almond milk to the blender, which helps maintain a softer scoop. 🍦

Q: Can I make other flavors? A: Definitely! ➡️ Omit the cocoa powder and add frozen strawberries for a fruity version, or stir in peanut butter for a chocolate-peanut butter swirl. 🍓🥜

Zesty Lemon Butter Fish Fillet

Zesty Lemon Butter Fish Fillet is a light yet flavorful dish featuring tender white fish coated in warm spices and pan-seared to perfection, then finished with a rich, tangy lemon butter sauce. Bright citrus, fragrant garlic, and fresh parsley balance the buttery sauce, making this an elegant yet easy meal perfect for weeknights or special occasions.

Ingredients

For the Fish

  • 4 fillets of white fish (cod, tilapia, or haddock)
  • 1 teaspoon paprika
  • 1 teaspoon garlic powder
  • 1 teaspoon onion powder
  • 2 tablespoons olive oil
  • Salt and black pepper, to taste

For the Lemon Butter Sauce

  • 4 tablespoons butter
  • 2 tablespoons olive oil
  • Juice and zest of 2 lemons
  • 4 cloves garlic, minced
  • 1 tablespoon fresh parsley, chopped
  • Salt and black pepper, to taste

Instructions

  1. Season the fish:
    Pat fish fillets dry with paper towels. Season both sides with paprika, garlic powder, onion powder, salt, and black pepper.
  2. Cook the fish:
    Heat olive oil in a large skillet over medium heat. Add fish fillets and cook for 3–4 minutes per side, until golden and cooked through. Remove fish from the skillet and set aside.
  3. Make the lemon butter sauce:
    In the same skillet, lower heat to medium-low. Add butter and olive oil. Once melted, stir in garlic and cook for 30–60 seconds until fragrant.
  4. Add lemon flavor:
    Stir in lemon juice and zest. Season with salt and black pepper to taste. Simmer gently for 1–2 minutes.
  5. Combine & serve:
    Return fish to the skillet, spoon sauce over the fillets, and cook for 1 more minute. Garnish with fresh parsley and serve immediately.

Recipe Notes

  • Fish is done when it flakes easily with a fork and appears opaque.
  • Fresh lemon juice is key for the best flavor—avoid bottled juice if possible.
  • Adjust lemon juice to taste if you prefer a milder citrus flavor.

Tips for Best Results

  • Dry the fish well before seasoning to get a nice golden crust.
  • Do not overcrowd the pan—cook in batches if needed.
  • Low heat for sauce: Prevents garlic from burning and butter from separating.
  • Extra richness: Add a splash of cream to the sauce if desired.

Servings

  • Serves: 4
  • Serving size: 1 fish fillet with sauce

Health Benefits

  • High-quality protein: Supports muscle growth and satiety.
  • Heart-healthy fats: Olive oil and fish provide beneficial fats.
  • Rich in omega-3s: Supports brain and heart health.
  • Low-carb & gluten-free: Suitable for many dietary lifestyles.