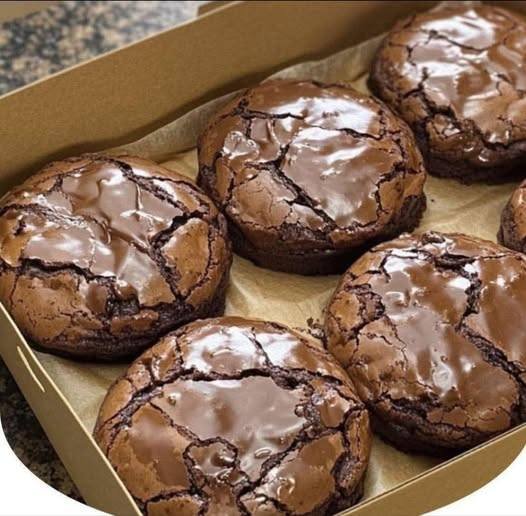
Tastes Like a Fudge Brownie, Eats Like a Cookie
If you love the rich, fudgy decadence of a brownie but crave the handheld convenience of a cookie, this recipe is your dream come true. These cookies are deeply chocolatey, soft in the center, slightly crisp on the edges, and studded with melty dark chocolate chunks. The secret ingredient? Sourdough discard, which adds subtle tang, moisture, and depth—making these cookies irresistibly chewy and complex in flavor.
Perfect for bake sales, holiday trays, or late-night chocolate cravings, these brownie-style cookies deliver bold cocoa flavor with that crackly, shiny top you love in a classic brownie.
Prep Time: 15 minutes
Chill Time: 30 minutes (recommended)
Bake Time: 10–12 minutes
Total Time: About 1 hour
Servings: 18–20 cookies
Ingredients
1 cup (120g) all-purpose flour
1/3 cup (35g) unsweetened cocoa powder
1/2 tsp baking soda
1/2 tsp fine salt
1/2 cup (115g) unsalted butter, softened
3/4 cup (150g) brown sugar
1/4 cup (50g) white sugar
1 large egg
1 tsp vanilla extract
1/2 cup (120g) sourdough discard (unfed)
1 cup (170g) dark chocolate chips or chunks
2 tbsp milk
Instructions
Preheat Oven: Preheat oven to 350°F (175°C). Line baking sheets with parchment paper.
Mix Dry Ingredients: In a bowl, whisk flour, cocoa powder, baking soda, and salt until evenly combined.
Cream Butter & Sugars: In a separate large bowl, beat softened butter, brown sugar, and white sugar until light and fluffy (about 2–3 minutes).
See also Mediterranean Garlic & Spinach White Pizza on a Cottage Cheese Crust
Add Egg & Vanilla: Beat in the egg and vanilla extract until smooth.
Incorporate Sourdough Discard: Mix in sourdough discard until fully combined.
Combine Wet & Dry: Gradually add dry ingredients into the wet mixture. Mix until just combined.
Add Milk: Stir in milk to loosen the dough slightly for fudgier texture.
Fold in Chocolate: Gently fold in dark chocolate chips or chunks.
Chill Dough: Refrigerate dough for at least 30 minutes to enhance flavor and texture.
Bake: Scoop 2-tablespoon portions onto prepared baking sheets. Bake 10–12 minutes until edges are set but centers remain soft. Cool on pan 5 minutes before transferring to wire rack.
Tips
Use Room Temperature Butter: Ensures proper creaming and texture.
Don’t Overmix: Overworking the dough makes cookies tough.
Chill for Thickness: Chilling prevents excess spreading.
Use Good Cocoa Powder: High-quality cocoa deepens flavor.
Underbake Slightly: Centers should look slightly soft for fudgy texture.
Measure Flour Correctly: Spoon and level to avoid dense cookies.
Use Dark Chocolate: Enhances brownie-like richness.
Let Rest After Baking: They firm up as they cool.
Sprinkle Sea Salt: Adds gourmet contrast.
Store Airtight: Keeps them soft and chewy for days.
Variations
Double Chocolate: Add ¼ cup white chocolate chips.
Nutty Crunch: Fold in ½ cup chopped walnuts or pecans.
Espresso Boost: Add 1 tsp instant espresso powder.
Mint Chocolate: Add ½ tsp peppermint extract.
Stuffed Cookies: Add a caramel or peanut butter center.
Gluten-Free Option: Use 1:1 gluten-free flour blend.
Dairy-Free: Substitute plant-based butter and milk.
Extra Fudgy: Reduce flour by 1 tablespoon.
Brown Butter Version: Brown the butter for deeper flavor.
See also Mediterranean Cheesy Spinach-Artichoke Bagels
Chunky Brownie Style: Use chopped chocolate bars instead of chips.
Q&A
What is sourdough discard?
It’s the unfed portion of sourdough starter removed before feeding.
2. Do they taste sour?
No, just a subtle tang that enhances chocolate flavor.
Can I skip sourdough discard?
You can substitute ¼ cup yogurt + ¼ cup flour, but flavor changes.
Why chill the dough?
It prevents spreading and improves texture.
Can I freeze the dough?
Yes, freeze scooped portions up to 3 months.
How do I get shiny tops?
Cream butter and sugar thoroughly and don’t overbake.
How long do they stay fresh?
3–4 days in an airtight container.
Can I make them thinner?
Flatten dough slightly before baking.
Why are my cookies dry?
Overbaking or too much flour may be the cause.
Can I double the recipe?
Absolutely—just scale ingredients evenly.
Nutrition
(Approximate Per Cookie)
Calories: 180
Carbohydrates: 22g
Protein: 2g
Fat: 9g
Saturated Fat: 5g
Sugar: 14g
Fiber: 2g
(Nutrition values may vary based on chocolate used.)
Conclusion
These brownie-inspired cookies truly offer the best of both worlds—intense chocolate flavor, chewy centers, crisp edges, and melty pockets of dark chocolate. The sourdough discard adds unique depth while keeping the cookies moist and tender. Whether you’re using up extra starter or simply craving something deeply chocolatey, this recipe guarantees bakery-style results with minimal effort.