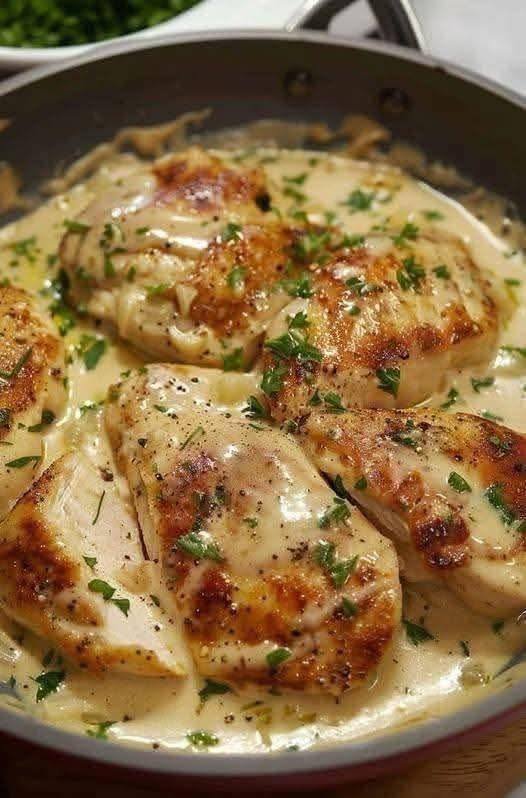
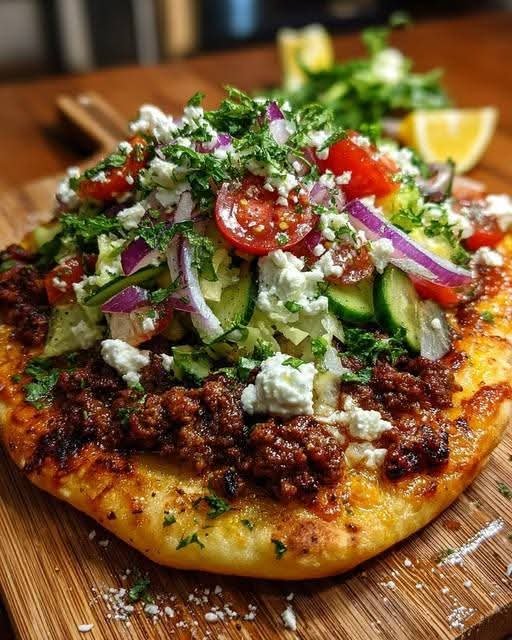
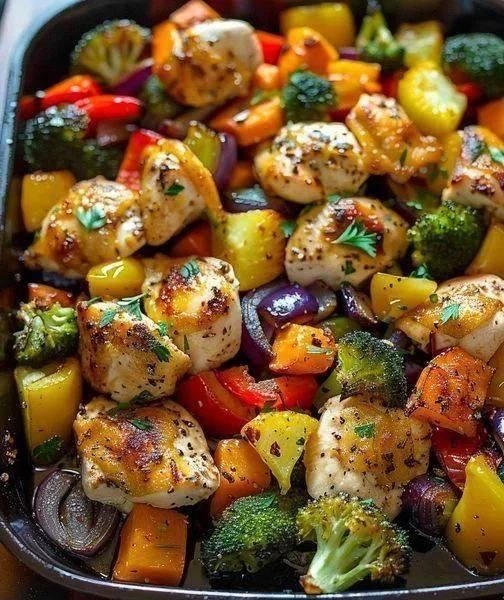
Mediterranean Greek Chicken Gyros with Cucumber Tzatziki
Mediterranean Greek Chicken Gyros with Cucumber Tzatziki is a classic street food favorite turned into a healthy, homemade meal. Juicy, marinated chicken is grilled or pan-seared to perfection and wrapped in warm pita bread along with crisp vegetables and creamy, garlicky tzatziki sauce.
This recipe brings the flavors of Greece to your kitchen, featuring fresh herbs, olive oil, lemon, and the cool tang of cucumber-yogurt sauce. It’s perfect for lunch, dinner, or entertaining with a Mediterranean flair.
Prep & Cook Time
Prep Time: 20 minutes
Marination Time: 30 minutes to 2 hours (optional for deeper flavor)
Cook Time: 15 minutes
Total Time: 50 minutes (including marination)
Servings: 4 gyros
Ingredients
For the Chicken Marinade:
1 lb (450g) boneless, skinless chicken thighs or breasts
3 tbsp extra virgin olive oil
2 tbsp fresh lemon juice
3 cloves garlic, minced
1 ½ tsp dried oregano
1 tsp smoked paprika
½ tsp ground cumin
½ tsp salt
¼ tsp black pepper
For the Cucumber Tzatziki Sauce:
1 cup plain Greek yogurt (full-fat or low-fat)
½ large cucumber, grated and squeezed to remove excess water
2 cloves garlic, finely minced
1 tbsp extra virgin olive oil
1 tbsp fresh lemon juice
1 tbsp chopped fresh dill or mint
¼ tsp salt
Black pepper to taste
For the Gyro Wraps:
4 Greek-style pita breads or flatbreads (warm or lightly toasted)
1 cup chopped romaine or iceberg lettuce
1 medium tomato, diced or sliced
½ small red onion, thinly sliced
½ cup crumbled feta cheese
Optional: sliced kalamata olives or pickled onions
Instructions
Marinate the Chicken:
In a medium bowl, whisk together olive oil, lemon juice, minced garlic, oregano, paprika, cumin, salt, and pepper.
Add the chicken and toss to coat.
Cover and marinate in the refrigerator for at least 30 minutes, or up to 2 hours for best flavor.
Prepare the Tzatziki Sauce:
In a small bowl, combine Greek yogurt, grated cucumber, minced garlic, olive oil, lemon juice, and chopped dill or mint.
Season with salt and black pepper.
Mix well, cover, and refrigerate until ready to serve (this allows the flavors to develop).
Cook the Chicken:
Heat a grill pan, outdoor grill, or large skillet over medium-high heat.
Remove the chicken from the marinade and cook for 5–7 minutes per side, or until fully cooked and nicely browned (internal temperature should reach 165°F / 74°C).
Transfer to a cutting board and let rest for 5 minutes, then slice into thin strips.
Assemble the Gyros:
Warm the pita breads in a dry skillet or microwave.
Spread a generous layer of tzatziki sauce onto each pita.
Add sliced chicken, lettuce, tomatoes, red onion, and feta cheese.
Top with extra tzatziki sauce and optional toppings like olives or pickled onions.
Serve:
Fold the pita over like a wrap or roll it up in parchment paper for a classic gyro look.
Serve immediately with lemon wedges on the side.
Tips
Use Chicken Thighs for Juiciness:
Chicken thighs stay moist and tender when grilled. Chicken breasts can be used if preferred, but watch the cooking time to avoid drying out.
Marinate for Maximum Flavor:
A minimum of 30 minutes is good, but if you have time, let the chicken marinate for up to 2 hours. This enhances the flavor and makes the meat more tender.
Drain the Cucumber Well:
Squeeze out as much water as possible from the grated cucumber for a thick and creamy tzatziki that won’t turn watery.
Warm the Pita Properly:
Lightly toast the pita in a dry skillet or wrap it in foil and warm it in the oven. This makes it pliable and prevents tearing.
Slice Chicken After Resting:
Let the cooked chicken rest for 5 minutes before slicing to keep the juices in.
Variations
Protein Options:
Lamb or Beef Gyros:
Use thinly sliced lamb or beef steak marinated in the same seasoning blend for a traditional Greek twist.
Vegetarian Gyros:
Substitute chicken with grilled halloumi, roasted chickpeas, falafel, or grilled vegetables like zucchini and eggplant.
Seafood Gyros:
Try grilled shrimp or salmon with the same marinade for a lighter gyro.
Sauce & Spread Ideas:
Add Hummus or Baba Ganoush:
Layer a spoonful of hummus or eggplant dip beneath the tzatziki for extra creaminess and flavor.
Spicy Option:
Add a drizzle of harissa sauce or sprinkle some Aleppo pepper flakes for heat.
Pita & Bread Options:
Use whole-wheat pita, naan, or gluten-free wraps as alternatives.
For a low-carb version, serve the gyro filling as a lettuce wrap or a gyro bowl.
Topping Variations:
Add pickled red onions, sun-dried tomatoes, or roasted red peppers for an extra punch of flavor.
Use fresh mint leaves or parsley for garnish.
Q&A
Q: Can I make the chicken gyros ahead of time?
A: Yes! You can marinate and cook the chicken up to 2 days in advance. Store it in an airtight container in the refrigerator. Reheat gently in a skillet before assembling the gyros.
Q: Can I grill the chicken outdoors instead of using a pan?
A: Absolutely! Traditional Greek gyros are often grilled. Use an outdoor grill or grill pan for smoky flavor and authentic char marks.
Q: What’s the best way to prevent tzatziki from becoming watery?
A: After grating the cucumber, squeeze out as much liquid as possible using a clean kitchen towel or cheesecloth. This keeps the sauce thick and creamy.
Q: Can I use store-bought tzatziki?
A: You can, but homemade tzatziki has fresher, more vibrant flavors and allows you to control the ingredients (like garlic, salt, and lemon levels).
Q: Are these gyros gluten-free?
A: The fillings and tzatziki are naturally gluten-free. To make the whole recipe gluten-free, simply use gluten-free pita bread or lettuce wraps.
Nutrition Facts (Per Gyro – Approximate)
Nutrient Amount
Calories 430 kcal
Protein 32 g
Carbohydrates 28 g
Fiber 3 g
Sugars 3 g
Fat 22 g
Saturated Fat 5 g
Sodium 620 mg
Vitamin A 15% DV
Vitamin C 20% DV
Calcium 12% DV
Iron 15% DV
Note: Nutrition may vary based on pita size, toppings, and exact ingredients used.
Conclusion
These Mediterranean Greek Chicken Gyros with Cucumber Tzatziki deliver a perfect mix of juicy, spiced chicken, cool creamy sauce, and fresh vegetables all wrapped in soft pita bread. The combination of flavors is both satisfying and nourishing, making this a great option for weeknight dinners, meal prep, or casual gatherings.
With just a bit of marination and a few simple steps, you’ll have a restaurant-style gyro experience at home—healthy, flavorful, and customizable to your preferences.

 Low-Point Pizza Roll-Ups (Weight Watchers)
 Ingredients
 Instructions
 Pizza Roll-Ups Q & A
 1–2 points per roll-up
 WW Pro Tip
 Crispy Broccoli Cheese Bites
 WW Points Overview
 Instructions
 Preheat
 Prepare the Broccoli
 Mix the Filling
 Form the Bites
 Cook
Cook Serve
Serve Low-Point Dipping Sauce Options
 Pro Tips for Extra Crispiness
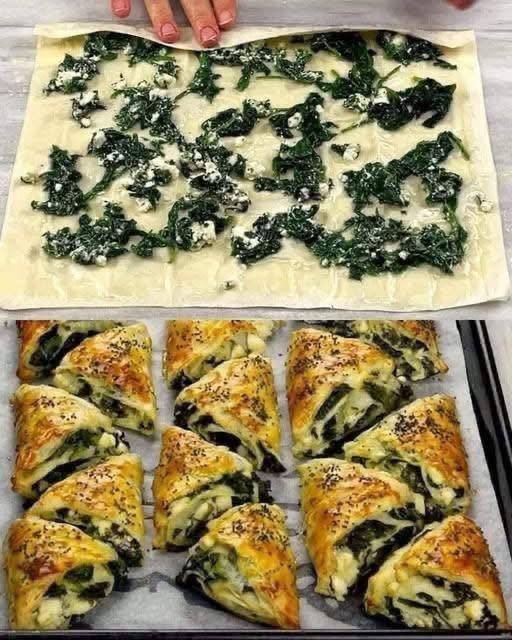
 Diabetic-Friendly Stuffed Phyllo Cups with Spinach, Feta & Sundried Tomatoes
 Servings: 12 mini cups
 Ingredients
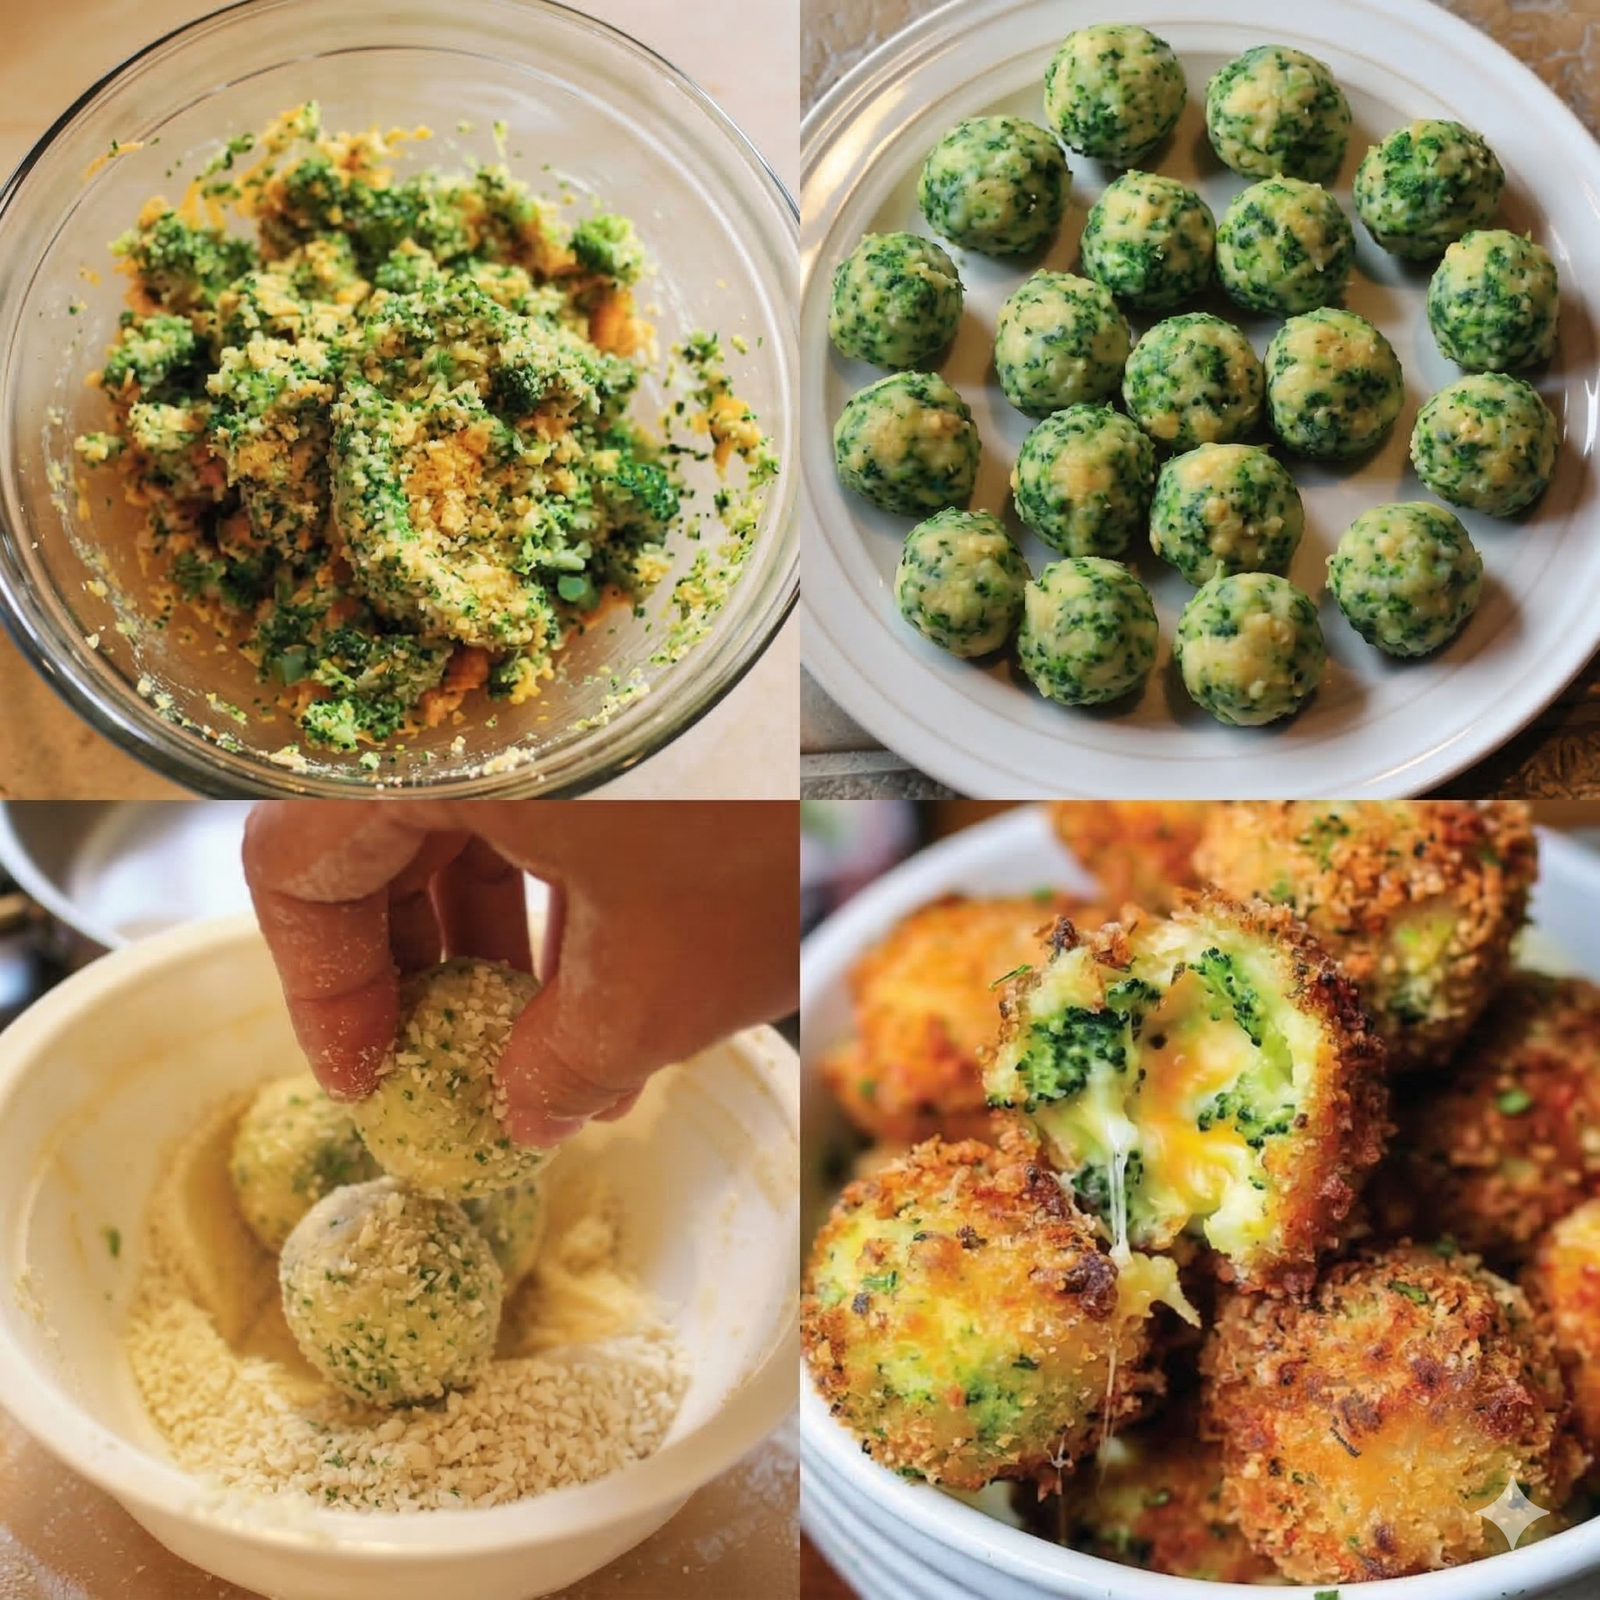


 No. This tea is a supportive habit, not a treatment replacement.