
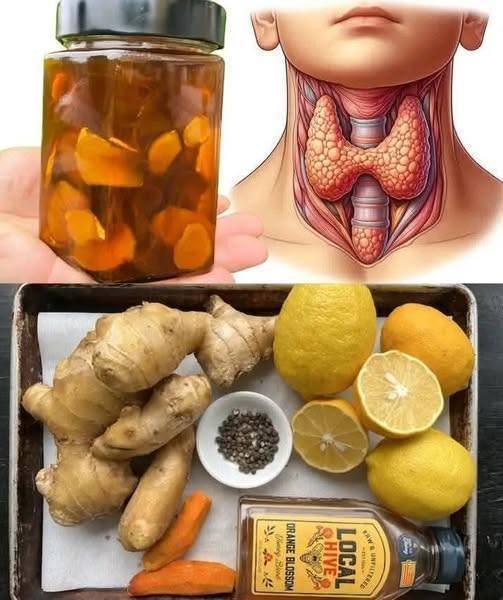
Morning Citrus Detox Drink –
This refreshing lemon-ginger morning drink is designed to boost hydration, support digestion, and gently energize your body before breakfast. The ingredients are natural and commonly used for digestive wellness. Drink it on an empty stomach for 5 days to feel lighter, refreshed, and less bloated.
 Ingredients
-
1 cup warm water (not boiling)
-
2 tablespoons fresh lemon juice
-
1 tablespoon freshly grated ginger or ½ teaspoon ginger powder
-
1 tablespoon raw honey (optional but recommended)
-
1 teaspoon apple cider vinegar (optional)
-
1–2 slices of lemon or lime for garnish
-
Warm 1 cup of water until it is pleasantly warm — not too hot.
-
Add fresh lemon juice and stir.
-
Add grated ginger; let it steep for 2 minutes.
-
Stir in raw honey until melted.
-
(Optional) Add apple cider vinegar for a stronger detox effect.
-
Strain if you want a smooth drink.
-
Pour into a glass and garnish with lemon or lime slices.
Drink 1 cup before breakfast every morning.
Benefits (Realistic & Safe)
-
Hydrates the body after overnight fasting
-
Supports digestion and reduces bloating
-
Ginger may help soothe the stomach
-
Lemon provides vitamin C
-
Honey offers mild energy and antioxidants
This drink can support overall wellness, but no drink alone burns fat; healthy eating and activity matter too.
Q&A Section
1. Can this drink reduce belly fat?
It cannot “melt fat,” but it helps reduce bloating, improves digestion, and may support weight-management efforts when paired with healthy habits.
2. Should I drink it hot or cold?
Warm is best — it activates digestion gently.
3. Can I drink it more than once a day?
Once daily is enough. Too much lemon or ginger may irritate the stomach in some people.
4. Can diabetics drink this?
Yes, but skip the honey and consult a healthcare provider if unsure.
5. Can I prepare it at night?
Fresh is best, but you can prepare it up to 8 hours ahead and store it in the fridge.
6. How long should I use it?
You can drink it for 5 days or even daily as a general morning wellness ritual.


 No. This tea is a supportive habit, not a treatment replacement.


 Helps prevent blood sugar spikes


 Supports Digestion
 Heart Health
 Antioxidant Boost
 Mild Detox Support
 May Help With Constipation
 Skin Glow Support
 Nutritional Info (Approximate per cup)

 Instructions
 Inhale gently for 5–10 minutes (keep eyes closed).
 Keep face 8–12 inches from the water to avoid burns.
 Helps loosen mucus
 May ease stuffy nose
 Clove contains natural antimicrobial compounds
 Promotes relaxation
 Warm steam supports sinus drainage