Homemade Aloe Vera Hair Growth Oil
-
Prep time: 10 minutes
-
Infusion time: 15 minutes
-
Shelf life: 2–3 weeks
Ingredients
-
2 to 3 Fresh Aloe Vera Leaves: Provides vitamins A, C, E, and B12.
-
1 Cup Carrier Oil: Coconut oil is excellent for deep penetration, while Olive oil is great for scalp moisture.
-
1 Tablespoon Castor Oil (Optional): Highly recommended for those focusing specifically on thickening and hair loss control.
Step-by-Step Instructions
-
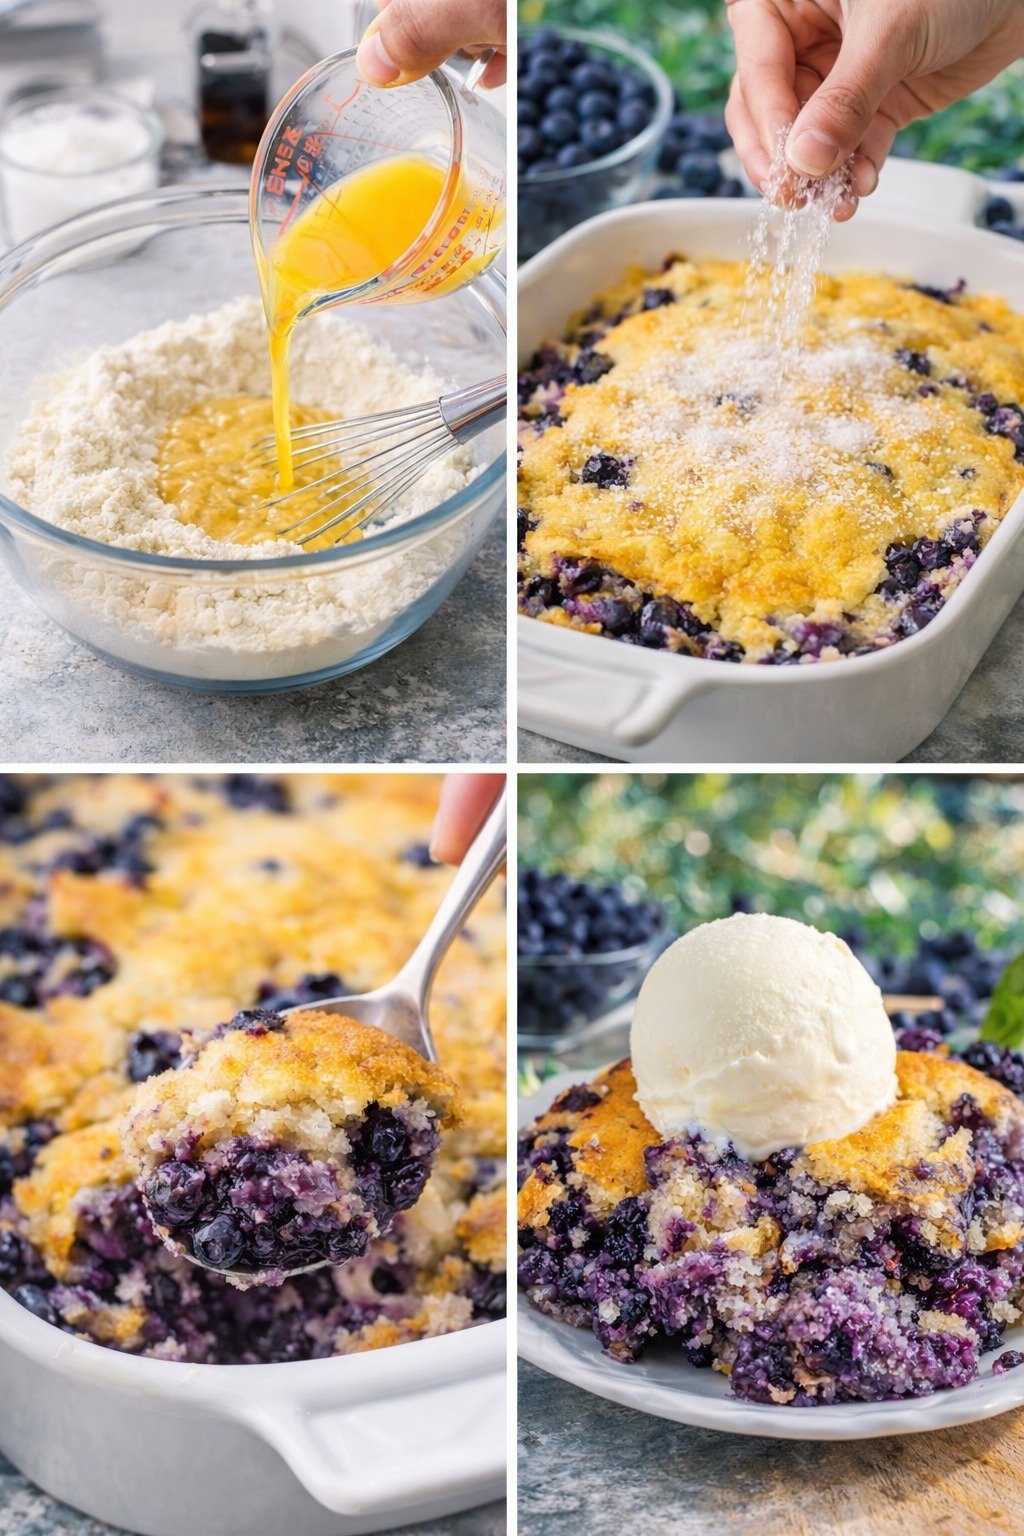
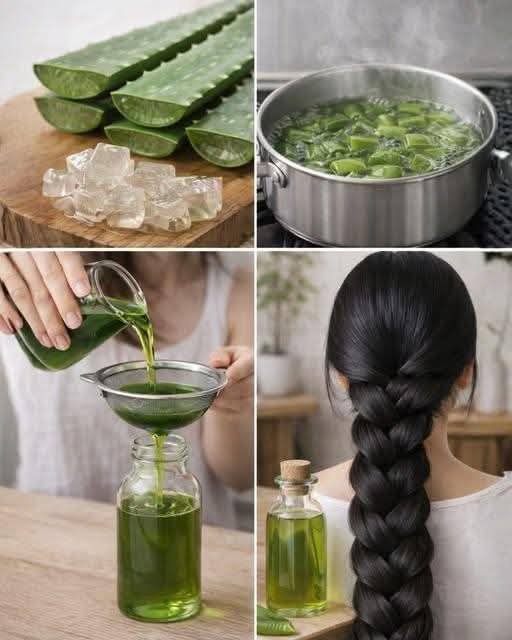
Extract the Gel: Wash the leaves thoroughly to remove any dirt. Trim the spiked edges, then slice the leaf open lengthwise. Use a spoon to scoop out the clear inner gel.
Note: Be careful to avoid the yellow sap (latex) near the skin, as it can be an irritant for some people.
-
Prepare the Gel: Cut the clear gel into small, uniform cubes. This increased surface area allows the oil to extract the nutrients more efficiently during the heating process.
-
Combine and Heat: Place your carrier oil (Coconut or Olive) in a heavy-bottomed pan over low heat. Add the aloe cubes immediately. It is vital to keep the heat low to prevent frying the gel, which can destroy the delicate enzymes.
-
The Infusion Process: Simmer the mixture for 10 to 15 minutes, stirring occasionally. You are looking for the gel to turn translucent or slightly brown and for the oil to take on a very faint greenish tint.
-
Cool and Strain: Remove the pan from the heat and let it sit until it reaches room temperature. Use a fine mesh sieve or a piece of cheesecloth to strain the oil into a clean, dry glass jar. Discard the spent aloe bits.
-
Final Fortification: If you are using Castor oil, stir it into the cooled, strained mixture now. Close the lid tightly and store it in a cool, dark place.
Questions & Answers
Q: Can I use store-bought Aloe Vera gel instead of fresh leaves? A: It is best to use fresh leaves. Store-bought gels often contain thickeners, preservatives, and alcohols that do not react well to heat and may not blend properly with the oil.
Q: Why did my oil turn cloudy? A: Cloudiness usually happens if there is still water content from the aloe in the oil. To prevent this, ensure the aloe gel is patted dry before adding it to the oil and ensure you simmer it long enough for the moisture to evaporate.
Q: How often should I apply this for noticeable results? A: Consistency is key with natural remedies. Aim for 2 to 3 times a week. Most people begin to notice a difference in hair texture within a month, while growth changes usually take 8–12 weeks of regular use.
Q: Is this safe for color-treated hair? A: Yes, this natural oil is generally safe for color-treated hair. In fact, the proteolytic enzymes in aloe can help repair the chemical damage often associated with hair dye.
Q: Can I leave this in my hair all day? A: While you can, it is quite a heavy treatment. Leaving it on for 1 to 2 hours provides ample time for the scalp to absorb the nutrients. If you have very dry hair, an overnight treatment is fine, but be sure to protect your pillowcase!


 Important: This is not a cure for conditions like diabetes, high cholesterol, or anemia.
 Supports hydration
 Does NOT detox organs