
Cheesy Garlic Butter Mozzarella Stuffed Rolls 🍞🧀🧄
Soft, fluffy bread rolls filled with gooey mozzarella and brushed with rich garlic butter—perfect as a snack, side dish, or party appetizer. When you pull one apart, the melted cheese stretches beautifully for that irresistible “cinematic” cheese pull.
Ingredients
1. The Dough
-
3½ cups all-purpose flour
-
1 cup warm milk (about 38 °C / 100 °F)
-
2¼ tsp instant yeast (1 packet)
-
2 tbsp sugar
-
1 tsp salt
-
4 tbsp melted butter
-
1 large egg
2. The Filling
-
12–15 cubes low-moisture mozzarella cheese (about 1.5–2 cm cubes)
3. The Garlic Butter
-
6 tbsp softened butter
-
4 cloves garlic, finely minced
-
2 tbsp fresh parsley, chopped
-
½ tsp salt
4. The Topping
-
1 cup shredded mozzarella & parmesan cheese mix
-
½ tsp dried oregano
Step-by-Step Method
Step 1: Prepare the Dough
-
In a large mixing bowl, combine the warm milk, sugar, and yeast.
-
Stir gently and let the mixture sit for 5 minutes until it becomes foamy. This indicates the yeast is activated.
-
Add the melted butter, egg, and salt to the mixture. Whisk until combined.
-
Gradually add the flour while mixing until a soft dough forms.
Kneading
-
Transfer the dough to a lightly floured surface.
-
Knead for 8–10 minutes until the dough becomes smooth, soft, and elastic.
Pro Tip:
If the dough sticks too much to your hands, add flour 1 tablespoon at a time. Avoid adding too much—slightly sticky dough produces softer rolls.
Step 2: First Rise
-
Lightly grease a bowl with oil or butter.
-
Place the dough inside and turn it once to coat the surface.
-
Cover with a damp cloth or plastic wrap.
-
Let it rise in a warm place for about 1 hour, or until the dough doubles in size.
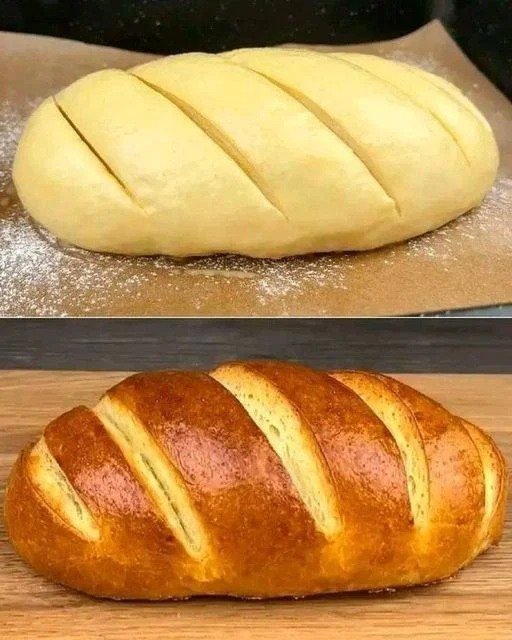
Step 3: Shape and Stuff
-
Punch down the risen dough gently to release air.
-
Divide the dough into 12–15 equal portions.
-
Flatten each piece into a small circle.
-
Place a cube of mozzarella in the center.
-
Fold the edges over the cheese and pinch tightly to seal.
-
Roll gently into a smooth ball.
Arrange
-
Place the dough balls seam-side down in a greased baking dish.
-
Arrange them so they are slightly touching—this helps create soft pull-apart rolls.
Step 4: Second Rise
-
Cover the pan again with a cloth.
-
Let the rolls rise for 30 minutes until puffy.
Prepare Garlic Butter
While waiting:
-
In a small bowl combine
-
softened butter
-
minced garlic
-
chopped parsley
-
salt
-
-
Mix until smooth.
Brush the Rolls
-
Brush half of the garlic butter over the tops of the risen rolls.
Step 5: Bake
-
Preheat the oven to 190 °C (375 °F).
-
Bake the rolls for 15 minutes.
Add Topping
-
Remove the tray from the oven.
-
Brush the remaining garlic butter over the rolls.
-
Sprinkle the shredded mozzarella & parmesan mixture on top.
-
Add a light sprinkle of dried oregano.
Final Bake
Return to the oven and bake for 8–10 minutes until:
-
the cheese melts
-
the tops become golden brown
-
the surface looks bubbly.


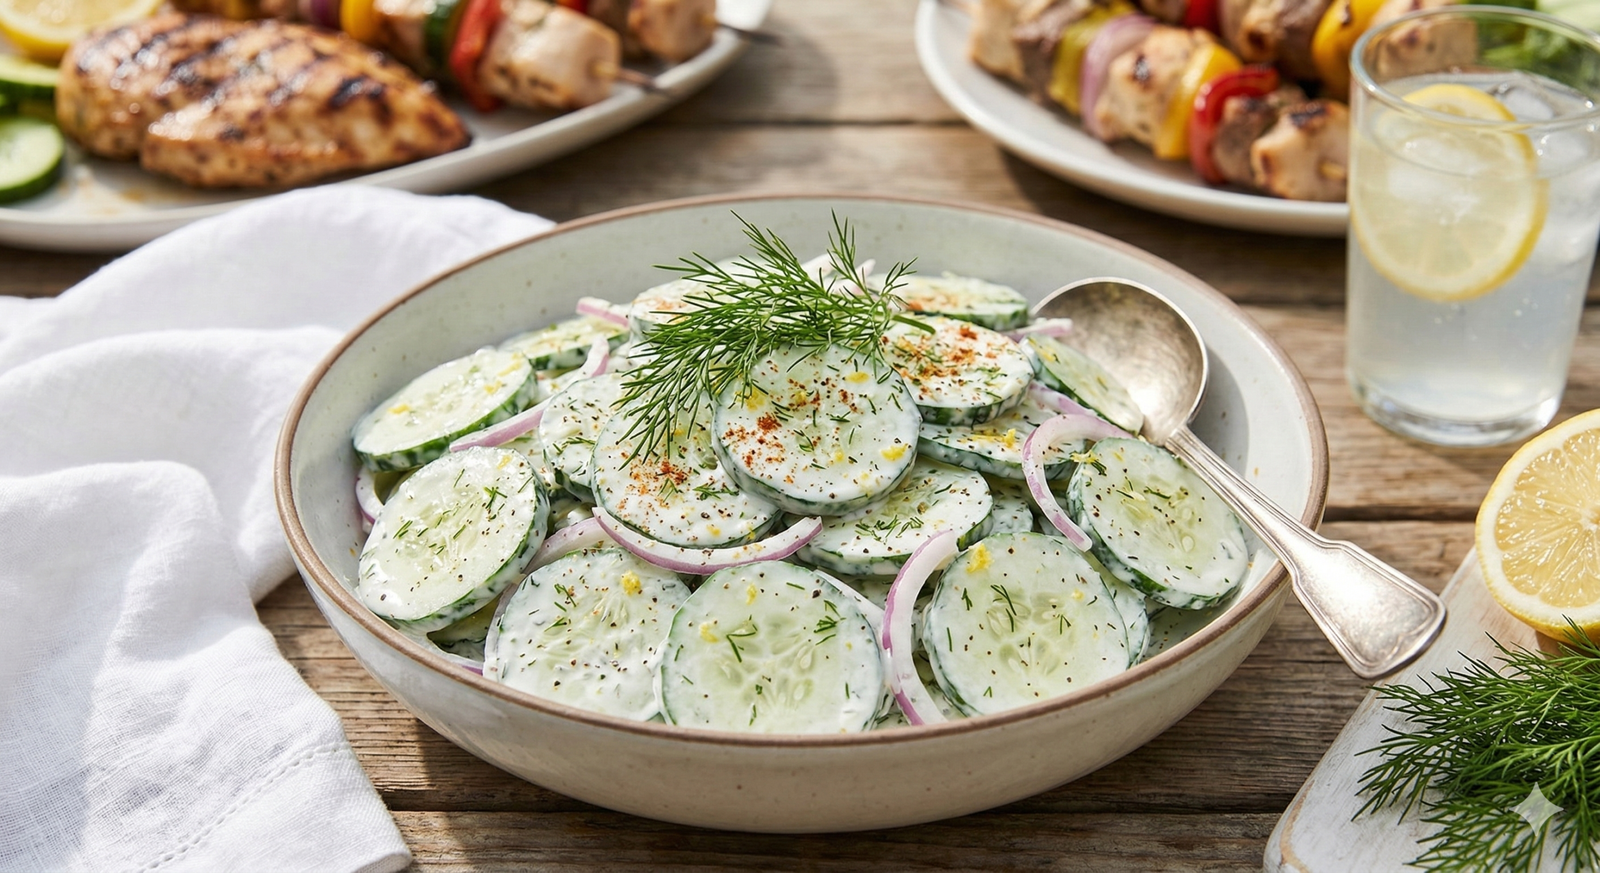
 Description
 Ingredients (Serves 4)
 Instructions
 Prepare the Cucumbers
 Make the Creamy Dressing
 Combine
 Chill
Chill Tips for Best Results
 Use English cucumbers for fewer seeds and less bitterness.
 Serving Suggestions
 Nutritional Info (Approx. per serving)
 Health Benefits
 Cucumbers are hydrating and low in calories
 Yogurt provides probiotics for gut health
 Light and heart-friendly when made with Greek yogurt
 Frequently Asked Questions


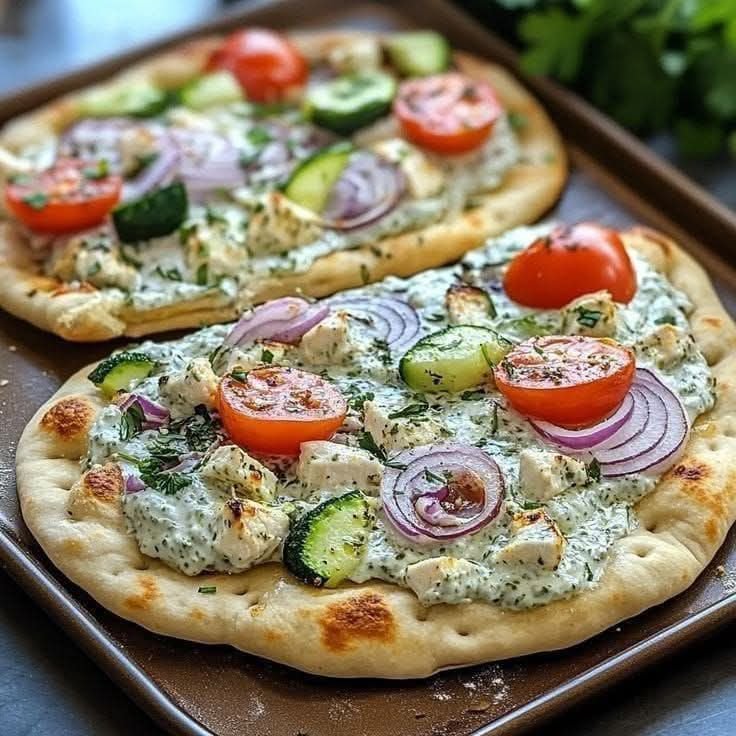
 Tzatziki Chicken Pizza
 Ingredients
 ):
): Notes
Notes