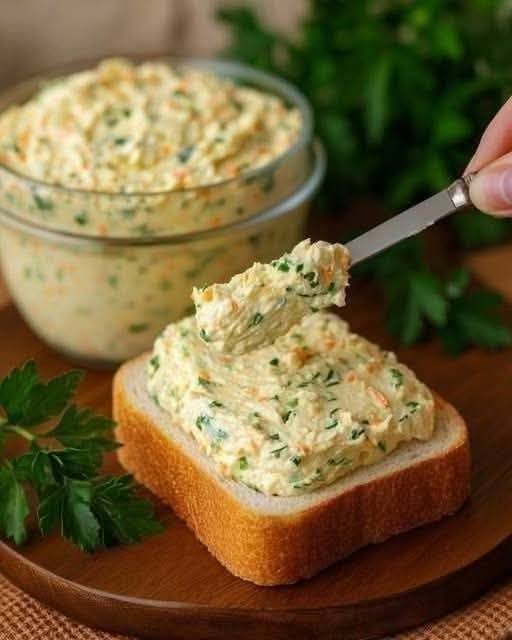
Garden Fresh Veggie Cream Cheese Spread

Garden Fresh Veggie Cream Cheese Spread

Prep time: 10 mins | Total time: 10 mins | Yields: ~2 cups

Ingredients

  • 16 ounces Cream cheese (softened to room temperature)

  • 1 packet (1 ounce) Ranch seasoning mix

  • 1/2 cup Broccoli (very finely chopped/minced)

  • 1/4 cup Red bell pepper (finely diced, for color and crunch)

  • 1/4 cup Carrots (shredded or finely minced)

  • 2 tbsp Green onions or chives (thinly sliced)


Detailed Instructions

  1. Prep the Veggies: Wash and dry your vegetables thoroughly. The key to a great spread is a fine dice—chop the broccoli, bell pepper, and carrots into very small, uniform pieces. This ensures you get a bit of “garden crunch” in every single bite.

  2. Soften the Base: In a medium mixing bowl, add the softened cream cheese. Using a hand mixer on medium speed (or a sturdy spatula), whip the cream cheese for 1–2 minutes until it is light, airy, and easy to spread.

  3. Season: Sprinkle the ranch seasoning packet over the whipped cream cheese. Fold it in gently until the seasoning is evenly distributed throughout the base.

  4. Fold in the Garden: Add the chopped broccoli, peppers, carrots, and green onions. Use a spatula to fold the vegetables into the cream cheese until they are well incorporated.

  5. Let the Flavors Marry: While you can serve this immediately, the flavor is even better if you cover the bowl and let it chill in the refrigerator for at least 30 minutes. This allows the dry seasonings to hydrate and the veggie flavors to blend.

  6. Serve: Spread generously over toasted bagels, use it as a filling for tortilla wraps, or serve it in a bowl as a dip for crackers and fresh cucumber slices.


Why this recipe is a keeper:

  • Customizable: Feel free to swap the broccoli for spinach or add a little diced jalapeño if you like a bit of warmth.

  • Make-Ahead Friendly: This stays fresh and delicious in an airtight container in the fridge for up to 5 days.

  • Crowd Pleaser: It’s an easy, colorful addition to any brunch spread or party platter.

Refreshing Ginger Lemon Wellness Water

Refreshing Ginger Lemon Wellness Water

Prep time: 10 mins | Steep time: 2–4 hours | Yields: ~1 Liter

Ingredients

  • 1-2 inches Fresh ginger root (peeled and thinly sliced or grated)

  • 2 large Fresh lemons (one sliced, one juiced)

  • 4 cups (1 Liter) Filtered water

  • Optional: 1-2 tbsp Raw honey or maple syrup (for a touch of natural sweetness)

  • Optional: A pinch of cayenne pepper or a few sprigs of fresh mint


Detailed Instructions

  1. Prepare the Ginger: Peel the ginger root using the edge of a spoon. Slice it into very thin rounds or grate it directly to release as much flavor and gingerol as possible.

  2. Boil and Steep: In a small pot, bring 2 cups of the water to a gentle boil. Add the ginger slices and let them simmer for about 5–8 minutes. This creates a concentrated “ginger tea” base.

  3. Combine: Remove the pot from the heat and let it cool slightly. Pour the ginger tea (you can strain out the pieces or leave them in) into a large glass pitcher. Add the remaining 2 cups of cold water.

  4. Add Citrus: Stir in the fresh lemon juice and drop in the lemon slices. The Vitamin C in the lemon pairs perfectly with the spicy notes of the ginger.

  5. Sweeten (Optional): If the drink is too spicy for your palate, stir in your natural sweetener while the water is still slightly warm so it dissolves completely.

  6. Chill and Infuse: For the best flavor, let the pitcher sit in the refrigerator for at least 2 hours. This allows the ingredients to fully infuse the water.


Why This Drink is a Great Choice:

  • Hydration: It makes reaching your daily water goals much more flavorful.

  • Digestion: Ginger has been used for centuries to help soothe the digestive system and reduce occasional bloating.

  • Antioxidants: Lemons are a great source of Vitamin C, which supports a healthy immune system.

4-Ingredient Cheesy Garlic Pull-Apart Loaf

4-Ingredient Cheesy Garlic Pull-Apart Loaf

Prep time: 5 mins | Bake time: 15 mins | Serves: 4-6

Ingredients

  • 1 Loaf of crusty bread (like Sourdough or a French baguette)

  • 1/2 cup Unsalted butter, melted

  • 3-4 cloves Garlic, finely minced

  • 1 1/2 cups Shredded cheese (Mozzarella or Monterey Jack work best for the pull)

  • Optional: Fresh parsley or chives for a pop of color.


Detailed Instructions

  1. Prep and Slice: Preheat your oven to 375°F (190°C). Using a serrated knife, cut the bread in a grid pattern (lengthwise and crosswise) about 1 inch apart. Be sure to cut deep, but do not cut through the bottom crust, as the base needs to hold everything together.

  2. Infuse with Flavor: In a small bowl, mix your minced garlic into the melted butter. Use a pastry brush or a spoon to drizzle this golden mixture into all the cracks of the bread, ensuring the garlic is evenly distributed.

  3. Stuff and Bake: Generously stuff the shredded cheese into the crevices. Wrap the loaf loosely in foil and bake for 10 minutes. Then, open the foil and bake for another 5 minutes (or until the cheese is melted, bubbly, and slightly golden).


Why this recipe is a favorite:

  • Speed: It takes only a few minutes to assemble but looks like it came from a professional bakery.

  • Customization: You can easily swap the garlic for Italian seasoning or add red pepper flakes for a little warmth.

  • Texture: The combination of the crunchy crust and the soft, cheesy interior makes it the perfect side dish for any meal.

The Ultimate Garlic Cheese Pull-Apart Bread

The Ultimate Garlic Cheese Pull-Apart Bread

Prep time: 10 mins | Bake time: 15–20 mins | Serves: 6–8

Ingredients

  • 1 loaf Sourdough or Italian boule (crusty bread works best)

  • 1/2 cup Unsalted butter, melted

  • 2-3 cloves Garlic, finely minced

  • 1 tsp Sea salt

  • 1 tbsp Fresh parsley, finely chopped

  • 1 1/2 cups Shredded cheese (a mix of Monterey Jack and Sharp Cheddar is best for the “pull”)

  • Optional: 2 green onions, thinly sliced


Instructions

  1. Preheat & Prepare: Preheat your oven to 350°F (175°C). Line a baking sheet with foil or parchment paper for easy cleanup.

  2. Cut the Bread: Using a serrated knife, cut the bread in a 1-inch diamond pattern. Cut deep into the loaf, but be careful not to cut all the way through to the bottom crust. You want the loaf to stay together as one piece.

  3. Mix the Garlic Butter: In a small bowl, whisk together the melted butter, minced garlic, sea salt, and fresh parsley.

  4. Butter the Cracks: Use a pastry brush or a small spoon to drizzle the garlic butter into every crevice of the bread. This ensures every bite is flavorful.

  5. Stuff with Cheese: Use your fingers to gently pull the cracks open and stuff plenty of shredded cheese inside. Don’t be shy—the more cheese in the cracks, the better the result!

  6. Wrap and Bake: Wrap the entire loaf loosely in foil. This allows the cheese to melt without the crust burning. Bake for 10 minutes.

  7. Crisp it Up: Remove the foil from the top and bake for another 5–10 minutes until the cheese is bubbly and the top of the bread is golden and crisp.

  8. Serve: Sprinkle with sliced green onions if desired. Serve immediately while the cheese is gooey.


A Tip for Success

If you want to prep this even further in advance, you can cut and butter the bread a few hours early, wrap it tightly, and simply add the cheese and bake right before your guests arrive.

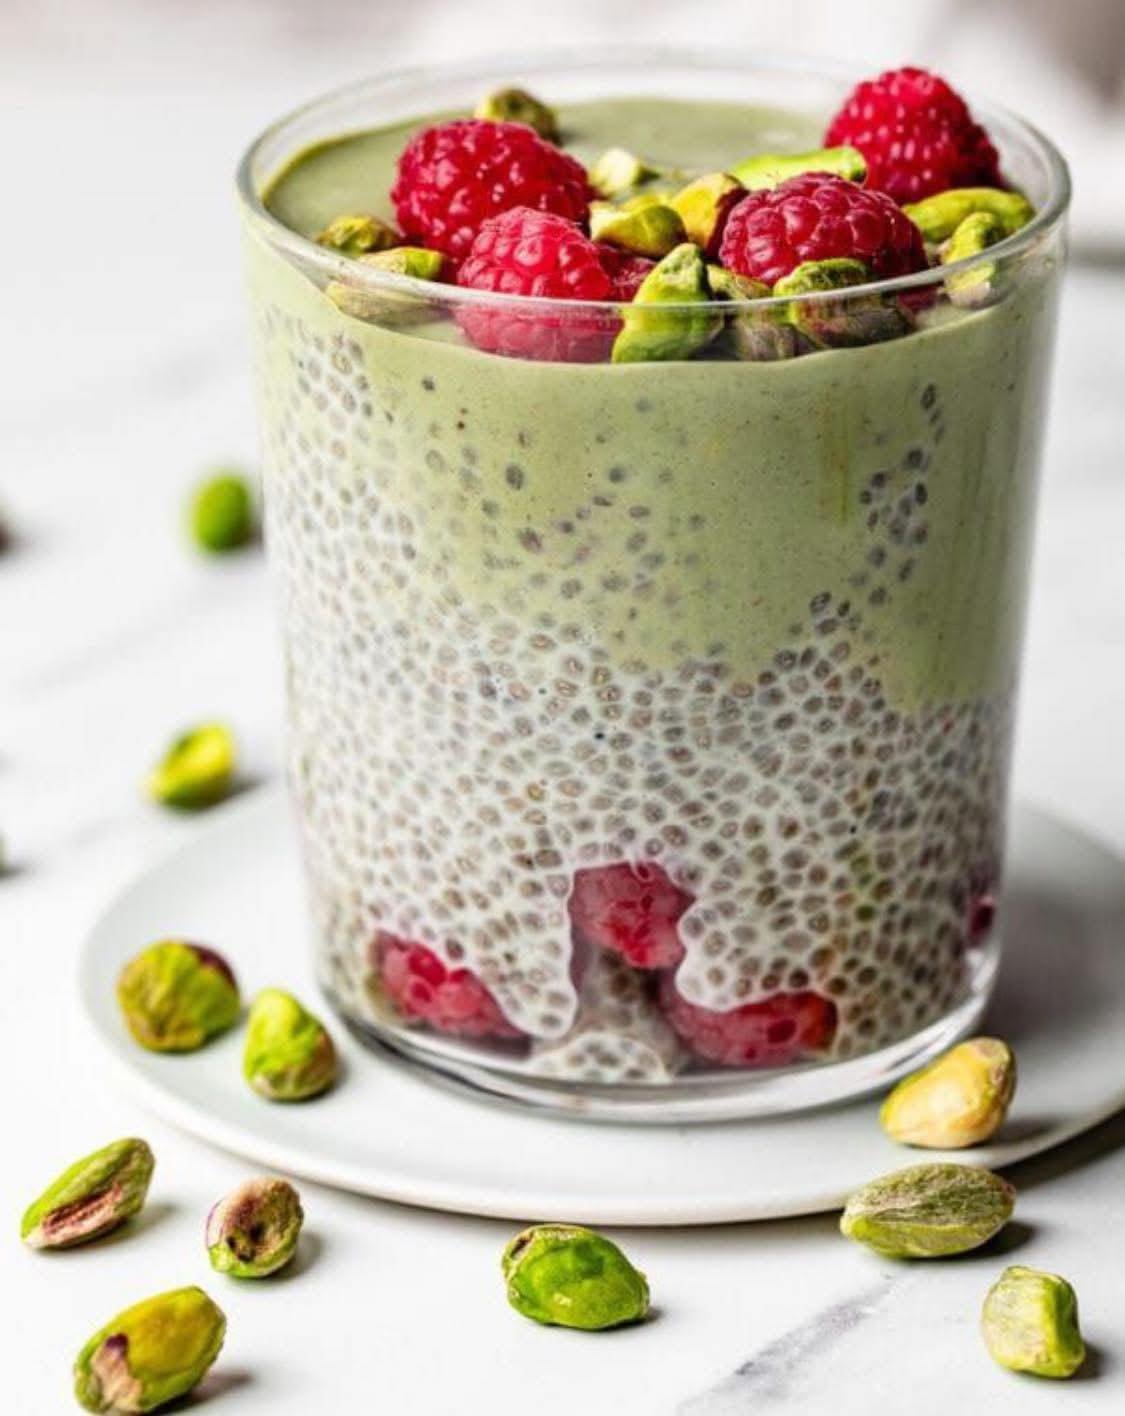
Healthy Chia Seed Pudding with Pistachios

Healthy Chia Seed Pudding with Pistachios

High-fiber • Naturally sweet • Perfect for breakfast or dessert


📝 Ingredients (2 servings)

  • 3 tablespoons chia seeds

  • 1 cup unsweetened almond milk (or milk of choice)

  • ½ teaspoon vanilla extract

  • 1–2 teaspoons honey or maple syrup (optional)

  • Pinch of salt

Toppings

  • 2–3 tablespoons shelled pistachios, roughly chopped

  • Fresh berries (optional)

  • Coconut flakes (optional)

  • Extra drizzle of honey (optional)


👩‍🍳 Instructions

1️⃣ Mix

In a bowl or jar, whisk together:

  • Almond milk

  • Vanilla

  • Sweetener (if using)

  • Pinch of salt

Stir in chia seeds and mix thoroughly.


2️⃣ Prevent Clumps

Let sit for 5 minutes, then stir again to break up any clumps.


3️⃣ Chill

Cover and refrigerate for at least 2 hours, preferably overnight, until thick and pudding-like.


4️⃣ Serve

Stir once more before serving.
Top with chopped pistachios and any additional toppings.

Cheesy Potato & Meatball Bake

Cheesy Potato & Meatball Bake

A hearty, protein-packed French-inspired dish that uses clever layering for a stunning presentation.

Ingredients

The Base & Meatballs:

  • 3 Large Potatoes: Boiled until tender but firm, then sliced.

  • 1 lb Lean Ground Beef or Turkey: (At least 93% lean to stay point-friendly).

  • 1 chopped White Onion: For sweetness and depth.

  • 2 cloves Garlic, minced: A fresh alternative to processed powders.

  • 1/4 cup Fresh Parsley, chopped: For brightness and color.

  • 1 Egg: To bind the meatballs.

  • Salt and Black Pepper: To taste.

The Topping:

  • 1 cup Low-Fat Mozzarella or Light Shredded Cheese: To get that melted, golden finish.

  • Optional: A pinch of nutmeg or paprika for a warm, savory aroma.


Detailed Instructions

1. Prepare the Potatoes

  • Place the whole potatoes in a pot of salted water.

  • Bring to a boil and cook for about 15–20 minutes until they are “al dente” (soft enough to slice, but not falling apart).

  • Drain, let them cool slightly, then peel and slice them into uniform rounds.

2. Mix the Meatballs

  • In a large bowl, combine the ground meat, chopped onion, garlic, parsley, and egg.

  • Season with salt and pepper.

  • Mix by hand until just combined. Roll the mixture into small, even-sized meatballs (roughly the size of a golf ball).

3. Assemble the Dish

  • Preheat your oven to 200°C (400°F).

  • In a round baking dish, begin arranging the potato slices and meatballs.

  • The Technique: Place a potato slice vertically against the edge of the dish, then a meatball, then another potato slice. Repeat this in concentric circles until the dish is full and the meatballs are “cradled” by the potatoes.

4. Bake and Melt

  • Cover the dish with foil and bake for 20 minutes.

  • Remove the foil. Top the entire dish evenly with the shredded cheese.

  • Return to the oven for another 10–15 minutes, or until the meatballs are fully cooked through and the cheese is golden and bubbly.


Serving Suggestion

This dish is quite filling on its own, but it pairs beautifully with a large green salad tossed in a light vinaigrette to keep your points low while adding volume to your meal.

Friendly Cinnamon Muffin Donuts

WW-Friendly Cinnamon Muffin Donuts

These muffins provide that classic “donut” texture using a simple, protein-rich base. By swapping the coating, you can enjoy that signature crunch without the heavy sugar hit.

Ingredients

The Batter Base:

  • 2 cups Self-Rising Flour: Provides the structure and lift.

  • 1 cup Sweetened Condensed Milk: This acts as your sweetener and fat source (look for a fat-free or low-fat version to lower the point count further).

  • 2 Large Eggs: To bind the batter and add a boost of protein.

The Mindful Coating:

  • ½ cup Granulated Stevia or Monk Fruit: A 1:1 sugar substitute to keep the “crunch” without the glycemic spike.

  • 1 teaspoon Ground Cinnamon: For that classic aromatic flavor.

  • 2–3 tablespoons Light Butter (Melted): Used sparingly to help the cinnamon mixture stick.


Detailed Instructions

1. Preparation

  • Preheat: Set your oven to 180°C (350°F). Ensure the rack is in the center position for even browning.

  • Prep the Pan: Lightly spray a standard 12-cup muffin tray with non-stick cooking spray or use silicone liners to ensure the muffins pop out easily.

2. Create the Batter

  • In a large mixing bowl, crack the two eggs and whisk them lightly.

  • Pour in the sweetened condensed milk and whisk until the eggs and milk are fully incorporated.

  • Slowly fold in the self-rising flour.

  • Pro Tip: Use a spatula to mix until just combined. If you overmix, the muffins will become tough rather than fluffy. Stop as soon as you see no more dry flour streaks.

3. Bake to Perfection

  • Spoon the batter into the prepared muffin cups, filling each about ¾ of the way full. This gives them room to rise into a “donut hole” dome.

  • Place in the oven and bake for 18–22 minutes.

  • The Test: Insert a toothpick into the center of a muffin; if it comes out clean or with just a few dry crumbs, they are ready. They should be a light golden brown.

4. The Finishing Touch

  • While the muffins are cooling for a minute, combine the cinnamon and sugar substitute in a small, shallow bowl.

  • Melt your light butter in a separate small bowl.

  • While the muffins are still warm, lightly brush the tops with a thin layer of butter.

  • Immediately roll the buttered top into the cinnamon-sweetener mix.

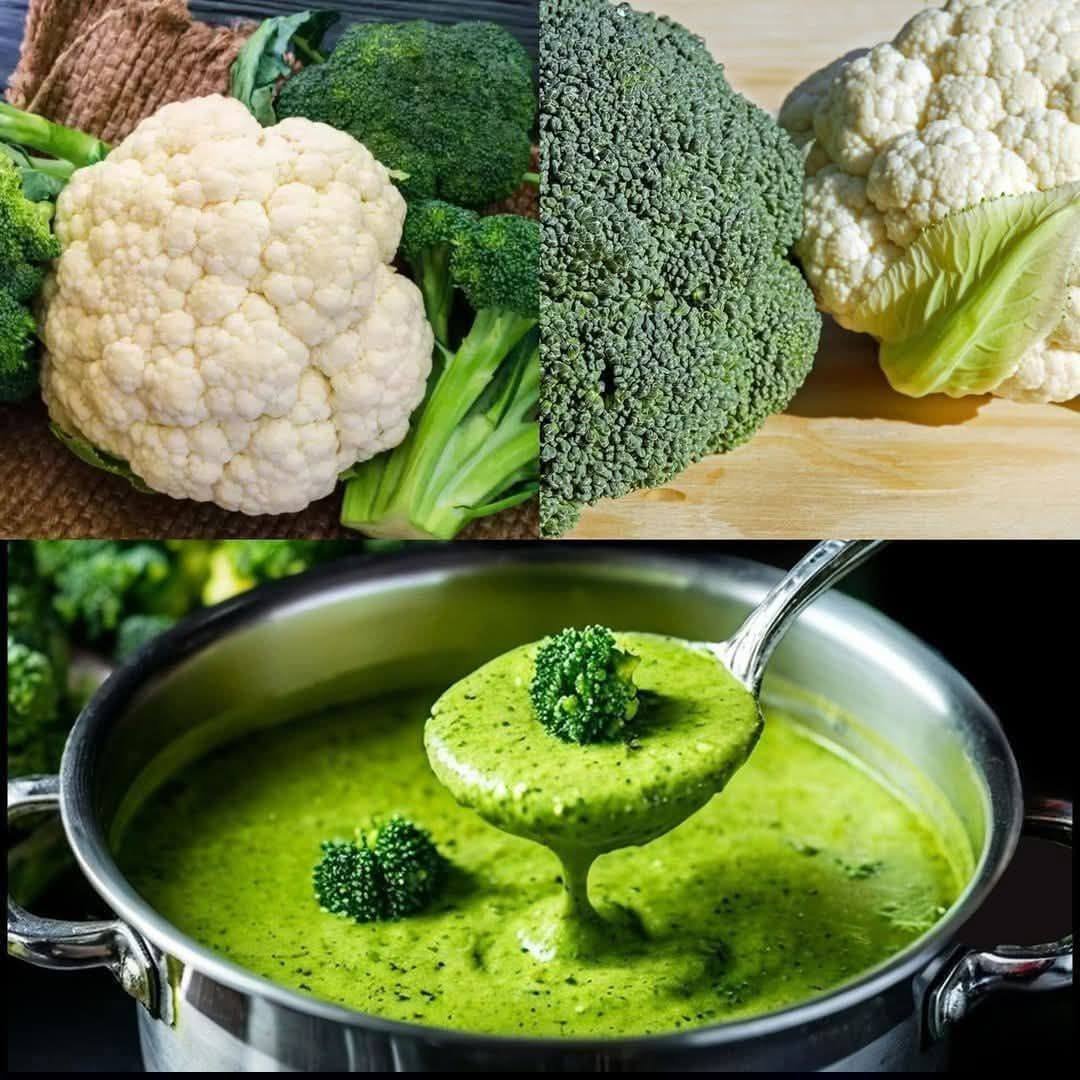
Broccoli & Cauliflower Healing Soup

Broccoli & Cauliflower Healing Soup

A gentle, creamy, and nourishing soup made with fresh broccoli and cauliflower. It’s light on the stomach, packed with fiber, antioxidants, and vitamins — perfect for digestion and overall wellness.

 Description

This soup is smooth, naturally creamy (without heavy cream), and easy to digest. Both broccoli and cauliflower belong to the cruciferous vegetable family, known for supporting gut health, reducing inflammation, and boosting immunity.

It’s ideal for:

  • Sensitive stomach days

  • Detox-style meals

  • Light dinners

  • Immune support

Ingredients (4 Servings)

  • 2 cups broccoli florets

  • 2 cups cauliflower florets

  • 1 small onion, chopped

  • 2 cloves garlic, minced

  • 1 tablespoon olive oil

  • 3 cups vegetable broth (or water)

  • ½ teaspoon turmeric (optional, for extra anti-inflammatory benefits)

  • Salt & black pepper to taste

  • ½ cup milk or coconut milk (optional for creaminess)

  • Fresh parsley (optional garnish)

 Instructions

  1. Heat olive oil in a pot over medium heat.

  2. Add chopped onion and garlic. Sauté until soft (2–3 minutes).

  3. Add broccoli and cauliflower florets. Stir for 1–2 minutes.

  4. Pour in vegetable broth. Bring to a boil.

  5. Reduce heat and simmer for 15–20 minutes until vegetables are tender.

  6. Blend using a hand blender (or regular blender) until smooth.

  7. Add milk/coconut milk if desired.

  8. Season with salt, pepper, and turmeric.

  9. Simmer for another 2 minutes. Serve warm.

 Servings

  • Makes: 4 servings

  • Serving size: ~1 bowl (1.5 cups)

 Nutritional Information (Per Serving – Approximate)

  • Calories: 120–150 kcal

  • Protein: 5g

  • Fiber: 4–5g

  • Carbohydrates: 15g

  • Fat: 6g

  • Vitamin C: 80% Daily Value

  • Vitamin K: 90% Daily Value

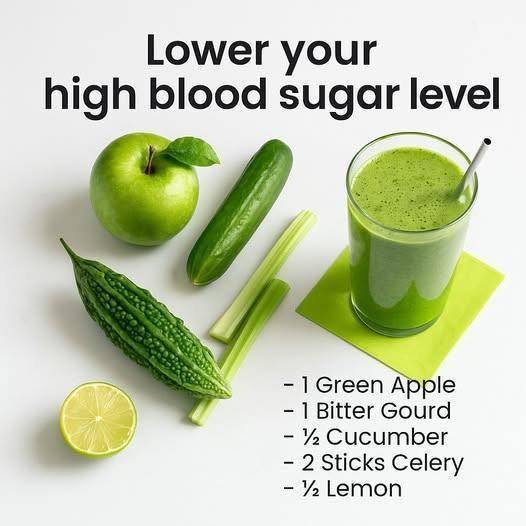
Refreshing Green Apple & Bitter Gourd Tonic

Refreshing Green Apple & Bitter Gourd Tonic

Prep time: 10 minutes | Servings: 1

Ingredients

  • 1 Green Apple: Deseeded.

  • 1 Small Bitter Gourd: Peeled and seeds removed.

  • ½ Cucumber.

  • 2 Sticks Celery.

  • Juice of ½ Lemon.

  • Optional: A pinch of black salt and a fresh tulsi (holy basil) leaf for added flavor.


Instructions

  1. Prepare the Produce: Wash the green apple, bitter gourd, cucumber, and celery thoroughly under cold water.

  2. Prep the Bitter Gourd: Peel the bitter gourd and slice it lengthwise to scoop out and discard all the seeds. Tip: If you find the taste too intense, soak the pieces in salt water for 10 minutes and rinse before juicing.

  3. Core the Apple: Remove the core and seeds from the green apple.

  4. Blend or Juice:

    • If using a juicer: Feed all ingredients through the machine and stir in the fresh lemon juice at the end.

    • If using a blender: Chop all ingredients into small pieces and blend with ½ cup of water until smooth.

  5. Strain: If you blended the ingredients, pour the mixture through a fine-mesh strainer or a nut milk bag to remove the pulp.

  6. Season and Serve: Stir in the lemon juice and the optional pinch of black salt. Serve immediately over ice if desired.


Why This Recipe is a Nutritious Choice

  • Hydration: With cucumber and celery as a base, this drink is exceptionally hydrating.

  • Low Calorie: At approximately 90 kcal, it provides a concentrated burst of nutrients without added sugars.

  • Vitamin C: The green apple and lemon juice provide a healthy dose of antioxidants.

⚠️ Important Safety Note

Consult your doctor before adding this to your routine if you are pregnant, have low blood pressure, or are currently taking medication for blood sugar, as the natural properties of bitter gourd may interact with your treatment.

Golden Garlic & Herb Butter Spread

Golden Garlic & Herb Butter Spread

Description

This rich, creamy butter spread is whipped with fresh herbs, garlic, and a hint of sweetness for balance. It’s soft enough to spread straight from the fridge and melts beautifully over warm bread, vegetables, or meats. Simple ingredients, huge flavor—this is the kind of recipe you pass down.

 Ingredients

  • 1 cup (225 g) unsalted butter, softened

  • 2–3 cloves garlic, finely minced or grated

  • 2 tbsp fresh parsley, finely chopped

  • 1 tbsp fresh chives or green onions, chopped

  • 1 tbsp fresh dill or cilantro (optional but lovely)

  • 1 tbsp olive oil (for extra smoothness)

  • ½ tsp salt (adjust to taste)

  • ¼ tsp black pepper

  • Optional flavor boosts:

    • ½ tsp paprika or chili flakes

    • 1 tsp lemon juice or zest

    • 1 tsp honey (very subtle sweetness)

 Instructions

  1. Place softened butter in a mixing bowl.

  2. Add garlic, herbs, olive oil, salt, and pepper.

  3. Mix with a spoon or hand mixer until fluffy and fully combined.

  4. Taste and adjust seasoning.

  5. Spoon into a jar or shape into a log using parchment paper.

  6. Chill for 30 minutes to firm up—or enjoy immediately.

Tips for Best Results

  • Use room-temperature butter for the creamiest texture

  • Finely chop herbs to avoid chunky bites

  • Roasted garlic = sweeter, milder flavor

  • Add a splash of cream if you want ultra-whipped butter

  • Keeps beautifully in the freezer—slice as needed

 Servings

  • Makes about 1 cup

  • Serves 8–10 as a spread

 Nutritional Info (per tablespoon, approx.)

  • Calories: ~100

  • Fat: 11 g

  • Saturated Fat: 7 g

  • Carbs: 0–1 g

  • Protein: 0 g

  • Sodium: varies by salt used

 Benefits

  • Fresh herbs provide antioxidants

  • Garlic supports heart and immune health

  • Homemade = no preservatives or additives

  • Small amount adds big flavor (less need for excess sauces)

Q & A

Q: Can I use salted butter?
Yes—just reduce or skip added salt.

Q: How long does it last?

  • Fridge: up to 2 weeks

  • Freezer: 3 months

Q: What can I use it on?
Bread, toast, corn, potatoes, pasta, steak, fish, eggs, rice, roasted veggies—anything.

Q: Can I make it vegan?
Absolutely. Use a high-quality plant-based butter.

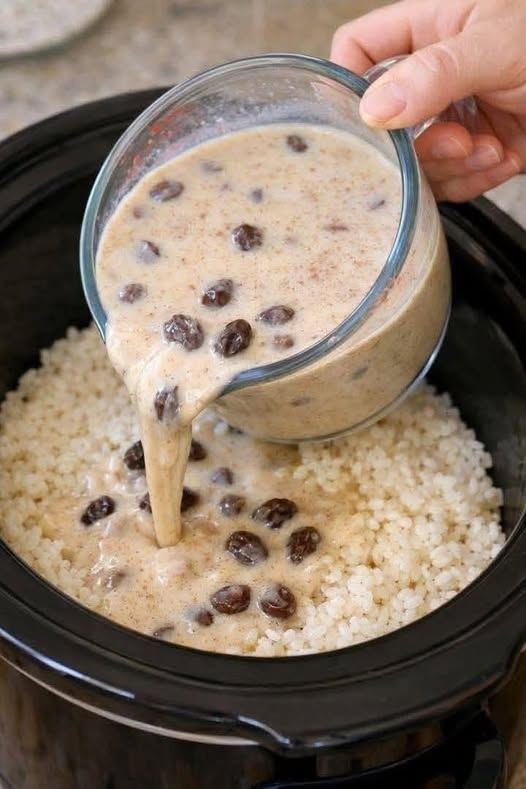
Creamy Raisin Rice Pudding (Slow Cooker Style)

Creamy Raisin Rice Pudding (Slow Cooker Style)

Description

This rich and comforting Creamy Raisin Rice Pudding is a classic dessert made with tender rice, warm cinnamon, sweet plump raisins, and a velvety milk custard. Slow-cooked to perfection, it develops a creamy texture with deep, cozy flavors. Perfect as a dessert or sweet breakfast treat.

 Ingredients

  • 1 cup uncooked white rice (or 3 cups cooked rice)

  • 2 cups water (if cooking rice first)

  • 4 cups whole milk

  • 1 cup heavy cream (optional for extra richness)

  • ¾ cup granulated sugar

  • 1 cup raisins

  • 2 large eggs (room temperature)

  • 2 teaspoons vanilla extract

  • 1 teaspoon ground cinnamon

  • ¼ teaspoon salt

  • 1 tablespoon butter

Instructions

Step 1: Cook the Rice

  • If using uncooked rice, cook with 2 cups water until tender (about 15 minutes).

  • Fluff and set aside.

Step 2: Prepare the Custard Mixture

  • In a bowl, whisk together milk, cream, sugar, eggs, vanilla, cinnamon, and salt.

Step 3: Combine in Slow Cooker

  • Add cooked rice and raisins to the slow cooker.

  • Pour custard mixture over rice.

  • Stir gently to combine.

  • Add butter on top.

Step 4: Cook

  • Cook on LOW for 2–3 hours, stirring once or twice, until thick and creamy.

  • It will thicken more as it cools.

Step 5: Serve

  • Serve warm for comfort or chilled for a firmer texture.

  • Sprinkle extra cinnamon on top if desired.

 Tips for Best Results

✔ Use whole milk for creaminess (low-fat works but less rich).
✔ Soak raisins in warm water for 10 minutes to make them extra plump.
✔ Stir gently to avoid breaking the rice grains.
✔ If too thick, add a splash of warm milk before serving.
✔ Add nutmeg for deeper flavor.

 Servings

Serves: 6–8 portions

Nutritional Information (Approx. per serving)

  • Calories: 320–380 kcal

  • Carbohydrates: 55g

  • Protein: 8g

  • Fat: 12g

  • Saturated Fat: 7g

  • Fiber: 2g

  • Sugar: 28g

(Values vary depending on ingredients used.)

Benefits

  • Provides energy from carbohydrates

  • Contains calcium from milk

  • Raisins add natural sweetness and antioxidants

  • Comfort food that supports satiety

Frequently Asked Questions

Q: Can I use brown rice?
Yes, but it will require longer cooking and slightly more liquid.

Q: Can I make this dairy-free?
Yes. Substitute almond milk or coconut milk and use dairy-free butter.

Q: How long does it last?
Store in an airtight container in the refrigerator for up to 4 days.

Q: Can I freeze rice pudding?
It can be frozen, but texture may change slightly. Stir well after thawing.

Q: Can I make it without eggs?
Yes, simply omit eggs; the pudding will be less custard-like but still creamy.

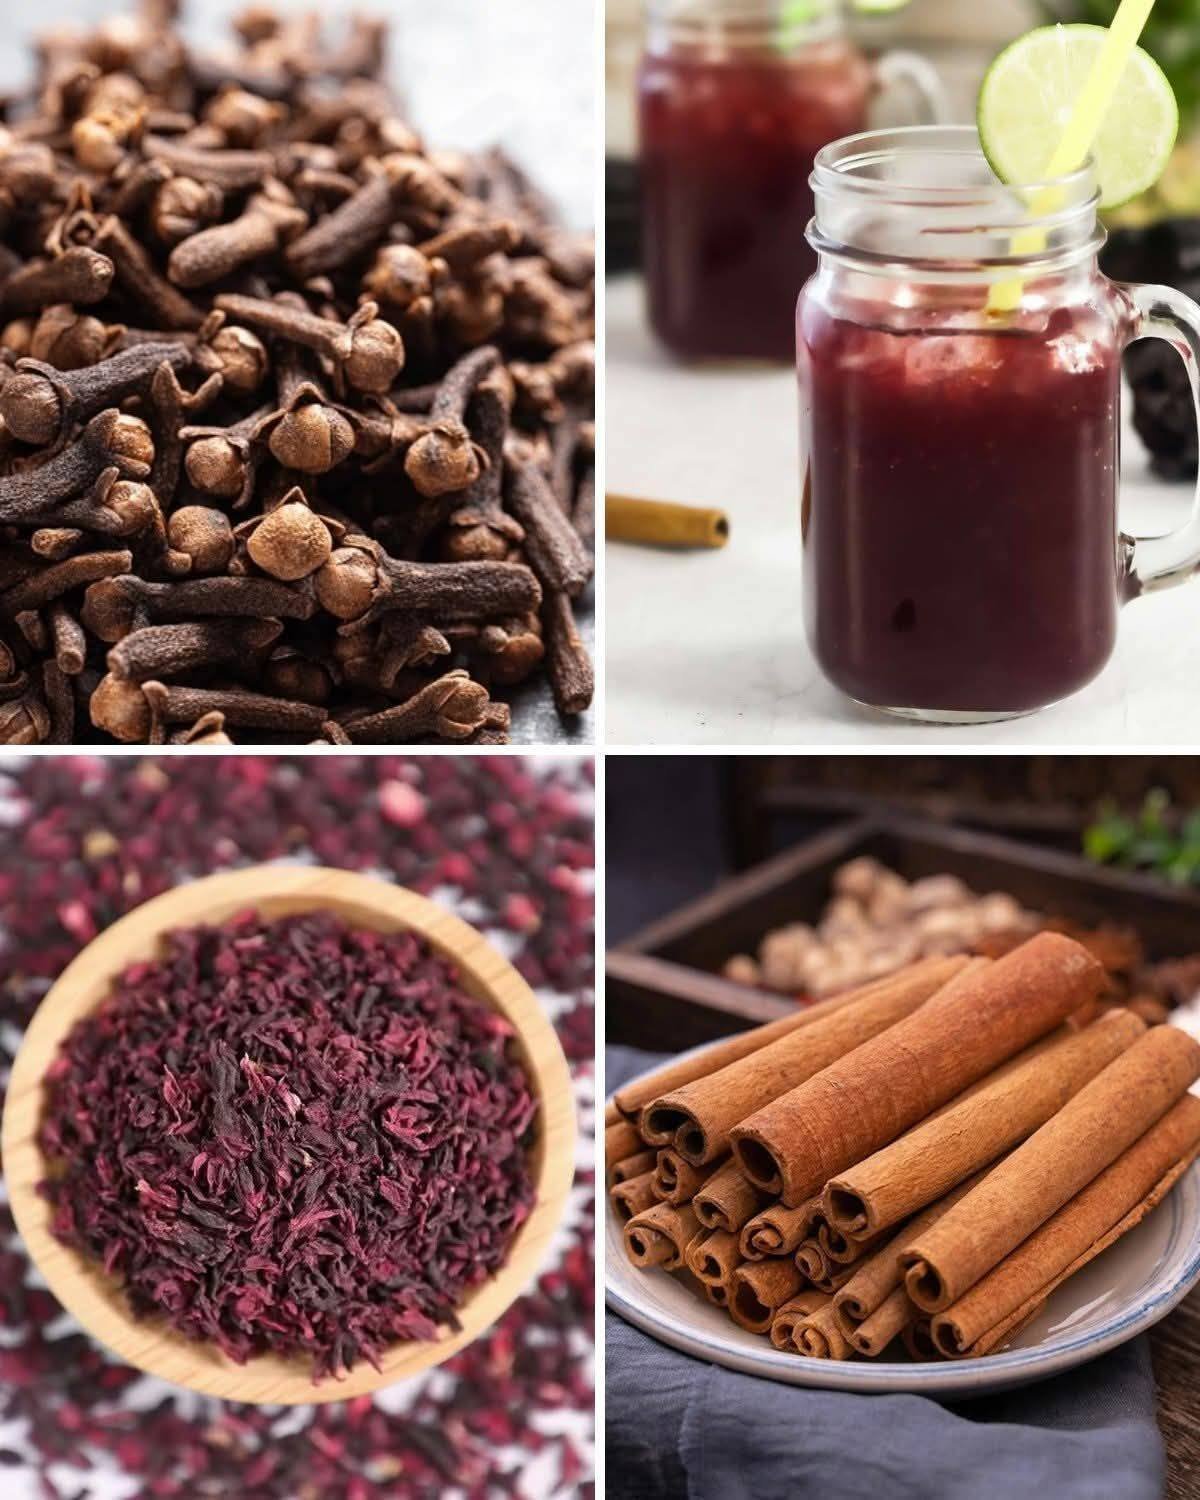
Hibiscus Clove Cinnamon Wellness Drink (Iced or Hot)

Hibiscus Clove Cinnamon Wellness Drink (Iced or Hot)

A refreshing, immune-boosting herbal drink made with dried hibiscus petals, whole cloves, and cinnamon sticks. This vibrant ruby beverage is tangy, lightly spiced, and naturally caffeine-free. It can be enjoyed hot as a soothing tea or chilled as a refreshing wellness drink.

 Description

This traditional-style herbal infusion combines:

  • Hibiscus – Tart, cranberry-like flavor

  • Cloves – Warm, slightly sweet and spicy

  • Cinnamon – Comforting and aromatic

It’s popular in many cultures as a cooling drink in warm weather and as a soothing remedy during cold seasons.

 Ingredients (4 Servings)

  • 4 cups (1 liter) water

  • 2 tablespoons dried hibiscus petals

  • 4–5 whole cloves

  • 1 cinnamon stick

  • 2–3 tablespoons honey or preferred sweetener (optional)

  • 1 tablespoon fresh lime or lemon juice (optional)

  • Ice cubes (if serving cold)

 Instructions

  1. Boil Water
    Bring 4 cups of water to a boil.

  2. Add Spices
    Add hibiscus petals, cloves, and cinnamon stick.

  3. Simmer
    Reduce heat and simmer for 10–15 minutes.

  4. Steep
    Turn off heat and let steep another 5–10 minutes for deeper flavor.

  5. Strain
    Strain into a pitcher or teapot.

  6. Sweeten & Adjust
    Add honey and lime/lemon juice if desired.

  7. Serve

    • Serve hot

    • Or chill for 1–2 hours and serve over ice

 Tips

✔ For stronger flavor: Use more hibiscus or simmer longer
✔ For a smoother taste: Add a slice of fresh ginger
✔ For weight management: Drink without sweetener
✔ For parties: Add sparkling water for a fizzy version
✔ Store in refrigerator up to 3 days

Servings

  • Makes: 4 cups

  • Serving Size: 1 cup

 Nutritional Information (Per 1 Cup, Unsweetened Approx.)

  • Calories: 5

  • Carbohydrates: 1g

  • Sugar: 0g (without sweetener)

  • Fat: 0g

  • Protein: 0g

  • Caffeine: 0mg

(Calories increase if sweetener is added.)

 Health Benefits

  • Rich in antioxidants

  • May support heart health

  • May help lower blood pressure

  • Supports digestion

  • Anti-inflammatory properties

  • Immune-supportive spices

  • Hydrating and caffeine-free

Q & A

Q: Can I drink this daily?
Yes, in moderate amounts (1–2 cups daily) unless you have low blood pressure or are advised otherwise by a doctor.

Q: Can pregnant women drink this?
Hibiscus is sometimes not recommended during pregnancy. Consult your healthcare provider first.

Q: Can I use hibiscus tea bags instead?
Yes. Use 2 tea bags in place of dried petals.

Q: How do I make it stronger?
Increase hibiscus to 3 tablespoons or simmer longer.

Q: Can I drink it for weight loss?
It may support metabolism and reduce sugar cravings when consumed unsweetened, but it’s not a magic solution.

Green Blood Sugar Balancing Smoothie

Green Blood Sugar Balancing Smoothie

A refreshing, fiber-rich green drink designed to help support healthy blood sugar levels naturally. This smoothie focuses on low-glycemic vegetables, healthy fats, and plant compounds that may improve insulin sensitivity.

Description

This smoothie combines leafy greens, cucumber, lemon, chia seeds, and cinnamon to create a nutrient-dense drink that may help stabilize blood sugar levels. It’s low in sugar, high in fiber, and contains ingredients known for supporting metabolic health.

Perfect for:

  • Morning blood sugar support

  • A mid-day balanced snack

  • People managing insulin resistance or type 2 diabetes (as part of a healthy diet)

 Ingredients (1 Serving)

  • 1 cup fresh spinach

  • ½ medium cucumber

  • ½ green apple (optional, for mild sweetness)

  • 1 tablespoon chia seeds

  • ½ teaspoon ground cinnamon

  • 1 tablespoon fresh lemon juice

  • 1 cup unsweetened almond milk (or water)

  • Ice cubes (optional)

 Instructions

  1. Add all ingredients into a blender.

  2. Blend until smooth (about 30–45 seconds).

  3. Taste and adjust lemon or cinnamon if desired.

  4. Serve immediately.

 Notes

  • Omit apple for an even lower-carb version.

  • Use unsweetened almond milk only (sweetened versions can spike sugar).

  • Fresh spinach can be replaced with kale.

 Tips for Best Results

  • Drink in the morning or before meals.

  • Pair with a protein source (boiled egg, nuts, Greek yogurt) for better blood sugar stability.

  • Avoid adding honey, bananas, or sweetened yogurt.

  • Consistency matters — include regularly in a balanced diet.

 Servings

Makes: 1 serving
Can be doubled for 2 servings.

Nutritional Information (Approximate per serving)

Without apple:

  • Calories: 120

  • Carbohydrates: 8g

  • Fiber: 5g

  • Net Carbs: 3g

  • Protein: 4g

  • Fat: 8g

  • Sugar: 2g

With ½ apple:

  • Calories: 160

  • Carbohydrates: 18g

  • Fiber: 6g

  • Net Carbs: 12g

  • Sugar: 9g

 Health Benefits

✔ High fiber helps slow glucose absorption
✔ Cinnamon may improve insulin sensitivity
✔ Chia seeds provide omega-3 fatty acids
✔ Lemon supports digestion
✔ Low glycemic ingredients

 Q & A

Q1: How fast will this lower blood sugar?

It may help stabilize blood sugar, but it does not instantly “cure” high blood sugar. Effects vary by person.

Q2: Can diabetics drink this daily?

Yes, if ingredients fit within their carb goals. Always consult a healthcare provider.

Q3: Can I drink this at night?

Yes, but morning or pre-meal is often better for blood sugar control.

Q4: Can I replace almond milk?

Yes — use water, coconut milk (unsweetened), or oat milk (unsweetened, but slightly higher carb).

Q5: Is this safe during pregnancy?

Generally yes, but always check with your healthcare provider.

The “Ultimate” Lean Chicken Salad

The “Ultimate” Lean Chicken Salad

Prep time: 15 minutes | Servings: 4–6 | Great for: Sandwiches, wraps, or over greens.

Ingredients

The Base:

  • 1 lb Chicken breast, cooked and shredded (poached or rotisserie-style works best)

  • ½ cup Celery, finely diced (adds a necessary crunch)

  • ¼ cup Red onion, finely minced

  • 2 tbsp Fresh cilantro or flat-leaf parsley, chopped

The Creamy Dressing:

  • 1 cup Non-fat plain Greek yogurt (this replaces mayo for a high-protein, tangy base)

  • 1 tbsp Dijon mustard

  • 1 tbsp Fresh lemon juice

  • ½ tsp Garlic powder

  • Salt and black pepper to taste

Optional Mix-ins:

  • ½ cup Grapes, halved (for a touch of sweetness)

  • 1 Small jalapeño, seeded and minced (if you like a little heat)


Instructions

  1. Prepare the Chicken: If you are cooking the chicken fresh, poach it in simmering water with a pinch of salt for 12–15 minutes until opaque throughout. Let it cool slightly, then shred using two forks or a hand mixer.

  2. Mix the Dressing: In a small bowl, whisk together the Greek yogurt, Dijon mustard, lemon juice, garlic powder, salt, and pepper until completely smooth.

  3. Combine: In a large mixing bowl, toss the shredded chicken with the celery, onion, and fresh herbs.

  4. Fold and Coat: Pour the dressing over the chicken mixture. Fold gently until everything is evenly coated. If the salad feels too dry, add an extra tablespoon of Greek yogurt.

  5. Chill: For the best flavor, cover and refrigerate for at least 30 minutes before serving. This allows the dressing to penetrate the chicken and the flavors to meld.


Meal Prep Tips

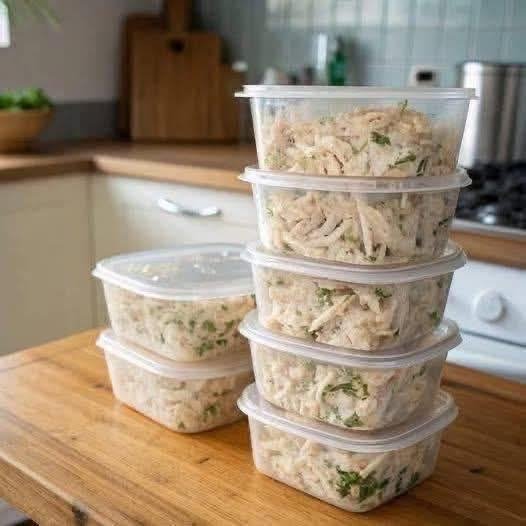
  • Storage: This salad stays fresh in airtight containers (like those in your photo) for up to 4 days in the refrigerator.

  • The “Zero Point” Secret: By using Greek yogurt instead of mayonnaise, you significantly reduce the fat and calorie content while adding a massive boost of protein.

  • Serving Ideas: Serve a scoop inside a large hollowed-out bell pepper, wrapped in large butter lettuce leaves, or simply on its own with a few whole-grain crackers.

Cucumber and Mint Wellness Water

Cucumber and Mint Wellness Water

Prep time: 10 minutes | Servings: 1-2

Ingredients

  • 1 large Cucumber: Sliced into thin rounds. Cucumbers are highly hydrating and contain antioxidants.

  • 1 medium Lemon: Sliced into rounds. Lemons are a great source of Vitamin C.

  • 1 small piece of Fresh Ginger (1 inch): Peeled and thinly sliced. Ginger is often used to soothe the digestive system.

  • 5-10 Fresh Mint Leaves: Slightly bruised to release their natural oils.

  • 4 cups Filtered Water: The base for your infusion.

  • Ice cubes: For serving.


Detailed Directions

1. Prepare the Produce

  • Wash the cucumber, lemon, and mint leaves thoroughly under cold water.

  • Slice the cucumber and lemon into thin, even rounds.

  • Peel the ginger and slice it into thin coins to maximize the surface area for infusion.

2. Assemble the Drink

  • In a large glass pitcher or individual jars, add the cucumber slices, lemon slices, and ginger.

  • Take the fresh mint leaves and gently press or “clap” them between your hands before adding them to the container; this helps release the aromatic oils.

3. Infuse

  • Pour the 4 cups of filtered water over the ingredients.

  • Stir gently with a long spoon to combine.

  • For the best flavor, place the pitcher in the refrigerator and let it steep for at least 1 to 2 hours. For a more intense flavor, you can let it infuse overnight.

4. Serve

  • Fill a glass with ice cubes.

  • Pour the chilled water over the ice, ensuring a few slices of cucumber and lemon make it into the glass for a beautiful presentation.

  • Enjoy this refreshing drink throughout the day to stay hydrated.


Success Tips

  • Refill as You Go: You can refill the pitcher with water 2–3 times using the same ingredients before the flavor begins to fade.

  • Freshness: For the best taste and nutrient profile, prepare a fresh batch every 24 hours.

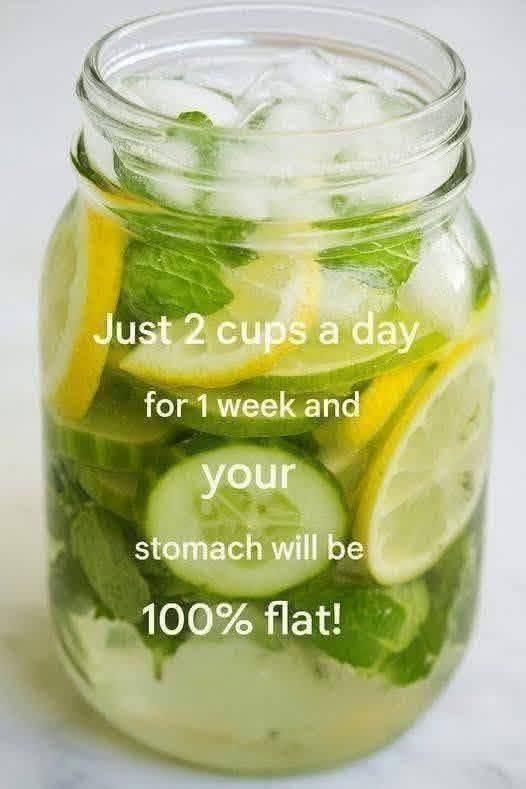
Cucumber & Citrus Infused Water

Cucumber & Citrus Infused Water

This refreshing drink is a fantastic way to enjoy the natural flavors of cucumber, lemon, and mint. While it’s often called a “detox” water, its real power lies in keeping you hydrated and providing a small boost of Vitamin C from the citrus.

Ingredients

  • Hydration Base: 8 cups (2 liters) of filtered water

  • Crisp Flavor: 1 large cucumber (thinly sliced)

  • Zest: 1 lemon (thinly sliced) and 1 lime (optional, thinly sliced)

  • Freshness: A handful of fresh mint leaves

  • Chill: 1–2 cups of ice


Detailed Step-by-Step Instructions

1. Prepare Your Produce

  • Thoroughly wash the cucumber, lemon, lime, and mint leaves under cool running water. Since these will be soaking in your water for hours, you want to ensure the skins are clean.

2. Slice Evenly

  • Use a sharp knife or a mandoline to slice the cucumber and citrus fruits into thin rounds. Thin slices allow more of the natural juices and oils to infuse into the water quickly.

3. Awaken the Mint

  • Take the mint leaves and gently “slap” them between your palms or bruise them slightly with the back of a spoon before adding them to the container. This releases the essential oils for a stronger aroma.

4. Combine

  • Place the cucumber slices, lemon, lime, and mint into a large glass pitcher or a 2-liter mason jar.

5. Add Water and Ice

  • Pour the 8 cups of water over the ingredients. Top with ice if you plan on serving it immediately.

6. The Infusion Process

  • For the best flavor, place the pitcher in the refrigerator and let it steep for at least 2 to 4 hours. This gives the ingredients time to flavor the water deeply.

7. Serving and Refilling

  • Serve chilled in a glass. You can keep refilling the pitcher with water throughout the day using the same fruit, though the flavor will become milder with each refill.


Helpful Success Tips

  • Bitterness Note: If you plan on keeping the water for more than 24 hours, it is best to remove the lemon and lime slices after about 4 hours. The white pith (the skin) of citrus can start to make the water taste bitter if left too long.

  • Keep it Fresh: Always store the infusion in the refrigerator and consume it within 2 days for the best taste and quality.

A Quick Note on Wellness

While this drink is a wonderful addition to a healthy lifestyle and can help reduce bloating by improving hydration, there is no single drink that can make a stomach “100% flat” on its own. True wellness comes from a balanced mix of nutrition, movement, and plenty of water!

Swirled Individual Cheesecakes

Swirled Individual Cheesecakes

This recipe makes approximately 12 standard-sized muffin cups.

Ingredients

For the Crust:

  • 1/2 cup almond flour

  • 1 tbsp sweetener (such as erythritol or monk fruit)

  • 1/4 tsp cinnamon

  • Pinch of salt

  • 2 tbsp butter, melted

For the Cheesecake Filling:

  • 8 oz (1 block) cream cheese, softened to room temperature

  • 1/2 cup sweetener

  • 1 large egg, room temperature

  • 1/2 tsp vanilla extract

  • 1/4 tsp salt

Optional Berry Swirl (as shown in image):

  • 2 tbsp sugar-free raspberry or strawberry jam (or pureed berries)


Detailed Step-by-Step Instructions

1. Preparation

  • Preheat your oven to 175°C (350°F).

  • Line a standard muffin tin with 12 paper or silicone liners.

2. Prepare the Crust

  • In a small bowl, whisk together the almond flour, sweetener, cinnamon, and salt.

  • Pour in the melted butter and stir until the mixture resembles wet sand.

  • Place about 1 tablespoon of the mixture into each muffin liner.

  • Use the back of a spoon or a small glass to press the crust down firmly until it is flat and even.

  • Bake the crusts for 5 minutes, then remove them from the oven and set aside to cool slightly. Lower the oven temperature to 160°C (325°F).

3. Create the Cheesecake Filling

  • In a large mixing bowl, beat the softened cream cheese and sweetener together until the mixture is smooth and fluffy.

  • Add the egg, vanilla extract, and salt.

  • Mix on low speed just until combined. Avoid over-mixing at this stage, as it can introduce air bubbles that may cause the cheesecakes to rise and then sink.

4. Fill the Cups

  • Divide the cheesecake batter evenly among the muffin liners, filling each one about 3/4 full over the pre-baked crusts.

5. Add the Swirl Effect

  • Place 2 or 3 small dots of your berry jam or puree on top of the cheesecake batter in each cup.

  • Using a toothpick or a thin skewer, gently swirl the jam into the batter in a circular motion to create the pattern seen in the photo.

6. Bake

  • Place the tin in the center of the oven and bake at 160°C (325°F) for 15–18 minutes.

  • The edges should be set and look slightly puffed, but the centers should still have a very slight “jiggle” when you gently shake the pan.

7. Cool and Set

  • Remove from the oven and let the cheesecakes cool completely in the pan at room temperature.

  • Once cooled, transfer the pan to the refrigerator for at least 2–3 hours (or overnight) to allow them to firm up completely before removing the liners.


Pro-Tips for Success

  • Room Temperature Ingredients: Ensure your cream cheese and egg are at room temperature before starting. This prevents lumps and ensures a silky-smooth texture.

  • Avoid Cracks: Don’t open the oven door during the first 12 minutes of baking. A steady temperature helps the cheesecakes set evenly.

  • Storage: These keep beautifully in an airtight container in the fridge for up to 5 days, or you can freeze them for up to a month.

Fresh Cucumber Lemonade

Fresh Cucumber Lemonade

A crisp, zesty beverage perfect for hot afternoons or as a bright addition to brunch.

  • Prep time: 15 minutes

  • Servings: 4–6 glasses

Ingredients

  • 2 large cucumbers, peeled and chopped

  • 1 cup fresh lemon juice (approx. 4–6 lemons)

  • 1/2 cup honey or sugar (adjust to your preferred sweetness)

  • 4 cups cold water

  • Ice cubes

  • Garnish: Fresh lemon slices, cucumber rounds, and mint sprigs


Detailed Directions

  1. Puree the Cucumber: Place the peeled and chopped cucumber pieces into a blender with 1 cup of the cold water. Blend on high until completely smooth and liquefied.

  2. Strain (Optional): If you prefer a clear lemonade, pour the cucumber puree through a fine-mesh sieve or nut milk bag into a large pitcher to remove the pulp. For a more fiber-rich “agua fresca” style, you can skip this step.

  3. Mix the Base: To the pitcher, add the fresh lemon juice and your choice of sweetener (honey or sugar). Stir vigorously until the sweetener is fully dissolved.

  4. Dilute: Pour in the remaining 3 cups of cold water and stir well to combine.

  5. Adjust to Taste: Give it a quick taste. If it’s too tart, add another tablespoon of sweetener. If it’s too sweet, add a splash more lemon juice or water.

  6. Chill and Garnish: Add plenty of ice cubes to the pitcher. Toss in a few lemon slices and cucumber rounds for a beautiful presentation.

  7. Serve: Pour into glasses and top with a sprig of fresh mint for an extra burst of aroma.

🥬🍳 Cabbage & Eggs Breakfast Skillet

📝 Ingredients

  • 2 cups green cabbage, thinly sliced

  • 2–3 large eggs

  • 1–2 tablespoons olive oil or butter

  • 1 small clove garlic, minced (optional)

  • Salt and black pepper, to taste

  • ¼ teaspoon paprika (optional)

  • 1 tablespoon chopped green onions or parsley (optional)


👩‍🍳 Instructions

1️⃣ Sauté the cabbage
Heat oil or butter in a skillet over medium heat.
Add sliced cabbage and cook for 5–7 minutes, stirring occasionally, until softened and slightly golden.

2️⃣ Add flavor
Stir in garlic (if using), salt, pepper, and paprika. Cook for another 30 seconds until fragrant.

3️⃣ Add the eggs
Crack the eggs directly into the pan.
Scramble everything together, or let the eggs set slightly before stirring — your choice!

4️⃣ Finish & serve
Cook until eggs are done to your liking.
Top with green onions or parsley and serve hot.

🍞 Bread in a Jar (1–2 Servings)

This “bread in a jar in a minute” recipe is basically a quick microwave protein–fiber bread made without white flour, yeast, or sugar.
It’s low-carb and gets structure from eggs + psyllium + flax instead of wheat.

Here’s the full, working version:


🍞 Bread in a Jar (1–2 Servings)

🥣 Ingredients

  • 3 eggs

  • 1 cup (240 ml) milk (dairy or unsweetened almond milk)

  • 2 tablespoons ground flax seeds

  • 2 tablespoons psyllium husk powder

  • ½ teaspoon baking powder (helps it rise)

  • Pinch of salt

(Optional: 1 tablespoon olive oil or melted butter for softer texture)


👩‍🍳 Instructions

  1. Mix wet ingredients
    In a bowl, whisk the eggs and milk until smooth.

  2. Add dry ingredients
    Stir in flax seeds, psyllium, baking powder, and salt.
    Mix well and let sit 1–2 minutes — it will thicken quickly.

  3. Prepare jar or mug
    Lightly grease a microwave-safe jar or large mug.

  4. Microwave
    Pour batter in (fill only halfway).
    Microwave on high for 2–3 minutes.
    (Time depends on microwave strength — start with 2 minutes.)

  5. Check doneness
    The bread should be firm and springy.
    Let cool 1–2 minutes, then remove and slice.


🔥 Oven Option (Better Texture)

Pour into a small greased loaf pan and bake at 350°F (175°C) for 20–25 minutes.


💡 Tips

  • Use ground flax, not whole seeds.

  • Psyllium gives structure — without it, it won’t hold like bread.

  • For savory bread: add herbs, garlic powder, or cheese.

  • For sweeter version: add cinnamon + a little natural sweetener.


⚠️ Important Notes

  • This is not traditional fluffy bread — it’s denser, more like sandwich loaf.

  • High in fiber — drink water when eating it.

  • If you’re new to psyllium, start small to avoid bloating.

If you’d like, I can also give you:

Pan-Seared Scallops with Creamy Garlic Herb Sauce

Pan-Seared Scallops with Creamy Garlic Herb Sauce

Pan-Seared Scallops with Creamy Garlic Herb Sauce is an elegant yet surprisingly simple dish that feels restaurant-worthy but comes together in about 25 minutes. Perfectly golden scallops are paired with a rich, velvety garlic cream sauce infused with herbs and a hint of lemon. Serve over pasta, mashed potatoes, rice, or alongside crusty bread to soak up every drop of the sauce.


🛒 Ingredients (Serves 2–3)

For the Scallops

  • 1 lb (450 g) large sea scallops

  • 1½ tbsp olive oil

  • 1 tbsp butter

  • Salt, to taste

  • Freshly ground black pepper

  • ½ tsp smoked paprika (or regular paprika)

  • ¼ tsp cayenne (optional)

For the Creamy Garlic Herb Sauce

  • 2 tbsp butter

  • 3 cloves garlic, finely minced

  • 1 cup heavy cream

  • ¼ cup chicken or seafood stock

  • ½ tsp Dijon mustard (optional)

  • ½ tsp Italian seasoning or dried thyme

  • Salt & pepper, to taste

  • 1 tbsp fresh parsley, finely chopped

  • 1 tsp lemon zest or 1 tbsp lemon juice


Instructions

1. Prepare the Scallops

Pat the scallops very dry with paper towels. Removing excess moisture is key to achieving a golden crust. If scallops have a small side muscle attached, gently peel it off. Season both sides with salt, black pepper, paprika, and cayenne (if using).

2. Sear the Scallops

Heat olive oil in a large skillet over medium-high heat until hot but not smoking. Add butter and allow it to melt. Place scallops in the pan in a single layer, making sure they are not touching.

Sear for 2–3 minutes on the first side without moving them. They should develop a deep golden crust. Flip carefully and cook another 1–2 minutes on the second side until opaque and just cooked through. Remove scallops from the pan and set aside. Do not overcook, as they can become rubbery.

3. Make the Creamy Garlic Herb Sauce

Reduce heat to medium. In the same skillet, melt 2 tablespoons butter. Add minced garlic and sauté for about 30 seconds until fragrant (do not brown).

Pour in the stock to deglaze the pan, scraping up any flavorful browned bits. Stir in heavy cream, Dijon mustard (if using), and Italian seasoning or thyme. Simmer gently for 3–5 minutes until the sauce thickens slightly.

Season with salt and pepper to taste. Add lemon zest or juice for brightness, then stir in fresh parsley.

4. Combine and Serve

Return the scallops to the pan, spooning the sauce over them. Let simmer gently for 1–2 minutes to warm through.

Serve immediately, garnished with extra parsley and a squeeze of lemon if desired.


Tips for Perfect Scallops

  • Use “dry” scallops (not water-treated) for better browning.

  • Ensure the pan is hot before adding scallops.

  • Avoid overcrowding the pan.

This dish delivers tender, buttery scallops with a luxurious garlic herb cream sauce—perfect for a special dinner at home.

Apple Cinnamon Cottage Cheese Mug Cake – Warm, Protein-Packed & Fall-Inspired 🍎🍂

Apple Cinnamon Cottage Cheese Mug Cake – Warm, Protein-Packed & Fall-Inspired 🍎🍂

This Apple Cinnamon Cottage Cheese Mug Cake is soft, fluffy, and perfectly spiced with cozy fall flavors. Packed with protein from cottage cheese and egg, it’s a wholesome single-serve treat you can enjoy for breakfast, snack time, or a healthier dessert. Ready in just minutes, this mug cake delivers warm apple-cinnamon comfort without turning on the oven.


Ingredients (Serves 1)

  • ¼ cup cottage cheese (blended until smooth)

  • 1 large egg

  • 2 tablespoons oat flour (or almond flour for lower carbs)

  • 2 tablespoons finely diced apple (peeled if preferred)

  • 1 teaspoon maple syrup or honey (optional, adjust to taste)

  • ½ teaspoon ground cinnamon

  • ¼ teaspoon baking powder

  • Pinch of nutmeg

  • Pinch of salt

Optional toppings: extra diced apples, chopped nuts, Greek yogurt, or a drizzle of maple syrup.


Instructions

1. Blend the Cottage Cheese

If your cottage cheese is lumpy, blend it in a small blender or with an immersion blender until smooth. This step ensures a soft, cake-like texture.

2. Mix the Batter

In a microwave-safe mug (10–12 oz size works best), whisk together the blended cottage cheese and egg until fully combined. Add oat flour (or almond flour), diced apple, maple syrup (if using), cinnamon, baking powder, nutmeg, and salt. Stir until you have a smooth batter. Make sure to scrape the bottom of the mug so everything is evenly mixed.

3. Microwave

Microwave on high for 60–90 seconds. Cooking time may vary depending on your microwave’s strength. The mug cake should look set on top but still slightly soft in the center. Avoid overcooking, as it can become rubbery.

4. Cool Slightly

Let the mug cake sit for 1–2 minutes. It will continue to cook slightly as it rests and will firm up to the perfect texture.

5. Serve & Enjoy

Enjoy straight from the mug or carefully loosen the edges with a knife and flip onto a plate. Top with extra cinnamon, chopped nuts, or a spoonful of Greek yogurt for added protein.


Tips

  • For extra sweetness, add a few sugar-free chocolate chips.

  • Use finely diced apples so they soften quickly while cooking.

  • Add a dash of vanilla extract for deeper flavor.

Lemon Cinnamon Detox Drink

Lemon Cinnamon Detox Drink

This simple Lemon Cinnamon Detox Drink is a refreshing, metabolism-supporting beverage often enjoyed first thing in the morning. The combination of fresh lemon juice, apple cider vinegar (with “the mother”), and a touch of cinnamon creates a tangy, slightly spicy drink that may help support digestion and hydration when consumed on an empty stomach. It takes just a few minutes to prepare and requires only a handful of natural ingredients.


Ingredients (Serves 1)

  • Juice of ½ fresh lemon

  • ¼ teaspoon ground cinnamon

  • 1 teaspoon apple cider vinegar (with the mother)

  • 200 ml (about ¾–1 cup) lukewarm water

Optional additions:

  • ½–1 teaspoon raw honey (for sweetness)

  • A pinch of cayenne pepper (for added kick)


Instructions

1. Warm the Water

Heat 200 ml of water until lukewarm. It should be warm but not hot, as very hot water can reduce the beneficial properties of raw apple cider vinegar and fresh lemon juice.

2. Add Lemon Juice

Squeeze the juice from half a fresh lemon into a cup. Freshly squeezed lemon is preferred over bottled juice for optimal flavor and nutrients.

3. Stir in Cinnamon

Add ¼ teaspoon of ground cinnamon to the lemon juice. Cinnamon may not fully dissolve, so stir well to distribute it evenly.

4. Add Apple Cider Vinegar

Pour in 1 teaspoon of apple cider vinegar (make sure it contains “the mother” for added beneficial compounds). Stir thoroughly to combine all ingredients.

5. Add Water and Mix

Pour the lukewarm water into the cup. Stir again until well blended. If desired, add a small amount of honey to balance the tartness.

6. Drink

Sip slowly on an empty stomach, ideally 15–20 minutes before breakfast. Stir occasionally while drinking, as the cinnamon may settle at the bottom.


Tips & Notes

  • Always dilute apple cider vinegar to protect tooth enamel and your stomach lining.

  • Consider using a straw to minimize contact with teeth.

  • If you have acid reflux, ulcers, or are sensitive to acidic drinks, consult a healthcare professional before regular use.

Sweet Chilli Salmon Bites with Lime Yogurt Dip

Sweet Chilli Salmon Bites with Lime Yogurt Dip

Sweet Chilli Salmon Bites are tender, flavourful, and perfectly caramelized in the oven. The salmon is marinated in a sweet and savoury chilli sauce blend, then baked until flaky with lightly crisp edges. Paired with a cool, tangy lime yogurt dip, these bites make a delicious appetizer, light dinner, or protein-packed snack. They’re easy to prepare and ready in about 25 minutes.


Ingredients (Serves 4)

For the Salmon Bites:

  • 1½ pounds fresh salmon, skin removed and cut into 1-inch cubes

  • ⅓ cup sweet chili sauce

  • 1 tablespoon soy sauce

  • 1 tablespoon olive oil

  • 1 teaspoon garlic, minced

  • 1 teaspoon fresh ginger, grated (optional)

  • Juice of ½ lime

  • ½ teaspoon smoked paprika

  • Salt and black pepper to taste

For the Lime Yogurt Dip:

  • 1 cup plain Greek yogurt

  • Zest of 1 lime

  • Juice of 1 lime

  • 1 tablespoon honey

  • 1 tablespoon chopped fresh cilantro

  • Pinch of salt

Optional garnish: sliced green onions, sesame seeds, extra lime wedges.


Instructions

1. Prepare the Salmon

Preheat your oven to 400°F (200°C). Line a baking sheet with parchment paper. Pat the salmon dry with paper towels and cut into evenly sized cubes. Place them in a mixing bowl.

2. Make the Marinade

In a small bowl, whisk together the sweet chili sauce, soy sauce, olive oil, garlic, ginger (if using), lime juice, smoked paprika, salt, and pepper. Pour the marinade over the salmon cubes and gently toss to coat. Let marinate for 10–15 minutes while the oven heats.

3. Bake

Arrange the salmon cubes in a single layer on the prepared baking sheet, leaving space between each piece. Bake for 10–12 minutes, or until the salmon is opaque and flakes easily with a fork. For slightly caramelized edges, broil for an additional 1–2 minutes.

4. Make the Lime Yogurt Dip

While the salmon bakes, combine Greek yogurt, lime zest, lime juice, honey, cilantro, and salt in a bowl. Stir until smooth and creamy. Adjust seasoning to taste.

5. Serve

Transfer the salmon bites to a serving platter. Garnish with green onions and sesame seeds if desired. Serve warm with the lime yogurt dip on the side for dipping.

These Sweet Chili Salmon Bites are sweet, tangy, and slightly spicy, balanced beautifully by the cool citrus dip. Perfect for gatherings or weeknight meals!

Roasted Cauliflower with Honey & Lemon Dressing

Here is your full 400-word recipe:


Roasted Cauliflower with Honey & Lemon Dressing

Roasted Cauliflower with Honey & Lemon Dressing is a simple yet elegant side dish that delivers the perfect balance of savoury, sweet, and bright citrus flavor. The cauliflower becomes tender on the inside with beautifully caramelized edges, while the honey-lemon dressing adds a fresh, slightly sweet finish. This dish pairs wonderfully with grilled meats, roasted chicken, or can be enjoyed on its own as a light vegetarian option.

Ingredients (Serves 4)

For the Roasted Cauliflower:

  • 1 large head cauliflower, cut into florets

  • 3 tablespoons olive oil

  • ½ teaspoon salt

  • ½ teaspoon black pepper

For the Honey & Lemon Dressing:

  • 2 tablespoons fresh lemon juice

  • 1 tablespoon honey

  • 1 teaspoon lemon zest

  • 1 small garlic clove, minced

  • 2 tablespoons olive oil

  • Pinch of salt

Optional garnish: chopped fresh parsley, toasted almonds, or crumbled feta cheese.


Instructions

  1. Preheat the Oven:
    Preheat your oven to 425°F (220°C). Line a large baking sheet with parchment paper for easy cleanup.

  2. Prepare the Cauliflower:
    Wash and thoroughly dry the cauliflower. Cut it into evenly sized florets to ensure even roasting. Place the florets in a large bowl and drizzle with olive oil. Sprinkle with salt and black pepper, then toss until evenly coated.

  3. Roast:
    Spread the cauliflower in a single layer on the prepared baking sheet. Make sure the pieces are not overcrowded, as this helps them roast instead of steam. Roast for 25–30 minutes, turning halfway through, until the edges are golden brown and slightly crispy.

  4. Make the Dressing:
    While the cauliflower roasts, whisk together the lemon juice, honey, lemon zest, minced garlic, olive oil, and a pinch of salt in a small bowl. Taste and adjust sweetness or acidity as desired.

  5. Finish and Serve:
    Transfer the roasted cauliflower to a serving dish. Drizzle the honey and lemon dressing over the warm florets and gently toss to coat. Garnish with fresh parsley, toasted almonds, or feta if desired.

Serve immediately while warm. The contrast of caramelized cauliflower and bright citrus dressing makes this dish both comforting and refreshing. It’s a beautiful, flavorful addition to any meal.