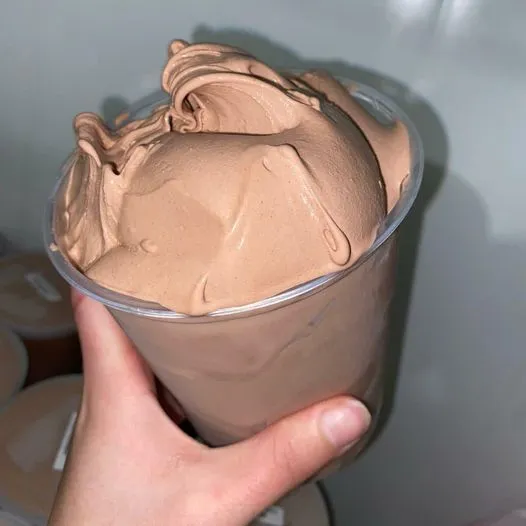
Garden Zucchini Casserole

A hearty, cheesy casserole loaded with fresh zucchini, spinach, bell peppers, and a creamy ricotta base — topped with a golden, crispy breadcrumb-Parmesan crust.

Prep Time: 20 minutes
Cook Time: 25–30 minutes
Total Time: ~50 minutes
Servings: 6–8
Dietary: Vegetarian, Comfort food

Ingredients

Vegetables:

  • Zucchini – 2 medium, sliced (about 4 cups)

  • Onion – 1 medium, chopped

  • Red bell pepper – 1, chopped

  • Fresh spinach – 2 cups, chopped

  • Garlic – 2 cloves, minced

Cheese & creamy base:

  • Mozzarella cheese – 1 cup, shredded

  • Ricotta cheese – 1 cup

  • Egg – 1 large

Seasoning:

  • Italian seasoning – 1 tsp

  • Salt – ½ tsp

  • Black pepper – ¼ tsp

Topping:

  • Breadcrumbs – 1 cup

  • Olive oil – 2 tbsp

  • Parmesan cheese – ½ cup, grated

Instructions

  1. Preheat oven: Set to 375°F (190°C). Grease a 9×13-inch baking dish with olive oil or cooking spray.

  2. Cook vegetables: In a skillet over medium heat, warm olive oil. Sauté onion and bell pepper for 5 minutes. Add garlic and cook for 1 minute. Stir in zucchini and spinach. Cook 5–7 minutes until zucchini is tender. Remove from heat and let cool slightly.

  3. Prepare ricotta mixture: In a bowl, combine ricotta, egg, Italian seasoning, salt, and pepper. Mix well.

  4. Assemble casserole: Stir the sautéed vegetables into the ricotta mixture. Pour into the prepared baking dish. Top with shredded mozzarella.

  5. Add breadcrumb topping: In a small bowl, mix breadcrumbs with Parmesan. Sprinkle evenly over the casserole.

  6. Bake: Bake uncovered for 25–30 minutes until the top is golden brown and bubbly.

  7. Rest & serve: Let cool for 5–10 minutes before slicing and serving.

Quick Notes & Pro Tips

  • Dry the zucchini: If your zucchini releases a lot of water, lightly salt and pat dry before cooking to avoid a watery casserole.

  • Make it ahead: Assemble up to 1 day in advance and refrigerate. Bake just before serving.

  • Crispier topping: Broil for 1–2 minutes at the end for a deeper golden crust.

Why You’ll Love It

This casserole is the perfect way to enjoy an abundance of fresh garden veggies — creamy, cheesy, and layered with texture from the crispy topping. It’s family-friendly, versatile, and makes a great side or main dish.

Ingredient Details & Substitutions

  • Cheese: Swap ricotta for cottage cheese or use fontina in place of mozzarella.

  • Breadcrumbs: Use panko for extra crunch or gluten-free breadcrumbs if needed.

  • Veggies: Add mushrooms or yellow squash for extra variety.

Variations & Serving Suggestions

  • Protein boost: Add cooked chicken or ground turkey for a heartier meal.

  • Spicy twist: Sprinkle red pepper flakes into the ricotta mixture.

  • Pair with: A crisp green salad and crusty bread for a complete dinner.

Storage & Make-Ahead

  • Refrigerate: Store leftovers in an airtight container for up to 4 days.

  • Freeze: Wrap tightly and freeze for up to 2 months. Thaw overnight before reheating.

  • Reheat: Warm in a 350°F oven until heated through to maintain crispness.

FAQs

Q: Can I use frozen spinach?
A: Yes — thaw and squeeze out excess water before adding.

Q: How do I keep the casserole from getting soggy?
A: Salt and pat the zucchini dry, and don’t overcook the veggies in the skillet.

Q: Can I make this dairy-free?
A: Substitute ricotta with dairy-free alternatives and use vegan cheese shreds.

Personal Note

This is one of my favorite ways to make a summer veggie harvest feel indulgent. The creamy ricotta base balances the fresh vegetables perfectly, and the crispy breadcrumb-Parmesan topping adds the ultimate finishing touch.

Your turn!
Tried this Garden Zucchini Casserole? Leave a comment or tag me on social media — I’d love to see your version!

Would you like me to make a “low-carb version” (no breadcrumbs, extra cheese) or a “Mediterranean version” with feta and sun-dried tomatoes?

Chocolate Chip Cookie Dough Brownie Bombs

Rich fudge brownies wrapped around edible chocolate chip cookie dough and coated in smooth melted chocolate — a triple-layered treat that’s pure dessert bliss!

Prep Time: 30 minutes (plus chilling)
Cook Time: 0 minutes
Chill Time: ~1½ hours
Total Time: ~2 hours
Servings: 20–24 bombs
Dietary: Decadent dessert, No-bake cookie dough

Ingredients

For the edible cookie dough:

  • Unsalted butter – ½ cup, softened

  • Brown sugar – ½ cup

  • White sugar – ¼ cup

  • Whole milk – 2 tbsp

  • Vanilla extract – 1 tsp

  • All-purpose flour – 1 cup (toast for safety if desired)

  • Salt – ¼ tsp

  • Mini chocolate chips – 1 cup

For the brownie layer:

  • Fudge brownies – 1 batch, cooled and cut into 1-inch squares

For the coating:

  • Candiquik or chocolate almond bark – 16 oz, melted

  • Mini chocolate chips – 1 cup (for topping)

Instructions

  1. Make the cookie dough: Beat butter, brown sugar, and white sugar together until light and fluffy. Mix in milk and vanilla. Gradually stir in flour and salt until combined. Fold in 1 cup mini chocolate chips.

  2. Form & freeze: Scoop tablespoon-sized dough balls, place on a foil-lined sheet, and freeze for at least 1 hour.

  3. Wrap with brownies: Cut cooled brownies into 1-inch squares. Flatten a brownie piece in your hand, place a cookie dough ball in the center, and wrap the brownie around it to seal. Repeat for all balls. Freeze again for 30 minutes.

  4. Coat in chocolate: Melt Candiquik or almond bark according to package directions. Dip each brownie bomb in the melted chocolate, allowing excess to drip off. Place on wax paper.

  5. Decorate & set: Immediately sprinkle with remaining mini chocolate chips. Chill until the coating is fully set.

Quick Notes & Pro Tips

  • Toast the flour: Bake at 350°F for 5 minutes to make it safe to eat raw.

  • Chill in stages: Freezing between steps makes the bombs easier to handle and dip.

  • Use a fork for dipping: It helps excess chocolate drip off cleanly.

Why You’ll Love It

Three desserts in one: soft cookie dough, chewy brownie, and a crisp chocolate shell. Perfect for parties, holidays, or anytime you need an indulgent bite-sized treat.

Ingredient Details & Substitutions

  • Brownies: Use homemade or a boxed mix for convenience.

  • Coating: Swap almond bark for dark, milk, or white chocolate.

  • Mix-ins: Add sprinkles, crushed cookies, or toffee bits inside or on top.

Variations & Serving Suggestions

  • Holiday twist: Decorate with colored sprinkles or drizzle with white chocolate.

  • Peanut butter lovers: Add 2 tbsp peanut butter to the cookie dough.

  • Party platter: Serve in mini cupcake liners for an easy grab-and-go dessert.

Storage & Make-Ahead

  • Refrigerate: Store in an airtight container for up to 1 week.

  • Freeze: Freeze for up to 2 months. Thaw in the fridge before serving.

FAQs

Q: Can I make these without the brownie layer?
A: Absolutely — just dip the cookie dough balls directly in chocolate for a simpler treat.

Q: Can I use pre-made cookie dough?
A: Yes, but make sure it’s labeled safe-to-eat raw (no eggs and heat-treated flour).

Q: How do I keep the chocolate coating smooth?
A: Melt chocolate slowly and stir often to prevent seizing.

Personal Note

These bombs are a personal favorite for when I can’t choose between brownies, cookies, or chocolate. They’re rich, decadent, and always the first thing gone at parties!

Your turn!
Tried these Chocolate Chip Cookie Dough Brownie Bombs? Leave a comment or tag me on social media — I’d love to see your creations!

Would you like me to make a “peanut butter cup version” (with peanut butter cookie dough and chocolate drizzle) or a “holiday version” decorated with festive colors?

Sausage Dipped Pancakes Delight

Savory breakfast sausages wrapped in fluffy, golden pancake batter — a handheld, sweet-and-savory breakfast treat that’s perfect for dipping in maple syrup.

Prep Time: 15 minutes
Cook Time: 15–20 minutes
Total Time: ~35 minutes
Servings: 16 pieces
Dietary: Breakfast, Kid-friendly

Ingredients

Dry ingredients:

  • All-purpose flour – 1½ cups

  • Baking powder – 3½ tsp

  • Salt – 1 tsp

  • Sugar – 1 tbsp

Wet ingredients:

  • Milk – 1¼ cups

  • Large egg – 1

  • Vanilla extract – 1 tsp

  • Unsalted butter – melted (3 tbsp)

  • Maple syrup – 1 tbsp

Protein:

  • Breakfast sausage patties – 16

Instructions

  1. Cook the sausage: In a large skillet, cook sausage patties over medium-high heat until fully cooked. Drain on a paper towel-lined plate. Set aside.

  2. Mix dry ingredients: In a large bowl, sift together flour, baking powder, salt, and sugar.

  3. Mix wet ingredients: In a separate bowl, whisk milk, egg, vanilla, melted butter, and maple syrup until smooth.

  4. Make the batter: Create a well in the dry ingredients and pour in the wet mixture. Stir until smooth and lump-free.

  5. Coat the sausages: Preheat a griddle or large skillet over medium-high heat and lightly grease with cooking spray. Dip each cooked sausage patty into the pancake batter until fully coated.

  6. Cook: Place battered sausages on the hot griddle. Cook until bubbles form on the surface, then flip and cook the other side until golden brown. Repeat with remaining patties.

  7. Serve: Enjoy warm with butter and extra maple syrup for dipping.

Quick Notes & Pro Tips

  • Even coating: Use a fork or tongs to dip the sausages for an even pancake layer.

  • Keep warm: Place finished pancakes in a 200°F oven while cooking the rest.

  • Thicker batter = better coating: If batter feels too runny, add 1–2 tbsp more flour.

Why You’ll Love It

It’s like a portable pancake breakfast — soft, fluffy pancakes hugging savory sausage with a hint of maple sweetness. Perfect for busy mornings or a fun weekend brunch!

Ingredient Details & Substitutions

  • Sausage: Use turkey or chicken sausage for a lighter option.

  • Flavor boost: Add a pinch of cinnamon or nutmeg to the batter for warmth.

  • Gluten-free: Use a 1:1 gluten-free flour blend.

Variations & Serving Suggestions

  • Cheesy twist: Add a thin slice of cheddar or Swiss between the sausage and batter.

  • On-a-stick: Skewer the patties before dipping for a fun, fair-style breakfast.

  • Pair with: Scrambled eggs and fruit for a full meal.

Storage & Make-Ahead

  • Refrigerate: Store leftovers in an airtight container for up to 3 days.

  • Freeze: Wrap individually and freeze for up to 1 month. Reheat in the oven or air fryer.

  • Reheat: Warm on a skillet or in a 350°F oven for best texture.

FAQs

Q: Can I use links instead of patties?
A: Absolutely — just cook them first and ensure they’re well-coated in batter.

Q: Can I make the batter ahead of time?
A: Yes, mix the batter up to 12 hours ahead and refrigerate. Stir well before using.

Q: How do I get the coating to stay on?
A: Pat sausages dry before dipping, and ensure the batter is slightly thick.

Personal Note

This recipe started as a fun weekend experiment — and now it’s a go-to for breakfast-for-dinner nights. They disappear fast at the table, especially with extra syrup for dipping!

Your turn!
Tried this Sausage Dipped Pancakes Delight? Leave a comment or tag me on social media — I’d love to see your version!

Would you like me to make a “corn dog-style” version (skewered and deep-fried) or a “mini pancake bite” version for party platters?

Slow Cooker Cracker Barrel Fried Apples

A warm, cinnamon-sweet apple dish inspired by the classic Cracker Barrel side — made easy in the slow cooker with buttery brown sugar glaze.

Prep Time: 15 minutes
Cook Time: 2 hours (high)
Total Time: ~2 hours 15 minutes
Servings: 6–8
Dietary: Vegetarian, Gluten-free

Ingredients

  • Firm apples (Granny Smith or Golden Delicious) – 6–8, peeled, cored, and sliced

  • Cornstarch – 2 tbsp

  • Brown sugar – ½ cup

  • Granulated sugar – ¼ cup

  • Ground cinnamon – 1½ tsp

  • Butter – ¼ cup, melted

  • Lemon juice – 1 tbsp

  • Vanilla extract – 1 tsp

Instructions

  1. Prep the apples: Peel, core, and slice apples into uniform wedges.

  2. Coat with cornstarch: Place apple slices in the slow cooker and sprinkle with cornstarch. Stir to coat evenly.

  3. Add sweetness & spice: Stir in brown sugar, granulated sugar, and cinnamon. Mix gently.

  4. Add liquids: Pour in melted butter, lemon juice, and vanilla. Stir to combine.

  5. Cook: Cover and cook on high for 2 hours, stirring once halfway through.

  6. Serve: Once apples are fork-tender and coated in a thick glaze, serve warm.

Quick Notes & Pro Tips

  • Best apples: Use firm, tart apples like Granny Smith or Golden Delicious — they hold up to slow cooking.

  • Thicker glaze: For extra thickness, stir in 1 additional teaspoon of cornstarch dissolved in water at the end and cook 5 more minutes.

  • Add a pinch of nutmeg: It enhances the cinnamon flavor for a deeper, spiced profile.

Why You’ll Love It

This set-it-and-forget-it version of Cracker Barrel’s fried apples gives you the same cozy, caramelized cinnamon flavor with no stovetop babysitting — perfect as a side, topping, or dessert.

Ingredient Details & Substitutions

  • Apples: Honeycrisp or Fuji add a sweeter flavor if you prefer less tartness.

  • Butter: Swap for coconut oil or vegan butter for a dairy-free version.

  • Sweeteners: Use maple syrup or honey instead of granulated sugar for a richer taste.

Variations & Serving Suggestions

  • As a side: Pair with pork chops, roasted chicken, or ham for a homestyle dinner.

  • As dessert: Top with vanilla ice cream or whipped cream.

  • As a filling: Use in pies, turnovers, or over pancakes and waffles.

Storage & Make-Ahead

  • Refrigerate: Store in an airtight container for up to 5 days.

  • Freeze: Freeze for up to 3 months; thaw in the fridge overnight before reheating.

  • Reheat: Warm in the microwave or on the stovetop over low heat.

FAQs

Q: Can I cook these on low instead of high?
A: Yes — cook on low for 3–4 hours.

Q: Can I leave the peels on?
A: Absolutely. Keeping the peels adds texture (and nutrients), though the sauce will be slightly less smooth.

Q: Can I double this recipe?
A: Yes — double the ingredients and add an extra 30–45 minutes of cooking time.

Personal Note

I love making this for holiday dinners — it’s one of those dishes that makes the whole house smell like cinnamon and butter. It also doubles as a perfect topping for pancakes or French toast the next morning.

Fried Strawberry Cheesecake Sandwiches

Golden, buttery brioche sandwiches stuffed with creamy cheesecake filling, fresh strawberries, and sweet preserves — a decadent treat that tastes like dessert and breakfast combined.

Prep Time: 10 minutes
Cook Time: 5–6 minutes
Total Time: ~15 minutes
Servings: 4 sandwiches
Dietary: Dessert, Indulgent brunch

Ingredients

For the sandwiches:

  • Brioche or challah bread – 8 slices

  • Butter – 2 tbsp (for frying)

For the creamy filling:

  • Cream cheese – 4 oz, softened

  • Powdered sugar – 2 tbsp

  • Fresh strawberries – ½ cup, sliced thin

  • Strawberry preserves or jam – ¼ cup

For the egg coating:

  • Large eggs – 2

  • Whole milk – 3 tbsp

For serving:

  • Powdered sugar – for dusting

Instructions

  1. Make the filling: Beat cream cheese and powdered sugar together until smooth and fluffy.

  2. Assemble sandwiches: Spread the cream cheese mixture on 4 slices of bread, leaving a small border. Layer with strawberries and a spoonful of preserves. Top with remaining bread slices, pressing gently to seal.

  3. Prepare egg coating: Whisk eggs and milk together in a shallow dish until blended.

  4. Dip sandwiches: Carefully dip each sandwich in the egg mixture, coating both sides.

  5. Fry: Melt butter in a skillet over medium heat. Fry sandwiches for 2–3 minutes per side until golden brown and crisp. Drain briefly on paper towels.

  6. Serve: Dust with powdered sugar, cut diagonally, and enjoy warm.

Quick Notes & Pro Tips

  • Bread choice: Use brioche or challah for a rich, fluffy texture.

  • Don’t overfill: Too much filling may cause leakage while frying.

  • Work in batches: Don’t overcrowd the pan for even browning.

Why You’ll Love It

It’s like cheesecake and French toast had a baby — creamy, fruity, buttery, and crisp on the outside. Perfect for brunch, dessert, or a sweet treat any time of day.

Ingredient Details & Substitutions

  • Jam options: Try raspberry or mixed berry preserves for variety.

  • Cream cheese: Use mascarpone for a silkier filling.

  • Fruit: Swap strawberries for blueberries, peaches, or sliced bananas.

Variations & Serving Suggestions

  • Make it extra indulgent: Drizzle with chocolate or caramel sauce.

  • Add crunch: Sprinkle crushed graham crackers inside for a cheesecake crust effect.

  • Serve with: Whipped cream or a scoop of vanilla ice cream for a full dessert.

Storage & Make-Ahead

  • Best served fresh: These are crispiest when eaten right after frying.

  • Make-ahead: Assemble sandwiches and store (unfried) in the fridge for up to 1 day. Dip and fry before serving.

FAQs

Q: Can I bake instead of frying?
A: Yes — bake at 375°F for 8–10 minutes per side on a buttered sheet, flipping halfway through.

Q: Can I make them savory instead?
A: Absolutely! Replace jam with ham or bacon and use a savory filling like herbed cream cheese.

Personal Note

This is one of my favorite brunch “desserts.” It’s ridiculously easy but feels like something from a café menu — perfect for impressing guests or treating yourself on a weekend morning.

Your turn!
Tried these Fried Strawberry Cheesecake Sandwiches? Leave a comment or tag me on social media — I’d love to see your creations!

Would you like me to create a “Nutella-stuffed version” or a “baked casserole version” (like a cheesecake-stuffed French toast bake)?

Ask ChatGPT

Crispy Baked Parmesan Crusted Chicken

Juicy chicken breasts coated in a golden, garlicky Parmesan-breadcrumb crust and topped with a gooey blend of mozzarella and Parmesan — a comforting, restaurant-quality dinner made at home.

Prep Time: 20 minutes
Cook Time: 20–25 minutes
Total Time: ~45 minutes
Servings: 4
Dietary: Kid-friendly, Crowd-pleaser

Ingredients

For the chicken:

  • 4 boneless, skinless chicken breasts

For the breading & coating:

  • Bread crumbs – 1 cup

  • Parmesan cheese – grated (½ cup)

  • Dried Italian seasoning – ½ tsp

  • Salt – ½ tsp

  • Black pepper – ¼ tsp

  • All-purpose flour – ½ cup

  • Eggs – 2 large

  • Milk – ¼ cup

For the cheese topping:

  • Parmesan cheese – grated (½ cup)

  • Mozzarella cheese – shredded (1 cup)

  • Garlic – minced (2 cloves)

For cooking:

  • Olive oil – 2 tbsp

Instructions

  1. Preheat oven: Set to 375°F (190°C). Lightly grease a baking dish with olive oil.

  2. Prepare breading: In a shallow dish, combine bread crumbs, ½ cup Parmesan, Italian seasoning, salt, and black pepper.

  3. Prepare wet & dry dips: In one dish, whisk eggs and milk. In another, add flour for dredging.

  4. Bread the chicken: Dredge each chicken breast in flour, then dip in egg mixture, and coat with bread crumbs.

  5. Pan-sear: Heat olive oil in a skillet over medium-high. Cook chicken for 3–4 minutes per side until golden brown.

  6. Assemble: Transfer seared chicken to the baking dish. In a bowl, mix remaining ½ cup Parmesan, mozzarella, and garlic. Sprinkle over chicken.

  7. Bake: Cook for 20–25 minutes until chicken reaches an internal temperature of 165°F (74°C) and cheese is melted and bubbly.

  8. Serve: Let rest briefly, then serve hot with mashed potatoes, pasta, or vegetables.

Quick Notes & Pro Tips

  • Thin chicken cooks faster: Pound chicken breasts to an even thickness for consistent cooking.

  • Crispier finish: Broil for 1–2 minutes after baking for a golden cheese crust.

  • Use fresh Parmesan: It melts and flavors better than pre-grated.

Why You’ll Love It

This dish delivers crispy, juicy chicken with a flavorful cheesy topping — the perfect balance between a weeknight dinner and a dish that feels special.

Ingredient Details & Substitutions

  • Breadcrumbs: Use panko for extra crunch.

  • Cheese: Try provolone or fontina in place of mozzarella for a melty twist.

  • Herbs: Add fresh basil or parsley to the cheese topping for brightness.

Variations & Serving Suggestions

  • Turn it into Chicken Parmesan: Add marinara sauce before baking.

  • Low-carb option: Use crushed pork rinds or almond flour instead of breadcrumbs.

  • Pair it with: Garlic mashed potatoes, buttered noodles, or a crisp Caesar salad.

Storage & Make-Ahead

  • Refrigerate: Store leftovers in an airtight container for up to 3 days.

  • Freeze: Wrap cooked chicken tightly and freeze for up to 2 months.

  • Reheat: Warm in the oven at 350°F to keep the coating crisp.

FAQs

Q: Can I use chicken thighs instead?
A: Yes — boneless, skinless thighs work great (adjust cook time slightly).

Q: Can I make this ahead?
A: Yes — bread the chicken up to 1 day in advance. Pan-sear and bake when ready.

Q: How do I keep the breading from falling off?
A: Pat chicken dry before breading and press crumbs firmly to adhere.

Personal Note

This recipe is my go-to when I want a quick but impressive dinner. The golden, cheesy crust is always a hit with kids and adults alike, and it pairs beautifully with almost any side.

Slow Cooker Beef Tips in Savory Gravy

Fork-tender chunks of beef simmered in a rich, savory sauce with optional hearty vegetables — a comforting, set-it-and-forget-it slow cooker meal.

Prep Time: 15 minutes
Cook Time: 6–8 hours (low) or 3–4 hours (high)
Total Time: ~6–8 hours
Servings: 6–8
Dietary: Gluten-free adaptable

Ingredients

For the beef:

  • Beef sirloin, chuck roast, or stew meat – 2 lbs, cut into bite-sized chunks

  • Salt – 1 tsp

  • Black pepper – 1 tsp

  • Olive oil – 1–2 tbsp (for browning, optional)

For the sauce:

  • Beef broth – 1 cup (low-sodium preferred)

  • Soy sauce – ¼ cup

  • Worcestershire sauce – ¼ cup

  • Brown sugar – 3 tbsp

  • Tomato paste – 2 tbsp

  • Garlic – 3 cloves, minced

  • Smoked paprika – 1 tsp

  • Onion powder – ½ tsp

  • Red pepper flakes – ¼ tsp (optional)

Optional add-ins:

  • Baby potatoes – 1 lb, halved

  • Baby carrots – 1 cup

  • Mushrooms – 1 cup, sliced

  • Onion – 1 medium, roughly chopped

  • Cornstarch slurry – 1–2 tbsp cornstarch + 2 tbsp cold water (for thickening)

Instructions

  1. Prep the beef: Pat beef chunks dry with paper towels. Season evenly with salt and pepper.

  2. Brown the beef (optional): Heat olive oil in a skillet over medium-high. Sear beef in batches until browned on all sides. (Skip if short on time.)

  3. Make the sauce: In a bowl, whisk together beef broth, soy sauce, Worcestershire, brown sugar, tomato paste, garlic, paprika, onion powder, and red pepper flakes.

  4. Assemble in slow cooker: Place beef in slow cooker. Add optional vegetables around and on top. Pour sauce over everything, coating the beef well.

  5. Cook: Cover and cook on low for 6–8 hours or high for 3–4 hours, until beef is fork-tender.

  6. Thicken (optional): About 20 minutes before serving, mix cornstarch with cold water. Stir into the slow cooker, cover, and cook on high until the sauce thickens.

  7. Serve: Spoon beef and sauce over mashed potatoes, rice, or egg noodles. Garnish with fresh parsley if desired.

Quick Notes & Pro Tips

  • Choose the right cut: Chuck roast is budget-friendly and melts beautifully after slow cooking.

  • Brown for flavor: While optional, searing the beef adds a deeper, richer taste.

  • Thicker sauce: Adjust cornstarch to reach your preferred gravy consistency.

Why You’ll Love It

This dish is hearty, versatile, and family-friendly. With minimal prep, you get beef that’s melt-in-your-mouth tender and swimming in a savory, well-balanced gravy — comfort food made easy.

Ingredient Details & Substitutions

  • Beef: Swap for pork shoulder or even chicken thighs for a different twist.

  • Vegetables: Add parsnips, celery, or sweet potatoes for variety.

  • Soy sauce: Use tamari for a gluten-free version.

Variations & Serving Suggestions

  • Make it creamy: Stir in ¼ cup heavy cream or sour cream at the end for a silky sauce.

  • Serve it with: Mashed potatoes, egg noodles, or crusty bread to soak up the gravy.

  • Add wine: Replace ¼ cup broth with red wine for a deeper, richer flavor.

Storage & Make-Ahead

  • Refrigerate: Store in an airtight container for up to 4 days.

  • Freeze: Cool completely and freeze for up to 2 months.

  • Reheat: Warm gently on the stovetop or in the microwave until heated through.

FAQs

Q: Can I make this in the oven instead?
A: Yes — bake in a covered Dutch oven at 160°C (325°F) for 2½–3 hours.

Q: How do I make it less sweet?
A: Reduce brown sugar to 1–2 tbsp or skip entirely for a more savory profile.

Q: Can I prep this the night before?
A: Absolutely — assemble all ingredients in the slow cooker insert, cover, and refrigerate overnight.

Personal Note

This recipe is my go-to when I want a hearty dinner with little hands-on time. The soy-Worcestershire-tomato combo builds a flavorful gravy that tastes like it’s been simmering all day (because it has!).

Bacon, Tomato & Onion Pie

A savory pie layered with caramelized onions, crisp bacon, juicy tomatoes, and a creamy, cheesy topping — the perfect comfort dish for brunch, dinner, or potlucks.

Prep Time: 20 minutes
Cook Time: 35–40 minutes
Total Time: ~1 hour
Servings: 6–8
Dietary: Comfort food, Crowd-pleaser

Ingredients

For the crust:

  • One pre-baked deep 9-inch pie shell

For the filling:

  • 8–6 thick slices of bacon – fried crisp and chopped

  • 2 medium tomatoes – thinly sliced

  • 1 large yellow onion – very thinly sliced

For the topping:

  • Mozzarella cheese – shredded (1 ½ cups)

  • Mayonnaise (½ cup)

  • Sour cream (½ cup)

  • All-purpose flour (1 tbsp)

  • Garlic powder (½ tsp)

  • Salt (¼ tsp)

  • Black pepper (¼ tsp)

For garnish (optional):

  • Fresh parsley or chives – chopped (1 tbsp)

Instructions

  1. Preheat oven: Set to 350°F (175°C). Place a baking sheet on the lower rack (to catch drips).

  2. Caramelize the onions: In a skillet over medium heat, cook onion slices in a little bacon grease until soft and golden brown (about 10 minutes). Let cool slightly.

  3. Layer the filling: In the pre-baked pie shell, layer half the onions, half the tomatoes, and half the bacon. Repeat with remaining onions, tomatoes, and bacon.

  4. Make the topping: In a bowl, mix mozzarella, mayonnaise, sour cream, flour, garlic powder, salt, and pepper until smooth.

  5. Assemble & bake: Spread the topping evenly over the layered filling. Bake for 35–40 minutes until bubbly and golden on top.

  6. Cool & serve: Let rest for a few minutes. Garnish with parsley or chives before slicing.

Quick Notes & Pro Tips

  • Pre-bake the crust: Ensures a crisp base that holds up to the filling.

  • Onions: Slow-cook them for deeper flavor.

  • Tomatoes: Pat slices dry to avoid excess moisture in the pie.

  • Serving tip: Let the pie cool slightly before slicing so it holds its shape.

Why You’ll Love It

This pie combines layers of smoky bacon, caramelized onions, and fresh tomatoes with a creamy, cheesy topping that bakes up golden and bubbly. It’s hearty enough for dinner but elegant enough for brunch.

Step-by-Step Cooking Guide

1. Prepping the Filling

  • Fry bacon until crisp. Caramelize onions in the rendered grease for rich flavor.

2. Layering the Pie

  • Onion, tomato, bacon — twice for even flavor distribution.

3. Mixing the Topping

  • Whip together the creamy mixture with mozzarella for a tangy, cheesy finish.

Ingredient Details & Substitutions

  • Cheese: Try cheddar or a mozzarella–Parmesan mix for more depth.

  • Sour cream: Swap for Greek yogurt for a lighter topping.

  • Crust: Use homemade pie dough or a store-bought pastry shell.

Variations & Serving Suggestions

  • Add a kick: Sprinkle in red pepper flakes or a dash of hot sauce.

  • Vegetarian version: Skip the bacon and add sautéed mushrooms or spinach.

  • Serving idea: Pair with a fresh green salad or serve as a side to grilled meats.

Storage & Make-Ahead

  • Refrigerate: Store covered for up to 3 days.

  • Reheat: Warm slices in a 325°F oven for 10–15 minutes to keep the crust crisp.

  • Make-ahead: Pre-cook bacon and onions and assemble layers a day ahead; bake fresh.

FAQs

Q: Can I use different cheese?
A: Yes — sharp cheddar, Gruyère, or a blend adds great flavor.

Q: Can I make this crustless?
A: Yes — pour filling into a greased pie dish and bake until set.

Q: How do I prevent a soggy crust?
A: Pat tomatoes dry and pre-bake the crust thoroughly.

Personal Note

This pie is inspired by classic Southern tomato pie but takes it up a notch with caramelized onions and smoky bacon. It’s the kind of dish that disappears fast at family gatherings.

Your turn!
Tried this Bacon, Tomato & Onion Pie? Leave a review or tag me on social media — I’d love to see your version!


Would you like me to make a “breakfast version” (with eggs for a quiche-like texture) or turn this into individual mini pies for parties?

Apple Spice Cake Muffins

When doing my weekend food prep, I usually make a banana loaf for the week but being that my bananas aren’t ripe enough yet, i asked chat GPT for a low point muffin recipe and made these 1 point carrot ones. They turned out really good. I added a bit of sugar free maple syrup and I used apple pie spice instead of cinnamon and nutmeg. I also used blueberry kodiak mix with a tad of cinammon oat one too.
1 cup shredded carrots
2 eggs
1/4 cup unsweetened applesauce
1/2 cup nonfat plain Greek yogurt
1/2 cup monk fruit sweetener or other zero-point sweetener
1 tsp vanilla extract
1 tsp baking powder
1/2 tsp baking soda
1 tsp cinnamon
1/4 tsp nutmeg
Pinch of salt
1 cup Kodiak Cakes Power Cakes mix
1. Preheat oven to 350°F (175°C) and line a muffin tin with 12 liners or spray with nonstick spray.
2. Mix wet ingredients: eggs, applesauce, Greek yogurt, sweetener, vanilla, and either grated carrots or pumpkin.
3. Stir in dry ingredients: Kodiak mix, baking powder, baking soda, spices, and salt.
4. Fold in any optional add-ins if using.
5. Spoon batter evenly into 12 muffin cups.
6. Bake for 18–22 minutes, or until a toothpick comes out clean.

Weight Watchers Chicken Parmesan

INGREDIENTS
¼ cup grated parmesan cheese
2 tbsp Italian seasoned breadcrumbs
⅛ tsp paprika
1 tsp dried parsley
½ tsp garlic powder
¼ tsp ground pepper
1 lb boneless skinless chicken breast 4 breasts ¼ lbs each
INSTRUCTIONS
Preheat oven to 400 degrees F.
In a medium mixing bowl, combine parmesan cheese, bread crumbs, and seasonings; mix well.
Dip each chicken breast in mixture, fully coating
Place on nonstick baking sheet.
Bake approx 20 to 25 minutes, or until chicken is fully cooked.
NOTES
MyWW Points: Blue Plan 2 and Green Plan 3 2 WW Freestyle Points and 3 Smart Points

NUTRITION
SERVINGS4 Calories: 172.9kcalCarbohydrates: 3.3gProtein: 27.1gFat: 5gSaturated Fat: 1.8g
Chicken Parmesan

Introduction: Step into the realm of culinary sophistication with our Chicken Parmesan recipe, a tantalizing symphony of flavors that promises to elevate your dining experience. This meticulously crafted dish combines the succulence of boneless, skinless chicken breast with a harmonious blend of parmesan cheese, Italian seasoned breadcrumbs, and an array of aromatic seasonings. With a mere 172.9 calories per serving, this gourmet creation effortlessly caters to both taste and health-conscious individuals. Join us on a culinary journey as we unveil the artistry behind this delectable Chicken Parmesan masterpiece.

Ingredients:

¼ cup grated parmesan cheese
2 tbsp Italian seasoned breadcrumbs
⅛ tsp paprika
1 tsp dried parsley
½ tsp garlic powder
¼ tsp ground pepper
1 lb boneless, skinless chicken breast (4 breasts, ¼ lbs each)

Step-by-Step Culinary Elegance:

Preparation Perfection: Preheat your oven to 400 degrees Fahrenheit, setting the stage for the transformation of simple ingredients into a gourmet delight. The preheating process ensures optimal cooking conditions, imparting a golden crispness to the Chicken Parmesan.
A Symphony of Flavors: In a medium mixing bowl, artfully combine the grated parmesan cheese, Italian seasoned breadcrumbs, paprika, dried parsley, garlic powder, and ground pepper. This meticulous blending of ingredients forms the essence of the dish, promising a burst of flavors in every succulent bite.
Coating Brilliance: Dip each boneless, skinless chicken breast into the seasoned mixture, ensuring a full and even coating. This step is crucial for infusing the chicken with the rich flavors and textures that define the classic Chicken Parmesan experience.
Arrangement and Baking: Place the coated chicken breasts on a nonstick baking sheet, allowing each piece to bask in the radiant heat of the oven. Bake for approximately 20 to 25 minutes, or until the chicken reaches the pinnacle of tenderness and is fully cooked.
Gastronomic Insights and Nutritional Considerations:

Weight Watchers Points: Revel in the knowledge that this culinary masterpiece is a mindful choice, with 2 Blue Plan points and 3 Green Plan points, as well as 2 WW Freestyle Points and 3 Smart Points. This makes it an ideal option for those seeking a balance between indulgence and wellness.
Nutritional Value: Each serving boasts a mere 172.9 calories, offering a guilt-free gastronomic experience. The chicken serves as an excellent source of protein, with 27.1g per serving, while maintaining a moderate fat content of 5g.
Conclusion: Our Chicken Parmesan recipe transcends the ordinary, inviting you to savor a gourmet dining experience in the comfort of your home. Immerse yourself in the symphony of flavors, the tender chicken, and the crispy coating, all converging to create a dish that is as pleasing to the palate as it is to the eye. Whether you’re hosting a dinner party or seeking to impress your loved ones with a culinary masterpiece, our Chicken Parmesan promises to be the star of your dining table.

Zero Point Cowboy Caviar

Ingredients

  • Base:
  • – 1 can black beans
  • – 1 can corn
  • – 1 diced red bell pepper
  • – 1/3 diced  red onion
  • – 1/2 diced jalapeño no seeds
  • – 32g @traderjoes hot and sweet jalapeños chopped up
  • Dressing:
  • – juice of 2 limes
  • – splash of water
  • – red wine vinegar I didn’t measure but start slow and you can always add more to taste
  • – 1 tsp @skinnymixes simple syrup you could also make your own with any sweetener
  • -1 tsp taco seasoning

Recipe Notes

The just pour the dressing right on! I added  guacamole and feta to mine and used these @traderjoes crunchy crisps for dipping!

It came out to 5 servings for 1 point per serving on my personal @ww plan. For reference, I do have zero point beans but do not have zero point corn.

Baked apple oatmeal By Olivia James

Delicious and Nutritious WW Baked Apple Oatmeal

Introduction: Start your day on a wholesome note with a serving of WW baked apple oatmeal. Bursting with flavors of cinnamon-spiced apples and hearty oats, this dish offers a satisfying and nutritious breakfast option. Whether you’re following the WW program or simply seeking a comforting morning meal, this recipe is sure to become a favorite in your kitchen.
Ingredients and Preparation: Gathering your ingredients is the first step to creating this delightful dish. You’ll need old-fashioned rolled oats, unsweetened almond milk (or your preferred milk alternative), fresh apples, ground cinnamon, nutmeg, salt, honey or maple syrup (for a touch of sweetness), and vanilla extract. Preheat your oven to 375°F (190°C) and prepare a baking dish by greasing it with cooking spray or butter. In a large mixing bowl, combine the oats, almond milk, diced apples, spices, sweetener, and vanilla extract, ensuring everything is thoroughly mixed. Pour the mixture into the prepared baking dish, spreading it out evenly.

Baking and Serving: Once assembled, the oatmeal-filled baking dish goes into the preheated oven. Allow it to bake for approximately 30-35 minutes, or until the oatmeal sets and develops a lightly golden brown hue on top. As the aroma of baked apples and spices fills your kitchen, eagerly anticipate the moment when you can indulge in this comforting treat. After baking, let the oatmeal cool for a few minutes before serving. Optionally, drizzle a bit more honey or maple syrup over the top for an extra touch of sweetness. Serve the baked apple oatmeal warm, allowing each spoonful to warm your soul and energize you for the day ahead.

WW Points Information: If you’re following the WW program, you’ll appreciate the nutritional benefits of this baked apple oatmeal. While the exact WW points may vary based on your ingredient choices and serving size, rest assured that this dish offers a balance of wholesome ingredients to support your wellness journey. Utilize the WW app or website to calculate the points accurately based on your specific recipe.

Conclusion: With its blend of wholesome oats, fresh apples, and warm spices, WW baked apple oatmeal is a breakfast sensation that nourishes both body and spirit. Whether you enjoy it as a weekday breakfast or a leisurely weekend brunch, this dish embodies comfort and satisfaction with every spoonful. Try it out and savor the goodness of a nutritious breakfast that leaves you feeling energized and ready to tackle the day ahead.


baked apple oatmeal
Baked apple oatmeal is a delightful and nutritious dish perfect for a cozy breakfast or brunch. Here’s a simple recipe for Weight Watchers (WW) baked apple oatmeal:

Ingredients:
2 cups old-fashioned rolled oats
2 cups unsweetened almond milk (or any milk of your choice)
2 medium-sized apples, peeled, cored, and diced
1 teaspoon ground cinnamon
1/4 teaspoon ground nutmeg
1/4 teaspoon salt
2 tablespoons honey or maple syrup (optional, adjust according to sweetness preference)
1 teaspoon vanilla extract
Cooking spray or butter for greasing the baking dish
Instructions:
Preheat your oven to 375°F (190°C). Grease a baking dish with cooking spray or butter.
In a large mixing bowl, combine the rolled oats, almond milk, diced apples, cinnamon, nutmeg, salt, honey or maple syrup (if using), and vanilla extract. Stir until well combined.
Pour the oatmeal mixture into the greased baking dish, spreading it out evenly.
Bake in the preheated oven for about 30-35 minutes, or until the oatmeal is set and the top is lightly golden brown.
Once baked, remove the oatmeal from the oven and let it cool for a few minutes before serving.
Serve the baked apple oatmeal warm, optionally with a drizzle of additional honey or maple syrup on top, and enjoy!
WW Points Information:
This recipe’s WW points will depend on the specific ingredients used and serving sizes. Be sure to calculate the points based on the ingredients you choose and the portion size you consume. You can use the WW app or website to calculate the points accurately.
Enjoy your delicious and nutritious WW baked apple oatmeal!

Zero-Point Fatbomb Fluff

Zero-Point Fatbomb Fluff
WW Low-Point Zero-Point Fatbomb Fluff
Ingredients:
1 cup fat-free Greek yogurt
1 cup unsweetened almond milk
1 tablespoon chia seeds
1 tablespoon flaxseed meal
1 teaspoon vanilla extract
1/2 teaspoon almond extract (optional)
Stevia or other zero-calorie sweetener, to taste
Fresh berries or other fruit for serving (optional)
Instructions:
Prepare the Base:
In a mixing bowl, combine fat-free Greek yogurt and unsweetened almond milk. Mix until smooth and well combined.
Add Seeds and Extracts:
Stir in chia seeds, flaxseed meal, vanilla extract, and almond extract (if using). These ingredients will add thickness and flavor to the fluff.
Sweeten to Taste:
Sweeten the mixture with stevia or your preferred zero-calorie sweetener. Start with a small amount and adjust to your desired level of sweetness.
Chill:
Cover the bowl and refrigerate the mixture for at least 1 hour, or overnight if possible. This allows the chia seeds and flaxseed meal to absorb moisture and thicken the fluff.
Serve:
Before serving, stir the fluff to ensure it’s well mixed and creamy. Divide into serving bowls or glasses.
Garnish:
Garnish with fresh berries or your favorite fruit, if desired. This adds extra flavor and texture to the dish.
Nutritional Information (per serving, without fruit):
Calories: Approximately 80 kcal
Protein: 7g
Carbohydrates: 7g
Fat: 2g
Fiber: 3g
Sugar: 3g
SmartPoints (WW):
Each serving of the WW Low-Point Zero-Point Fatbomb Fluff is approximately 1 SmartPoint on the WW (Weight Watchers) program.
Tips:
Variations: Customize your fluff by adding different extracts such as coconut or lemon for a variety of flavors. You can also top it with nuts or shredded coconut for added crunch.
Make-Ahead: This fluff can be prepared ahead of time and stored in the refrigerator for up to 3 days. It’s a convenient option for quick breakfasts or snacks.
Health Benefits: This recipe is low in calories and packed with protein from the Greek yogurt. Chia seeds and flaxseed meal provide omega-3 fatty acids and fiber, contributing to a balanced diet.
Allergen Information: Ensure all ingredients used are suitable for your dietary needs, especially if you have allergies or sensitivities to dairy or nuts.
Zero-Point Fatbomb Fluff is a satisfying and guilt-free treat that fits into a healthy eating plan. Whether you’re looking for a nutritious breakfast option, a post-workout snack, or a light dessert, this fluff delivers on taste and nutrition without compromising your wellness goals.

Low Point Peanut Buster Parfait

Low point Peanut Buster parfait is great dessert when you have sweet tooth, perfect dessert for me Low Point Peanut Buster Parfait (WW Friendly)
Servings: 1 WW Points: 2–3 points (depending on brands used – can be 1 if simplified)
Ingredients:
  • ½ cup fat-free vanilla Greek yogurt (or plain with vanilla extract) – 0 points
  • 1 tbsp sugar-free chocolate syrup (e.g., Hershey’s Zero Sugar) – 0 points
  • 1 tbsp PB2 (powdered peanut butter), mixed with a bit of water to make a drizzle – 1 point
  • 1 tbsp fat-free whipped topping – 0 points
  • 1 tsp crushed peanuts – 1 point
  • Optional: A sprinkle of sugar-free mini chocolate chips (like Lily’s) – 0–1 point
Instructions:
  • In a glass or bowl, layer half of the Greek yogurt on the bottom.
  • Drizzle with half the PB2 and chocolate syrup.
  • Add the remaining yogurt on top.
  • Drizzle again with the rest of the PB2 and syrup.
  • Top with fat-free whipped toppingcrushed peanuts, and optional chocolate chips.
  • Serve immediately — or chill it a few minutes for that parfait chill factor!
Tips:
  • Want it even more indulgent? Add a few pieces of crushed chocolate rice cakes or a mini WW bar crumbled in (adjust points).
  • Use chocolate Greek yogurt for a double chocolate twist.

1 Point Weight Watchers Fluffy Pancakes – No Bananas!

Ingredients

      • 1 cup self rising flour
      • 1/2 cup NF greek  yogurt
      • 2 eggs
      • 1 1/2 teaspoon baking powder
      • 1 1/2 teaspoon vanilla extract
      • 1/8 teaspoon almond extract
      • 1/3 cup + 2Tablespoons water

Instructions

      • Put all ingredients into mixer (wet ingredients first). Mix with whisk attachment until blended. Cook on griddle heated to medium. Makes 12 pancakes, 1 SP each!

Ingredients

      • 1 cup self rising flour
      • 1/2 cup NF greek yogurt
      • 2 eggs
      • 1 1/2 teaspoon baking powder
      • 1 1/2 teaspoon vanilla extract
      • 1/8 teaspoon almond extract
      • 1/3 cup + 2Tablespoons water

Instructions

      • Put all ingredients into mixer (wet ingredients first). Mix with whisk attachment until blended. Cook on griddle heated to medium. Makes 12 pancakes, 1 SP each!
      • Source:slapdashmom.com

Weight Watchers Spicy Chinese Chicken

Title: Flavorful Spicy Chinese Chicken: A 20-Minute Weight Watchers Dinner Delight

Introduction: Embark on a culinary journey to the heart of Chinese cuisine with our tantalizing Spicy Chinese Chicken recipe. Crafted with tender boneless, skinless chicken breasts and infused with an array of aromatic spices, this dish is a testament to both flavor and convenience. In just 20 minutes, you can whip up a savory dinner that’s sure to impress your taste buds and leave you craving more. Plus, with its Weight Watchers-friendly ingredients, you can savor every bite without guilt. Let’s dive into the details of this delectable recipe and elevate your dinner game tonight!
Ingredients:

1 lb boneless, skinless chicken breasts, thinly sliced
2 tablespoons soy sauce (reduced-sodium)
1 tablespoon rice vinegar
1 tablespoon hoisin sauce
1 tablespoon sesame oil
2 cloves garlic, minced
1 teaspoon fresh ginger, grated
1/2 teaspoon crushed red pepper flakes (adjust to taste)
1/4 teaspoon Chinese five-spice powder
1 tablespoon cornstarch
2 tablespoons water
2 green onions, thinly sliced (for garnish)
Cooked rice or cauliflower rice, for serving
Instructions:

In a small bowl, whisk together soy sauce, rice vinegar, hoisin sauce, sesame oil, minced garlic, grated ginger, red pepper flakes, and Chinese five-spice powder. Set aside.
In a separate bowl, mix cornstarch and water until smooth to create a slurry. Set aside.
Heat a large skillet or wok over medium-high heat. Add a splash of oil and swirl to coat the pan.
Add the thinly sliced chicken breasts to the hot skillet, spreading them out in a single layer. Cook for 2-3 minutes per side, or until lightly browned and cooked through.
Once the chicken is cooked, reduce the heat to medium and pour the prepared sauce over the chicken in the skillet. Stir to coat the chicken evenly with the sauce.
Cook for an additional 1-2 minutes, allowing the sauce to thicken slightly.

Gradually pour the cornstarch slurry into the skillet, stirring constantly, until the sauce thickens to your desired consistency.
Remove the skillet from the heat and garnish the spicy Chinese chicken with thinly sliced green onions.
Serve the chicken hot over cooked rice or cauliflower rice, and enjoy the burst of flavors with each mouthful.
Nutritional Information (per serving, chicken only):

Calories: 220
Total Fat: 6g
Saturated Fat: 1g
Cholesterol: 96mg
Sodium: 543mg
Total Carbohydrates: 6g
Dietary Fiber: 0g
Sugars: 1g
Protein: 34g
SmartPoints (Weight Watchers): 4

Conclusion: Indulge in the savory goodness of our Spicy Chinese Chicken, a delightful dish that’s both quick and easy to prepare. With its bold flavors and tender chicken, this recipe is sure to become a favorite in your dinner rotation. Whether you’re following the Weight Watchers program or simply looking for a delicious meal that’s ready in a flash, this recipe ticks all the boxes. Treat yourself to a taste of Asia tonight and elevate your dinner experience with this mouthwatering creation!

Apple enchilada Dessert

Introduction: Embark on a culinary journey with our delightful Weight Watchers Apple “Enchilada” dessert—a wholesome indulgence that satisfies your sweet cravings without compromising on your wellness goals. This innovative recipe transforms everyday ingredients into a delectable treat, earning a mere 2 SmartPoints per serving. Join us as we explore the intricacies of crafting these Apple “Enchiladas,” providing detailed instructions, culinary insights, and precise measurements for a guilt-free dessert experience.

Ingredients:

For the Apple Filling:

  1. 4 cups thinly sliced apples (peeled and cored)
  2. 2 tablespoons lemon juice
  3. 1/4 cup granulated sugar
  4. 1 teaspoon ground cinnamon
  5. 1/4 teaspoon nutmeg
  6. 1 tablespoon cornstarch
  7. 1/4 cup water

For the “Enchiladas”:

  1. 8 small whole wheat tortillas (6 inches in diameter)
  2. Cooking spray

For the Topping:

  1. 1/4 cup light whipped cream
  2. Ground cinnamon for dusting

Instructions:

  1. Apple Preparation Precision:
    • Begin the culinary journey with apple preparation precision. Peel, core, and thinly slice four cups of apples. Toss them in lemon juice to preserve freshness and prevent browning.
  2. Sugar and Spice Symphony:
    • In a bowl, orchestrate a sugar and spice symphony by combining granulated sugar, ground cinnamon, nutmeg, and cornstarch. This aromatic blend enhances the natural sweetness of the apples, creating a flavorful filling.
  3. Apple Coating Ballet:
    • Engage in an apple coating ballet by tossing the sliced apples in the sugar and spice mixture. Ensure each slice is evenly coated, allowing the flavors to meld harmoniously.
  4. Stovetop Elegance:
    • Bring the mixture to stovetop elegance by cooking the coated apples in a saucepan over medium heat. Add water to create a luscious syrup, simmering until the apples are tender yet maintain their shape.
  5. Tortilla Warming Ritual:
    • Embrace a tortilla warming ritual by lightly heating whole wheat tortillas. This step enhances their pliability, making them easier to roll and creating a delightful texture in the finished “Enchiladas.”
  6. Filling Distribution Artistry:
    • Distribute the apple filling with artistry, spooning a generous portion onto each warmed tortilla. Ensure an even distribution to guarantee a consistent flavor profile in every bite.
  7. Rolling Mastery:
    • Master the rolling technique by folding the sides of each tortilla toward the center and then rolling from the bottom to create a snug “Enchilada.” Place them seam-side down on a prepared baking dish.
  8. Cooking Spray Finale:
    • Conclude the preparation with a cooking spray finale, lightly coating the tops of the “Enchiladas.” This step promotes a golden brown finish in the oven while keeping the dish light and heart-healthy.
  9. Oven Baking Brilliance:
    • Bake the “Enchiladas” in a preheated oven at 350°F (175°C) for approximately 15-20 minutes or until they achieve a golden perfection. This oven baking brilliance allows the flavors to meld and intensify.
  10. Whipped Cream Elegance:
    • Present a whipped cream elegance by topping each “Enchilada” with a dollop of light whipped cream. This airy addition adds a delightful creaminess, complementing the warm apple filling.
  11. Cinnamon Dusting Extravaganza:
    • Embark on a cinnamon dusting extravaganza, sprinkling ground cinnamon over the whipped cream. This final touch not only enhances the visual appeal but adds an extra layer of warmth to the dessert.
  12. Serving Presentation Panache:
    • Showcase serving presentation panache by arranging the “Enchiladas” on a dessert platter. Consider drizzling any remaining apple syrup over the top for an added burst of flavor.
  13. SmartPoints Transparency:
    • Embrace SmartPoints transparency by calculating and sharing the nutritional information per serving. This transparency empowers your audience to make informed choices within their wellness journey.
  14. Portion Control Wisdom:
    • Offer portion control wisdom by highlighting that each “Enchilada” is a perfectly portioned delight, allowing for guilt-free enjoyment without compromising on dietary goals.
  15. Health-Conscious Ingredient Insights:
    • Provide insights into the health-conscious choices made in the recipe, such as whole wheat tortillas and light whipped cream. These choices align with the Weight Watchers philosophy of mindful and balanced eating.
  16. Versatility Exploration:
    • Encourage versatility exploration by suggesting variations to the recipe. Whether it’s adding a hint of vanilla to the whipped cream or incorporating a sprinkle of chopped nuts, invite your audience to personalize the dish.
  17. Storage and Reheating Recommendations:
    • Share storage and reheating recommendations for those who may want to enjoy the Apple “Enchiladas” at a later time. Proper storage ensures they maintain their texture and flavor upon reheating.
  18. Community Connection Invitation:
    • Transform your website into a community connection hub by inviting your audience to share their experiences with the Apple “Enchiladas.” Encourage them to experiment with different apple varieties or share creative presentations.
  19. Seasonal Ingredient Adaptations:
    • Offer seasonal ingredient adaptations, suggesting ways to modify the recipe based on the availability of different apple varieties or seasonal twists. This flexibility allows the dish to be enjoyed year-round.
  20. Culinary Conclusion Celebration:
    • Conclude the culinary celebration by inviting your audience to savor the delightful experience of Weight Watchers Apple “Enchiladas.” Emphasize the joy of indulging in a sweet treat that aligns with wellness goals, providing a perfect balance of flavor and nutrition.

Weight Watchers Creamy Broccoli Salad

This Weight Watchers Creamy Broccoli Salad is packed with broccoli, bacon, red onions, sunflower seeds and tossed together with a creamy ranch dressing!! The combination of all the flavors makes this Broccoli Salad irresistible!

Skinny Creamy Broccoli Salad: A Healthful Twist on a Classic Favorite
Introduction
Indulge in the perfect marriage of flavor and nutrition with our Skinny Creamy Broccoli Salad. This delightful rendition takes a beloved classic and transforms it into a healthful yet delicious dish, making it an ideal addition to your repertoire of wholesome recipes.

Wholesome Ingredients
Crafted with an emphasis on nutrition, this salad begins with a generous serving of fresh broccoli florets, providing a robust base packed with essential vitamins, minerals, and dietary fiber. The inclusion of crisp red onions and colorful cherry tomatoes adds a burst of freshness and visual appeal, while also contributing vital nutrients.

Creamy Dressing Magic
The secret to this skinny version lies in the creamy dressing. Utilizing a light Greek yogurt base instead of traditional mayonnaise, we maintain the creamy texture without compromising on nutritional value. The dressing is elevated with a hint of Dijon mustard for a tangy kick, and a touch of honey for a subtle sweetness, creating a perfect balance of flavors.

Nutty Crunch
To add a satisfying crunch and a dose of heart-healthy fats, we incorporate a medley of chopped almonds or walnuts. This not only enhances the texture but also introduces a delightful nuttiness that complements the creamy dressing and crisp vegetables.

Flavorful Seasoning
A judicious seasoning of salt, pepper, and a dash of garlic powder ties the elements together, elevating the overall taste profile. This careful seasoning ensures that each bite is a symphony of flavors, showcasing the natural goodness of the ingredients.

Serving Suggestions
This Skinny Creamy Broccoli Salad isn’t just a side dish; it’s a versatile culinary creation. Serve it as a refreshing accompaniment at barbecues, picnics, or potlucks. Alternatively, elevate it to a light meal by adding grilled chicken or shrimp for a protein boost, making it a well-rounded and satisfying option for any occasion.

Conclusion: A Nutrient-Rich Delight
In conclusion, our Skinny Creamy Broccoli Salad is a testament to the belief that wholesome eating can be both delicious and nourishing. By carefully selecting nutrient-dense ingredients and optimizing the dressing, we’ve created a salad that doesn’t compromise on taste while aligning seamlessly with a health-conscious lifestyle. Elevate your culinary experience with this vibrant and satisfying dish, making each bite a celebration of flavor and well-being.

Ingredients
Salad Ingredients
2 heads of broccoli, or about 5 cups, cut into bite size pieces
8 slices center cut bacon or Hormel precooked bacon, cooked and crumbled
1/2 cup reduced fat cheddar cheese, shredded or cubed ( I use Velveeta Shreds)
1/3 cup red onion, diced
1/4 cup dry and roasted sunflower seeds
handful of craisins, optional
Dressing Ingredients
1/2 ( .5 oz.) dry ranch dressing packet
1/2 cup Kraft light mayo
1 cup non fat plain yogurt
1/4 cup unsweetened almond or skim milk
1 Tbsp white wine vinegar or apple cider vinegar
¼ tsp salt
pinch of sugar sweetener ( I use Lakanto Classic Monkfruit Sweetener)
Instructions
In a large mixing bowl combine broccoli pieces, red onion, sunflower seeds and cheese.
Meanwhile make the dressing: In a small bow combine, mayonnaise, vinegar, dry ranch mix, salt, sweetener, unsweetened almond or skim milk, and yogurt. Whisk until well combined.
Pour dressing over broccoli salad mix. Toss until all ingredients are well combined.
Sprinkle the salad with cooked bacon crumbles. Toss just before serving.
Garnish with handful of craisins, if desired for addtional points.
Store in an airtight container the refrigerator for up to 5 days.
Makes 7 ( 1 cup) servings

3 Points® per serving

Smartpoints: Green, Blue, and Purple: 4 SmartPoints per serving

What other ingredients could I add to this salad?

Cubed cheese
Raisins
Cashews
Pecans
Cherry tomatoes
White onion rather than red onion

Nutrition Information:
YIELD:7
SERVING SIZE:1
Amount Per Serving: CALORIES: 177TOTAL FAT: 13gSATURATED FAT: 3gTRANS FAT: 0gUNSATURATED FAT: 0gCHOLESTEROL: 26mgSODIUM: 342mgCARBOHYDRATES: 6gNET CARBOHYDRATES: 5gFIBER: 1gSUGAR: 3gPROTEIN: 10g

Weight Watchers Zero Point Chocolate Mug Cake

For those moments when a chocolate craving strikes and you’re on a Weight Watchers journey, this Zero Point Chocolate Mug Cake is the answer to your dessert dreams. With no added sugar and a Points value of zero, this quick and easy recipe allows you to indulge in the rich, chocolaty goodness without compromising your commitment to a healthy lifestyle. In just a few minutes, you can whip up a single-serving treat that’s both satisfying and figure-friendly.

Ingredients:

2 tablespoons unsweetened cocoa powder
1 teaspoon baking powder
3 tablespoons non-fat Greek yogurt
1 teaspoon vanilla extract
2 tablespoons water
A pinch of salt
1-2 packets of your preferred zero-calorie sweetener (adjust to taste)
Optional: Sugar-free whipped topping or a sprinkle of cocoa powder for garnish
Instructions:

Prepare the Mug: Start by selecting a microwave-safe mug. Make sure it’s large enough to accommodate the rising cake while cooking.
Mix Dry Ingredients: In the mug, combine the unsweetened cocoa powder, baking powder, and a pinch of salt. Stir the dry ingredients until well mixed.
Add Wet Ingredients: Add the non-fat Greek yogurt, vanilla extract, and water to the mug. Mix the ingredients thoroughly to form a smooth batter. Adjust the sweetness by adding zero-calorie sweetener to your liking.
Microwave for Instant Perfection: Microwave the mug on high for 1 to 2 minutes, depending on your microwave’s wattage. Keep an eye on it to prevent overflowing.
Cool and Garnish: Allow the mug cake to cool for a minute before diving in. Optionally, top it with sugar-free whipped topping or a sprinkle of cocoa powder for an extra touch of decadence.
Enjoy Your Zero Point Indulgence: Delight in the guilt-free pleasure of this Weight Watchers Zero Point Chocolate Mug Cake. The combination of cocoa richness, moist texture, and the absence of added sugar make it a perfect solution for satisfying your sweet tooth without derailing your wellness goals.
This recipe serves as a reminder that wholesome ingredients can come together to create a delicious treat, even within the constraints of a Weight Watchers program. Embrace the simplicity and enjoy the instant satisfaction of this zero-point chocolate mug cake whenever the need for a sweet escape arises.

Savoring the Sweet Simplicity: This Weight Watchers Zero Point Chocolate Mug Cake not only caters to your sweet cravings but does so without the guilt associated with traditional desserts. The beauty lies in its simplicity – a handful of pantry staples combined in a mug, microwaved to perfection, and voila! You have a warm, chocolatey indulgence that aligns with your wellness journey.

The Power of Non-Fat Greek Yogurt: One key player in this guilt-free creation is non-fat Greek yogurt. Its creamy texture not only contributes to the moistness of the cake but also adds a protein boost without extra fat. This ingredient swap is a game-changer, turning a standard mug cake into a satisfying treat that won’t compromise your commitment to healthier choices.

Zero Points, Maximum Flavor: The genius behind this recipe lies in its zero-point designation on the Weight Watchers scale. The absence of added sugar and the reliance on natural sweetness from ingredients like Greek yogurt and vanilla extract make this mug cake a smart choice for those mindful of their point allocation. It’s a testament to the idea that you can have your cake and eat it too, even on a weight management program.

A Quick Fix for Chocolate Cravings: One of the most appealing aspects of this recipe is its speed. In just a few minutes, you can whip up a single-serving delight that satisfies chocolate cravings without the need for extensive baking or cleaning up a kitchen full of utensils. It’s the perfect solution for those moments when you want a sweet treat without the time investment.

Customize to Your Liking: Feel free to make this mug cake your own by experimenting with toppings or mix-ins. Add a handful of sugar-free chocolate chips for extra decadence, or incorporate a dash of cinnamon for a unique twist. The flexibility of this recipe allows you to tailor it to your taste preferences, ensuring a personalized and enjoyable dessert experience.

A Lesson in Moderation and Mindful Eating: This Weight Watchers Zero Point Chocolate Mug Cake serves as a delightful reminder that wellness is not about deprivation but about making informed choices. By indulging in this treat, you’re practicing moderation and savoring the joy of dessert without compromising your health goals. It’s a small, delicious step towards a balanced and sustainable approach to mindful eating.

Taco fiesta bubble up casserole

Taco fiesta bubble up casserole
8 points, 7sp or 6pp/serving (same on freestyle 7sp) 7SP on blue, green or purple
PREP TIME20 mins
COOK TIME50 mins
TOTAL TIME1 hr 10 mins
COURSEMain meals
SERVINGS6
INGREDIENTS
1 lb cooked extra lean ground beef
1 7.5 oz package pillsbury biscuits (10 biscuits to the pack, the ones In the 4 value pack, if you can’t find that size you can buy the bigger size and weigh it out)
1 package Taco seasoning, 30g
1 1/3 cup salsa
2 cup diced peppers I used red, orange and yellow
1 cup diced onion I used red onion
1 cup reduced fat shredded cheese I use a 3 cheese blend
Green onion
Fat free sour cream for topping optional
INSTRUCTIONS
Cook the ground beef in a pan on the stove, add the taco seasoning and simmer for a few minutes.
Preheat oven to 350F, spray a 9×13 casserole dish and set aside.
Mix the ground beef and salsa together in a bowl.
Cut up the peppers & onion, and then cut the biscuits into 6 pieces each.
Place half of the biscuit pieces in the bottom of the casserole dish, top with half of the meat mixture, half of the peppers and onions and half of the cheese. Repeat layers and finish with the chopped green onion on top.
Loosely cover with foil and bake in oven for 35 minutes, remove foil and continue baking for 15 minutes.Let cool for 5 minutes then cut into 6 servings. 8 personal points per serving, 7sp or 6 points plus. Top with a spoon of fat free sour cream (optional)
NOTES
Points- 8
Personal Points- 8
Smart Points- Blue/Green/Purple- 7
Points Plus- 6

Sheet Pan Pineapple Chicken with Peppers & Onions

Juicy chicken thighs, sweet pineapple, and colorful bell peppers roasted together in a tangy-sweet soy glaze — a quick, vibrant weeknight dinner made on one pan.

Prep Time: 15 minutes
Cook Time: 20–25 minutes
Total Time: 35–40 minutes
Servings: 4
Dietary: Gluten-free adaptable, Dairy-free

Ingredients

  • Boneless, skinless chicken thighs (1½ lbs / 680 g), trimmed

  • Salt (1 tsp)

  • Black pepper (½ tsp)

  • Garlic powder (1 tsp)

  • Olive oil (1 tbsp)

  • Fresh pineapple chunks (2 cups) – or canned, drained

  • Red bell pepper (1), sliced into strips

  • Yellow bell pepper (1), sliced into strips

  • Small red onion (1), cut into wedges

  • Low-sodium soy sauce (2 tbsp)

  • Honey (2 tbsp)

  • Rice vinegar (1 tbsp)

  • Freshly grated ginger (1 tsp) – or ½ tsp ground

  • Garlic (2 cloves), minced

  • Fresh cilantro or green onions (2 tbsp), chopped, for garnish

  • Lime wedges, for serving

Instructions

  1. Prep the oven & pan – Preheat to 425°F (220°C). Line a large rimmed sheet pan with foil or parchment.

  2. Season chicken – In a bowl, toss chicken thighs with salt, pepper, garlic powder, and olive oil. Spread in the center of the sheet pan.

  3. Make the glaze & coat veggies – In the same bowl, whisk soy sauce, honey, rice vinegar, ginger, and garlic. Add pineapple, bell peppers, and onion; toss to coat.

  4. Arrange & drizzle – Spread veggies and pineapple around the chicken on the pan. Drizzle any remaining glaze over the top.

  5. Roast – Bake for 20–25 minutes, until chicken reaches 165°F (74°C) internally and veggies are tender.

  6. Optional char – For extra caramelization, broil on high for 2–3 minutes, watching carefully.

  7. Garnish & serve – Sprinkle with cilantro or green onions. Serve with lime wedges.

Quick Notes & Pro Tips

  • Marinate ahead: Let chicken sit in the sauce for 30 minutes (up to 2 hours) for deeper flavor.

  • Fresh vs canned pineapple: Fresh provides a brighter flavor and natural enzymes; canned works well if well-drained.

  • Spice it up: Add red pepper flakes or Sriracha to the glaze.

  • Cleanup tip: Use a rimmed sheet pan to prevent drips.

Why You’ll Love It

This sheet pan meal is colorful, fresh, and bold in flavor with minimal cleanup. It’s perfect for a weeknight dinner, yet beautiful enough for entertaining.

Step-by-Step Cooking Guide

Seasoning the Chicken

  • Toss thighs with olive oil and simple spices — this ensures even browning and juicy meat.

Making the Glaze

  • A blend of soy, honey, rice vinegar, ginger, and garlic creates a sweet-savory coating for the pineapple and veggies.

Roasting to Perfection

  • Bake until chicken is cooked through and veggies are caramelized.

  • Tip: Broiling at the end adds a charred, restaurant-style finish.

Ingredient Details & Substitutions

  • Chicken: Swap thighs for breasts (reduce bake time to 18–20 minutes).

  • Soy sauce: Use tamari or coconut aminos for a gluten-free version.

  • Vegetables: Try adding zucchini or snap peas for extra crunch.

  • Sweetener: Maple syrup works in place of honey.

Variations & Serving Suggestions

  • Make it spicy: Add chili flakes, cayenne, or diced jalapeños.

  • Serve it over: Steamed jasmine rice, quinoa, or cauliflower rice for a low-carb option.

  • Turn it into wraps: Slice the chicken and veggies and stuff into tortillas with a drizzle of the pan sauce.

Storage & Make-Ahead

  • Refrigerate: Store in an airtight container for up to 3 days.

  • Freeze: Freeze cooked chicken and veggies for up to 1 month. Thaw in the fridge before reheating.

  • Reheating: Warm in a 350°F oven or skillet over medium heat to keep the chicken juicy.

FAQs

Q: Can I use chicken breasts instead of thighs?
A: Yes — reduce the cooking time by a few minutes and check for doneness early.

Q: How can I make this vegetarian?
A: Replace chicken with firm tofu or chickpeas for a plant-based sheet pan meal.

Q: Can I prep it ahead?
A: Yes — chop veggies and marinate chicken up to 24 hours ahead for a faster assembly.

Personal Note

This recipe was inspired by my love for sweet-and-savory stir-fries but simplified for a single sheet pan. It’s a vibrant, hands-off dinner that delivers big flavor with little effort.

Your turn!
Tried this Sheet Pan Pineapple Chicken? Leave a comment or tag me on social media — I’d love to see how you serve it!

Would you like me to add a “meal prep version” (pre-portioned bowls with rice or quinoa for lunches)?
Or make it a “grilled version” for summer cooking?

Cheesy Taco Bean Dip

A warm, creamy, and cheesy dip layered with seasoned beef, beans, salsa, and melty cheese — perfect for game days, parties, or an easy weeknight snack!

Prep Time: 15 minutes
Cook Time: 25 minutes
Total Time: ~40 minutes
Servings: 8–10
Dietary: Gluten-Free (when served with GF chips), Make-Ahead Friendly

Ingredients

  • Ground beef – or use turkey sausage for a lighter option

  • Taco seasoning – one packet (or homemade)

  • Water – to help the seasoning blend

  • Refried beans – one can (vegetarian works too)

  • Cream cheese – softened for smooth mixing

  • Sour cream – for tang and creaminess

  • Salsa – chunky style preferred

  • Garlic powder – for extra flavor

  • Shredded Mexican cheese blend – cheddar, Monterey Jack, or a combo

  • Chopped green onions or jalapeños – for garnish

  • Tortilla chips – for serving

Instructions

  1. Preheat oven – Set to 350°F (175°C). Grease a 9×13-inch baking dish.

  2. Cook the meat – Brown ground beef (or sausage) in a skillet over medium heat. Drain fat, add taco seasoning + water, and simmer for 2–3 minutes.

  3. Make the creamy base – In a large bowl, mix softened cream cheese, sour cream, refried beans, salsa, and garlic powder until smooth.

  4. Combine – Fold the cooked meat into the bean-cheese mixture.

  5. Assemble – Spread evenly into the prepared dish. Top with shredded cheese.

  6. Bake – Bake uncovered for 20–25 minutes, until bubbly and slightly golden.

  7. Serve – Garnish with green onions or jalapeños. Serve warm with tortilla chips, veggies, or pita chips.

Quick Notes & Pro Tips

  • Cream cheese tip: Fully soften before mixing for a lump-free base.

  • Make-ahead: Assemble up to 24 hours ahead; refrigerate, then bake before serving.

  • Slow cooker method: Combine ingredients (minus toppings) and heat on LOW for 2–3 hours.

  • Adjust spice: Use mild or spicy salsa and add jalapeños or hot sauce for a kick.

Why You’ll Love It

This dip is hearty enough to double as a burrito filling and crowd-pleasing enough to disappear fast at parties. It’s a creamy, cheesy, taco-inspired dish with customizable heat levels and plenty of texture.

Step-by-Step Cooking Guide

Seasoning & Meat

  • Brown beef or sausage, season with taco mix, and simmer to enhance flavor.

  • Tip: Drain excess fat well to avoid a greasy dip.

Mixing the Base

  • Blend softened cream cheese, sour cream, beans, salsa, and garlic.

  • Tip: Use a hand mixer for a super smooth, creamy consistency.

Assembling & Baking

  • Spread in the dish, top with shredded cheese, and bake until bubbly.

  • Troubleshooting: If the top cheese browns too quickly, cover loosely with foil for the last 5 minutes.

Ingredient Details & Substitutions

  • Meat: Swap ground beef with turkey, chorizo, or plant-based crumbles.

  • Beans: Replace refried beans with black beans or pinto beans for texture.

  • Cheese: Use pepper jack for a spicier kick or extra cheddar for more tang.

  • Salsa: Try corn salsa or verde salsa for a flavor twist.

Variations & Serving Suggestions

  • Party version: Make mini individual dips in ramekins for easy serving.

  • Buffet style: Keep warm in a slow cooker during parties.

  • Repurpose it: Use leftovers as a burrito, quesadilla, or nacho topping.

Storage & Make-Ahead

  • Refrigeration: Store leftovers in an airtight container for up to 4 days.

  • Freezing: Not ideal (dairy may separate), but works for up to 1 month if tightly wrapped.

  • Reheating: Warm in the oven at 325°F until heated through or microwave in short bursts.

FAQs

Q: Can I make this vegetarian?
A: Yes — replace the meat with black beans, lentils, or plant-based crumbles.

Q: Can I use homemade taco seasoning?
A: Definitely. Mix 1 tbsp chili powder, 1 tsp paprika, ½ tsp cumin, ½ tsp garlic powder, ½ tsp onion powder, ½ tsp oregano, and a pinch of cayenne.

Q: Can I make this spicier?
A: Use hot salsa, add diced jalapeños, or sprinkle with crushed red pepper.

Personal Note

This recipe came together for a last-minute game-day snack — and it’s been a go-to for parties ever since. It’s hearty, versatile, and the kind of dip everyone hovers over until it’s gone.

Your turn!
If you try this Cheesy Taco Bean Dip, leave a comment or tag me on social media — I’d love to see your version!

Would you like me to add a quick “homemade taco seasoning” recipe card for readers who want to skip the packet?
Also, should I make a “party platter version” (baked in a cast-iron or served in a skillet for presentation)?

Chicken Bacon Ranch Stromboli

Cheesy, crispy, and loaded with flavor – this stromboli combines creamy ranch, smoky bacon, juicy chicken, and melty mozzarella all wrapped in golden pizza dough.

Prep Time: 15 minutes
Cook Time: 25–30 minutes
Total Time: ~45 minutes
Servings: 4–6
Dietary: Kid-friendly, Party-friendly, Freezer-friendly


Ingredients You’ll Need

  • Pizza dough (store-bought or homemade) – for a crispy, chewy crust

  • Ranch dressing – creamy, tangy base

  • Mozzarella cheese – shredded for melty goodness

  • Cooked bacon – crumbled for salty crunch

  • Cooked chicken – diced (rotisserie chicken works perfectly)

  • Red onion – thinly sliced (mild bite, optional to sauté)

  • Fresh parsley – chopped for garnish (optional)

  • Egg – beaten, for brushing over the crust

Instructions

  1. Prep the dough

    • Preheat oven to 375°F (190°C).

    • Lightly flour a surface and roll out pizza dough into a large rectangle.

    • Tip: Let the dough rest at room temp for 10–15 minutes to make rolling easier.

  2. Build the filling

    • Spread ranch dressing evenly, leaving a border around the edges.

    • Layer on mozzarella, bacon, chicken, and red onion.

  3. Roll it up

    • Starting from one long side, roll tightly like a jelly roll.

    • Pinch the seams and ends to seal. Place seam-side down on a parchment-lined baking sheet.

  4. Finish for baking

    • Brush with beaten egg for a golden crust.

    • Use a sharp knife to make shallow slits across the top (to release steam).

  5. Bake

    • Bake for 25–30 minutes, until golden brown and puffed.

  6. Slice & serve

    • Cool for 5 minutes to make slicing easier. Garnish with parsley, cut, and enjoy warm!

Quick Notes & Pro Tips

  • Don’t overstuff: Too much filling makes it hard to roll and may leak.

  • Seal well: Pinch edges to prevent cheese and ranch from oozing.

  • Cool before slicing: Let rest for 5 minutes so the filling sets.

  • Reheating: Oven or air fryer keeps it crispy; skip the microwave if you want crunch.

Why You’ll Love It

This isn’t just dinner – it’s comfort food you can hold in your hands. The ranch gives a tangy twist, bacon adds smokiness, and mozzarella ties it all together in a golden crust. Perfect for weeknight dinners, game-day snacking, or as a party appetizer.

Step-by-Step Cooking Guide

Rolling & Filling

  • Roll out dough into a rectangle. Spread ranch evenly (don’t overdo it).

  • Layer chicken, bacon, mozzarella, and onions.

  • Tip: Keep fillings light near the edges to make sealing easier.

Rolling & Sealing

  • Roll tightly, jelly-roll style, pinching seams closed.

  • Transfer carefully to a parchment-lined sheet, seam-side down.

Finishing Touches

  • Brush with egg for a glossy finish.

  • Cut shallow slits for steam release.

Baking & Cooling

  • Bake until puffed and golden.

  • Troubleshooting: If the crust browns too quickly, tent with foil for the last 10 minutes.

Ingredient Details & Substitutions

  • Pizza dough: Store-bought saves time, but homemade works for extra flavor.

  • Chicken: Leftover rotisserie or grilled chicken works best. Swap with turkey for a lighter version.

  • Cheese: Use cheddar or Monterey Jack for a different twist.

  • Ranch dressing: Swap for Caesar or garlic cream sauce if preferred.

  • Veggies: Add spinach, bell peppers, or sautéed mushrooms for more texture.

Variations & Serving Suggestions

  • Flavor twist: Add jalapeños for heat or swap ranch for Buffalo sauce for a spicy version.

  • Party-ready: Slice into bite-sized pieces for a fun appetizer.

  • Pair it: Serve with extra ranch, marinara, or sriracha mayo.

  • Balance it: Pair with a Caesar or garden salad for a fresh contrast.

Storage & Make-Ahead

  • Refrigeration: Wrap cooled slices in foil or store in an airtight container for up to 3 days.

  • Freezing: Wrap unbaked or baked stromboli tightly in plastic wrap + foil. Freeze up to 2 months. Thaw overnight in the fridge if baked before freezing.

  • Reheating: Oven or air fryer at 375°F for 5–8 minutes keeps the crust crispy.

FAQs

Q: Can I make this ahead of time?
A: Yes – assemble, wrap tightly, and refrigerate for up to 24 hours before baking.

Q: Can I use a different cheese?
A: Absolutely – cheddar, provolone, or even pepper jack add great flavor.

Q: Can I make it vegetarian?
A: Yes – swap chicken and bacon for roasted veggies and a sprinkle of feta or extra cheese.

Personal Note

This recipe was born from my love of game-day snacks and weeknight meals that don’t require utensils. It’s cheesy, hearty, and has that perfect mix of creamy, smoky, and tangy flavors that make everyone ask for seconds.

Your turn!
Tried this Chicken Bacon Ranch Stromboli? Drop a comment, rate the recipe, or tag me on social media – I’d love to see your creation!

Do you want me to add a nutrition label (calories, protein, carbs, fat per slice) to make it more like a fully optimized recipe card?
Also, should I make a party-sized version (two smaller strombolis) for serving at gatherings?

Pizza Enchiladas Ground Beef

Flour tortillas filled with beef, pepperoni, and cheese, baked under pizza sauce and melted mozzarella, perfect for family nights.

Ingredients

→ Filling

 1 lb lean ground beef
 1 cup diced yellow onion
 1 medium green bell pepper, diced
 3 oz pepperoni, chopped
 1 tablespoon chopped garlic
 1/3 cup pizza sauce
 1 tablespoon Italian seasoning
 1 cup ricotta cheese
 1 cup shredded mozzarella cheese
 1/3 cup crumbled bacon
 8 large flour tortillas

→ Topping

 2 cups pizza sauce
 2 1/2 cups shredded mozzarella cheese
 3 oz pepperoni slices
 1/4 cup crumbled bacon

Steps

Preheat oven to 375F.

Drop the lean ground beef into a large skillet over medium-high heat. Crumble the ground beef well as it cooks.

Once the ground beef is fully browned, add the diced onions, bell peppers, and chopped pepperoni to the skillet. Stir well and continue cooking until the vegetables have softened.

Add the chopped garlic to the skillet. Stir well and continue cooking for 2 minutes.

Remove the skillet from heat. Add the pizza sauce, Italian seasoning, ricotta cheese, shredded mozzarella, and crumbled bacon to the skillet. Stir until all ingredients are well combined.

Lay out the flour tortillas and scoop some of the ground beef mixture down the center of each tortilla. Roll up the tortillas tightly.

Spray a baking sheet with cooking spray. Place the rolled-up tortillas onto the baking sheet.

Pour the pizza sauce over the rolled-up tortillas. Sprinkle the shredded mozzarella, pepperoni slices, and crumbled bacon on top.

Place the baking sheet in the oven and bake the enchiladas until the cheese is fully melted and just starting to brown around the edges, about 20 to 25 minutes.

Serve warm and enjoy your pizza enchiladas.

Required Tools

  • Large skillet
  • Baking sheet
  • Cooking spray

Allergy Information

Always check each ingredient for allergens, and consult a medical professional if unsure.

Nutritional Information (per serving)

These details are shared for general guidance and don’t replace professional advice.


Low Point Hearty Beef Enchiladas

Ingredients

  • 2 packages of the Mission White Corn  Tortillas, super size
  • 1 ( 16 oz. ) can of fat free refried beans
  • 1 (20 oz.) can red enchilada sauce
  • 2 Tbsp diced olives
  • 1 (4 oz.) can green chiles
  • 1 pound 96%  ground lean beef or 99% ground turkey
  • 1/2 cup reduced fat shredded  cheese ( I use Trader Joe’s lite 3 cheese blend)
  • 1/2 Tbsp taco seasoning

Instructions

  1. Preheat oven to 350 degrees.
  2. Spray a large skillet pan with non stick cooking spray. Cook ground beef over medium heat until meat is no longer pink.
  3. Add taco seasoning and 2 tsp of water and reduce heat to low for 60 seconds. Remove from heat and set aside.
  4. In a large mixing bowl combine, refried beans, green chiles and cooked ground beef. Stir until well combined.
  5. Spray a 13 x 9 baking dish or 2 ( 8 x 8) baking dish with non stick cooking spray.
  6. If you prefer the tortilla crispy, then you will want to first cook tortillas in a skillet, sprayed with non stick cooking spray for 1-2 over medium heat on each side.
  7. Then top each tortilla with 1/4 cup of beef mixture. Roll up and place seam down in prepared baking dish.
  8. IIf you use two (8 x 8 ) baking dishes-you will add 7 enchiladas per dish.
  9. Repeat for all 14 tortillas.
  10. Pour enchilada sauce evenly over enchiladas. Sprinkle cheese evenly over the top of sauce.Add diced olives.
  11. Bake for 20 minutes or until bubbly.

Makes 14 enchiladas

3 Points® per enchilada

Notes

  • Source” Thepounddropper.com