Mediterranean Diet for Beginners: Your Ultimate Guide to Healthy Living

The Mediterranean Diet emphasizes whole, plant-based foods and healthy fats, focusing on overall eating patterns rather than strict rules. It encourages:

Buy vitamins and supplements

Discover more
Bread
bread
wheat

  • A generous amount of whole grains like brown rice and whole-wheat bread.

This simple yet powerful way of eating is linked to a significantly lower risk of coronary artery disease (CAD) and has become a gold standard for promoting heart health, managing weight, and reducing inflammation.

Ketosis supplement guide

 The Benefits of the Mediterranean Diet

The Mediterranean diet shines because it supports your health on many fronts, including:

Groceries

Lowering the risk of cardiovascular disease (heart attack, stroke).

Buy vitamins and supplements
  •  Helping maintain a healthy weight.
  • Promoting healthy blood sugar, blood pressure, and cholesterol levels.
  •  Reducing the risk of metabolic syndrome Improving gut health by encouraging a healthy balance of gut bacteria.
  • Decreasing cancer risk thanks to antioxidant-rich foods.
  •  Supporting brain health and slowing age-related cognitive decline.
  • Promoting longer life.

Its secret lies in what it limits (saturated fat, trans fat, refined carbs, and excess sodium) and what it encourages (unsaturated fats, fiber, antioxidants, and nutrient-dense foods).

Think of it like a choir: no single food or nutrient stands alone. Together, the foods in the Mediterranean Diet harmonize to create an environment where your body can truly thrive.


Mediterranean Diet Food List

Here’s a snapshot of what to load up on:

Groceries
  • Vegetables: Tomatoes, spinach, cucumbers, artichokes, zucchini.
  • Fruits: Berries, oranges, figs, melons, grapes.
  • Whole grains: quinoa, brown rice, barley, farro.
  • Nuts and seeds: Walnuts, almonds, sunflower seeds, flaxseeds.
  • Legumes: Chickpeas, lentils, black beans, white beans.
  • Healthy fats: Extra virgin olive oil, avocados.
  • Fish: Salmon, sardines, tuna, mackerel.
  • Poultry: Skinless chicken, turkey.
  • Dairy: Natural cheese, plain Greek yogurt.
  • Eggs: In moderation.
  • Herbs and spices: basil, oregano, rosemary, and cumin.

Mediterranean Diet: Serving Goals

Here’s a simple guide to how much of each food group to aim for:

Vegetable stir-fry kit

Breakfast

  • Greek yogurt with berries and walnuts
  • Steel-cut oats with  fruit and flaxseed
  • Vegetable omelet (mostly egg whites)

Lunch Quinoa salad with roasted vegetables

  • Whole-grain wrap with hummus and veggies
  • Bulgur tabbouleh with lemon and herbs

Dinner

  • Baked salmon with a cucumber and tomato salad
  • Grilled chicken over sautéed greens and cannellini beans
  • Roasted veggie pizza on whole-grain crust

 Snacks

  • Handful of nuts and seeds
  • Fresh seasonal fruit
  • Veggies with hummus
  • Whole-grain crackers with Greek yogurt dip

 Foods to Limit

While the Mediterranean diet is flexible, it’s best to avoid or greatly limit:

Buy vitamins and supplements
  •  Sugary drinks (soda, sweetened juices)
  •  Processed meats (bacon, sausage)
  •  Highly processed foods (packaged snacks, fast food)
  •  Refined grains (white bread, white rice)
  •  Foods high in saturated fat and sodium
  •  Commercially baked sweets and desserts

The Mediterranean Diet Pyramid

The Mediterranean Diet Pyramid is a visual guide that shows how often to eat different foods:

Groceries
  • Base:  Vegetables, fruits, whole grains, legumes, nuts, seeds, olive oil (daily)
  • Middle: Fish, poultry, dairy (weekly)
  • Top:  Red meat and sweets (rarely)

It’s not just about food, though. The Mediterranean lifestyle also values physical activity,diet sharing meals with family and friends, and enjoying life at a slower pace Final Thoughts

The Mediterranean diet isn’t just a trend—it’s a time-tested approach to eating that supports your heart, mind, and body.  By focusing on fresh, colorful foods and enjoying meals in a balanced, thoughtful way, you’re investing in your health for the long term.

Vegetable stir-fry kit

Ready to give it a try? Start small: drizzle a little extra virgin olive oil over your next salad, swap white bread for whole grain, or plan a fish dinner this week. Over time, these little changes add up to big results!

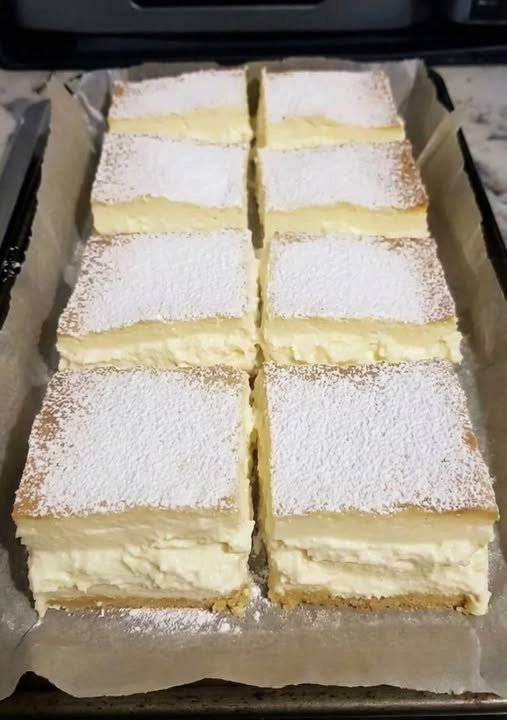
3-Ingredient Yogurt Cake

3-Ingredient Yogurt Cake

Yield: 1 round cake (8 slices)
Prep Time: 10 minutes
Bake Time: 45–55 minutes

This cake is soft, creamy, and lightly sweet. It’s perfect for tea time or as a simple dessert when you want something comforting with very few ingredients.


🧾 Ingredients

  • 500 g (2 cups) plain yogurt
    (Greek yogurt or any thick yogurt works best)

  • 4 large eggs

  • ½ cup (100 g) sugar

✔ Optional for flavor (not counted as ingredients):

  • 1 teaspoon vanilla extract

  • Powdered sugar for dusting


👩‍🍳 Instructions

1. Prepare the Pan and Oven

Preheat the oven to 170°C (340°F).
Line a round cake pan with parchment paper, allowing some paper to rise up the sides. This helps remove the cake easily after baking.


2. Mix the Batter

In a large bowl, add the yogurt and sugar.
Whisk until smooth and creamy.

Add the eggs one at a time, whisking well after each addition until the mixture is fully blended and silky.


3. Pour and Level

Pour the batter into the prepared pan.
Gently tap the pan on the counter once or twice to release air bubbles.


4. Bake

Place the pan in the oven and bake for 45–55 minutes, until the top is lightly golden and the center is set.

The cake should look firm around the edges and slightly soft in the center.


5. Cool

Remove from the oven and let the cake cool completely in the pan.
As it cools, it will gently settle and become more compact.


6. Serve

Lift the cake out using the parchment paper.
Dust with powdered sugar if desired.
Slice and serve chilled or at room temperature.


🌟 Helpful Tips

  • Use thick yogurt for the best texture.

  • Do not overbake; this keeps the cake creamy inside.

  • Refrigerate for 2–3 hours for clean slices.

  • Store in the refrigerator up to 3 days.

Savory Pumpkin & Cheese Patties

Savory Pumpkin & Cheese Patties

Yields: 4–6 patties
Prep Time: 15 minutes
Cook Time: 10–12 minutes

These pumpkin patties are soft inside, lightly crisp outside, and full of fresh herb flavor. They are perfect as a snack, side dish, or light meal. The cheese adds richness and helps with structure, while dill and green onions give freshness.


🧾 Ingredients

  • 200 g pumpkin, finely grated

  • 1 cup mozzarella or cheddar cheese, shredded (optional but recommended for better texture)

  • 1 small bunch fresh dill, finely chopped

  • 1 small bunch green onions, finely chopped

  • 1 clove garlic, finely minced

  • 1 large egg, lightly beaten

  • 3–4 tablespoons all-purpose flour or breadcrumbs, added gradually

  • Salt, to taste

  • Black pepper, to taste

  • 2 tablespoons olive oil or butter, for cooking


👩‍🍳 Instructions

1. Prepare the Pumpkin

Grate the pumpkin using the large holes of a grater.
If the pumpkin releases a lot of liquid, place it in a clean kitchen towel and gently press to remove excess moisture.
This helps the patties hold together better and improves their texture.


2. Combine the Vegetables

Place the grated pumpkin in a mixing bowl.
Add the chopped dill, green onions, and minced garlic.
If using cheese, add it now and mix gently until evenly distributed.


3. Bind the Mixture

Pour in the beaten egg.
Season with salt and black pepper.
Mix until everything is well combined.

Gradually add the flour or breadcrumbs, one tablespoon at a time.
Mix after each addition until the mixture becomes thick enough to shape without falling apart.
The mixture should be moist but not watery.


4. Shape the Patties

Divide the mixture into 4–6 equal portions.
Gently shape each portion into a round patty about 2–3 cm (1 inch) thick.
Place them on a plate while you heat the pan.


5. Cook the Patties

Heat olive oil or butter in a non-stick skillet over medium heat.
Carefully place the patties into the pan, leaving space between them.

Cook for 4–5 minutes on each side, turning once, until they are golden and cooked through.


6. Serve

Transfer the patties to a plate lined with paper towel to absorb any excess oil.
Serve warm with:

  • Greek yogurt

  • Sour cream

  • Garlic yogurt sauce

  • Or a fresh salad


🌟 Helpful Tips

  • You can bake these at 180°C (350°F) for 20–25 minutes for a lighter option.

  • Add paprika or cumin for extra flavor.

  • These patties freeze well after cooking.

Healing Turmeric Vegetable Soup with Cauliflower, Carrots & Celery

This Healing Turmeric Vegetable Soup is a soothing, anti-inflammatory bowl of comfort that’s perfect for boosting immunity, calming digestion, and warming the body from the inside out. Made with simple vegetables, fragrant spices, and fresh lemon, this soup is light yet deeply satisfying. Turmeric and cumin bring earthy warmth, while cauliflower and carrots add gentle sweetness and texture. It’s ideal for detox days, cold evenings, or whenever you need a nourishing reset.

Ingredients

  • 1 tablespoon olive oil
  • 1 yellow onion, finely chopped
  • 3 garlic cloves, minced
  • 2 celery stalks, finely chopped
  • 2 large carrots, peeled and sliced into rounds
  • 2 cups cauliflower florets
  • 1 teaspoon ground turmeric
  • ½ teaspoon ground cumin
  • Salt and black pepper, to taste
  • 4 cups low-sodium vegetable broth
  • 1 cup water
  • Juice of ½ lemon
  • ¼ cup chopped fresh parsley, plus extra for garnish

Instructions

  1. Sauté the aromatics
    Heat the olive oil in a large pot or Dutch oven over medium heat. Add the chopped onion and cook for 3–4 minutes, stirring occasionally, until soft and translucent. This step builds the soup’s flavor base.
  2. Add garlic and vegetables
    Stir in the minced garlic and cook for 30 seconds until fragrant. Add the chopped celery and sliced carrots. Sauté for another 3–4 minutes, allowing the vegetables to soften slightly and release their natural sweetness.
  3. Incorporate the spices
    Sprinkle in the turmeric and ground cumin. Stir well to coat the vegetables evenly. Cooking the spices briefly in oil helps awaken their aroma and enhances their healing properties. Season lightly with salt and black pepper.
  4. Simmer the soup
    Add the cauliflower florets, vegetable broth, and water. Stir to combine, then bring the soup to a gentle boil. Reduce the heat to low, cover partially, and let it simmer for 20–25 minutes, or until the vegetables are tender but not mushy.
  5. Finish with brightness
    Once the soup is cooked, turn off the heat. Stir in the fresh lemon juice and chopped parsley. Taste and adjust seasoning with more salt, pepper, or lemon juice if needed.
  6. Serve and enjoy
    Ladle the soup into bowls and garnish with extra fresh parsley. Serve warm on its own or with whole-grain toast or a simple side salad.

Tips & Variations

  • For a creamier texture, blend half the soup and return it to the pot.
  • Add a pinch of red pepper flakes or fresh ginger for extra warmth.
  • This soup stores well in the refrigerator for up to 4 days and tastes even better the next day.

This golden, healing soup is gentle, flavorful, and deeply nourishing—perfect for restoring balance and comfort with every spoonful. 🌿✨

Mexican Salmon Patties

Mexican Salmon Patties

Prep Time: 20 minutes
Cook Time: 10–15 minutes
Servings: 6 patties

Flavorful, hearty, and crisp on the outside while tender inside. These patties combine salmon, beans, corn, and fresh herbs for a balanced Tex‑Mex-inspired dish. Perfect for lunch, dinner, or meal prep.


🧾 Ingredients

  • 25 oz (1 can) canned salmon, drained & deboned

  • Juice of 2 limes

  • 1½ sleeves original saltine crackers, crushed (or other crackers/binder)

  • 15 oz can black beans, drained & rinsed

  • 15 oz can corn, drained

  • 2 tablespoons mayonnaise

  • 4 eggs

  • 1 medium-large onion, minced

  • 1 cup fresh cilantro, chopped

  • 3–4 jalapeños, diced (adjust seeds for heat preference)

  • 4 tablespoons taco seasoning

  • 2 tablespoons garlic powder

  • Salt and pepper, to taste

  • Vegetable oil, for frying


👩‍🍳 Instructions

Step 1: Mix the Patty Mixture

  1. In a large bowl, combine:

    • Drained salmon

    • Lime juice

    • Crushed crackers

    • Black beans

    • Corn

    • Mayonnaise

    • Eggs

    • Minced onion

    • Chopped cilantro

    • Diced jalapeños

    • Taco seasoning

    • Garlic powder

    • Salt and pepper

  2. Mix gently until everything is evenly combined.

  3. If mixture feels too loose, add more crushed crackers until it holds together.


Step 2: Form the Patties

  1. Using your hands, shape the mixture into 6 evenly sized patties.

  2. Make them thick enough to hold together but not so large that they won’t cook through.

  3. Optional: Chill patties in the fridge for 10–15 minutes for better stability.


Step 3: Fry the Patties

  1. Heat enough vegetable oil in a skillet over medium-high heat to coat the bottom.

  2. Carefully place patties into hot oil.

  3. Fry for 3–4 minutes on each side, until golden brown and cooked through.

  4. Use a spatula to flip carefully to maintain shape.


Step 4: Drain & Serve

  1. Remove patties from skillet and place on paper towels to drain excess oil.

  2. Serve hot with:

    • Cilantro cream sauce

    • Salsa or ranch

    • Fresh salad or grilled veggies


🌟 Tips for Success

  • Ensure salmon is well-drained so patties hold together.

  • Adjust jalapeño seeds to control heat.

  • Use enough oil to prevent sticking and ensure even browning.

  • Leftovers reheat well: re-sear in a skillet for crispness.


🍽 Serving Suggestions

  • Serve in tacos or wraps with fresh veggies.

  • Pair with cilantro-lime rice for a full meal.

  • Top with avocado slices or a dollop of yogurt for creaminess.

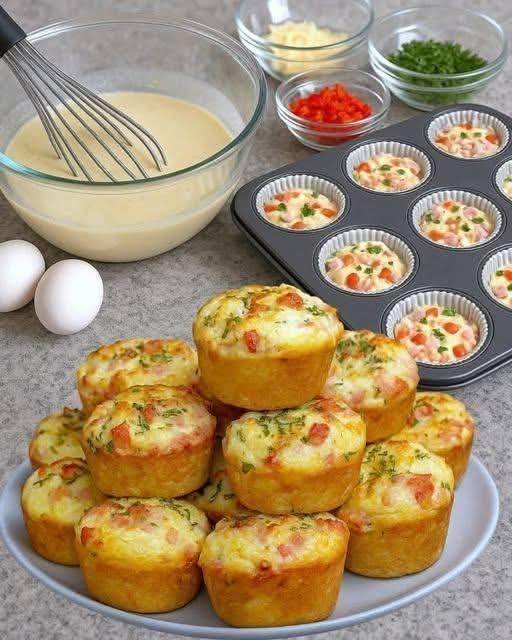
Easy and Fluffy Vanilla Muffins

Easy and Fluffy Vanilla Muffins

Prep Time: 10 minutes
Bake Time: 20–25 minutes
Yields: 12 standard muffins

Soft, airy, and golden muffins that are simple to make and perfect for breakfast, snacks, or dessert.


🧾 Ingredients

  • 2 eggs

  • 125 ml (½ cup) vegetable oil

  • 250 ml (1 cup) milk

  • 200 g (1 cup) sugar

  • 360 g (3 cups) all-purpose flour

  • 1 teaspoon baking powder

  • ½ teaspoon salt

  • 100 g (⅔ cup) raisins or chocolate chips (optional)

  • 1 teaspoon vanilla extract (optional, for extra flavor)


👩‍🍳 Step-by-Step Instructions

🔥 Step 1: Prepare Oven and Muffin Pan

  1. Preheat oven to 375°F (190°C).

  2. Line a 12-cup muffin tin with paper liners or grease each cup lightly with butter or oil.


🥄 Step 2: Whisk Wet Ingredients

  1. In a large mixing bowl, whisk eggs and sugar until pale and slightly frothy.

  2. Add vegetable oil, milk, and vanilla extract (if using).

  3. Whisk until fully combined.


🥣 Step 3: Combine with Dry Ingredients

  1. Sift flour, baking powder, and salt directly into the wet mixture.

  2. Use a spatula or wooden spoon to fold gently until just combined.

    • Stop mixing when flour streaks disappear to keep muffins light and fluffy.


🍫 Step 4: Add Mix-ins (Optional)

  1. Gently fold in raisins or chocolate chips if desired.


🧁 Step 5: Fill Muffin Cups

  1. Divide batter evenly among the 12 cups, filling about ¾ full.

  2. Place the tin in the center of the oven.


🔥 Step 6: Bake

  1. Bake for 20–25 minutes.

  2. Muffins are done when:

    • Tops are golden brown

    • They spring back when lightly pressed

    • Toothpick inserted comes out clean or with a few moist crumbs


❄ Step 7: Cool

  1. Let muffins cool in the tin for 5 minutes.

  2. Transfer to a wire rack to cool completely.


🌟 Pro-Tips for Success

  • Room Temperature Ingredients: Eggs and milk at room temperature give a smoother, well-incorporated batter.

  • Storage: Keep in an airtight container at room temperature for up to 3 days. Freeze for up to 2 months.

  • Optional Flavors: Add cinnamon, nutmeg, or lemon zest for a flavor twist.

Crispy Eggplant & Mozzarella Bake

Crispy Eggplant & Mozzarella Bake

Prep Time: 10 minutes
Cook Time: 15–20 minutes
Servings: 3–4 portions

Golden, crisp eggplant layered with juicy tomatoes and melted mozzarella. Light, comforting, and perfect as a main dish or side.


🧾 Ingredients

  • 2 large eggplants

  • 3 eggs

  • 180 g mozzarella cheese, shredded

  • 6–8 cherry tomatoes (or 2 medium tomatoes), sliced

  • 1 tablespoon mayonnaise or Greek yogurt

  • Olive oil, for brushing

  • Breadcrumbs or Panko (for coating)

  • Sea salt, to taste

  • Ground black pepper, to taste

Optional

  • Fresh basil leaves (for garnish)

  • Dried oregano (for flavor)


👩‍🍳 Step-by-Step Instructions

🍆 Step 1: Prepare the Eggplant

  1. Wash the eggplants and trim off the ends.

  2. Slice into rounds about ½ inch (1 cm) thick.

  3. If desired, sprinkle lightly with salt and let sit for 5 minutes.

  4. Pat dry with a paper towel to remove extra moisture.


🥚 Step 2: Make the Egg Coating

  1. In a shallow bowl, whisk together:

    • Eggs

    • Mayonnaise (or yogurt)

    • Salt

    • Black pepper

  2. Mix until smooth.


🍞 Step 3: Coat the Slices

  1. Dip each eggplant slice into the egg mixture.

  2. For extra crispness, coat with breadcrumbs or Panko.

  3. Place coated slices on a plate while preparing the pan.


🧀 Step 4: Assemble the Layers

  1. Preheat oven to 400°F (200°C).

  2. Line a baking tray with parchment paper and lightly brush with olive oil.

  3. Arrange half of the eggplant slices on the tray.

  4. Top each slice with:

    • A slice of tomato

    • A generous pinch of mozzarella

    • A sprinkle of dried oregano (optional)

  5. Add another eggplant slice on top to form stacks
    (or bake as single layers if preferred).


🔥 Step 5: Bake

  1. Lightly brush the tops with olive oil.

  2. Bake for 15–20 minutes until:

    • Eggplant is tender

    • Cheese is melted and lightly golden

    • Coating is crisp


🌿 Step 6: Serve

  1. Garnish with fresh basil leaves.

  2. Serve warm for best texture and flavor.


🌟 Helpful Tips

✔ Use Panko for extra crunch
✔ Add garlic powder for extra flavor
✔ Serve with a green salad or yogurt dip
✔ Best enjoyed fresh and warm

Creamy Milk & Fruit Terrine (Agar-Agar Dessert)

Creamy Milk & Fruit Terrine (Agar-Agar Dessert)

Prep Time: 15 minutes
Setting Time: 2–3 hours
Servings: 6–8 slices

This colorful terrine is a light, refreshing dessert made with fresh fruit and creamy milk, set naturally with agar-agar. Each slice looks like stained glass and tastes cool, smooth, and fruity.


🧾 Ingredients

🍊 Fruit Layer

  • 2–3 tangerines, peeled and separated

  • 2 kiwis, peeled and sliced

  • 1–2 persimmons, peeled and sliced

  • ½ grapefruit, peeled and segmented (white pith removed)

  • 1 apple, cored and finely chopped

  • 1 banana, sliced


🥛 Milk Layer

  • 500 ml (2 cups) milk

  • 3–4 tablespoons sugar or honey (adjust to taste)

  • 8 g agar-agar powder

  • 50 ml water (to dissolve agar)

  • 1 teaspoon vanilla extract (optional)


👩‍🍳 Step-by-Step Instructions

🍓 Step 1: Prepare the Fruit

  1. Wash, peel, and slice all fruits as listed.

  2. Arrange the fruit evenly inside a rectangular glass dish or silicone loaf mold.

  3. Mix colors and shapes for a bright, mosaic look in every slice.


🌿 Step 2: Dissolve the Agar-Agar

  1. In a small bowl, combine agar-agar powder and water.

  2. Stir until smooth and lump-free.

  3. Let it sit for 1 minute.


🔥 Step 3: Heat the Milk Mixture

  1. Pour milk and sugar (or honey) into a saucepan.

  2. Heat gently over medium heat until warm.

  3. Add the agar mixture to the milk and stir well.


🍲 Step 4: Activate the Agar-Agar

  1. Bring the mixture to a gentle boil while stirring continuously.

  2. Let it boil for 1–2 minutes to fully activate the agar.

  3. Remove from heat and stir in vanilla extract.


🥄 Step 5: Assemble the Terrine

  1. Let the milk mixture cool for 3–5 minutes (it must remain liquid).

  2. Slowly pour over the arranged fruit.

  3. Use a spoon to gently press down floating fruit so everything stays covered.


❄ Step 6: Set and Chill

  1. Allow the dish to cool at room temperature until it begins to firm.

  2. Transfer to the refrigerator for 2–3 hours until fully set and chilled.


🔪 Step 7: Serve

  1. Run a thin knife around the edges of the dish.

  2. Turn out onto a serving plate.

  3. Slice and serve chilled.


🌟 Helpful Tips

✔ Use firm fruit for clean slices
✔ Adjust sweetness to taste
✔ Coconut milk can replace regular milk
✔ Add a little citrus zest for extra aroma
✔ Best served cold

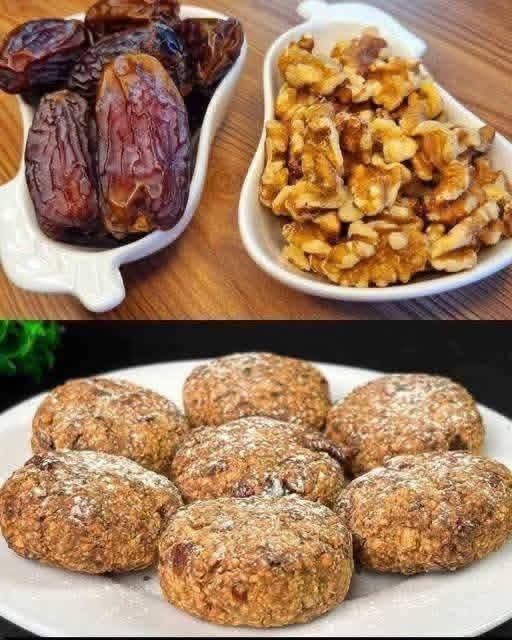
No-Bake Nut & Date Bars

No-Bake Nut & Date Bars

Prep Time: 15 minutes
Chilling Time: 1–2 hours
Yield: 8–10 bars

Naturally sweet, rich in texture, and packed with nuts and fruit, these no-bake bars are perfect for quick snacks or healthy treats. No oven needed and very easy to prepare.


🧾 Ingredients

  • 75 g (½ cup) almonds

  • 50 g (½ cup) walnuts

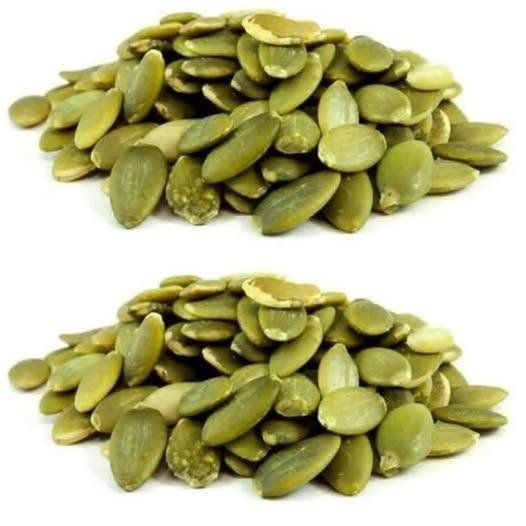
  • 50 g (½ cup) pumpkin seeds

  • 250 g (1⅔ cups) dates, pitted

  • 100 g (⅓ cup) natural peanut butter (creamy or crunchy)

  • 40 g (¼ cup) dried cranberries

  • Optional: a small pinch of sea salt (for flavor balance)


👩‍🍳 Step-by-Step Instructions

🥜 Step 1: Prepare the Nuts & Seeds

  1. Add almonds, walnuts, and pumpkin seeds to a food processor.

  2. Pulse several times until they are chopped into small, chunky pieces.
    (Do not grind into powder — a little texture gives a better bite.)

  3. Transfer the chopped mixture to a large mixing bowl.


🍯 Step 2: Process the Dates

  1. Make sure all dates are pitted.

  2. If they are firm, soak them in warm water for 5 minutes, then drain well.

  3. Place the dates in the food processor and blend until they form a thick, sticky paste.


🥣 Step 3: Combine the Mixture

  1. Add the date paste to the bowl with the nuts and seeds.

  2. Add peanut butter and dried cranberries.

  3. Mix using a strong spoon or lightly oiled hands until:

    • All ingredients are evenly combined

    • The mixture holds together when pressed


📐 Step 4: Press into the Pan

  1. Line a small rectangular or square pan (about 8 × 4 inches) with parchment paper, leaving extra paper on the sides.

  2. Transfer the mixture into the pan.

  3. Press down firmly and evenly using:

    • A spatula

    • Or the bottom of a flat glass

This helps the bars hold their shape when sliced.


❄ Step 5: Chill to Set

  1. Place the pan in the refrigerator for 1–2 hours until firm.
    (For faster setting, you can freeze for 30 minutes.)


🔪 Step 6: Slice and Store

  1. Lift the firm block out using the parchment paper.

  2. Cut into bars or small squares with a sharp knife.


🧊 Storage Tips

Refrigerator:
Store in an airtight container for up to 2 weeks.

Freezer:
Wrap bars individually in parchment paper and store in a freezer-safe bag for up to 3 months.

Golden Homemade Seeded Bread

Golden Homemade Seeded Bread

Prep Time: 20 minutes
Rising Time: 1½ – 2 hours
Bake Time: 30–35 minutes
Servings: 1 loaf (8–10 slices)

Soft inside, golden outside, and lightly crisp on top with beautiful seeds. This homemade bread is perfect for breakfast, sandwiches, or serving warm with butter.


🧾 Ingredients

  • 500 g all-purpose flour

  • 10 g salt

  • 10 g sugar

  • 10 g dry yeast

  • 300 ml warm water (about 110°F / 43°C – lukewarm)

  • 2 tablespoons olive oil or melted butter

  • 1 tablespoon milk (optional, for brushing)

Topping (optional)

  • Sesame seeds

  • Poppy seeds

  • Mixed seeds or “everything” seasoning


👩‍🍳 Step-by-Step Instructions

🌿 Step 1: Activate the Yeast

  1. In a small bowl, add warm water, sugar, and dry yeast.

  2. Stir gently and let it rest for 5–10 minutes.

  3. The mixture should become foamy and bubbly.
    This shows the yeast is active and ready.


🥣 Step 2: Mix the Dough

  1. In a large mixing bowl, combine the flour and salt.

  2. Make a well in the center.

  3. Pour in the yeast mixture and olive oil.

  4. Stir with a spoon or spatula until a soft dough forms and no dry flour remains.


✋ Step 3: Knead the Dough

  1. Transfer the dough to a lightly floured surface.

  2. Knead for 8–10 minutes until:

    • Smooth

    • Elastic

    • Soft

  3. If the dough feels sticky, sprinkle in small amounts of flour as needed.

(You can also knead using a stand mixer with a dough hook for 5–7 minutes.)


🕰 Step 4: First Rise

  1. Lightly grease a clean bowl with oil.

  2. Place the dough inside and turn once to coat lightly.

  3. Cover with a cloth or plastic wrap.

  4. Let rise in a warm place for about 1 hour, until doubled in size.


🥖 Step 5: Shape the Loaf

  1. Gently press the dough to remove excess air.

  2. Shape into an oval or round loaf.

  3. Place on a baking tray lined with parchment paper.

  4. Use a sharp knife to make diagonal cuts across the top for a decorative look.


🌤 Step 6: Second Rise

  1. Cover loosely.

  2. Let rise again for 30–45 minutes until slightly puffed.

This rise helps create a light, soft texture.


🔥 Step 7: Add Topping & Bake

  1. Preheat oven to 400°F (200°C).

  2. Brush the top of the loaf with milk (optional) for a golden finish.

  3. Sprinkle seeds or seasoning evenly over the top.

  4. Bake for 30–35 minutes until:

    • Top is golden

    • Bottom sounds hollow when tapped


❄ Step 8: Cool Before Slicing

  1. Transfer bread to a wire rack.

  2. Let cool for at least 20 minutes before slicing.

Cooling allows the bread to set properly and slice beautifully.


🌟 Tips for Best Bread

✔ Use lukewarm water (not hot)
✔ Add seeds inside dough for extra texture
✔ Store covered for up to 2 days
✔ Freeze slices for later use
✔ Brush with butter after baking for extra softness

Sweet Spiral Dough Cake with Dried Fruits & Nuts

Sweet Spiral Dough Cake with Dried Fruits & Nuts

Prep Time: 25 minutes
Rising Time: 1½–2 hours
Bake Time: 30–35 minutes
Servings: 8–10 slices
Pan Size: 9-inch (22–24 cm) round pan

A soft, fluffy yeast cake shaped into a beautiful spiral and filled with dried fruits and crunchy nuts. Lightly sweet, golden on the outside, and tender inside.


🥚 Dough Ingredients

  • 2 eggs (room temperature)

  • 4 tablespoons sugar

  • 400 ml warm milk (lukewarm, not hot)

  • 1 packet (7 g) dry yeast

  • 100 ml vegetable oil

  • 780 g all-purpose flour (add gradually)

  • ½ teaspoon salt

  • 70 g butter (softened)


🍇 Filling & Topping

  • ½ cup raisins or dried cranberries

  • ½ cup chopped nuts (almonds or walnuts)

  • 1 egg yolk + 1 tablespoon milk (for brushing)

  • Honey or apricot jam (for glazing)


🥣 Step 1: Activate the Yeast

  1. In a large mixing bowl, add warm milk, sugar, and dry yeast.

  2. Stir gently and leave for 5–10 minutes until the surface becomes foamy.
    This shows the yeast is active.


🥄 Step 2: Mix the Dough

  1. Add the eggs and vegetable oil to the yeast mixture.

  2. Mix well until smooth.

  3. Begin adding flour gradually along with salt.

  4. Stir using a wooden spoon or spatula until a soft dough forms.


✋ Step 3: Knead the Dough

  1. Add the softened butter to the dough.

  2. Knead by hand or with a mixer for 8–10 minutes until:

    • Smooth

    • Elastic

    • Soft

    • No longer sticky

  3. Place the dough into a lightly oiled bowl.

  4. Cover with a clean cloth.

  5. Let rise in a warm place for 1 to 1½ hours, until doubled in size.


🌀 Step 4: Shape the Spiral

  1. Gently press the risen dough to remove air.

  2. Transfer to a lightly floured surface.

  3. Roll into a large rectangle (about ½ cm thick).

  4. Sprinkle dried fruits and chopped nuts evenly over the surface.

  5. Roll tightly from one long side into a long log, like a roll cake.


🧁 Step 5: Arrange in the Pan

  1. Grease a round baking pan.

  2. Place the dough log into the pan, starting from the center and winding outward to form a spiral shape.

  3. Cover and let rise again for 30 minutes until slightly puffed.


🔥 Step 6: Bake

  1. Preheat oven to 350°F (180°C).

  2. Mix egg yolk and milk and brush over the dough.

  3. Bake for 30–35 minutes until:

    • Top is golden

    • The cake feels light

    • Bottom sounds hollow when tapped


✨ Step 7: Glaze & Finish

  1. While the cake is warm, brush the top with honey or warmed jam for shine.

  2. Sprinkle with extra chopped nuts if desired.

  3. Allow to cool slightly before slicing.


🌟 Tips for Best Results

✔ Use lukewarm milk (not hot)
✔ Add flour slowly for soft dough
✔ You can add cinnamon or vanilla to the filling
✔ Serve warm or at room temperature
✔ Store covered up to 2 days at room temperature

Apple Hurricane Cake 

Apple Hurricane Cake

Prep Time: 20 minutes
Bake Time: 35–40 minutes
Servings: 8 slices
Pan Size: 8–9 inch (20–22 cm) round pan

A soft apple cake with a beautiful custard spiral baked right on top. Moist inside, lightly golden outside, and stunning when sliced.


🥚 Cream Filling (Custard Spiral)

Ingredients

  • 2 egg yolks

  • ¼ cup (60 g) sugar

  • 1 tablespoon (15 g) cornstarch

  • 1 cup (240 ml) milk

  • 1 teaspoon vanilla essence

Method

  1. In a small saucepan, whisk together the egg yolks, sugar, and cornstarch until smooth.

  2. Slowly pour in the milk while whisking continuously to prevent lumps.

  3. Place the pan over medium heat and stir constantly using a whisk or spatula.

  4. Cook until the mixture thickens into a smooth, creamy custard.

  5. Remove from heat and stir in the vanilla essence.

  6. Transfer to a bowl and cover with plastic wrap touching the surface.

  7. Allow it to cool completely before using.


🍏 Apple Preparation

Ingredients

  • 3 medium apples (peeled and diced)

Method

  1. Peel, core, and cut the apples into small cubes (about 1 cm).

  2. Set aside for later use.


🍰 Cake Batter

Ingredients

  • 2 whole eggs

  • 2 egg whites (leftover from custard)

  • ½ cup (100 g) sugar

  • Pinch of salt

  • ½ cup (120 ml) milk

  • ⅓ cup (80 ml) vegetable oil or melted butter

  • 2 cups (250 g) all-purpose flour

  • 1 tablespoon (12 g) baking powder

  • Prepared diced apples

Method

  1. In a large bowl, beat the whole eggs, egg whites, sugar, and salt until pale and frothy.

  2. Add the milk and oil and mix until smooth.

  3. Sift in the flour and baking powder.

  4. Fold gently until just combined. Do not overmix.

  5. Fold in the diced apples evenly.


🌪 Assembly (Hurricane Design)

  1. Preheat oven to 350°F (180°C).

  2. Grease and line an 8–9 inch round pan with parchment paper.

  3. Pour the apple batter into the pan and level the top.

  4. Transfer the cooled custard to a piping bag or plastic bag with the tip cut off.

  5. Starting from the center, pipe the custard in a spiral pattern moving outward to the edge.


🔥 Baking

  1. Place the pan in the center of the oven.

  2. Bake for 35–40 minutes.

  3. The cake is ready when:

    • The top is lightly golden

    • A toothpick inserted into the cake portion comes out clean


🍽 Cooling & Serving

  1. Let the cake cool in the pan for 10 minutes.

  2. Remove from the pan and cool completely on a rack.

  3. Dust generously with powdered sugar to highlight the spiral pattern.

  4. Slice and serve.


✅ Tips

  • Use firm apples for best texture.

  • Custard must be fully cooled before piping.

  • Store covered at room temperature for 1 day or refrigerate up to 3 days.

  • Best served slightly warm or at room temperature.

Perfect Crinkle Top Brownies

Perfect Crinkle Top Brownies

Rich, fudgy, and decadent, these brownies feature a dense, chewy center topped with the classic paper-thin, crackly crust that makes every bite irresistible.


Ingredients (8×8-inch pan, 16 squares)

  • 1/2 cup (115 g) unsalted butter, melted

  • 1 cup (200 g) granulated sugar

  • 2 large eggs

  • 1 teaspoon vanilla extract

  • 1/3 cup (35 g) unsweetened cocoa powder

  • 1/2 cup (60 g) all-purpose flour

  • 1/4 teaspoon salt

  • 1/4 teaspoon baking powder


Instructions

1. Preheat and Prep

  1. Preheat the oven to 175°C (350°F).

  2. Grease an 8×8-inch square baking pan or line it with parchment paper, leaving a slight overhang for easy removal of the brownies after baking.


2. Cream the Butter and Sugar

  1. In a large mixing bowl, combine the melted butter and granulated sugar.

  2. Whisk vigorously for 1–2 minutes until the mixture looks glossy and slightly thickened.

Tip for the Crinkle Top: Thoroughly whisking the sugar into the butter helps dissolve the sugar, which is key to forming that signature shiny, crackly crust.


3. Add Wet Ingredients

  1. Add the eggs and vanilla extract to the butter-sugar mixture.

  2. Whisk for another minute until the batter turns pale and smooth.


4. Incorporate Dry Ingredients

  1. Sift together the cocoa powder, flour, salt, and baking powder.

  2. Using a spatula, gently fold the dry ingredients into the wet mixture.

  3. Mix only until the streaks of flour disappear. Overmixing can make brownies tough instead of fudgy.


5. Bake

  1. Pour the batter into the prepared pan and smooth the top with a spatula.

  2. Bake in the preheated oven for 20–25 minutes.

Toothpick Test: Insert a toothpick in the center; it should come out with a few moist crumbs. A fully clean toothpick may indicate the brownies are slightly overbaked.


6. Cool and Slice

  1. Allow the brownies to cool completely in the pan. This ensures the fudgy interior sets and the crinkle top firms up.

  2. Lift the brownies out using the parchment paper and cut into 16 equal squares.


Why This Recipe Works

  • Cocoa Ratio: Using 1/3 cup of cocoa powder gives a deep chocolate flavor without drying out the brownies.

  • Fudgy Texture: The combination of 1/2 cup flour and 2 eggs creates a dense, chewy texture rather than a cake-like structure.

  • Shiny Crinkle Top: Thoroughly whisking the sugar into melted butter and eggs ensures that classic crackly surface.


Pro Tips for Perfect Brownies

  • Do not overbake: Even a minute too long can dry out the edges. Keep an eye on the toothpick test.

  • Let them cool fully: Cutting brownies too soon can result in crumbling and a less defined top.

  • Optional add-ins: Fold in chocolate chips, nuts, or a swirl of caramel for extra indulgence.

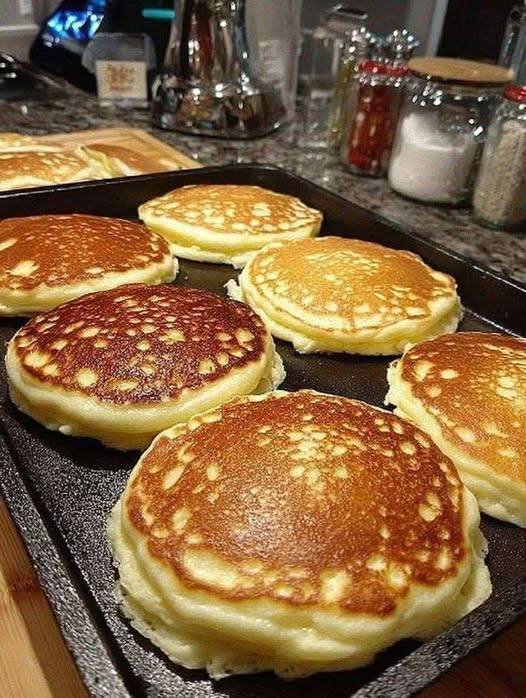
Japanese Soufflé Pancakes

Japanese Soufflé Pancakes

Fluffy, tall, and cloud-like, these Japanese soufflé pancakes are a delightful treat for breakfast, brunch, or dessert. Serve with butter, syrup, or even a scoop of rich chocolate gelato for a luxurious twist.


Ingredients (Makes 2–3 pancakes)

For the Pancakes:

  • 2 large eggs, separated (yolks and whites)

  • 1 ½ tablespoons whole milk

  • ¼ teaspoon vanilla extract

  • ¼ cup (30 g) all-purpose flour, sifted

  • 2 tablespoons granulated sugar

  • ½ teaspoon baking powder

  • Optional: 1 teaspoon water (for steaming in the pan)

For Serving (Optional):

  • Butter

  • Maple syrup

  • Chocolate gelato


Instructions

1. Prepare the Yolk Base

  1. In a small bowl, whisk together the egg yolks, milk, and vanilla extract until thick and slightly frothy.

  2. Sift the flour and baking powder over the mixture.

  3. Gently fold with a whisk or spatula until just combined. Do not overmix—overmixing will make the pancakes dense.


2. Make the Meringue

  1. In a clean metal or glass bowl, beat the egg whites on low speed until frothy.

  2. Gradually add the sugar, one tablespoon at a time, while increasing the mixer speed to medium-high.

  3. Beat until stiff peaks form. Peaks should stand straight when you lift the beaters.

Tip: Using cold eggs helps create a more stable meringue.


3. Fold the Batter

  1. Add about one-third of the meringue to the yolk mixture. Fold gently to lighten the batter.

  2. Add the remaining meringue in two additions. Fold carefully using a “cut and turn” motion to keep as much air as possible.


4. Pipe the Batter

  1. Transfer the batter into a piping bag or a large Ziploc bag with the corner cut off.

  2. Pipe tall mounds of batter onto a lightly greased non-stick pan.

  3. For extra height, pipe a small amount on top of each mound after a minute.


5. Cook “Low and Slow”

  1. Set the pan to the lowest possible heat.

  2. Add 1 teaspoon of water in empty spaces of the pan and cover with a lid. The steam will help the pancakes rise.

  3. Cook for 5–6 minutes on the first side until golden brown.


6. Flip Gently

  1. Carefully lift each pancake with a spatula and flip.

  2. Add another teaspoon of water, cover, and cook for another 4–5 minutes.

  3. Pancakes should be fluffy, golden, and fully set inside.


7. Serve Immediately

  • These pancakes are highest and fluffiest right after cooking. They may deflate slightly as they cool.

  • Serve with butter, maple syrup, or a scoop of chocolate gelato for a decadent treat.


Pro Tips for Perfect Soufflé Pancakes

  • Patience is key: Low heat ensures the inside cooks without burning the outside.

  • Cold eggs: Helps stabilize the meringue for taller pancakes.

  • Steaming: Adding a little water to the pan creates gentle steam, aiding the rise.

  • Immediate service: Like soufflés, these are best enjoyed fresh for maximum fluffiness.

Fast Flourless Oatmeal Breakfast Bread

Fast Flourless Oatmeal Breakfast Bread

Caption: ✨ Healthy breakfast has never been this easy! This flourless, butter-free oatmeal bread is a total game-changer for your morning routine. Just three main ingredients to create a gluten-free loaf that is hearty, wholesome, and perfectly golden! 🍞🥣🌿


Ingredients (Makes 1 loaf)

  • 280 g (3 cups) rolled oats (use certified gluten-free if needed)

  • 2 large eggs

  • 250 g (1 cup) plain yogurt or Greek yogurt

  • 1 tsp baking powder (optional, for extra lift)

  • ½ tsp salt (optional, to enhance flavor)

Optional Mix-ins:

  • Chopped walnuts, pumpkin seeds, or sunflower seeds

  • Extra oats for topping


Instructions

1. Prep Oven and Pan

  1. Preheat your oven to 350°F (180°C).

  2. Line a standard loaf pan with parchment paper or lightly grease it to ensure the bread comes out easily.


2. Mix Wet Ingredients

  1. In a large bowl, whisk the eggs until smooth.

  2. Stir in the yogurt until the mixture is creamy and well combined.


3. Add the Oats

  1. Gradually add the oats to the wet mixture.

  2. If using, add baking powder and salt.

  3. Stir thoroughly until the oats are fully moistened.

  4. If adding nuts or seeds, fold them in now.


4. Let the Batter Rest

  • Let the batter sit for 10 minutes.

  • This allows the oats to absorb moisture, creating a better texture in the bread.


5. Bake

  1. Pour the batter into the prepared loaf pan and smooth the top with a spatula.

  2. Bake in the oven for 35–45 minutes, or until the top is golden brown and firm to the touch.


6. Cool and Slice

  1. Let the bread cool in the pan for 10 minutes.

  2. Transfer to a wire rack and cool completely before slicing.


Serving Suggestions

  • Savory: Toast a slice and top with avocado, tomato, or a poached egg.

  • Sweet: Serve warm with honey, nut butter, or a sprinkle of cinnamon.


Why You’ll Love This

  • Flourless & Gluten-Free: Perfect for sensitive stomachs or gluten-free diets.

  • Quick & Easy: Just 3 main ingredients and 10 minutes prep time.

  • Healthy & Hearty: Rolled oats provide fiber and yogurt adds protein, making it a filling breakfast.

Fluffy Mini Pizza Soft Rolls

Fluffy Mini Pizza Soft Rolls

Caption: 🍕✨ The perfect snack for pizza lovers! These “Mini Pizza Soft Rolls” combine a cloud-like homemade dough with all your favorite savory toppings. They’re fun to make, beautiful to serve, and guaranteed to disappear in minutes! ☁️🥨

Ingredients

For the Homemade Dough:

  • 200 ml (¾ cup) warm milk (ensure it is warm to the touch, not hot)

  • 10 g (2 tsp) active dry yeast

  • 1 tablespoon (12 g) sugar

  • 60 ml (¼ cup) vegetable oil

  • 4 g (¾ tsp) salt

  • 420 g (3 ½ cups) all-purpose flour

For the Filling & Toppings (Based on Images):

  • Shredded Mozzarella cheese (for that perfect melt)

  • Diced Salami or Pepperoni

  • Black Olives, sliced

  • Red and Green Bell Peppers, finely diced

  • Optional: A light spread of pizza sauce or pesto


Preparation Steps

  1. Activate the Yeast:

    • In a large mixing bowl, combine the warm milk, sugar, and yeast.

    • Stir gently and let it sit for about 5–10 minutes until it becomes frothy.

  2. Mix the Dough:

    • Add the oil and salt to the yeast mixture.

    • Gradually sift in the flour and mix until a dough starts to form.

    • Knead the dough on a lightly floured surface for 5–7 minutes until it is smooth and elastic.

    • Place the dough in a greased bowl, cover with a warm damp cloth, and let it rise in a warm spot for about 1 hour or until doubled in size.

  3. Roll and Fill:

    • Punch down the risen dough and roll it out into a large, thin rectangle on a floured surface.

    • Spread a thin layer of sauce (if using) and sprinkle a generous amount of mozzarella cheese over the dough.

    • Evenly distribute the salami, peppers, and black olives across the surface.

  4. Shape the Rolls:

    • Starting from one of the long edges, carefully roll the dough into a tight log.

    • Use a sharp knife or a piece of unflavored dental floss to cut the log into 8–10 equal slices.

  5. Bake to Perfection:

    • Preheat your oven to 375°F (190°C).

    • Place the rolls onto a baking sheet lined with parchment paper, leaving space for them to expand.

    • Bake for 20–25 minutes until the edges are golden brown and the cheese is bubbly.

  6. Cool and Serve:

    • Let the rolls rest for 5 minutes before serving. Enjoy them warm for the softest texture!

Golden Carrot & Mozzarella Rolls

Golden Carrot & Mozzarella Rolls (Flourless & Healthy)

Caption: ✨ Just 3 main ingredients and zero flour! Crispy outside, tender inside, cheesy, and full of goodness. Perfect healthy snack! 🥕🧀


Ingredients (Serves 4–5)

  • 1 large carrot (approx. 115 g / 4 oz), finely grated

  • 1 large egg

  • 150 g (5.3 oz) mozzarella cheese, grated

  • 1 clove garlic, minced

  • 2 tbsp (8 g) fresh parsley, finely chopped

  • Salt and pepper, to taste

Optional Topping:

  • 1 tsp sesame seeds

  • 1 tsp poppy seeds

  • ½ tsp dried herbs (like oregano or thyme)


Instructions

1. Prepare the Base

  1. Preheat oven to 375°F (190°C).

  2. Squeeze excess moisture from the grated carrot using a clean kitchen towel. This prevents soggy rolls and ensures crispiness.


2. Mix the Dough

  1. In a medium bowl, combine:

    • Grated carrot

    • Grated mozzarella

    • Egg

  2. Add minced garlic, chopped parsley, salt, and pepper.

  3. Stir until the mixture forms a thick, sticky dough.


3. Shape the Rolls

  1. Divide the mixture into 4–5 equal portions.

  2. Roll each portion into a small cylinder (log shape).


4. Add Topping (Optional)

  1. Line a baking sheet with parchment paper.

  2. Place rolls on the sheet.

  3. Sprinkle sesame seeds, poppy seeds, and dried herbs evenly on top.


5. Bake

  1. Bake in preheated oven for 15–20 minutes.

  2. Remove when cheese is melted and rolls are golden brown.


6. Serve

  1. Let rolls cool for 2–3 minutes.

  2. Serve warm for the best cheesy pull.


Why You’ll Love This

  • Gluten-Free & Healthy: No flour needed.

  • High in Protein: Egg and mozzarella make a satisfying snack.

  • Hidden Veggies: Sneak more carrots into a tasty, savory treat.

Golden Layered Italian Beef & Pasta Bake

Golden Layered Italian Beef & Pasta Bake

Caption: 🇮🇹✨ A secret straight from Italy! This isn’t just a pasta dish; it’s a masterpiece of savory beef, creamy béchamel, and melted cheese. The best dinner you will ever have—simple, hearty, and absolutely unforgettable! 🍝🧀

Ingredients

For the Beef Sauce:

  • 600 g minced beef

  • 1 onion, chopped

  • 2 cloves of garlic, minced

  • 300 g chopped canned tomatoes (in their own juice)

  • Salt and black pepper to taste

  • 1 tbsp olive oil (for sautéing)

For the Creamy Béchamel & Pasta:

  • 300 g penne rigate pasta

  • 40 g butter

  • A bunch of spring onions, chopped

  • 2 tablespoons flour

  • 500 ml milk

  • 150 g hard Parmesan cheese, grated

  • 150 g hard mozzarella cheese, grated


Preparation Steps

1. Prepare the Savory Beef Base

  • Heat a splash of olive oil in a large pan over medium heat.

  • Add the chopped onion and minced garlic, sautéing until softened and fragrant.

  • Add the 600 g minced beef and cook until browned.

  • Stir in the 300 g chopped tomatoes and season with salt and black pepper.

  • Let the sauce simmer on low heat for about 10–15 minutes until thickened.

2. Cook the Pasta

  • Bring a large pot of salted water to a boil.

  • Cook the 300 g penne rigate until it is “al dente” (slightly firm to the bite).

  • Drain the pasta and set aside.

3. Make the Béchamel Sauce

  • In a medium saucepan, melt the 40 g of butter.

  • Add the chopped spring onions and cook for 1 minute.

  • Stir in the 2 tablespoons of flour and cook for another minute to create a roux.

  • Slowly pour in the 500 ml of milk, whisking constantly to ensure no lumps form.

  • Continue cooking and stirring until the sauce thickens and coats the back of a spoon.

  • Stir in half of the grated Parmesan cheese until melted.

4. Assemble the Layers

  • Preheat your oven to 390°F (200°C).

  • In a large baking dish, spread the beef sauce as the bottom layer.

  • Combine the cooked penne with the creamy béchamel sauce and spread this mixture evenly over the beef.

  • Top the dish with the remaining Parmesan and the 150 g grated mozzarella.

5. Bake to Perfection

  • Place in the oven and bake for 20–25 minutes, or until the cheese is melted and develops a beautiful golden-brown crust.

  • Let the dish rest for 5 minutes before slicing into squares to serve.

Golden Pan Börek (Su Böreği Style)

Golden Pan Börek (Su Böreği Style)

This pan-made börek has soft, layered pastry with a creamy cheese filling and a golden crust. It is inspired by traditional Su Böreği but prepared easily using ready-made phyllo dough and a frying pan.


📝 Ingredients

  • 4 sheets ready-made phyllo dough (yufka)

  • 300 g full-fat white cheese or feta cheese, crumbled

  • ½ bunch fresh parsley, finely chopped

  • 2 large eggs

  • 3 tablespoons plain yogurt

  • ½ cup milk (optional, for extra softness)

  • 3–4 tablespoons vegetable oil or melted butter


👩‍🍳 Step-by-Step Instructions

1️⃣ Prepare the Filling

  • In a medium bowl, combine the crumbled cheese and chopped parsley.

  • Mix well and set aside.


2️⃣ Prepare the Sauce

  • In a separate bowl, whisk together:

    • Eggs

    • Yogurt

    • Milk (if using)

    • 2 tablespoons of oil or melted butter

  • Mix until smooth and well blended.

This mixture keeps the börek soft and tender.


3️⃣ Prepare the Pan

  • Lightly grease a large non-stick frying pan with oil or butter.

  • Place one sheet of phyllo into the pan, allowing the edges to hang over the sides.


4️⃣ Build the Layers

  • Brush the first phyllo sheet generously with the sauce.

  • Tear the second and third sheets into large pieces.

  • Dip each piece into the sauce and place them loosely into the pan to form layers.


5️⃣ Add the Filling

  • Spread the cheese and parsley mixture evenly over the layered dough.


6️⃣ Seal the Börek

  • Dip any remaining phyllo pieces into the sauce and place them over the filling.

  • Fold the overhanging edges of the first sheet over the top to seal everything inside.

  • Pour any remaining sauce evenly over the top.


7️⃣ Cook the Börek

  • Cover the pan with a lid and cook on medium-low heat for 8–10 minutes.

  • Check the bottom; when it turns golden, carefully flip the börek using a plate or lid.

  • Cook the second side uncovered for another 5–8 minutes until golden and cooked through.


8️⃣ Rest and Serve

  • Slide the börek onto a cutting board.

  • Let it rest for 5 minutes before cutting.

  • Slice into squares or triangles and serve warm.


⭐ Helpful Tips

  • Use low heat to prevent burning

  • Do not press the layers too tightly; this keeps the börek soft

  • Serve with yogurt or fresh salad

  • Best enjoyed fresh, but can be reheated gently in a pan

Golden Walnut & Jam Swirl Cake

Golden Walnut & Jam Swirl Cake

Caption:The cake of your dreams is only 5 minutes away! This soft, fluffy sponge features a sweet jam swirl and a crunchy walnut topping. It’s incredibly simple and absolutely delicious! 🍰🥨

Ingredients

  • Eggs: 2 large

  • Vanilla Sugar: 1 packet (8g)

  • Salt: A pinch

  • Sugar: 120g (2/3 cup)

  • Oil: 120ml (1/2 cup)

  • Milk: 120ml (1/2 cup)

  • Flour: 220g (1 ¾ cups)

  • Baking Powder: 1 tablespoon

  • Jam: 50g (your favorite variety, like strawberry or apricot)

  • Walnuts: 50g, chopped

  • Baking Dish: 24 cm Bundt or round pan


Preparation Steps

  1. Prep the Pan and Oven:

    • Preheat your oven to 350°F (180°C).

    • Grease your 24 cm baking dish with a little oil or butter and dust lightly with flour to prevent sticking.

  2. Mix the Batter:

    • In a large bowl, whisk the 2 eggs, vanilla sugar, salt, and 120g of sugar until the mixture is light and frothy.

    • Pour in the 120ml of oil and 120ml of milk. Whisk until well combined.

  3. Add Dry Ingredients:

    • Sift the 220g of flour and 1 tablespoon of baking powder into the wet mixture.

    • Gently whisk until you have a smooth batter with no lumps.

  4. Assemble with Jam and Nuts:

    • Pour the batter into your prepared baking dish.

    • Drop small spoonfuls of the 50g of jam over the surface of the batter. Use a toothpick or knife to gently swirl it in for a marbled effect.

    • Sprinkle the 50g of chopped walnuts evenly over the top.

  5. Bake to Perfection:

    • Bake for 35–40 minutes.

    • The cake is ready when it is golden brown and a toothpick inserted into the center comes out clean.

  6. Cool and Serve:

    • Let the cake cool in the pan for 10 minutes before carefully turning it out onto a wire rack to cool completely.

Peanut Butter Oat Energy Balls (No-Bake Snack)

🥜 Peanut Butter Oat Energy Balls (No-Bake Snack)

These soft and chewy peanut butter energy balls are quick to prepare and made with simple ingredients. They are perfect for snacks, lunchboxes, or a small sweet bite during the day.


📝 Ingredients

  • ⅔ cup creamy peanut butter

  • 1 cup old-fashioned oats (plus extra for rolling, if desired)

  • 1½ tablespoons honey

  • ¼ cup mini dark chocolate chips (optional)

  • 1 tablespoon flax seeds or chia seeds (optional)


👩‍🍳 Step-by-Step Instructions

1️⃣ Mix the Base

In a medium mixing bowl, add:

  • Peanut butter

  • Honey

Stir well until smooth and evenly blended.


2️⃣ Add the Dry Ingredients

Add the oats to the peanut butter mixture.
If using chocolate chips or seeds, add them now.

Mix thoroughly until everything is well combined and the mixture becomes thick and slightly sticky.


3️⃣ Chill the Mixture (Optional but Helpful)

Place the bowl in the refrigerator for 15–30 minutes.
This helps the mixture firm up and makes shaping easier.


4️⃣ Shape the Balls

Scoop about 1 tablespoon of the mixture at a time.
Roll it gently between your palms to form a small ball (about 2.5 cm / 1 inch wide).

If desired, roll each ball in dry oats for extra texture.


5️⃣ Set and Store

Place the balls on a tray or plate.
Refrigerate for 30 minutes until firm.

Transfer to an airtight container.


📦 Storage

  • Refrigerator: up to 7 days

  • Freezer: up to 1 month


⭐ Helpful Tips

  • Use smooth peanut butter for easy mixing

  • Add a little extra oats if mixture feels too soft

  • Add a small splash of milk if mixture feels too dry

  • Keep chilled for best texture


💛 Why You’ll Enjoy This Recipe

  • No baking needed

  • Made with simple pantry ingredients

  • Easy to prepare

  • Soft, chewy, and lightly sweet

Golden Apple Sponge Pie (Soft & Light)

Golden Apple Sponge Pie (Soft & Light)

This apple sponge pie has a fluffy cake base topped with tender, lightly sweetened apples. It’s made with simple pantry ingredients and has a beautiful golden finish.


📝 Ingredients

For the Apple Topping

  • 2 large apples, peeled and sliced

  • 25 g butter

  • 1 tablespoon lemon juice

  • 20 g sugar

For the Sponge Batter

  • 2 large eggs

  • 130 g sugar

  • 60 ml milk

  • 150 g self-rising flour
    (or 150 g all-purpose flour + 1 teaspoon baking powder)


👩‍🍳 Step-by-Step Instructions

1️⃣ Prepare the Apples

  • Peel and core the apples.

  • Slice them evenly so they cook uniformly.

  • Heat a pan over medium heat and melt the butter.

  • Add the apple slices, lemon juice, and sugar.

  • Cook gently for 3–5 minutes, stirring lightly, until the apples soften and become lightly golden.

  • Remove from heat and allow them to cool slightly.


2️⃣ Make the Batter

  • In a large bowl, whisk the eggs and sugar together until pale and fluffy.

  • Add the milk and mix gently until combined.


3️⃣ Add the Flour

  • Sift the flour (and baking powder if using).

  • Fold it into the batter gently using a spatula.

  • Mix only until combined to keep the batter light and airy.


4️⃣ Assemble the Pie

  • Preheat oven to 180°C (350°F).

  • Line a round baking tin with parchment paper.

  • Pour the batter evenly into the tin.

  • Arrange the cooked apple slices on top in a neat pattern.


5️⃣ Bake

  • Bake for 30–35 minutes or until a toothpick inserted in the center comes out clean.

  • The surface should be golden in color.


6️⃣ Cool and Serve

  • Let the pie cool in the pan for 10 minutes, then remove carefully.

  • Serve warm or at room temperature.

Optional toppings:
✔ Light dusting of powdered sugar
✔ Spoon of whipped cream
✔ Vanilla ice cream


⭐ Helpful Tips

  • Slice apples evenly for even cooking

  • Do not overmix the batter

  • Let the pie cool slightly before slicing

  • Store in an airtight container for up to 2 days


✨ Optional Finish

For a shiny top, lightly brush the warm apples with a little apricot jam or honey after baking.

Easy Homemade Nut & Fruit Nougat (Soft & Chewy)

Easy Homemade Nut & Fruit Nougat (Soft & Chewy)

This homemade nougat is smooth, milky, and pleasantly chewy, filled with crunchy roasted peanuts and naturally sweet dried fruits. It’s simple to prepare and perfect for snacks, gifting, or dessert trays.


📝 Ingredients

  • 500 g (about 3 cups) peanuts

  • 50 g (¼ cup) black sesame seeds

  • 10 g (2 teaspoons) white sesame seeds

  • 2 pieces dried mango, chopped

  • 1 handful dried cranberries

  • 30 g (2 tablespoons) butter (or a small amount of corn oil)

  • 200 g (7 oz) marshmallows

  • 100 g (1 cup) milk powder


👩‍🍳 Step-by-Step Instructions

1️⃣ Prepare the Nuts and Fruits

  • Roast the peanuts in a dry pan or oven until lightly golden and fragrant.

  • Let them cool slightly, then rub off and remove the skins.

  • Chop the dried mango into small, bite-sized pieces.

  • Set aside the cranberries, sesame seeds, and chopped mango.


2️⃣ Melt the Base

  • Place a non-stick pan over low heat.

  • Add the butter and let it melt gently.

  • Add the marshmallows and stir continuously until they melt completely and become smooth and glossy.


3️⃣ Add the Milk Powder

  • Slowly add the milk powder to the melted marshmallow mixture.

  • Stir quickly and evenly until fully blended and thickened.


4️⃣ Mix in the Nuts and Fruits

  • Turn off the heat.

  • Add:

    • Roasted peanuts

    • Black sesame seeds

    • White sesame seeds

    • Chopped dried mango

    • Cranberries

  • Mix thoroughly until all ingredients are well coated with the creamy mixture.


5️⃣ Shape the Nougat

  • Transfer the warm mixture onto parchment paper or a silicone baking mat.

  • Cover with another sheet of parchment paper and press it into a flat rectangle (about 2–3 cm / 1 inch thick).

  • Smooth the surface using a spatula or rolling pin.


6️⃣ Cool and Set

  • Let the nougat cool at room temperature or place it in the refrigerator until firm.


7️⃣ Slice and Serve

  • Once fully set, use a sharp knife to cut into small rectangles or squares.

  • Clean the knife between cuts for neat edges.


📦 Storage Tips

  • Store nougat in an airtight container at room temperature for up to 2 weeks.

  • To prevent sticking, wrap pieces individually in parchment paper or lightly dust them with milk powder.


⭐ Helpful Tips

  • Keep heat low to prevent burning

  • Stir constantly for smooth texture

  • Chop fruits evenly for better distribution

  • Use fresh, good-quality peanuts for best taste

  • Slice only after fully cooled for clean cuts

Crispy Onion Recipes

🧅Crispy Onion Recipes

You can make classic onion rings or crispy onion ring chips using simple ingredients and proper frying or baking methods.


🍽️ Recipe 1: Classic Crispy Onion Rings

📝 Ingredients

  • 2 large sweet onions

  • 2 cups all-purpose flour

  • 1 teaspoon baking powder

  • 1 teaspoon salt

  • 1 teaspoon garlic powder

  • 1 large egg

  • 1 cup cold club soda

  • 1½ cups panko breadcrumbs

  • Vegetable oil (for frying)


👩‍🍳 Instructions

1. Prepare the Onions

Peel the onions and slice them into thick rings.
Separate the rings gently and set aside.


2. Make the Batter

In a bowl, mix:

  • Flour

  • Baking powder

  • Salt

  • Garlic powder

In another bowl, whisk:

  • Egg

  • Cold club soda

Combine both mixtures to form a smooth batter.


3. Coat the Rings

Dip each onion ring into the batter, letting excess drip off.
Roll in panko breadcrumbs until fully coated.


4. Fry

Heat vegetable oil in a deep pan to medium heat (about 175°C / 350°F).
Carefully place onion rings into hot oil.
Fry for 2–3 minutes per side until golden and crisp.


5. Drain and Serve

Remove and place on paper towels to remove excess oil.
Serve hot with ketchup or creamy dip.


🌸 Recipe 2: Onion Ring Chips (Crispy Bloom-Style)

📝 Ingredients

  • 2 large sweet onions

  • 2 cups all-purpose flour

  • 1 teaspoon paprika

  • ½ teaspoon garlic powder

  • ½ teaspoon smoked paprika

  • ½ teaspoon salt

  • 2 eggs

  • 1 tablespoon olive oil

  • 1 tablespoon grated Parmesan cheese (optional)


👩‍🍳 Instructions

1. Prepare the Onion

Cut off the top of the onion.
Place root-side down and slice downward in sections without cutting fully through the base.
Gently spread the layers apart.


2. Prepare the Coating

Mix flour, paprika, garlic powder, smoked paprika, and salt in a bowl.
In another bowl, whisk eggs with olive oil.


3. Coat the Onion

Dip the onion into egg mixture, then into flour mixture.
Make sure seasoning reaches between layers.


4. Fry or Bake

For Frying:
Heat oil to medium temperature.
Lower onion carefully into oil and fry until golden brown.

For Baking:
Place onion on baking tray.
Bake at 200°C (400°F) for 25–30 minutes until crisp.


5. Serve

Place on plate and serve with creamy sauce or ketchup.


⭐ Helpful Tips

  • Use sweet onions for best flavor

  • Cold batter makes crispier coating

  • Always fry in moderate heat

  • Serve immediately for best texture

  • Can be baked for lighter option

Creamy Sauce Quartet (4 Easy Dipping Sauces)

Creamy Sauce Quartet (4 Easy Dipping Sauces)

These four smooth and flavorful sauces are inspired by popular restaurant-style dips. They are mild, sweet, tangy, and creamy—perfect for burgers, fries, wraps, and grilled foods.


📝 Common Creamy Base

(Used for Yum Yum, Hamburger, and French Sauce)

  • ½ cup high-quality mayonnaise

Place the mayonnaise in a small mixing bowl and use it as the base for each sauce.


🍅 1. Yum Yum Sauce (Sweet & Tangy)

Ingredients

  • ½ cup mayonnaise

  • 1 teaspoon tomato paste

  • ½ teaspoon garlic powder

  • ½ teaspoon paprika

  • 1 teaspoon sugar

Instructions

  1. Add mayonnaise to a bowl.

  2. Mix in tomato paste until smooth.

  3. Add garlic powder, paprika, and sugar.

  4. Stir until evenly blended and creamy.

  5. Taste and adjust sweetness or seasoning if needed.

Best with: fries, chicken, seafood, sandwiches


🧄 2. Shawarma-Style Yogurt Sauce (Creamy & Garlicky)

Ingredients

  • ½ cup plain Greek yogurt

  • 1 tablespoon tahini

  • 1 garlic clove, finely crushed

  • 1 tablespoon fresh lemon juice

Instructions

  1. Add yogurt to a bowl.

  2. Mix in tahini until smooth.

  3. Stir in crushed garlic and lemon juice.

  4. Blend well until creamy.

  5. Chill for 30 minutes for better flavor.

Best with: shawarma, wraps, grilled meat, falafel


🍔 3. Hamburger Sauce (Mild & Sweet)

Ingredients

  • ½ cup mayonnaise

  • 1 tablespoon ketchup

  • 1 tablespoon finely chopped sweet relish

Instructions

  1. Place mayonnaise in a bowl.

  2. Add ketchup and mix until uniform in color.

  3. Stir in chopped relish.

  4. Mix gently until fully combined.

  5. Refrigerate for 20–30 minutes before serving.

Best with: burgers, fries, sandwiches


🥒 4. French-Style Sauce (Zesty & Tangy)

Ingredients

  • ½ cup mayonnaise

  • 1 tablespoon yellow mustard

  • 1 teaspoon white vinegar

  • A small pinch of dried herbs (optional)

Instructions

  1. Add mayonnaise to a bowl.

  2. Mix in mustard until smooth.

  3. Add vinegar and stir well.

  4. Add herbs if using and mix again.

  5. Chill before serving for best taste.

Best with: salads, grilled chicken, wraps, vegetables


⭐ Helpful Tips

  • Use fresh ingredients for best flavor

  • Chill sauces before serving for thicker texture

  • Store in sealed containers in the refrigerator

  • Use within 3–5 days

  • Stir before serving