Blueberry Cheesecake Parfait

Blueberry Cheesecake Parfait

Prep time: 15 mins | Chill time: 30 mins | Servings: 4

Ingredients

The Crust:

  • 1 cup graham cracker crumbs

  • 2 tbsp melted butter

The Cheesecake Filling:

  • 8 oz (225g) cream cheese, softened

  • 1/2 cup powdered sugar

  • 1 cup heavy cream, whipped

  • 1 tsp vanilla extract

The Blueberry Layer:

  • 2 cups fresh or frozen blueberries

  • 2 tbsp sugar

  • 1 tbsp lemon juice

Instructions

  1. Prepare the Blueberries: In a small saucepan, combine blueberries, sugar, and lemon juice. Simmer over medium heat for 5–8 minutes until the berries burst and the sauce thickens slightly. Let it cool completely.

  2. Make the Crust: Mix graham cracker crumbs and melted butter in a small bowl until it looks like wet sand.

  3. Cream the Cheese: In a large bowl, beat the softened cream cheese and powdered sugar until smooth and creamy. Fold in the vanilla extract.

  4. Fold in Cream: Gently fold the whipped heavy cream into the cream cheese mixture until light and airy.

  5. Assemble the Parfaits: * Spoon a layer of the graham cracker mixture into the bottom of 4 glass jars or ramekins.

    • Add a thick layer of the cheesecake filling.

    • Spoon the cooled blueberry sauce over the top.

    • Repeat the layers if your jars are tall enough.

  6. Chill: Refrigerate for at least 30 minutes before serving to allow the flavors to meld.


Your Growing Recipe Book

  • Seafood Luxury: Crispy Copycat Joe’s Crab Shack Crab Cakes.

  • Holiday Tradition: Old-World Christmas Fruit Cake with cherries and pecans.

  • Indulgent Dessert: Chocolate Mousse Cake with a glossy ganache and nuts.

Banana Avocado Almond Smoothie

Banana Avocado Almond Smoothie

This banana avocado almond smoothie is a rich, creamy, and nourishing drink perfect for breakfast, post-workout recovery, or a healthy snack. It combines the natural sweetness of ripe bananas with the healthy fats of avocado and the protein boost from almonds, creating a balanced and satisfying smoothie.

Ingredients

  • 1 ripe banana (peeled and sliced)

  • ½ ripe avocado (peeled and pitted)

  • 10–12 raw almonds (soaked for 4–6 hours for better digestion)

  • 1 cup chilled milk (dairy or almond milk)

  • ½ cup ice cubes

  • 1–2 teaspoons honey or dates (optional, to taste)

  • A pinch of cinnamon or cardamom powder (optional)

Preparation Method

  1. Start by soaking the almonds in water for several hours. This softens them and improves nutrient absorption. If short on time, you can use unsoaked almonds, but soaked ones blend more smoothly.

  2. Add the banana slices, avocado flesh, soaked almonds, and milk to a blender.

  3. Blend on high speed until the mixture becomes smooth and creamy.

  4. Add ice cubes and blend again for 20–30 seconds until chilled and frothy.

  5. Taste the smoothie and add honey or dates if extra sweetness is desired.

  6. Sprinkle a pinch of cinnamon or cardamom for added aroma and flavor.

  7. Pour into a tall glass and serve immediately.

Texture & Flavor

This smoothie has a thick, velvety texture thanks to the avocado. The banana provides natural sweetness, while almonds add a subtle nutty flavor. Ice gives it a refreshing chill without watering it down.

Health Benefits

  • Bananas provide potassium, energy, and digestive support.

  • Avocado is rich in healthy fats, fiber, and vitamins that support heart health and skin.

  • Almonds add protein, vitamin E, and minerals for sustained energy.

  • This smoothie helps keep you full longer and supports overall nutrition.

Serving Tips

  • Garnish with chopped almonds on top for crunch.

  • For extra protein, add a spoon of peanut butter or yogurt.

  • To make it vegan, use almond or oat milk.

This smoothie is simple, wholesome, and perfect for daily healthy living. 🥤🍌🥑

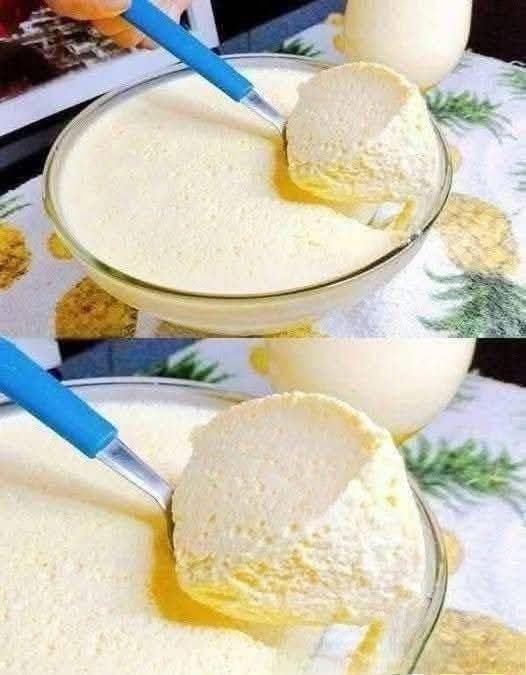
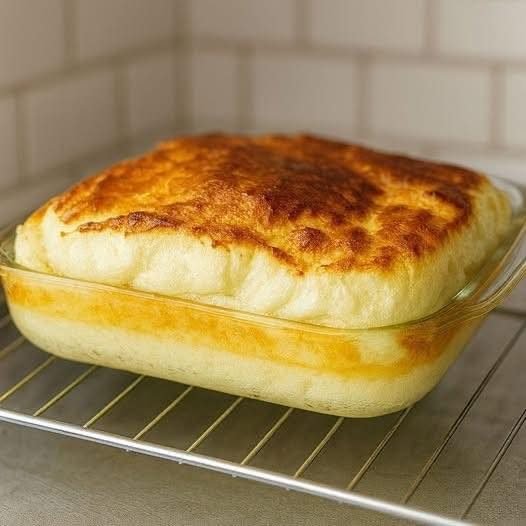
Creamy Milk Cake: With 6 Simple Ingredients, Easy to Prepare and Very Tasty

Hi, everyone, today we’re going to learn how to make Milk Cake using simple ingredients. So grab your pen and paper to jot down the ingredients, then follow the complete preparation method.

How to Make Creamy Milk Cake

If you love creamy, easy, and irresistible cakes, try the Milk Cake. Its soft, pudding-like texture delights from the first bite. See below the list of all ingredients and required quantities. And then, a very complete preparation method with details of the recipe.

Recipe Ingredients:

  • 3 eggs
  • 200 ml coconut milk (6.8 fl oz)
  • 500 ml milk (16.9 fl oz)
  • 3 tablespoons butter or margarine
  • 1 Small cup with condensed milk
  • 1 cup all-purpose flour (4.9 oz / 140g)
  • 3 tablespoons sugar (optional)

Instructions:

First, blend the eggs, butter, condensed milk, and coconut milk in a blender until smooth.

Then, add the milk and, optionally, three tablespoons of sugar.

Next, add the flour and blend again until all ingredients are well combined.

After that, grease a glass baking dish with butter and flour. Then, pour the batter into the prepared dish.

Soon after, place the glass baking dish in a larger pan with hot water for a water bath.

Finally, bake in a preheated oven at 356 °F (180 °C) for about 45 minutes.

At last, let it cool before cutting.

Finishing up, serve and enjoy

🥤 Creamy Peanut Butter Honey Smoothie

📝 Description

This Peanut Butter Honey Smoothie is a smooth, indulgent drink with a perfect balance of nutty richness and natural sweetness. The creamy texture comes from ripe banana and milk, while peanut butter adds depth and protein. Honey provides gentle sweetness, and vanilla gives a warm, aromatic finish. Ideal for breakfast, post-workout energy, or a healthy dessert-style drink.


🧾 Ingredients (Serves 1–2)

  • 2 tablespoons creamy peanut butter

  • 1 large ripe banana, sliced

  • 1½ cups cold milk (dairy or almond/oat milk)

  • 1–2 tablespoons pure honey (adjust to taste)

  • ½ teaspoon vanilla extract

  • 4–5 ice cubes (optional, for thicker texture)

  • 1 tablespoon chia seeds or flaxseeds (optional, for nutrition)

👩‍🍳 Step-by-Step Instructions

  1. Prepare the Ingredients
    Peel and slice the banana for easier blending. Measure all ingredients in advance to ensure smooth preparation.

  2. Add to Blender
    Pour the milk into the blender first. Add banana slices, peanut butter, honey, vanilla extract, and seeds (if using).

  3. Blend Until Smooth
    Blend on high speed for 30–45 seconds until the smoothie becomes thick and creamy. Add ice cubes if you prefer a colder, milkshake-like consistency.

  4. Taste & Adjust
    Taste the smoothie and adjust sweetness with extra honey or thin it with a splash of milk if needed.

  5. Serve
    Pour into a tall glass. Drizzle honey or peanut butter along the inside of the glass for a decorative swirl, just like the image.


🌟 Tips & Variations

  • Add ½ cup Greek yogurt for extra creaminess and protein

  • Use frozen banana instead of ice for a richer texture

  • Add cocoa powder for a chocolate-peanut twist

  • Sprinkle crushed peanuts on top for crunch


🥗 Nutritional Benefits

  • High in protein and healthy fats

  • Provides long-lasting energy

  • Naturally sweetened with honey

  • Supports muscle recovery and fullness

Creamy Lemon Mousse

🍋 3-Ingredient Lemon Mousse

Prep time: 15 minutes | Chilling time: 2 hours | Servings: 2-4

Ingredients

  • 2 cups (500ml) Heavy Whipping Cream (must be very cold)

  • 1 can (14 oz / 400g) Sweetened Condensed Milk

  • 1/2 cup Fresh Lemon Juice (about 2–3 large lemons)

  • Optional: Lemon zest for garnish


Instructions

  1. Whip the Cream: In a large chilled bowl, pour in the cold heavy whipping cream. Use a hand mixer or stand mixer to beat the cream until stiff peaks form. (Be careful not to over-beat, or it will turn into butter!)

  2. Combine Milk and Lemon: In a separate medium bowl, whisk together the sweetened condensed milk and the fresh lemon juice. The acid in the lemon will naturally begin to thicken the condensed milk.

  3. Fold Gently: Gently pour the lemon mixture into the bowl of whipped cream. Use a spatula to fold the mixture together slowly. Do not stir vigorously, or you will lose the air and fluffiness.

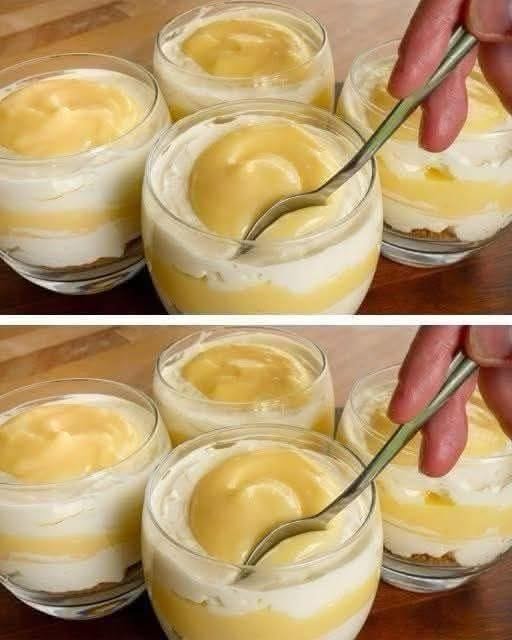
  4. Assemble: Spoon or pipe the mousse into serving glasses, as shown in the bottom image.

  5. Chill: Place the glasses in the refrigerator for at least 2 hours (or overnight). This allows the mousse to set into a velvety texture.

  6. Garnish: Top with fresh lemon zest or a small slice of lemon right before serving.


Tips for Success

  • Keep it Cold: Ensure your cream and your mixing bowl are cold to get the best volume.

  • Adjust Tanginess: If you prefer a very tart dessert, add an extra tablespoon of lemon juice. If you like it sweeter, stick to the 1/2 cup measurement.

  • Zest First: Always zest your lemons before squeezing them for juice!

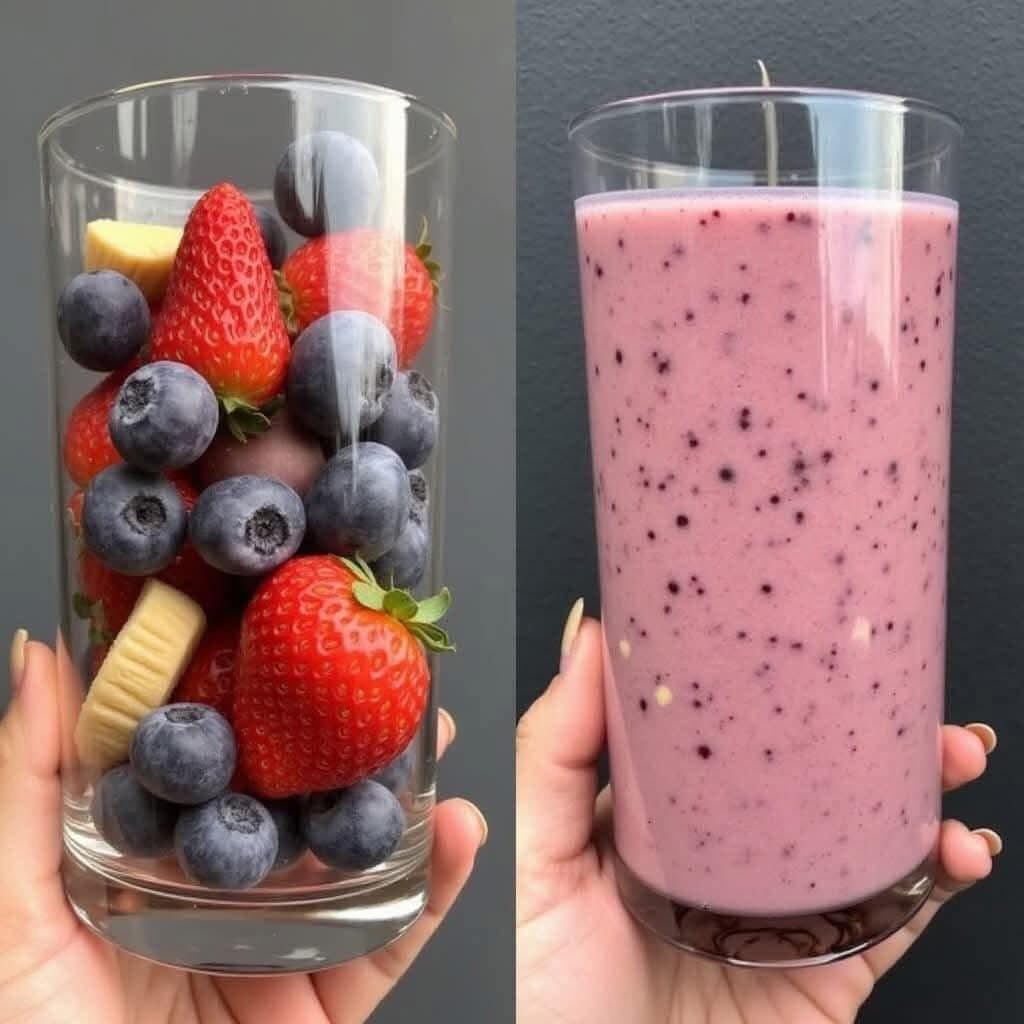
Healthy Cashew Smoothie

Healthy Cashew Smoothie

Ingredients

The following ingredients are required for this recipe:

  • Banana: 1 medium (frozen is best for a thicker texture).

  • Strawberries: 1/2 cup fresh or frozen.

  • Avocado: 1/4 to 1/2 of a ripe avocado (adds healthy fats and creaminess).

  • Cashews: 1/4 cup raw or roasted (unsalted).

  • Almond Milk: 1 cup (unsweetened).

  • Honey: 1–2 teaspoons, or to taste.

  • Ice: 1/2 cup to 1 cup depending on desired thickness.


Instructions

  1. Prep the Cashews: If you do not have a high-speed blender, soak the cashews in hot water for 15 minutes and drain them before using to ensure a perfectly smooth consistency.

  2. Combine: Add the almond milk to the blender first (liquid first helps the blades spin more easily), followed by the bananastrawberriesavocado, and cashews.

  3. Sweeten and Chill: Add the honey and the ice.

  4. Blend: Start on a low speed and gradually increase to high. Blend for 45–60 seconds until the cashews are completely pulverized and the mixture is silky.

  5. Adjust: If the smoothie is too thick, add a splash more almond milk. If you prefer it colder/thicker, add more ice.

Why this works

  • Avocado: Provides a velvety mouthfeel and heart-healthy monounsaturated fats.

  • Cashews: Act as a natural “cream” while adding plant-based protein.

  • Strawberries: Give the smoothie its signature pale pink color and a boost of Vitamin C

Creamy Orange Sunshine Smoothie

Creamy Orange Sunshine Smoothie

Prep time: 5 minutes | Servings: 2 smoothies

🛒 Ingredients

To achieve that bright color and thick, frothy consistency, you will need:

Ingredient Amount Notes
Oranges 2 large Peeled and deseeded (Navel or Valencia work best).
Frozen Banana 1 medium Essential for the thick, creamy texture shown.
Greek Yogurt $1/2$ cup Use Plain or Vanilla for added creaminess and protein.
Milk of Choice $1/2$ cup Almond milk, coconut milk, or dairy milk.
Vanilla Extract 1 tsp This provides the “creamsicle” flavor.
Honey or Maple Syrup 1 tbsp Optional, depending on the sweetness of your oranges.
Ice $1/2$ cup Optional, for a frostier finish.

🥣 Instructions

  1. Prepare the Fruit: Peel the oranges and remove as much of the white pith as possible to avoid bitterness. Ensure your banana is pre-frozen for the best results.

  2. Combine: Add the liquid ingredients (milkyogurtvanilla, and sweetener) to the blender first.

  3. Layer: Add the orange segments and frozen banana on top.

  4. Blend: Start on a low setting and gradually increase to high. Blend for 60 seconds until the mixture is perfectly smooth and no orange fibers remain.

  5. Garnish: Slice an extra orange into thin rounds. Cut a small slit in each slice and place them on the rim of the glasses as shown in the image.

💡 Tips for Success

  • The “Cream” Factor: For an even richer taste, replace the milk with a splash of heavy cream or full-fat coconut milk.

  • Boost the Color: If your oranges are pale, add a tiny pinch of turmeric. It won’t change the flavor but will make the orange color pop.

  • High Fiber: If you prefer a lighter texture, you can use $1/2$ cup of fresh orange juice instead of whole oranges, though you’ll lose the beneficial fiber.

Carrot & Beetroot Vitality Juice

Carrot & Beetroot Vitality Juice

This blend is naturally sweet, earthy, and packed with Vitamin A and iron.


Ingredients

  • Carrots: 3–4 medium-sized (washed and peeled).

  • Beetroot: 1 small or half of a large one (peeled and sliced).

  • Apple (Optional): 1 green or red apple (adds sweetness and balances the earthy beet flavor).

  • Ginger: A small 1-inch knob (peeled, for a spicy kick and digestion).

  • Lemon Juice: 1 tablespoon (to keep the color bright and add Vitamin C).

  • Water: ½ cup (only if using a blender).


Preparation Steps

Method 1: Using a Juicer

  1. Prep: Wash all vegetables thoroughly. Peel the carrots and beetroot to remove any bitter skin.

  2. Process: Feed the carrots, beetroot, apple, and ginger through your juicer one by one.

  3. Finish: Stir in the fresh lemon juice.

  4. Serve: Pour into a glass and enjoy immediately for the best nutrient absorption.

Method 2: Using a Blender

  1. Chop: Cut the carrots, beetroot, and apple into small cubes.

  2. Blend: Place the cubes into the blender with the ginger and ½ cup of water. Blend on high until completely smooth.

  3. Strain: Pour the mixture through a fine-mesh nut milk bag or a cheesecloth into a pitcher. Squeeze well to extract all the juice.

  4. Serve: Stir in the lemon juice and serve chilled.


Quick Tips for the Best Juice

  • Balance the Earthiness: Beetroot has a very strong “earthy” flavor. If you are new to beet juice, start with a smaller amount and increase it as you get used to the taste.

  • Cold is Best: Chill your vegetables in the fridge before juicing for a crisp, refreshing drink without needing ice.

  • Don’t Waste the Pulp: If you use a juicer, you can save the leftover carrot and beet pulp to mix into muffin batters or compost for your garden.

Keto Garlic Parmesan Chicken Skewers

Keto Garlic Parmesan Chicken Skewers 🍢 Prep: 15 mins | Cook: 15 mins | Servings: 4 (2 skewers each)

INGREDIENTS:

  • 1½ lb Chicken breast (cut into 1-inch chunks)

  • ½ cup Parmesan cheese (grated)

  • 3 tbsp Olive oil

  • 4 cloves Garlic (minced)

  • 2 tbsp Fresh parsley (chopped)

  • 1 tsp Italian seasoning

  • ½ tsp Lemon zest

  • ½ tsp Paprika

  • ¾ tsp Salt & ½ tsp Black pepper

INSTRUCTIONS: 1️⃣ Marinate: In a large mixing bowl, combine olive oil, minced garlic, lemon zest, Italian seasoning, paprika, salt, pepper, and half of the parsley. 2️⃣ Coat: Toss the chicken chunks in the marinade until well-coated. Add the Parmesan cheese and toss again so the cheese sticks to the chicken. 3️⃣ Skewer: Thread the chicken pieces onto your skewers (if using wooden skewers, soak them in water first!). 4️⃣ Grill: Preheat your grill to medium-high. Grill for 12–15 minutes, turning with tongs occasionally, until the chicken is cooked through and the cheese forms a golden crust. 5️⃣ Garnish: Sprinkle with the remaining fresh parsley and serve hot.

Pairs perfectly with a side of garlic aioli or a crisp green salad! YUMM! 😋


💡 Pro-Tips for Success

  • Switch the Protein: If you prefer a juicier skewer, swap the chicken breast for chicken thighs. They have a higher fat content, which is great for keto and makes them harder to overcook.

  • Cheese Choice: If you’ve run out of Parmesan, Pecorino Romano is a fantastic salty alternative that melts and crisps up beautifully.

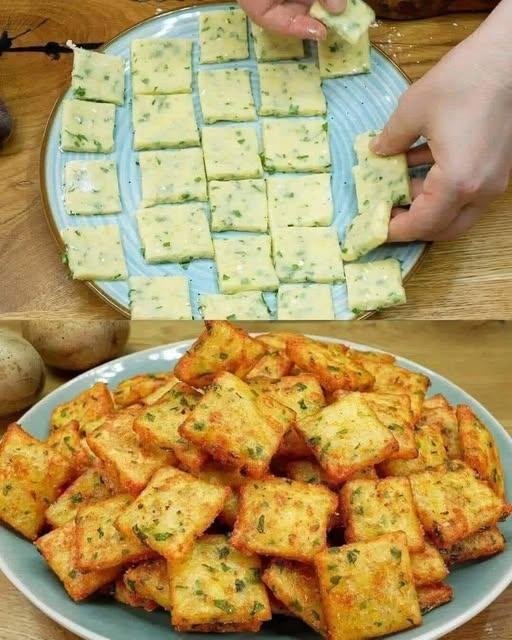
Crispy Zucchini & Potato Pancakes

Crispy Zucchini & Potato Pancakes 🥞 Prep: 10 mins | Cook: 10 mins | Yields: Large batch

INGREDIENTS:

  • 1 Zucchini (grated)

  • 1 Potato (grated)

  • 3 Eggs

  • 300 ml Milk

  • 140 g Flour

  • 1 tsp Baking powder

  • Fresh spring onions & parsley (chopped)

  • Salt to taste

  • Plant oil for frying

INSTRUCTIONS: 1️⃣ Squeeze Dry: Grate the zucchini and potato. Wrap them in a clean kitchen towel and twist hard to remove ALL excess liquid. This ensures they get crispy, not soggy! 2️⃣ The Batter: In a bowl, whisk eggs and milk until frothy. Slowly whisk in flour and baking powder until smooth. 3️⃣ Combine: Fold in the dried veggies, chopped herbs, and salt. 4️⃣ Fry: Heat oil in a non-stick skillet over medium heat. Spoon small rounds of batter into the pan. 5️⃣ Flip: Cook for 2-3 minutes per side until beautifully golden brown.

Serve hot with a dollop of Greek yogurt or garlic dip. YUMM! 😋

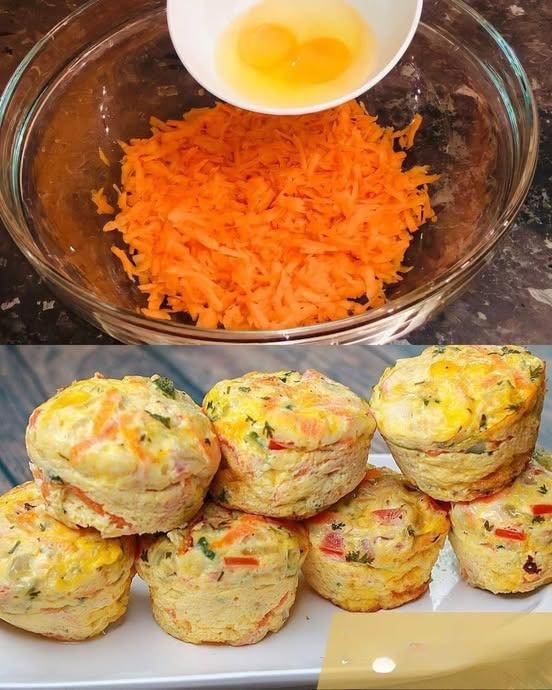
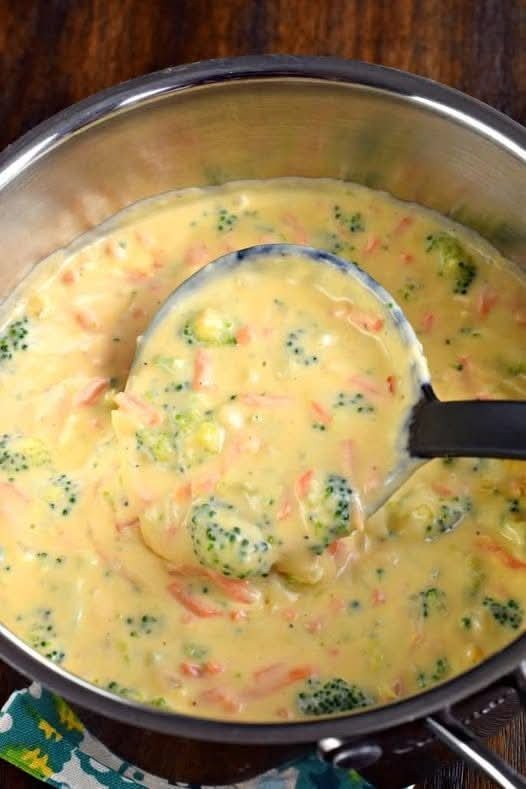
Carrot Soup

Carrot Soup


Ingredients:

1 tablespoon olive oil

1 onion, chopped

2 garlic cloves, minced

1 lb (about 4–5) carrots, peeled and sliced

4 cups vegetable or chicken stock

½ teaspoon salt (more to taste)

¼ teaspoon black pepper

½ teaspoon ground ginger or 1 teaspoon fresh grated (optional)

½ cup cream or coconut milk (optional)

fresh parsley or chives (optional garnish)


Instructions:


1. Heat olive oil in a pot over medium heat.

2. Add onion and cook until soft.

3. Add garlic and carrots and stir a minute.

4. Pour in stock, salt, pepper, and ginger.

5. Bring to a boil, then reduce heat and simmer until carrots are very tender.

6. Use a blender or stick blender to puree the soup until smooth.

7. Stir in cream or coconut milk if using; heat through.

8. Taste and adjust seasoning.

9. Serve warm with parsley or chives on top.

No-Bake Nutty Chocolate Energy Bars with Cashew Cream

No-Bake Nutty Chocolate Energy Bars with Cashew Cream


🧾 Ingredients

For the Chocolate Base:

  • 100 g (3½ oz) oats

  • 60 g (2 oz) dates, pitted

  • 2 tablespoons peanut butter

  • 1 teaspoon cocoa powder

  • ½ cup mixed nuts (almonds, hazelnuts, or walnuts), lightly roasted and chopped

For the Cashew Cream:

  • 150 g (5 oz) cashews (soaked in hot water for 30–40 minutes)

  • ¼ cup water or plant milk (add gradually)

  • 1 tablespoon honey or maple syrup (optional)

Topping (optional):

  • Pumpkin seeds

  • Dried cranberries

  • Chopped nuts


🧑‍🍳 Instructions

1️⃣ Prepare the Chocolate Base

  • Add oats, dates, peanut butter, and cocoa powder to a food processor.

  • Blend until the mixture becomes thick and sticky.

  • Transfer to a bowl and mix in the chopped nuts by hand.

  • Press the mixture firmly into the bottom of a lined square pan or muffin mold to form an even layer.


2️⃣ Make the Cashew Cream

  • Drain the soaked cashews.

  • Add them to a blender with a small amount of water or plant milk.

  • Blend until smooth and creamy. Add liquid slowly until desired texture is reached.


3️⃣ Assemble the Bars

  • Spread the cashew cream evenly over the chocolate base.

  • Sprinkle toppings over the surface if desired.


4️⃣ Chill and Set

  • Place in the freezer for 2 hours or until firm.

  • Remove and cut into bars or squares.


🍽 Storage

  • Store in an airtight container in the refrigerator for up to 7 days.

  • For longer storage, keep in the freezer and thaw slightly before eating.


✅ Helpful Tips

  • If dates are dry, soak them in warm water for 10 minutes before blending.

  • For a softer base, add 1–2 teaspoons of milk while blending.

  • Use parchment paper for easy removal.

Oil-Free Orange Cranberry Loaf

Oil-Free Orange Cranberry Loaf
This soft and flavorful loaf gets its moisture from applesauce instead of oil, making it light, tender, and perfect for tea time or holiday baking.


🧾 Ingredients

  • 2 cups all-purpose flour (or 1:1 gluten-free baking blend)

  • 1 cup fresh or frozen cranberries

  • 1 cup orange juice (freshly squeezed for best flavor)

  • 1 tablespoon orange zest

  • ¾ cup granulated sugar (or coconut sugar)

  • 1 teaspoon vanilla extract

  • 1 teaspoon baking powder

  • ½ teaspoon baking soda

  • ½ teaspoon salt

  • ½ cup unsweetened applesauce

Optional topping:

  • Sliced almonds or rolled oats


👩‍🍳 Instructions

1. Prepare the Oven and Pan

Preheat your oven to 175°C (350°F).

Line a standard loaf pan with baking paper or lightly grease it with a small amount of butter or non-stick spray to prevent sticking.


2. Mix the Dry Ingredients

In a large bowl, add:

  • Flour

  • Sugar

  • Baking powder

  • Baking soda

  • Salt

Whisk well until evenly mixed.

Add the cranberries to the dry mixture and gently toss them in the flour. This helps keep them evenly distributed while baking.


3. Mix the Wet Ingredients

In a separate bowl, combine:

  • Orange juice

  • Orange zest

  • Applesauce

  • Vanilla extract

Whisk until smooth.


4. Make the Batter

Pour the wet mixture into the dry mixture.

Using a spatula or spoon, mix gently until just combined.
Do not overmix — this keeps the loaf soft and tender.

The batter will be thick.


5. Bake

Pour the batter into the prepared loaf pan and smooth the top.

Sprinkle almonds or oats on top if using.

Place in the oven and bake for 50–60 minutes, or until:

  • The top is lightly golden

  • A toothpick inserted in the center comes out clean

If the top browns too quickly, cover loosely with foil during the last 10 minutes.


6. Cool

Remove from the oven and let the loaf rest in the pan for 10 minutes.

Carefully transfer to a wire rack and allow to cool completely before slicing.
This helps the loaf hold its shape.


🍽 Serving Suggestions

Serve:

  • Plain

  • With tea or coffee

  • With a light dusting of powdered sugar

  • With a simple orange glaze (powdered sugar + orange juice)


📦 Storage

  • Store covered at room temperature for 2 days

  • Refrigerate for up to 5 days

  • Freeze slices for up to 1 month


⭐ Helpful Tips

✔ Use unsweetened applesauce
✔ Fresh orange juice gives better flavor
✔ Do not overmix the batter
✔ Frozen cranberries can be used without thawing

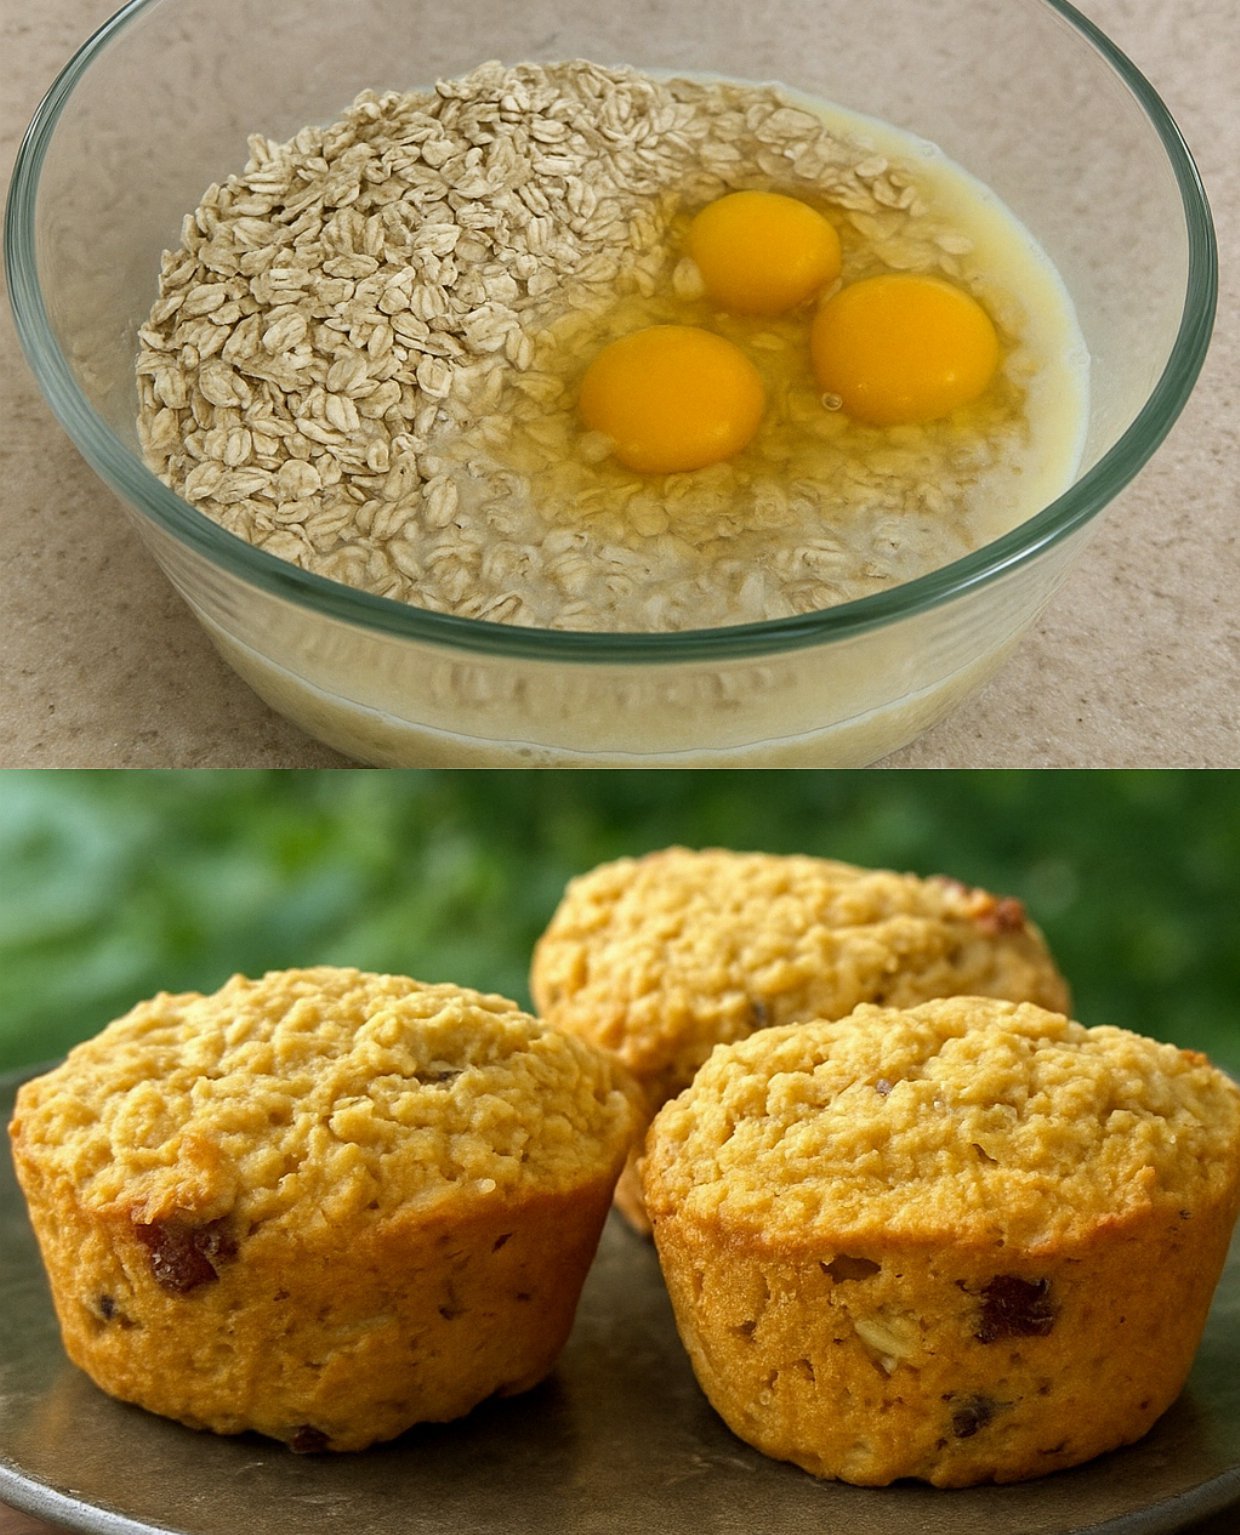
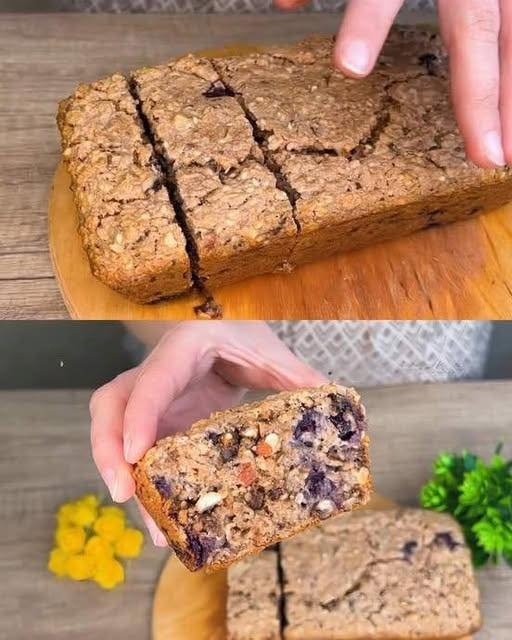
Easy & Delicious Oatmeal Apple Cake

Easy & Delicious Oatmeal Apple Cake


🧾 Ingredients

  • 200 g oat flakes

  • 250 ml milk

  • 3 eggs (room temperature)

  • 2 ripe bananas

  • 1 apple

  • Cinnamon, to taste

Optional (for extra flavor or texture):

  • 1 tablespoon honey or maple syrup (only if bananas are not sweet)

  • A handful of chopped walnuts or pecans


👩‍🍳 Instructions

1. Soak the Oats

Place the oat flakes in a large mixing bowl.

Pour in the milk and stir well.

Let the mixture rest for 10 minutes so the oats soften and absorb the liquid. This helps create a moist and tender cake texture.


2. Prepare the Fruit

Peel the bananas and mash them with a fork until smooth.

Wash the apple, remove the core, and slice it into thin, even slices. Set aside for topping.


3. Make the Batter

Add the mashed bananas to the soaked oats.

Crack in the eggs.

Add cinnamon according to your taste.

Mix everything thoroughly with a whisk or spoon until the batter is smooth and evenly combined.

If using honey or maple syrup, stir it in now.


4. Prepare for Baking

Preheat your oven to 180°C (350°F).

Grease a round cake pan or line it with baking paper.

Pour the batter into the pan and spread it evenly.

Arrange the apple slices neatly on top in a circular or decorative pattern.

If using nuts, sprinkle them over the top.


5. Bake

Place the pan in the preheated oven.

Bake for 35–40 minutes, or until:

  • The cake feels firm in the center

  • A toothpick inserted into the middle comes out clean

  • The apple slices on top are lightly golden

Remove from the oven and let the cake cool in the pan for about 10–15 minutes.


🍽 Serving Suggestions

Serve:

  • Warm or cold

  • With tea or coffee

  • With yogurt or a light drizzle of honey

  • As a breakfast cake or snack


⭐ Helpful Tips

✔ Use ripe bananas for natural sweetness
✔ Thin apple slices bake more evenly
✔ Do not overbake to keep the cake soft
✔ You can add raisins or dates for extra sweetness


📦 Storage

  • Store covered at room temperature for 1 day

  • Refrigerate for up to 3 days

  • Can be frozen in slices for up to 1 month

Grandma’s Chocolate Yogurt Marble Cake

Grandma’s Chocolate Yogurt Marble Cake
This soft and moist cake combines rich chocolate batter with creamy yogurt filling, creating a beautiful marbled look and a tender texture in every slice.


🧾 Ingredients

For the Cake Batter:

  • 3 eggs (room temperature)

  • 150 g (¾ cup) sugar

  • 110 ml vegetable or sunflower oil

  • 110 ml milk

  • 250 g (about 1⅔ cups) all-purpose flour

  • 15 g baking powder

  • 20 g cocoa powder

  • 2 tablespoons milk (for cocoa mixture)

  • A dash of vanilla extract

  • A pinch of salt


For the Yogurt Filling:

  • 300 g thick yogurt or Greek yogurt

  • 1 egg

  • 50 g sugar

  • 1 tablespoon cornstarch


👩‍🍳 Instructions

1. Prepare the Base Batter

In a large mixing bowl, add:

  • Eggs

  • Sugar

  • Salt

  • Vanilla extract

Whisk well until the mixture becomes pale and slightly thick.

Slowly add:

  • Oil

  • Milk

Whisk again until fully combined.

Sift in:

  • Flour

  • Baking powder

Fold gently using a spatula until smooth and lump-free. Do not overmix.


2. Make the Chocolate Batter

Transfer about one-third of the batter into a separate bowl.

In another small bowl, mix:

  • Cocoa powder

  • 2 tablespoons milk

Stir to form a smooth paste.

Add this cocoa paste to the smaller portion of batter and mix until dark and well blended.


3. Prepare the Yogurt Filling

In a bowl, combine:

  • Yogurt

  • Egg

  • Sugar

  • Cornstarch

Whisk until smooth and creamy. Set aside.


4. Assemble the Cake

Preheat oven to 180°C (350°F).

Grease a round cake pan or springform pan.

Pour the chocolate batter into the pan and spread evenly.

Pour the plain batter over the chocolate layer.

Use a skewer or knife to gently swirl the batters together to create a marble effect.

Spoon small dollops of the yogurt mixture on top. They will sink slightly during baking and create creamy pockets inside the cake.


5. Bake

Place the pan in the oven and bake for 35–45 minutes.

Check doneness by inserting a toothpick into the cake portion (not the yogurt spots). It should come out clean.

Remove from oven and let the cake cool completely in the pan before removing.


🍽 Serving

Slice and serve:

  • Plain

  • With tea or coffee

  • Lightly dusted with powdered sugar

  • With fresh fruit


⭐ Helpful Tips

✔ Do not overmix the batter
✔ Use thick yogurt for best texture
✔ Let cake cool fully before slicing
✔ Add chocolate chips for extra richness


📦 Storage

  • Store covered at room temperature for 1 day

  • Refrigerate for up to 3 days

  • Can be frozen for up to 1 month

Dreamy Creamy Dessert: Delicious recipe made in a glass dish

Hello, everyone, today we’re going to learn how to make Creamy Dessert using simple ingredients. So grab your pen and paper to jot down the ingredients, then follow the complete preparation method.

How to Make Dreamy Creamy Dessert

An irresistible dessert with smooth cream, crunchy cookies, and just the right touch of chocolate. Perfect for parties and special occasions. See below the list of all ingredients and required quantities. And then, a very complete preparation method with details of the recipe.

Recipe Ingredients:

White Cream:

  • 2 egg yolks
  • 1 can sweetened condensed milk (14 oz / 395g)
  • 2 cups milk (16 fl oz / 480ml)
  • 2 tablespoons cornstarch (0.7 oz / 20g)
  • 1 teaspoon vanilla extract (0.17 oz / 5ml)

Chocolate Ganache:

  • 7 oz chopped semi-sweet chocolate (200g)
  • 1 small box of table cream or heavy cream (6.7 oz / 200g)

Assembly:

  • 1 package of ladyfinger or Maria cookies (about 6 oz / 170g)
  • Milk for soaking the cookies
  • Chocolate sprinkles or chocolate shavings (optional)

Instructions:

White Cream:
First, in a saucepan, combine the sweetened condensed milk, milk, egg yolks, and cornstarch. Stir well before turning on the heat to ensure all ingredients are fully mixed.

Then, place over medium heat, stirring constantly, until the mixture thickens into a creamy consistency.

Right after that, turn off the heat and stir in the vanilla extract. Set aside and let it cool completely.

Ganache:
Next, melt the chocolate using a double boiler or microwave, heating it in 30-second intervals and stirring in between.

After that, add the heavy cream to the melted chocolate and mix until smooth and glossy.

Assembly:
Afterwards, in a glass baking dish, make a layer using cookies dipped in milk. Then, spread half of the white cream on top of the cookies.

Next, add another layer of milk-dipped cookies, followed by the remaining white cream.

To finish, pour the chocolate ganache over the top. If you like, decorate with chocolate sprinkles or shavings.

Lastly, refrigerate for at least 3 hours before serving, so the dessert sets properly and is nicely chilled.

Delicious Nut and Date Energy Bars for a Quick Snack

Delicious Nut and Date Energy Bars for a Quick Snack

If you’re on the hunt for a healthy yet tasty snack, look no further! These Nut and Date Energy Bars are packing a serious punch in both flavor and nutrition. Perfect as a quick pick-me-up or a pre-workout boost, they’re made with wholesome ingredients that are not only good for you but also incredibly satisfying. Their chewy texture, coupled with the crunch from the nuts and seeds, makes them a delightful treat that’s hard to resist. Plus, they’re super easy to whip up at home!


Ingredients You’ll Need

To create your own Nut and Date Energy Bars, you’ll need the following ingredients:


75 g (1/2 cup or 2.6 oz) almonds

50 g (1/2 cup or 1.8 oz) walnuts

50 g (1/2 cup or 1.8 oz) pumpkin seeds

250 g (1 2/3 cups or 8.8 oz) pitted dates

100 g (1/3 cup or 3.5 oz) peanut butter

40 g (1/4 cup or 1.4 oz) dried cranberries

1 pinch of salt

How to Make Nut and Date Energy Bars

Follow these simple steps to create your Nut and Date Energy Bars:

Line an 8×8 inch baking dish with parchment paper to make removing the bars easier.

Using a food processor, coarsely chop the almonds, walnuts, and pumpkin seeds.

Add the pitted dates to the processor. Blend everything together until it becomes a clumpy mixture. If your dates are dry, soak them in warm water for a bit before adding them.

Mix in the peanut butter and a pinch of salt. Blend until you achieve a dough-like consistency.

Stir in the dried cranberries either by hand or with a quick pulse in the processor.

Transfer the mixture to the prepared baking dish and press it down firmly into an even layer.

Place the dish in the refrigerator for at least 1 hour to let the bars firm up.

Once they are firm, lift the mixture out of the dish and slice it into bars. Store any leftovers in the refrigerator.

Why Everyone Is Loving This Nut and Date Energy Bars

With a growing interest in healthy snacking options, people are searching for recipes like these Nut and Date Energy Bars now more than ever. They’re not only convenient but also cater to a variety of dietary preferences, making them a fantastic choice for anyone looking to eat healthier. Packed with protein, fiber, and essential nutrients, these bars are perfect for those busy days when you need that extra energy without compromising on quality.


How to Serve Nut and Date Energy Bars

These delicious energy bars can be enjoyed at any time of the day! Grab one for breakfast as you rush out the door, enjoy them as a mid-afternoon snack, or even serve them at your next gathering as a healthy treat. They pair wonderfully with a cup of yogurt or a smoothie for a balanced meal. You can also sprinkle some extra pumpkin seeds or chopped nuts on top for added crunch if you like!


Expert Tips for Nut and Date Energy Bars

Storage: Keep your energy bars in an airtight container in the fridge for up to two weeks. They also freeze well if you want to make a larger batch ahead of time.

Flavor Variations: Feel free to swap in other nuts like cashews or hazelnuts, or try adding a bit of cocoa powder for a chocolatey twist!

Dietary Swaps: If you’re allergic to peanuts, almond or cashew butter can be a delightful alternative.

Nut and Date Energy Bars: Frequently Asked Questions

1. Can I use other types of nuts?

Absolutely! You can try different nuts or seeds based on your preference.

2. How can I make these bars sweeter?

If you prefer a sweeter bar, consider adding a touch of honey or maple syrup before blending.


3. Are these bars suitable for kids?

Yes, they make a great healthy snack for kids and can be packed in lunchboxes!


Take a little time to make these Nut and Date Energy Bars at home. They’re not only easy to prepare, but they also offer a great way to refuel your body naturally. Enjoy the chewy goodness for yourself and share them with family and friends!

Strawberry Pineapple Mango Smoothie

Strawberry Pineapple Mango Smoothie

Ingredients

Strawberry: 4–5 fresh or frozen berries.


Pineapple: 1/2 cup fresh or frozen chunks.


Mango: 1/2 cup fresh or frozen chunks.


Chia Seeds: 1 tablespoon.


Liquid Base: 1 cup of your choice (Water, Coconut Water, or Almond Milk work best for this flavor profile).


Optional: A squeeze of lime or a teaspoon of honey if you prefer it extra sweet.


Instructions

Prep the Fruit: Wash the strawberries and remove the green stems. If using fresh mango and pineapple, peel and dice them into cubes.


Combine: Add the strawberries, pineapple, mango, and chia seeds into your blender.


Add Liquid: Pour in your chosen liquid base. Using frozen fruit will result in a thicker, colder smoothie; if using fresh fruit, you may want to add 1/2 cup of ice.


Blend: Start on a low speed and gradually increase to high. Blend for about 45–60 seconds until the chia seeds are well incorporated and the mixture is completely smooth.


Serve: Pour into a glass and enjoy immediately.


Why this combination works:

Mango & Pineapple: Provide a creamy texture and a burst of tropical Vitamin C.


Strawberries: Add a light tartness and antioxidants.


Chia Seeds: These are “powerhouse” seeds that add healthy Omega-3 fatty acids and help keep you feeling full longer.

🍌 The Ultimate Creamy Banana Smoothie

🍌 The Ultimate Creamy Banana Smoothie


Prep time: 5 minutes | Servings: 1-2


Ingredients


To get that frothy texture seen in your photo, using a frozen banana is the secret!

1 large banana (peeled and frozen for extra creaminess)


1 cup milk of choice (dairy, almond, or oat work great)


1/4 cup Greek yogurt (adds tang and protein)

1/2 tsp vanilla extract


1 tsp honey or maple syrup (optional, depending on banana ripeness)


A pinch of cinnamon (optional, for warmth)

Ice cubes (only if you didn’t use a frozen banana)


Instructions


Prep the Banana: For the best results, slice your banana into chunks before freezing. If you’re using a fresh banana, add about 1/2 cup of ice to the blender to get that chilled, thick consistency.

Layer the Liquid: Add your milk and yogurt to the blender first. This helps the blades spin freely and prevents the fruit from getting stuck at the bottom.


Combine: Add the banana chunks, vanilla, and sweetener.


Blend: Start on a low speed and gradually increase to high. Blend for about 45–60 seconds until completely smooth and frothy.

Garnish: Pour into a glass and top with fresh banana slices and a light dusting of cinnamon, just like in your image.


💡 Pro Tips for Success


The “Spot” Rule: Use bananas that have a few brown spots. They have a much higher sugar content, which means you won’t need to add any extra honey or syrup.

Make it Thick: If you want a “smoothie bowl” consistency, reduce the milk to 1/2 cup.


Boost It: Feel free to throw in a tablespoon of peanut butter or a handful of spinach (though the color will change to green!).

Sheet Pan Blueberry Pancakes

Sheet Pan Blueberry Pancakes

Ingredients

The Dry Mix:


2 cups All-purpose flour


2 tbsp Granulated sugar


1 tbsp Baking powder


1/2 tsp Salt


The Wet Mix:


1 ½ cups Milk (whole or 2% works best)


2 Large eggs


4 tbsp Unsalted butter, melted and slightly cooled


1 tsp Vanilla extract


The Topping:


1 – 1 ½ cups Fresh blueberries (frozen works too, just don’t thaw them first)


Instructions

Prep the Oven: Preheat your oven to 425°F (220°C). Grease a standard 13×18 inch rimmed baking sheet (half-sheet pan) generously with butter or non-stick spray. For extra safety against sticking, you can line it with parchment paper.


Mix Dry Ingredients: In a large bowl, whisk together the flour, sugar, baking powder, and salt.


Mix Wet Ingredients: In a separate medium bowl, whisk the milk, eggs, melted butter, and vanilla until smooth.


Combine: Pour the wet ingredients into the dry ingredients. Whisk gently until just combined. Pro-tip: Don’t overmix! A few small lumps are perfectly fine and actually help keep the pancakes fluffy.


Pour and Spread: Pour the batter onto your prepared baking sheet. Use a spatula to spread it evenly into the corners.


Add Blueberries: Sprinkle the blueberries evenly over the top of the batter.


Bake: Place in the oven and bake for 12–15 minutes. You’re looking for a golden-brown top and a toothpick inserted into the center to come out clean.


Serve: Let it cool for a minute, then slice into squares just like in your photo.


Tips for Success

Fluffiness: If you want them extra tall, you can swap the milk for buttermilk and add 1/2 tsp of baking soda to the dry mix.


Crispy Edges: For those buttery, crispy edges, melt a little extra butter directly on the pan while the oven preheats, then swirl it around before adding the batter.


Customization: You can do “sections” if you have picky eaters—blueberries on one half, chocolate chips or strawberries on the other!

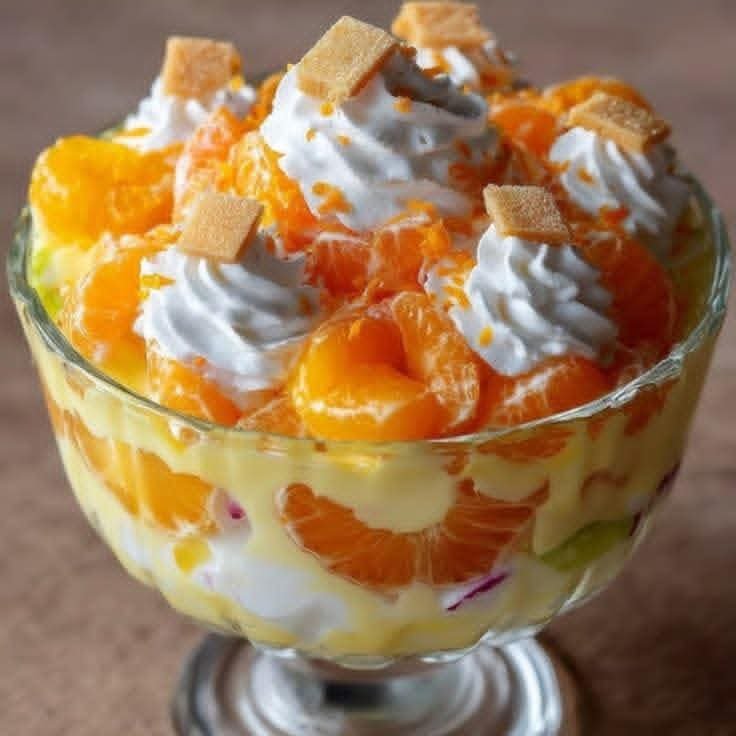
Mandarin Orange Salad

Mandarin Orange Salad

Refreshing Mandarin Orange Salad: A Step-by-Step Guide

If you’re looking for a salad that’s light, refreshing, and bursting with citrusy sweetness, the Mandarin Orange Salad is the perfect choice. It’s colorful, easy to make, and ideal as a side dish for lunch, dinner, or even as a vibrant addition to holiday meals. This salad combines crisp greens, juicy mandarin segments, and a hint of crunch, all dressed in a tangy-sweet dressing.


Ingredients You’ll Need

For the salad:


1 can (11 oz) of mandarin orange segments, drained (or fresh mandarin slices)

6 cups mixed salad greens (romaine, spinach, arugula, or spring mix)

½ cup sliced almonds, toasted

½ cup shredded carrots

¼ cup thinly sliced red onion

½ cup crumbled feta cheese or goat cheese (optional)

½ cup dried cranberries or raisins (optional)

For the dressing:

3 tablespoons olive oil

2 tablespoons white wine vinegar or apple cider vinegar

1 tablespoon honey or maple syrup

1 teaspoon Dijon mustard

Salt and black pepper to taste

Step-by-Step Instructions

Step 1: Prepare the Salad Base

Start by washing your salad greens thoroughly under cold water. Spin them dry in a salad spinner or pat dry with a clean kitchen towel. Place the greens in a large mixing bowl as the base of your salad.


Step 2: Add Vegetables and Crunch

Add shredded carrots and thinly sliced red onions to the greens. These ingredients give the salad texture, color, and subtle flavor contrasts.


Step 3: Toast the Almonds

In a small pan over medium heat, toast the sliced almonds until they turn golden brown and emit a nutty aroma. Stir constantly to prevent burning. Once done, remove from heat and allow them to cool slightly before adding to the salad.

Step 4: Incorporate the Mandarin Oranges

Drain the mandarin oranges if using canned ones, or peel and segment fresh mandarins. Gently fold them into the salad, being careful not to mash the delicate fruit. Their bright, juicy flavor is the star of this dish.


Step 5: Add Cheese and Optional Ingredients

Sprinkle crumbled feta or goat cheese over the salad for a creamy, tangy element. If you like, add dried cranberries or raisins for a touch of sweetness. These optional ingredients make the salad more complex and flavorful.


Step 6: Make the Dressing

In a small bowl or jar, whisk together olive oil, vinegar, honey, and Dijon mustard until well combined. Season with a pinch of salt and freshly ground black pepper. Taste and adjust the sweetness or acidity to your liking.

Step 7: Dress the Salad

Pour the dressing over the salad just before serving. Toss gently to coat all ingredients evenly without crushing the mandarin slices. The dressing should lightly coat the salad rather than drenching it.


Step 8: Serve Immediately

Transfer the salad to a serving bowl or individual plates. Garnish with extra toasted almonds or a few whole mandarin slices for a visually appealing presentation. Serve fresh and enjoy the burst of citrus flavor in every bite.

Easy and Crispy Homemade Hash Browns with Cheese Sauce

Easy and Crispy Homemade Hash Browns with Cheese Sauce

There’s something incredibly satisfying about homemade hash browns, especially when they’re crispy on the outside and fluffy on the inside. This Easy and Crispy Homemade Hash Browns with Cheese Sauce recipe is perfect for breakfast, dinner, or even as a delicious snack. With autumn in the air and cozy nights ahead, this recipe is trending as everyone looks for comforting meals that warm the heart and fill the stomach. Plus, who can resist a rich, cheesy sauce drizzled over perfectly fried potatoes? Let’s get cooking!

What You’ll Need for Crispy Homemade Hash Browns with Cheese Sauce

900 g (2 lb) potatoes, peeled and grated

Cold water, as needed

4 tbsp cornstarch

Salt, to taste

Black pepper, to taste

Paprika, to taste

Oil for frying

25 g (1 oz) butter

1 tbsp wheat flour

240 ml (1 cup) milk

40 g (1.5 oz) cheese, grated

Extra salt and black pepper, to taste

How to Make Crispy Homemade Hash Browns with Cheese Sauce

Prepare the Potatoes: Grate the potatoes and immediately place them in a bowl of cold water. This will help remove excess starch, keeping your hash browns extra crispy.

Drain and Dry: After soaking for a few minutes, drain the potatoes well. Squeeze them firmly with your hands or use a clean kitchen towel to remove as much moisture as possible.

Season the Potatoes: Transfer the drained potatoes to a bowl and sprinkle in the cornstarch, salt, black pepper, and paprika. Mix it all together until the potatoes are evenly coated.

Heat the Oil: In a large pan, heat a generous amount of oil over medium heat.

Shape and Fry: Shape the potato mixture into flat patties and carefully place them in the hot oil. Fry for about 5–7 minutes on each side until they are golden brown and crispy. Once cooked, drain the hash browns on paper towels to remove any excess oil.

Make the Cheese Sauce: In a saucepan over medium heat, melt the butter. Add the flour and cook, stirring for about 1 minute. Gradually pour in the milk while whisking continuously to avoid lumps. Keep cooking until the sauce thickens up.

Add the Cheese: Stir in the grated cheese along with some extra salt and pepper, mixing until everything is smooth and creamy.

Serve: Enjoy your crispy hash browns hot, either topped with the cheesy sauce or served on the side for dipping.

Why Everyone Is Loving This Crispy Homemade Hash Browns with Cheese Sauce

As comfort food becomes more sought-after during the colder months, recipes like this are becoming increasingly popular. Not only do they satisfy cravings, but they’re also easy to make, making them perfect for anyone looking to whip up a hearty meal without spending hours in the kitchen. Plus, the gooey cheese sauce adds an irresistible creamy texture that makes this dish a family favorite!

Serving Suggestions

These crispy hash browns are great for any meal of the day! Serve them for breakfast alongside eggs and toast, enjoy them as a savory snack, or even make them a part of your dinner plates. They pair wonderfully with a fresh salad or sautéed vegetables. Add some chives or green onions on top for a pop of color and flavor!


Helpful Tricks

Storage Tips: If you have leftovers, store the hash browns in an airtight container in the fridge for up to 3 days. Reheat in a skillet for the best texture.

Flavor Variations: Feel free to experiment with spices. Adding garlic powder or shredded carrots can kick up the flavor a notch!

Cheese Options: While cheddar is a classic choice for the cheese sauce, you could also try using mozzarella for a stretchier texture or a more pungent cheese like gouda for a unique twist.

Crispy Homemade Hash Browns with Cheese Sauce FAQs

Can I make these hash browns ahead of time?

Yes, you can prepare the potato mixture a few hours in advance. Just keep it covered in the fridge until you’re ready to fry

What type of potatoes is best for hash browns?

Russet potatoes are the best choice as their high starch content makes for crispy hash browns.


Can I bake these hash browns instead of frying?

Yes, you can bake them at 425°F (220°C) on a greased baking sheet for about 25-30 minutes, flipping halfway through. They might not be as crispy, but they’ll be healthier.

Give this recipe a try and enjoy the warm, cheesy goodness from your own kitchen. It’s a simple dish that brings a smile to the table, perfect for sharing and satisfying hunger all around. Bon appétit!

Blueberry Cream Cheese Crumb Cake

Blueberry Cream Cheese Crumb Cake

Description

A luscious, bakery-style treat featuring a soft, buttery cake base layered with tangy cream cheese, juicy blueberries, and a sweet crumbly streusel topping. This cake is perfect for brunch, tea time, or dessert, offering richness and fruitiness in every bite.

Ingredients

For the Cake Batter:

  • 1/2 cup (1 stick) unsalted butter, softened
  • 3/4 cup granulated sugar
  • 2 large eggs
  • 1 tsp vanilla extract
  • 1 1/2 cups all-purpose flour
  • 1 1/2 tsp baking powder
  • 1/4 tsp salt
  • 1/2 cup whole milk

For the Cream Cheese Layer:

  • 8 oz cream cheese, softened
  • 1/4 cup granulated sugar
  • 1 egg yolk
  • 1/2 tsp vanilla extract

For the Blueberry Layer:

  • 1 1/2 cups fresh or frozen blueberries
  • 1 tbsp all-purpose flour (optional, to coat berries and prevent sinking)

For the Crumb Topping:

  • 1/2 cup all-purpose flour
  • 1/4 cup brown sugar
  • 1/4 cup granulated sugar
  • 1/2 tsp ground cinnamon
  • 1/4 cup unsalted butter, melted

Instructions

  1. Preheat Oven:
    Preheat your oven to 350°F (175°C). Grease and flour a 9-inch springform or square baking pan.
  2. Prepare Cake Batter:
    • In a bowl, cream the softened butter and sugar together until light and fluffy.
    • Beat in the eggs, one at a time, then add vanilla.
    • In a separate bowl, whisk together flour, baking powder, and salt.
    • Alternate adding the dry ingredients and milk into the butter mixture, mixing just until combined.
    • Spread the batter evenly into the prepared pan.
  3. Cream Cheese Layer:
    • In a bowl, beat the cream cheese, sugar, egg yolk, and vanilla extract until smooth.
    • Gently spread this mixture over the cake batter in the pan.
  4. Blueberry Layer:
    • Toss blueberries with 1 tbsp flour (optional).
    • Evenly distribute the blueberries over the cream cheese layer.
  5. Crumb Topping:
    • In a bowl, combine flour, brown sugar, granulated sugar, cinnamon, and melted butter. Mix until crumbly.
    • Sprinkle over the top of the blueberry layer.
  6. Bake:
    • Bake for 45–55 minutes, or until the top is golden and a toothpick inserted in the center comes out mostly clean (it’s okay if a little cream cheese clings).
    • Let the cake cool in the pan for 10 minutes, then remove to a wire rack to cool completely.

Notes

  • Frozen blueberries? Don’t thaw before using—just coat in flour to prevent sinking.
  • For a lemon twist: Add 1 tsp lemon zest to the cream cheese mixture.
  • Storage: Store leftovers in the fridge for up to 4 days because of the cream cheese layer.

Tips

  • Don’t overmix the cake batter—this keeps it soft and tender.
  • Use a springform pan for easy removal and a clean presentation.
  • Serve slightly warm or at room temperature for best flavor.

Servings

Makes 8–10 generous slices.

Nutritional Information (Per serving, approx.):

  • Calories: 370
  • Protein: 5g
  • Fat: 20g
  • Carbohydrates: 42g
  • Sugar: 24g
  • Fiber: 2g
  • Calcium: 6% DV
    (Values may vary depending on specific ingredients.)

Benefits

  • Rich flavor with creamy, fruity, and crumbly textures.
  • Great make-ahead dessert—tastes even better the next day!
  • Blueberries provide antioxidants and vitamin C.
  • Versatile—works as a dessert, breakfast, or tea-time treat.

Q&A Section

Q: Can I use other berries instead of blueberries?

A: Yes! You can use raspberries, blackberries, or chopped strawberries. Keep the total berry amount to about 1 1/2 cups for best texture.

Q: Can I freeze this cake?

A: Absolutely. Slice the cake, wrap tightly in plastic wrap and foil, and freeze for up to 2 months. Thaw overnight in the fridge or microwave for a quick treat.

Q: Can I make this gluten-free?

A: Yes. Use a 1:1 gluten-free flour blend in place of the all-purpose flour for all components of the cake.

Q: What’s the best way to serve it?

A: Slightly warm, dusted with powdered sugar or topped with whipped cream.

Classic Moist Vanilla Sheet Cake

Classic Moist Vanilla Sheet Cake

Ingredients

  • 2 1/2 cups All-purpose flour

  • 1 3/4 cups Granulated sugar

  • 1 1/4 cups Whole milk (room temperature)

  • 1/2 cup (1 stick) Unsalted butter (softened)

  • 1/2 cup Vegetable oil

  • 4 Large eggs (room temperature)

  • 1 tbsp Vanilla extract

  • 2 1/2 tsp Baking powder

  • 1/2 tsp Salt


Instructions

1. Prep and Preheat

  • Preheat your oven to 175°C (350°F).

  • Grease a 9×13 inch baking pan and line the bottom with parchment paper to ensure the cake releases easily, as seen in the provided image.

2. Mix Dry Ingredients

  • In a medium bowl, whisk together the flour, baking powder, and salt. Set this aside.

3. Cream Butter and Sugar

  • In a large mixing bowl (or stand mixer), beat the softened butter and granulated sugar together on medium-high speed until the mixture is light and fluffy (about 3 minutes).

  • Pour in the vegetable oil and mix until well combined.

4. Add Eggs and Vanilla

  • Add the eggs one at a time, beating well after each addition.

  • Stir in the vanilla extract.

5. Combine Everything

  • Reduce the mixer speed to low. Add the flour mixture in three parts, alternating with the milk, starting and ending with the flour.

  • Mix just until combined; do not overmix, or the cake may become dense.

6. Bake

  • Pour the batter into the prepared pan and smooth the top with a spatula.

  • Bake for 30–35 minutes, or until the top is golden brown and a toothpick inserted into the center comes out clean.

7. Cool and Serve

  • Place the pan on a wire rack and let the cake cool completely before frosting.


Pro Tip for the Best Texture

Using room temperature milk and eggs is essential! It allows the ingredients to emulsify properly, creating a uniform, velvety crumb that doesn’t crumble when sliced.

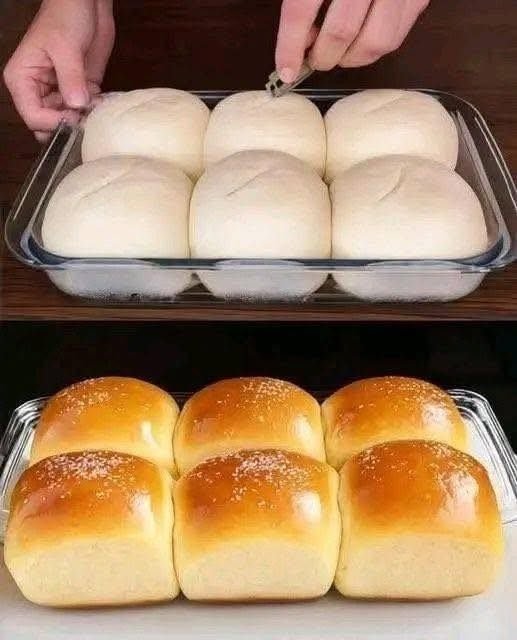
Fluffy Stovetop Milk Bread (No Oven Needed)

Fluffy Stovetop Milk Bread (No Oven Needed)
These soft bread rolls are cooked in a pan instead of an oven, giving them a golden outside and a very fluffy inside. They are perfect for breakfast, tea time, or as a sweet treat when coated in sugar.


🧾 Ingredients

  • 1 glass (200 ml) warm milk

  • 400 g (about 2 cups) all-purpose flour or bread flour

  • 50 g butter, softened

  • 2 tablespoons sugar

  • 1 teaspoon dry yeast

  • 1 teaspoon salt

  • Extra sugar for coating (optional)


👩‍🍳 Instructions

1. Activate the Yeast

Pour the warm milk into a large bowl.

Add:

  • Sugar

  • Dry yeast

Stir gently and let it rest for 5 minutes until the mixture becomes slightly foamy.
(This shows the yeast is active.)


2. Make the Dough

Add flour and salt to the milk mixture.

Mix with a spoon or your hands until a rough dough forms.

Add the softened butter and knead the dough for 8–10 minutes until:

  • Smooth

  • Soft

  • Elastic

  • Not sticky


3. First Rise

Lightly grease a bowl and place the dough inside.

Cover with a cloth or plastic wrap.

Leave in a warm place for 1 hour, or until the dough doubles in size.


4. Shape the Rolls

Gently press the dough to remove excess air.

Divide into equal portions and roll into small balls (about golf-ball size).

Place them on a tray, cover, and let them rest for 15 minutes.


5. Cook on the Stovetop

Lightly grease a wide non-stick pan with a small amount of oil or butter.

Place the dough balls in the pan with a little space between them.

Cover tightly with a lid.

Cook on very low heat for 10–12 minutes.

Flip the rolls gently, cover again, and cook for another 5–8 minutes until:

  • Both sides are golden

  • Bread sounds hollow when tapped


6. Finish and Serve

While still warm, roll the bread in sugar if you want a sweet coating.

Serve warm or at room temperature.


⭐ Important Tip

Keep the heat very low and the lid on at all times.
This creates steam inside the pan and helps the bread cook through without burning.


🍽 Serving Ideas

✔ With tea or coffee
✔ With jam or honey
✔ As a sandwich roll
✔ With butter or Nutella


📦 Storage

  • Store in an airtight container for up to 2 days

  • Reheat lightly in a pan or microwave

  • Can be frozen for up to 1 month