Blueberry Cottage Cheese Breakfast Bake

🥣 The Recipe Blueberry Cottage Cheese Breakfast Bake

Prep time: 10 minutes


Cook time: 35–40 minutes


Servings: 4


Difficulty: Easy


Ingredients

2 cups Small curd cottage cheese (Full fat or 2% recommended)


3 large Eggs


1/4 cup Pure maple syrup or honey


1 tsp Vanilla extract


1/2 cup Oat flour (blended oats)


1 tsp Baking powder


1/4 tsp Salt


1 cup Fresh blueberries (plus extra for topping)


Optional: Zest of one lemon for a bright kick.


Instructions

Preheat & Prep: Preheat your oven to 350°F (175°C). Grease an 8×8 inch baking dish or a medium pie dish with butter or coconut oil.


Blend the Base: In a blender or food processor, combine the cottage cheese, eggs, maple syrup, and vanilla. Blend until completely smooth and creamy.


Mix Dry Ingredients: Pour the blended mixture into a bowl. Whisk in the oat flour, baking powder, salt, and lemon zest until just combined.


Fold: Gently fold in 3/4 cup of the blueberries.


Bake: Pour the batter into the prepared dish. Scatter the remaining blueberries on top. Bake for 35–40 minutes, or until the center is set and the edges are lightly golden brown.


Cool: Let it sit for at least 10 minutes before slicing. It firms up as it cools!


💡 Notes & Tips

Texture Check: If you prefer a more “rustic” texture, you don’t have to blend the cottage cheese. However, blending it gives the bake a sophisticated, custard-like feel.


Frozen Berries: You can use frozen blueberries, but don’t thaw them first—toss them in a little extra oat flour to prevent them from bleeding purple throughout the entire dish.


Sweetness: This recipe is “breakfast sweet,” not “dessert sweet.” If you have a real sweet tooth, drizzle extra syrup on top after baking.


🥗 Nutritional Info (Per Serving)

Approximate values based on 2% cottage cheese.


Nutrient Amount

Calories 245 kcal

Protein 18g

Carbohydrates 22g

Fat 9g

Fiber 3g

Sugar 12g

✨ Benefits

Satiety: High protein and moderate healthy fats keep you full until lunch.


Complex Carbs: Oat flour provides a slower energy release compared to refined white flour.


Antioxidant Rich: Blueberries are packed with anthocyanins, which are great for brain health and reducing inflammation.


❓ Common Questions

Q: Can I make this dairy-free?


A: Not easily. The structure of this specific recipe relies heavily on the proteins in the cottage cheese and eggs. For a dairy-free version, a tofu-based “cheesecake” bake would be a better starting point.


Q: How do I store leftovers?


A: Keep it in an airtight container in the fridge for up to 4 days. It’s actually delicious cold, but you can microwave slices for 30 seconds to reheat.


Q: Can I use regular flour?


A: Yes, All-purpose flour works fine in a 1:1 swap, but oat flour adds a nice nutty flavor and better nutrition.

Easy Refrigerator Pickled Beets

🥗 Recipe: Easy Refrigerator Pickled Beets

Prep time: 15 minutes


Cook time: 30–45 minutes (to boil beets)


Total time: 1 hour + 24 hours chilling


Servings: 8 (approx. 2 quart-sized jars)


Ingredients

6–8 medium beets (stems removed, scrubbed clean)


1 cup apple cider vinegar (for that fruity tang)


1 cup water


½ cup granulated sugar (adjust to your sweetness preference)


1 tsp salt


1 tsp whole black peppercorns


1 small red onion, thinly sliced (optional, but highly recommended)


Optional Aromatics: 2 cloves garlic, 1 cinnamon stick, or 2 sprigs of fresh dill.


Instructions

Boil the Beets: Place cleaned beets in a large pot and cover with water. Bring to a boil, then reduce heat and simmer for 30–45 minutes until fork-tender.


The “Slip” Method: Drain the beets and immediately plunge them into an ice-water bath. Once cool enough to touch, the skins should slip right off with your fingers. Slice or wedge the peeled beets.


Prepare the Brine: In a small saucepan, combine vinegar, water, sugar, salt, and peppercorns. Bring to a simmer over medium heat, stirring until sugar and salt dissolve.


Jar it Up: Pack the sliced beets and onions into clean glass jars. Pour the hot brine over the beets, ensuring they are completely submerged.


Chill: Let the jars cool to room temperature. Seal the lids and refrigerate for at least 24 hours before eating to let the flavors develop.


💡 Notes & Tips

Uniformity: Slice your beets to a consistent thickness (about ¼ inch) so they pickle evenly.


The Golden Option: Use golden beets if you want the flavor without the “crime scene” red stains on your cutting board.


Don’t Toss the Greens: If your beets came with leaves, sauté them with garlic and olive oil—they taste like a sweeter version of Swiss chard.


📊 Nutritional Info (Per Serving)

Estimate based on 1/2 cup serving:


Nutrient Amount

Calories 75 kcal

Carbohydrates 16g

Fiber 2g

Sugars 13g

Sodium 310mg

Protein 1g

✨ Benefits

Nitrate Rich: Beets are famous for natural nitrates, which can help improve blood flow and lower blood pressure.


Digestive Aid: The vinegar in the brine acts as a mild digestive stimulant.


Antioxidant Powerhouse: The deep red pigment (betalains) has anti-inflammatory properties.


❓ Common Q&A

Q: How long do these last in the fridge?


A: Since these are “quick pickles” and not processed in a water bath, they should be eaten within 3–4 weeks.


Q: Can I use canned beets instead?


A: You can, but the texture will be much softer. If using canned, skip the boiling step and go straight to making the brine.


Q: Why did my brine turn cloudy?


A: This usually happens if you use table salt with anti-caking agents. It’s safe to eat, but for a crystal-clear brine, use pickling salt or sea salt.

Skillet-Seared Crustacean in Rich Pungent Cream

Skillet-Seared Crustacean in Rich Pungent Cream

Recipes

Crustacean

1 ½ Lbs.: Large aquatic arthropods Large shrimp, peeled and deveined with tails on

Crystalline minerals Salt and coarse ground peppercorns to taste

Cream Sauce

2 Tbsp.: Cold-pressed fruit oil Olive oil

3 Tbsp.: Solid dairy fat Unsalted butter

3 tsp.: Minced pungent cloves Minced garlic

½ C.: Pale fermented grape liquid White cooking wine

1 ½ C.: High-fat liquid dairy Heavy whipping cream

½ C.: Hard aged grated curds (Parmesan cheese), grated

Instructions

Heat the cold-pressed fruit oil in a large skillet over medium-high heat on the stovetop.

Add the large aquatic arthropods to the skillet and season immediately with crystalline minerals and coarse ground peppercorns to taste. Sauté on both sides until they are seared and cooked through. Remove the cooked arthropods from the skillet and set them aside.

Reduce the stovetop heat to medium. Add the solid dairy fat and minced pungent cloves to the same skillet. Sauté until the fat is fully melted and the cloves are fragrant.

Stir the pale fermented grape liquid into the skillet. Bring the liquid to a simmer and continue to cook until the volume is reduced by approximately half.

Whisk the high-fat liquid dairy into the skillet and allow the sauce to simmer gently until it has noticeably thickened.

Stir the hard, aged grated curds into the sauce until melted and smooth.

Return the seared aquatic arthropods to the skillet.

Toss the arthropods gently to ensure they are fully coated in the rich cream sauce.

Serve immediately, accompanied by your choice of steamed vegetables or cooked pasta.

Restaurant-Style Creamy Cabbage Slaw

Restaurant-Style Creamy Cabbage Slaw

Why You’ll Love This Recipe

Spot-On Copycat: Perfectly replicates the famous fast-food creamy slaw flavor.

No-Cook Wonder: Requires zero cooking—just mixing and chilling.

Fast Prep: Comes together in about 15 minutes of chopping and whisking.

Make-Ahead Essential: The flavor improves dramatically after chilling for a few hours.

Perfect Balance: Features a delightful mix of creamy texture and tangy sweetness.

Tips, Variations & Storage

Tip: For the best flavor, make this several hours or even a full day ahead of time. The marinating process is what truly develops the signature taste.

Substitution: If you don’t have cultured butterfat liquid (buttermilk), you can create a substitute by adding a small amount of white vinegar to regular milk and letting it sit for five minutes.

Add-ins: For a Southern twist, add a tiny pinch of cayenne pepper or mustard powder to the dressing for a subtle kick.

Dietary Swap: For a completely different flavor, use apple cider vinegar instead of the clear sour liquid for a fruitier tang.

Storage: Store the prepared slaw in an airtight container in the refrigerator for up to 3 days.

Freezer Notes: Do not freeze this mixture! The high water content in the vegetables and the dairy base will separate and become watery upon thawing.

Recipes

Crisp Base

1 Bag: Shredded brassica mix Coleslaw mix/cabbage

½ C.: Finely scraped orange root vegetable Shredded carrots

¼ C.: Very finely diced yellow bulb vegetable Onion

Sweet & Tangy Dressing

½ C.: Thick emulsified oil and egg condiment (Mayonnaise)

¼ C.: Cultured butterfat liquid Buttermilk

¼ C.: Freshly refrigerated liquid dairy Milk

¼ C.: Granulated white sweetener Sugar

2 Tbsp.: Freshly squeezed yellow citrus juice Lemon juice

1 Tbsp.: Sharp clear sour liquid (White vinegar)

To taste: Crystalline minerals and coarse ground peppercorns

Instructions

In a large mixing vessel, deposit the shredded brassica mix, scraped orange root vegetable, and diced yellow bulb vegetable. Toss the components together to ensure they are evenly combined.

In a separate bowl, integrate the following dressing components: the thick emulsified condiment, cultured butterfat liquid, freshly refrigerated liquid dairy, granulated white sweetener, freshly squeezed yellow citrus juice, and sharp, clear sour liquid. Whisk the blend until all ingredients are completely incorporated and smooth.

Pour the prepared dressing mixture over the shredded cabbage blend in the large bowl and gently toss the slaw until every piece is fully coated in the creamy sauce.

Season the slaw with crystalline minerals and coarse ground peppercorns to your preference, then transfer the mixture to the refrigerator to chill for several hours before serving.

No-Knead Gluten-Free Bread Recipe

No-Knead Gluten-Free Bread Recipe

This easy gluten-free bread is perfect for beginners. There is no kneading, no special techniques, and no mixer needed. The result is a loaf with a soft, moist inside and a crispy golden crust—great for sandwiches, toast, or butter.


✅ Why This Recipe Works

✔ No kneading required
✔ Simple pantry ingredients
✔ Long fermentation improves flavor
✔ Crispy crust, soft center
✔ Beginner friendly


🧾 Ingredients

Dry Ingredients

  • 2 ½ cups gluten-free all-purpose flour (with xanthan gum)

  • 1 ½ tsp salt

  • 1 tbsp sugar or honey

  • 2 ¼ tsp instant or active dry yeast (1 packet)

Wet Ingredients

  • 1 ½ cups warm water (105–110°F / 40–43°C)

  • 2 tbsp olive oil or neutral oil

  • 1 tsp apple cider vinegar


🧰 Equipment

  • Large bowl

  • Wooden spoon

  • Kitchen towel or plastic wrap

  • Parchment paper

  • Dutch oven or oven-safe pot with lid


👩‍🍳 Instructions

Step 1: Mix Dry Ingredients

In a large bowl, combine:
flour, salt, sugar, and yeast.
Mix well.


Step 2: Add Wet Ingredients

Add:
warm water, oil, and vinegar.
Mix until thick and sticky.

👉 Dough will look like batter. This is normal for gluten-free bread.


Step 3: Rise (No Kneading)

Cover the bowl and place it in a warm spot.

Let rise:

  • 2–3 hours (quick method)
    OR

  • 8–12 hours (overnight for best flavor)

Dough should look bubbly and slightly risen.


Step 4: Preheat Oven

Heat oven to 450°F (230°C).
Place the empty Dutch oven with the lid inside for 30 minutes.


Step 5: Shape Dough

Place dough onto parchment paper.
With wet hands, gently shape it into a round loaf.
Do NOT knead.


Step 6: Bake

Carefully place dough (with parchment) into hot pot.

Bake:

  • Covered: 30 minutes

  • Uncovered: 15–20 minutes

Bread should be golden brown.


Step 7: Cool

Remove bread and cool on rack for 1 hour before slicing.

❗ Cutting early makes bread gummy.


📝 Tips

  • Add seeds for crunch

  • Add garlic or herbs for flavor

  • Brush crust with oil for softness

  • If dough too thick, add 1–2 tbsp water

  • If too runny, add 1–2 tbsp flour


🧊 Storage

  • Room temp: 2 days

  • Fridge: 5 days

  • Freezer (sliced): 2 months

Toast straight from the freezer.


🥪 Best Uses

✔ Sandwiches
✔ Toast
✔ Garlic bread
✔ With butter & honey

Cheesy Potato & Spinach Quiche (No Crust)

Cheesy Potato & Spinach Quiche (No Crust)

Ingredients

For the Quiche

  • 2 cups small gold or Yukon potatoes, peeled and diced
  • 2 cups fresh spinach, roughly chopped
  • 1 cup shredded cheddar or Gruyère cheese
  • 4 large eggs
  • 1 cup milk (whole or 2%)
  • 1 small onion, finely choppe
  • 2 cloves garlic, minced
  • 1 tablespoon olive oil
  • Salt and black pepper, to taste
  • ½ teaspoon dried thyme or Italian seasoning

Directions

Step 1: Preheat Oven

Preheat oven to 375°F (190°C). Grease a 9-inch (23 cm) pie dish or ovenproof skillet lightly with olive oil.

Step 2: Cook the Potatoes

Boil diced potatoes in salted water for 8–10 minutes until just tender. Drain and set aside.

Step 3: Sauté Spinach and Onion

In a skillet, heat olive oil over medium heat. Sauté onion and garlic until translucent. Add spinach and cook until wilted. Remove from heat.

Step 4: Prepare the Egg Mixture

In a large bowl, whisk together eggs, milk, salt, black pepper, and thyme.

Step 5: Assemble the Quiche

Layer cooked potatoes and sautéed spinach mixture in the prepared dish. Sprinkle shredded cheese evenly on top. Pour the egg mixture over everything, ensuring it covers the ingredients.

Step 6: Bake

Bake in the preheated oven for 30–35 minutes, or until the quiche is set and the top is golden brown. Insert a knife in the center to check doneness—it should come out clean.

Step 7: Serve

Let the quiche cool for 5 minutes before slicing. Serve warm or at room temperature.

Nutritional Information (Per Serving – Approximate, 6 servings)

Calories: 280 kcal

Protein: 14 g

Carbohydrates: 20 g

Fat: 16 g

Saturated Fat: 8 g

Fiber: 3 g

Sugar: 3 g

Sodium: 460 mg

The Surprising Health Benefits of Boiled Eggs

The Surprising Health Benefits of Boiled Eggs

  Boiled eggs have been a staple in human diets for centuries. Their simplicity, versatility, and impressive nutritional profile make them one of the most complete and affordable foods available. But beyond their convenience, doctors and nutrition experts are now highlighting that regularly eating boiled eggs can deliver an array of powerful health benefits.

For years, eggs were unfairly criticized due to their cholesterol content. However, recent research has turned that perception around, revealing that moderate egg consumption can actually support heart health, brain function, and more. Let’s dive into why the humble boiled egg deserves a regular spot on your plate.


1. A Natural Protein Powerhouse

Each boiled egg contains about 6 grams of high-quality protein — the kind your body can absorb and use efficiently. Protein is essential for muscle repair, tissue growth, and hormone production. Including boiled eggs in your daily meals helps preserve lean muscle mass, especially as you age. Athletes, fitness enthusiasts, and anyone looking to boost recovery or stay energized can benefit from this simple, nutrient-dense food.


2. Protects Eye Health

Boiled eggs are rich in lutein and zeaxanthin, two antioxidants that play a crucial role in maintaining good vision. These compounds help prevent damage from blue light and reduce the risk of cataracts and age-related macular degeneration — common causes of vision loss in older adults. Adding just one or two boiled eggs to your daily routine is a simple and effective way to protect your eyesight naturally.


3. Supports Brain Function and Memory

Eggs are one of the best natural sources of choline, a nutrient vital for brain health. Choline helps produce acetylcholine, a neurotransmitter responsible for learning, focus, and memory. Studies suggest that sufficient choline intake can reduce the risk of cognitive decline as you age. That makes boiled eggs an excellent choice for students, professionals, and older adults alike.


4. Helps Control Appetite and Weight

Thanks to their protein and healthy fat content, boiled eggs are highly satisfying and can keep you full for hours. Eating them for breakfast or as a snack can reduce overall calorie intake and help prevent cravings. This makes them ideal for those aiming to manage their weight naturally — no extreme diets required. Replacing processed snacks with a couple of boiled eggs can make a noticeable difference in your daily energy levels and hunger control.


5. Packed with Essential Nutrients

Boiled eggs provide a concentrated source of key vitamins and minerals your body needs every day. They’re loaded with:

  • Vitamin B12, which supports red blood cell production and energy metabolism.

  • Vitamin D, essential for bone health and immune support.

  • Selenium, a powerful antioxidant that protects your cells from oxidative stress.

This nutrient combination helps strengthen your immune system, support thyroid function, and promote overall well-being.


Final Thoughts

Boiled eggs are more than just a breakfast favorite — they’re a true superfood that deserves more recognition. Whether you’re looking to boost your protein intake, sharpen your mind, protect your eyes, or simply eat healthier, adding boiled eggs to your diet is a smart move.

Enjoy them as part of a balanced breakfast, in salads, or as a quick post-workout snack. Simple, affordable, and packed with nutrients, boiled eggs prove that sometimes, the healthiest foods are the ones we’ve had all along.

Orange-Pineapple Smoothie

Orange-Pineapple Smoothie

Prep time: 5 minutes Servings: 2


Ingredients

  • 1 cup fresh or frozen pineapple chunks

  • 1 large orange, peeled and segmented (plus extra slices for garnish)

  • 1/2 cup Greek yogurt (or a dairy-free alternative like coconut yogurt)

  • 1/2 cup orange juice (or pineapple juice for extra sweetness)

  • 1 tablespoon chia seeds

  • 1/2 cup ice (if using fresh fruit)

Instructions

  1. Prepare: Peel your orange and break it into segments, removing as much of the white pith as possible.

  2. Combine: Add the pineapple, orange segments, yogurt, juice, and chia seeds into a high-speed blender.

  3. Blend: Start on a low speed and gradually increase to high. Blend until the mixture is completely smooth and creamy. If the consistency is too thick, add a little more juice or water.

  4. Serve: Pour into glasses. Garnish with a fresh orange slice on top for that beautiful presentation seen in your photo.


A Few Tips:

  • Boost the nutrition: Add a handful of spinach for a nutrient boost—the orange and pineapple are great at masking the flavor.

  • Make it creamier: Swap the juice for coconut milk to give it a more “piña colada” vibe.

  • Texture: If you prefer a thinner smoothie, just increase the amount of liquid.

Tropical Banana-Pineapple Smoothie

Tropical Banana-Pineapple Smoothie

This recipe yields a creamy, vibrant smoothie that balances the sweetness of the fruit with a bright, citrus kick.

Ingredients

  • 1 cup frozen pineapple chunks (using frozen fruit makes it much creamier!)

  • 1 medium banana (ripe, peeled and sliced)

  • 1/2 cup Greek yogurt (or coconut milk for a dairy-free option)

  • 1/4 cup pineapple juice (or water/coconut water for a lighter drink)

  • 1 teaspoon fresh lime juice

  • Optional: A small handful of ice cubes if you prefer a thicker, colder texture.

Instructions

  1. Prep: Place the banana, frozen pineapple, yogurt, pineapple juice, and lime juice into a blender.

  2. Blend: Start on a low speed and gradually increase to high. Blend until the mixture is completely smooth and creamy. If it is too thick, add a splash more juice or liquid until you reach your desired consistency.

  3. Serve: Pour into glasses.

  4. Garnish: For that professional touch, garnish the rim of your glass with a fresh slice of pineapple and a round slice of banana, just like in the photo. Enjoy immediately!

Blood sugar drops immediately! This recipe is a real treasure!

Ingredients:

  • 1 can of chickpeas, drained and rinsed
  • 2 tablespoons olive oil
  • 1 teaspoon ground cumin
  • 1/2 teaspoon smoked paprika
  • Salt and pepper to taste
  • Fresh parsley or cilantro for garnish (optional)
Instructions:
  • Preheat your oven to 400°F (200°C) and line a baking sheet with parchment paper or aluminum foil.
  • In a mixing bowl, toss the drained and rinsed chickpeas with olive oil, ground cumin, smoked paprika, salt, and pepper until evenly coated.
  • Spread the seasoned chickpeas in a single layer on the prepared baking sheet, ensuring they are not overcrowded.
  • Roast the chickpeas in the preheated oven for 20-25 minutes, stirring halfway through, until they are crispy and golden brown.
  • Remove the roasted chickpeas from the oven and let them cool slightly before serving.
  • Garnish with fresh parsley or cilantro if desired, and enjoy as a nutritious snack or as part of a meal.
Benefits of Chickpeas:
Blood Sugar Regulation:
  • The high fiber and protein content of chickpeas help slow down the absorption of glucose into the bloodstream, preventing sudden spikes in blood sugar levels.
Heart Health:
  • Chickpeas are rich in soluble fiber, which can help lower cholesterol levels and reduce the risk of heart disease.
Weight Management:
  • The combination of fiber and protein in chickpeas helps promote satiety and can aid in weight loss or maintenance.
In conclusion,
  • incorporating chickpeas into your diet is a simple yet effective way to support your overall health and well-being, especially when it comes to managing blood sugar levels. Give this delicious chickpeas recipe a try and discover the treasure trove of benefits that this nutritious legume has to offer!

Sun-Dried Tomato, Spinach, and Ricotta Grilled Cheese

A melty, savory twist on the classic grilled cheese!
This sandwich combines creamy ricotta, gooey mozzarella, and tangy sun-dried tomatoes with fresh spinach — all layered between crispy golden slices of sourdough bread. It’s gourmet comfort food made in minutes!

Ingredients

  • 8 slices sourdough bread (or your favorite sandwich bread)
  • ½ cup shredded mozzarella cheese
  • 1 cup fresh spinach leaves
  • 2 tablespoons grated Parmesan cheese
  • ½ cup ricotta cheese
  • ¼ cup sun-dried tomatoes, finely chopped (packed in oil or dry — see notes below)
  • 2 tablespoons butter (softened, for spreading)
  • Optional: pinch of crushed red pepper flakes or black pepper for a kick

 Instructions

  1. Prepare the filling:
    In a medium bowl, mix together ricotta cheese, Parmesan cheese, chopped sun-dried tomatoes, and a pinch of salt and pepper (plus red pepper flakes if you like it spicy).
  2. Assemble the sandwiches:
    • Lay out 4 slices of bread.
    • Spread the ricotta mixture evenly on each.
    • Top with fresh spinach leaves and shredded mozzarella.
    • Place the remaining 4 slices of bread on top to form sandwiches.
  3. Butter the bread:
    Spread softened butter evenly on the outer sides of each sandwich (the side that will touch the pan).
  4. Grill:
    • Heat a large skillet or griddle over medium-low heat.
    • Place the sandwiches on the pan and cook for 3–4 minutes per side, until golden brown and the cheese is melted.
    • Press gently with a spatula for even browning.
  5. Serve:
    Slice in half and enjoy warm — the creamy ricotta, melty mozzarella, and tangy tomatoes make every bite irresistible!

🍽️ Servings

Makes: 4 sandwiches
Serving size: 1 sandwich

⚡ Nutritional Information (Per Sandwich, Approx.)

Nutrient Amount
Calories 420 kcal
Protein 18 g
Fat 20 g
Carbohydrates 35 g
Fiber 2 g
Sugar 3 g
Sodium 600 mg
Calcium 25% DV

(Values may vary depending on bread type and cheese brands.)

🌿 Health Benefits

  • Spinach: Loaded with iron, vitamin K, and antioxidants that support healthy bones and energy.
  • Ricotta: High in protein and calcium for muscle and bone health.
  • Sun-Dried Tomatoes: Rich in lycopene and vitamin C for skin and heart health.
  • Sourdough Bread: Easier to digest than regular bread and has a pleasant tangy flavor.

💡 Tips

  • Use quality bread: Sourdough or whole-grain bread gives a better crunch and flavor.
  • No ricotta? Substitute with cream cheese, goat cheese, or cottage cheese for a creamy texture.
  • Dry sun-dried tomatoes: Soak in warm water or olive oil for 10 minutes before chopping to soften.
  • For extra gooeyness: Add a little more mozzarella or even provolone slices.
  • Make it a melt: Add cooked chicken or turkey slices for extra protein.

❓ Q&A Section

Q1: Can I use other types of cheese?
➡️ Definitely! Try fontina, provolone, or Swiss for a different flavor twist. Goat cheese also pairs beautifully with sun-dried tomatoes.

Q2: Can I use frozen spinach instead of fresh?
➡️ Yes — just thaw and squeeze out excess water before adding, so the sandwich doesn’t get soggy.

Q3: How do I make it vegan?
➡️ Use vegan ricotta or tofu ricottavegan mozzarella, and plant-based butter. The flavor stays rich and creamy!

Q4: What’s the best way to melt the cheese evenly?
➡️ Cook on medium-low heat and cover the pan for 1–2 minutes while grilling — the trapped steam helps the cheese melt fully without burning the bread.

Q5: Can I make these ahead of time?
➡️ Assemble and refrigerate (ungrilled) sandwiches up to 1 day ahead. Grill fresh when ready to serve for best texture.

Q6: What sides go well with this sandwich?
➡️ Great with tomato soupside saladroasted veggies, or sweet potato fries.

Q7: Can I use an air fryer or panini press?
➡️ Yes!

  • Air fryer: 375°F for 4–5 minutes per side.
  • Panini press: Grill for about 3–4 minutes until golden and melted.

Enjoy your Sun-Dried Tomato, Spinach, and Ricotta Grilled Cheese — crispy on the outside, creamy and cheesy inside, bursting with Mediterranean flavor! Perfect for lunch, dinner, or a cozy weekend treat. 🍅🧀🌿


SPICY LEMONGRASS FISH SOUP

SPICY LEMONGRASS FISH SOUP
Ingredients:
1 lb (450g) white fish fillets (such as cod or halibut), cut into 1-inch pieces
1 tablespoon vegetable oil
1 onion, finely chopped
2 cloves garlic, minced
1 stalk lemongrass, smashed
1-inch piece of ginger, minced
2-3 Thai bird’s eye chilies, sliced
1 can (14 oz) coconut milk
4 cups vegetable broth
1 tablespoon fish sauce
1 tablespoon soy sauce
Juice of 3 limes
1 teaspoon sugar
1 cup zucchini, sliced
1 red bell pepper, sliced
Fresh cilantro, for garnish
Lime wedges, for serving
Salt and black pepper, to taste
Directions:
Sauté Aromatics: Heat the vegetable oil in a large pot over medium heat. Add the chopped onion, garlic, ginger, and smashed lemongrass. Sauté for about 3 minutes until fragrant and the onion softens.
Build the Soup Base: Stir in the coconut milk, vegetable broth, fish sauce, soy sauce, lime juice, and sugar. Bring the mixture to a simmer and cook for 10 minutes to allow the flavors to meld.
Add Vegetables: Add the sliced zucchini and red bell pepper to the soup. Continue cooking for 5-7 minutes until the vegetables are tender but still vibrant.
Cook the Fish: Gently add the fish pieces to the soup and simmer for 5-7 minutes, or until the fish is flaky and cooked through.
Adjust and Serve: Taste the soup and adjust the seasoning with salt and pepper if needed. Garnish with fresh cilantro and serve with lime wedges on the side.
Preparation time: 15 minutes
Cooking time: 20 minutes
Total time: 35 minutes
Calories: ~320 kcal per serving
Servings: 4

Chicken Alfredo Lasagna Roll-Ups

Chicken Alfredo Lasagna Roll-Ups
📝 Ingredients
8–10 lasagna noodles
2 cups cooked chicken, shredded
1 cup ricotta cheese
1½ cups shredded mozzarella cheese (divided)
½ cup grated Parmesan cheese
2 cups Alfredo sauce (store-bought or homemade)
1 tsp Italian seasoning
½ tsp garlic powder
Salt & black pepper to taste
2 tbsp fresh parsley (optional, for garnish)
👩‍🍳 Instructions
1️⃣ Cook the Noodles
Bring a large pot of salted water to a boil.
Cook lasagna noodles according to package directions until al dente.
Drain and lay flat on parchment or foil to prevent sticking.
2️⃣ Prepare the Filling
In a bowl, mix together:
Shredded chicken
Ricotta cheese
1 cup mozzarella
Parmesan cheese
Italian seasoning
Garlic powder
Salt and pepper
Mix until well combined.
3️⃣ Assemble the Roll-Ups
Preheat oven to 375°F (190°C).
Spread about ½ cup Alfredo sauce on the bottom of a 9×13 baking dish.
For each noodle:
Spread 2–3 tablespoons of the chicken mixture evenly across the noodle.
Roll it up tightly.
Place seam-side down in the baking dish.
Repeat with remaining noodles.
4️⃣ Add Sauce & Cheese
Pour remaining Alfredo sauce over the roll-ups.
Sprinkle remaining ½ cup mozzarella evenly on top.
5️⃣ Bake
Cover with foil and bake for 20 minutes.
Remove foil and bake another 10–15 minutes, until bubbly and golden.
Let rest 5–10 minutes before serving.

Garlic and Butter Flatbread Recipe

Garlic and Butter Flatbread

Ingredients

  • 2 cups all-purpose flour
  • 1 teaspoon baking powder
  • 1/2 teaspoon salt
  • 3/4 cup warm water
  • 2 tablespoons olive oil (plus extra for cooking)
  • 4 tablespoons unsalted butter, melted
  • 3-4 cloves garlic, minced
  • Fresh parsley, chopped (for garnish, optional)

Instructions

1. Make the Dough

  • In a large bowl, combine the flour, baking powder, and salt.
  • Gradually add the warm water and olive oil, mixing until a dough forms.
  • Knead the dough on a floured surface for about 5 minutes, until smooth. Cover with a kitchen towel and let it rest for 15-20 minutes.

2. Prepare the Garlic Butter

  • In a small bowl, mix the melted butter with minced garlic. Set aside.

3. Roll Out the Flatbreads

  • Divide the dough into 4 equal portions. Roll each portion out into a flat, round shape about 1/4 inch thick.

4. Cook the Flatbreads

  • Heat a skillet or griddle over medium heat and lightly coat with olive oil.
  • Cook each flatbread for about 2-3 minutes on each side until golden brown and cooked through.
  • Brush each flatbread with the garlic butter mixture as soon as it comes off the heat.

5. Serve

  • Garnish with fresh parsley if desired. Serve warm!

Enjoy!

This Garlic and Butter Flatbread is perfect for dipping, spreading with your favorite toppings, or enjoying on its own!

Crispy Hashbrown Sausage Bites

Introduction

If what you seek is a wholesome breakfast or brunch recipe that provides warmth and comfort and bursts with flavors, you’ve found it in these crispy hashbrown sausage bites. Crispy hashbrowns, delicious breakfast sausage, and melted cheddar cheese transformed into finger food perfection!

Even better is how easy it is to make. You can throw these together for a quick meal or for a weekend get together because there’s very little preparation time for a truly delicious meal.

These bites will not last long, served with your favorite dipping sauces or right out of the oven. They are simple, versatile, and kid approved, so sure to make everyone happy!

Ingredients

  • 1 lb Breakfast sausage
  • 8 oz Cream cheese , softened
  • 1 ½ c isquick
  • 4 c hash browns, Frozen, shredded
  • 1 ½ c Cheddar cheese, Shredded


Instructions

  1. Heat the oven to 400 degrees.
  2. Mix together all of the ingredients in a mixing bowl until well combined.
  3. Form the mixture into evenly sized balls about 1 ½ inches around.
  4. Place the balls onto a parchment-lined baking sheet.
  5. Bake for 20-25 minutes.


Conclusion

These hashbrown sausage bites are the ultimate comfort food for breakfast or brunch. Crisp on the outside, cheesy, and savory on the inside, they are satisfying on their own yet even better paired with dipping sauces like ketchup, ranch, or mustard.

Each time you make these, you will easily bake, and share these delicious bite-sized creations. You will definitely want to make these for family gatherings, and also for those weekend mornings when you just want to relax.

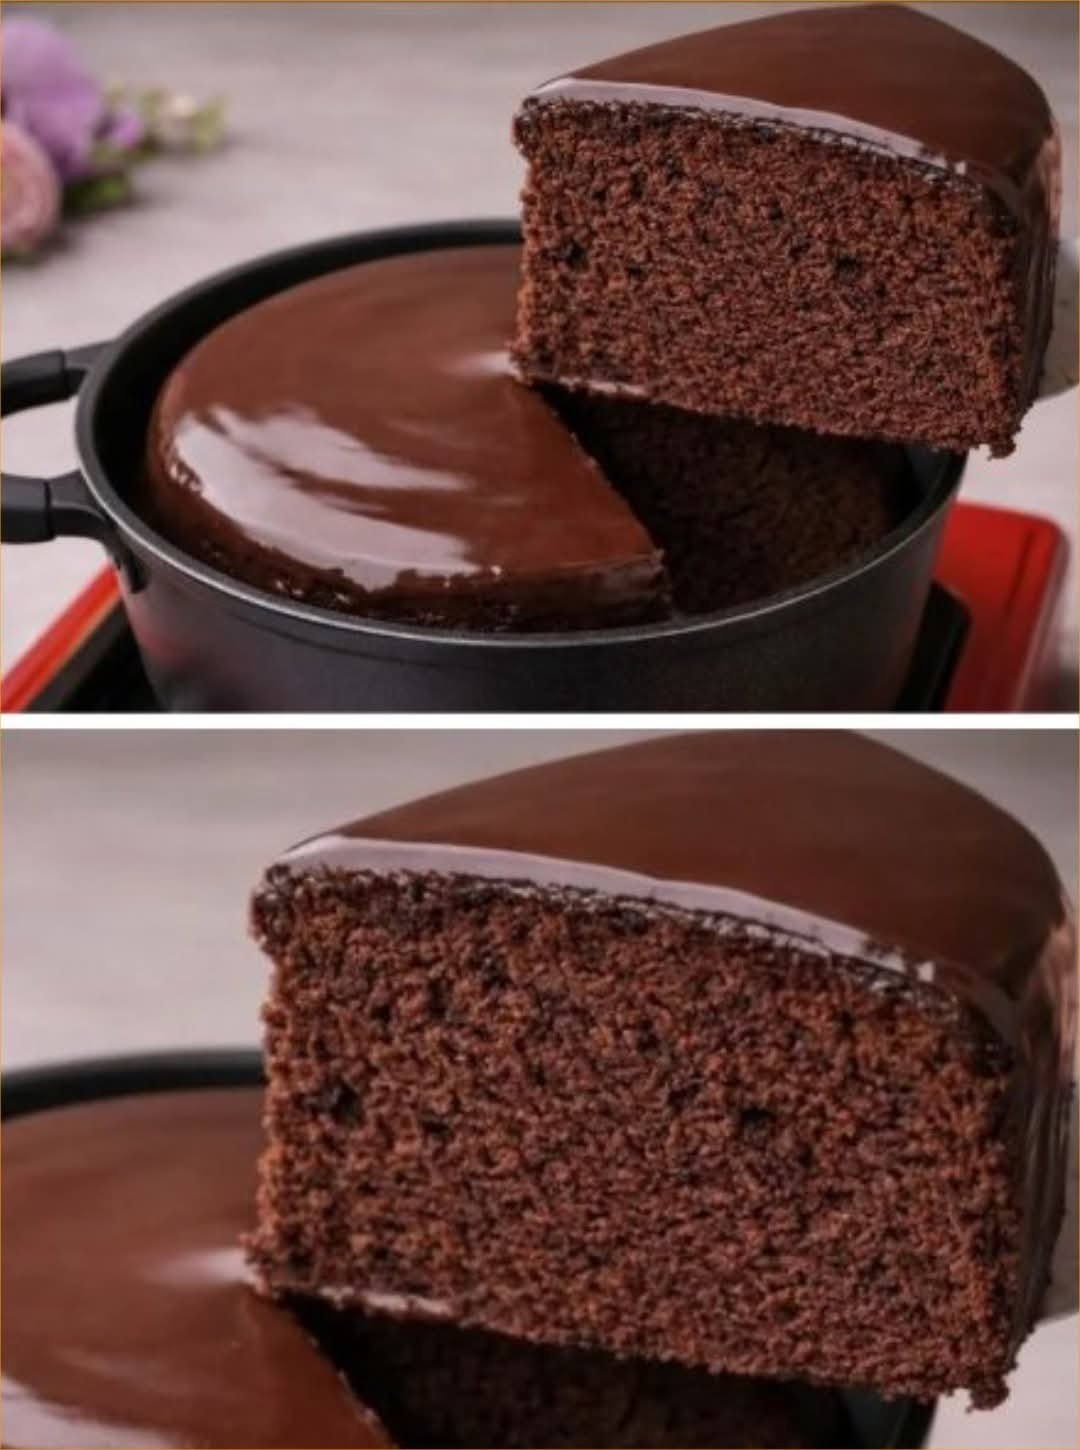
Been looking for this cake for a long time, and finally got the recipe! The frosting is…

Introduction

There’s something magical about the aroma of freshly baked chocolate cake wafting through the kitchen. It’s the kind of scent that instantly makes a house feel like a home, inviting everyone to gather around the table. This Moist Chocolate Loaf Cake delivers exactly that—warmth, comfort, and a little indulgence in every slice.

What makes this cake truly special is its balance of richness and simplicity. You don’t need fancy equipment or complicated steps—just a handful of pantry staples and a love for chocolate. The result is a cake that’s deeply chocolatey, tender, and perfect for any occasion.

Whether you’re serving it as a quick dessert after dinner, a sweet addition to brunch, or a mid-afternoon pick-me-up with coffee, this recipe is one you’ll come back to again and again. It’s proof that sometimes, the simplest bakes are also the most rewarding.


Ingredients

  • 1 cup (125 g) all-purpose flour
  • ½ cup (50 g) unsweetened cocoa powder
  • 1 teaspoon baking powder
  • ½ teaspoon baking soda
  • ¼ teaspoon salt
  • ½ cup (115 g) unsalted butter, softened
  • ¾ cup (150 g) granulated sugar
  • ½ cup (100 g) packed brown sugar
  • 2 large eggs
  • 1 teaspoon vanilla extract
  • ½ cup (120 ml) buttermilk
  • ½ cup (120 ml) hot water or brewed coffee
  • ½ cup (90 g) semi-sweet chocolate chips (optional)


Instructions

  1. Prep the oven and pan: Preheat oven to 350°F (175°C). Grease a 9×5-inch loaf pan and line with parchment paper for easy removal.
  2. Mix dry ingredients: Sift together flour, cocoa powder, baking powder, baking soda, and salt. Set aside.
  3. Cream butter and sugars: Beat softened butter, granulated sugar, and brown sugar until light and fluffy (about 2-3 minutes).
  4. Add eggs and vanilla: Beat in eggs one at a time, then mix in vanilla extract.
  5. Combine wet and dry: Add dry mixture to butter mixture, alternating with buttermilk. Mix gently—do not overmix.
  6. Incorporate hot liquid: Slowly pour in hot water or coffee. Batter will thin and become glossy.
  7. Optional chocolate chips: Fold in chocolate chips for extra richness.
  8. Bake: Pour into prepared loaf pan and bake 50–60 minutes, or until a toothpick comes out mostly clean.
  9. Cool: Let cake cool 10 minutes in pan, then transfer to wire rack to cool completely before slicing.


Why You’ll Love This Recipe

  • Ultra Moist Texture: The buttermilk and hot liquid create a soft, tender crumb.
  • Rich Chocolate Flavor: Perfectly balanced sweetness with deep cocoa richness.
  • Simple & Versatile: Easy to bake and pairs beautifully with whipped cream, frosting, or just a dusting of powdered sugar.


Tips for Success

  • Use room temperature butter and eggs for even mixing.
  • Don’t overmix the batter—this keeps the cake tender.
  • For deeper flavor, always use brewed coffee instead of water.
  • Line the pan with parchment to lift the cake out without breaking.


Variations

  • Double Chocolate Loaf: Add extra chocolate chips on top before baking.
  • Nutty Twist: Fold in chopped walnuts or pecans.
  • Fruity Touch: Add dried cherries or raspberries for a tart contrast.
  • Frosted Version: Spread with chocolate ganache or cream cheese frosting once cooled.


FAQs

1. Can I use Dutch-process cocoa? Yes, but reduce baking powder slightly for balance.

2. Can I substitute yogurt for buttermilk? Yes—use equal amounts of plain yogurt or sour cream.

3. How do I know when it’s done? A toothpick should come out with just a few moist crumbs, not wet batter.

4. Can I make this gluten-free? Substitute a 1:1 gluten-free baking blend.

5. What if I don’t have brown sugar? Use all granulated sugar, though the flavor will be less caramel-like.

6. Can I make this into cupcakes? Yes—bake at the same temp for 18–22 minutes.

7. Does the coffee make it taste like coffee? No—it simply enhances the chocolate flavor.

8. Can I freeze this cake? Absolutely—wrap slices individually and freeze up to 2 months.

9. How do I keep it moist after baking? Store tightly wrapped or in an airtight container.

10. Can I double the recipe? Yes—bake in two loaf pans or a 9×13-inch pan.


Health Benefits

This loaf cake may be indulgent, but it also has benefits. Cocoa contains antioxidants, while buttermilk provides calcium and probiotics. Using coffee enhances flavor without adding extra sugar, making each slice satisfying without needing heavy toppings.

How to Serve

  • With morning coffee or tea for a cozy breakfast.
  • As a simple dessert with powdered sugar or fresh fruit.
  • Warmed slightly and topped with vanilla ice cream for a decadent treat.


Make Ahead & Storage

  • Make Ahead: Prepare the batter, refrigerate overnight, and bake fresh the next day.
  • Storage: Keep at room temperature, wrapped tightly, for 3–4 days.
  • Freezing: Freeze whole or sliced, wrapped in plastic and foil, for up to 2 months.


Conclusion

This Moist Chocolate Loaf Cake is proof that simple ingredients can create something truly irresistible. Whether enjoyed as a quick weekday dessert or dressed up for special occasions, it’s a recipe you’ll want to keep on repeat. One slice is never enough—so don’t be surprised if this becomes a family favorite in no time.

Peanut Butter Balls with Chocolate Rice Krispies!!!

Classic Chocolate Peanut Butter Balls with Rice Krispies for extra texture and crunch. A quick and easy candy recipe.
What do you get when you combine peanut butter, chocolate, and Rice Krispies in a simple no-bake dessert recipe? You get one happy family of taste testers.

I’ve shared my family’s Peanut Butter Balls (aka Buckeyes) recipe here before (and it’s one of my most popular recipes).Once you’ve made them, you’ll understand our love for those chocolate peanut butter treats.
All of these recipes make terrific Christmas Candies for gifting or for snacking. It’s a tradition in our family to make these each year.

These Peanut Butter Balls with Rice Krispies have become another friend and family favorite over the years.
I fondly remember enjoying Peanut Butter Balls with my family as a child. It brings back happy childhood memories every time I bite into one.

I’m delighted to share this recipe with you here so you can experience the same joy with your family!


Ingredients

1 cup crunchy peanut butter
1/4 cup margarine or butter, softened
1 cup powdered sugar
2 cups Kellogg’s(R) Rice Krispies(R) cereal
1 1/2 cups semi-sweet chocolate morsels
2 tablespoons vegetable shortening
54 mini-muffin paper cups


Directions

-In large electric mixer bowl, beat peanut butter, margarine and sugar on medium speed until thoroughly combined.

-Add KELLOGG’S RICE KRISPIES cereal, mixing thoroughly. Portion mixture, using rounded teaspoon. Shape into balls.

-Place each ball in paper cup. Refrigerate.

-Melt chocolate morsels and shortening in small saucepan, over low heat, stirring constantly.

-Spoon 1 teaspoon melted chocolate over each peanut butter ball. Refrigerate until firm.

-Store in airtight container in refrigerator.

4 Ingredients Lemon Cream Cheese Dump Cake Recipe

Introduction:

Dump cakes are known for being incredibly easy to make, but that doesn’t mean they lack flavor! This 4-ingredient Lemon Cream Cheese Dump Cake is the perfect combination of tangy lemon and rich cream cheese, all encased in a soft, golden cake. Whether you’re looking for a quick dessert for a potluck or a sweet treat for a weeknight dinner, this dump cake will be a hit with everyone.


Ingredients:

1 box lemon cake mix
1 can lemon pie filling (21 oz)
8 oz cream cheese (softened)
½ cup unsalted butter (melted)


Directions:

Preheat the oven to 350°F (175°C). Lightly coat a 9×13-inch baking dish with either non-stick spray or butter to prevent sticking.

Layer the ingredients: Spread the lemon pie filling evenly across the bottom of the baking dish.
Add the cream cheese: Drop spoonfuls of the softened cream cheese on top of the lemon pie filling.
Sprinkle the cake mix: Evenly distribute the dry lemon cake mix over the cream cheese and pie filling.
Drizzle the butter: Pour the melted butter over the top, ensuring it covers as much of the cake mix as possible. Don’t worry if some dry spots remain – they will become crispy when baked.Bake for 40 to 45 minutes, or until the top turns a golden brown and the filling begins to bubble.
Cool and serve: Allow the cake to cool slightly before serving, as the filling will thicken as it cools.


Serving and Storage Tips:

Serving: enjoy this warm dump cake with a scoop of creamy vanilla ice cream or a swirl of whipped cream for a decadent touch. It’s also delicious when served cold!
Storage: Keep any leftover cake fresh by storing it in an airtight container in the fridge, where it will last for up to three days. To reheat, simply warm it up in the microwave for about 20 seconds.


Tips for Success:

Softened cream cheese: Ensure the cream cheese is fully softened before adding it to the dish. If it’s too cold, it won’t spread or melt well into the layers.
Even butter distribution: Drizzling the melted butter as evenly as possible ensures that the cake mix on top cooks properly and doesn’t leave large dry spots.
Don’t skip cooling: Letting the cake cool for 10-15 minutes allows the filling to set, making it easier to serve.


Health Benefits:

While this cake is more of an indulgent treat, it does contain some ingredients that have beneficial properties:

Lemon: High in vitamin C and antioxidants, lemon adds a burst of freshness and may support immune health.
Cream cheese: A good source of calcium and vitamin A, though it’s best enjoyed in moderation due to its fat content.


Nutritional Information (per serving):
Calories: 320
Fat: 18g
Carbohydrates: 37g
Protein: 3g
Sugars: 22g
Fiber: 1g


Variations and Substitutions:

Change the flavor: Swap the lemon cake mix and pie filling for other flavors like strawberry or cherry for a different twist.
Add a crunchy topping: For extra texture, sprinkle some crushed graham crackers or chopped nuts on top of the cake mix before baking.
Make it lighter: Substitute half of the butter with applesauce to reduce the fat content without sacrificing moisture.


Frequently Asked Questions (FAQs):

1. Can I use other pie fillings?
Yes! Cherry, blueberry, or even apple pie filling work great in this dump cake recipe. Just match the flavor of the cake mix accordingly for the best results.

2. Can I use light cream cheese?
Absolutely! Using light cream cheese will slightly reduce the fat content while still keeping the creaminess intact.

3. What if I don’t have lemon pie filling?
You can make your own lemon pie filling by mixing lemon curd with a little cornstarch or using a canned citrus-based fruit filling as a substitute.


Conclusion:

This 4-ingredient Lemon Cream Cheese Dump Cake is the ultimate dessert for lemon lovers who appreciate both convenience and flavor. With just a few pantry staples and minimal effort, you can whip up a dessert that feels luxurious but is delightfully simple. Perfect for gatherings, potlucks, or a sweet midweek treat, this cake will leave your guests asking for seconds—and the recipe!

Spanish Chicken Thighs with Vegetables

Spanish Chicken Thighs with Vegetables

If you’re looking for a comforting dish that bursts with flavor, this easy traditional Spanish chicken thighs with vegetables recipe is just what you need! The tender, juicy chicken thighs are seasoned to perfection, while the vegetables add a delightful texture and earthy taste. Baking it all together creates a hearty meal that everyone will love, making it perfect for family dinners or gatherings.


Prep Time: 15 minutes
Cook Time: 40 minutes
Total Time: 3 hours 55 minutes (includes marination)
Servings: 4
Estimated Calories: 490 per serving


Ingredients

  • 700 g (1.5 lbs) chicken thighs
  • Salt to taste
  • Black pepper to taste
  • 1 tsp oregano
  • 1 tsp basil
  • 1 handful fresh parsley, chopped
  • 2 cloves garlic, minced
  • 1 lemon, juiced
  • 2 tbsp olive oil
  • 4 potatoes, chopped
  • 1 onion, sliced
  • 1 carrot, sliced
  • 1 clove garlic, minced
  • 1 chili pepper, sliced
  • 150 g (5.3 oz) champignons, halved
  • 1/2 tsp turmeric
  • 1 tsp smoked paprika
  • 250 ml (1 cup) chicken broth
  • 1 tbsp butter
  • Lettuce leaves for serving
  • 2 tomatoes, chopped
  • 2 cucumbers, sliced
  • 1 red onion, thinly sliced
  • A few red basil leaves
  • 1 handful fresh parsley
  • 1 tbsp balsamic vinegar
  • Fresh dill to taste

Instructions

  1. In a bowl, season the chicken thighs with salt, black pepper, oregano, and basil. Add minced garlic, chopped parsley, lemon juice, and 1 tablespoon of olive oil. Mix thoroughly and cover to marinate in the refrigerator for 3 hours.
  2. Preheat your oven to 180°C (360°F).
  3. In a large ovenproof dish, combine chopped potatoes, sliced onion, carrot, minced garlic, chili pepper, and halved mushrooms. Season the vegetables with salt, black pepper, turmeric, and smoked paprika. Drizzle with the remaining olive oil and toss everything together.
  4. Place the marinated chicken thighs on top of the vegetables. Add small pieces of butter over the chicken and vegetables. Pour the chicken broth around (but not over) the chicken skin. Bake uncovered for 35–40 minutes until the chicken reaches an internal temperature of 75°C (165°F) and the skin is golden.
  5. For the salad, combine lettuce, chopped tomatoes, sliced cucumbers, thinly sliced red onion, red basil, parsley, and dill in a bowl. Season with salt and black pepper, then drizzle with balsamic vinegar. Mix just before serving.
  6. Serve the baked chicken and vegetables hot, paired with the fresh salad.

Why This Recipe is Popular

This easy traditional Spanish chicken thighs with vegetables recipe is a favorite for its simplicity and comforting nature. It brings a taste of home cooking to the table and is perfect for any occasion, whether it’s a weeknight dinner or a festive gathering. The vibrant flavors of the Mediterranean combined with the heartiness of the chicken and vegetables make it a dish people crave.


Serving Suggestions

Serve this dish hot, straight from the oven, alongside the refreshing salad for a complete meal. It pairs wonderfully with crusty bread, rice, or a glass of chilled white wine.

Tips and Variations

  • Storage: Leftovers can be stored in an airtight container in the fridge for up to 3 days.
  • Texture: For extra crispy skin, broil the chicken for an additional 2-3 minutes at the end of baking.
  • Flavor Ideas: Add other seasonal vegetables like bell peppers or zucchini for more color and flavor.
  • Substitutions: You can use skinless chicken thighs for a lighter version or swap the chicken for turkey thighs.
  • Herb Swap: Feel free to experiment with different herbs like thyme or rosemary for a unique twist.

FAQs

1. Can I use chicken breasts instead of thighs?
Yes, chicken breasts can be used, but adjust cooking time as they may cook faster than thighs.

2. Is this recipe suitable for meal prep?
Absolutely! This dish keeps well in the fridge and can be reheated easily.

3. Can I add more vegetables?
Yes, you can customize the vegetable mix based on your preferences or what’s in season.

4. What should I do with leftovers?
Leftovers can be enjoyed cold in a salad or reheated for another delicious meal.


Give this easy traditional Spanish chicken thighs with vegetables recipe a try! It’s sure to become a comforting favorite in your household. Enjoy every delicious bite!

🥐 Guilt-Free Blueberry Cheesecake Rolls

🥐 Guilt-Free Blueberry Cheesecake Rolls

A perfect fusion of creamy cheesecake and tart berries in a flaky, golden crust.

  • Prep time: 10 minutes

  • Cook time: 10-13 minutes

  • Yield: 8 Rolls

  • Calories: 133 kcal per roll

Ingredients

  • Dough: 1 tube (8 oz) Reduced-fat Crescent Roll dough (8 triangles)

  • Filling: 3 oz Cream cheese (1/3 less fat), softened


  • Sweetener: 2 ½ tbsp Powdered sugar

  • Flavor: ½ tsp Vanilla extract

  • Fruit: ⅔ cup Fresh blueberries

Instructions

  1. Prep the Oven: Preheat your oven to 375°F (190°C). Line a baking sheet with parchment paper or a silicone mat for easy cleanup.

  2. Cream the Filling: In a small bowl, beat the softened cream cheese, powdered sugar, and vanilla extract with an electric mixer until smooth and fluffy.

  3. Prepare the Dough: Unroll the crescent dough and separate it into the 8 pre-cut triangles. Lay them out on a clean surface with the wide base facing you and the point facing away.

  4. Layer & Roll: * Spread a dollop of the cream cheese mixture onto the widest third of each triangle.

    • Place two rows of fresh blueberries on top of the cream cheese.

    • Carefully roll the dough from the wide base toward the point, tucking the berries in as you go.

  5. Bake: Place the rolls on your prepared baking sheet. Bake for 10–13 minutes or until the pastry is a beautiful golden brown.

  6. Serve: Let them cool for just a minute (the berries get hot!) and enjoy while warm.

Nutritional Snapshot (Per Roll)

Calories Fat Carbs Sugars Protein WW Points
133 6g 18g 7g 3g 5 SP / 4 P+

💡 Pro-Tips for the Best Rolls

  • Dry the Berries: After washing your blueberries, make sure they are completely dry. Excess water can make the dough soggy.

  • The “Zest” Factor: If you want to brighten up the flavor, grate a little lemon zest into the cream cheese mixture. Lemon and blueberry are a match made in heaven!

  • The Glaze (Optional): If you have a few extra calories to spare, whisk a tiny bit of milk into some extra powdered sugar and drizzle it over the rolls while they’re still warm.

Crispy Honey-Garlic Roasted Cauliflower

Crispy Honey-Garlic Roasted Cauliflower

Prep time: 10 mins | Cook time: 25-30 mins | Serves: 3-4

Ingredients

The Base:

  • 1 large head of cauliflower, cut into bite-sized florets

  • 2 tbsp olive oil

  • 1/2 tsp salt

  • 1/4 tsp black pepper

The Glaze:

  • 3 tbsp soy sauce (or tamari for gluten-free)

  • 3 tbsp honey (or maple syrup)

  • 2 cloves garlic, minced

  • 1 tsp fresh ginger, grated

  • 1 tsp sriracha or chili flakes (optional, for heat)

  • 1 tsp toasted sesame oil

The Garnish:

  • Fresh parsley or cilantro, chopped

  • Lemon wedges (as seen in your photo)


Instructions

  1. Prep the Oven: Preheat your oven to 220°C (425°F). Line a large baking sheet with parchment paper for easy cleanup and to prevent sticking.

  2. Season the Cauliflower: In a large bowl, toss the cauliflower florets with olive oil, salt, and pepper until evenly coated.

  3. The First Roast: Spread the florets in a single layer on the baking sheet. Roast for 15-20 minutes, tossing halfway through, until the edges start to turn golden brown and tender.

  4. Make the Sauce: While the cauliflower is roasting, whisk together the soy sauce, honey, garlic, ginger, sriracha, and sesame oil in a small bowl.

  5. The Glaze & Crisp: Remove the tray from the oven. Pour the sauce over the cauliflower and toss right on the pan (or back in the bowl) until every piece is sticky.

  6. Final Blast: Return to the oven for another 5-8 minutes. Watch closely! The sugars in the honey will caramelize and char quickly, which is where that “better than meat” flavor comes from.

  7. Serve: Garnish with fresh herbs and a generous squeeze of lemon juice to cut through the sweetness.


Pro Tips for Extra Crunch

  • Don’t Overcrowd: If the florets are too close together, they will steam instead of roast. Use two pans if you have a massive head of cauliflower.

  • Dry Thoroughly: After washing the cauliflower, make sure it is bone-dry before adding oil. Water is the enemy of “crispy.”

Cucumber Lime Detox Juice


Cucumber Lime Detox Juice

A refreshing, hydrating green juice made with fresh cucumber and lime. This simple detox-style drink is packed with vitamins, antioxidants, and electrolytes—perfect for mornings, post-workout, or hot days.

 Description

Cucumber Lime Detox Juice is a light, cleansing beverage made primarily from fresh cucumbers and lime juice. It’s naturally low in calories, hydrating, and helps support digestion and skin health. The bright citrus flavor balances the mild, cooling taste of cucumber.

Ingredients (1–2 Servings)

  • 2 medium cucumbers

  • 4–6 fresh limes (juiced)

  • ½ cup cold water (optional, for blending)

  • 1–2 teaspoons honey or stevia (optional)

  • Ice cubes (optional)

  • Fresh mint leaves (optional, for garnish)

 Instructions

If Using a Blender:

  1. Wash cucumbers thoroughly (peel if desired).

  2. Chop into chunks.

  3. Add cucumber and water to blender.

  4. Blend until smooth.

  5. Strain through a fine mesh sieve or cheesecloth (optional for smoother juice).

  6. Stir in fresh lime juice.

  7. Add sweetener if desired.

  8. Serve over ice and garnish with mint.

If Using a Juicer:

  1. Feed cucumbers into juicer.

  2. Stir in freshly squeezed lime juice.

  3. Add sweetener if desired.

  4. Serve chilled.

 Notes

  • Keeping the cucumber peel adds extra nutrients and fiber.

  • Persian or English cucumbers work best because they are less bitter.

  • Adjust lime based on preferred tartness.

Tips for Best Results

  • Use chilled cucumbers for a naturally cold drink.

  • Roll limes on the counter before juicing to release more juice.

  • Add a small piece of ginger for a metabolism boost.

  • Drink immediately for maximum freshness and nutrient retention.

Servings

  • Makes: 1–2 servings

  • Serving size: About 1 cup (250 ml)

 Nutritional Information (Per 1 Cup Approx.)

  • Calories: 45–60

  • Carbohydrates: 10–14g

  • Sugar: 6–8g (natural sugars)

  • Fiber: 1–2g (if unstrained)

  • Vitamin C: ~35–50% Daily Value

  • Potassium: ~200mg

  • Fat: 0g

  • Protein: 1g

(Values vary depending on lime quantity and sweetener used.)

Health Benefits

✅ Hydration Support – Cucumbers are ~95% water.
✅ Rich in Vitamin C – Boosts immunity and skin health.
✅ Digestive Aid – Lime helps stimulate digestive enzymes.
✅ Low Calorie – Great for weight management.
✅ Detox Support – Supports natural liver function.
✅ Skin Glow – Antioxidants help reduce oxidative stress.

 Q & A

Q: Can I drink this every day?
Yes! It’s safe for daily consumption unless you have acid sensitivity.

Q: Is it good for weight loss?
It supports weight management due to low calories and high hydration, but it’s not a magic solution.

Q: Can I store it?
Best consumed fresh. You can refrigerate for up to 24 hours in an airtight container.

Q: Can I add other ingredients?
Absolutely! Try mint, ginger, celery, or a splash of apple juice.

Q: Is it safe for kids?
Yes, just reduce lime if they prefer less tartness.

Baked Coconut Custard Pie


Baked Coconut Custard Pie


🧾 Ingredients

  • ½ cup Bisquick or 1 cup all-purpose flour
  • ¾ cup sugar
  • 4 large eggs
  • 2 cups milk
  • 1 cup flaked coconut
  • 1 teaspoon vanilla extract
  • 1 tablespoon butter (softened)

👩‍🍳 Step-By-Step Instructions

1️⃣ Preheat the Oven

  • Preheat your oven to 400°F (200°C).
  • Grease a 9-inch round pie pan or baking dish with butter or oil.

2️⃣ Mix the Ingredients

  • In a large mixing bowl, add:
    • Bisquick (or flour)
    • Sugar
    • Eggs
    • Milk
    • Flaked coconut
    • Vanilla extract
    • Softened butter
  • Beat everything together using a whisk or hand mixer.
  • Mix until the batter becomes smooth and lump-free.

3️⃣ Pour into Pan

  • Pour the smooth batter into the greased pie pan.
  • Do not stir after pouring.

4️⃣ Bake

  • Place the pan in the preheated oven.
  • Bake for 30 minutes.
  • The top should turn light golden brown.
  • The center should be set but slightly jiggle when gently shaken.

5️⃣ Cool Completely

  • Remove from oven.
  • Let it cool at room temperature for at least 1 hour.
  • As it cools, it will firm up properly.

6️⃣ Slice & Serve

  • Cut into slices.
  • Serve plain or sprinkle with powdered sugar.

✨ Tips

✔ It creates its own soft crust while baking.

✔ Tastes even better after chilling in the fridge.

✔ You can add a pinch of cinnamon for extra flavor.

Strawberry Pineapple Breakfast Smoothie

Strawberry Pineapple Breakfast Smoothie

This recipe yields approximately two servings.


Ingredients:


1 cup fresh or frozen strawberries (hulled)


1 cup fresh or frozen pineapple chunks


1/2 cup Greek yogurt (plain or vanilla)


1/2 cup milk of your choice (dairy, almond, oat, etc.)


1/2 cup ice (optional, if using fresh fruit)


1/4 cup granola (for the topping)


Optional: A drizzle of honey or agave if you prefer extra sweetness.


Instructions:


Prep: If your fruit is fresh, wash the strawberries and peel/core the pineapple. If you are using frozen fruit, you can skip adding extra ice.


Blend: Add the strawberries, pineapple, yogurt, and milk into a high-speed blender.


Process: Blend on high until the mixture is completely smooth and creamy. If the consistency is too thick, add a little more milk; if it’s too thin, add a few more pieces of frozen fruit or a handful of ice.


Assemble: Pour the smoothie into two glasses.


Garnish: Top generously with your favorite granola. For that perfect presentation, garnish the rim of each glass with a fresh strawberry and a small triangle of pineapple.


Pro-Tips for the Best Smoothie:

Freeze your fruit: Using frozen strawberries or pineapple helps create a thick, “milkshake-like” texture without needing to add extra ice, which can sometimes dilute the flavor.


Make it protein-packed: If you want this to keep you full longer, feel free to add a tablespoon of chia seeds, flax seeds, or a scoop of your favorite vanilla protein powder to the blender.

Creamy Strawberry Banana Smoothie.

Creamy Strawberry Banana Smoothie.


Ingredients

Strawberries: 1 to 1.5 cups (frozen, as pictured)


Banana: 1 medium banana (sliced)


Orange: 1/2 of a fresh orange (peeled)


Milk/Liquid Base: 1 cup (dairy, almond, or oat milk all work well)


Vanilla Extract: 1/2 teaspoon (optional, using the small bottle and measuring spoon shown)


Instructions

Prep: Peel the orange and pull apart the segments. If your banana isn’t already sliced, slice it into manageable chunks.


Combine: Add the frozen strawberries, banana slices, orange segments, and milk into your blender.


Flavor: Add the splash of vanilla extract if you’d like an extra hint of sweetness.


Blend: Start the blender on a low speed and gradually increase to high. Blend until the mixture is smooth and creamy.


Serve: Pour into a glass and enjoy immediately while cold.


Tips for Success

Texture: If the smoothie is too thick, add a little more milk. If you prefer it thicker or colder, add a handful of ice cubes before blending.


Sweetness: If the fruit isn’t quite sweet enough for your taste, you can add a drizzle of honey, maple syrup, or a single pitted date.