Easy Potato Patties
If you’re craving a deliciously crispy snack, look no further than this easy homemade potato patties recipe! These golden, crunchy treats are made with tender mashed potatoes, sautéed veggies, and smoky cheese, creating a delightful blend of flavors and textures. People adore these potato patties because they are simple to make, serve as a versatile side dish, or stand alone as a hearty snack. You’ll find them to be a delightful addition to any meal or a great afternoon nibble!
Recipe Summary
Prep Time: 15 minutes
Cook Time: 15 minutes
Total Time: 30 minutes
Servings: 4
Estimated Calories: 220 per serving
Ingredients
1 kg (2 lb) potatoes, peeled
1 shallot or small onion, finely chopped
1 carrot, grated
Fresh parsley, chopped to taste
Smoked cheese (scamorza), cut into small cubes
2 eggs
125 ml (1/2 cup) plain yogurt
4–5 tbsp (30–40 g) wheat flour
Salt and black pepper to taste
Vegetable oil for frying
Instructions
Boil the peeled potatoes in salted water until fork-tender. Drain and let them cool slightly.
In a pan, heat a little oil over medium heat. Sauté the finely chopped shallot and grated carrot for 5–7 minutes until softened and lightly golden.
Mash the cooled potatoes until smooth in a large bowl.
Add the sautéed vegetables, chopped parsley, salt, and pepper to the mashed potatoes. Mix well.
Stir in the smoked cheese cubes, eggs, and yogurt until combined.
Gradually add flour until a thick, moldable mixture forms.
Heat vegetable oil in a frying pan over medium heat.
Shape the mixture into thick patties and fry them on both sides until deep golden brown and cooked through.
Drain the patties on paper towels and serve warm.
Why This Recipe is Popular
Easy homemade potato patties are a beloved dish for many reasons. They’re not only a great way to use up leftover potatoes but also evoke feelings of nostalgia and comfort. Their simplicity and versatility make them a great choice for busy weeknights or casual gatherings, and they cater to both kids and adults alike.
Serving Suggestions
These crispy potato patties make a fantastic side dish with a variety of main courses or a delightful snack on their own. Pair them with a fresh salad or some dipping sauce like garlic aioli for an extra flavor boost. They also work well at barbecues, parties, or family dinners!
Tips and Variations
Storage: Store any leftover potato patties in an airtight container in the refrigerator for up to 3 days. Reheat them in a skillet for best results.
Texture: For extra crispiness, make sure the oil is hot enough before adding the patties. This helps achieve a perfect golden crust.
Flavor Ideas: Feel free to mix in other herbs or spices such as dill or paprika to enhance the flavor.
Cheese Swap: Try using different types of cheese, like cheddar or feta, for a unique twist.
Vegetable Add-ins: You can add in finely diced bell peppers or spinach for added nutrition and flavor.
FAQs
1. Can I freeze these potato patties?
Yes, you can freeze the uncooked patties. Just layer them between parchment paper and store in an airtight container for up to 2 months.
2. What can I serve with potato patties?
They pair perfectly with simple salads, yogurt dips, or your favorite sauces.
3. How long do the patties take to fry?
Each side typically takes about 3–4 minutes in hot oil until golden brown.
4. Can I make these potato patties gluten-free?
Absolutely! Substitute the regular flour with a gluten-free all-purpose flour to suit your dietary needs.
Give this easy homemade potato patties recipe a try! They’re bound to become a new family favorite that you’ll want to make again and again. Happy cooking!


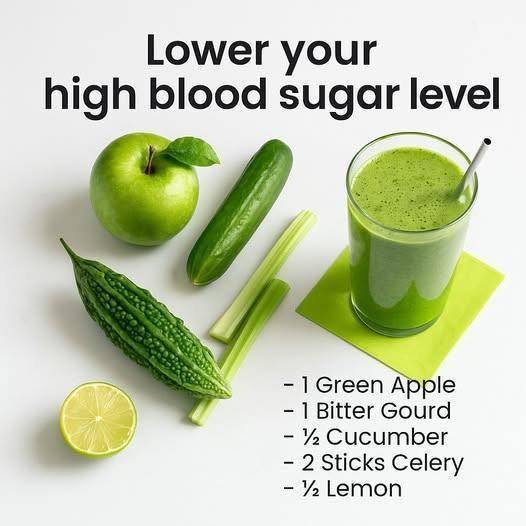
 “Diabetic-friendly” means lower in sugar and carbs — always monitor blood glucose and consult your healthcare provider for personal guidance.
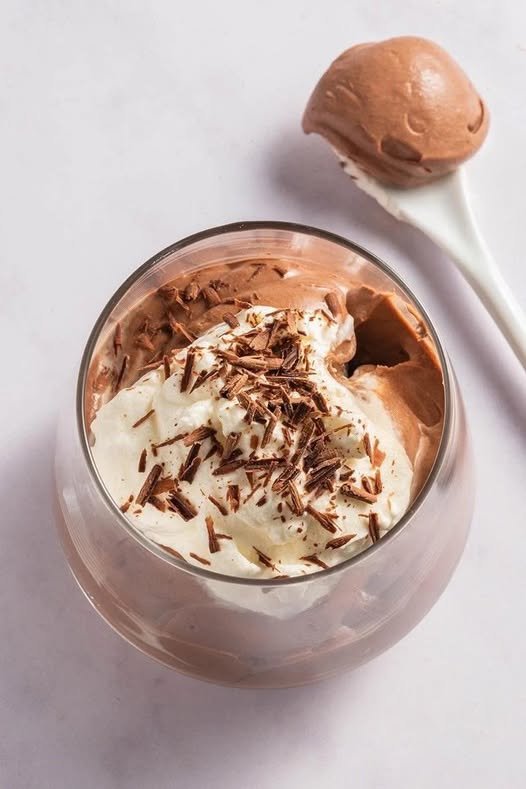
 Lower sugar than traditional cream rolls
 Add sugar-free strawberry puree swirl
 Mix in 1 tbsp unsweetened cocoa powder
 Add 1 tbsp coconut cream for tropical flavor
 Add ½ tsp instant espresso for mocha twist

 Tips for Best Results
 Keeps You Full Longer
 Supports Digestion
 Helps Control Blood Sugar
 Boosts Metabolism
 Heart Healthy