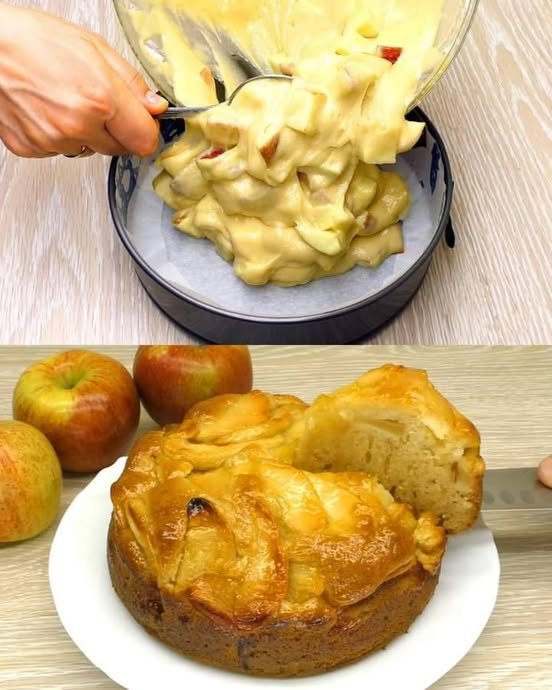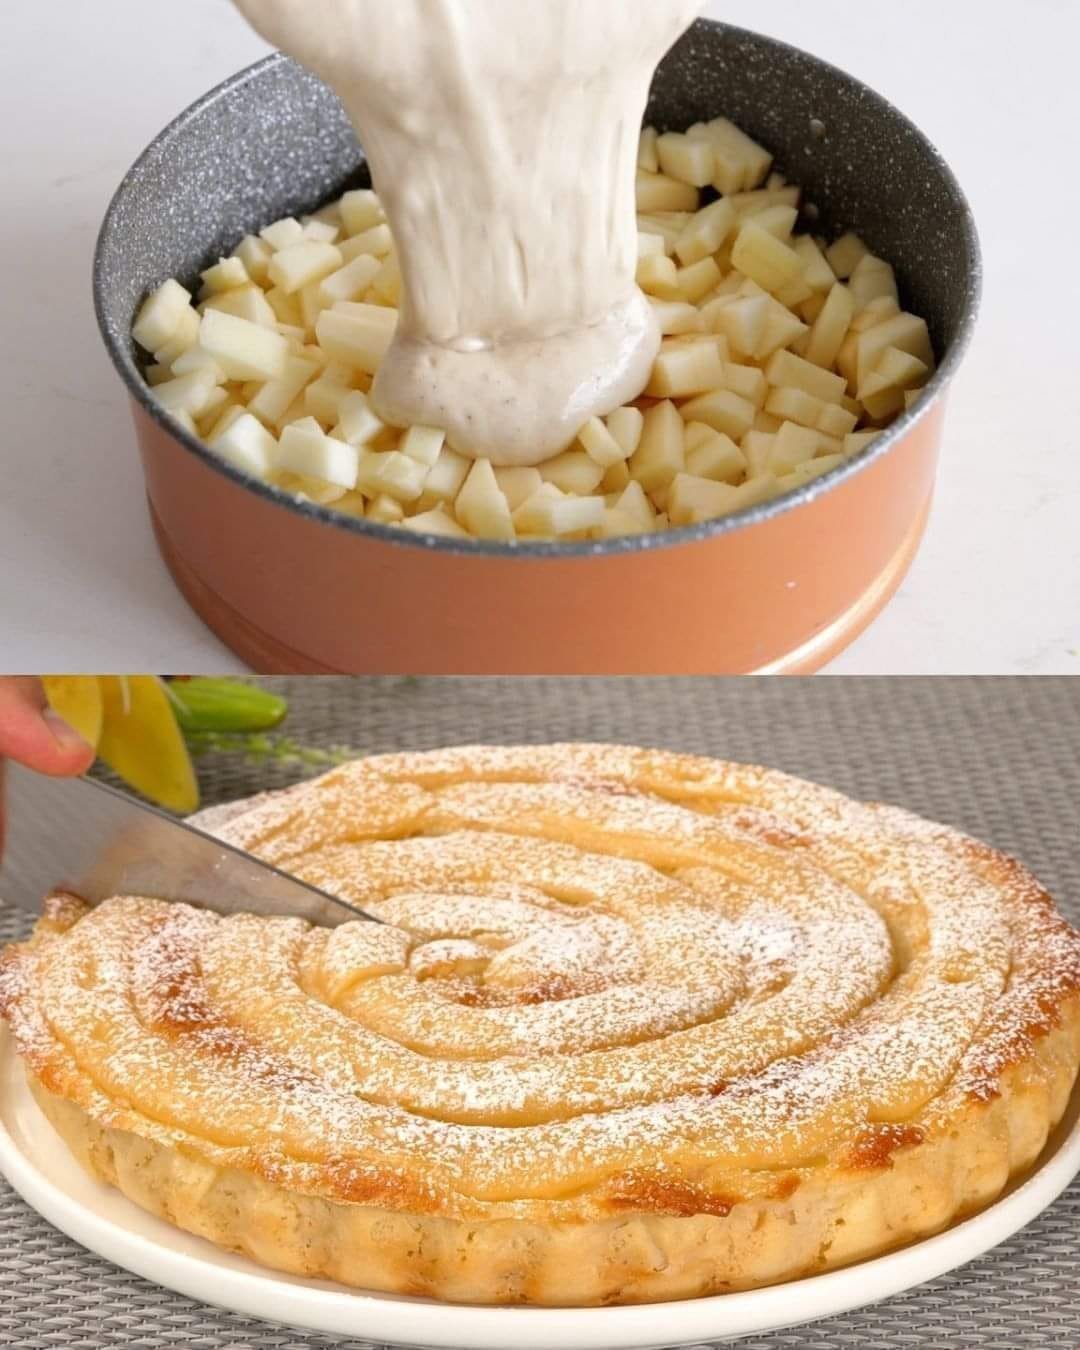
Apple Hurricane Cake
Prep Time: 20 minutes
Bake Time: 35–40 minutes
Servings: 8 slices
Pan Size: 8–9 inch (20–22 cm) round pan
A soft apple cake with a beautiful custard spiral baked right on top. Moist inside, lightly golden outside, and stunning when sliced.
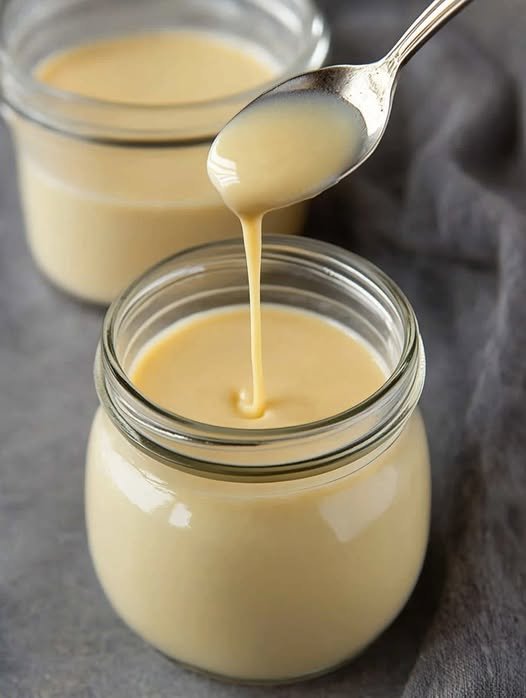
🥚 Cream Filling (Custard Spiral)
Ingredients
-
2 egg yolks
-
¼ cup (60 g) sugar
-
1 tablespoon (15 g) cornstarch
-
1 cup (240 ml) milk
-
1 teaspoon vanilla essence
Method
-
In a small saucepan, whisk together the egg yolks, sugar, and cornstarch until smooth.
-
Slowly pour in the milk while whisking continuously to prevent lumps.
-
Place the pan over medium heat and stir constantly using a whisk or spatula.
-
Cook until the mixture thickens into a smooth, creamy custard.
-
Remove from heat and stir in the vanilla essence.
-
Transfer to a bowl and cover with plastic wrap touching the surface.
-
Allow it to cool completely before using.
🍏 Apple Preparation
Ingredients
-
3 medium apples (peeled and diced)
Method
-
Peel, core, and cut the apples into small cubes (about 1 cm).
-
Set aside for later use.
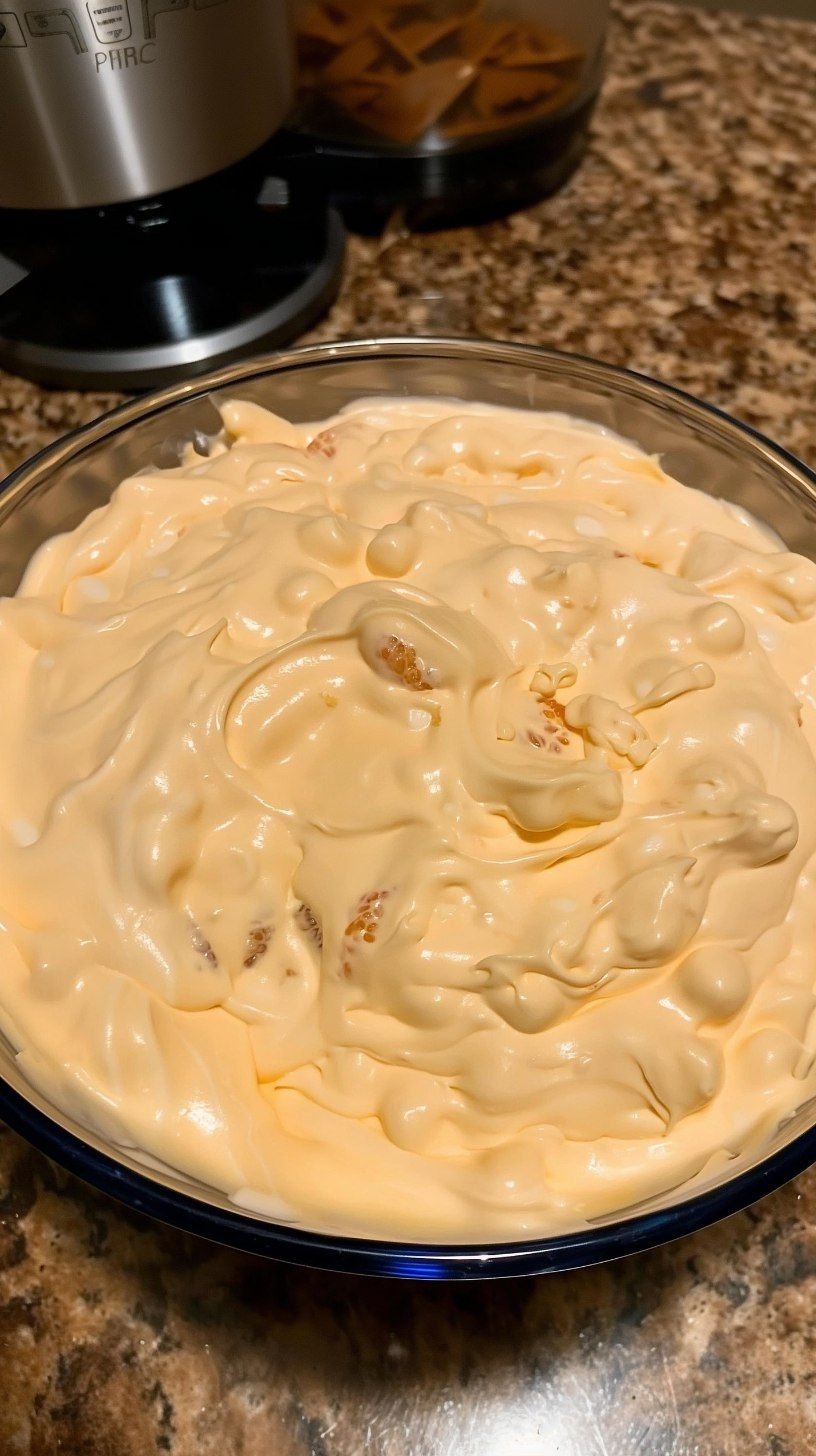
🍰 Cake Batter
Ingredients
-
2 whole eggs
-
2 egg whites (leftover from custard)
-
½ cup (100 g) sugar
-
Pinch of salt
-
½ cup (120 ml) milk
-
⅓ cup (80 ml) vegetable oil or melted butter
-
2 cups (250 g) all-purpose flour
-
1 tablespoon (12 g) baking powder
-
Prepared diced apples
Method
-
In a large bowl, beat the whole eggs, egg whites, sugar, and salt until pale and frothy.
-
Add the milk and oil and mix until smooth.
-
Sift in the flour and baking powder.
-
Fold gently until just combined. Do not overmix.
-
Fold in the diced apples evenly.
🌪 Assembly (Hurricane Design)
-
Preheat oven to 350°F (180°C).
-
Grease and line an 8–9 inch round pan with parchment paper.
-
Pour the apple batter into the pan and level the top.
-
Transfer the cooled custard to a piping bag or plastic bag with the tip cut off.
-
Starting from the center, pipe the custard in a spiral pattern moving outward to the edge.
🔥 Baking
-
Place the pan in the center of the oven.
-
Bake for 35–40 minutes.
-
The cake is ready when:
-
The top is lightly golden
-
A toothpick inserted into the cake portion comes out clean
-
🍽 Cooling & Serving
-
Let the cake cool in the pan for 10 minutes.
-
Remove from the pan and cool completely on a rack.
-
Dust generously with powdered sugar to highlight the spiral pattern.
-
Slice and serve.
✅ Tips
-
Use firm apples for best texture.
-
Custard must be fully cooled before piping.
-
Store covered at room temperature for 1 day or refrigerate up to 3 days.
-
Best served slightly warm or at room temperature.