Nutritional Profile

Beetroot is a nutrient-dense root vegetable that offers a variety of vitamins and minerals to support daily bodily functions. It is frequently used in juices and salads to promote natural wellness and vitality.

Nutritional Profile

Beetroot contains several key nutrients that contribute to different aspects of health:

  • Vitamin A: Helps maintain healthy vision.

  • Vitamin C: Supports the immune system.

  • Fiber: Promotes healthy digestion and gut health.

  • Iron & Folate: Support blood cell production and oxygen transport.

  • Betalains & Nitrates: Antioxidants and compounds that support cellular health and circulation.

Potential Wellness Benefits

When included as part of a balanced diet, beetroot may offer the following supportive benefits:

  • Digestive & Liver Support: Helps promote liver wellness and digestive comfort.

  • Circulation & Heart Health: Assists in maintaining healthy circulation and balanced blood pressure levels.

  • Energy & Performance: Helps reduce feelings of fatigue and supports physical performance.

  • Cognitive Function: May support brain function and memory.


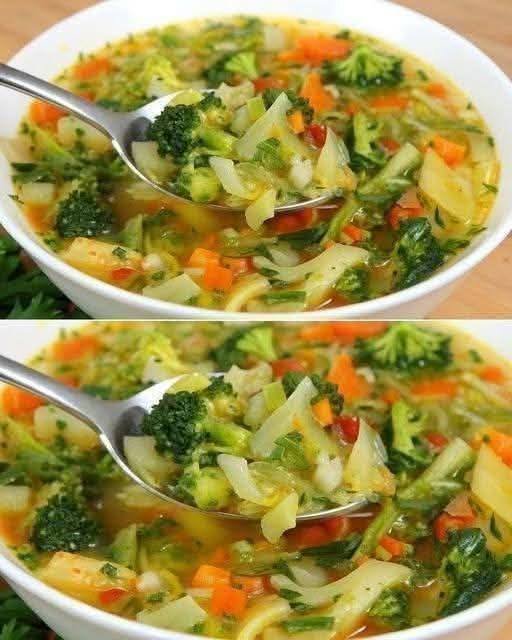
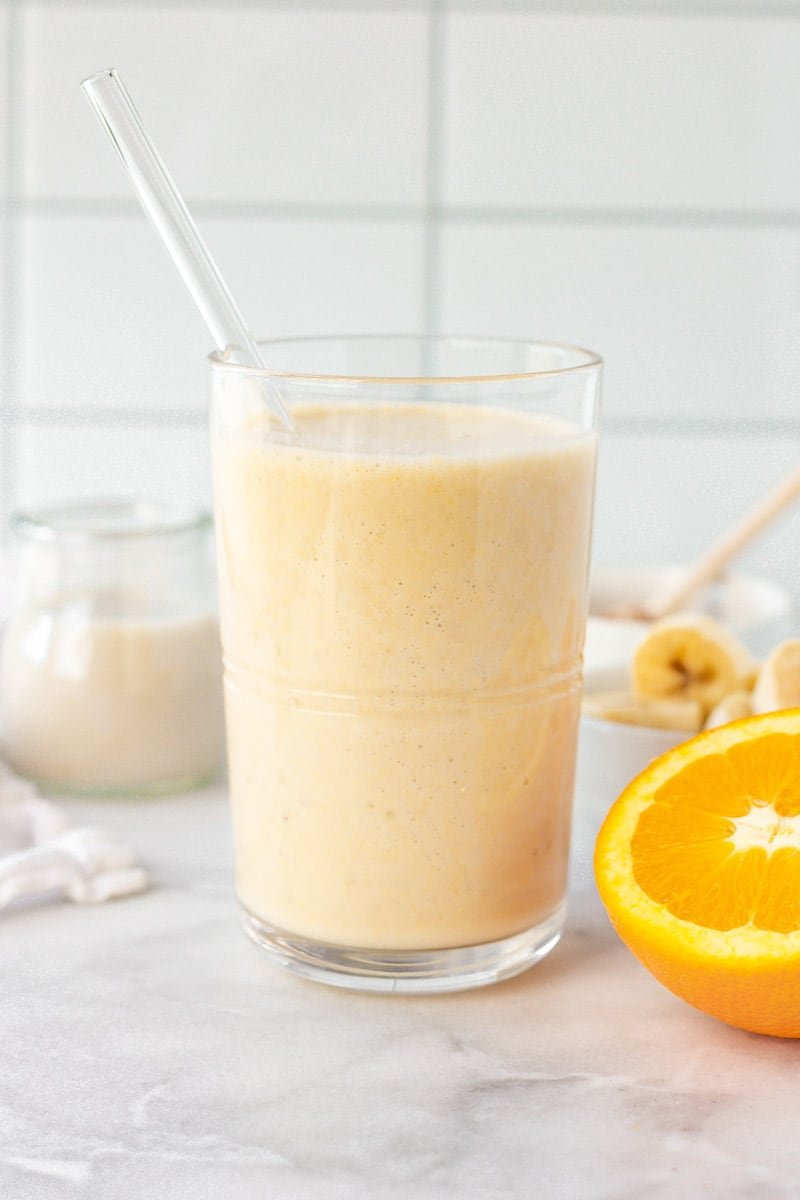
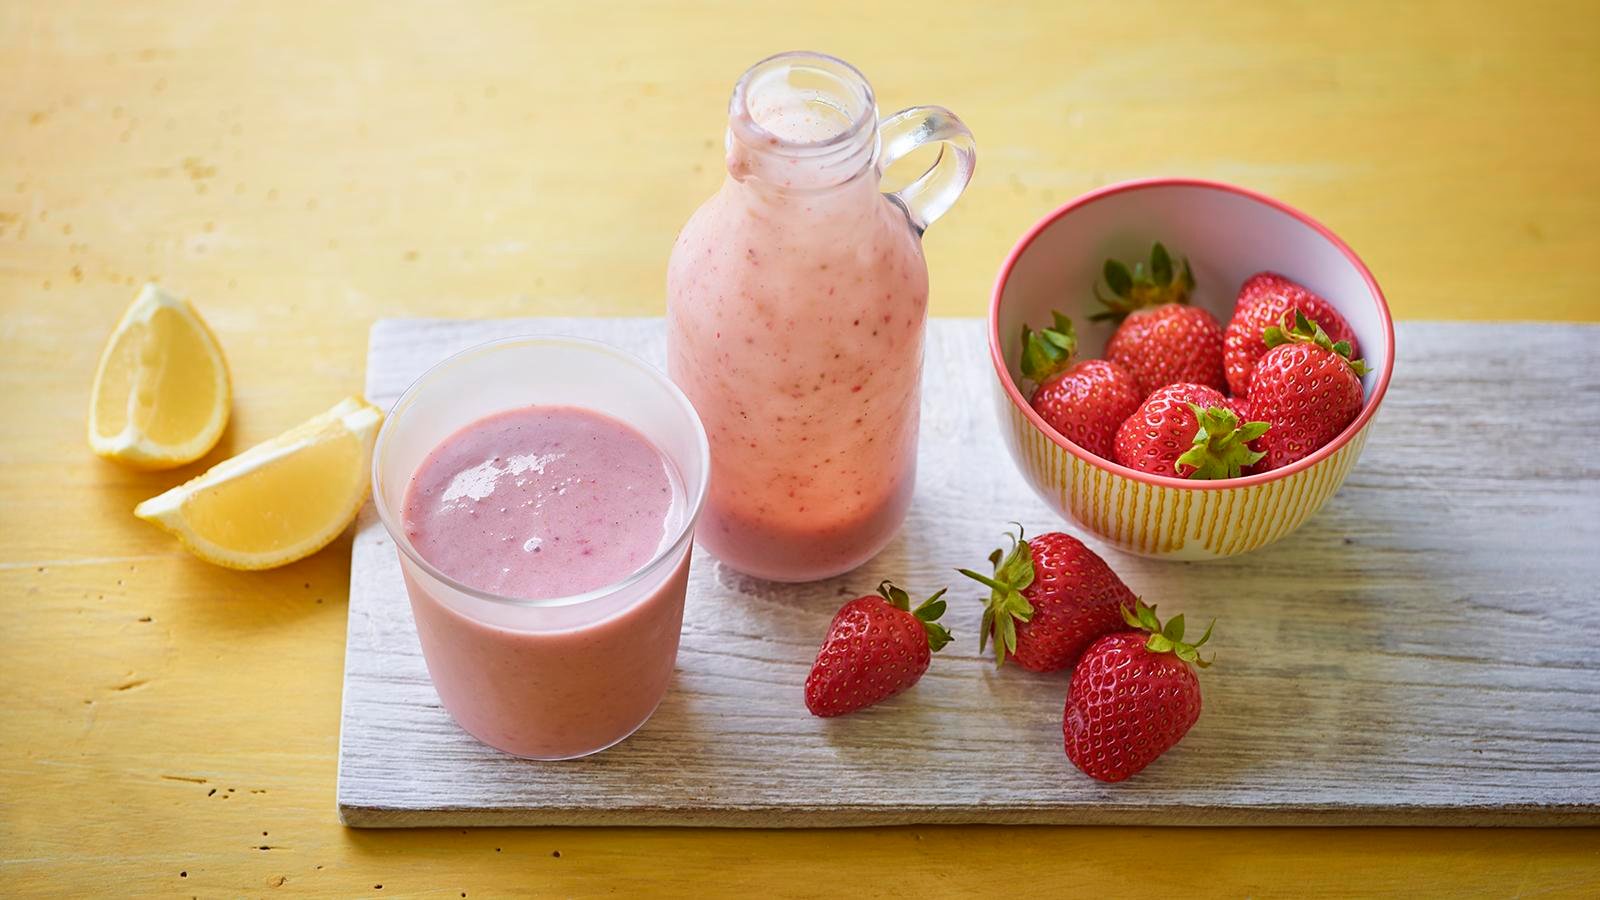
Natural Beetroot Drink Recipe

This simple recipe is designed to support digestive and liver wellness.

Ingredients

  • 1 medium beetroot

  • 1 carrot

  • 1 orange and ½ lemon

  • 1 teaspoon grated ginger

  • 1 cup of water

Preparation

  1. Clean: Wash all ingredients thoroughly and peel the beetroot and carrot.

  2. Chop: Cut the vegetables into small pieces.

  3. Juice: Squeeze the juice from the orange and lemon.

  4. Blend: Combine all ingredients and water in a blender; blend for 1 minute until smooth.

  5. Serve: Strain the mixture if you prefer a thinner consistency.

Usage Guidelines

  • Frequency: Drink one glass 3–4 times per week, ideally in the morning before breakfast.

  • Duration: Follow this routine for 2–3 weeks alongside a balanced diet for best results.

⚠️ Important Considerations

  • Kidney Health: Individuals with kidney stones or conditions should consult a healthcare professional before increasing beetroot intake.

  • Blood Pressure: Those with low blood pressure should consume beetroot in moderation.

  • Natural Changes: It is normal for beetroot to temporarily change the color of urine or stool.

🥑 Creamy Avocado & Banana Bliss

🥑 Creamy Avocado & Banana Bliss

This recipe makes one large serving. It’s naturally sweet, full of healthy fats, and has a velvet-like texture.

Ingredients

  • 1/2 Ripe Avocado: Pitted and scooped out.

  • 1 Frozen Banana: Using a frozen banana makes it extra thick and chilly without needing much ice.

  • 1 cup Milk of choice: Dairy, almond, or oat milk all work perfectly.

  • 1 tbsp Honey: Plus a little extra for that beautiful drizzle on top.

  • 1/4 tsp Vanilla extract: (Optional) To enhance the sweetness.

  • A handful of ice: Only if you prefer a slushier consistency.


Instructions

  1. Prep the Fruit: Place the scooped avocado and the frozen banana chunks into your blender.

  2. Add Liquids: Pour in your milk of choice, the honey, and the vanilla extract.

  3. Blend: Start on a low speed and gradually increase to high. Blend for about 45–60 seconds until the green flecks disappear and the mixture is perfectly smooth.

  4. The “Drizzle” Technique: Pour the smoothie into a glass. To get the look in your photo, take a spoon dipped in honey and let it slowly run down the inside edge of the glass before adding a final swirl on top.

  5. Garnish: Slice a fresh banana coin and notch it onto the rim of the glass.


Quick Tips for the Best Result

  • Ripeness Matters: Ensure your avocado is soft to the touch. An underripe avocado will make the smoothie taste “grassy” rather than creamy.

  • Boost It: If you want more protein, a scoop of vanilla protein powder or 1/4 cup of Greek yogurt fits right in without changing the flavor profile significantly.

🍊 Creamy Orange Banana Smoothie

🍊 Creamy Orange Banana Smoothie

Prep time: 5 minutes | Servings: 1

Ingredients

  • 1 large orange: Peeled and segmented (remove seeds if necessary).

  • 1 frozen banana: Using a frozen banana gives it that thick, milkshake-like texture seen in the photo.

  • 1/2 cup Greek yogurt: Plain or vanilla works best for creaminess.

  • 1/4 cup Milk of choice: (Dairy, almond, or oat milk) to help it blend.

  • 1/2 tsp Vanilla extract: This gives it that “creamsicle” flavor.

  • Optional: A drizzle of honey or maple syrup if you prefer it sweeter.


Instructions

  1. Prep the fruit: Peel the orange and break it into segments. If you don’t have a frozen banana, use a fresh one and add 1/2 cup of ice to the blender.

  2. Layer the blender: Add the liquid (milk) first, followed by the yogurt, then the orange segments and banana. Putting liquids in first helps the blades spin more easily.

  3. Blend: Start on a low speed and gradually increase to high. Blend for about 45–60 seconds until completely smooth and frothy.

  4. Taste test: Give it a quick sip. If it’s too thick, add a splash more milk. If you want it sweeter, add your sweetener of choice and pulse again.

  5. Serve: Pour into a tall glass, grab a glass straw like the one in your photo, and enjoy immediately!


Pro Tips for the Best Texture

  • Freeze your bananas: Whenever your bananas get spotty, peel them, break them in half, and store them in a freezer bag. They make smoothies much creamier than ice does.

  • Zest it up: For an extra punch of orange flavor, grate a little bit of the orange zest into the blender before you juice or peel the fruit.

Creamy Strawberry Lemonade Smoothie

Creamy Strawberry Lemonade Smoothie

This recipe yields about 2 servings and takes less than 5 minutes to whip up.


Ingredients

  • Strawberries: 2 cups fresh or frozen (hulls removed)

  • Milk or Yogurt: 1 cup (use Greek yogurt for a thicker texture or almond/oat milk for a lighter version)

  • Lemon: Juice of 1/2 a lemon (about 1 tablespoon)

  • Sweetener: 1–2 tablespoons of honey, maple syrup, or agave (optional, to taste)

  • Ice: 1/2 cup (only needed if using fresh strawberries instead of frozen)


Instructions

  1. Prep the Fruit: Wash the strawberries and pat them dry. Remove the green leafy tops.

  2. Combine: Add the strawberries, your choice of milk or yogurt, and the fresh lemon juice into a blender.

  3. Sweeten: Add your preferred sweetener if you like a treat that’s more sweet than tart.

  4. Blend: Start the blender on a low setting and gradually increase to high. Blend until the mixture is completely smooth and creamy.

  5. Adjust: If the smoothie is too thick, add a splash more milk. If it’s too thin, add a few more frozen strawberries or ice cubes and blend again.

  6. Serve: Pour into a glass or a small carafe, just like in the photo, and garnish with a lemon wedge or a whole strawberry.


Tips for the Perfect Blend

  • For Extra Creaminess: Use a frozen banana in place of the sweetener; it adds a velvety texture without overpowering the strawberry flavor.

  • Zest it Up: For a stronger citrus kick, grate a tiny bit of lemon zest into the blender before mixing.

Sticky Bourbon Chicken & Fried Rice

🍗 Sticky Bourbon Chicken & Fried Rice

 Description

Sticky Bourbon Chicken & Fried Rice is a flavorful Asian-inspired dish featuring tender chicken coated in a sweet, savory, and slightly smoky bourbon sauce served alongside delicious homemade fried rice. The bourbon sauce caramelizes beautifully, creating a sticky glaze that perfectly coats the chicken. Paired with fried rice loaded with vegetables, eggs, and soy sauce, this dish is a satisfying and restaurant-quality meal you can easily make at home.

🥘 Ingredients

For the Bourbon Chicken

  • 1 lb boneless skinless chicken thighs or breasts, diced

  • 1 tbsp vegetable oil

  • 3 cloves garlic, minced

  • 1 tsp ginger, minced

Bourbon Sauce

  • ¼ cup bourbon whiskey

  • ¼ cup soy sauce

  • ¼ cup brown sugar

  • 2 tbsp ketchup

  • 1 tbsp apple cider vinegar

  • 1 tbsp honey

  • 1 tsp sesame oil

  • ½ tsp red pepper flakes (optional)

  • 1 tbsp cornstarch + 2 tbsp water (slurry for thickening)

For the Fried Rice

  • 3 cups cooked cold rice (preferably day-old)

  • 2 tbsp vegetable oil

  • 2 eggs, beaten

  • ½ cup diced carrots

  • ½ cup peas

  • 3 green onions, chopped

  • 2 tbsp soy sauce

  • 1 tsp sesame oil

  • Salt and pepper to taste

👩‍🍳 Instructions

Step 1: Cook the Chicken

Heat vegetable oil in a skillet over medium-high heat. Add diced chicken and cook for 5–7 minutes until browned and fully cooked.

Step 2: Make the Bourbon Sauce

Add garlic and ginger to the pan and sauté for 30 seconds. Pour in bourbon, soy sauce, brown sugar, ketchup, vinegar, honey, sesame oil, and red pepper flakes. Stir well.

Step 3: Simmer

Allow the sauce to simmer for 4–5 minutes so the alcohol cooks off and flavors blend.

Step 4: Thicken the Sauce

Add the cornstarch slurry and stir until the sauce becomes thick and sticky. Coat the chicken evenly.

Step 5: Make the Fried Rice

Heat oil in a large pan or wok. Scramble the eggs and set aside.

Step 6: Cook the Vegetables

Add carrots and peas to the pan and sauté for 2–3 minutes.

Step 7: Add Rice

Add the cold rice and break it apart. Stir-fry for 3–4 minutes.

Step 8: Season

Add soy sauce, sesame oil, green onions, and scrambled eggs. Stir well and cook for another 2 minutes.

 Servings

Serves: 4 people

 Nutritional Information (Approx per serving)

Nutrient Amount
Calories 520 kcal
Protein 32 g
Carbohydrates 50 g
Fat 18 g
Sugar 12 g
Sodium 850 mg

(Values may vary depending on ingredients used.)

 Recipe Notes

  • Using day-old rice helps achieve the perfect fried rice texture.

  • Chicken thighs provide more flavor and tenderness than chicken breasts.

  • The bourbon flavor becomes mild as the alcohol cooks off.

 Tips for Best Results

✔ Use high heat when cooking fried rice for authentic flavor.
✔ Avoid overcrowding the pan when cooking chicken.
✔ Add a splash of soy sauce at the end for extra flavor.
✔ Garnish with sesame seeds or green onions for presentation.

 Health Benefits

🍗 High Protein – Supports muscle growth and repair.
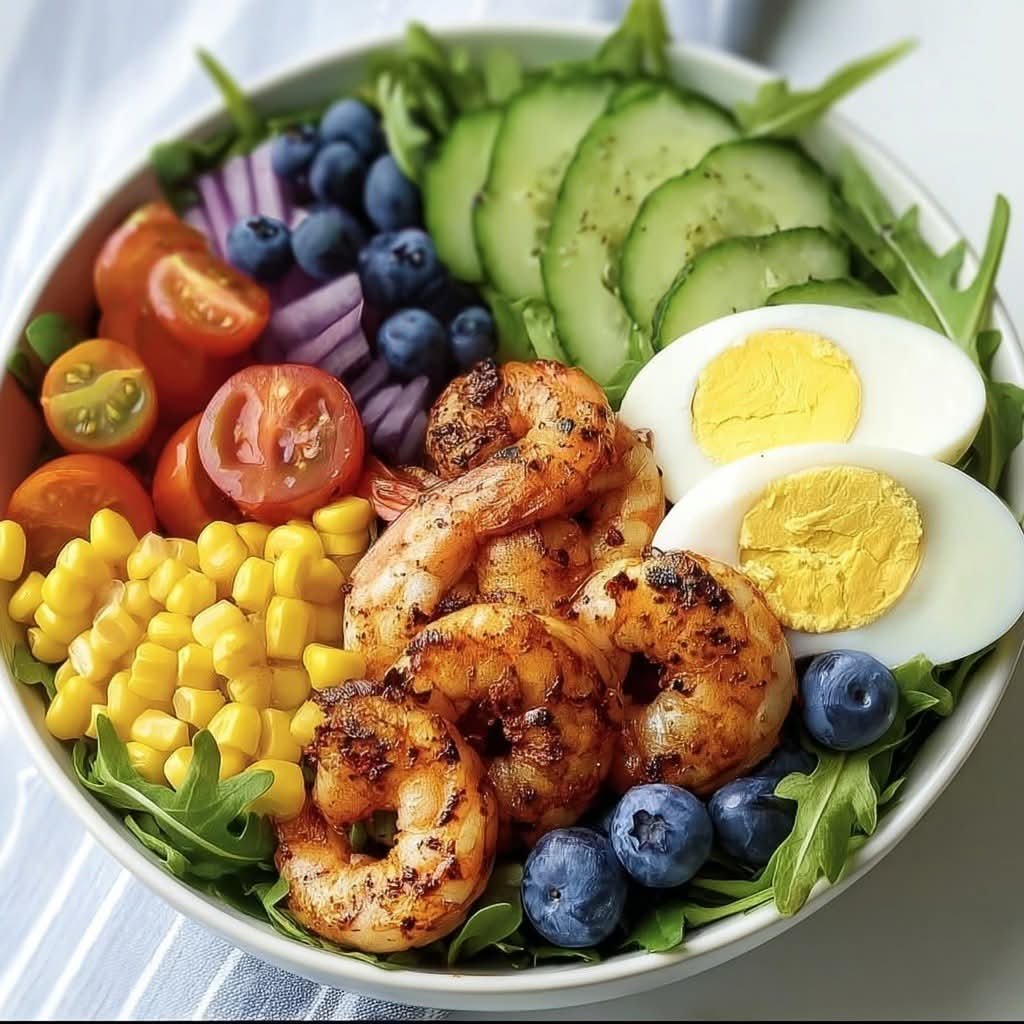
🥕 Vegetables – Provide vitamins, fiber, and antioxidants.
🍚 Rice – Supplies energy and carbohydrates for daily activities.
🧄 Garlic & Ginger – Help support immune health and digestion.

 Q & A

Q1: Can I make this recipe without bourbon?

Yes. Replace bourbon with apple juice or chicken broth for a similar flavor profile.

Q2: Can I use leftover rice?

Yes! In fact, leftover rice works best for fried rice because it’s less sticky.

Q3: How do I store leftovers?

Store in an airtight container in the refrigerator for up to 3 days.

Q4: Can I freeze bourbon chicken?

Yes, the chicken can be frozen for up to 2 months.

Q5: What vegetables can I add to fried rice?

You can add:

  • Bell peppers

  • Corn

  • Mushrooms

  • Broccoli

 Serving Suggestions

Serve Sticky Bourbon Chicken & Fried Rice with:

  • Steamed broccoli

  • Asian cucumber salad

  • Egg rolls or spring rolls

  • Chili oil or hot sauce

✅ Summary:
Sticky Bourbon Chicken & Fried Rice is a delicious combination of sweet, savory, and smoky flavors with tender chicken and flavorful fried rice. It’s quick to prepare, satisfying, and perfect for weeknight dinners or homemade takeout-style meals.

High-Protein Blueberry Muffins

High-Protein Blueberry Muffins (Easy & Healthy)

 Description

These High-Protein Blueberry Muffins are soft, fluffy, and packed with juicy blueberries in every bite. Made with a zero-sugar mix and protein-rich milk, they’re a healthier twist on classic muffins—perfect for breakfast, snacks, or post-workout fuel. Quick to make and absolutely delicious!

 Ingredients

Main Ingredients

  • 1 box zero sugar blueberry muffin mix

  • 1 bottle (11–14 oz) protein milk (like Fairlife)

  • 1 cup fresh blueberries

Optional Add-Ins

  • 1 egg (for extra fluffiness)

  • 1 tsp vanilla extract

  • 1 tbsp melted butter or oil

 Instructions

1. Preheat Oven

Preheat oven to 375°F (190°C) and line a muffin tin with liners or grease it.

2. Mix Ingredients

In a bowl, combine:

  • Muffin mix

  • Protein milk

  • Blueberries

Mix until just combined (don’t overmix).

3. Fill Muffin Tin

Pour batter evenly into muffin cups (about 3/4 full).

4. Bake

Bake for 15–20 minutes or until a toothpick comes out clean.

5. Cool & Serve

Let muffins cool for 5–10 minutes before serving.

 Servings

Makes: 10–12 muffins

Nutritional Information (Approx per muffin)

Nutrient Amount
Calories 120–150 kcal
Protein 6–10 g
Carbohydrates 18 g
Fat 3 g
Sugar Low / Reduced

(Depends on mix and milk used.)

 Recipe Notes

  • Zero sugar mix keeps this recipe lighter and healthier.

  • Protein milk boosts nutritional value without changing taste.

  • Fresh blueberries give the best texture and flavor.

Tips for Best Results

✔ Don’t overmix batter to keep muffins fluffy
✔ Toss blueberries in a little flour to prevent sinking
✔ Add extra blueberries on top before baking for a bakery look
✔ Let muffins cool to set properly

Health Benefits

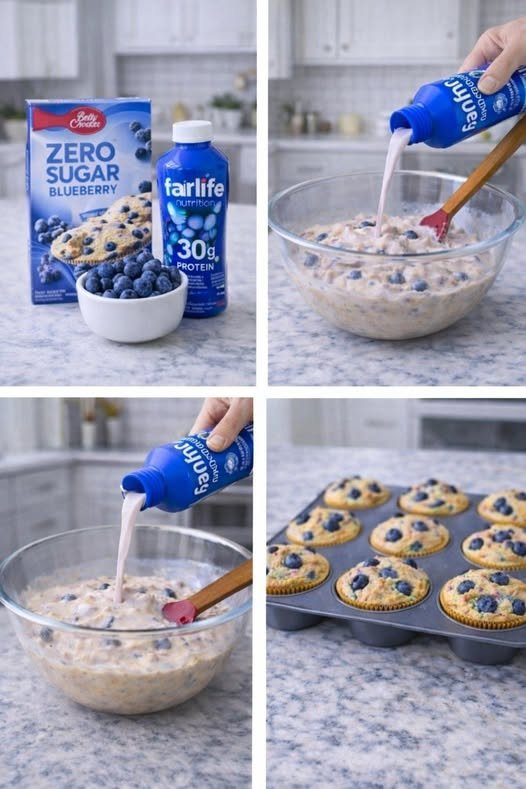
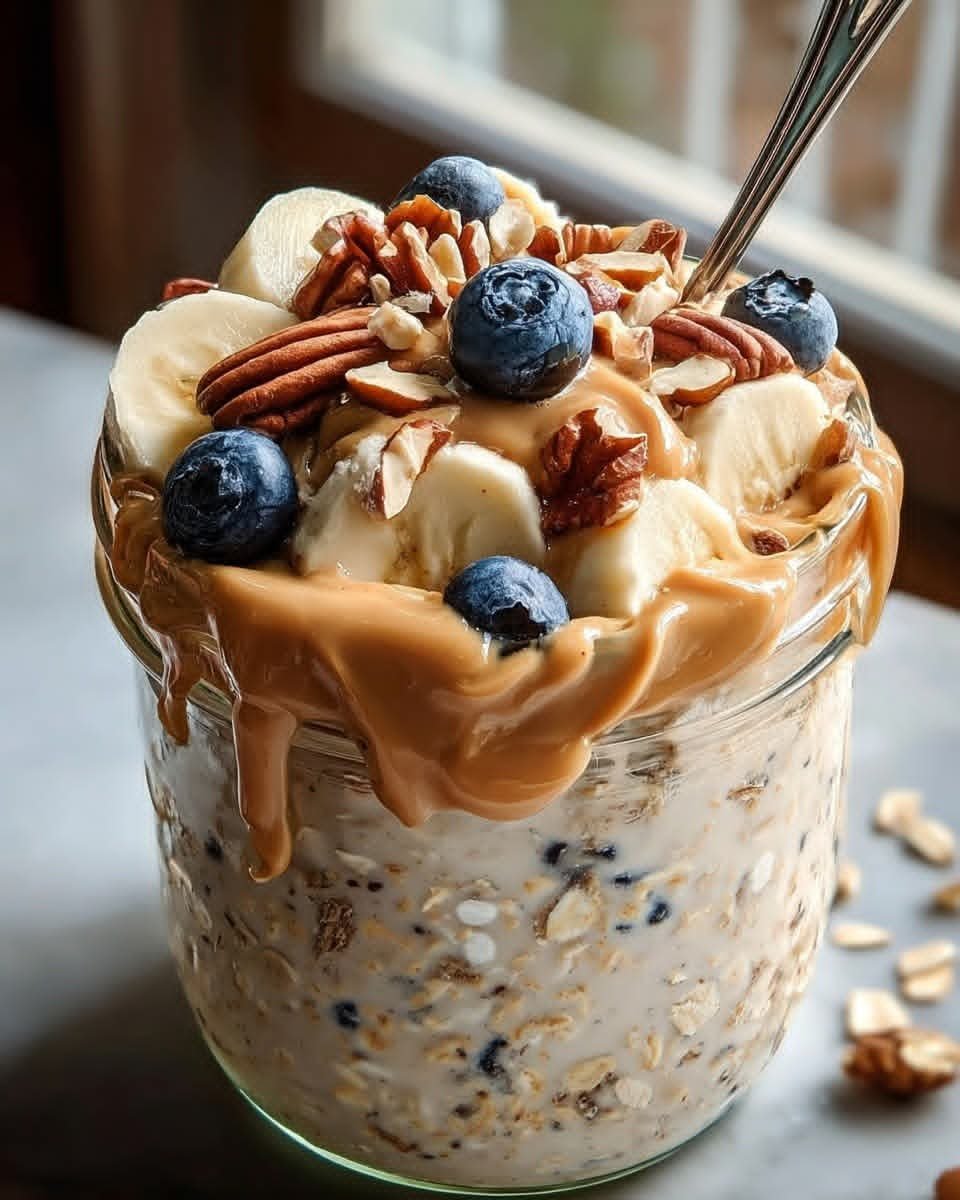
🫐 Blueberries – Rich in antioxidants and support brain health
🥛 Protein Milk – Helps build muscle and keeps you full longer
🍰 Lower Sugar – Great for healthier lifestyle choices
⚡ Energy Boost – Perfect breakfast or snack option

 Q & A

Q1: Can I use regular milk instead?

Yes, but protein content will be lower.

Q2: Can I use frozen blueberries?

Yes, just don’t thaw them before mixing.

Q3: How do I store muffins?

Store in an airtight container for 2–3 days at room temperature.

Q4: Can I freeze these muffins?

Yes, freeze for up to 2 months.

Q5: Can I make this gluten-free?

Use a gluten-free muffin mix.

 Serving Suggestions

Serve with:

  • Greek yogurt

  • Coffee or tea ☕

  • Honey drizzle or butter

  • Fresh fruit on the side

✅ Summary:
High-Protein Blueberry Muffins are a quick, healthy, and delicious treat made with simple ingredients. Perfect for busy mornings or a guilt-free snack!

Crockpot Ravioli Lasagna

🧀 Crockpot Ravioli Lasagna

📖 Description

Crockpot Ravioli Lasagna is the ultimate comfort food made effortless. Instead of layering traditional lasagna noodles, this recipe uses cheese-filled ravioli for a rich, cheesy shortcut. Slow-cooked in a savory meat sauce and topped with melted mozzarella, it turns into a bubbly, hearty dish that tastes like it took hours of hands-on work—when really, your slow cooker did most of it.

Perfect for busy weeknights, family dinners, or potlucks.

🛒 Ingredients For Crockpot Ravioli Lasagna

  • 1 (25 oz) bag frozen cheese ravioli

  • 1 lb ground beef (or Italian sausage)

  • 1 small onion, diced

  • 2 cloves garlic, minced

  • 1 (24 oz) jar marinara or pasta sauce

  • 1 (14.5 oz) can diced tomatoes (optional)

  • 1 teaspoon Italian seasoning

  • 1/2 teaspoon salt

  • 1/2 teaspoon black pepper

  • 2 cups shredded mozzarella cheese

  • 1/2 cup grated Parmesan cheese

  • 1 cup ricotta cheese (optional, for extra creaminess)

  • Fresh basil or parsley (for garnish)

👩‍🍳 Instructions

1️⃣ Cook the Meat

In a skillet over medium heat, cook ground beef and onion until browned. Drain excess grease. Add garlic and cook 1 minute more.
Stir in marinara sauce, diced tomatoes, Italian seasoning, salt, and pepper. Simmer 3–5 minutes.

2️⃣ Layer in the Crockpot

Lightly spray the crockpot with cooking spray.

Layer as follows:

  • Thin layer of meat sauce

  • Frozen ravioli (single layer)

  • Ricotta (small spoonfuls, optional)

  • Mozzarella + Parmesan
    Repeat layers until ingredients are used, finishing with sauce and cheese on top.


3️⃣ Slow Cook

  • Cook on LOW for 4–5 hours
    OR

  • Cook on HIGH for 2–3 hours

Avoid overcooking—ravioli can become too soft.

4️⃣ Serve

Let sit 10–15 minutes before serving so layers set. Garnish with fresh herbs.

🍽 Servings

Serves: 6–8 people

💡 Notes

  • No need to thaw ravioli.

  • Use beef ravioli for extra richness.

  • Add spinach or mushrooms between layers for veggies.

  • For a spicier version, use hot Italian sausage.

🔥 Tips for Best Results

✔ Don’t over-stir once layered.
✔ Spray crockpot to prevent sticking.
✔ Use whole milk mozzarella for better melt.
✔ Let it rest before slicing—this keeps layers intact.

🥗 Nutritional Information (Approximate per serving – based on 8 servings)

  • Calories: 420–480

  • Protein: 25g

  • Carbohydrates: 35g

  • Fat: 22g

  • Fiber: 3g

  • Sodium: 780mg

(Values vary depending on brand and ingredients used.)

🌟 Benefits of This Recipe

  • Time-saving shortcut to classic lasagna

  • Family-friendly and kid-approved

  • Budget-friendly ingredients

  • Great for meal prep and leftovers

  • Minimal prep, maximum flavor

❓ Q & A

Q: Can I make it without meat?

Yes! Skip the beef and use extra veggies or plant-based crumbles.

Q: Can I prepare it ahead of time?

Yes. Assemble it in the crockpot insert, refrigerate overnight, and cook the next day.

Q: Can I freeze leftovers?

Absolutely. Store in an airtight container up to 2 months.

Q: Why is my ravioli mushy?

It likely cooked too long. Check at the minimum cook time.

Q: Can I use fresh ravioli instead of frozen?

Yes, but reduce cooking time by about 30–45 minutes.

Grilled Chicken Salad with Avocado & Herb Dressing

Grilled Chicken Salad with Avocado & Herb Dressing 🥑🥗🍗
Ingredients:
For the Chicken:
2 chicken breasts 🍗
1 tbsp olive oil 🫒
1 tsp smoked paprika 🌶️
1/2 tsp garlic powder 🧄
Salt & pepper 🧂
For the Salad:
150g mixed lettuce 🥬
150g cherry tomatoes, halved 🍅
1 cucumber, sliced 🥒
1 avocado, diced 🥑
150g sweet corn 🌽
For the Creamy Herb Dressing:
150g Greek yogurt 🥣
2 tbsp mayonnaise 🥄
Juice of 1/2 lemon 🍋
2 tbsp fresh dill or parsley, chopped 🌿
1 garlic clove, minced 🧄
Salt & pepper to taste 🧂

🥗🍤 Fresh Shrimp & Veggie Power Bowl

🥗🍤 Fresh Shrimp & Veggie Power Bowl

A colorful, healthy bowl packed with protein, fresh vegetables, and sweet berries. Perfect for a light lunch or refreshing dinner!

🛒 Ingredients

🍤 Grilled shrimp

🥒 Cucumber slices

🍅 Cherry tomatoes

🌽 Sweet corn

🫐 Blueberries

🧅 Red onion slices

🥬 Arugula or mixed greens

🥚 Boiled eggs

🫒 Olive oil

🧂 Salt & black pepper

👩‍🍳 Instructions

1️⃣ 🥬 Place fresh arugula or mixed greens in a bowl as the base.

2️⃣ 🍤 Grill the shrimp with olive oil, salt, and pepper until golden.

3️⃣ 🥒 Arrange cucumber slices, cherry tomatoes, corn, blueberries, and red onions around the bowl.

4️⃣ 🥚 Add halved boiled eggs for extra protein.

5️⃣ 🍤 Place the grilled shrimp in the center.

6️⃣ 🫒 Drizzle lightly with olive oil and sprinkle salt & pepper.

🍓🫐 Strawberry Blueberry Yogurt Cup

🍓🫐 Strawberry Blueberry Yogurt Cup

Ingredients:

🍓 Strawberries

🫐 Blueberries

🥣 Greek yogurt

🌾 Oats

🍯 Honey

Recipe:

1️⃣ Add oats to the bottom of the glass.

2️⃣ Layer fresh strawberries.

3️⃣ Add a layer of blueberries.

4️⃣ Spoon creamy Greek yogurt on top.

5️⃣ Drizzle honey and enjoy.

🍓🍍 Tropical Strawberry Pineapple Cup

Ingredients:

🍓 Strawberries

🍍 Pineapple chunks

🥣 Greek yogurt

🌾 Oats

🍯 Honey

Recipe:

1️⃣ Start with oats at the bottom.

2️⃣ Add fresh strawberries.

3️⃣ Layer juicy pineapple chunks.

4️⃣ Add a layer of yogurt.

5️⃣ Finish with a little honey.

🥝🫐 Kiwi Blueberry Power Cup

Ingredients:

🥝 Kiwi slices

🫐 Blueberries

🥣 Greek yogurt

🌾 Oats

🌰 Walnuts

Recipe:

1️⃣ Add oats as the base.

2️⃣ Sprinkle walnuts for crunch.

3️⃣ Layer blueberries.

4️⃣ Add creamy yogurt.

5️⃣ Top with fresh kiwi slices.

🍌🍊 Banana Orange Fruit Cup

Ingredients:

🍌 Banana slices

🍊 Orange slices

🍇 Red grapes

🌾 Oats

🥣 Yogurt

Recipe:

1️⃣ Place oats at the bottom.

2️⃣ Add grapes.

3️⃣ Layer banana slices.

4️⃣ Add fresh orange slices.

5️⃣ Finish with yogurt.

🥝🍌 Kiwi Banana Granola Cup

Ingredients:

🥝 Kiwi slices

🍌 Banana slices

🥣 Yogurt

🥣 Granola

🌾 Oats

Recipe:

1️⃣ Add oats to the cup.

2️⃣ Sprinkle crunchy granola.

3️⃣ Layer banana slices.

4️⃣ Add kiwi slices.

5️⃣ Top with yogurt.

🍑🍌 Peach Banana Crunch Cup

Ingredients:

🍑 Peach chunks

🍌 Banana slices

🥜 Mixed nuts

🌾 Oats

🥣 Yogurt

Recipe:

1️⃣ Start with oats.

2️⃣ Add chopped nuts.

3️⃣ Layer banana slices.

4️⃣ Add juicy peach chunks.

5️⃣ Finish with yogurt.

🍓🫐 Berry Yogurt Parfait Cups 🥣✨

🍓🫐 Berry Yogurt Parfait Cups 🥣✨

🛒 Ingredients:

🥣 2 cups Greek yogurt

🍓 Strawberries (chopped)

🫐 Blueberries

🍇 Raspberries

🌰 Granola

🍯 Honey or maple syrup

🌿 Mint leaves (optional, for garnish)

👩‍🍳 Instructions:

🫙 Add a layer of 🌰 granola at the bottom of each jar.

🍓 Add a layer of mixed berries (strawberries, 🫐 blueberries, 🍇 raspberries).

🥣 Spoon in a thick layer of Greek yogurt.

🔁 Repeat layers (granola → fruit → yogurt).

🍓 Top with fresh berries and a 🌿 mint leaf.

🍯 Drizzle honey for extra sweetness.

🍓 Creamy Fruit Salad 🍌🍊

🍓 Creamy Fruit Salad 🍌🍊

Ingredients

🍓 Strawberries

🍌 Banana slices

🍊 Orange segments

🍇 Grapes

🥝 Kiwi pieces

🥣 Creamy yogurt or custard

🌿 Mint leaves

Instructions

1️⃣ Wash and slice all fruits. 🔪

2️⃣ Mix fruits in a bowl with yogurt or custard. 🥣

3️⃣ Top with extra fruit and mint leaves. 🌿

4️⃣ Chill and serve fresh. ✨🍓

4-Ingredient Creamy “Dindim” Recipe

4-Ingredient Creamy “Dindim” Recipe

🧾 Ingredients

  • 1 sachet of Tang (strawberry or passion fruit as shown in the photo)

  • 1 liter of Whole Milk

  • 1 can (395g) of Sweetened Condensed Milk

  • 1 tablespoon of Neutral Emulsifier (the secret to that “very creamy” texture)


🥣 Preparation

  1. Blend: Place the milk, condensed milk, and the Tang powder into a blender.

  2. Add Creaminess: Add the emulsifier and blend for about 2–3 minutes until the mixture doubles in volume and becomes very thick and airy.

  3. Fill: Use a funnel to pour the mixture into small plastic “sacolé” bags (like the tubes in the image).

  4. Freeze: Tie the bags tightly and place them in the freezer for at least 4–6 hours until solid.


💡 Tips for the Best Result

  • Avoid Bubbles: After blending, let the mixture sit for a few minutes so the foam settles before filling the bags.

  • Variations: You can add a little bit of fruit jam or chocolate syrup inside the bag before filling it for a “gourmet” look.

  • Health Balance: Since this recipe uses refined sugar and processed drink mix, you might want to balance it out with a fresh Natural Beetroot Drink (recipe included in your first text) during the week to support your liver and digestion!

🍋 5-Ingredient Lemon Curd Chia Pudding

🍋 5-Ingredient Lemon Curd Chia Pudding

Ingredient Amount
Chia Seeds 1/4 cup
Milk of Choice 1 cup (Coconut or Almond works great)
Lemon Curd 3-4 tbsp (Store-bought or homemade)
Maple Syrup/Honey 1 tbsp (Optional, adjust based on curd sweetness)
Lemon Zest 1 tsp (For that extra “zesty” punch)

Quick Instructions

  1. Mix: In a jar or bowl, whisk together the milk, lemon curd, sweetener, and zest until the curd is well incorporated.

  2. Combine: Stir in the chia seeds thoroughly.

  3. Wait: Let it sit for 5-10 minutes, then give it one more good stir to prevent clumping.

  4. Chill: Cover and refrigerate for at least 2 hours, or ideally overnight.

  5. Serve: Top with an extra dollop of lemon curd or some fresh berries before diving in!

Pro Tip: For that ultra-creamy “curd” look seen in the photo, use a full-fat coconut milk or stir in a spoonful of Greek yogurt before chilling.

Creamy Baked Rice Pudding

Creamy Baked Rice Pudding

📝 

Ingredients

  • ½ cup rice (short grain or basmati)
  • 4 cups milk
  • ½ cup sugar (adjust to taste)
  • 2 tbsp butter
  • 2 eggs
  • 1 tsp vanilla essence
  • ¼ tsp salt
  • ½ tsp cinnamon or cardamom (optional)
  • 2 tbsp cream (optional, for extra richness)

👩‍🍳 

Step-by-Step Method

Step 1: Cook the rice

  • Wash rice and cook it with 2 cups of milk on low heat.
  • Stir occasionally until rice becomes soft and creamy.

Step 2: Add remaining milk & sugar

  • Pour in remaining milk and sugar.
  • Cook on low heat, stirring continuously until mixture thickens.

Step 3: Prepare egg mixture

  • In a separate bowl, beat:
    • Eggs
    • Vanilla essence
    • Salt

👉 This gives the pudding a custard-like texture.

Step 4: Combine carefully

  • Slowly add a little hot rice mixture into the eggs (to avoid scrambling).
  • Then pour the egg mixture back into the pot and mix well.

Step 5: Add butter & flavor

  • Add butter and optional cinnamon/cardamom.
  • Mix until smooth and creamy.

Step 6: Bake for golden top

  • Pour mixture into a greased baking dish or ramekins.
  • Bake at 180°C (350°F) for 25–30 minutes until top is golden brown.

Step 7: Cool & serve

  • Let it cool slightly — it thickens more as it rests.
  • Serve warm or chilled 😋


Q/A – Common Questions

❓ 1. Which rice is best?

✔ Short grain rice is best for creamy texture, but basmati also works.

❓ 2. Can I skip eggs?

✔ Yes! It will still taste good but less custardy.

❓ 3. Why is my pudding watery?

✔ It needs more cooking time or cooling time to thicken.

❓ 4. Can I make it without baking?

✔ Yes, cook longer on stove until thick — baking just gives that golden top.

❓ 5. How long can I store it?

✔ Keep in fridge for 3–4 days in airtight container.

❓ 6. Can I add toppings?

✔ Yes! Add raisins, nuts, or caramel for extra flavor.

9 Healthy Chicken Salad Meal Prep Ideas for the Week

Looking for the ultimate healthy chicken salad meal prep to fuel your week?

Say goodbye to sad desk lunches and hello to colorful, nourishing, and protein-packed meals! These 9 healthy chicken salad meal prep ideas are not only packed with vibrant veggies and lean grilled chicken, but they’re also customizable, crave-worthy, and perfect for anyone who’s short on time but big on flavor.

Ingredients List

Here’s what you’ll commonly need for these 9 variations (mix and match!):

  • Grilled chicken breast – juicy, flavorful, high-protein base
  • Hard-boiled eggs – creamy, protein-rich, satisfying
  • Fresh greens – baby spinach, arugula, romaine, or spring mix
  • Broccoli florets – crisp, earthy crunch (blanch or steam lightly)
  • Bell peppers (red, yellow) – sweet, colorful, high in vitamin C
  • Cherry tomatoes or diced tomatoes – juicy acidity
  • Cucumber slices – cool and hydrating
  • Avocado slices – creamy, healthy fats
  • Corn kernels – sweet and chewy contrast
  • Red cabbage – crunchy and detoxifying
  • Red onions – sharp and vibrant flavor
  • Dips/dressings – hummus, ranch, or green goddess dressing

Substitution tips:

  • Swap grilled chicken for tofu or tempeh for a plant-based twist.
  • Use quinoa or brown rice for a carb boost.
  • Trade eggs for chickpeas for a vegan version.

Timing

  • Prep time: 30–40 minutes
  • Cook time: 15–20 minutes (grill or bake chicken)
  • Total time: ~1 hour for 9 meals

Compared to daily cooking, this saves you over 4 hours a week!

Instructions

1. Season and Grill the Chicken

Use a mix of olive oil, garlic powder, smoked paprika, salt, and pepper. Grill or bake at 400°F for 15–20 minutes until golden and juicy. Let rest before slicing.

2. Boil the Eggs

Place eggs in a saucepan, cover with water, bring to boil, then simmer for 10 minutes. Cool in an ice bath before peeling.

3. Chop the Veggies

Slice bell peppers, cucumbers, tomatoes, red onions, and avocado. Shred the cabbage and steam broccoli lightly for better texture.

4. Assemble the Greens

Add a bed of fresh greens into each meal prep container. Use different greens to keep flavors varied throughout the week.

5. Layer with Protein and Veggies

Top with sliced chicken, halved eggs, and your choice of vegetables. Keep textures and colors in mind for visual appeal and satisfaction.

6. Add Your Sauce or Dressing

Pour sauces like hummus, ranch, or green goddess into small dressing containers or silicone cups to keep salads crisp until serving.

7. Seal and Store

Close each container tightly and refrigerate. These salads stay fresh for up to 4–5 days.

Nutritional Info (Per Serving)

  • Calories: ~450
  • Protein: 35–40g
  • Fat: 20g (from chicken, avocado, dressing)
  • Carbs: 20–25g (from corn, veggies)
  • Fiber: 6–8g
  • Sugar: ~5g (natural from veggies)

Macros may vary based on toppings and dressing.

Healthier Alternatives

  • Keto: Skip corn and carrots, use full-fat ranch or avocado dressing.
  • Vegan: Use marinated tofu, chickpeas, or lentils instead of chicken and eggs.
  • Whole30: Stick to whole veggies, grilled meat, and approved dressings.
  • Low-carb: Focus on greens, protein, and high-fiber veggies like broccoli.

Serving Suggestions

  • Warm it up: Microwave just the chicken if you prefer it hot over cold greens.
  • Wrap it up: Toss ingredients into a whole-grain wrap for an easy lunch on-the-go.
  • Power bowl: Add quinoa or brown rice for a more filling option.
  • Picnic perfect: Pack these for park lunches or road trip fuel.

Common Mistakes to Avoid

  1. Soggy salads: Always store dressing separately to preserve crunch.
  2. Undercooked chicken: Use a thermometer to ensure 165°F internal temp.
  3. No flavor balance: Include a mix of sweet (corn, peppers), tangy (dressing), and savory (eggs, chicken).
  4. Repetitive meals: Rotate ingredients weekly to avoid salad burnout.
  5. Overcrowding containers: Give room for air circulation to keep greens crisp.

Storing Tips

  • Refrigerator: Keeps fresh for 4–5 days in airtight glass containers.
  • Freezer: Chicken can be frozen separately; don’t freeze veggies or eggs.
  • Advance prep: Chop veggies and make dressings ahead to save even more time.

Conclusion

With these healthy chicken salad meal prep ideas, you’re not just eating better—you’re simplifying your life. Packed with lean protein, vibrant vegetables, and tasty dressings, these meals are everything your body (and taste buds) crave during a busy week.

Ready to take your meal prep game to the next level? Try these salads, share your favorite combos in the comments, and tag us in your creations!

FAQs

1. Can I freeze these chicken salads?
Only the cooked chicken can be frozen. Keep veggies and eggs fresh in the fridge.

2. How long do they last in the fridge?
Up to 5 days when stored in airtight containers.

3. What’s the best way to reheat them?
Remove the greens and microwave just the chicken for 30–60 seconds.

4. Are these good for weight loss?
Yes! They’re high in protein and fiber, and low in processed carbs—ideal for most weight-loss plans.

5. Can I make these dairy-free?
Absolutely. Just use dairy-free dressings and skip any cheese additions.

No-Bake Chocolate Peanut Butter Balls

No-Bake Chocolate Peanut Butter Balls

📝 

Ingredients (Only 3!)

  • 1 cup peanut butter (smooth works best)
  • 2 cups crushed biscuits (like digestive or graham crackers)
  • 1½ cups melted chocolate (milk or dark)

👩‍🍳 

Step-by-Step Method

Step 1: Crush the biscuits

  • Take biscuits and crush them into fine crumbs using a blender or rolling pin.

Step 2: Make the mixture

  • In a bowl, add:
    • Peanut butter
    • Crushed biscuits
  • Mix well until it becomes a soft dough-like texture.

👉 If too dry, add 1–2 tbsp milk.

👉 If too sticky, add a little more biscuit crumbs.

Step 3: Shape the balls

  • Take small portions and roll into bite-sized balls.
  • Place them on a tray lined with butter paper.

Step 4: Chill

  • Put the balls in the fridge for 20–30 minutes to firm up.

Step 5: Coat with chocolate

  • Melt chocolate (microwave or double boiler).
  • Dip each ball into melted chocolate and coat fully.

Step 6: Set

  • Place back on tray and refrigerate for 15–20 minutes until chocolate hardens.

😋 

Ready to Enjoy!

Soft inside, chocolaty outside — super addictive!


Q/A – Common Questions

❓ 1. Can I use any biscuits?

✔ Yes! Digestive, Marie, or graham crackers all work well.

❓ 2. What if I don’t have peanut butter?

✔ You can use Nutella or any nut butter (like almond butter).

❓ 3. How long can I store them?

✔ Store in fridge for 5–7 days in an airtight container.

❓ 4. Can I skip chocolate coating?

✔ Yes, but coating makes them extra delicious and rich.

❓ 5. Why are my balls breaking?

✔ Mixture is too dry — add a little milk or more peanut butter.

❓ 6. Can I freeze them?

✔ Yes! Freeze up to 1 month and thaw before eating.­

Simple Celery Hydration Juice

Simple Celery Hydration Juice

 Description

A fresh, light vegetable juice that supports hydration, digestion, and provides antioxidants and minerals. Best used as a morning hydration drink, not a detox cure.

 Ingredients (1 serving)

  • 6–8 fresh celery stalks (organic if possible)

  • ½ cup water (optional, if blending)

  • Optional add-ins (gentle, not detox):

    • ½ cucumber

    • Small squeeze of lemon (for taste, not “cleansing”)

 Instructions

  1. Wash celery thoroughly.

  2. Juicer method: Juice celery directly.
    Blender method: Blend with water, then strain.

  3. Drink immediately for best taste and nutrient retention.

 How to Use It (this matters)

  • Drink on an empty stomach if it feels good to you

  • 1 small glass (200–250 ml) is enough

  • Not more than 3–4 times per week

  • Stop if you experience bloating, dizziness, or diarrhea

Servings

  • 1 serving per recipe

 Approximate Nutritional Info (per serving)

  • Calories: ~40

  • Water: ~95%

  • Fiber: Low (most removed during juicing)

  • Potassium: Moderate

  • Vitamin K: High

  • Antioxidants: Present (flavonoids)

 Real Benefits (no exaggeration)

✔ Supports hydration
✔ May help reduce bloating (for some people)
✔ Provides antioxidants that support general skin health
✔ Low-calorie, sugar-light vegetable option

❌ Does NOT detox organs
❌ Does NOT cure disease
❌ Does NOT replace medical treatment

 Who Should Be Careful

  • Kidney disease (high potassium risk)

  • Low blood pressure

  • On diuretics

  • History of kidney stones (celery contains oxalates)

If that’s you → talk to a doctor first

 Q & A

Q: Does celery juice clean the blood?
A: No. Your liver and kidneys already do that job 24/7.

Chicken Sausages with Zucchini, Tomatoes & Pasta

Chicken Sausages with Zucchini, Tomatoes & Pasta


A hearty, one-pan pasta dish packed with juicy chicken sausage, tender zucchini, burst tomatoes, and fresh basil in a light, savory Parmesan sauce.


Time & Yield

Prep Time: 10 minutes


Cook Time: 25 minutes


Total Time: 35 minutes


Servings: 4–5 servings


🧾 Ingredients

1 tsp olive oil


12 oz Italian-style chicken sausages, sliced


1 cup diced onion


½ tsp salt


2 tsp minced garlic


½ tsp crushed red pepper flakes (optional)


4 cups chicken broth


8 oz Radiatore pasta (or penne, rotini, shells)


2 cups chopped zucchini


2 tbsp lemon juice


1½ cups grated Parmesan cheese, divided


1 cup grape tomatoes, halved


⅓ cup chopped fresh basil

Instructions

Brown the sausage

Heat olive oil in a large skillet or deep pan over medium heat. Add sliced chicken sausage and cook until browned on both sides. Remove and set aside.


Sauté aromatics

In the same pan, add onion and salt. Cook 3–4 minutes until softened. Stir in garlic and red pepper flakes; cook 30 seconds until fragrant.


Cook the pasta

Pour in chicken broth and bring to a boil. Add pasta, reduce to a simmer, and cook uncovered, stirring occasionally, until pasta is al dente (about 10–12 minutes).


Add vegetables & sausage

Stir in zucchini and return sausage to the pan. Cook 3–4 minutes until zucchini is tender.


Finish the sauce

Add lemon juice and 1 cup Parmesan cheese, stirring until melted and creamy.


Add tomatoes & basil

Gently fold in tomatoes and basil. Remove from heat.


Serve

Top with remaining Parmesan and extra basil if desired.


Flavor Notes

Lightly creamy without heavy cream


Fresh, slightly tangy from lemon


Savory and satisfying with balanced textures


Tips & Variations

Make it creamy: Add ¼ cup heavy cream or cream cheese


Low-carb: Swap pasta for zucchini noodles


Extra veggies: Add spinach, mushrooms, or bell peppers


Cheese swap: Try Pecorino Romano or Asiago


Spicy: Use hot Italian chicken sausage

Storage & Reheating

Refrigerate: Up to 3 days in an airtight container


Reheat: Gently on stovetop with a splash of broth


Not freezer-friendly (pasta texture may soften)


Estimated Nutrition (per serving)

(Approximate values)


Calories: ~520 kcal


Protein: ~32 g


Carbohydrates: ~45 g


Fat: ~24 g


Fiber: ~4 g


Calcium: ~25% DV


Benefits

High in lean protein


Balanced carbs for energy


Rich in calcium from Parmesan


Zucchini & tomatoes add fiber and antioxidants


One-pan meal = easy cleanup


Q & A

Q: Can I use regular pork sausage?

✔ Yes, but it will increase fat and calories.


Q: Can I make this gluten-free?

✔ Use gluten-free pasta and check sausage labels.


Q: Can I use water instead of broth?

✔ Yes, but broth gives better flavor.


Q: Is this good for meal prep?

✔ Yes, for up to 3 days refrigerated.


Q: Can I make it dairy-free?

✔ Omit cheese or use dairy-free Parmesan.

Warm Ginger & Clove Tonic

Warm Ginger & Clove Tonic

This recipe is designed to be a concentrated infusion. You can drink it warm as a tea, or let it cool and dilute it with sparkling water for a refreshing botanical drink.

Ingredients

  • Ginger: 1 large knob (about 3–4 inches), sliced or roughly chopped.

  • Whole Cloves: 1 tablespoon.

  • Fresh Mint: 2–3 sprigs (plus extra for garnish).

  • Water: 4 cups (approx. 1 liter).

  • Optional: 1–2 tablespoons of honey or a squeeze of fresh lemon.

Instructions

  1. Prep the Ginger: Wash the ginger well. You don’t need to peel it, but slicing it thinly or bruising it with a heavy knife will help release more of its natural oils.

  2. Simmer: Place the water, ginger slices, and whole cloves in a pot. Bring to a gentle boil, then reduce the heat and let it simmer for 10–15 minutes. The longer it simmers, the “spicier” it will be.

  3. Infuse the Mint: Turn off the heat. Add the fresh mint leaves to the pot. Cover and let it steep for another 5 minutes.

  4. Strain and Serve: Strain the liquid into a mug or a glass bottle.

  5. Sweeten: Add honey or lemon to taste while the liquid is still warm.

A Few Tips

  • Strength: If you find the clove flavor too intense, start with just 5–6 cloves the first time.

  • Storage: This infusion keeps well in the fridge for up to 3 days. It’s excellent served cold over ice!

  • Safety Note: While ginger and cloves are generally great, they can be quite potent. If you have specific health conditions or are on blood-thinning medication, it’s always a good idea to check with a doctor before making this a daily habit.

Cheesy Zucchini Pancake Pockets (Soft & Crispy)

Cheesy Zucchini Pancake Pockets (Soft & Crispy)

📖 Description
These cheesy zucchini pancake pockets are a delicious savory treat—crispy on the outside, soft inside, and filled with gooey melted cheese. Perfect for breakfast, lunch, or a quick snack, they’re easy to make and packed with flavor from fresh herbs and tender zucchini.

🛒 Ingredients

  • 2 medium zucchini (grated)
  • 3 large eggs
  • 1 cup all-purpose flour
  • 1 teaspoon salt
  • ½ teaspoon black pepper
  • ½ teaspoon garlic powder
  • ½ cup fresh dill or parsley (finely chopped)
  • 1 cup shredded mozzarella or cheddar cheese
  • 2–3 tablespoons milk (optional for smoother batter)
  • 2 tablespoons oil or butter (for frying)

🧑‍🍳 Instructions

  1. Prepare the Zucchini
    Grate the zucchini using a coarse grater. Place it in a clean cloth and squeeze out excess water. This step is important to keep the pancakes from becoming soggy.
  2. Make the Batter
    In a large bowl, add the grated zucchini and crack in the eggs. Mix well until combined. Add flour, salt, black pepper, and garlic powder. Stir everything together until a thick batter forms. If it feels too thick, add a little milk to loosen it slightly.
  3. Add Herbs & Cheese
    Mix in the chopped dill or parsley for a fresh flavor. Add half of the shredded cheese into the batter and keep the rest for filling.
  4. Cook the Pancakes
    Heat a non-stick pan over medium heat and add a little oil or butter. Pour a ladle of batter into the pan and spread it slightly into a round shape. Cook for about 2–3 minutes until golden brown on the bottom.
  5. Add Filling & Fold
    Sprinkle some shredded cheese on one half of the pancake. Fold the pancake over like a pocket and press gently. Cook for another 1–2 minutes until the cheese melts and both sides are golden.
  6. Repeat
    Continue the process with the remaining batter, adding oil as needed.

🍽️ Serving Suggestions
Serve these warm with yogurt dip, sour cream, or a simple garlic sauce. They also pair well with a fresh salad or tea for a light meal.

💡 Tips

  • Always remove excess water from zucchini for best texture.
  • Use mozzarella for stretchiness or cheddar for a sharper taste.
  • Cook on medium heat to avoid burning while ensuring the inside cooks through.

These cheesy zucchini pockets are simple, satisfying, and perfect for any time of the day! 😋

Healing Garden Vegetable Soup

Healing Garden Vegetable Soup

A nourishing, cozy vegetable soup packed with vitamins, minerals, and anti-inflammatory goodness. Light yet satisfying, this soup is perfect for daily meals, family dinners, and anyone looking to feel better from the inside out.

 Description

This Healing Garden Vegetable Soup is loaded with fresh vegetables simmered gently in a flavorful broth. It’s naturally low in calories, rich in fiber, and bursting with antioxidants. The flavors are clean, comforting, and deeply satisfying—making it a soup your body and your family will crave again and again.

 Ingredients

  • 1 tbsp olive oil

  • 1 medium onion, finely chopped

  • 2 cloves garlic, minced

  • 2 carrots, diced

  • 2 celery stalks, chopped

  • 1 medium potato, thinly sliced

  • 1½ cups broccoli florets

  • 1 zucchini, sliced

  • 1 cup green beans, chopped

  • 6 cups vegetable broth (low sodium)

  • 1 tsp dried thyme

  • ½ tsp turmeric (optional, for healing boost)

  • Salt and black pepper to taste

  • Fresh parsley or dill, chopped (for garnish)

  • Juice of ½ lemon (optional, for brightness)

 Instructions

  1. Heat olive oil in a large pot over medium heat.

  2. Add onion and sauté for 3–4 minutes until soft and translucent.

  3. Stir in garlic and cook for 30 seconds until fragrant.

  4. Add carrots, celery, and potato. Cook for 5 minutes, stirring occasionally.

  5. Pour in vegetable broth and bring to a gentle boil.

  6. Reduce heat and simmer for 10 minutes.

  7. Add broccoli, zucchini, and green beans.

  8. Season with thyme, turmeric, salt, and pepper.

  9. Simmer for another 8–10 minutes until vegetables are tender but vibrant.

  10. Finish with lemon juice if using.

  11. Serve hot, garnished with fresh herbs.

Notes

  • Keep vegetables slightly firm to preserve nutrients.

  • Chop vegetables evenly for consistent cooking.

  • This soup tastes even better the next day!

 Tips for Best Results

  • Use fresh, seasonal vegetables whenever possible

  • Don’t overcook—bright color means more nutrients

  • Add leafy greens (spinach or kale) at the end for extra benefits

  • A pinch of chili flakes adds gentle warmth

 Servings

  • Serves: 4–6 people

  • Prep Time: 15 minutes

  • Cook Time: 25 minutes

Nutritional Information (per serving, approx.)

  • Calories: 120

  • Protein: 4g

  • Carbohydrates: 20g

  • Fiber: 6g

  • Fat: 3g

  • Sodium: varies by broth

Health Benefits

  • Supports digestion and gut health

  • Rich in antioxidants and vitamins A, C, and K

  • Anti-inflammatory and immune-boosting

  • Helps with hydration and detox support

  • Light, comforting, and easy on the stomach

 Q & A

Q: Can I eat this soup every day?
Absolutely! It’s balanced, light, and nutrient-dense.

Q: Can I freeze it?
Yes—store in airtight containers for up to 3 months.

Q: Can I add protein?
Of course! Add lentils, chickpeas, beans, or shredded chicken.

Q: Is this soup good for weight management?
Yes—low calorie, high fiber, and very filling.

Guava Leaf Tea for Blood Sugar Control

Guava Leaf Tea for Blood Sugar Control

Description:
Guava leaves have been traditionally used in herbal medicine to help manage blood sugar levels. This tea is simple, natural, and can be a healthy addition to your morning routine.

Ingredients

  • 5–6 fresh guava leaves (or 2–3 tsp dried guava leaves)

  • 2 cups of water

  • Optional: Honey or lemon for taste

Instructions / Method

  1. Rinse the leaves thoroughly to remove any dust or impurities.

  2. Boil water in a small pot.

  3. Add the guava leaves to the boiling water.

  4. Simmer for 10 minutes on low heat.

  5. Turn off the heat and let it steep for another 5 minutes.

  6. Strain the tea into a cup.

  7. Add honey or lemon if desired, though it’s best consumed plain for maximum effect.

Notes & Tips

  • Use fresh leaves whenever possible for stronger flavor and potency.

  • Do not add sugar; it will counteract the blood sugar benefits.

  • Regular consumption is recommended for noticeable benefits, but always consult your healthcare provider.

  • Can be consumed once or twice daily.

Servings

  • Makes 2 cups of tea. Each serving is approximately 1 cup.

Nutritional Info (per cup, plain)

  • Calories: 2–5 kcal

  • Carbohydrates: 0–1 g

  • Fat: 0 g

  • Protein: 0 g

Benefits

  • May help regulate blood sugar levels.

  • Supports digestion.

  • Rich in antioxidants.

  • May aid in weight management.

Q/A for Guava Leaf Tea

Q: Can I use dried guava leaves?
A: Yes, 2–3 tsp of dried leaves is equivalent to 5–6 fresh leaves.

Q: How often should I drink it?
A: 1–2 cups daily is generally safe, but consult your doctor if you have underlying health conditions.

Q: Are there side effects?
A: Rare, but excessive consumption might cause mild digestive discomfort.

Q: Can children drink it?
A: It’s safe in small quantities, but check with a pediatrician.

🥜🍌 Peanut Butter Banana Overnight Oats with Blueberries 🫐🥄

🥜🍌 Peanut Butter Banana Overnight Oats with Blueberries 🫐🥄

🛒 Ingredients

🥣 1/2 cup rolled oats

🥛 1/2 cup milk (any kind)

🍌 1 ripe banana (sliced)

🫐 1/4 cup blueberries

🥜 1–2 tbsp peanut butter

🌰 2 tbsp mixed nuts (pecans, almonds)

🍯 1 tbsp honey or maple syrup

🌱 1 tsp chia seeds (optional)

👩‍🍳 Instructions

🥣 In a jar, mix oats, milk, chia seeds, and a little honey.

❄️ Cover and refrigerate overnight (or at least 4 hours).

🍌 In the morning, add sliced banana on top.

🫐 Sprinkle blueberries and chopped nuts.

🥜 Drizzle peanut butter generously over everything.

🍯 Add extra honey if you like it sweeter.

🍓🍌 Strawberry Banana Yogurt Parfait 🥣✨

🍓🍌 Strawberry Banana Yogurt Parfait 🥣✨

🛒 Ingredients:

🍓 1 cup strawberries (sliced)

🍌 1 banana (sliced)

🥣 1 cup Greek yogurt

🥜 ½ cup granola

🍯 1–2 tbsp honey

🌿 Mint leaves (optional)

👩‍🍳 Instructions:

🥄 Add a layer of yogurt at the bottom of a glass.

🍓 Add a layer of strawberries and 🍌 banana slices.

🥜 Sprinkle granola for crunch.

🔁 Repeat layers until the glass is full.

🍯 Drizzle honey on top.

🌿 Garnish with mint for a fresh look.