Tropical Carrot & Pineapple Glow Smoothie

Tropical Carrot & Pineapple Glow Smoothie

This blend is packed with Vitamin A from the carrots and Vitamin C from the pineapple, making it great for energy and skin health.


Ingredients

  • Carrots: 2 medium carrots (peeled and roughly chopped)

  • Pineapple: 1.5 cups fresh or frozen pineapple chunks

  • Liquid Base: 1 cup coconut water (or orange juice for extra sweetness)

  • Creaminess: 1/2 cup Greek yogurt or a splash of coconut milk

  • Optional Kick: 1/2 inch piece of fresh ginger (peeled)

  • Sweetener: 1 tsp honey or maple syrup (optional, depending on fruit ripeness)

  • Ice: 1/2 cup (if using fresh instead of frozen fruit)


Instructions

  1. Prep the Carrots: Since carrots are quite firm, if you don’t have a high-speed blender, you may want to finely grate them or lightly steam them for 2 minutes and let them cool before blending.

  2. Layer the Blender: Add the liquid (coconut water) first, followed by the carrots and ginger, then the pineapple and yogurt on top.

  3. Blend: Start on a low speed and gradually increase to high. Blend for 60–90 seconds until the carrot particles are completely pulverized and the texture is silky smooth.

  4. Adjust: If the smoothie is too thick, add a little more coconut water. If you want it colder, toss in a few ice cubes and pulse again.

  5. Serve: Pour into a tall glass as shown in the image and enjoy immediately!


Pro Tips for the Best Texture

  • High-Speed Blending: To get that perfectly smooth pour seen in the second panel of your image, a high-speed blender is key for handling raw carrots.

  • Juice vs. Smoothie: If you prefer a thinner consistency like a juice, you can strain the mixture through a fine-mesh sieve or nut milk bag to remove the fiber.

Creamy Lemon Mousse

Creamy Lemon Mousse

🍋 3-Ingredient Lemon Mousse

Prep time: 15 minutes | Chilling time: 2 hours | Servings: 2-4

Ingredients

  • 2 cups (500ml) Heavy Whipping Cream (must be very cold)

  • 1 can (14 oz / 400g) Sweetened Condensed Milk

  • 1/2 cup Fresh Lemon Juice (about 2–3 large lemons)

  • Optional: Lemon zest for garnish


Instructions

  1. Whip the Cream: In a large chilled bowl, pour in the cold heavy whipping cream. Use a hand mixer or stand mixer to beat the cream until stiff peaks form. (Be careful not to over-beat, or it will turn into butter!)

  2. Combine Milk and Lemon: In a separate medium bowl, whisk together the sweetened condensed milk and the fresh lemon juice. The acid in the lemon will naturally begin to thicken the condensed milk.

  3. Fold Gently: Gently pour the lemon mixture into the bowl of whipped cream. Use a spatula to fold the mixture together slowly. Do not stir vigorously, or you will lose the air and fluffiness.

  4. Assemble: Spoon or pipe the mousse into serving glasses, as shown in the bottom image.

  5. Chill: Place the glasses in the refrigerator for at least 2 hours (or overnight). This allows the mousse to set into a velvety texture.

  6. Garnish: Top with fresh lemon zest or a small slice of lemon right before serving.


Tips for Success

  • Keep it Cold: Ensure your cream and your mixing bowl are cold to get the best volume.

  • Adjust Tanginess: If you prefer a very tart dessert, add an extra tablespoon of lemon juice. If you like it sweeter, stick to the 1/2 cup measurement.

  • Zest First: Always zest your lemons before squeezing them for juice!

Cheesy Air Fryer Hasselback Potatoes

Cheesy Air Fryer Hasselback Potatoes

Prep time: 10 mins | Cook time: 45 mins | Servings: 2

Ingredients

  • 2 russet potatoes

  • 4 tbsp butter, melted

  • 1 tbsp garlic paste or minced garlic

  • 3 to 5 slices Colby Jack cheese (cut into fourths)

  • Kosher salt and black pepper to taste

  • Optional toppings: Sour cream and fresh chives


Instructions

  1. Prep the Potatoes: * Cut a thin slice from the bottom of each potato to create a flat, stable base.

    • Place the potato between two chopsticks. Use a sharp knife to cut 1/4-inch slices across the potato; the chopsticks will stop your knife from cutting all the way through.

  2. The “Lift” Trick: * Place the small slices you cut from the bottom into the air fryer basket.

    • Set the large sliced potatoes on top of these bottom slices. This helps the Hasselback layers fan open during cooking.

  3. Seasoning: * Mix the melted butter, garlic, salt, and pepper.

    • Gently fan out the potato slices and brush the garlic butter over the top, making sure it gets between the layers.

    • Sprinkle with a little extra salt and pepper.

  4. First Stage Air Fry: * Set your air fryer to 370°F and cook for 20 minutes.

  5. Second Stage Air Fry: * Brush any remaining garlic butter over the potatoes.

    • Cook for an additional 20 to 25 minutes at 370°F until the edges are crispy and golden.

  6. Add the Cheese: * Slide the small cheese pieces into the gaps between the potato slices (either every gap or every other gap depending on your preference).

    • Cook for 1 to 2 more minutes until the cheese is bubbling and melted.

  7. Serve: * Top with a dollop of sour cream and a sprinkle of fresh chives.


Pro Tips for the Best Hasselbacks

  • Butter is Key: Don’t be shy with the garlic butter; it’s what creates the “salty” and “cheesy” experience mentioned in your notes.

  • Potato Size: Try to choose russet potatoes of a similar size so they cook evenly at the same time.

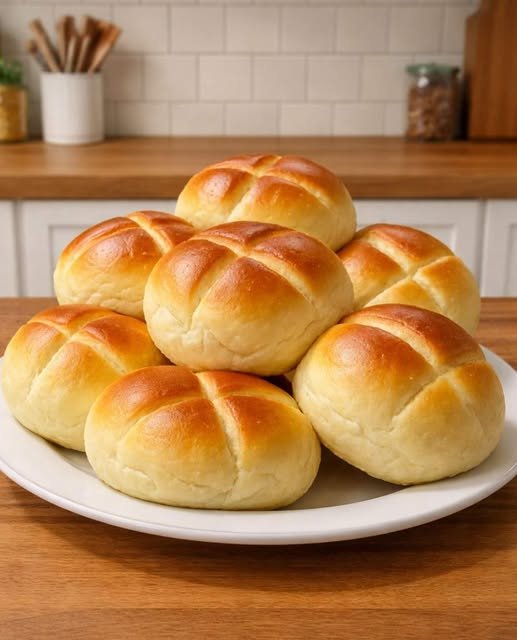
🍞 Soft Buttermilk Dinner Rolls

🍞 Soft Buttermilk Dinner Rolls

Pillowy • Tender • Lightly Sweet

These soft buttermilk rolls are fluffy on the inside with a golden, buttery top. The buttermilk adds a gentle tang and keeps the rolls moist for hours. Perfect for dinner, holidays, or breakfast with butter and jam.


Recipe Overview

  • Prep Time: 20 minutes

  • Rising Time: 1½–2 hours

  • Bake Time: 18–22 minutes

  • Oven Temperature: 180°C (350°F)

  • Yield: 12–15 rolls


Ingredients

  • 3½ cups (440 g) all-purpose flour

  • 1 cup warm buttermilk (lukewarm, not hot)

  • ¼ cup sugar

  • ¼ cup unsalted butter, melted and slightly cooled

  • 1 large egg, room temperature

  • 2¼ teaspoons instant yeast

  • 1 teaspoon salt

For Finishing

  • 2 tablespoons melted butter (for brushing after baking)


Equipment Needed

  • Large mixing bowl

  • Measuring cups and spoons

  • Wooden spoon or mixer

  • Clean kitchen towel

  • Baking pan (9×13 inch or similar)


Step-by-Step Instructions

1. Activate and Mix

  • In a large bowl, combine:

    • Warm buttermilk

    • Sugar

    • Yeast

  • Stir gently and let rest 5 minutes until slightly foamy

  • Add melted butter and egg

  • Mix until well combined


2. Form the Dough

  • Add flour and salt gradually

  • Mix until a soft, slightly sticky dough forms

  • Turn dough onto a lightly floured surface


3. Knead

  • Knead for 8–10 minutes until:

    • Smooth

    • Elastic

    • Soft but not sticky

  • Add small amounts of flour only if needed


4. First Rise

  • Place dough in a lightly greased bowl

  • Turn once to coat

  • Cover with a towel

  • Let rise in a warm place for 60–75 minutes, or until doubled


5. Shape the Rolls

  • Punch down the dough gently

  • Divide into equal portions (12–15 pieces)

  • Roll each piece into a smooth ball


6. Second Rise

  • Arrange rolls in a greased baking pan

  • Leave slight space between them

  • Cover and let rise 30–40 minutes until puffy


7. Bake

  • Preheat oven to 180°C (350°F)

  • Bake for 18–22 minutes, until tops are golden brown

  • Rolls should sound hollow when tapped lightly


8. Finish and Serve

  • Remove from oven

  • Brush immediately with melted butter

  • Let cool 10 minutes before serving


Texture & Flavor

  • Texture: Very soft, fluffy interior

  • Flavor: Mildly sweet with gentle tang from buttermilk

  • Crust: Lightly golden and buttery


Helpful Tips

  • Use warm, not hot, buttermilk

  • Do not over-flour the dough

  • Rolls rise best in a draft-free area

  • For extra softness, bake rolls close together


Storage

  • Store covered at room temperature for 2 days

  • Refrigerate up to 4 days

  • Reheat briefly before serving


Variations

  • Add garlic butter for savory rolls

  • Sprinkle sesame or poppy seeds before baking

  • Shape into slider buns

  • Make cloverleaf rolls using a muffin tin

Apple & Blueberry Yogurt Cake

Apple & Blueberry Yogurt Cake

Moist, fruity, and effortlessly beautiful—this Apple & Blueberry Yogurt Cake is a perfect blend of creamy texture and light sweetness. It’s the kind of dessert Tinsuf loves: simple ingredients, elegant results, and a taste that feels like homemade comfort.

Soft yogurt cake baked with apple slices and juicy blueberries—a light, rustic delight.


Table of Contents

Meta Section

  • Author: (tinsuf)
  • Cuisine: European
  • Category: Dessert
  • Keywords: yogurt cake, apple dessert, blueberry cake, simple baking
  • Prep Time: 15 minutes
  • Cook Time: 45 minutes
  • Total Time: 1 hour
  • Yield: 8–10 servings


Ingredients

  • 1 cup plain Greek yogurt
  • 3 large eggs
  • ¾ cup granulated sugar
  • ½ cup vegetable oil
  • 1 ½ cups all-purpose flour
  • 2 tsp baking powder
  • 1 tsp vanilla extract
  • 1 medium apple, thinly sliced
  • ½ cup blueberries
  • Pinch of salt
  • Powdered sugar for dusting (optional)


Instructions

  1. Preheat oven to 350°F (175°C). Line an 8-inch pan with parchment paper.
  2. In a bowl, whisk yogurt, eggs, sugar, oil, and vanilla until smooth.
  3. Add flour, baking powder, and salt. Mix until combined, then pour batter into the pan.
  4. Arrange apple slices decoratively on top and sprinkle blueberries evenly.
  5. Bake for 40–45 minutes until golden and just set in the center. Let cool fully.
  6. Slice and serve plain, dusted with powdered sugar, or with whipped cream.


ADVERTISEMENT


Tips & Variations

  • For extra flavor: Add lemon zest or a pinch of cinnamon to the batter.
  • Fruit swaps: Try raspberries, peaches, or sliced pears for seasonal twists.
  • Texture tip: Use Greek yogurt for a denser, custard-like texture, or plain yogurt for a lighter crumb.
  • Serving idea: Enjoy slightly chilled for a refreshing summer dessert.

Creamy Avocado & Banana Energy Smoothie

Creamy Avocado & Banana Energy Smoothie

This recipe yields approximately one large serving.


Ingredients

  • 1/2 Medium Avocado: Pitted and peeled (provides the creamy texture and healthy fats).

  • 1 Frozen Banana: Sliced (frozen works best for a “milkshake” consistency).

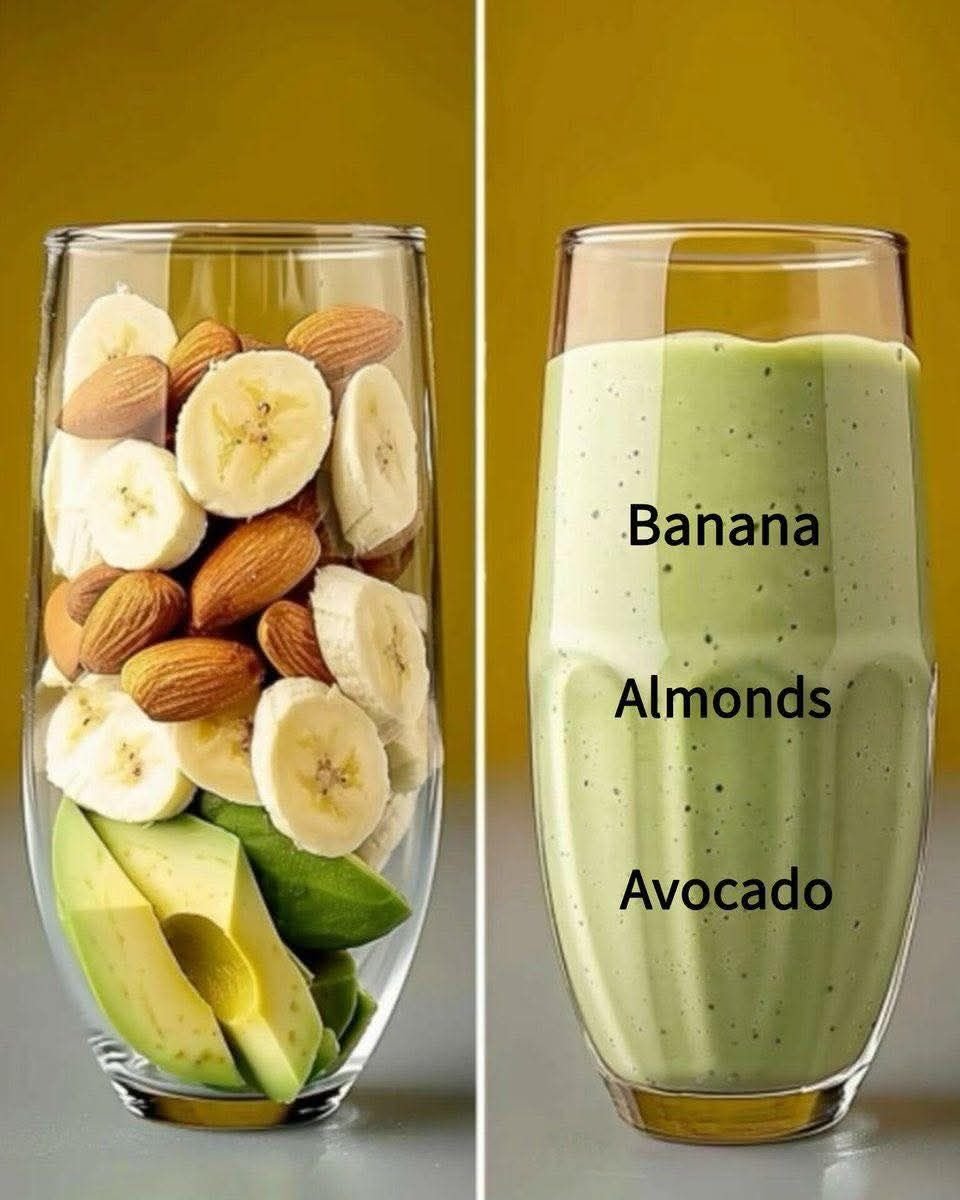
  • 1/4 Cup Whole Almonds: (as seen in the glass) or 1 tablespoon of almond butter.

  • 1 Cup Liquid Base: Unsweetened almond milk, coconut water, or regular milk.

  • Optional Sweetener: 1 teaspoon of honey or a pitted date if you prefer it sweeter.

  • Optional Topping: A sprinkle of crushed walnuts or extra sliced almonds.


Instructions

  1. Prep the Fruit: If you haven’t already, slice your banana and scoop the avocado out of its skin.

  2. Layer the Blender: Add the liquid base first (this helps the blender run smoothly), followed by the almonds, banana, and avocado.

  3. Blend: Start on a low speed and gradually increase to high. Blend for about 45–60 seconds until the mixture is completely smooth and no almond bits remain.

  4. Adjust Consistency: If the smoothie is too thick, add a splash more liquid. If you want it colder/thicker, add 2–3 ice cubes and blend again.

  5. Serve: Pour into a glass and top with crushed nuts as shown in the photo.


Quick Nutrition Tip

This combination is excellent for long-lasting energy because the healthy fats from the avocado and almonds slow down the absorption of the natural sugars in the banana, preventing a “sugar crash” later.

Homemade Lemon Water

Homemade Lemon Water

Ingredients

  • 2 Large Lemons: Choose firm, bright yellow lemons.

  • 4–6 Cups Water: Filtered or spring water works best.

  • Ice: Optional, for serving.

  • Optional Sweetener: A small amount of honey or stevia if you find it too tart.


Instructions

  1. Wash the Lemons: Since you are putting the slices directly into the water, scrub the skin thoroughly to remove any wax or residue.

  2. Slice: Cut one lemon into thin rounds.

  3. Juice: Squeeze the juice of the second lemon into your pitcher.

  4. Combine: Add the lemon slices to the pitcher and fill with water.

  5. Infuse: Let the pitcher sit in the refrigerator for at least 30 minutes before drinking. This allows the lemon oils and juice to blend with the water.


Healthy Tips for Use

  • Protect Your Teeth: The acid in lemons can soften tooth enamel. It is best to drink this through a straw or rinse your mouth with plain water afterward.

  • Temperature: Many people prefer drinking this warm in the morning to help wake up their digestive system, or ice-cold for refreshment.

  • Manage Expectations: While staying hydrated can reduce bloating and help you feel better, sustainable body changes come from a balanced diet and regular physical activity.

Mixed Berry Crumb Cheesecake


Mixed Berry Crumb Cheesecake

Ingredients

Crust Base:

  • 1½ cups graham cracker crumbs
  • ⅓ cup melted butter
  • 2 tablespoons sugar

Cheesecake Filling:

  • 24 oz (3 blocks) cream cheese, softened
  • 1 cup granulated sugar
  • 1 cup sour cream
  • 3 large eggs

Berry Swirl:

  • 1 cup fresh raspberries
  • 1 cup fresh blackberries
  • 2 tablespoons sugar
  • 1 teaspoon lemon juice

Crumb Topping:

Discover more
Bread
Garlic
Cake
CREAM CHEESE
cheese
Cream Cheese
bread
cream cheese
Cheese
cake

  • ½ cup all-purpose flour
  • ½ cup brown sugar
  • 4 tablespoons cold butter, cubed

Flavoring:

  • 2 teaspoons vanilla extract

Instructions

Prepare the crust by combining graham cracker crumbs, melted butter, and sugar.

Press the mixture firmly into the bottom of a 9-inch spring form pan.

Bake at 175°C (350°F) for 8 minutes, then cool completely.

Simmer raspberries, blackberries, sugar, and lemon juice in a small pan for 5–7 minutes until thickened.

Strain through a mesh sieve to remove seeds, then let the berry sauce cool.

Beat softened cream cheese and sugar until smooth.

Add sour cream and vanilla extract, mixing until incorporated.

Add eggs one at a time on low speed to avoid incorporating excess air.

Pour half the cheesecake batter over the cooled crust.

Drop spoonfuls of berry sauce on top and swirl lightly with a knife.

Add the remaining batter and repeat the berry swirl.

Mix flour, brown sugar, and cold butter until crumbly.

Sprinkle the streusel topping generously over the cheesecake.

Bake at 160°C (325°F) for 55–65 minutes, until edges are set but the center still has a slight jiggle.

Cool completely before removing from the pan.

The Surprising Health Benefits of Boiled Eggs

Boiled eggs have been a staple in human diets for centuries. Their simplicity, versatility, and impressive nutritional profile make them one of the most complete and affordable foods available. But beyond their convenience, doctors and nutrition experts are now highlighting that regularly eating boiled eggs can deliver an array of powerful health benefits.

For years, eggs were unfairly criticized due to their cholesterol content. However, recent research has turned that perception around, revealing that moderate egg consumption can actually support heart health, brain function, and more. Let’s dive into why the humble boiled egg deserves a regular spot on your plate.

1. A Natural Protein Powerhouse

Each boiled egg contains about 6 grams of high-quality protein — the kind your body can absorb and use efficiently. Protein is essential for muscle repair, tissue growth, and hormone production. Including boiled eggs in your daily meals helps preserve lean muscle mass, especially as you age. Athletes, fitness enthusiasts, and anyone looking to boost recovery or stay energized can benefit from this simple, nutrient-dense food.


2. Protects Eye Health

Boiled eggs are rich in lutein and zeaxanthin, two antioxidants that play a crucial role in maintaining good vision. These compounds help prevent damage from blue light and reduce the risk of cataracts and age-related macular degeneration — common causes of vision loss in older adults. Adding just one or two boiled eggs to your daily routine is a simple and effective way to protect your eyesight naturally.


3. Supports Brain Function and Memory

Eggs are one of the best natural sources of choline, a nutrient vital for brain health. Choline helps produce acetylcholine, a neurotransmitter responsible for learning, focus, and memory. Studies suggest that sufficient choline intake can reduce the risk of cognitive decline as you age. That makes boiled eggs an excellent choice for students, professionals, and older adults alike.


4. Helps Control Appetite and Weight

Thanks to their protein and healthy fat content, boiled eggs are highly satisfying and can keep you full for hours. Eating them for breakfast or as a snack can reduce overall calorie intake and help prevent cravings. This makes them ideal for those aiming to manage their weight naturally — no extreme diets required. Replacing processed snacks with a couple of boiled eggs can make a noticeable difference in your daily energy levels and hunger control.


5. Packed with Essential Nutrients

Boiled eggs provide a concentrated source of key vitamins and minerals your body needs every day. They’re loaded with:

  • Vitamin B12, which supports red blood cell production and energy metabolism.

  • Vitamin D, essential for bone health and immune support.

  • Selenium, a powerful antioxidant that protects your cells from oxidative stress.

This nutrient combination helps strengthen your immune system, support thyroid function, and promote overall well-being.


Final Thoughts

Boiled eggs are more than just a breakfast favorite — they’re a true superfood that deserves more recognition. Whether you’re looking to boost your protein intake, sharpen your mind, protect your eyes, or simply eat healthier, adding boiled eggs to your diet is a smart move.

Enjoy them as part of a balanced breakfast, in salads, or as a quick post-workout snack. Simple, affordable, and packed with nutrients, boiled eggs prove that sometimes, the healthiest foods are the ones we’ve had all along.

🍋 Ginger Water (Fresh & Refreshing Homemade Drink)

🍋 Ginger Water (Fresh & Refreshing Homemade Drink)

A simple, warming drink made with fresh ginger and water. This ginger water has a gentle spice, light sweetness (optional), and a clean, refreshing finish. It can be enjoyed warm or chilled and is easy to prepare with everyday ingredients.


Recipe Overview

  • Prep Time: 5 minutes

  • Cook Time: 10–15 minutes

  • Cooling Time: Optional

  • Yield: 2–3 servings


Ingredients

  • 1–2 tablespoons fresh ginger, peeled and thinly sliced

  • 3 cups (750 ml) water

  • 1–2 teaspoons honey or sugar (optional, to taste)

  • 1 tablespoon lemon juice (optional, for brightness)

  • Fresh mint leaves (optional, for serving)


Equipment Needed

  • Small saucepan

  • Knife and cutting board

  • Strainer

  • Heat-safe jug or glass


Step-by-Step Instructions

1. Prepare the Ginger

  • Peel the ginger using a spoon or knife

  • Slice thinly to expose more surface area for flavor


2. Simmer the Ginger

  • Add the ginger slices and water to a saucepan

  • Bring to a gentle boil over medium heat

  • Reduce heat to low and simmer for 10–15 minutes

    • Longer simmer = stronger flavor


3. Strain

  • Remove from heat

  • Strain the liquid into a jug or glass, discarding the ginger slices


4. Flavor (Optional)

  • Stir in honey or sugar while the liquid is warm

  • Add lemon juice if desired

  • Taste and adjust sweetness or strength


5. Serve

  • Serve warm for a cozy drink

  • Or let cool and serve chilled over ice

  • Garnish with fresh mint or a slice of lemon if desired


Taste & Texture

  • Flavor: Lightly spicy, clean, and refreshing

  • Texture: Smooth and clear

  • Aroma: Warm ginger with subtle citrus notes (if lemon is added)


Helpful Tips

  • Use fresh ginger for best flavor

  • Slice ginger thinly, not thick

  • Avoid boiling aggressively to keep taste balanced

  • Store leftovers in the refrigerator for up to 2 days


Variations

  • Mint Ginger Water: Add mint leaves while cooling

  • Lemon Ginger Water: Increase lemon juice slightly

  • Cold Infusion: Simmer briefly, then refrigerate overnight

  • Light Sweet Version: Use a small amount of honey


Storage

  • Keep refrigerated in a covered container

  • Shake or stir before serving

Ultimate Crock Pot Chicken and Dumplings

This Best Ever Crock Pot Chicken and Dumplings is the definition of a true “set it and forget it” comfort meal. Chicken thighs stay juicy and tender during the slow cook, and refrigerated biscuits make an easy shortcut for soft, fluffy dumplings—no homemade dough required.

Best Ever Crock-Pot Chicken and Dumplings

Ingredients

INGREDIENT AMOUNT
Boneless, skinless chicken thighs 6
Buttermilk refrigerated biscuits 1 can
Frozen mixed vegetables, thawed 2 cups
Chicken broth 2 cups
Cream of chicken soup 1 can
Cream of celery soup 1 can
Onion, diced 1
Fresh parsley, chopped (divided) 2 tablespoons
Poultry seasoning 1 teaspoon
Black pepper To taste

How to Make Best Ever Crock-Pot Chicken and Dumplings

Step 1: Build the Base
Scatter the diced onion evenly across the bottom of the crock pot. Arrange the chicken thighs in a single layer on top of the onions.

Step 2: Mix the Sauce
In a medium bowl, whisk together the cream of chicken soup, cream of celery soup, poultry seasoning, fresh parsley, and black pepper until smooth. Pour the mixture evenly over the chicken.

Discover more
Buttermilk
stuffed
Bread
Beef
Dressing
buttermilk
bread
gravy
Sunscreen
Meatloaf recipes cookbook

Step 3: Slow Cook
Pour the chicken broth over the contents of the crock pot. Cover and cook on high for 5 hours.
Important: Keep the lid closed for the first 4 hours to retain steam and ensure the chicken cooks properly.

Step 4: Shred the Chicken & Add Vegetables
With 1 hour remaining, remove the lid and add the thawed mixed vegetables. Shred the chicken directly in the crock pot using two forks, stirring to combine.

Step 5: Add the Dumplings
Lightly flatten each biscuit and cut into 4 long strips. Place the biscuit strips evenly over the top of the chicken mixture.

Discover more
gravy
Dressing
Buttermilk
buttermilk
bread
Beef
Bread
stuffed
Sunscreen
Vegetable

Step 6: Finish and Serve
Cover and continue cooking for the final hour. Once the dumplings are cooked through and fluffy, gently stir to distribute them throughout the dish. Serve hot, topped with additional fresh parsley if desired.

No-Bake 3-Ingredient Milk Pudding

🍮 No-Bake 3-Ingredient Milk Pudding

Smooth • Creamy • Simple Custard-Style Dessert

This easy milk pudding is a soft, creamy dessert made with just milk, sugar, and eggs. It sets gently in the refrigerator and has a smooth, comforting texture similar to classic custard. With careful low-heat cooking and constant stirring, you get a silky pudding without baking or complicated steps.


Recipe Overview

  • Prep Time: 5 minutes

  • Cook Time: 10–15 minutes

  • Chill Time: 2–3 hours

  • Servings: 4 small bowls


Ingredients

Main Ingredients

  • 2 cups (500 ml) milk

  • ⅓ cup (70 g) sugar

  • 2 large eggs

Optional (Recommended)

  • 1 teaspoon vanilla extract
    (adds aroma and smooth flavor)

Optional Toppings

  • Chopped peanuts or walnuts

  • Caramel drizzle

  • Fresh fruit


Equipment Needed

  • Medium saucepan

  • Whisk or silicone spatula

  • Fine-mesh strainer

  • Serving bowls or ramekins


Step-by-Step Instructions

1. Mix the Eggs and Sugar

  • Place the saucepan on the counter (do not heat yet)

  • Add eggs and sugar

  • Whisk until the sugar is mostly dissolved and the mixture looks slightly pale and smooth


2. Add the Milk

  • Slowly pour the milk into the egg mixture

  • Whisk continuously to keep everything smooth

  • Add vanilla extract if using


3. Cook Gently

  • Place the saucepan over low heat

  • Stir constantly using a whisk or spatula

  • Scrape the bottom and sides of the pan to prevent sticking

⚠️ Important: Keep the heat low. High heat can cause the eggs to cook unevenly.


4. Thicken the Pudding

  • Continue stirring for 10–12 minutes

  • The mixture will gradually thicken

  • It is ready when it:

    • Coats the back of a spoon

    • Looks creamy but still pours easily

(It will firm up more as it cools.)


5. Strain for Smoothness

  • Remove from heat

  • Pour the mixture through a fine strainer into a bowl or jug

  • This step ensures a silky, lump-free texture


6. Chill and Set

  • Pour the pudding into serving bowls or ramekins

  • Let cool at room temperature for about 20 minutes

  • Cover and refrigerate for 2–3 hours, until fully set


7. Serve

  • Serve chilled

  • Add nuts, caramel, or fruit just before serving if desired


Texture & Flavor

  • Texture: Smooth, soft, custard-like

  • Flavor: Lightly sweet, creamy, comforting


Helpful Tips

  • Stir continuously for best texture

  • Never let the mixture boil

  • Use room-temperature eggs for smoother blending

  • For extra richness, replace ¼ cup of milk with cream


Optional Variation (Firmer Texture)

If you prefer a firmer, pudding-style set:

  • Mix 1 tablespoon cornstarch into the cold milk before heating

  • Proceed with the recipe as written


Storage

  • Store covered in the refrigerator

  • Best enjoyed within 2 days

Moist Orange Pound Cake

🍊 Moist Orange Pound Cake

Soft • Fragrant • Naturally Citrus-Forward

This orange pound cake is tender, moist, and filled with fresh orange flavor from real juice and zest. It has a fine crumb, a golden crust, and a bright citrus glaze that soaks gently into the cake. Perfect for tea time, breakfast, or dessert, this cake stays soft for days and slices beautifully.


Recipe Overview

  • Prep Time: 15 minutes

  • Bake Time: 65–70 minutes

  • Oven Temperature: 350°F (175°C)

  • Yield: 1 loaf or bundt-style cake (10–12 slices)


Ingredients

Dry Ingredients

  • 2½ cups (300 g) all-purpose flour

  • ¾ teaspoon baking powder

  • ¼ teaspoon salt


Wet Ingredients

  • 1 cup (200 g) granulated sugar

  • 2 tablespoons fresh orange zest
    (from about 3 oranges)

  • ¾ cup (180 ml) fresh orange juice

  • 1 cup (240 ml) vegetable oil

  • 3 large eggs, room temperature

  • 1 tablespoon vanilla extract


Orange Glaze

  • 1 cup (120 g) powdered sugar

  • Zest of ½ orange

  • 2 tablespoons fresh orange juice


Equipment Needed

  • Mixing bowls

  • Whisk

  • Rubber spatula

  • Loaf pan or bundt pan

  • Fine grater (for zest)

  • Wire cooling rack


Step-by-Step Instructions

1. Prepare the Oven and Pan

  • Preheat oven to 350°F (175°C)

  • Grease a loaf or bundt pan thoroughly

  • Lightly dust with flour and tap out excess

  • Set aside


2. Combine Dry Ingredients

  • In a large bowl, sift together:

    • Flour

    • Baking powder

    • Salt

  • Whisk briefly to distribute evenly

  • Set aside


3. Infuse the Sugar with Orange Zest

  • Place sugar and orange zest in a separate bowl

  • Rub them together using clean fingertips

  • Continue until the sugar feels slightly moist and fragrant
    (this step releases natural citrus oils for stronger flavor)


4. Mix the Wet Ingredients

  • Add to the orange-sugar mixture:

    • Eggs

    • Orange juice

    • Vegetable oil

    • Vanilla extract

  • Whisk until smooth and well blended


5. Make the Batter

  • Pour the wet mixture into the dry ingredients

  • Fold gently using a spatula

  • Mix just until no dry flour remains

  • Do not overmix to keep the cake tender


6. Bake the Cake

  • Pour batter evenly into prepared pan

  • Smooth the top gently

  • Bake for 65–70 minutes

  • Test with a toothpick inserted into the center

    • It should come out clean or with a few soft crumbs


7. Cool

  • Let cake cool in the pan for 10–15 minutes

  • Carefully remove and transfer to a wire rack

  • Allow to cool until slightly warm


Glaze Instructions

8. Prepare the Orange Glaze

  • In a small bowl, whisk:

    • Powdered sugar

    • Orange zest

    • Orange juice

  • Adjust consistency if needed

    • Add more juice for thinner glaze

    • Add more sugar for thicker glaze


9. Glaze the Cake

  • Drizzle glaze over the slightly warm cake

  • Allow glaze to set before slicing


Texture & Flavor

  • Texture: Moist, soft, fine crumb

  • Flavor: Bright orange with gentle sweetness

  • Finish: Light citrus glaze that soaks into the cake


Storage Tips

  • Store covered at room temperature for 2 days

  • Refrigerate for up to 5 days

  • Bring to room temperature before serving for best texture


Optional Variations

  • Add ½ teaspoon cardamom or cinnamon

  • Replace half the oil with melted butter for richer flavor

  • Add chopped almonds for texture

  • Use lemon instead of orange for a citrus swap

🥕 Moist Carrot Cake with Cream Cheese Frosting

🥕 Moist Carrot Cake with Cream Cheese Frosting

Soft • Spiced • Rich • Perfectly Balanced

This classic carrot cake is incredibly moist and tender, made with freshly grated carrots, warm spices, and a smooth cream cheese frosting. It bakes evenly, slices beautifully, and tastes even better the next day as the flavors deepen.


Recipe Overview

  • Prep Time: 20 minutes

  • Bake Time: 35–40 minutes

  • Cooling Time: 1 hour

  • Total Time: About 2 hours

  • Yield: 1 square cake (9–12 servings)


Why This Recipe Works

  • Oil keeps the cake moist for days

  • Fresh carrots add natural sweetness and texture

  • Balanced spices enhance flavor without overpowering

  • Cream cheese frosting adds gentle tang and richness

  • Simple mixing method prevents a dense crumb


Ingredients

For the Cake

  • 2 cups (250 g) all-purpose flour

  • 2 teaspoons baking powder

  • ½ teaspoon baking soda

  • ½ teaspoon salt

  • 1 teaspoon ground cinnamon

  • ½ teaspoon ground nutmeg

  • 1 cup (200 g) granulated sugar

  • 4 large eggs, room temperature

  • 1 cup (240 ml) vegetable oil

  • 2 cups (240 g) finely grated carrots

  • ½ cup (120 g) chopped walnuts or pecans (optional)


For the Cream Cheese Frosting

  • 8 oz (225 g) cream cheese, softened

  • ½ cup (115 g) unsalted butter, softened

  • 2 cups (250 g) powdered sugar, sifted

  • 1 teaspoon vanilla extract


Optional Garnish

  • Chopped nuts

  • Light dusting of cinnamon


Equipment Needed

  • 8×8-inch or 9×9-inch square baking pan

  • Mixing bowls

  • Whisk

  • Hand mixer or spatula

  • Parchment paper

  • Cooling rack


Step-by-Step Instructions

1. Prepare the Oven and Pan

  • Preheat oven to 350°F (180°C)

  • Line a square baking pan with parchment paper or grease well

  • Set aside


2. Mix the Dry Ingredients

  • In a medium bowl, whisk together:

    • Flour

    • Baking powder

    • Baking soda

    • Salt

    • Cinnamon

    • Nutmeg

This ensures even spice distribution.


3. Mix the Wet Ingredients

  • In a large bowl, whisk sugar and vegetable oil until smooth

  • Add eggs one at a time, mixing well after each addition

  • The mixture should look glossy and well blended


4. Combine and Fold

  • Gradually add the dry ingredients to the wet mixture

  • Fold gently until just combined

⚠️ Do not overmix to keep the cake tender.

  • Fold in grated carrots

  • Stir in chopped nuts if using


5. Bake

  • Pour batter into the prepared pan

  • Spread evenly

  • Bake for 35–40 minutes, or until a toothpick inserted in the center comes out clean


6. Cool Completely

  • Let the cake cool in the pan for 15 minutes

  • Transfer to a wire rack

  • Cool completely before frosting


Cream Cheese Frosting Instructions

7. Prepare the Frosting

  • In a bowl, beat softened cream cheese and butter until smooth

  • Gradually add powdered sugar, mixing slowly

  • Add vanilla extract

  • Beat until creamy, fluffy, and spreadable


8. Frost and Serve

  • Spread frosting evenly over the cooled cake

  • Garnish with chopped nuts if desired

  • Slice into squares and serve


Texture & Flavor Notes

  • Cake: soft, moist, and lightly spiced

  • Frosting: creamy, smooth, and gently tangy

  • Flavor improves after resting overnight


Storage Tips

  • Room temperature: Up to 1 day (covered)

  • Refrigerator: Up to 5 days

  • Freezer: Unfrosted cake freezes well up to 2 months


Optional Variations

  • Add ½ cup crushed pineapple, well drained

  • Mix in raisins or shredded coconut

  • Use brown sugar for deeper flavor

  • Make as cupcakes (bake 18–22 minutes)

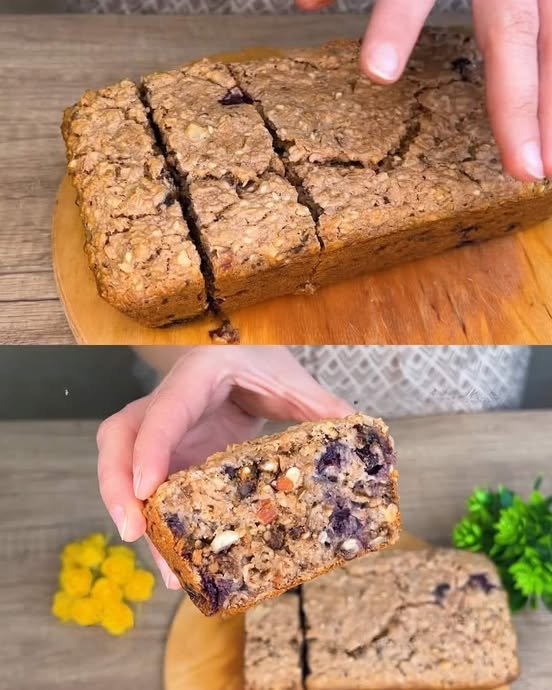
Moist Banana Nut Bread

Moist Banana Nut Bread

Soft • Rich • Nutty • Stays Fresh for Days

This classic Banana Nut Bread is perfectly moist with a tender crumb and a rich banana flavor. Made with very ripe bananas and toasted walnuts, it’s ideal for breakfast, tea time, or sharing as a homemade gift. The loaf slices cleanly and tastes even better the next day.


Recipe Overview

  • Prep Time: 10 minutes

  • Bake Time: 55–60 minutes

  • Total Time: About 1 hour 10 minutes

  • Yield: 1 loaf (about 10 slices)


Why This Recipe Works

  • Very ripe bananas add natural sweetness and moisture

  • Butter provides rich flavor and soft texture

  • Toasted walnuts enhance aroma and crunch

  • Gentle mixing keeps the loaf tender

  • Balanced ingredients prevent dryness or heaviness


Ingredients

Wet Ingredients

  • 3 very ripe bananas (medium to large)

  • ½ cup (8 tablespoons) unsalted butter, room temperature

  • ¾ cup granulated sugar
    (Honey may be used as a substitute for deeper flavor)

  • 2 large eggs, lightly beaten

  • ½ teaspoon vanilla extract


Dry Ingredients

  • 1½ cups all-purpose flour

  • 1 teaspoon baking soda

  • ½ teaspoon salt


Mix-Ins

  • 1 cup walnuts, toasted and coarsely chopped

  • ½ cup raisins
    (or chocolate chips, if preferred)


Equipment Needed

  • 9×5-inch loaf pan

  • Mixing bowls

  • Whisk

  • Rubber spatula

  • Wire cooling rack


Step-by-Step Instructions

1. Prepare the Oven and Pan

  • Preheat oven to 350°F (175°C)

  • Grease a 9×5-inch loaf pan with butter

  • Lightly dust with flour or line with parchment paper


2. Toast the Walnuts

  • Place walnuts in a dry skillet over medium heat

  • Stir continuously for 3–5 minutes, until fragrant

  • Remove from heat, let cool, then chop coarsely

Tip: Toasting brings out the natural oils and flavor of the nuts.


3. Cream Butter and Sugar

  • In a large bowl, beat the softened butter and sugar together

  • Mix until smooth, creamy, and pale

This step helps create a soft, even crumb.


4. Prepare the Banana Mixture

  • Mash bananas with a fork until they resemble chunky applesauce

  • Add mashed bananas to the butter mixture

  • Stir in the beaten eggs and vanilla extract

  • Mix until fully combined


5. Combine Dry Ingredients

  • In a separate bowl, whisk together:

    • Flour

    • Baking soda

    • Salt


6. Make the Batter

  • Add dry ingredients to the wet mixture

  • Gently fold until just combined

⚠️ Do not overmix — stop as soon as no dry flour remains.

  • Fold in the toasted walnuts and raisins evenly


7. Bake

  • Pour batter into the prepared loaf pan

  • Smooth the top gently

  • Bake for 55–60 minutes


8. Test for Doneness

  • Insert a toothpick into the center

  • It should come out clean or with a few moist crumbs

If needed, bake an additional 5 minutes and check again.


9. Cool Properly

  • Let the bread cool in the pan for 10 minutes

  • Transfer carefully to a wire rack

  • Cool completely before slicing


Texture & Flavor Notes

  • Inside: moist, soft, and banana-rich

  • Top: lightly golden with nutty crunch

  • Flavor deepens after resting overnight


Storage Tips

  • Room temperature: Wrap tightly, keeps fresh for 2–3 days

  • Refrigerator: Up to 5 days

  • Freezer: Slice and freeze up to 3 months


Optional Variations

  • Add ½ teaspoon cinnamon for warmth

  • Replace half the flour with whole wheat flour

  • Use pecans instead of walnuts

  • Add banana slices on top before baking for decoration

🧀 Savory Herb & Garlic Pull-Apart Bread

🧀 Savory Herb & Garlic Pull-Apart Bread

Soft • Aromatic • Golden • Perfect for Sharing

This Savory Herb & Garlic Bread is fluffy on the inside with a lightly crisp, golden top. Fresh garlic and herbs infuse every bite, while olive oil keeps the crumb tender and flavorful. Designed as a pull-apart loaf, it’s ideal for serving warm at the table.


Why This Recipe Works

  • Proper yeast activation ensures a light, airy texture

  • Olive oil adds softness and rich flavor

  • Fresh garlic and herbs create deep aroma

  • Two rises give excellent structure and fluffiness

  • Pull-apart shaping makes it easy to serve


Ingredients

For the Dough

  • 3 cups all-purpose flour, plus extra for dusting

  • 1 teaspoon salt

  • 2 teaspoons sugar

  • 2¼ teaspoons instant dry yeast (1 standard packet)

  • 1 cup warm water (about 105–110°F / 40–43°C)

  • 3 tablespoons olive oil

Flavor Add-Ins

  • 3 cloves garlic, finely minced

  • 1½ tablespoons fresh rosemary, finely chopped
    (or 1 teaspoon dried rosemary)

For the Top (Optional but Recommended)

  • 1–2 tablespoons olive oil or melted butter

  • Optional: pinch of salt or grated cheese


Step-by-Step Instructions

1. Activate the Yeast

  • In a small bowl, combine:

    • Warm water

    • Sugar

    • Yeast

  • Stir gently and let sit for 5–10 minutes

  • The mixture should become slightly foamy

Tip: If it doesn’t foam, the yeast may be inactive—start again for best results.


2. Mix the Dough

  • In a large bowl, whisk together:

    • Flour

    • Salt

    • Minced garlic

    • Chopped rosemary

  • Make a well in the center

  • Pour in:

    • Yeast mixture

    • Olive oil

  • Mix with a spoon or your hands until a shaggy dough forms


3. Knead the Dough

  • Transfer dough to a lightly floured surface

  • Knead for 5–8 minutes until:

    • Smooth

    • Elastic

    • Slightly tacky but not sticky

Adjustment Tip:
If the dough sticks, add flour 1 tablespoon at a time.


4. First Rise

  • Lightly oil a clean bowl

  • Place dough inside and turn once to coat

  • Cover with a damp cloth or plastic wrap

  • Let rise in a warm place for about 1 hour, or until doubled in size


5. Shape the Pull-Apart Pieces

  • Gently punch down the dough to release air

  • Divide into 8–10 equal portions

  • Roll each portion into a smooth ball

  • Arrange balls snugly in a greased loaf pan


6. Second Rise

  • Cover the pan loosely

  • Let rise again for 30 minutes

This step ensures a light, fluffy final texture.


7. Bake

  • Preheat oven to 375°F (190°C)

  • Brush the top with olive oil or melted butter

  • Bake for 25–30 minutes, until:

    • Top is golden brown

    • Bread sounds hollow when tapped


8. Cool and Serve

  • Let bread cool in the pan for 10 minutes

  • Remove gently and serve warm

  • Pull apart and enjoy the soft, herbed layers


Texture & Flavor Notes

  • Interior: soft, fluffy, and aromatic

  • Exterior: lightly crisp and golden

  • Flavor: savory garlic with fresh herb warmth


Storage Tips

  • Room temperature: Wrap and store up to 2 days

  • Refrigerator: Up to 4 days (reheat before serving)

  • Freezer: Freeze baked bread up to 2 months


Optional Variations

  • Add grated cheese between dough balls

  • Mix in parsley or thyme

  • Sprinkle sesame or herb seasoning on top

  • Brush with garlic-infused butter after baking

Creamy Broccoli Cauliflower Salad

Creamy Broccoli Cauliflower Salad

Crunchy • Creamy • Savory-Sweet • Perfect for Gatherings

This classic Creamy Broccoli Cauliflower Salad is a well-loved favorite for potlucks, picnics, and family meals. Crisp fresh vegetables are paired with smoky, crunchy bacon, sharp cheese, and a tangy-sweet dressing that coats every bite beautifully. It improves with time, making it ideal for preparing ahead.


Why This Recipe Works

  • Raw broccoli and cauliflower stay crisp and refreshing

  • Creamy dressing balances tang and sweetness

  • Bacon adds depth and crunch

  • Chilling time allows flavors to blend perfectly

  • Easy to customize for different diets


Ingredients

The Salad Base

  • 3 cups fresh broccoli florets, chopped into bite-sized pieces

  • 3 cups fresh cauliflower florets, chopped small

  • 6 slices bacon, cooked until crisp and crumbled

  • ¾ cup sharp cheddar cheese, freshly grated

  • ⅓ cup red onion, finely diced

  • ½ cup roasted sunflower seeds
    (or chopped almonds for a nutty variation)

  • Optional: ½ cup dried cranberries or raisins for gentle sweetness


The Creamy Dressing

  • ¾ cup mayonnaise, good quality

  • ¼ cup sour cream or plain Greek yogurt

  • 2 tablespoons apple cider vinegar

  • 2 tablespoons granulated sugar
    (or honey or maple syrup)

  • ½ teaspoon salt

  • ¼ teaspoon black pepper


Step-by-Step Instructions

1. Prepare the Vegetables

  • Wash broccoli and cauliflower thoroughly

  • Pat completely dry using a clean kitchen towel

Important Tip: Dry vegetables allow the dressing to cling properly instead of sliding off.

  • Chop into small, evenly sized pieces for the best texture and flavor in every bite


2. Cook the Bacon

  • Cook bacon in a skillet or oven until deeply crisp

  • Transfer to paper towels to cool

  • Crumble into small pieces

Make-Ahead Tip: Store bacon separately and add just before serving to keep it crunchy.


3. Make the Dressing

  • In a medium bowl, whisk together:

    • Mayonnaise

    • Sour cream (or yogurt)

    • Apple cider vinegar

    • Sugar

    • Salt

    • Black pepper

  • Whisk until smooth and creamy

  • Taste and adjust:

    • Add more vinegar for tang

    • Add a touch more sweetener if desired


4. Assemble the Salad

  • In a large mixing bowl, combine:

    • Broccoli

    • Cauliflower

    • Red onion

    • Cheddar cheese

    • Sunflower seeds

  • Pour dressing over the salad

  • Fold gently until all vegetables are evenly coated


5. Chill for Best Flavor

  • Cover and refrigerate for at least 30 minutes

  • For best results, chill 3–4 hours to allow flavors to blend

  • Stir in the crumbled bacon just before serving
    (or sprinkle on top for presentation)


Texture & Flavor Notes

  • Crisp vegetables with creamy coating

  • Savory, slightly sweet, and tangy balance

  • Bacon adds crunch and smoky depth


Customization & Variations

Lighter Version

  • Replace half the mayonnaise with Greek yogurt

  • Use honey or reduce sweetener

Low-Carb Version

  • Omit sugar and dried fruit

  • Add extra bacon or chopped hard-boiled eggs

Plant-Based Version

  • Use dairy-free mayonnaise

  • Replace bacon with toasted seeds or smoked seasoning


Storage & Make-Ahead Tips

  • Make Ahead:

    • Chop vegetables and prepare dressing up to 24 hours in advance

    • Store separately and combine 1–2 hours before serving

  • Leftovers:

    • Store in an airtight container in the refrigerator

    • Keeps well for up to 3 days

    • Stir before serving as some moisture may release

  • Freezing:

    • Not recommended due to texture changes

Best Walnut & Raisin Banana Bread

Best Walnut & Raisin Banana Bread

Moist • Dense • Naturally Sweet • Nutty Crunch

This classic Walnut & Raisin Banana Bread is rich, moist, and deeply flavorful. Overripe bananas provide natural sweetness and softness, while toasted walnuts add crunch and raisins bring gentle bursts of sweetness. This loaf is perfect for breakfast, tea time, or a comforting homemade snack.


Why This Recipe Works

  • Uses very ripe bananas for maximum flavor and moisture

  • Balanced fat and sugar for a soft yet sturdy crumb

  • Toasted walnuts enhance aroma and texture

  • Gentle mixing prevents a tough loaf

  • Bakes evenly with a beautifully golden top


Ingredients

The Base

  • 3 ripe bananas, thoroughly mashed
    (The peels should be heavily speckled or brown)

  • ½ cup unsalted butter (1 stick), softened to room temperature
    (Butter adds richness and moisture)

  • ¾ cup white sugar
    (You may substitute with 1 scant cup honey for a deeper flavor)

  • 1 large egg, lightly beaten
    (One egg keeps the bread soft and tender)

  • 1 teaspoon vanilla extract

  • 1 teaspoon baking soda

  • A pinch of salt

  • 1½ cups all-purpose flour, sifted


The Mix-Ins

  • ½ cup walnuts, chopped and lightly toasted

  • ½ cup raisins
    (Soak in warm water for 5 minutes, then drain and pat dry for plumpness)


Equipment Needed

  • 4×8-inch loaf pan

  • Mixing bowls

  • Whisk or spoon

  • Rubber spatula

  • Wire cooling rack


Step-by-Step Instructions

1. Prepare the Oven and Pan

  • Preheat your oven to 350°F (175°C)

  • Grease a 4×8-inch loaf pan with butter or non-stick spray

  • Optionally line with parchment paper for easy removal


2. Toast the Walnuts

  • Place chopped walnuts in a dry skillet over medium heat

  • Stir frequently for 3–5 minutes, until lightly golden and fragrant

  • Remove from heat and allow to cool completely

Tip: Toasting walnuts brings out their natural oils and enhances flavor.


3. Cream the Butter and Sugar

  • In a large mixing bowl, combine softened butter and sugar

  • Beat until smooth, creamy, and slightly fluffy

This step helps create a soft crumb.


4. Add Wet Ingredients

  • Stir in the beaten egg until fully incorporated

  • Add vanilla extract

  • Mix in mashed bananas until smooth and uniform


5. Add Dry Ingredients

  • Sprinkle baking soda and salt evenly over the batter

  • Gently fold in the flour using a spatula

  • Mix just until no dry flour remains

⚠️ Do not overmix — overmixing can make the bread dense


6. Fold in Walnuts and Raisins

  • Gently fold in:

    • All the raisins

    • Half of the toasted walnuts

Reserve remaining walnuts for topping.


7. Bake

  • Pour batter evenly into the prepared loaf pan

  • Sprinkle remaining walnuts on top

  • Bake for 50–60 minutes


8. Check for Doneness

  • Insert a toothpick into the center

  • It should come out clean or with a few moist crumbs

If needed, bake 5 minutes longer and check again.


9. Cool Properly

  • Let the bread cool in the pan for 10 minutes

  • Carefully remove and transfer to a wire rack

  • Allow to cool completely before slicing


Texture & Flavor Notes

  • Inside: moist, tender, and banana-rich

  • Top: golden with a nutty crunch

  • Flavor deepens even more the next day


Storage Tips

  • Room temperature: Wrap tightly, keeps fresh for 2 days

  • Refrigerator: Up to 5 days

  • Freezer: Slice, wrap individually, and freeze up to 3 months

🥒🍅 Classic Cucumber Tomato Salad

🥒🍅 Classic Cucumber Tomato Salad

Fresh • Light • Everyday Mediterranean Side

This simple cucumber tomato salad is crisp, refreshing, and packed with bright flavor. Juicy tomatoes, crunchy cucumber, and thinly sliced red onion are tossed in a light olive oil and red wine vinegar dressing with just a touch of honey for balance. It’s perfect as a quick side dish, a picnic salad, or a healthy addition to any meal.


🧾 Ingredients

  • 1 English cucumber (no need to peel)

  • 10 ounces grape or cherry tomatoes, halved

  • ½ small red onion, thinly sliced (about ½ cup)

  • 2 tablespoons olive oil

  • 2 tablespoons red wine vinegar

  • 1 teaspoon honey

  • ½ teaspoon kosher salt or fine sea salt

  • ¼ teaspoon black pepper

  • 1 tablespoon chopped fresh parsley, dill, and/or basil (optional)


👩‍🍳 Instructions

  1. Prepare the cucumber
    Trim off both ends of the cucumber. Slice it in half lengthwise, then cut into ¼-inch thick half-round slices.

  2. Combine the vegetables
    Place the sliced cucumber, halved tomatoes, and red onion into a medium mixing bowl.

  3. Make the dressing
    In a small bowl, whisk together the olive oil, red wine vinegar, honey, salt, and black pepper until well blended.

  4. Toss the salad
    Pour the dressing over the vegetables and gently toss until everything is evenly coated.

  5. Add herbs and serve
    Gently stir in the fresh herbs if using. Serve immediately, or refrigerate for 1–2 hours to allow the flavors to blend before serving.


🌿 Helpful Tips

  • For extra crunch, add sliced bell peppers or radishes

  • Feta cheese or olives make a great optional topping

  • This salad tastes even better after chilling for a short time

  • Best enjoyed within 24 hours for maximum freshness

Soft Oven-Baked Tray Bread (Bakery-Style)

Soft Oven-Baked Tray Bread (Bakery-Style)

Yield: 2 large flatbreads
Prep Time: 25 minutes
Resting Time: 1½–2 hours
Bake Time: 18–22 minutes
Difficulty: Easy–Intermediate


🧾 INGREDIENTS

For the Dough

  • All-purpose flour – 4½ cups (560 g)

  • Warm milk – 1 cup (240 ml)

  • Warm water – ½ cup (120 ml)

  • Instant yeast – 2¼ teaspoons (1 sachet)

  • Sugar – 2 tablespoons

  • Salt – 1½ teaspoons

  • Oil or melted butter – 4 tablespoons

  • Yogurt – 3 tablespoons (for softness)


For Topping

  • Egg yolk – 1

  • Milk – 2 tablespoons

  • Sesame seeds – 1½ tablespoons

  • Nigella seeds (kalonji) – 1 tablespoon


For Tray

  • Semolina or cornmeal – 2 tablespoons (prevents sticking)


👩‍🍳 STEP-BY-STEP METHOD


🔹 Step 1: Activate the Yeast

  1. In a bowl, mix warm milk + warm water + sugar

  2. Sprinkle yeast on top

  3. Let rest 8–10 minutes until foamy

✔️ If it bubbles, yeast is active


🔹 Step 2: Make the Dough

  1. In a large bowl add:

    • Flour

    • Salt

  2. Pour in:

    • Yeast mixture

    • Oil

    • Yogurt

  3. Mix with a spoon, then knead by hand 10–12 minutes

➡️ Dough should be soft, slightly sticky, elastic

(Add 1–2 tbsp flour only if needed.)


🔹 Step 3: First Rise

  1. Lightly oil the bowl

  2. Place dough inside and cover

  3. Let rise in warm place 1–1½ hours

✔️ Dough should double in size


🔹 Step 4: Shape the Bread

  1. Punch down dough gently

  2. Divide into 2 equal portions

  3. Shape each into an oval or round loaf

  4. Place on baking tray dusted with semolina


🔹 Step 5: Second Rest

Cover loosely and let rest 20–25 minutes

This step gives extra fluffiness


🔹 Step 6: Topping & Design

  1. Mix egg yolk and milk.

  2. Brush generously over dough

  3. Sprinkle sesame and nigella seeds

  4. Press shallow finger lines or crisscross pattern on top

(This is traditional and helps even baking.)


🔹 Step 7: Bake

  • Preheat oven to 200°C (390°F)

  • Bake 18–22 minutes

  • Bread should be:

    • Deep golden

    • Soft when pressed

    • Lightly crisp on top


🔹 Step 8: Finish

  • Brush lightly with butter (optional)

  • Cover with cloth for 5 minutes to soften crust


🫓 FINAL RESULT

  • Golden bakery-style bread

  • Soft, airy crumb

  • Slight crunch from seeds

  • Perfect for dipping, wraps, or sandwiches


💡 PRO TIPS

✔ Yogurt makes it extra soft
✔ Semolina prevents soggy bottoms
✔ Do not overbake
✔ Can be frozen after cooling


🍽 SERVING IDEAS

  • With butter & honey

  • With curry or daal

  • As sandwich bread

  • With tea or soup

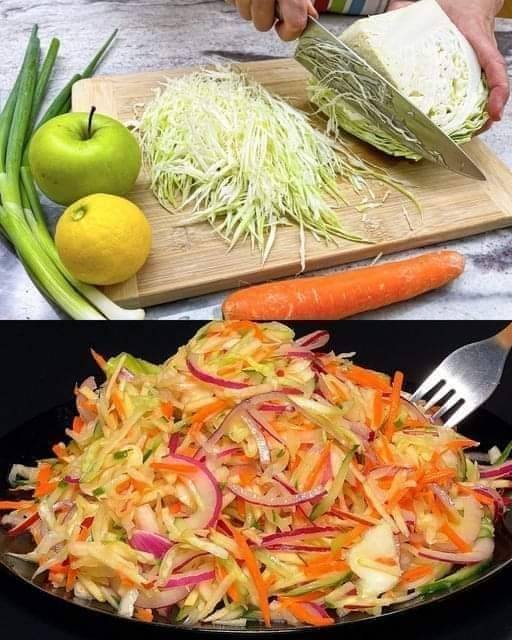
🫒 Mediterranean Garden Slaw with Creamy Lemon-Tahini Dressing

🥗 Creamy Mediterranean Crunch Salad (Dairy-Free)

A vibrant, crunchy Mediterranean salad packed with fresh vegetables, fragrant herbs, and a silky tahini-based dressing. This salad improves as it rests, making it ideal for meal prep, gatherings, or light meals.


🌿 Why This Recipe Works

  • Light yet creamy without mayo or dairy

  • Rich in Mediterranean staples: olive oil, lemon, garlic, herbs

  • Excellent for meal prep—stays crunchy for days

  • Versatile: side dish, wrap filling, or main with protein


🧾 Ingredients

🥬 Vegetable Base

  • 4 cups green cabbage, finely shredded

  • 1½ cups broccoli slaw (julienned broccoli stems)

  • 1 cup carrots, julienned

  • ½ cup red onion, very thinly sliced

  • ¼ cup fresh parsley, finely chopped

  • 2 tablespoons fresh dill, chopped (optional but recommended)

  • 2 tablespoons green onions, thinly sliced


🫒 Mediterranean Creamy Dressing

  • ⅓ cup tahini

  • ¼ cup extra-virgin olive oil

  • ¼ cup fresh lemon juice

  • 1½ tablespoons red wine vinegar

  • 2 garlic cloves, finely grated or minced

  • 1 tablespoon Dijon mustard

  • 1½ teaspoons honey or maple syrup

  • ¾ teaspoon sea salt (adjust to taste)

  • ½ teaspoon freshly ground black pepper

  • ½ teaspoon dried oregano

  • ¼ teaspoon ground cumin

  • 2–4 tablespoons water (to thin, as needed)


➕ Optional Mediterranean Add-Ins

  • ½ cup crumbled feta cheese (omit for dairy-free)

  • ⅓ cup sliced Kalamata olives

  • ¼ cup toasted sunflower seeds or pine nuts

  • 1 cup cooked chickpeas, drained and rinsed

  • Grilled chicken, shrimp, or falafel for a complete meal


👩‍🍳 Instructions

1️⃣ Prepare the Vegetables

Finely shred the cabbage for the best texture.
In a large mixing bowl, combine cabbage, broccoli slaw, carrots, red onion, parsley, dill, and green onions. Toss gently to distribute evenly.


2️⃣ Make the Dressing

In a bowl or blender, whisk together:

  • Tahini

  • Olive oil

  • Lemon juice

  • Red wine vinegar

  • Garlic

  • Dijon mustard

  • Honey or maple syrup

  • Salt, pepper, oregano, and cumin

Slowly add water, one tablespoon at a time, until the dressing becomes smooth, creamy, and pourable.

💡 The dressing should lightly coat the vegetables, not overwhelm them.


3️⃣ Combine

Pour the dressing over the vegetables and toss thoroughly until everything is evenly coated.


4️⃣ Rest & Marinate

Cover and refrigerate for 30–60 minutes.
This allows the cabbage to soften slightly and absorb the Mediterranean flavors.


5️⃣ Final Taste Adjustment

Before serving, adjust if needed:

  • Extra lemon juice for brightness

  • Additional salt for depth

  • A light drizzle of olive oil for richness


🍽️ Serving Suggestions

  • Serve alongside grilled fish, chicken, or lamb

  • Stuff into warm pita or flatbread with falafel

  • Pair with Mediterranean rice or quinoa

  • Ideal for meal prep—keeps well up to 4 days refrigerated


🌿 Mediterranean Nutrition Highlights

  • Heart-healthy fats from olive oil and tahini

  • Fiber-rich vegetables for digestion

  • Plant-based protein from tahini and chickpeas

  • No refined sugars, heavy creams, or processed dressings

Hearty Grilled Steak Salad with Avocado & Fresh Vegetables

This recipe showcases a beautifully composed steak salad that balances fresh, crisp vegetables with tender, juicy slices of perfectly grilled steak. It’s an ideal meal for those seeking a balance between indulgence and healthy eating. Packed with lean protein, healthy fats, and a variety of fresh vegetables, this steak salad is a satisfying and nutritious option for lunch or dinner. Let’s break down the components and discuss what makes this dish such a great choice.

1. Grilled Steak
Ingredients:

Steak (flank, ribeye, or sirloin)
Olive oil
Salt and pepper
Garlic powder or fresh garlic
Optional: a squeeze of lemon juice or balsamic vinegar for extra flavor
Why It Works: The steak is the centerpiece of this salad, providing a rich and flavorful protein source. Seasoned simply with olive oil, salt, pepper, and garlic, the steak is grilled to perfection, achieving a juicy, tender texture with a caramelized crust. Steak is an excellent source of high-quality protein, which helps build and repair tissues, and it’s rich in iron, an essential mineral that supports healthy blood cells and oxygen transport.

The grilling method gives the steak a smoky flavor, while the simplicity of the seasoning allows the natural taste of the meat to shine. Slicing the steak thinly ensures that each bite is tender and easy to eat, perfectly complementing the crunchy vegetables beneath it.

Pro Tip: Let the steak rest for about 5 minutes after grilling to ensure the juices redistribute, making the meat more tender and flavorful. For added depth, marinate the steak for an hour in olive oil, garlic, and a splash of balsamic vinegar before grilling.

2. Fresh Avocado Slices
Ingredients:

Ripe avocado
Salt and pepper for seasoning
Lemon or lime juice (optional)
Why It Works: Avocado adds a creamy, buttery element to the salad, providing healthy fats that help you stay full longer and support heart health. Avocados are rich in monounsaturated fats, which are known to improve cholesterol levels, and they’re also packed with fiber, potassium, and vitamins C, E, and K. Their mild, creamy texture balances the bold flavors of the steak, making every bite rich and satisfying.

Pro Tip: Sprinkle the avocado slices with a bit of lemon or lime juice to enhance their flavor and prevent them from browning. Season lightly with salt and pepper for extra taste.

3. Crisp Leafy Greens
Ingredients:

Lettuce (green leaf or romaine)
Optional: mixed greens, spinach, or arugula
Why It Works: The foundation of the salad is made up of fresh, crisp lettuce, providing a light and crunchy texture. Lettuce is low in calories and high in water content, making it a hydrating and refreshing base. It also offers a dose of fiber, which helps with digestion and keeps you feeling satisfied without adding excess calories.

Green leafy vegetables are a powerhouse of nutrients, including vitamins A and K, and antioxidants that help protect your body from inflammation and oxidative stress. The subtle flavor of the lettuce allows the other components of the salad to stand out.

Pro Tip: For added texture and flavor, mix in some peppery arugula or baby spinach, which also provides additional nutrients like iron and folate.

4. Cherry Tomatoes
Ingredients:

Cherry tomatoes (halved)
Salt and pepper
Why It Works: Cherry tomatoes bring a burst of sweetness and acidity to the salad, balancing the richness of the steak and avocado. These small, juicy tomatoes are packed with vitamins C and K, as well as lycopene, a powerful antioxidant that supports heart health and may help reduce the risk of certain cancers.

The pop of color from the tomatoes adds visual appeal to the plate, making it not only nutritious but also beautiful to serve. The acidity of the tomatoes complements the savory steak and creamy avocado, adding a refreshing contrast in each bite.

Pro Tip: Lightly season the tomatoes with salt and pepper to enhance their natural sweetness and flavor.

5. Onion Rings
Ingredients:

White or red onion, thinly sliced
Why It Works: Onions add a crisp, sharp bite to the salad, which contrasts well with the other more tender components. Whether using white or red onions, their slightly sweet and pungent flavor complements the richness of the steak and avocado. Onions also provide a dose of vitamin C and antioxidants, making them a great addition to this nutrient-dense meal.

Pro Tip: If you prefer a milder onion flavor, soak the sliced onions in cold water for about 10 minutes before adding them to the salad. This will reduce their pungency while keeping their crisp texture.

Nutritional Benefits of the Steak Salad
This steak salad offers a perfect balance of nutrients, making it both satisfying and healthy:

Protein: The steak provides a high-quality protein source, essential for muscle repair and overall health.
Healthy Fats: The avocado adds heart-healthy fats, which help with satiety and the absorption of fat-soluble vitamins.
Vitamins and Antioxidants: The fresh vegetables (lettuce, tomatoes, and onions) provide an array of vitamins, antioxidants, and fiber, supporting immune function and digestive health.
Low in Carbohydrates: This salad is low in refined carbohydrates, making it a great option for those on low-carb or ketogenic diets while still providing essential nutrients from vegetables.
How to Make the Perfect Steak Salad at Home
Grill the Steak: Season your choice of steak (ribeye, flank, or sirloin) with olive oil, salt, pepper, and garlic powder. Grill over medium-high heat until cooked to your desired doneness (about 4-5 minutes per side for medium-rare). Let it rest for 5 minutes before slicing thinly.

Prepare the Vegetables: While the steak is grilling, slice the avocado, halve the cherry tomatoes, and thinly slice the onions. Wash and dry the lettuce or mixed greens.

Assemble the Salad: In a large bowl or plate, arrange the lettuce, cherry tomatoes, avocado slices, and onion rings. Top with the grilled steak slices.

Dress the Salad: Lightly drizzle olive oil and a splash of lemon juice or balsamic vinegar over the salad. Season with salt and pepper to taste.

Final Thoughts: A Hearty and Healthy Steak Salad
This steak salad is not only visually stunning but also packed with nutrients that make it a well-balanced meal. The combination of juicy, flavorful steak, creamy avocado, fresh vegetables, and a light dressing creates a dish that is satisfying, filling, and nutrient-dense. Whether you’re looking for a protein-packed lunch or a light yet hearty dinner, this salad hits all the right notes. Plus, it’s easy to customize by adding your favorite greens or topping it with extras like feta cheese or a boiled egg.

Give this steak salad a try and enjoy a healthy, delicious meal that leaves you feeling full and energized!

Crispy Turkish-Style Fried Eggplant

Crispy Turkish-Style Fried Eggplant

Yields: 4 Servings | Prep time: 15 mins | Cook time: 10–12 mins

Ingredients

The Base:

  • 2 Large eggplants

  • Salt (to taste, used for sweating and seasoning)

  • Water (for soaking)

The Coating:

  • 3 Eggs

  • 1/2 cup All-purpose flour

  • 1/2 cup Breadcrumbs (optional, for extra crunch)

  • 1/2 tsp Red pepper flakes (Pul Biber) or Paprika

  • 1/2 tsp Garlic powder

  • Vegetable oil (for frying)


Detailed Instructions

1. Prepare the Eggplants

  • Wash the 2 large eggplants.

  • You can peel them in a “zebra” pattern (strips of skin removed) or leave the skin on for texture.

  • Slice the eggplants into rounds or long strips about 1/2 inch thick.

2. Remove Bitterness (Sweating)

  • Place the eggplant slices in a large bowl and sprinkle generously with salt.

  • Let them sit for 10–15 minutes. This process draws out any bitter juices.

  • Rinse the slices under cold water and pat them completely dry with paper towels. Drying is key to ensuring the coating sticks and they don’t steam in the pan.

3. Set Up the Breading Station

  • In one shallow bowl, place the flour mixed with a pinch of salt, pepper flakes, and garlic powder.

  • In a second bowl, beat the 3 eggs thoroughly.

  • Optional: Place breadcrumbs in a third bowl if you prefer a thicker, crunchier crust.

4. Coat the Slices

  • Dredge each eggplant slice first in the flour, shaking off the excess.

  • Dip the floured slice into the beaten eggs, ensuring it is fully submerged.

  • If using breadcrumbs, press the egg-washed slice into the crumbs last.

5. Fry to Golden Perfection

  • Heat about 1 inch of vegetable oil in a large skillet over medium-high heat.

  • Once the oil is shimmering, add the eggplant slices in a single layer (do not overcrowd the pan).

  • Fry for 3–5 minutes per side until they are deep golden brown and the centers are tender when pierced with a fork.

6. Drain and Serve

  • Transfer the fried eggplants to a plate lined with paper towels to drain excess oil.

  • Serve immediately while hot and crispy.


Serving Suggestion

In Turkey, these are often served with a side of garlic yogurt sauce (plain yogurt mixed with minced garlic and a pinch of salt) and a drizzle of tomato sauce.

2-Ingredient Ice Cream Bread

2-Ingredient Ice Cream Bread

Yields: 1 Loaf | Prep time: 5 mins | Bake time: 40–45 mins

Ingredients

  • 2 cups (approx. 475ml) Full-fat vanilla ice cream (slightly softened)

  • 1 ½ cups (approx. 190g) Self-rising flour

  • Note: It is essential to use full-fat ice cream (not “light” or “low-fat”) because the fat content acts as the shortening for the bread.


Detailed Instructions

1. Prep the Oven and Pan

Preheat your oven to 350°F (175°C). Grease a standard loaf pan thoroughly with butter or non-stick spray, or line it with parchment paper for easy removal.

2. Soften the Ice Cream

Allow your ice cream to sit at room temperature for about 10–15 minutes until it is soft and easily scoopable, but not completely melted into a liquid.

3. Mix the Batter

In a large mixing bowl, combine the softened ice cream and the self-rising flour. Stir gently with a spatula just until the flour is incorporated. Do not overmix, as this will result in a tough, dense bread rather than a fluffy one.

4. Transfer and Smooth

Pour the batter into your prepared loaf pan. Use a spatula to smooth the top so it bakes evenly.

5. Bake to Perfection

Place the pan on the center rack and bake for 40–45 minutes. The bread is done when the top is golden brown and a toothpick inserted into the center comes out clean.

6. Cool and Serve

Let the bread cool in the pan for about 10 minutes before transferring it to a wire rack. This bread is best served warm with a little bit of butter or a drizzle of honey.


Why This Recipe Works

  • Self-rising flour already contains the baking powder and salt needed for the bread to rise.

  • Full-fat ice cream provides the liquid, sugar, and fat (cream), which are the core components of a traditional quick-bread batter.

Creative Variations

  • Chocolate Chip: Fold in 1/2 cup of chocolate chips before baking.

  • Berry Swirl: Use strawberry ice cream instead of vanilla for a fruity pink loaf.

  • Birthday Cake: Use “Funfetti” or cake-batter flavored ice cream and add extra sprinkles on top.

Soft Cheese-Stuffed Bread Boats with Herb Tomato Glaze

Soft Cheese-Stuffed Bread Boats with Herb Tomato Glaze

Yields: 10–12 Boats | Prep time: 20 mins (+1 hour rising) | Cook time: 20–25 mins

Ingredients

The Dough:

  • 200 ml Lukewarm milk

  • 200 ml Lukewarm water

  • 1 tbsp Sugar

  • 7 g (1 packet) Active dry yeast

  • 600-650 g All-purpose flour

  • 1 tsp Salt

  • 50 ml Vegetable oil

The Filling:

  • 300 g Feta cheese or soft white cheese, crumbled

  • 1 cup Shredded mozzarella

  • 1 Egg (optional, to bind)

  • Fresh parsley, chopped

The Herb Tomato Glaze:

  • 2 tbsp Tomato paste

  • 3 tbsp Olive oil

  • 1 tsp Dried oregano or Italian herbs

  • 1 clove Garlic, minced

  • Fresh parsley, finely chopped


Detailed Instructions

1. Prepare the Yeast Base

  • In a large mixing bowl, combine the 200 ml lukewarm milk, 200 ml lukewarm water, and 1 tbsp sugar.

  • Sprinkle 7 g of active dry yeast over the top and stir gently.

  • Let the mixture sit for about 5–10 minutes until it becomes foamy.

2. Mix and Knead the Dough

  • Add 50 ml vegetable oil and 1 tsp salt to the yeast mixture.

  • Gradually add 600-650 g of flour, mixing until a soft dough forms.

  • Knead the dough on a floured surface for 8–10 minutes until it is smooth and elastic.

3. First Rise

  • Place the dough in a lightly greased bowl and cover it with a warm, damp cloth.

  • Let it rise in a warm, draft-free spot for 1 hour or until it has doubled in size.

4. Shape the Boats

  • Punch the dough down to release air and divide it into 10–12 equal pieces.

  • Roll each piece into an oval shape.

  • Place a generous amount of the cheese filling (the crumbled feta, mozzarella, and parsley) in the center.

  • Fold the edges of the dough over the cheese and twist the ends to create a “boat” or twisted loaf shape.

5. Apply the Herb Tomato Glaze

  • Whisk together the 2 tbsp tomato paste, 3 tbsp olive oil, 1 tsp herbs, 1 clove minced garlic, and fresh parsley.

  • Use a pastry brush to coat the tops of the dough boats generously with this savory glaze.

6. Bake

  • Preheat your oven to 375°F (190°C).

  • Arrange the boats on a baking sheet lined with parchment paper.

  • Bake for 20–25 minutes until the bread is golden brown and the cheese is melted and bubbly.

7. Serve

  • Let the bread boats cool for a few minutes so the cheese sets slightly.

  • These are best served warm when the bread is at its softest.