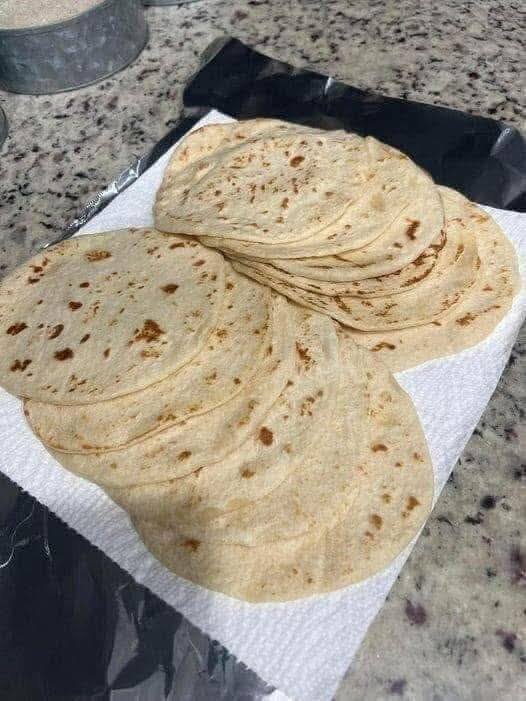
Mediterranean Low-Carb Tortillas (Flexible, Strong & Grain-Free)
These Mediterranean-style low-carb tortillas are soft, bendable, and shockingly sturdy—without flour, starches, or sugar. Made with just eggs and cheese (plus one secret ingredient), they’re perfect for wraps, gyros, quesadillas, or breakfast roll-ups while staying low-carb and protein-rich.
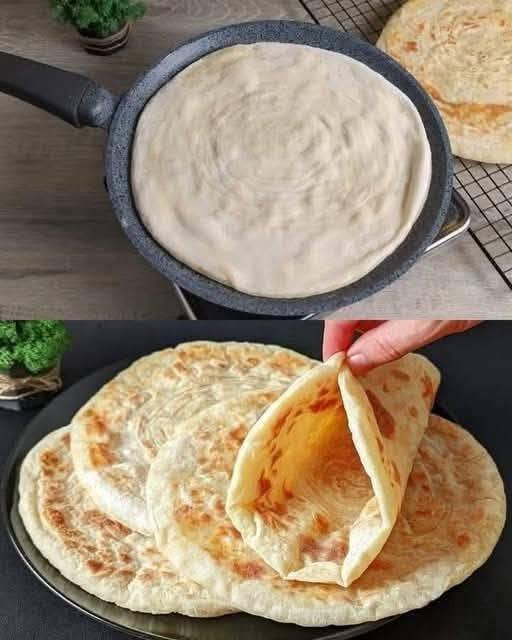
Unlike eggy flatbreads that crack or tear, these tortillas cool into a flexible, almost wheat-like texture. The key is gentle heat, full blending, and allowing them to rest after cooking. Simple ingredients. Smart technique. Big payoff.
Ingredients (Makes 4 Tortillas)
- 2 large eggs
- ½ cup shredded mozzarella (low-moisture works best)
- 1 tablespoon cream cheese (the secret to flexibility)
Optional (still carnivore, improves strength):
- ½ tablespoon beef gelatin
Equipment
- Blender or food processor
- Non-stick skillet (8–10 inch)
- Silicone spatula
Instructions
1️⃣ Blend Until Silky
Add eggs, shredded mozzarella, cream cheese, and gelatin (if using) to a blender or food processor.
Blend until completely smooth—no cheese bits, no streaks. This step is crucial for even cooking and flexibility.
2️⃣ Heat the Pan Gently
Place a non-stick skillet over medium-low heat.
Lightly grease with butter or beef tallow.
The pan should be warm, not hot—too much heat causes rubbery tortillas.
3️⃣ Cook Thin & Even
Pour ¼ of the batter into the center of the pan.
Immediately swirl to form a thin, even circle.
Cook for 60–90 seconds, until:
- The edges lift easily
- The surface looks set with no wet spots
4️⃣ Flip Carefully
Flip gently using a silicone spatula.
Cook the second side for 30–40 seconds, then remove to a plate or cooling rack.
👉 Do not overcook — they continue to firm up as they cool.
Cooling = Flexibility
Let tortillas cool for 2–3 minutes before using.
This resting phase is where the magic happens—they become bendable, strong, and tear-resistant.
Texture Troubleshooting
- Too eggy? Use 1 whole egg + 1 egg white
- Breaking? Add a little more cream cheese or gelatin
- Rubbery? Heat was too high
Storage
- Fridge: 3–4 days (store with parchment between)
- Freezer: Up to 1 month
Simple, clean, and endlessly versatile—these tortillas prove low-carb doesn’t mean low-satisfaction. 💪🌯


 Instructions
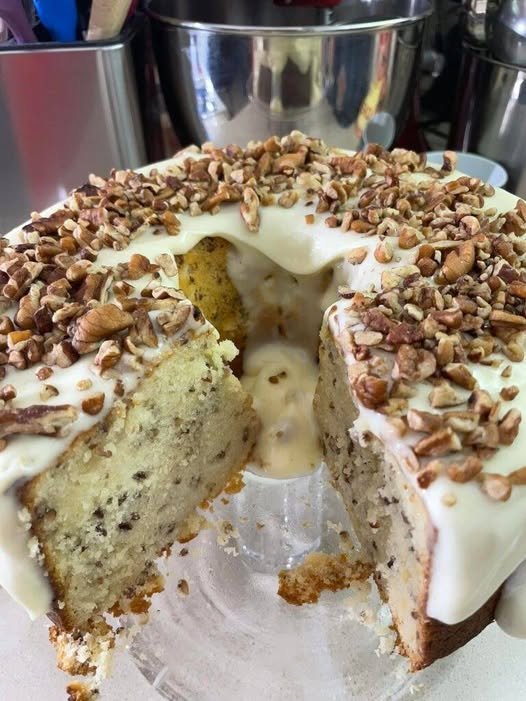
 Glaze Magic
 Q & A (Because Everyone Asks)


 Great source of calcium and protein