Canadian Cheese Soup

Canadian Cheese Soup

Prep Time: 15 minutes
Cook Time: 25 minutes
Yield: 4–6 servings

A creamy soup made with vegetables, milk, broth, and sharp cheddar cheese.


Ingredients

  • 3 tablespoons unsalted butter

  • 1 medium onion, finely diced

  • 2 carrots, finely diced

  • 2 celery stalks, finely diced

  • 3 tablespoons all-purpose flour

  • 4 cups chicken broth (or vegetable broth)

  • 2 cups whole milk or half-and-half

  • 2½ cups sharp cheddar cheese, freshly shredded

  • ½ teaspoon salt, or to taste

  • ½ teaspoon black pepper, or to taste

  • ¼ teaspoon paprika or dry mustard (optional)


Equipment

  • Large soup pot

  • Wooden spoon or whisk

  • Measuring cups


Instructions

1. Cook the Vegetables

Melt butter in a large pot over medium heat.
Add onion, carrots, and celery.
Cook for 6–8 minutes, stirring occasionally, until vegetables are soft.


2. Make the Roux

Sprinkle flour over the vegetables.
Stir well and cook for 1–2 minutes to remove raw flour taste.


3. Add Broth

Slowly pour in the broth while stirring constantly.
Bring to a gentle simmer.
Cook for 5 minutes until slightly thickened.


4. Add Milk

Lower heat to medium-low.
Stir in the milk or half-and-half.
Heat gently without boiling.


5. Add Cheese

Add shredded cheddar a small handful at a time.
Stir continuously until completely melted and smooth.
Do not allow soup to boil.


6. Season

Add salt, black pepper, and optional paprika or dry mustard.
Taste and adjust seasoning.


7. Serve

Ladle into bowls and serve warm.


Storage

  • Refrigerate in a sealed container for up to 3 days

  • Reheat gently over low heat, stirring frequently

  • Add milk or broth if soup becomes too thick

Freezing is not recommended due to texture changes after thawing.


Optional Variations

  • Broccoli Cheddar: Add 1 cup finely chopped broccoli

  • Bacon Cheddar: Stir in cooked chopped bacon

  • Spicy: Add cayenne or chopped jalapeño

  • Smoked: Use smoked cheddar

  • Thicker Soup: Add 1 additional tablespoon flour

  • Gluten-Free: Use gluten-free flour or cornstarch


Serving Suggestions

  • Crusty bread

  • Garlic toast

  • Green salad

  • Grilled cheese sandwich

Sweet milk fudge squares

Total Time: 4 hours 15 minutes (15 minutes active, 4 hours chilling)
Difficulty: Easy
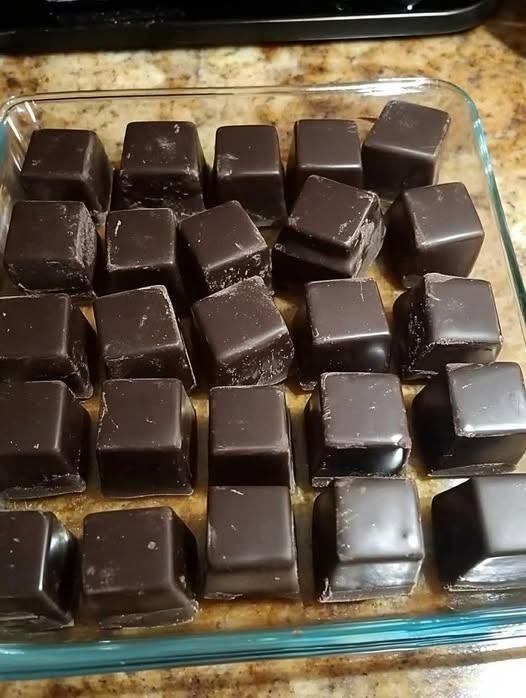
Yield: 16 rich, 2-inch squares

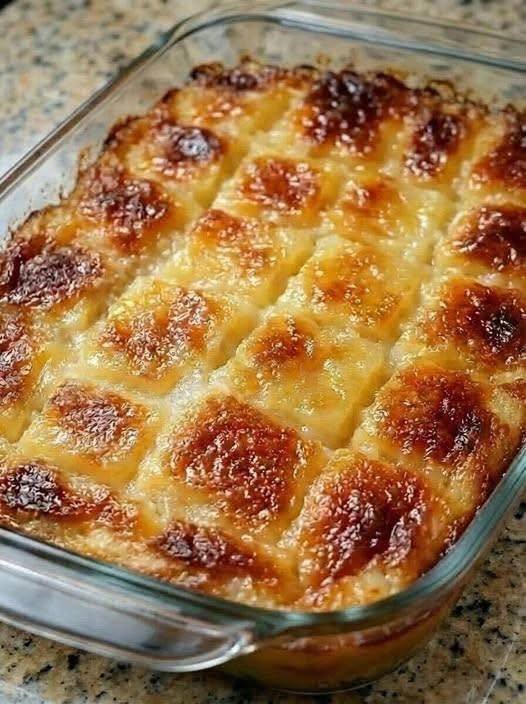
There’s a special kind of magic in a dessert that requires no oven, yet yields a result so creamy, sweet, and decadent it feels like a cherished secret. Sweet Milk Fudge Squares are exactly that—a timeless, no-bake confection that marries the deep caramelized flavor of cooked sweetened condensed milk with the satisfying crunch of a graham cracker crust. Unlike traditional fudge, these squares are velvety smooth and sliceably firm, offering a perfect balance of simplicity and indulgence. They’re the ideal treat for a potluck, a holiday platter, or a moment when you need a little sweet comfort.

Ingredients
For the Crust:
1 ½ cups (about 150g) graham cracker crumbs (from roughly 12 full sheets)

⅓ cup (75g) granulated sugar

6 tablespoons (85g) unsalted butter, melted

Pinch of salt

For the Fudge Filling:
1 can (14 oz or 397g) full-fat sweetened condensed milk

2 cups (about 340g) high-quality semi-sweet chocolate chips

2 tablespoons (28g) unsalted butter

1 teaspoon pure vanilla extract

¼ teaspoon fine sea salt

For Topping (Optional but Recommended):
A light sprinkle of flaky sea salt (like Maldon)

Or, a dusting of cocoa powder

Equipment Needed
8×8 inch square baking pan

Parchment paper

Medium mixing bowl

Medium saucepan

Whisk and spatula

Heatproof bowl (for double boiler method, if using)

Step-by-Step Instructions
Step 1: Prepare the Pan & Make the Crust
Time: 10 minutes | Intensity: Low

Line the Pan: Line your 8×8 inch pan with parchment paper, leaving an overhang on two opposite sides. This “sling” will make removing the fudge squares effortless. Lightly grease any exposed sides of the pan.

Mix Crust: In a medium bowl, combine the graham cracker crumbs, sugar, and a pinch of salt. Pour the melted butter over the mixture and stir with a fork until the crumbs are evenly moistened and resemble wet sand.

Press Firmly: Transfer the crumb mixture to the prepared pan. Using the bottom of a flat glass or measuring cup, press the crumbs firmly and evenly into the base of the pan to create a compact, solid crust. Set aside.

Step 2: Create the Luscious Fudge Filling
Time: 10-15 minutes | Intensity: Medium (requires focus)

Stovetop Method (Direct):

Combine & Melt: In a medium saucepan over low heat, combine the entire can of sweetened condensed milk, chocolate chips, and 2 tablespoons of butter.

Cook Gently: Stir constantly with a whisk or silicone spatula. The mixture will look separated at first but will gradually come together into a thick, glossy, homogeneous “pudding” as the chocolate melts. This should take about 5-7 minutes. Do not let it boil.

Finish: Once completely smooth and no streaks of condensed milk remain, remove from heat. Immediately stir in the vanilla extract and ¼ teaspoon of sea salt. The salt is crucial—it elevates the chocolate flavor and cuts the sweetness perfectly.

Alternative: Double Boiler Method
If you’re concerned about scorching, place a heatproof bowl over a pot of gently simmering water (ensure the bowl doesn’t touch the water). Combine all filling ingredients in the bowl and stir until melted and smooth.

Step 3: Assemble & Chill to Set
Time: 4 hours (mostly inactive) | Intensity: Low

Pour & Spread: Immediately pour the hot fudge filling over the prepared crust. Use an offset spatula or the back of a spoon to spread it into a perfectly smooth, even layer.

Top (Optional): If using, sprinkle a few flakes of sea salt evenly over the surface for a gorgeous, professional finish and a delightful salty contrast.

The Long Chill: This is the most important step for the perfect texture. Allow the pan to cool at room temperature for 15 minutes, then transfer to the refrigerator. Chill for at least 4 hours, or ideally overnight, until the fudge layer is completely firm and set.

Step 4: Slice & Serve
Time: 5 minutes | Intensity: Low

Remove from Pan: Using the parchment paper sling, gently lift the entire block of fudge out of the pan and onto a cutting board.

Slice Cleanly: For pristine squares, wipe a long, sharp knife with a hot, damp cloth and dry it between each cut. Cut the block into 4 rows by 4 rows to make 16 squares. For a cleaner cut, you can briefly warm the knife under hot water.

Serve & Store: Arrange the squares on a serving plate. Store any leftovers in a single layer in an airtight container in the refrigerator for up to 1 week.

Chef’s Notes & Tips for Success
Chocolate Choice Matters: The quality of your chocolate chips directly impacts the flavor. A good semi-sweet chip (around 50-60% cacao) provides the best balance. Milk chocolate can be used for a sweeter, milder fudge.

Patience is Key: Rushing the chilling process will result in messy, soft squares that won’t hold their shape. The overnight chill is truly worth it.

Customize It: Stir ½ cup of chopped toasted nuts (pecans, walnuts) or a handful of mini marshmallows into the fudge filling just before pouring. You can also substitute the graham crackers with digestive biscuits or vanilla wafers for a different crust flavor.

Gifting Idea: These squares stack beautifully in a small gift box lined with parchment, making them a wonderful homemade present.

Nutrition Information
(Per serving, 1 square, calculated without optional toppings)

Calories: ~280 kcal

Total Fat: 15g

Saturated Fat: 9g

Cholesterol: 25mg

Sodium: 115mg

Total Carbohydrates: 34g

Dietary Fiber: 1g

Sugars: 29g

Protein: 3g

Note: Nutritional information is an estimate calculated using a database and may vary based on specific brands and measurements used.

In Conclusion, these Sweet Milk Fudge Squares are a testament to the fact that the most beloved recipes are often the simplest. With minimal effort and a handful of pantry staples, you create a dessert of pure, nostalgic joy. The creamy, dense fudge paired with the buttery, crisp crust is a combination that never fails to delight. So, clear a space in your fridge, and get ready to make a treat that will have everyone asking for the recipe. Enjoy!

Mediterranean Spinach & Cheese Crustless Bake

A light, savory oven bake inspired by Greek flavors

This Mediterranean Spinach & Cheese Crustless Bake is a beautifully simple dish that sits somewhere between a crustless quiche and a spanakopita-style casserole. Made with eggs, creamy yogurt, tender spinach, and a blend of melty and tangy cheeses, it bakes up fluffy on the inside with a lightly golden top. Naturally gluten-free and low in carbs, it’s a wonderful option for breakfast, brunch, or a quick dinner served with a fresh salad.

The absence of a crust keeps this dish light while allowing the Mediterranean flavors to shine. Greek yogurt adds moisture and a gentle tang, while feta brings saltiness and depth. It’s an easy recipe to customize and holds up well for meal prep, making it a practical yet satisfying addition to your weekly menu.

Ingredients

  • 6 large eggs
  • 1 cup Greek yogurt (or plain yogurt)
  • 3 tbsp extra-virgin olive oil, divided
  • 1½ cups fresh spinach, chopped (or frozen spinach, well-drained)
  • 1 cup shredded mozzarella or kasseri cheese
  • ½ cup crumbled feta cheese
  • 1 small onion, finely chopped
  • ½ cup chopped green onions or leeks
  • 1 clove garlic, minced
  • ½ tsp dried oregano
  • ½ tsp black pepper
  • ¾ tsp salt (adjust to taste)

Optional Add-Ins

  • ¼ cup diced cooked turkey, chicken, or ham
  • ¼ cup chopped zucchini or bell pepper

Instructions

  1. Preheat the oven
    Preheat your oven to 375°F (190°C). Lightly grease a round or square baking dish with olive oil and set aside.
  2. Prepare the vegetables
    Heat 1 tablespoon of olive oil in a skillet over medium heat. Add the chopped onion and sauté for 3–4 minutes until soft and translucent. Stir in the garlic and cook for another 30 seconds until fragrant. Add the spinach and cook just until wilted. Remove from heat and let cool slightly.
  3. Mix the egg base
    In a large bowl, whisk together the eggs, Greek yogurt, remaining olive oil, salt, black pepper, and dried oregano until smooth and well combined.
  4. Combine everything
    Fold the cooled spinach mixture into the egg base. Gently stir in the shredded mozzarella, crumbled feta, and green onions. If using any optional add-ins like cooked meat or extra vegetables, fold them in at this stage.
  5. Bake
    Pour the mixture into the prepared baking dish and smooth the top. Bake uncovered for 35–40 minutes, or until the center is set and the top is lightly golden.
  6. Rest and serve
    Remove from the oven and allow the bake to rest for about 10 minutes before slicing. This helps it firm up and makes cleaner slices.
See also  Mediterranean Pepperoni Pizza Grilled Cheese

Serving Suggestions

  • Serve warm or at room temperature with a Greek cucumber-tomato salad
  • Add olives and extra feta on the side
  • Enjoy leftovers for breakfast or lunch throughout the week

Storage & Tips

This bake keeps well in the refrigerator for 3–4 days and reheats beautifully. It can also be sliced and frozen for up to 2 months. Simply thaw overnight and warm gently before serving.

Light, fluffy, and full of Mediterranean comfort, this crustless bake proves that simple ingredients can create something truly satisfying 🌿✨

Ham and Cheese Butter Swim Biscuits

Ham and Cheese Butter Swim Biscuits

These biscuits are unique because they literally “swim” in melted butter while baking, creating a crispy, golden crust on the outside while staying incredibly moist on the inside.

  • Prep time: 15 minutes

  • Bake time: 25–30 minutes

  • Servings: 9 large biscuits


Ingredients

The Dry & Mix-ins:

  • 2 ½ cups All-purpose flour

  • 2 cups Small diced ham

  • 1 ½ cups Shredded cheddar cheese (sharp cheddar works best!)

  • 1 tbsp Granulated sugar

  • 1 tbsp Baking powder

  • 1 tsp Salt

The Wet:

  • 2 cups Cold buttermilk

  • 1 stick (½ cup) Unsalted butter, melted


Instructions

  1. Preheat and Prep: Preheat your oven to 450°F (230°C). Pour the melted butter into an 8×8 or 9×9 inch metal or glass baking pan, coating the bottom evenly.

  2. Mix Dry Ingredients: In a large bowl, whisk together the flour, sugar, baking powder, and salt. Stir in the diced ham and shredded cheese until they are well-coated in the flour mixture (this prevents them from sinking).

  3. Add Buttermilk: Gently pour the buttermilk into the dry mixture. Stir with a spatula just until a wet, shaggy dough forms. Do not overmix, or the biscuits will become tough!

  4. The “Swim”: Turn the dough out directly into the pan of melted butter. Use a spatula to gently spread the dough to the edges of the pan. It’s okay if butter splashes up over the top; that’s exactly what you want.

  5. Pre-cut: Using a knife or a bench scraper, cut the dough into a 3×3 grid (9 squares) while it is still raw in the pan. This helps the butter seep into the cracks.

  6. Bake: Bake for 25–30 minutes, or until the tops are deep golden brown and the butter has been fully absorbed.

  7. Serve: Let them rest for about 5 minutes before re-cutting along your lines and serving warm.


Pro-Tips for Extra Flavor

  • Herb Topping: As seen in your photo, a sprinkle of fresh chopped parsley or chives right after baking adds a beautiful pop of color and freshness.

  • Honey Glaze: If you like a sweet-and-salty vibe, drizzle a little honey over them while they are steaming hot.

🥝 Creamy Kiwi-Banana Smoothie


🥝 Creamy Kiwi-Banana Smoothie

Prep time: 5 minutes | Servings: 1 large glass


Ingredients

2 ripe kiwis (peeled and sliced)


1 frozen banana (sliced; using a frozen banana gives it that thick, creamy texture)


1/2 cup Greek yogurt (plain or vanilla)


1/2 cup milk of choice (almond, oat, or dairy)


1 tsp honey or maple syrup (optional, depending on how sweet your fruit is)


Handful of ice cubes


Extra slices of kiwi and banana (for garnish)


Instructions

Prepare the Fruit: Peel your kiwis and banana. To get the look in the photo, set aside one round slice of each fruit to perch on the rim of the glass.


Blend: Place the kiwis, frozen banana, yogurt, milk, and sweetener into a high-speed blender.


Adjust Texture: Add the ice cubes and blend on high until the mixture is completely smooth and bright green. If it’s too thick, add a splash more milk; if too thin, add more ice.


Assemble: Pour into a tall glass. If you want the “fruit inside” look from the photo, drop a few small kiwi chunks into the glass before pouring.


Garnish: Slice a small notch into your reserved kiwi and banana rounds and slide them onto the rim of the glass.


💡 Pro-Tips for the Best Result

The Color: If you want an even more intense green without changing the flavor, toss in a small handful of fresh baby spinach. You won’t taste it, but it boosts the nutrients and the “wow” factor.


The Ripeness: Make sure your kiwis are slightly soft to the touch. Under-ripe kiwis can be quite tart and grainy.

🍓 The Ultimate Strawberry Cheesecake Freakshake

🍓 The Ultimate Strawberry Cheesecake Freakshake

🛒 Ingredients

For the Milkshake Base:


3 large scoops Premium vanilla or strawberry ice cream


1/2 cup Fresh strawberries (hulled)


1/4 cup Whole milk (adjust for desired thickness)


1 tbsp Cream cheese (softened, for 그 cheesecake tang)


For the Assembly & Toppings:


Strawberry syrup: For the “drip” effect


Whipped cream: Heavy and stable


Graham crackers: Crushed into crumbs


Fresh strawberries: Whole and sliced


1 slice Classic New York Style Cheesecake (the star topping!)


👩‍🍳 Preparation Steps

Prep the Glass: Drizzle strawberry syrup along the inside walls of a large glass or mason jar. Let it drip down naturally. For an extra touch, smear a little frosting or honey around the outer rim and press crushed graham crackers into it.


Blend the Base: In a blender, combine the ice cream, fresh strawberries, milk, and softened cream cheese. Blend until smooth but still very thick.


The Pour: Carefully pour the milkshake into the prepared glass, leaving about an inch of space at the top.


The “Freak” Toppings:


Pipe a generous mountain of whipped cream on top.


Carefully rest a slice of cheesecake on the rim/whipped cream.


Nestle whole strawberries into the cream.


Generously sprinkle graham cracker crumbs over everything.


Final Flourish: Add one last drizzle of strawberry syrup over the cheesecake and whipped cream.


💡 Pro-Tips for Success

Chill your glass: Put the glass in the freezer for 15 minutes before starting. This keeps the shake thick and helps the syrup “sticks” to the sides better.


The Support System: If the cheesecake slice feels heavy, you can insert a thick straw or a wooden skewer through the shake to help anchor the cake slice in place.


Note: This is a very rich treat, so it’s perfect for sharing with a friend!

Banana Split Dessert Recipe

Banana Split Dessert Recipe

Yields: 12–15 servings | Prep time: 30 minutes | Chill time: 4 hours


The Ingredients

Layer Ingredients

Crust 2 cups Graham cracker crumbs, 1/2 cup melted butter, 1/4 cup sugar

Cream Layer 8 oz softened cream cheese, 1/2 cup softened butter, 2 cups powdered sugar

Fruit Layer 3-4 ripe bananas (sliced), 1 lb fresh strawberries (sliced)

Topping 8 oz Whipped topping (like Cool Whip), chopped walnuts or pecans

Garnish Chocolate syrup, extra fruit, and maraschino cherries (optional)

Preparation Steps

Prepare the Base: Combine the graham cracker crumbs, melted butter, and sugar. Press the mixture firmly into the bottom of a 9×13 inch glass baking dish. Chill in the freezer for 10 minutes to set.


Make the Cream Filling: In a large bowl, beat the softened cream cheese and 1/2 cup butter until smooth. Gradually add powdered sugar and beat for about 3–5 minutes until the mixture is light and fluffy. Spread this evenly over the crust.


Layer the Fruit: Place a single layer of sliced bananas over the cream mixture. Follow this with a layer of sliced strawberries.


Add the Whipped Topping: Spread the whipped topping (or homemade whipped cream) over the fruit, smoothing it out to the edges.


Decorate: As seen in your photo, use a piping bag to add extra swirls of whipped cream. Top with more banana slices, strawberry halves, and a generous sprinkle of chopped nuts.


The Finishing Touch: Drizzle chocolate syrup over the top in a zigzag pattern.


Chill: Cover and refrigerate for at least 4 hours (overnight is even better) to allow the layers to firm up so they can be sliced cleanly.


Pro-Tips for Success

Prevent Browning: To keep the bananas on top looking fresh, you can toss them in a little lemon juice before placing them on the dessert.


Crust Variation: If you want a saltier kick, swap the graham crackers for crushed pretzels!


Serving: Use a sharp knife dipped in warm water to get those perfect, clean layers when slicing.

🍑 Fresh Peach Ice Cream Recipe

🍑 Fresh Peach Ice Cream Recipe

Ingredients

2 cups Heavy whipping cream (chilled)


1 can (14 oz) Sweetened condensed milk


2 cups Fresh peaches (peeled and finely chopped or pureed)


1 tsp Vanilla extract


1 tbsp Lemon juice (to keep the peaches bright)


Optional: A pinch of salt to balance the sweetness


Instructions

Prepare the Peaches: Take your chopped peaches and toss them with the lemon juice. If you prefer a smoother ice cream, pulse half of them in a blender. Keep the other half chunky for texture.


Whip the Cream: In a large bowl, whip the chilled heavy cream until stiff peaks form. (Be careful not to over-whip it into butter!)


Mix the Base: In a separate medium bowl, stir together the sweetened condensed milk, vanilla extract, and salt.


Fold it Together: Gently fold the condensed milk mixture into the whipped cream using a spatula. Do this slowly so you don’t lose the airiness.


Add the Fruit: Gently fold in your prepared peaches.


Freeze: Pour the mixture into a loaf pan or a freezer-safe container. Cover it tightly with plastic wrap or a lid.


Chill: Freeze for at least 6 to 8 hours, or overnight for the best scooping consistency.


Quick Pro-Tips

The Peaches: Make sure your peaches are very ripe! They should feel slightly soft and smell fragrant.


Serving: Let the container sit on the counter for about 5 minutes before scooping. This makes it much easier to get those perfect, round scoops like in your photo.

Pomegranate & Ginger Glow Smoothie

Pomegranate & Ginger Glow Smoothie

This recipe balances the earthy sweetness of carrots with the tartness of pomegranate and a spicy kick of fresh ginger.


Ingredients

Category Ingredient Quantity

The Base Fresh Carrot Juice (or 2 chopped carrots) 1 cup

The Fruit Pomegranate Arils (seeds) ½ cup

The Kick Fresh Ginger 1-inch knob, peeled

Creaminess Greek Yogurt or Frozen Banana ½ cup

Liquid Coconut Water or Orange Juice ½ cup

Garnish Fresh Mint & Pomegranate Seeds For topping

Instructions

Prep the Veggies: If you don’t have a juicer, finely chop the carrots so they blend easily. Peel your ginger using the edge of a spoon.


Combine: Place the carrot juice, pomegranate seeds, ginger, and your choice of creaminess (banana or yogurt) into a high-speed blender.


Blend: Start on a low setting and gradually increase to high. Blend for about 60 seconds until completely smooth.


Note: If using whole pomegranate seeds, you may want to strain the mixture through a fine-mesh sieve if you prefer a silkier texture.


Adjust: If it’s too thick, add a splash more coconut water. If you want it colder, add a handful of ice.


Serve: Pour into a tall glass and top with fresh mint leaves and a few extra pomegranate arils, just like in the photo!


Pro-Tip for Success

If you find the pomegranate seeds too “crunchy” for your blender, try using 100% pure pomegranate juice instead of the whole seeds for the liquid base. It keeps that deep flavor without the texture of the pits.

A depression era staple that kept families fed. Simple, filling, and more comforting than people expect.

 Ingredients

2 cups fresh or frozen peas

4 tablespoons butter

4 tablespoons all-purpose flour

2 cups milk (whole milk preferred)

1/2 teaspoon kosher salt, or to taste

1/4 teaspoon black pepper, or to taste

1/4 teaspoon sugar (optional, to round out the flavor)

1/8 teaspoon onion powder or a small pinch of finely minced onion (optional)

4–8 slices sturdy bread (white, wheat, or homemade), for toast

1–2 tablespoons butter, for buttering the toast

Chopped fresh parsley or a pinch of dried parsley for garnish (optional)

Directions

If using fresh peas, shell them and rinse under cool water. If using frozen peas, measure out 2 cups and set aside; no need to thaw completely.

In a medium saucepan, bring a small amount of water to a boil and add the peas. Simmer for 3–5 minutes, just until tender and bright green. Drain well and set aside. (If using very tender garden peas, they may need even less time.)

In the same saucepan or a clean one, melt 4 tablespoons of butter over medium heat. Once melted and just beginning to foam, sprinkle in the 4 tablespoons of flour.

Whisk the flour and butter together to form a smooth paste (a roux). Cook this mixture for 1–2 minutes, stirring constantly, to remove the raw flour taste. It should stay pale and smell slightly nutty, not browned.

Slowly pour in the milk, a little at a time, whisking constantly to keep the sauce smooth. At first it will look lumpy, but as you continue to add milk and whisk, it will come together into a silky sauce.

Season the sauce with salt, pepper, sugar if using, and onion powder or minced onion if desired. Continue to cook over medium heat, stirring often, until the sauce thickens enough to coat the back of a spoon, 3–5 minutes.

Gently stir the cooked, drained peas into the cream sauce. Reduce the heat to low and let the mixture simmer for another 2–3 minutes so the flavors can mingle. Taste and adjust the seasoning as needed.

While the peas are simmering, toast the bread slices until golden and crisp. Butter the hot toast lightly so it stays tender underneath the sauce.

To serve, place 1–2 slices of toast on each plate and spoon a generous amount of the creamed peas over the top. If you like, sprinkle with a little parsley for color.

Serve immediately while hot, with a fork and knife, and maybe a second slice of toast nearby in case you want to swipe up e

very last bit of sauce.

Polish Pickle Soup tastes like comfort with a zing

Full recipe>>>

Servings: 4–6


Prep time: 15 mins | Cook time: 30 mins


Ingredients

Category Item Quantity

The Base Chicken or Vegetable Broth 6 cups

Vegetables Potatoes (Gold/Yellow), cubed 3 medium

Carrots, sliced or grated 2 medium

Onion, finely diced 1 small

The Zing Dill Pickles (Fermented/Brined), grated 1.5 cups

Pickle Juice (from the jar) ½ to ¾ cup

Creamy Finish Sour Cream (full fat) ½ cup

All-purpose Flour (optional thickener) 1 tbsp

Herbs/Spice Fresh Dill, chopped ¼ cup

Butter 2 tbsp

Salt & Black Pepper to taste

Instructions

Sauté: Melt butter in a large pot. Add onions and carrots, sautéing for about 5 minutes until softened.


Simmer: Add the broth and cubed potatoes. Bring to a boil, then reduce heat and simmer until potatoes are fork-tender (about 12–15 minutes).


The Pickles: While the potatoes cook, sauté the grated pickles in a small pan with a teaspoon of butter for 3 minutes—this intensifies the flavor.


Combine: Add the pickles to the main pot. Important: Only add pickles after the potatoes are soft, or the acidity will keep the potatoes hard.


Temper & Cream: Whisk the sour cream and flour together in a small bowl. Ladle a bit of hot soup into the cream to “temper” it (so it doesn’t curdle), then pour the mixture back into the pot.


Season: Add the pickle juice, fresh dill, salt, and pepper. Simmer for another 5 minutes and serve.


Chef’s Tips & Notes

Pickle Choice: Use “Polskie Ogórki”—naturally fermented pickles in brine. Avoid “bread and butter” or sweet pickles; they will ruin the flavor profile.


The Grate Debate: Grating the pickles (rather than slicing) ensures you get a bit of tang in every single spoonful.


Leftovers: This soup actually tastes better the next day as the flavors meld.


Nutritional Info (Per Serving)

Calories: 210 kcal


Carbohydrates: 22g


Protein: 4g


Fat: 12g


Sodium: 980mg (High due to pickles—adjust broth salt accordingly!)

The Easiest No-Knead Crusty Bread

The Easiest No-Knead Crusty Bread

This bread features a thick, crackly crust and a soft, airy interior with those beautiful “crane” holes. By using a Dutch oven, you trap steam, which allows the bread to rise fully before the crust sets.

Prep time: 10 minutes (plus 12–18 hours rising)

Bake time: 45 minutes

Servings: 1 loaf (approx. 8–10 slices)

Ingredients

3 cups (390g) All-purpose flour or Bread flour (plus extra for dusting)

1 ½ cups (355ml) Lukewarm water

1 tsp Active dry yeast or Instant yeast

1 ½ tsp Salt

Instructions

Mix: In a large bowl, whisk the flour, salt, and yeast. Pour in the lukewarm water and stir with a wooden spoon or spatula until a shaggy, sticky ball forms. Do not overmix; you just want the flour hydrated.

The Long Nap: Cover the bowl tightly with plastic wrap or a beeswax wrap. Let it sit at room temperature (about 70°F or 21°C) for 12 to 18 hours. It’s ready when the surface is dotted with bubbles and it has more than doubled in size.

Prep for Heat: Place a 4-to-6 quart Dutch oven (with the lid) into your oven and preheat to 450°F (230°C). Let the pot get scorching hot for at least 30 minutes.

Shape: While the oven heats, scrape the dough onto a well-floured surface. Gently fold it over itself once or twice (don’t degas it too much!). Shape into a rough ball and let it rest on a piece of parchment paper for 30 minutes.

Bake: Carefully lift the parchment paper and dough and drop it into the hot Dutch oven.

Covered: Bake for 30 minutes.

Uncovered: Remove the lid and bake for another 12–15 minutes until the crust is deeply golden brown.

The Hardest Part: Let it cool on a wire rack for at least 1 hour before slicing. If you cut it too soon, the steam escapes and the inside can become gummy.

Pro Tips for Success

Sticky is Good: If the dough feels too wet to handle, don’t panic! Wetter dough leads to better steam and a loftier interior. Just use plenty of flour on your hands.

The “Ear”: For that professional look, use a sharp knife or razor to slash a 1/2-inch deep “X” or line across the top right before putting it in the pot.

No Dutch Oven? Use a heavy oven-safe pot with a tight lid, or bake on a preheated baking sheet and toss a few ice cubes into a separate tray on the bottom

rack to create steam.

Immune Boosting Soups to Power Your Body All Year Long

Full recipe>>> Prep time: 15 minutes


Cook time: 30 minutes


Servings: 4–6


Ingredients

1 cup Red or yellow lentils (rinsed)


2 tbsp Extra virgin olive oil or avocado oil


1 large Sweet potato, cubed


2 medium Carrots, sliced into rounds


2 stalks Celery, chopped


1 small Yellow onion, diced


3 cloves Garlic, minced


1 inch Fresh ginger, grated


1 tsp Ground turmeric (the star immune-booster)


½ tsp Black pepper (essential to activate the turmeric)


6 cups Vegetable or bone broth


2 cups Fresh spinach or kale, chopped


1 tbsp Fresh lemon juice (adds Vitamin C and brightens flavor)


Optional: Fresh parsley and crusty sourdough bread for serving.


Instructions

Sauté the Base: In a large pot, heat oil over medium heat. Add onion, carrots, and celery. Sauté for 5–7 minutes until softened.


Bloom the Spices: Add the garlic, ginger, and turmeric. Stir constantly for 1 minute until fragrant. This “blooms” the spices, releasing their essential oils.


Simmer: Stir in the lentils, sweet potatoes, and broth. Bring to a boil, then reduce heat to low. Cover and simmer for 20–25 minutes, or until lentils and potatoes are tender.


The Green Finish: Stir in the spinach (or kale) and lemon juice. Let the greens wilt for 2 minutes.


Season: Season with salt and extra black pepper to taste. Serve hot with a sprig of parsley.

Creamy Avocado & Banana Fuel Smoothie

Creamy Avocado & Banana Fuel Smoothie

Prep time: 5 minutes | Servings: 1


Ingredients

1/2 Medium Avocado: Ripe (should be soft to the touch).


1 Frozen Banana: Sliced (frozen gives it a colder, thicker texture).


2 tbsp Whole Almonds: Or 1 tbsp of almond butter for an even smoother finish.


1 cup Liquid: Unsweetened almond milk, oat milk, or coconut water work best.


Optional: A drizzle of honey or 1-2 pitted dates if you prefer it sweeter.

Instructions

Prep the Almonds: If you have a high-speed blender, you can toss the whole almonds right in. If your blender is less powerful, soak the almonds in water for 15 minutes beforehand or use almond butter to avoid “gritty” bits.


Layer the Blender: Add the liquid first, followed by the avocado and banana slices. This helps the blades spin freely and prevents stalling.


Blend: Start on a low speed to break up the frozen banana and nuts, then crank it up to high for 45–60 seconds until the mixture is completely velvety and pale green.


Adjust: If it’s too thick (more like a smoothie bowl), add an extra splash of liquid.


Quick Nutritional Tip


This smoothie is rich in monounsaturated fats (the heart-healthy kind) and potassium. Because it’s quite dense, it’s very satiating and works great as a meal replacement or a post-workout recovery drink.

3-Ingredient Blueberry Slow Cooker Cobbler

Full recipe>>> 3-Ingredient Blueberry Slow Cooker Cobbler

This recipe is the ultimate “set it and forget it” dessert. By using the slow cooker, you avoid heating up the whole kitchen, and the berries break down into a rich, thick sauce that perfectly pillows the cake topping.


Prep time: 5 minutes


Cook time: 2–3 hours (High) or 4 hours (Low)


Servings: 6–8


Ingredients

Frozen Blueberries: 2 bags (approx. 24–32 oz total).


Yellow or White Cake Mix: 1 box (standard 15.25 oz size).


Unsalted Butter: 1/2 cup (1 stick), melted or thinly sliced.


Instructions

Layer the Fruit: Lightly grease your slow cooker insert with butter or non-stick spray. Pour the frozen blueberries directly into the bottom. (Optional: toss with a tablespoon of sugar if you like it extra sweet).


Add the Topping: Evenly sprinkle the dry cake mix over the top of the berries. Do not stir!


Add the Fat: Pour the melted butter as evenly as possible over the cake mix. Alternatively, place thin pats of butter across the entire surface to cover as much powder as possible.


The “Tea Towel Trick”: Place a clean kitchen towel or a double layer of paper towels over the top of the slow cooker before putting the lid on. This catches condensation and prevents the crust from getting soggy.


Cook: Cook on High for 2 to 2.5 hours or Low for 4 hours, until the edges are bubbling and the center is set.


Recipe Notes & Tips

The Crust: Since slow cookers use moist heat, the top won’t get “oven-crispy” on its own. If you want a crunchier top, pull the ceramic insert out at the end and pop it under your oven broiler for 2–3 minutes.


Berry Blends: Feel free to use a “Mixed Berry” frozen bag (raspberries, blackberries, blueberries) for more complexity.


Serving: This is best served warm with a scoop of vanilla bean ice cream or a dollop of cold whipped cream.

Creamy Cheeseburger Bowl (Meal Prep Style)

Creamy Cheeseburger Bowl (Meal Prep Style)

This Creamy Cheeseburger Bowl is a balanced, comforting meal that brings together familiar flavors in a fresh and nourishing way. It is perfect for meal prep, easy lunches, or relaxed dinners. Each bowl is layered with fluffy rice, seasoned ground beef, crisp vegetables, melted cheese, and a smooth, creamy sauce that ties everything together beautifully. The ingredients are simple, and the steps are easy to follow, making this recipe suitable for cooks of all experience levels.


Ingredients (Serves 4)

For the base


2 cups cooked white or brown rice


1 tablespoon olive oil


1 cup shredded lettuce


For the beef topping


500 grams ground beef


1 small onion, finely chopped


1 teaspoon garlic powder


1 teaspoon paprika


½ teaspoon black pepper


½ teaspoon salt (adjust to taste)


Fresh toppings


1 cup cherry tomatoes, chopped


1 cup shredded cheddar cheese


½ cup sliced pickles


2 tablespoons chopped green onions


1 tablespoon sesame seeds (optional, for texture)


Creamy sauce


½ cup mayonnaise


2 tablespoons ketchup


1 tablespoon mustard


1 teaspoon honey


1 tablespoon pickle juice or lemon juice


Instructions

Start by preparing the rice according to package instructions. Once cooked, fluff it gently and set it aside to cool slightly. This will help keep the bowls neat when assembling.


Heat olive oil in a pan over medium heat. Add the chopped onion and cook until soft and lightly golden. Add the ground beef and gently break it apart using a spoon. Cook until it is evenly browned and fully done. Sprinkle in garlic powder, paprika, salt, and black pepper. Stir well so the seasoning is evenly distributed. Remove from heat and let it rest for a few minutes.


While the beef is cooling, prepare the creamy sauce. In a small bowl, mix mayonnaise, ketchup, mustard, honey, and pickle juice until smooth. Taste and adjust seasoning if needed. The sauce should be creamy, slightly tangy, and balanced.


To assemble the bowls, start with a generous layer of rice at the bottom of each bowl. Add shredded lettuce on top of the rice, followed by chopped tomatoes. Spoon the seasoned beef evenly over the vegetables. Sprinkle shredded cheddar cheese on top, allowing it to gently soften from the warmth of the beef.


Finish each bowl with pickle slices, chopped green onions, and a drizzle of the creamy sauce. If desired, sprinkle sesame seeds on top for a light crunch.


Serving and Storage Tips

These bowls can be enjoyed warm or chilled, depending on preference. They store well in the refrigerator for up to three days, making them ideal for meal planning. Keep the sauce separate if you prefer a fresher texture when reheating.


This Creamy Cheeseburger Bowl delivers comfort, freshness, and balance in every bite, all while being simple, satisfying, and family-friendly.

Homemade Dark Chocolate Bites

Homemade Dark Chocolate Bites

Prep Time: 10 minutes
Chill Time: 1–2 hours
Yield: About 24 small bites

These simple chocolate bites are made with cocoa powder and coconut oil for a firm, rich texture and deep chocolate flavor.


Ingredients

  • 1 cup unsweetened cocoa powder (Dutch-processed gives a smoother taste)

  • 1 cup coconut oil, melted

  • 1 tablespoon ground coffee or instant coffee powder (optional, for flavor depth)

  • 2 to 4 tablespoons powdered sweetener (stevia, erythritol, or preferred sweetener)

  • Pinch of sea salt (optional)

Optional mix-ins:

  • Chopped nuts

  • Unsweetened coconut flakes

  • Orange zest

  • Peppermint extract

  • Vanilla extract


Equipment

  • Silicone chocolate molds or

  • Parchment-lined square dish

  • Mixing bowl

  • Whisk

  • Spoon or small spatula


Instructions

1. Prepare the Molds

Place silicone molds on a tray or line a small glass dish with parchment paper. Set aside.


2. Melt the Coconut Oil

If not already melted, gently melt the coconut oil using a double boiler or microwave in short intervals. Let it cool slightly but remain liquid.


3. Mix the Liquid Ingredients

In a medium bowl, whisk together:

  • Melted coconut oil

  • Sweetener

  • Coffee powder (if using)

  • Salt

Stir until the sweetener is mostly dissolved.


4. Add Cocoa Powder

Sift the cocoa powder into the bowl to avoid lumps.
Whisk slowly until the mixture becomes smooth and glossy with no dry spots.


5. Adjust Flavor

Taste a small amount.
Add more sweetener if needed, 1 teaspoon at a time.
If desired, mix in vanilla, citrus zest, or other flavorings.


6. Pour into Molds

Carefully pour or spoon the chocolate mixture into molds or the lined dish.
Tap gently on the counter to remove air bubbles.


7. Chill

Place in refrigerator for 1–2 hours, or freezer for 30 minutes, until fully firm.


8. Unmold and Store

Remove chocolate from molds or cut into bite-size pieces.
Store in an airtight container in the refrigerator.


Storage

  • Keep refrigerated due to coconut oil’s low melting point

  • Best used within 7 days

  • Will soften at room temperature


Texture & Flavor Notes

  • Firm when chilled

  • Smooth and rich

  • Slight coffee note if used

  • Sweetness can be fully customized

Garlic Cheese Fingers

Garlic Cheese Fingers

Prep Time: 10 minutes
Cook Time: 10–12 minutes
Serves: 4–6

Crispy flatbread or pizza crust topped with garlic butter and melted cheese, sliced into easy-to-share fingers.


Ingredients

  • 1 prepared pizza crust or flatbread (thin works best)

  • 1 tablespoon butter, melted

  • 1 tablespoon olive oil

  • 2 cloves garlic, finely minced

  • 1 cup shredded mozzarella cheese

  • ¼ cup grated Parmesan cheese

  • ½ teaspoon dried oregano or Italian seasoning

  • ¼ teaspoon black pepper

  • Optional:

    • Chopped fresh parsley

    • Red pepper flakes

    • Light sour cream or yogurt for dipping


Instructions

1. Preheat Oven

Preheat oven to 400°F (200°C).
Line a baking tray with parchment paper or lightly grease it.


2. Prepare Garlic Butter

In a small bowl, mix:

  • Melted butter

  • Olive oil

  • Minced garlic

  • Black pepper

  • Oregano or Italian seasoning

Stir until well combined.


3. Prepare the Crust

Place pizza crust or flatbread on the baking tray.
Brush the entire surface evenly with the garlic butter mixture.


4. Add Cheese

Sprinkle mozzarella evenly over the crust.
Top with Parmesan cheese.


5. Bake

Bake for 10–12 minutes, or until:

  • Cheese is fully melted

  • Edges are lightly golden

  • Bottom is crisp

For extra browning, broil for the last 1–2 minutes while watching closely.


6. Slice and Serve

Remove from oven and let rest for 2 minutes.
Slice into strips or triangles.
Garnish with chopped parsley if desired.


Optional Light Version (Lower-Calorie Method)

  • Use whole wheat or low-carb flatbread

  • Use part-skim mozzarella

  • Reduce butter to ½ tablespoon

  • Increase garlic and herbs for flavor without extra fat


Storage & Reheating

  • Storage: Refrigerate leftovers up to 2 days

  • Reheat: Oven or air fryer at 350°F (175°C) for 4–5 minutes

  • Avoid microwave for best texture


Serving Ideas

Serve with:

  • Marinara sauce

  • Light garlic yogurt dip

  • Tomato soup

  • Fresh salad

Salmon Stuffed with Spinach & Parmesan

Salmon Stuffed with Spinach & Parmesan

Prep Time: 15 minutes
Cook Time: 12–15 minutes
Serves: 4

Tender salmon fillets filled with a creamy spinach and Parmesan mixture, then baked until flaky and golden.


Ingredients

  • 4 salmon fillets (about 6 oz / 170 g each, skin removed if preferred)

  • 1 tablespoon olive oil

  • 1 teaspoon smoked paprika

  • ½ teaspoon garlic powder

  • ½ teaspoon onion powder

  • 1 cup fresh spinach, finely chopped

  • ¼ cup grated Parmesan cheese

  • Optional:

    • Salt, to taste

    • Black pepper, to taste

    • 1 tablespoon cream cheese or ricotta (for a creamier filling)

    • Lemon wedges, for serving


Instructions

1. Preheat and Prepare

Preheat oven to 375°F (190°C).
Lightly grease a baking dish with olive oil or line with parchment paper.


2. Prepare the Salmon

Using a sharp knife, cut a pocket lengthwise into the side of each salmon fillet (do not cut all the way through).
Place fillets on a plate and brush lightly with olive oil.

Season both sides with:

  • Smoked paprika

  • Garlic powder

  • Onion powder

  • Salt and pepper (if using)


3. Make the Filling

In a bowl, combine:

  • Chopped spinach

  • Parmesan cheese

  • Optional cream cheese or ricotta

Mix until evenly blended.


4. Stuff the Salmon

Spoon the spinach mixture into each salmon pocket.
Press gently so the filling stays inside.


5. Bake

Place stuffed fillets in the prepared baking dish.
Bake uncovered for 12–15 minutes, or until:

  • Salmon flakes easily with a fork

  • Internal temperature reaches 145°F (63°C)

For a lightly browned top, broil for the last 1–2 minutes.


6. Rest and Serve

Let the salmon rest for 2–3 minutes before serving.
Serve with lemon wedges if desired.


Helpful Tips

  • Even cooking: Choose fillets of similar thickness.

  • Extra flavor: Add a pinch of nutmeg or dried basil to the filling.

  • Side ideas: Serve with roasted potatoes, rice, or steamed vegetables.

  • Storage: Refrigerate leftovers in a sealed container for up to 2 days.

  • Reheating: Warm gently in the oven at 300°F (150°C) to avoid drying out.

Cheesy Baked Potato Casserole (Steakhouse-Style)

Cheesy Baked Potato Casserole (Steakhouse-Style)

Prep Time: 20 minutes
Bake Time: 45–55 minutes
Serves: 6–8

A rich, baked potato dish layered with cream, cheese, and seasonings, baked until golden and bubbling.


Ingredients

  • 3 pounds (about 6 medium) potatoes, peeled and thinly sliced

  • 2 cups heavy cream

  • 1 cup whole milk

  • 3 tablespoons butter

  • 3 cloves garlic, minced

  • 1 teaspoon salt

  • ½ teaspoon black pepper

  • ½ teaspoon paprika

  • 1 teaspoon onion powder

  • 2 cups shredded cheddar cheese

  • 1 cup shredded mozzarella or Monterey Jack cheese

  • ½ cup grated Parmesan cheese

  • Fresh parsley, chopped (optional, for garnish)


Instructions

1. Preheat and Prepare

Preheat oven to 375°F (190°C).
Butter or lightly grease a 9×13-inch baking dish.


2. Cook the Cream Base

In a saucepan over medium heat, melt the butter.
Add garlic and cook for 30 seconds until fragrant.
Pour in cream and milk.
Stir in salt, pepper, paprika, and onion powder.
Heat until warm but not boiling. Remove from heat.


3. Layer the Potatoes

Arrange half of the sliced potatoes evenly in the baking dish.
Pour half of the cream mixture over them.
Sprinkle with:

  • 1 cup cheddar

  • ½ cup mozzarella

  • ¼ cup Parmesan

Repeat with remaining potatoes, cream, and cheeses.


4. Bake Covered

Cover the dish tightly with foil.
Bake for 35 minutes.


5. Bake Uncovered

Remove foil and bake for another 15–20 minutes, until:

  • The top is golden brown

  • The potatoes are tender when pierced with a fork

  • The sauce is bubbling around the edges


6. Rest and Serve

Let rest for 10 minutes before slicing.
Garnish with parsley if desired.


Helpful Tips

  • Even cooking: Slice potatoes evenly (⅛-inch thick is ideal).

  • Extra flavor: Add a pinch of thyme or rosemary to the cream mixture.

  • Texture option: Top with breadcrumbs for a crisp finish.

  • Storage: Refrigerate leftovers up to 3 days.

  • Reheating: Warm in oven at 325°F (165°C) until heated through.

Cloud Milk Cake (3 Ingredients)

Cloud Milk Cake (3 Ingredients)

Prep Time: 15 minutes
Bake Time: 30–35 minutes
Serves: 6–8 slices

A light, airy cake made with eggs, milk, and sweetener, with a soft texture similar to a soufflé-style sponge.


Ingredients

  • 5 large eggs, separated

  • 1 cup (240 ml) milk

  • ½ cup granulated sweetener (such as monk fruit or erythritol, adjust to taste)

Optional:

  • 1 teaspoon vanilla extract

  • Pinch of cream of tartar (for stabilizing egg whites)


Instructions

1. Prepare the Pan and Oven

Preheat your oven to 325°F (160°C).
Line the bottom of an 8-inch round or square baking pan with parchment paper.
Do not grease the sides of the pan so the batter can rise evenly.


2. Mix the Yolk Batter

Place the egg yolks in a medium bowl.
Add the milk and ¼ cup of the sweetener.
Whisk until smooth and slightly pale in color.
Stir in vanilla extract if using.


3. Whip the Egg Whites

In a clean, dry bowl, beat the egg whites with a mixer on medium-high speed.
Once foamy, gradually add the remaining ¼ cup sweetener.
Beat until stiff peaks form.
If using cream of tartar, add it at the foamy stage.


4. Combine the Mixtures

Add a small portion of the whipped egg whites to the yolk mixture and stir gently to loosen it.
Then gently fold the remaining egg whites into the batter using a spatula.
Fold slowly and carefully to keep the mixture airy.


5. Bake in a Water Bath

Pour the batter into the prepared pan.
Place the pan inside a larger baking dish and pour hot water into the outer dish until it reaches about 1 inch up the sides of the cake pan.

Bake for 30–35 minutes, or until:

  • The top is lightly golden

  • The cake feels springy when gently touched


6. Cool Gradually

Turn off the oven and crack the door open.
Let the cake sit inside for 10 minutes.
Remove and allow to cool completely in the pan before slicing.


Helpful Tips

  • Clean bowl: Any grease or water can prevent egg whites from whipping properly.

  • Gentle folding: Use a light hand to keep the batter fluffy.

  • Flavor ideas: Add lemon zest or almond extract for variation.

  • Serving: Serve plain or with fruit, cream, or a light glaze.

  • Storage: Keep covered in the refrigerator for up to 2 days.

Condensed Milk–Style Cream (No Added Sugar)

Condensed Milk–Style Cream (No Added Sugar)

Prep Time: 5 minutes
Cook Time: 20–25 minutes
Yield: About 1½ cups

A thick, creamy milk concentrate made with only three main ingredients, suitable for desserts, drinks, and baking.


Ingredients

  • 2 cups milk (dairy or unsweetened plant-based)

  • ¾ cup milk powder (full-cream or skim)

  • 2–3 tablespoons powdered sweetener (such as stevia or monk fruit, to taste)

Optional:

  • ½ teaspoon vanilla extract (for flavor)


Instructions

1. Combine the Ingredients

In a medium saucepan, add:

  • Milk

  • Milk powder

  • Sweetener

Whisk until the milk powder is fully dissolved and no lumps remain.


2. Cook the Mixture

Place the saucepan over low heat.
Stir constantly with a spoon or whisk to prevent sticking or burning.

Continue cooking for 20–25 minutes, or until the mixture thickens to a condensed-milk consistency.
It should coat the back of a spoon and flow slowly when poured.


3. Flavor (Optional)

Remove from heat and stir in vanilla extract, if using.


4. Cool and Store

Allow to cool to room temperature.
Pour into a clean jar with a lid.
Refrigerate until cold and fully thickened.


Helpful Tips

  • Thickness control: Cook longer for a thicker result, or add a small splash of milk if it becomes too thick.

  • Smooth texture: Whisk continuously to avoid lumps from the milk powder.

  • Color: Low heat helps keep the mixture pale and smooth.

  • Storage: Keep refrigerated in a sealed jar for up to 5 days.

  • Use for: Coffee, tea, desserts, puddings, and baking recipes that call for condensed milk.

Flourless Apple & Cocoa Cake

Flourless Apple & Cocoa Cake

Prep Time: 10 minutes
Bake Time: 35–40 minutes
Serves: 8 slices

A soft, dense chocolate-style cake made from blended apples, eggs, and cocoa powder.


Ingredients

  • 4 medium apples (such as Gala, Fuji, or Red Delicious), peeled and cored

  • 4 large eggs

  • 5 tablespoons unsweetened cocoa powder

  • 1 teaspoon baking powder

  • Olive oil, for greasing the pan

  • Optional: Pinch of salt


Instructions

1. Prepare the Apples

Peel and core the apples.
Cut them into small chunks so they blend easily.


2. Blend the Base

Place the apple pieces and eggs into a blender or food processor.
Blend until completely smooth and liquid, with no visible apple pieces.


3. Add Dry Ingredients

Add the cocoa powder, baking powder, and salt (if using).
Blend again until the mixture is fully combined and evenly colored.


4. Prepare the Pan and Oven

Preheat your oven to 350°F (180°C).
Lightly grease a silicone mold or line a loaf pan with parchment paper and brush with olive oil.


5. Bake

Pour the batter into the prepared pan.
Bake for 35–40 minutes, or until a toothpick inserted into the center comes out clean.


6. Cool and Set

Let the cake cool in the pan for 20 minutes.
Transfer to the refrigerator and chill for 1 hour before slicing.
This helps the cake firm up and develop its dense texture.


7. Serve

Slice and serve as is, or with an optional topping of melted dark chocolate drizzled over the top.


Helpful Tips

  • Smoother texture: Blend the apples very well to avoid chunks in the batter.

  • Flavor option: Add ½ teaspoon vanilla extract or cinnamon for extra aroma.

  • Pan choice: Silicone or parchment-lined pans release more easily.

  • Storage: Store covered in the refrigerator for up to 3 days.

Classic Creamy Strawberry Smoothie


Classic Creamy Strawberry Smoothie


Ingredients

2 cups Fresh or frozen strawberries (hulled)


1 cup Milk of your choice (dairy, almond, or oat work great)


1/2 cup Plain or vanilla Greek yogurt (for that creamy texture)


1 tablespoon Honey or maple syrup (optional, depending on berry sweetness)


1/2 cup Ice cubes (only if using fresh berries; skip if using frozen)


Fresh mint leaves (optional, for garnish)


Instructions

Prep the Berries: Wash the strawberries and remove the green stems. If they are very large, cut them in half to help the blender along.


Combine: Place the strawberries, milk, yogurt, and sweetener into your blender.


Blend: Start on a low speed and gradually increase to high. Blend for about 45–60 seconds until the mixture is completely smooth and no large fruit chunks remain.


Adjust Consistency: * If it’s too thick, add a splash more milk.


If it’s too thin, add a few more frozen berries or a handful of ice.


Serve: Pour into tall glasses and garnish with a fresh strawberry on the rim or a sprig of mint for that professional look.


Pro Tips for the Best Flavor

Freeze your fruit: Using frozen strawberries gives the smoothie a thicker, “milkshake” consistency without diluting the flavor with ice.


Balance the tang: If your yogurt is very tart, a tiny pinch of salt can actually help bring out the natural sweetness of the strawberries.

Pineapple Cucumber Salad recipe

Pineapple Cucumber Salad recipe

If your salad game needs a refresh, this bright and zesty pineapple cucumber salad is the perfect way to shake things up. Sweet, tangy, and slightly spicy, it’s the kind of dish that disappears from the table faster than you expect.

Ingredients

Serves: 4

For the Salad:

2 cups fresh pineapple, diced

1 large cucumber, thinly sliced (English or Persian cucumbers work best)

½ small red onion, thinly sliced

¼ cup fresh cilantro, chopped

1 small red chili (or jalapeño), finely sliced (optional, for heat)

¼ teaspoon salt (or to taste)

For the Dressing:

2 tablespoons lime juice (freshly squeezed)

1 tablespoon honey or agave syrup

1 tablespoon olive oil

½ teaspoon chili flakes (optional)

Black pepper, to taste

Instructions

Prepare the Ingredients:

In a large mixing bowl, combine pineapple, cucumber, red onion, and chili.

Make the Dressing:

In a small bowl, whisk together lime juice, honey, olive oil, salt, and pepper.

Combine:

Pour the dressing over the pineapple mixture and toss gently to coat everything evenly.

Add Fresh Herbs:

Sprinkle in chopped cilantro and toss again lightly.

Chill & Serve:

Refrigerate for at least 15–20 minutes to let the flavors meld. Serve col

d as a side or light snack.