High-Protein Blueberry Muffins (Easy & Healthy)
Description
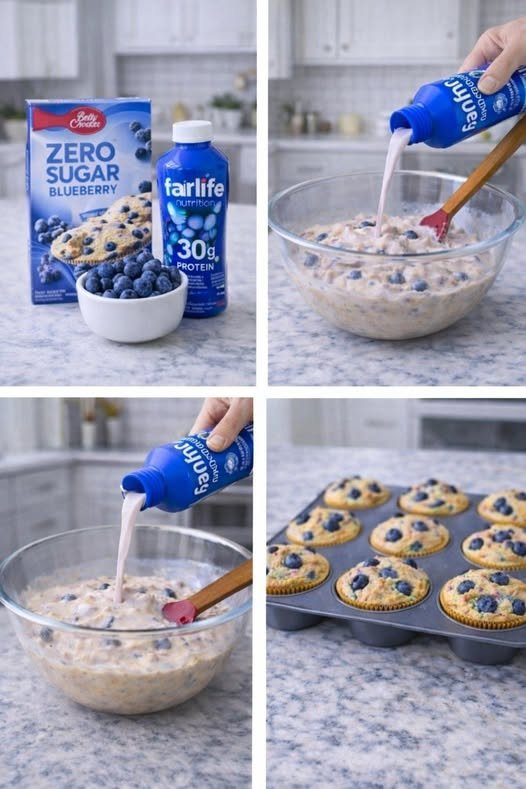
These High-Protein Blueberry Muffins are soft, fluffy, and packed with juicy blueberries in every bite. Made with a zero-sugar mix and protein-rich milk, they’re a healthier twist on classic muffins—perfect for breakfast, snacks, or post-workout fuel. Quick to make and absolutely delicious!
Ingredients
Main Ingredients
-
1 box zero sugar blueberry muffin mix
-
1 bottle (11–14 oz) protein milk (like Fairlife)
-
1 cup fresh blueberries
Optional Add-Ins
-
1 egg (for extra fluffiness)
-
1 tsp vanilla extract
-
1 tbsp melted butter or oil
Instructions
1. Preheat Oven
Preheat oven to 375°F (190°C) and line a muffin tin with liners or grease it.
2. Mix Ingredients
In a bowl, combine:
-
Muffin mix
-
Protein milk
-
Blueberries
Mix until just combined (don’t overmix).
3. Fill Muffin Tin
Pour batter evenly into muffin cups (about 3/4 full).
4. Bake
Bake for 15–20 minutes or until a toothpick comes out clean.
5. Cool & Serve
Let muffins cool for 5–10 minutes before serving.
Servings
Makes: 10–12 muffins
Nutritional Information (Approx per muffin)
| Nutrient | Amount |
|---|---|
| Calories | 120–150 kcal |
| Protein | 6–10 g |
| Carbohydrates | 18 g |
| Fat | 3 g |
| Sugar | Low / Reduced |
(Depends on mix and milk used.)
Recipe Notes
-
Zero sugar mix keeps this recipe lighter and healthier.
-
Protein milk boosts nutritional value without changing taste.
-
Fresh blueberries give the best texture and flavor.
Tips for Best Results
 Don’t overmix batter to keep muffins fluffy Toss blueberries in a little flour to prevent sinking Add extra blueberries on top before baking for a bakery look Let muffins cool to set properly
Health Benefits
 Blueberries – Rich in antioxidants and support brain health
 Protein Milk – Helps build muscle and keeps you full longer
 Lower Sugar – Great for healthier lifestyle choices
 Energy Boost – Perfect breakfast or snack option
Q & A
Q1: Can I use regular milk instead?
Yes, but protein content will be lower.
Q2: Can I use frozen blueberries?
Yes, just don’t thaw them before mixing.
Q3: How do I store muffins?
Store in an airtight container for 2–3 days at room temperature.
Q4: Can I freeze these muffins?
Yes, freeze for up to 2 months.
Q5: Can I make this gluten-free?
Use a gluten-free muffin mix.
Serving Suggestions
Serve with:
-
Greek yogurt
-
Coffee or tea

-
Honey drizzle or butter
-
Fresh fruit on the side
 Summary:
High-Protein Blueberry Muffins are a quick, healthy, and delicious treat made with simple ingredients. Perfect for busy mornings or a guilt-free snack!

 Crockpot Ravioli Lasagna
 Description
 Ingredients For Crockpot Ravioli Lasagna
 Instructions
 Cook the Meat
 Layer in the Crockpot
 Slow Cook
 Serve
Serve Servings
 Notes
Notes Tips for Best Results
 Nutritional Information (Approximate per serving – based on 8 servings)
 Benefits of This Recipe
 Q & A
Q & A


 Does NOT detox organs


 Instructions