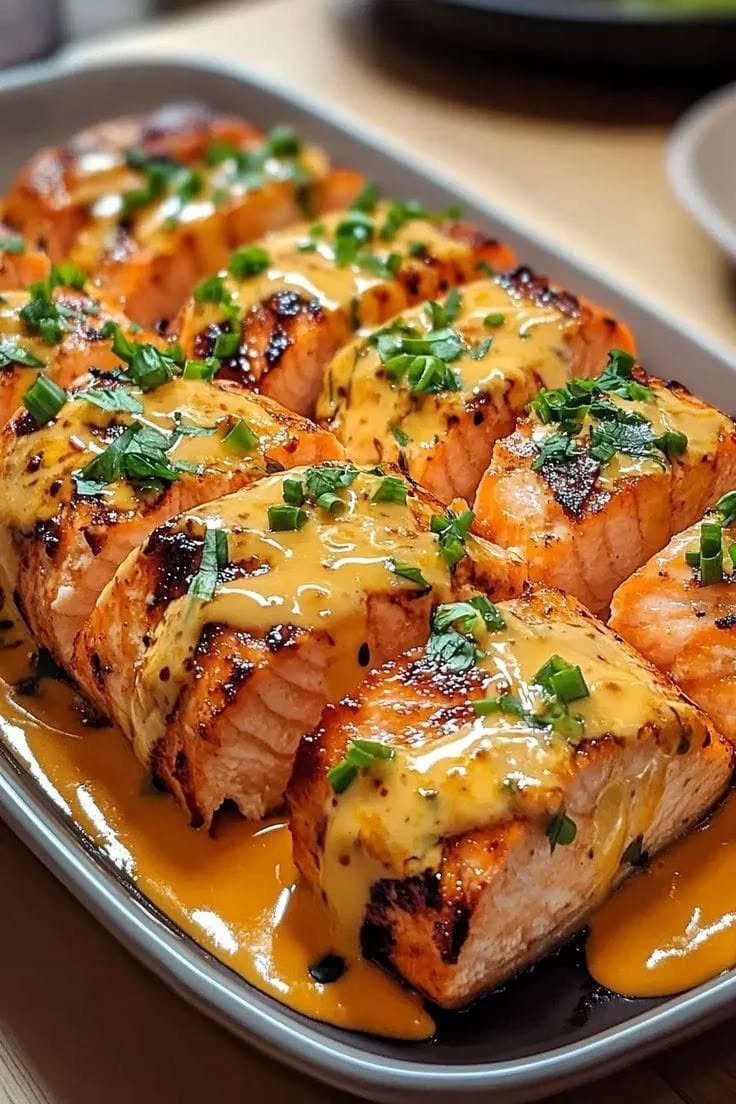
Bang Bang Salmon Made Perfect in Just 15 Minutes
Total Time: 15 minutes (5 minutes prep | 10 minutes cook)
Servings: 4
If you love meals that are quick, flavorful, and just a little indulgent, Bang Bang Salmon will become your new weeknight favorite. This dish takes tender, flaky salmon fillets and coats them in a creamy, sweet, and spicy Bang Bang sauce that’s downright addictive. Best of all, the whole recipe comes together in just 15 minutes—from pan to plate—making it perfect for busy days when you want something that feels special but requires almost no effort.
Ingredients
For the Salmon:
4 salmon fillets (about 6 oz each)
1 tablespoon olive oil
Salt and black pepper, to taste
½ teaspoon paprika
½ teaspoon garlic powder
For the Bang Bang Sauce:
⅓ cup mayonnaise
3 tablespoons sweet chili sauce
1–2 teaspoons sriracha sauce (adjust to taste)
1 teaspoon honey
Optional Garnish:
Green onions, thinly sliced
Sesame seeds
Instructions
Prep the Salmon
Start by patting the salmon fillets dry with paper towels. Removing excess moisture helps achieve a crisp, golden exterior. Season both sides with salt, black pepper, paprika, and garlic powder.
Heat the Pan
In a large skillet, heat olive oil over medium-high heat. Once hot, place the salmon fillets skin-side down (if they have skin) and cook for 4–5 minutes, undisturbed, until the skin crisps and the edges start to turn opaque.
Flip and Finish
Carefully flip the fillets using a spatula and cook for another 3–4 minutes, depending on thickness. The salmon should flake easily with a fork but remain slightly pink and juicy inside. Avoid overcooking—it continues to cook slightly after removing from heat.
Alternatively, you can bake the salmon at 400°F (200°C) for 10–12 minutes, or air-fry it for about 8–9 minutes for a lighter texture.
Make the Bang Bang Sauce
While the salmon cooks, whisk together mayonnaise, sweet chili sauce, sriracha, and honey in a small bowl. Taste and adjust the spice level to your liking—add more sriracha for heat or extra honey for balance.
Combine
Once the salmon is cooked, drizzle or brush the Bang Bang sauce generously over the top while the fillets are still warm. This helps the sauce melt slightly and coat the surface evenly.
Garnish and Serve
Top the salmon with sliced green onions and sesame seeds for a touch of freshness and crunch. Serve immediately with your favorite sides—steamed jasmine rice, couscous, roasted broccoli, or a crisp salad all work beautifully.
Tips
Choose quality salmon: Fresh or frozen (and thawed) wild-caught salmon gives the best flavor and texture. If using frozen, pat dry thoroughly after thawing to remove moisture.
Don’t move the salmon too soon: Let it cook undisturbed for the first few minutes to develop that crisp sear.
Check doneness: Salmon is perfectly cooked when it reaches an internal temperature of 125–130°F (52–54°C) for medium and flakes easily with a fork.
Control the heat: If the pan gets too hot, reduce the heat slightly—olive oil can burn easily, and you don’t want a bitter taste.
Sauce timing: Always add the sauce after cooking. Adding it too early can cause the sugars to burn.
Variations:
Greek-Inspired: Swap mayonnaise for Greek yogurt and add a squeeze of lemon juice for a tangier, lighter sauce.
Extra Spicy: Stir in crushed red pepper flakes or a dash of harissa paste for a bolder Mediterranean heat.
Citrus Twist: Add orange or lime zest to the sauce for brightness and depth.
Garlic Lovers’ Version: Mix a bit of minced garlic or roasted garlic paste into the sauce for extra punch.
Baked Version: For a hands-off approach, brush the sauce on before baking and let it caramelize slightly in the oven.
Asian-Mediterranean Fusion: Add a touch of soy sauce or sesame oil to the sauce and serve over rice noodles or jasmine rice.
Serving Ideas:
Over Grains: Serve on top of a bowl of quinoa, bulgur, or couscous, and drizzle any extra sauce over it.
With Vegetables: Pair with roasted asparagus, zucchini, or a Mediterranean salad with olives and cherry tomatoes.
As Tacos or Wraps: Flake the cooked salmon and serve in pita wraps or lettuce cups with fresh cucumber and extra sauce.
For Brunch: Place on avocado toast with a fried egg and a drizzle of sauce for a gourmet twist.
Q&A
Q: Can I make this recipe ahead of time?
A: You can prep the sauce in advance—it keeps well in the fridge for up to 5 days. Cook the salmon fresh, as reheating can dry it out.
Q: What can I substitute for mayonnaise?
A: Greek yogurt is a great substitute if you want a lighter version. You can also use half yogurt and half mayo for a creamy but tangy balance.
Q: Is it possible to grill the salmon?
A: Absolutely. Brush the salmon with olive oil and seasonings, then grill for about 3–4 minutes per side. Add the Bang Bang sauce after removing it from the grill to avoid burning.
Q: Can I use another fish?
A: Yes, this recipe works beautifully with cod, halibut, or even shrimp. Adjust the cooking time depending on thickness.
Q: How spicy is this dish?
A: It’s mild to medium heat as written. You control the spice level by adjusting the amount of sriracha—start with one teaspoon and increase gradually.
Q: What sides go best with Bang Bang Salmon?
A: Mediterranean-style sides like lemon couscous, roasted potatoes, or a cucumber salad balance the richness of the sauce perfectly.
Nutrition
(Per Serving)
Calories: ~410
Protein: 34g
Fat: 26g
Carbohydrates: 8g
Sugar: 6g
Fiber: <1g
Sodium: ~420mg
(Nutrition may vary depending on the amount of sauce used and the size of the fillets.)
Conclusion
In just 15 minutes, Bang Bang Salmon gives you a restaurant-quality meal bursting with flavor, texture, and color. The combination of crispy salmon and creamy, spicy-sweet sauce creates a perfect harmony that feels indulgent yet fresh. It’s the kind of dish that satisfies both your craving for comfort food and your desire to eat something balanced and wholesome.


 Strawberry Cheesecake Dump Cake
 Description
 Ingredients (Only 5!)
 Instructions
 Serving Ideas
 Q & A
Q & A
 Hydration before sleep
 May aid digestion (mint & ginger)
 Vitamin C from lemon
 Relaxing bedtime ritual
 Important:
 No. Never replace prescribed treatment with home remedies.


 Servings & Timing:
 Dietary Badges:
 One-Pot
 Dairy-Based
 Comfort Food
 High Protein
 Ingredients Checklist:
 Instructions:
 Additional Notes:
 Hero Image & Quick Intro:
 Ingredient Details & Swaps:
 Ingredient Substitutions:
 Variations & Serving Suggestions:
 Storage & Make-Ahead Info:
 Nutrition Info (Per Serving – Approximate)
 Story Behind the Recipe:
 Join the Conversation!
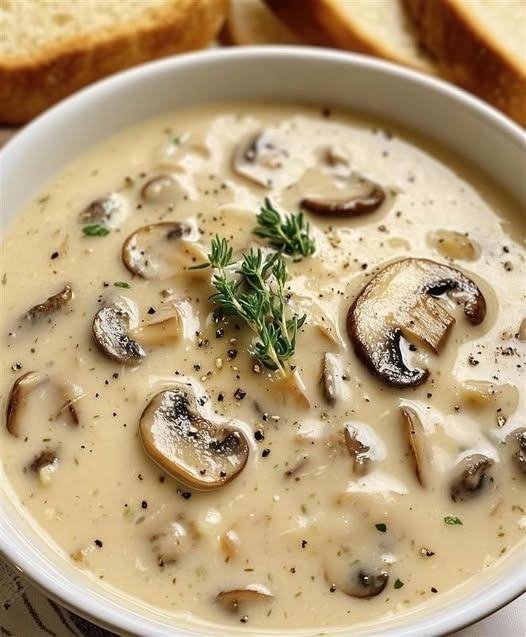
 Tag me on social media with your soup pics—I love seeing your cozy creations!