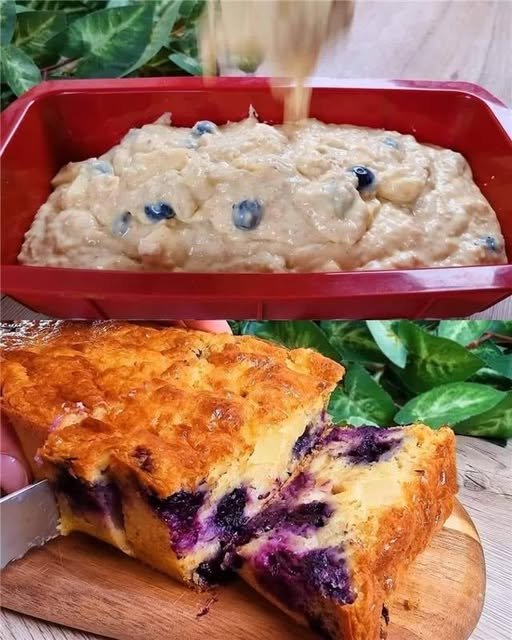
Keto Blueberry Lemon Bread
A moist, zesty, and low-carb loaf that feels like a cheat meal but fits perfectly into a ketogenic lifestyle.
-
Prep time: 15 minutes
-
Bake time: 50–60 minutes
-
Servings: 12 slices
-
Net Carbs: 6g per slice
Ingredients
The Dry Base:
-
2 cups Finely ground almond flour
-
¼ cup Coconut flour
-
½ cup Erythritol or monk fruit sweetener
-
1 tsp Baking powder
-
½ tsp Baking soda
-
¼ tsp Salt
The Wet Mix:
-
3 Large eggs (room temperature)
-
½ cup Unsweetened almond milk
-
¼ cup Fresh lemon juice
-
2 tbsp Fresh lemon zest
-
1 tsp Pure vanilla extract
-
¼ cup Coconut oil or butter, melted and cooled
The Star:
-
½ cup Fresh blueberries
Instructions
-
Prep the Station: Preheat your oven to 350°F (175°C). Line a standard loaf pan with parchment paper (letting the edges hang over for easy removal) or grease it well.
-
Sift and Whisk Dry: In a large bowl, whisk together the almond flour, coconut flour, sweetener, baking powder, baking soda, and salt. Ensure there are no clumps, especially with the coconut flour.
-
Combine Wet: In a separate medium bowl, whisk the eggs, almond milk, lemon juice, lemon zest, and vanilla until fully incorporated.
-
Fold and Incorporate: Pour the wet ingredients into the dry. Stir gently until just combined. Fold in the melted coconut oil (or butter).
-
Add Blueberries: Gently fold in the fresh blueberries. Chef’s Tip: Tossing the berries in a teaspoon of almond flour before adding them can help prevent them from sinking to the bottom of the loaf!
-
The Bake: Pour the batter into the prepared pan and smooth the top. Bake for 50–60 minutes. At the 45-minute mark, check if the top is browning too quickly; if so, tent it loosely with foil. The bread is done when a toothpick comes out clean.
-
Cooling is Key: Let the bread cool in the pan for 10 minutes, then lift it out onto a wire rack. For the best texture, wait until it is completely cool before slicing—keto breads can be fragile while warm!
Quick Nutrition Profile (Per Slice)
-
Calories: 150
-
Net Carbs: 6g (10g Total – 4g Fiber)
-
Fat: 12g
-
Protein: 5g
-
WW SmartPoints: 5
Storage Tip
Because of the moisture from the blueberries and almond flour, this bread stays freshest in the refrigerator for up to 5 days. It also freezes beautifully—just slice it before freezing so you can grab a single piece whenever the craving hits.