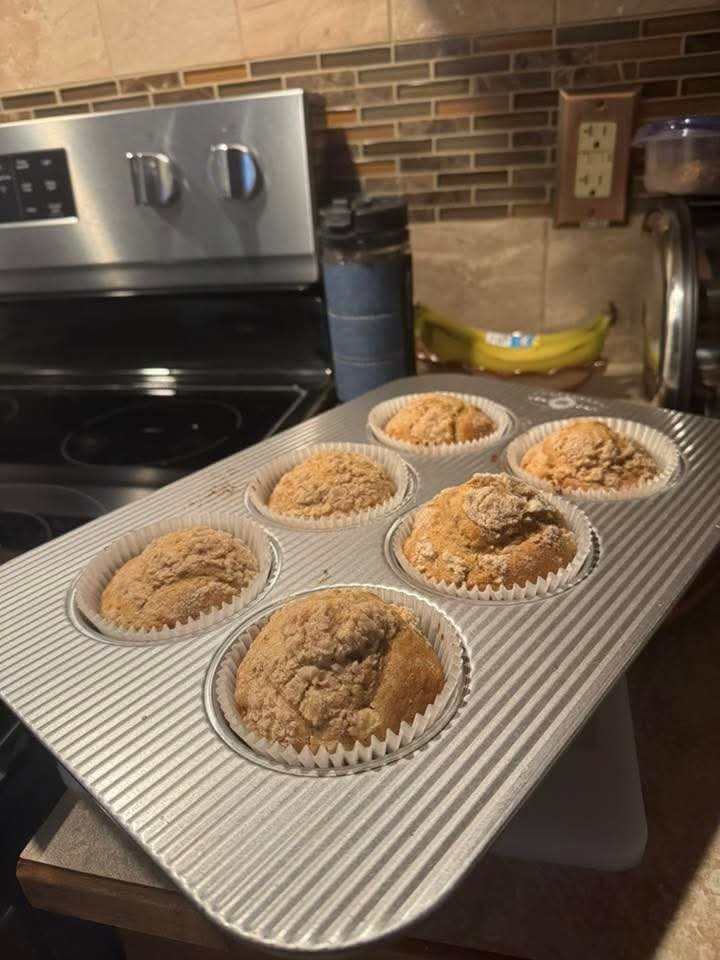
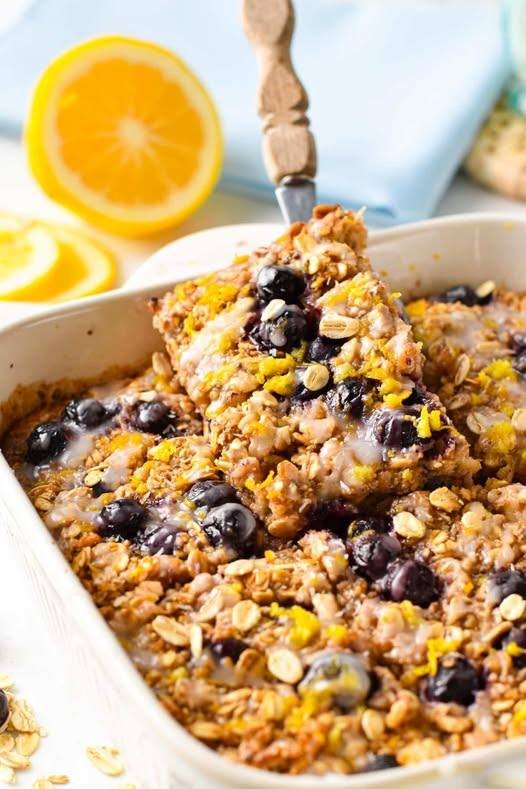
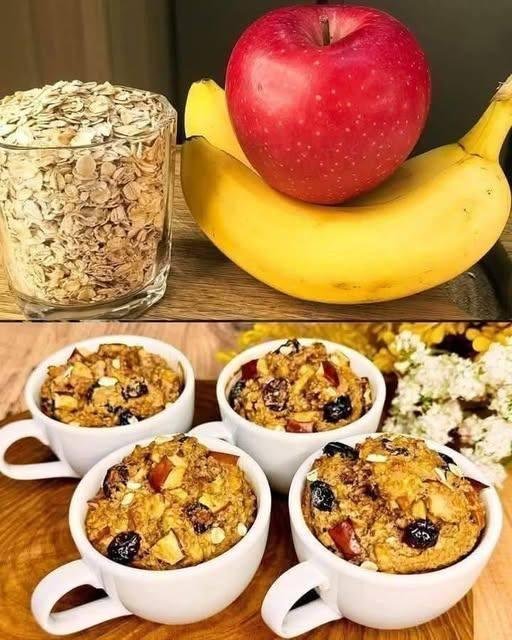
Easy Recipes
Garlic Parmesan Roasted Potatoes

Garlic Parmesan Roasted Potatoes
Description
Garlic Parmesan Roasted Potatoes are crispy on the outside, fluffy on the inside, and packed with savory flavor. Roasted to golden perfection with olive oil, fresh garlic, and herbs, then finished with nutty Parmesan cheese, this dish makes an irresistible side for almost any meal—from weeknight dinners to holiday spreads.
Prep & Cook Time
-
Prep Time: 10 minutes
-
Cook Time: 35–40 minutes
-
Total Time: 45–50 minutes
Servings
4 servings
Ingredients
-
2 lbs (900 g) baby potatoes or Yukon Gold potatoes, halved
-
3 tbsp olive oil
-
4 cloves garlic, minced
-
½ tsp salt (adjust to taste)
-
½ tsp black pepper
-
1 tsp Italian seasoning (or dried rosemary & thyme)
-
½ tsp paprika (optional, for extra flavor)
-
½ cup freshly grated Parmesan cheese
-
2 tbsp fresh parsley, finely chopped (optional garnish)
Instructions
-
Preheat oven to 400°F (200°C). Line a baking sheet with parchment paper or lightly grease it.
-
Prepare potatoes: Wash and dry the potatoes thoroughly. Cut them into even halves for uniform cooking.
-
Season: In a large bowl, toss potatoes with olive oil, minced garlic, salt, pepper, Italian seasoning, and paprika until evenly coated.
-
Roast: Spread potatoes cut-side down in a single layer on the baking sheet.
-
Bake: Roast for 30–35 minutes, flipping once halfway, until golden brown and fork-tender.
-
Add Parmesan: Remove from oven, sprinkle Parmesan cheese evenly over the potatoes, and return to the oven for 5 more minutes until melted and lightly crisp.
-
Garnish & serve: Sprinkle with fresh parsley and serve hot.
Recipe Notes
-
Freshly grated Parmesan melts better and tastes richer than pre-shredded cheese.
-
Baby potatoes give the crispiest results, but any waxy potato works well.
-
For extra crispiness, soak potatoes in cold water for 20 minutes, then dry thoroughly before roasting.
Tips for Best Results
-
Don’t overcrowd the pan – space allows browning instead of steaming.
-
Cut-side down roasting helps achieve a crispy texture.
-
Add cheese near the end to prevent burning.
-
Use a hot oven (400°F or higher) for maximum crisp.
Nutritional Information (Per Serving – Approximate)
-
Calories: 260 kcal
-
Carbohydrates: 32 g
-
Protein: 7 g
-
Fat: 12 g
-
Saturated Fat: 3 g
-
Fiber: 4 g
-
Sodium: 420 mg
-
Calcium: 150 mg
Health Benefits
-
Potatoes provide potassium, vitamin C, and fiber for digestion and heart health.
-
Garlic supports immune function and has anti-inflammatory properties.
-
Olive oil contains healthy monounsaturated fats.
-
Parmesan cheese adds calcium and protein for bone strength.
Q & A
Q: Can I make this recipe vegan?
A: Yes! Replace Parmesan with nutritional yeast or a dairy-free cheese alternative.
Q: Can I air-fry these potatoes?
A: Absolutely. Cook at 380°F (190°C) for 18–22 minutes, shaking halfway.
Q: Can I prepare these ahead of time?
A: You can parboil and season the potatoes ahead, then roast fresh for best texture.
Q: What dishes pair well with this recipe?
A: Grilled chicken, steak, baked fish, roasted vegetables, or a fresh green salad.
Q: How do I store leftovers?
A: Store in an airtight container in the refrigerator for up to 3 days. Reheat in the oven or air fryer for crispiness.
Pickled Beets
Ingredients
-10 pounds fresh small beets, stems removed
-2 cups white sugar
-1 tablespoon pickling salt
-1 quart white vinegar
-¼ cup whole cloves
Directions
Step 1: Put enough water in a large stockpot to cover the beets.
Bring to a boil and cook until the beets are soft, which should take about 15 minutes depending on how big they are.
If your beets are big, cut them in half.
Drain the beets, keeping 2 cups of the water, let them cool, and peel them.
Step 2: Boil the jars and lids for at least 10 minutes to make sure they are clean.
Put beets in each jar and a few whole cloves in each jar.
Step 3: Mix the sugar, beet water, vinegar, and pickling salt in a large pot.
Bring quickly to a boil.
Pour the hot brine over the beets in the jars and make sure the lids are on tight.
Step 4: Put a rack in the bottom of a large stockpot and fill it halfway with water.
Bring to a boil over high heat, then use a holder to carefully place the jars in the pot.
Leave a space of 2 inches between each jar.
If you need to, add more boiling water until the level of water is at least 1 inch above the tops of the jars.
Bring the water to a boil, put the lid on the pot, and let it cook for 10 minutes.
🍦 3-Ingredient Mango Sorbet
Prep time: 10 minutes | Freeze time: 4+ hours | Servings: 4
Ingredients
-
3 cups Frozen Mango Chunks: (About 2 large ripe mangoes). Using frozen mango is the secret to getting that thick, “soft-serve” consistency immediately.
-
2 tablespoons Honey or Maple Syrup: Adjust based on how sweet your mangoes are.
-
1 tablespoon Fresh Lime Juice: This cuts through the sweetness and keeps the color bright.
-
Optional: 2–4 tablespoons of warm water or coconut milk (only if needed to help your blender move).
Instructions
-
Prep the Mango: If you are using fresh mangoes, peel and dice them, then freeze the chunks in a single layer on a tray for at least 4 hours. If using store-bought frozen mango, you’re ready to go!
-
Blend: Place the frozen mango, sweetener, and lime juice into a high-speed blender or food processor.
-
Process: Pulse until the mango is broken down. Then, blend on high. You may need to stop and scrape down the sides a few times.
-
Tip: If the blade is spinning but not grabbing the fruit, add 1 tablespoon of water or coconut milk at a time until it creates a smooth swirl.
-
-
Serve or Firm Up: * For soft-serve: Serve immediately right out of the blender.
-
For scoopable sorbet (as pictured): Transfer the mixture into a shallow container (like a loaf pan), smooth the top, and freeze for another 2–3 hours.
-
-
Scoop: Use a warm ice cream scoop to create those perfect round spheres.
Pro-Tips for Success
-
The Mango Matters: Use “Alphonso” or “Honey” (Ataulfo) mangoes if available; they are less fibrous and much creamier than other varieties.
-
Don’t Over-blend: Blending for too long will cause the friction of the blades to melt the sorbet.
-
Easy Scooping: If the sorbet has been in the freezer overnight, let it sit on the counter for 5–10 minutes before scooping so it softens slightly.
Creamy Ice Cream with Condensed Milk
Description
This Creamy Ice Cream with Condensed Milk is a rich, velvety, and easy-to-make frozen dessert that requires no eggs or special machine. It’s made using only a few simple ingredients — condensed milk, whipped cream, and vanilla — resulting in a luscious, smooth texture and melt-in-your-mouth goodness. Perfect for a hot summer day or any time you crave a sweet treat!
Ingredients For Creamy Ice Cream with Condensed Milk
-
2 cups (480 ml) heavy whipping cream, chilled
-
1 can (14 oz / 400 g) sweetened condensed milk
-
1 tsp vanilla extract (or any preferred flavoring)
-
Optional mix-ins: chocolate chips, nuts, caramel, fruit puree, etc.]
Instructions:
-
Whip the Cream:
In a large chilled bowl, beat the heavy cream with an electric mixer on medium-high speed until stiff peaks form (about 3–4 minutes). -
Mix Condensed Milk & Flavoring:
In another bowl, whisk together the condensed milk and vanilla extract (or other flavors like cocoa powder, coffee, or fruit puree). -
Combine:
Gently fold the whipped cream into the condensed milk mixture. Use a spatula to mix carefully — keep the mixture airy for that light, creamy texture. -
Add Mix-ins (Optional):
Fold in chocolate chips, fruit bits, or nuts if desired. -
Freeze:
Pour the mixture into an airtight container, smooth the top, and cover with plastic wrap or a lid.
Freeze for at least 6 hours or overnight until firm. -
Serve:
Scoop and enjoy! For easier scooping, let the ice cream sit at room temperature for 5 minutes before serving.
Notes:
-
Keep your cream very cold before whipping — it helps create better volume and texture.
-
Don’t overmix after combining; it can make the texture dense.
-
You can divide the base into smaller containers and flavor each one differently (chocolate, strawberry, coffee, etc.).
Tips:
-
Add a pinch of salt to balance sweetness.
-
For chocolate ice cream: mix ¼ cup cocoa powder with the condensed milk before folding in the whipped cream.
-
For fruity flavors: swirl in ½ cup fruit puree like mango or strawberry before freezing.
-
Use sweetened condensed milk, not evaporated milk.
Servings:
Makes about 6–8 scoops (4–5 servings).
Nutritional Info (per serving):
| Nutrient | Amount |
|---|---|
| Calories | ~290 kcal |
| Protein | 4 g |
| Fat | 18 g |
| Carbohydrates | 28 g |
| Sugar | 26 g |
| Calcium | 110 mg |
Benefits:
-
Homemade & preservative-free – You control the ingredients.
-
Quick & easy – No machine or eggs required.
-
Customizable – Add your favorite mix-ins or flavorings.
-
Rich in calcium & energy, making it a delicious indulgence.
Q&A:
Q1: Can I make this without heavy cream?
A: You can use chilled whipping cream or non-dairy alternatives like coconut cream, but texture may vary.
Q2: How long does it last?
A: Store in an airtight container in the freezer for up to 2 weeks.
Q3: Can I make it sugar-free?
A: Yes! Use sugar-free condensed milk and unsweetened whipping cream.
Q4: How can I make it extra creamy?
A: Add 1 tbsp of cream cheese or milk powder to the condensed milk before mixing.
Layered Chicken Ranch Salad
Ingredients
-
The Base: 2 large heads of Romaine lettuce, chopped.
-
The Crunch: 1 large English cucumber, diced.
-
The Protein: 3 cups shredded cooked chicken (rotisserie chicken works perfectly).
-
The Toppings: ½ cup shredded cheddar cheese and 2 tablespoons chopped fresh chives or green onions.
-
The Dressing: ½ cup creamy Ranch dressing (plus extra for serving).
Instructions
-
Prepare the Base: In a large rectangular dish (approx. 9×13 inch), lay down a thick, even layer of the chopped Romaine lettuce.
-
Add the Texture: Scatter the diced cucumbers over the lettuce. Focus some around the edges so they are visible through the glass or over the top.
-
Layer the Chicken: Spread the shredded chicken evenly over the center of the salad. If the chicken is cold, you can lightly season it with black pepper beforehand.
-
Add Flavor: Sprinkle the shredded cheddar cheese and chopped chives over the top of the chicken.
-
The Finish: Using a spoon or a squeeze bottle, drizzle the Ranch dressing in vertical lines across the entire dish as seen in the photo.
Tips for the Best Results
-
Keep it Crisp: If you aren’t serving this immediately, wait to add the dressing until right before eating. This prevents the lettuce from wilting.
-
Additions: This base also pairs beautifully with crumbled bacon, halved cherry tomatoes, or sliced avocado.
-
Shortcut: Use a store-bought rotisserie chicken to save time; just shred it while it’s still slightly warm for the best texture.
Cabbage Fritters
Cabbage Fritters
Description
Cabbage fritters are crispy on the outside, soft on the inside, and packed with flavor. Made with finely shredded cabbage, simple spices, and a light batter, these fritters are a budget-friendly, quick snack or side dish. They’re popular across many cuisines and can be shallow-fried, deep-fried, baked, or air-fried.
Prep & Cook Time
-
Prep Time: 15 minutes
-
Cook Time: 15 minutes
-
Total Time: 30 minutes
Servings
-
Serves: 4 people
-
Yield: ~12 fritters
Ingredients
-
2 cups finely shredded cabbage
-
½ cup onion, finely chopped
-
½ cup all-purpose flour (or chickpea flour for gluten-free)
-
2 tbsp cornstarch (optional, for extra crispiness)
-
1 egg (optional; skip for vegan version)
-
1 tsp salt (adjust to taste)
-
½ tsp black pepper
-
½ tsp chili powder or paprika
-
½ tsp cumin powder
-
1 tsp garlic, minced
-
2–3 tbsp water (as needed)
-
Oil for frying
Instructions
-
Prepare the cabbage: Shred cabbage finely and squeeze out excess moisture.
-
Mix ingredients: In a bowl, combine cabbage, onion, flour, cornstarch, spices, garlic, and egg (if using).
-
Make batter: Add water gradually to form a thick, scoopable batter.
-
Heat oil: Heat oil in a pan over medium heat.
-
Fry fritters: Drop spoonfuls of batter into hot oil and flatten slightly.
-
Cook evenly: Fry 2–3 minutes per side until golden brown.
-
Drain & serve: Remove and drain on paper towels. Serve hot.
Notes
-
Squeezing moisture from cabbage is key to crispy fritters.
-
Chickpea flour adds protein and enhances flavor.
-
Egg helps binding but is optional.
Tips for Best Results
-
Don’t overcrowd the pan; fry in batches.
-
Keep oil at medium heat to avoid soggy fritters.
-
Add chopped herbs (cilantro, parsley) for extra freshness.
-
For healthier cooking, air-fry at 180°C (350°F) for 12–15 minutes, flipping halfway.
Nutritional Information (Approx. per serving)
-
Calories: 180 kcal
-
Carbohydrates: 22 g
-
Protein: 4 g
-
Fat: 8 g
-
Fiber: 3 g
-
Sodium: 300 mg
(Values may vary based on oil and ingredients used.)
Health Benefits
-
Rich in fiber: Supports digestion and gut health
-
Low-cost & nutritious: Cabbage is packed with vitamin C and antioxidants
-
Versatile diet-friendly: Can be made vegan or gluten-free
-
Good for weight management: Filling and low-calorie when baked or air-fried
Q & A
Q: Can I make cabbage fritters without egg?
A: Yes. Use chickpea flour or add 1 tbsp flaxseed meal mixed with water.
Q: Why are my fritters soggy?
A: Excess moisture in cabbage or oil not hot enough.
Q: Can I store leftovers?
A: Yes. Refrigerate for up to 2 days and reheat in an oven or air fryer.
Q: Can I add other vegetables?
A: Absolutely. Carrots, zucchini, or bell peppers work well.
Q: Are cabbage fritters healthy?
A: Yes, especially when baked or air-fried and made with minimal oil.
Nut and Date Bars
Nut and Date Bars
These bars are made from dates, nuts, and seeds. The dates provide binding and mild sweetness, while the nuts and seeds add texture. The mixture is pressed into a pan and chilled until firm before slicing.
Preparation Time
15 minutes
Cooking Time
10 minutes
Chilling Time
1 hour
Total Time
Approximately 1 hour 25 minutes
Yield
About 10–12 bars (depending on size)
Ingredients
-
150 g dates, pitted and soaked in cold water for 15 minutes
-
70 g cashews
-
70 g walnuts
-
70 g almonds
-
70 g hazelnuts
-
70 g pumpkin seeds
-
40 g pine nuts
Instructions
1. Prepare the Dates
Drain the soaked dates thoroughly.
Place them in a blender or food processor and blend until a thick, smooth paste forms. Set aside.
2. Toast the Nuts and Seeds
Place the cashews, walnuts, almonds, hazelnuts, pumpkin seeds, and pine nuts into a large dry skillet.
Heat over medium heat and toast for 5–8 minutes, stirring frequently to prevent burning, until lightly browned and aromatic.
Remove from the heat and allow to cool slightly. If desired, roughly chop the larger nuts for a more even texture.
3. Combine the Mixture
Transfer the toasted nuts and seeds to a large mixing bowl.
Add the date paste and mix thoroughly using a sturdy spatula or lightly oiled hands until all components are evenly combined.
4. Press Into a Pan
Line a small rectangular pan or loaf tin with parchment paper, leaving excess paper over the edges for easy removal.
Transfer the mixture into the pan and press it down firmly using the back of a spoon or a flat-bottomed glass to create a compact, even layer.
5. Chill and Slice
Place the pan in the refrigerator for at least 1 hour, or until the mixture is firm.
Once set, lift the mixture out using the parchment paper and place it on a cutting board.
Slice into bars or squares using a sharp knife.
Storage Notes
-
Store the bars in an airtight container in the refrigerator for up to 2 weeks.
-
For longer storage, they may be frozen for up to 3 months and thawed as needed.
Lemon Crinkle Biscuits
These lemon-flavored biscuits have a soft interior and a lightly crisp exterior. They are coated in powdered sugar before baking, which creates a cracked surface as they expand in the oven.
Preparation Time
15 minutes
Chilling Time (Optional)
30 minutes
Baking Time
12–15 minutes
Yield
Approximately 20–24 biscuits
Ingredients
Biscuit Dough
-
2 large eggs, at room temperature
-
100 g granulated sugar
-
80 ml neutral vegetable oil (such as sunflower oil)
-
Zest of 1 lemon, finely grated
-
50 ml freshly squeezed lemon juice
-
380 g all-purpose flour, sifted
-
12 g baking powder
-
A small pinch of salt
Coating
-
80 g powdered sugar, for rolling
Instructions
1. Mix the Wet Ingredients
Place the eggs and granulated sugar in a large mixing bowl. Whisk until the mixture becomes pale and slightly thickened.
Add the oil, lemon juice, and lemon zest. Whisk again until fully combined.
2. Combine the Dry Ingredients
In a separate bowl, mix the flour, baking powder, and salt until evenly distributed.
3. Form the Dough
Gradually add the dry ingredients to the wet mixture. Stir with a spatula or wooden spoon until a soft, slightly sticky dough forms.
If the dough is difficult to handle, cover the bowl and refrigerate for 30 minutes to firm it slightly.
4. Shape and Coat
Preheat the oven to 180°C (350°F). Line a baking tray with parchment paper.
Scoop approximately 1 tablespoon of dough and roll it gently into a ball.
Roll each ball in powdered sugar until fully coated.
Arrange the coated dough balls on the prepared baking tray, leaving space between them.
5. Bake
Bake for 12–15 minutes, or until the biscuits have spread and developed a cracked surface.
The tops should remain light in color, while the bottoms may show slight browning.
Remove from the oven and allow the biscuits to cool on the tray for 5 minutes before transferring to a wire rack.
Storage Notes
-
Store cooled biscuits in an airtight container at room temperature for up to 5 days.
-
The texture remains soft as long as the container is well sealed.
Apple and Cinnamon Oat Breakfast Bake
This baked oat dish combines apples, cinnamon, eggs, milk, and nuts to create a soft, lightly spiced breakfast option that can be served warm or at room temperature.
Preparation Time
15 minutes
Baking Time
30–35 minutes
Servings
4–6
Ingredients
-
1 cup (90 g) rolled oats or quick oats
-
240 ml milk (dairy or unsweetened plant-based milk)
-
3 medium apples (about 400 g), peeled and cored
-
2 large eggs
-
30 g butter, divided
-
1 teaspoon ground cinnamon
-
1 teaspoon vanilla extract or a small pinch of vanillin
-
1 cup (100 g) chopped nuts (walnuts, almonds, or pecans)
-
½ cup (75 g) blueberries (optional)
-
A small pinch of salt
Instructions
1. Soak the Oats
Place the oats in a mixing bowl and pour in the milk. Stir until evenly combined.
Allow the mixture to rest for 10 minutes so the oats absorb the liquid and soften.
2. Prepare the Apples
Cut the peeled and cored apples into small pieces.
Transfer them to a blender or food processor and pulse until a thick, slightly textured puree forms. Do not overblend; a small amount of texture is desirable.
3. Mix the Batter
Melt 1 tablespoon of the butter and allow it to cool slightly.
Add the apple puree, eggs, vanilla extract, cinnamon, salt, and melted butter to the soaked oats.
Stir until all ingredients are evenly incorporated.
4. Add Nuts and Fruit
Fold in the chopped nuts and blueberries, if using. Mix gently to distribute them evenly throughout the batter.
5. Prepare the Baking Dish
Preheat the oven to 180°C (350°F).
Use the remaining 1 tablespoon of butter to grease a medium-sized baking dish.
Pour the batter into the prepared dish and smooth the surface.
6. Bake
Bake for 30–35 minutes, or until the center is set and the top is lightly browned.
Remove from the oven and allow to rest for 5–10 minutes before serving.
Helpful Notes
-
For a smoother texture, the apples can be grated instead of blended.
-
The bake firms up as it cools, making it easier to slice.
-
Store leftovers in an airtight container in the refrigerator for up to 3 days.
Orange Oat Muffins
Orange Oat Muffins
These muffins are made with oats, fresh orange juice, and eggs, resulting in a moist and lightly citrus-flavored baked product. They are suitable for breakfast or as a small snack.
Preparation Time
10 minutes
Baking Time
20–25 minutes
Yield
6–8 muffins
Ingredients
-
1 large orange (zest and juice)
-
1½ cups (120 g) oat flakes (quick oats or rolled oats)
-
1 cup (240 ml) water or unsweetened plant-based milk
-
2 large eggs
-
1 teaspoon baking powder
-
1 teaspoon vanilla extract (optional)
-
A small pinch of salt
Optional Add-ins
-
Raisins
-
Chopped nuts
Instructions
1. Prepare the Orange
Wash the orange thoroughly. Finely grate approximately 1 tablespoon of the outer zest, avoiding the white pith underneath.
Cut the orange in half and squeeze out the juice. Remove any seeds.
2. Soak the Oats
Place the oat flakes in a large mixing bowl.
Add the freshly squeezed orange juice and the water (or plant-based milk).
Stir well and let the mixture rest for 10 minutes, allowing the oats to absorb liquid and soften.
3. Mix the Batter
Add the eggs, orange zest, baking powder, vanilla extract (if using), and salt to the soaked oats.
Stir until the eggs are fully incorporated and the batter is evenly mixed.
If using raisins or nuts, fold them in gently at this stage.
4. Prepare the Muffin Pan
Preheat the oven to 180°C (350°F).
Line a muffin tin with paper or silicone liners, or lightly grease the cups.
Divide the batter evenly among the muffin cups, filling them almost to the top.
5. Bake
Place the muffin tin in the preheated oven and bake for 20–25 minutes, or until the tops are set and lightly colored.
Allow the muffins to cool in the pan for a few minutes before transferring them to a wire rack.
Helpful Notes
-
For a finer texture, the oats can be blended briefly before soaking.
-
The flavor depends on the natural sweetness of the orange used.
-
Store baked muffins in an airtight container in the refrigerator for up to 3 days.
Chocolate Oat Banana Cake
This baked chocolate oat cake uses oats, bananas, eggs, and cocoa powder to create a soft, moist texture without refined sugar. The natural sweetness comes from ripe bananas, while the oats provide structure and body.
Preparation Time
10 minutes
Soaking Time
15 minutes
Baking Time
35–40 minutes
Yield
1 small cake (8–10 slices, depending on size)
Ingredients
-
120 g oat flakes (about ¾ cup + 1 tablespoon)
-
200 ml hot milk (dairy milk or unsweetened plant-based milk such as almond or oat)
-
2 large eggs
-
2 ripe bananas, mashed
-
40 g unsweetened cocoa powder (approximately 3–4 tablespoons)
-
1 teaspoon baking powder
-
A small pinch of salt
Optional Toppings
-
Chopped walnuts
-
Melted dark chocolate (70% cocoa or higher)
Instructions
1. Soak the Oats
Place the oat flakes in a large heat-resistant bowl. Pour the hot milk over the oats and stir well.
Allow the mixture to rest for 15 minutes, stirring once or twice. This step softens the oats and helps create a smoother cake texture after baking.
2. Prepare the Banana and Egg Mixture
In a separate bowl, mash the bananas thoroughly using a fork until mostly smooth.
Add the eggs and whisk until the mixture is fully combined and slightly frothy.
3. Combine the Batter
Add the soaked oats (including any remaining liquid) to the banana and egg mixture.
Sift in the cocoa powder and baking powder, then add the salt.
Mix gently but thoroughly with a spatula until the batter is evenly blended and has a uniform chocolate color. Avoid overmixing.
4. Prepare the Baking Dish
Preheat the oven to 180°C (350°F).
Line a small square or rectangular baking dish with parchment paper, or lightly grease it with a small amount of oil.
5. Bake
Pour the batter into the prepared dish and spread it evenly.
If using toppings, sprinkle chopped walnuts or small pieces of dark chocolate over the surface.
Bake for 35–40 minutes, or until the center is set and a toothpick inserted into the middle comes out mostly clean with a few moist crumbs.
6. Cool and Finish
Remove the cake from the oven and allow it to cool completely in the pan.
If desired, drizzle melted dark chocolate over the cooled cake before slicing.
Helpful Notes
-
The sweetness of this cake depends on the ripeness of the bananas; bananas with brown spots provide the best flavor.
-
For a finer texture, the soaked oats can be blended briefly before mixing with the other ingredients.
-
Store leftovers in an airtight container in the refrigerator for up to 3 days.
Stuffed Phyllo Cups with Spinach, Feta & Sundried Tomatoes
Ingredients
Table of Contents
-
phyllo pastry cups—12 to 15 cups
-
spinach—2 cups (finely chopped or frozen thawed, squeezed dry)
-
feta cheese — ¾ cup (crumbled)
-
sun-dried tomatoes—¼ cup (finely chopped)
-
olive oil—1 tbsp
-
garlic—2 cloves (minced)
-
cream cheese—3 tbsp (optional but recommended)
-
mozzarella cheese—2 tbsp (optional for extra creaminess)
-
black pepper—½ tsp
-
oregano—½ tsp
-
red chili flakes—¼ tsp (optional)
-
salt — to taste (use lightly; feta is already salty)
Instructions
-
Preheat oven to 180°C (350°F). Place Oven to warm.
-
Heat olive oil in a pan. Add minced garlic and sauté for 20–30 seconds until fragrant.
-
Add chopped spinach and cook 1–2 minutes until softened.
-
Lower the flame and mix in:
-
feta cheese
-
sun-dried tomatoes
-
cream cheese (optional)
-
mozzarella cheese (optional)
-
black pepper
-
oregano
-
red chili flakes (optional)
-
-
Stir until creamy and well combined. Remove from heat.
-
Spoon the spinach mixture into phyllo pastry cups.
-
Bake for 8–10 minutes until the filling is warm and the cups are crisp.
-
Serve immediately.
✨ Optional Garnish
-
fresh basil, chopped
-
walnuts crushed
❓ Q&A
Q: Can I make these ahead of time?
A: Yes. Prepare the filling, store it in the fridge, and fill + bake right before serving.
Q: What if I don’t have sun-dried tomatoes?
A: Replace with chopped roasted red peppers or regular tomatoes sautéed until thick.
Q: Can I skip cream cheese?
A: Yes, but the filling will be less creamy. You can add a spoon of yogurt instead.
Butter Cookies Recipe
Ingredients
- 1 cup 225 g unsalted butter, softened
- ¾ cup 150 g granulated sugar
- 1 large egg
- 1 teaspoon vanilla extract
- 2 cups 250 g all-purpose flour
- ¼ teaspoon salt
- Optional: 2–3 tablespoons powdered sugar for dusting
Instructions
-
Preheat oven to 180 °C (350 °F).
-
Line a baking sheet with parchment paper.
-
Cream the butter and sugar
-
In a bowl, beat the softened butter and granulated sugar until smooth and fluffy.
-
Add egg and vanilla
-
Mix in the egg and vanilla extract until fully combined.
-
Add dry ingredients
-
Gradually add the flour and salt. Mix until the dough comes together (don’t overmix).
-
Shape the cookies
-
Roll the dough into small balls (about 1 inch / 2.5 cm).
-
Place them on the baking sheet and gently flatten with a fork or the palm of your hand.
-
Bake
-
Bake for 10–12 minutes, or until the edges are lightly golden.
-
Cool & finish
-
Let the cookies cool on the tray for 5 minutes, then transfer to a wire rack.
-
Dust with powdered sugar if desired.
Berry Yogurt Parfait: 5 Best Ways to Elevate Your Breakfast
Introduction
Did you know that people who eat breakfast regularly are 12% less likely to develop nutritional deficiencies? Yet, 31% of Americans report feeling bored with their morning meal options. A berry yogurt parfait isn’t just another breakfast—it’s a nutritional powerhouse that combines protein-rich yogurt with antioxidant-packed berries in a way that can revolutionize your morning routine. Whether you’re looking to break free from breakfast monotony or seeking a healthier start to your day, mastering the art of the perfect berry yogurt parfait can transform how you approach the most important meal of the day.
Ingredients List
To create a standout berry yogurt parfait that delights both your taste buds and nourishes your body, gather these essential ingredients:
- 2 cups Greek yogurt (plain or vanilla)
- 1½ cups mixed berries (strawberries, blueberries, raspberries, blackberries)
- ¼ cup honey or maple syrup
- ½ cup granola (store-bought or homemade)
- 2 tablespoons chia seeds
- 1 tablespoon flaxseed (ground)
- Fresh mint leaves for garnish
Substitution options:
- For dairy-free: Coconut yogurt or almond-based yogurt
- For lower sugar: Stevia or monk fruit sweetener instead of honey
- For gluten-free: Quinoa-based granola or toasted nuts
The vibrant crimson and indigo hues of fresh berries against creamy yogurt create a visual feast that makes this parfait as appealing to the eyes as it is to the palate.
Timing
- Preparation time: 10 minutes
- Assembly time: 5 minutes
- Total time: 15 minutes (60% faster than most hot breakfast options)
This quick preparation time makes berry yogurt parfaits an ideal solution for busy mornings without sacrificing nutrition or flavor.
Step-by-Step Instructions
Step 1: Prepare Your Berries
Rinse all berries thoroughly under cold water. Remove stems from strawberries and slice them into quarters or eighths depending on size. Pat all berries dry gently with a paper towel. For frozen berries, thaw them partially—research shows semi-frozen berries release fewer juices into yogurt, preventing a watery parfait.
Step 2: Sweeten Your Yogurt Base
In a medium bowl, combine Greek yogurt with 2-3 tablespoons of honey or maple syrup, adjusting to your sweetness preference. Studies indicate that adding sweetener directly to the yogurt rather than layering it separately ensures a more balanced flavor profile throughout your parfait.
Step 3: Create Perfect Layers
Begin with a generous dollop of sweetened yogurt at the bottom of your serving glass or bowl (clear containers showcase the beautiful layers). Add a layer of mixed berries, followed by a sprinkle of granola. Repeat layers, ensuring each remains distinct. The ideal ratio is 2:1:1 (yogurt:berries:granola) for optimal texture and flavor balance.
Step 4: Add Nutritional Boosters
Sprinkle chia seeds and ground flaxseed between layers or on top. These superfoods not only add omega-3 fatty acids but also create a delightful textural contrast. For maximum nutrition, add them just before serving to preserve their beneficial properties.
Step 5: Finish With Flair
Top your parfait with a few whole berries, a light drizzle of honey, and a sprig of fresh mint. This final touch elevates your parfait from ordinary to extraordinary, engaging all senses with aromatic mint complementing the sweet-tart berries.
Nutritional Information
A standard serving of berry yogurt parfait (approximately 8 oz) contains:
- Calories: 285
- Protein: 17g
- Carbohydrates: 38g (Fiber: 6g)
- Fat: 9g (Saturated Fat: 3g)
- Calcium: 25% DV
- Vitamin C: 35% DV
- Antioxidants: High (berries contain some of the highest antioxidant levels among common foods)
Research published in the Journal of Nutrition suggests that combining berries with protein-rich yogurt creates a breakfast that stabilizes blood sugar more effectively than grain-based breakfasts.
Healthier Alternatives for the Recipe
Transform your berry yogurt parfait into an even more nutritious powerhouse with these smart modifications:
- Replace conventional granola with a mixture of raw nuts and seeds to reduce added sugars by up to 75%
- Use 2% Greek yogurt instead of whole milk varieties to maintain creaminess while reducing saturated fat content
- Incorporate exotic berries like goji or acai for increased antioxidant diversity
- Sweeten naturally with mashed ripe banana instead of honey for added potassium and fiber
- Add a quarter avocado (thinly sliced) between layers for heart-healthy monounsaturated fats that enhance nutrient absorption
Serving Suggestions
Elevate your berry yogurt parfait experience with these creative serving ideas:
- Serve in chilled cocktail glasses for an elegant brunch presentation
- Create a parfait bar with separate ingredients for family breakfasts, allowing everyone to customize their own
- Pack components separately in a bento-style container for an on-the-go breakfast that stays fresh until assembly
- Pair with a slice of whole-grain toast for additional fiber and a more substantial meal
- For special occasions, serve mini parfaits in shot glasses as a nutritious breakfast appetizer
Common Mistakes to Avoid
Even the simplest recipes have pitfalls. Avoid these common parfait problems:
- Using overly ripe berries (they release too much juice, creating a soggy parfait)
- Adding granola too far in advance (it loses its crunch after about 30 minutes in contact with yogurt)
- Neglecting temperature balance (cold berries directly from the refrigerator can make yogurt too firm)
- Over-sweetening (research shows most people prefer parfaits with subtle sweetness that doesn’t mask berry flavor)
- Improper layering technique (thin, numerous layers create better flavor distribution than a few thick ones)
Storing Tips for the Recipe
Maximize freshness and convenience with these storage strategies:
- Prepare individual components up to 3 days in advance and store separately
- Store sliced berries with a paper towel in the container to absorb excess moisture
- For meal prep, create parfait “kits” with yogurt in the bottom of containers and berries/granola in separate compartments
- Freeze individual portions of berries in small bags for quick assembly
- If storing a fully assembled parfait, limit to 4 hours maximum to preserve textural integrity
Conclusion
The berry yogurt parfait represents the perfect intersection of nutrition, convenience, and culinary delight. By mastering these five elevation techniques—proper layering, thoughtful ingredient selection, nutritional boosting, creative presentation, and smart preparation—you transform a simple breakfast into an extraordinary start to your day. The beauty of this versatile dish lies in its adaptability to your personal taste preferences and nutritional needs. Take these insights and create your signature parfait that nourishes both body and spirit.
FAQs
Can I make berry yogurt parfaits ahead of time for the entire week?
While complete parfaits are best enjoyed fresh, you can prepare components separately up to 3 days in advance. Store yogurt, berries, and granola in separate containers and assemble just before eating to maintain optimal texture.
What’s the best yogurt to use for a creamy, protein-rich parfait?
Greek yogurt offers the highest protein content (17-20g per cup) and creamiest texture. For plant-based options, look for soy or pea-protein based yogurt alternatives with at least 8g protein per serving.
Are frozen berries as nutritious as fresh ones?
Studies show frozen berries often contain more nutrients than fresh ones that have been transported long distances. Flash-freezing preserves berries at peak ripeness, locking in antioxidants and vitamins.
How can I make this parfait more filling for active days?
Increase protein by adding 1-2 tablespoons of nut butter between layers, or incorporate ¼ cup of cottage cheese into your yogurt base. Adding more healthy fats and protein extends satiety by up to 3 hours.
Can children help prepare berry yogurt parfaits?
Absolutely! Parfait assembly is ideal for developing fine motor skills and teaching nutrition basics. Let younger children handle soft berries and layering while adults manage any cutting tasks.
Keto Blueberry Breakfast Quesadilla
A low-carb, sweet breakfast that feels indulgent—without the guilt
If you’re following a keto or low-carb lifestyle but still crave something warm, sweet, and comforting in the morning, this Keto Blueberry Breakfast Quesadilla is about to become your new favorite. It delivers the creamy, fruity satisfaction of a classic breakfast wrap—without the carb overload.
By swapping traditional tortillas for keto-approved alternatives and using naturally low-carb ingredients, this recipe keeps you firmly on track while still feeling like a treat. It’s quick to prepare, requires minimal ingredients, and is packed with protein, healthy fats, fiber, and antioxidants.
Blueberries add just the right burst of natural sweetness, while the creamy filling makes every bite rich and satisfying. Whether you need a fast weekday breakfast, a relaxed weekend brunch, or even a dessert-style snack, this quesadilla checks all the boxes.
🧾 Ingredients
For the Quesadilla
-
2 low-carb/keto tortillas (almond flour or homemade, 6–7 inches)
-
½ cup fresh blueberries
(or frozen, thawed and well-drained) -
3 tablespoons cream cheese, softened
-
1 tablespoon unsweetened Greek yogurt (optional, for extra creaminess)
-
½ teaspoon vanilla extract
-
1 teaspoon powdered erythritol or monk fruit sweetener (adjust to taste)
-
1 teaspoon butter or coconut oil (for cooking)
-
1 teaspoon cinnamon (optional)
-
Pinch of sea salt
Optional Toppings
-
Sugar-free maple syrup
-
Dusting of powdered erythritol
-
Fresh mint leaves
👩🍳 Instructions
1. Prepare the Filling
In a small bowl, mix the softened cream cheese, Greek yogurt (if using), vanilla extract, powdered sweetener, and a pinch of sea salt. Stir until smooth and creamy.
2. Add the Blueberries
Gently fold in the blueberries. If using frozen berries, ensure they are fully thawed and drained to prevent excess moisture.
3. Assemble the Quesadilla
Lay one keto tortilla flat on a clean surface. Spread the cream cheese mixture evenly over the tortilla, leaving about ½ inch around the edges.
4. Layer & Seal
Place the second tortilla on top, pressing gently to seal.
5. Heat the Pan
Heat a non-stick skillet over medium heat. Add butter or coconut oil and let it melt, coating the pan evenly.
6. Cook
Transfer the quesadilla to the skillet. Cook for 2–3 minutes per side, until golden brown and lightly crisp.
7. Slice & Serve
Remove from heat and rest for 1–2 minutes before slicing into four wedges. This helps the filling set slightly.
🧮 Nutrition Information
Per Serving (½ quesadilla)
-
Calories: 210 kcal
-
Protein: 9 g
-
Fat: 15 g
-
Total Carbohydrates: 9 g
-
Dietary Fiber: 5 g
-
Net Carbs: 4 g
🟣 WW SmartPoints (per serving)
-
WW Green: 4
-
WW Blue: 4
-
WW Purple: 4
Low SmartPoints thanks to keto tortillas, sugar-free sweeteners, and optional reduced-fat dairy.
✅ Why This Recipe Works
-
Low-carb & keto-friendly – Keeps net carbs low enough to support ketosis
-
Balanced macros – Healthy fats + protein = long-lasting energy
-
Antioxidant-rich – Blueberries support brain and skin health
-
Comfort food feel – Sweet, warm, and satisfying without the crash
Unlike traditional breakfast wraps that can contain 40–50g of carbs, this version delivers indulgence with control.
💡 Tips for Success
-
Use almond or coconut flour tortillas—avoid standard flour tortillas.
-
Adjust sweetness to your taste with more or less powdered sweetener.
-
Cook over medium heat to prevent burning while warming the filling.
-
Add texture with chia seeds, ground flax, or unsweetened coconut flakes.
-
Make it meal-prep friendly by preparing the filling the night before.
🍽️ Serving Suggestions
Pair your quesadilla with:
-
Scrambled or fried eggs for extra protein
-
A green smoothie (spinach, avocado, almond milk)
-
Chia seed pudding for added fiber
-
Coffee, tea, or a keto latte
🧊 Storage & Reheating
-
Refrigerator: Store in an airtight container for up to 2 days
-
Freezing: Not recommended (cream cheese and berries may separate)
-
Reheating: Warm in a skillet over low heat or bake at 325°F (165°C) for 5–7 minutes
(Avoid microwaving to keep tortillas crisp)
🌱 Health Benefits at a Glance
-
Supports ketosis & weight management
-
Rich in antioxidants
-
High in healthy fats for steady energy
-
Nearly 10g protein per serving
-
Keeps you full and satisfied longer
⭐ Final Thoughts
The Keto Blueberry Breakfast Quesadilla proves that eating low-carb doesn’t mean giving up comfort or flavor. It transforms a classic breakfast favorite into a nutrient-dense, keto-approved dish that feels indulgent yet supports your health goals.
Quick, customizable, and delicious—this recipe deserves a permanent spot in your breakfast rotation.
Creamy Lemon Dream Ice Cream
Ingredients
| Ingredient | Amount | Notes |
| Heavy Cream | 2 cups (480ml) | Cold, for whipping |
| Sweetened Condensed Milk | 1 can (14oz) | Provides the sweetness and silkiness |
| Fresh Lemon Juice | 1/2 cup | About 3–4 large lemons |
| Lemon Zest | 2 tbsp | Finely grated (avoid the white pith) |
| Vanilla Extract | 1 tsp | Enhances the lemon flavor |
| Salt | 1 pinch | Balances the sweetness |
Instructions
-
Zest and Juice: Grate the zest from your lemons first, then juice them. Set aside.
-
Mix the Base: In a large bowl, whisk together the sweetened condensed milk, lemon juice, lemon zest, vanilla, and salt. The acid in the lemon will slightly thicken the condensed milk—this is normal!
-
Whip the Cream: In a separate chilled bowl, whip the heavy cream until stiff peaks form. Be careful not to over-whip into butter.
-
Fold Gently: Take a scoop of the whipped cream and stir it into the lemon mixture to lighten it. Then, gently fold the rest of the whipped cream into the mixture using a spatula. Move in a circular “over-and-under” motion to keep the air in.
-
Freeze: Pour the mixture into a loaf pan or an airtight container. Top with extra lemon slices (as seen in your photo) if desired.
-
Set: Cover with plastic wrap (touching the surface to prevent ice crystals) and freeze for at least 6 hours, or overnight.
Pro Tips for the Best Results
-
Cold Tools: Chill your mixing bowl and beaters in the freezer for 10 minutes before whipping the cream for more volume.
-
The “Zest” Secret: Rub the lemon zest into the condensed milk with your fingers before mixing. This releases the essential oils for a deeper citrus aroma.
-
Serving: Let the container sit on the counter for 3–5 minutes before scooping to get those perfect, smooth swirls shown in your image.
BUFFALO RANCH COTTAGE CHEESE BOWL
You guys… this one’s unreal — creamy, spicy, high-protein, and totally addictive!
Here’s what you need:
½ cup cottage cheese (the creamy, protein-packed base)
½ cup shredded chicken or ground turkey
1 tbsp buffalo sauce (sugar-free if possible)
1 tbsp light ranch or Greek yogurt ranch dressing
¼ cup chopped celery or cucumbers (for crunch)
A sprinkle of shredded cheese
Optional: green onions or a few crushed tortilla chips for topping
Mix everything together in a bowl, or layer it for that buffalo chicken dip meets burrito bowl moment.
Add a squeeze of lemon or extra ranch drizzle if you want it creamier!
Apple Slab Pie
Ingredients
For the crust
- 3 cups 360 g all-purpose flour
- 1 teaspoon salt
- 2 tablespoons granulated sugar
- 1 cup 226 g cold unsalted butter, cubed
- 6 –8 tablespoons ice water
- For the filling
- 6 cups about 6 medium apples, peeled and sliced
- ¾ cup 150 g granulated sugar
- 2 tablespoons brown sugar
- 2 teaspoons ground cinnamon
- ¼ teaspoon ground nutmeg
- 2 tablespoons all-purpose flour
- 1 tablespoon lemon juice
- 1 teaspoon vanilla extract
For the topping
- 1 egg beaten (for egg wash)
- 1 tablespoon coarse sugar optional
Instructions
Prepare the crust
-
In a large bowl, mix flour, salt, and sugar.
-
Add cold butter cubes and cut in until the mixture looks like coarse crumbs.
-
Slowly add ice water, 1 tablespoon at a time, until dough just comes together.
-
Divide dough into two balls, flatten into disks, wrap in plastic, and chill for 30 minutes.
Make the filling
-
In a bowl, combine sliced apples, sugars, cinnamon, nutmeg, flour, lemon juice, and vanilla.
-
Toss until the apples are evenly coated.
Assemble the slab pie
-
Preheat oven to 375°F (190°C).
-
Roll one dough disk into a rectangle large enough to line a 9×13 inch pan.
-
Press dough into the pan, letting excess hang over edges.
-
Pour apple filling into the crust and spread evenly.
-
Roll out the second dough disk and place it on top. Seal edges and crimp.
-
Cut a few slits on top to vent steam.
-
Brush with beaten egg and sprinkle coarse sugar if desired.
🍎🍌 Healthy Oatmeal–Apple Dessert (No Flour, No Sugar)
Naturally sweet • High fiber • Guilt-free
Servings: 6–8 slices
Prep Time: 10 minutes
Bake Time: 30–35 minutes
Ingredients
- 1 cup oatmeal (rolled oats)
- 2 apples, peeled & grated or finely chopped
- 1 banana, mashed (natural sweetener)
- 2 eggs
- ½ cup walnuts (50 g), chopped
Optional (but recommended):
- 1 teaspoon cinnamon
- ½ teaspoon vanilla extract
- Pinch of salt
Instructions
- Preheat oven to 180°C / 350°F. Line or lightly grease a baking dish.
- Blend oats into coarse oat flour or leave whole for more texture.
- Mix wet ingredients: mashed banana, eggs, and apples.
- Stir in oats and chopped walnuts.
- Add cinnamon, vanilla, and salt if using.
- Pour into baking dish and spread evenly.
- Bake 30–35 minutes, until set and lightly golden.
- Let cool slightly before slicing.
How to Serve
- Warm with a spoon of Greek yogurt
- Cold as a snack bar
- With extra apple slices on top
Tips & Variations
- Extra moist: Add 2–3 tablespoons milk or yogurt
- Crunchy top: Sprinkle a few walnuts before baking
- More protein: Add 1–2 tablespoons peanut butter
- Gluten-free: Use certified gluten-free oats
Why This Dessert Is Healthy
No refined sugar
No white flour
Naturally sweet from fruit
Rich in fiber, healthy fats & protein
Healthy No-Sugar Cinnamon Apple Muffins
📝 Description
These healthier Cinnamon Apple Muffins are naturally sweetened with apples and dates, made with wholesome flours, and contain no refined sugar. They’re soft and fluffy with warm cinnamon flavor and a light oat crumb topping—comforting, nourishing, and satisfying.
🧺 Ingredients
Muffins
1 cup whole wheat flour
¾ cup oat flour (or blended oats)
2 tsp baking powder
1½ tsp ground cinnamon
¼ tsp nutmeg (optional)
¼ tsp salt
2 large eggs (room temperature)
½ cup unsweetened applesauce
¼ cup olive oil or melted coconut oil
¼ cup milk (dairy or unsweetened almond milk)
1 tsp vanilla extract
1½ cups finely chopped sweet apples (Honeycrisp or Gala)
¼ cup chopped dates or raisins (optional but recommended for sweetness)
Healthy Crumb Topping (Optional)
¼ cup rolled oats
2 tbsp almond flour (or whole wheat flour)
1 tsp cinnamon
1½ tbsp coconut oil, solid
👩🍳 Instructions
Preheat oven to 375°F (190°C). Line a muffin pan with paper liners.
Prepare crumb topping: Mix oats, almond flour, and cinnamon. Rub in coconut oil until crumbly. Set aside.
Mix dry ingredients: Whisk whole wheat flour, oat flour, baking powder, cinnamon, nutmeg, and salt.
Mix wet ingredients: In another bowl, whisk eggs, applesauce, oil, milk, and vanilla.
Combine: Gently fold wet ingredients into dry until just mixed.
Fold in apples and dates/raisins.
Fill muffin cups nearly to the top.
Sprinkle crumb topping lightly over each muffin.
Bake for 22–25 minutes, until a toothpick comes out clean.
Cool 5 minutes before transferring to a rack.
⭐ Notes
Applesauce replaces sugar and keeps muffins moist
Dates add gentle sweetness without spikes
Oat flour makes the muffins tender and filling
💡 Tips for Best Results
Use very sweet apples for best flavor
Chop apples finely for even sweetness
If you want extra sweetness, add ½ mashed ripe banana
Avoid overmixing to keep muffins fluffy
🍽️ Servings
Makes: 12 muffins
🧾 Nutritional Info (Approx. per muffin)
Calories: ~165
Carbohydrates: 22g
Fat: 7g
Protein: 5g
Fiber: 4g
Added Sugar: 0g
🌿 Health Benefits
No refined sugar or sweeteners
High fiber from oats, apples, and whole wheat
Healthy fats support heart health
Sustained energy without sugar crashes
❓ Q & A
Q: Is this recipe diabetic-friendly?
A: It contains no added sugar, but fruit sugars remain. Use green apples and skip dates for lower glycemic impact.
Q: Can I make it gluten-free?
A: Yes—use gluten-free oat flour and almond flour.
Q: Can I store them?
A: Keep refrigerated up to 5 days or freeze for 2 months.
Meat-Stuffed Spiral Breakfast Bread
Ingredients
For the Dough:
-
800g All-purpose flour
-
5g Yeast (1 tsp)
-
5g Salt (1 tsp)
-
10g Sugar (2 tsp)
-
Approx. 450–500ml Lukewarm water
-
2 tbsp Vegetable oil
For the Filling:
-
500g Ground beef or lamb (with a bit of fat for juiciness)
-
2 Medium onions, very finely diced
-
1 tsp Black pepper
-
1 tsp Cumin (optional)
-
1 tsp Salt
-
100g Butter, melted (for brushing the dough)
Instructions
1. Prepare the Dough
-
In a large bowl, mix the flour, yeast, salt, and sugar.
-
Gradually add the lukewarm water and oil. Knead for about 10 minutes until the dough is smooth and elastic.
-
Cover and let it rest for 30–45 minutes in a warm place. It doesn’t need to double in size completely, just soften.
2. Prepare the Filling
-
In a bowl, mix the raw ground meat with the finely diced onions.
-
Season with salt, pepper, and cumin. Pro Tip: Knead the onions into the meat with your hands to release the onion juices; this keeps the bread moist.
3. Shape the Spirals
-
Divide the dough into 4–6 equal balls.
-
On a lightly floured surface, roll one ball out as thin as possible (nearly translucent).
-
Brush the entire surface with melted butter.
-
Sprinkle a thin layer of the raw meat mixture across the dough (as seen in your photo).
-
Carefully roll the dough up into a long, thin log.
-
Twist the log slightly, then coil it into a spiral (like a snail shell).
4. Bake
-
Place the spirals on a baking sheet lined with parchment paper.
-
Brush the tops with egg yolk mixed with a teaspoon of milk for that golden shine.
-
Bake in a preheated oven at 200°C (400°F) for about 25–30 minutes, or until they are deep golden brown and the meat inside is fully cooked.
Tips for Success
-
The Onions: Don’t skip the onions! They steam the meat inside the dough, making it tender.
-
Resting: If the dough is hard to roll out, let it rest for 5 minutes and try again. This relaxes the gluten.
Warm Citrus Marinated Olives
Prep time: 5 mins | Cook time: 10 mins | Serves: 4–6
Ingredients
-
Olives: 2 cups mixed green olives (Castelvetrano are best for that buttery texture seen in the photo).
-
Citrus: 3 large strips of orange peel and 2 strips of lemon peel (use a vegetable peeler, avoiding the white bitter pith).
-
Oil: 1/2 cup high-quality extra virgin olive oil.
-
Aromatics: 3 cloves of garlic (thinly sliced) and 1/2 tsp red pepper flakes (adjust for heat).
-
Herbs: 4–5 sprigs of fresh thyme and 1 sprig of rosemary.
-
Finishing: A pinch of flaky sea salt and a squeeze of fresh orange juice.
Instructions
-
Prep the Olives: Drain your olives from their brine and pat them dry with a paper towel. This ensures the oil sticks to them rather than sliding off.
-
Infuse the Oil: In a small saucepan or skillet, combine the olive oil, orange and lemon peels, sliced garlic, thyme, and red pepper flakes.
-
Heat Gently: Place the pan over low heat. You want the oil to shimmer and the garlic to just barely begin to sizzle (about 3–5 minutes). Do not let the garlic brown, or it will taste bitter.
-
Marinate: Add the olives to the warm oil. Stir gently to coat. Keep them on the low heat for another 5 minutes to allow the olives to warm through and absorb the citrus oils.
-
Serve: Remove from heat. Add a tiny squeeze of fresh orange juice and a sprinkle of flaky salt. Serve them warm in a shallow bowl, just like in your photo.
Pro Tips for the Best Flavor
-
Crush the Olives: Use the side of a knife to gently “smash” a few of the olives before marinating. This allows the flavored oil to get inside the olive.
-
Make Ahead: While great warm, these are even better the next day! If you store them in the fridge, the oil will solidify; just bring them back to room temperature or warm them slightly before serving.
-
The Leftover Oil: Do not throw away the oil once the olives are
🍏 The Refreshing Green Smoothie
This looks like a vibrant, refreshing Green Detox Smoothie. Based on the ingredients shown in the image—green apple, cucumber, and baby spinach—here is a balanced recipe that is both delicious and nutrient-dense.
🍏 The Refreshing Green Smoothie
This recipe yields approximately one large serving or two smaller snack portions. It is naturally sweetened by the apple and kept crisp by the cucumber.
Ingredients
1 Green Apple: (Granny Smith works best), cored and sliced.
1/2 Cucumber: Sliced (peeled if you prefer a smoother texture).
1 cup Baby Spinach: Fresh and packed.
1/2 cup Water or Coconut Water: For easy blending.
1 tablespoon Lemon Juice: To add brightness and prevent oxidation.
Optional: 3–4 ice cubes for a chilled, slushy consistency.
Optional: A small pinch of fresh ginger for a little “zing.”
Instructions
Prep the Produce: Thoroughly wash the spinach, apple, and cucumber. You can keep the skins on the apple and cucumber for extra fiber, as long as they are cleaned well.
Layer the Blender: Add your liquid base (water or coconut water) first. This helps the blades move freely. Add the spinach next, followed by the heavier cucumber and apple slices.
Blend: Start on a low speed and gradually increase to high. Blend for about 45–60 seconds until the texture is completely smooth and no leaf bits remain.
Adjust: If the smoothie is too thick, add a splash more water. If you’d like it colder, toss in the ice cubes and pulse again.
Serve: Pour into a tall glass, grab a straw, and enjoy immediately for the best taste and nutrient retention.
Why this combination works
Green Apple: Provides a tart sweetness and pectin for digestion.
Cucumber: Extremely hydrating and gives the drink a light, “spa-water” feel.
Spinach: A mild leafy green that blends perfectly without overpowering the fruit flavors.
Homemade Fresh Vegetable Pickle Jars (Crisp & Flavorful)
These colorful vegetable pickle jars are a beautiful and practical way to preserve fresh produce while adding bright flavor to everyday meals. Made with simple vegetables, gentle seasonings, and a light brine, this recipe creates crisp, refreshing pickles that can be enjoyed with sandwiches, rice dishes, grilled foods, or even as a quick snack. The jars in the image show sliced cucumbers, carrots, peppers, onions, and fresh herbs, all layered neatly for both taste and appearance.
Ingredients
4 medium cucumbers, thinly sliced
2 large carrots, peeled and cut into sticks or thin slices
1 red bell pepper, sliced
1 yellow bell pepper, sliced
1 medium onion, thinly sliced
3 cups water
2 cups white vinegar
2 tablespoons salt
2 tablespoons sugar
1 teaspoon black peppercorns
1 teaspoon mustard seeds
1 teaspoon coriander seeds
4–6 cloves garlic, lightly crushed
Fresh dill sprigs or other fresh herbs
Clean glass jars with tight-fitting lids
Preparation Steps
Wash all vegetables thoroughly and allow them to dry. Slice them evenly so they pickle at the same rate.
In a saucepan, combine water, vinegar, salt, and sugar. Heat gently while stirring until the salt and sugar dissolve completely. Remove from heat and allow the brine to cool slightly.
Place garlic cloves, peppercorns, mustard seeds, coriander seeds, and fresh herbs at the bottom of each clean jar.
Begin layering the vegetables inside the jars. Arrange cucumbers, carrots, peppers, and onions tightly but without crushing them. This helps maintain texture and creates a visually appealing jar.
Carefully pour the warm brine over the vegetables, making sure everything is fully covered.
Tap the jars gently on the counter to release air bubbles. Add more brine if needed.
Seal the jars with lids and allow them to cool to room temperature.
Tips
Add chili slices for extra warmth if desired
Use apple cider vinegar for a slightly softer flavor
Keep vegetables fully submerged for best results
These homemade vegetable pickle jars are crisp, refreshing, and full of natural flavor—perfect for adding brightness to any meal.
Storage and Serving
Refrigerate the jars for at least 24 hours before serving to allow the flavors to develop. These pickled vegetables taste even better after 2–3 days. Keep refrigerated and enjoy within 2–3 weeks for best freshness.