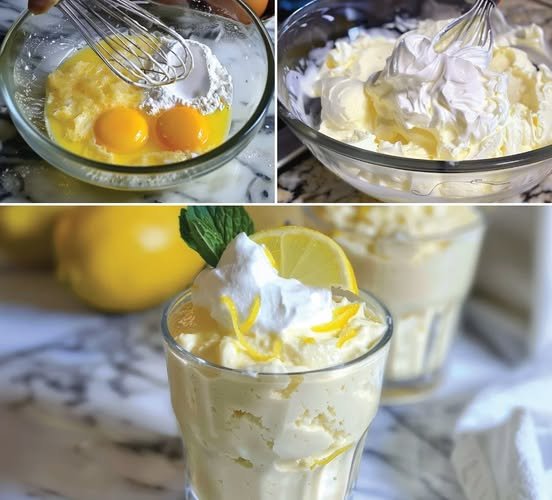
Banana Mousse in 5 Minutes
Banana Mousse is one of those desserts that feels elegant yet comes together with surprisingly simple ingredients. Smooth, creamy, and naturally fruity, this quick mousse delivers a light texture with rich banana flavor and a delicate sweetness balanced by milk and butter. It is perfect when you want a chilled dessert that looks impressive but requires minimal cooking skills. The gelatin helps create a soft, airy consistency that sets beautifully in the fridge, making it ideal for serving at gatherings or as a refreshing after-dinner treat. Despite the name “5 minutes,” most of the time is hands-off chilling, while the preparation itself is quick and beginner-friendly. Whether you serve it in small glasses, molds, or layered with biscuits for a fancier presentation, this mousse offers a classic homemade dessert experience that appeals to both kids and adults. Once you make it, you will find it becomes a go-to recipe for easy entertaining and quick sweet cravings.
Prep Time: 5–10 minutes
Cooking Time: 10 minutes
Chilling Time: 3–4 hours
Total Time: About 4 hours
Yield: 6–8 servings
Ingredients
3 ripe bananas
25 g butter
70 g sugar (for the banana mix)
700 ml milk
150 g sugar (for the milk)
30 g gelatin
70 ml water
Instructions
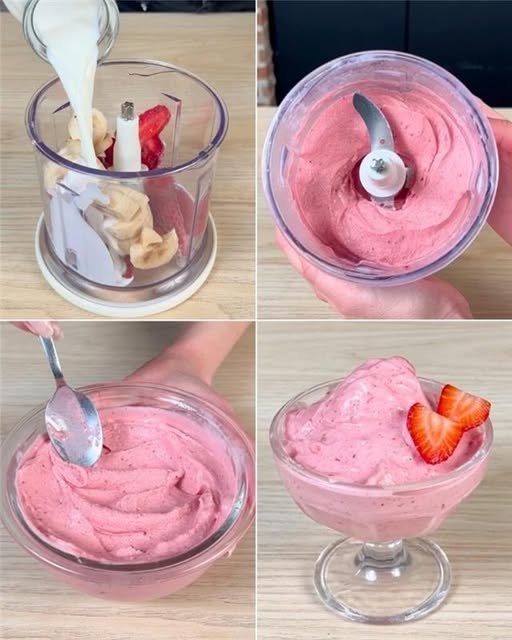
Peel bananas and mash them until smooth using a fork or blender.
In a saucepan, melt butter over low heat and add mashed bananas.
See also Roasted Carrots in an Air Fryer
Stir in 70 g sugar and cook gently for 2–3 minutes until slightly thick and fragrant.
In a separate bowl, sprinkle gelatin over 70 ml water and let it bloom for 5 minutes.
Heat milk in another pot and add 150 g sugar, stirring until dissolved. Do not boil.
Add the bloomed gelatin into the warm milk mixture and stir until fully melted.
Combine the warm banana mixture with the milk mixture and whisk until smooth.
Strain the mixture if you want an extra silky mousse texture.
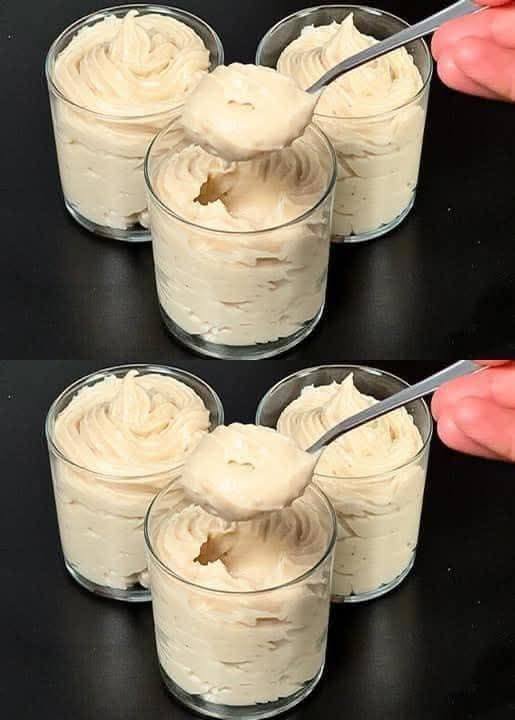
Pour into serving glasses or molds and allow to cool at room temperature briefly.
Refrigerate for at least 3–4 hours until fully set, then serve chilled.
Tips
Use ripe bananas with brown spots for stronger flavor and natural sweetness.
Avoid boiling milk after adding gelatin since high heat can weaken its setting ability.
Stir continuously when heating bananas to prevent sticking or burning.
Straining the mixture removes lumps and creates a professional finish.
If you want a lighter mousse, gently fold in whipped cream before chilling.
Pour into small cups for quicker setting and easy portion control.
Chill molds lightly before pouring to help the mousse set evenly.
Taste the mixture before setting to adjust sweetness if needed.
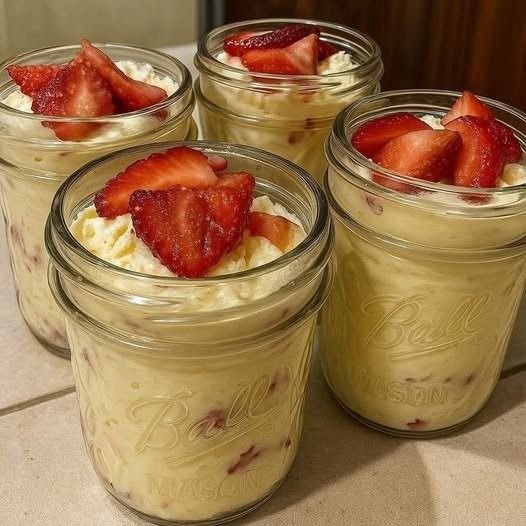
Use clear glasses for a layered or decorated presentation.
Let mousse sit at room temperature for a few minutes before serving for the best texture.
Variations
Add vanilla extract for a warm, bakery-style aroma.
Mix in cocoa powder for a banana chocolate mousse version.
Layer with crushed biscuits or sponge cake for a trifle-style dessert.
Replace part of the milk with coconut milk for a tropical twist.
See also Air Fryer Salmon
Top with caramel sauce or honey for extra richness.
Fold in chopped nuts for texture contrast.
Add cinnamon or nutmeg for a spiced variation.
Make mini mousse cups topped with whipped cream and banana slices.
Use plant-based milk and vegan gelatin alternatives for a dairy-free version.
Create a two-layer mousse by adding a strawberry or mango puree layer.
Q&A
Can I reduce the sugar?
Yes, adjust according to banana ripeness and taste preference.
What if I do not have gelatin?
Agar-agar can be used, but follow package instructions.
Can I freeze banana mousse?
Freezing changes texture, so refrigeration is best.
How long does it last?
Store in the fridge up to 3 days in an airtight container.
Can I use condensed milk instead of sugar and milk?
Yes, but reduce added sugar accordingly.
Why did my mousse not set?
The milk may have been too hot or gelatin insufficiently dissolved.
Can I make it ahead?
Yes, it is perfect for preparing a day in advance.
Is blending necessary?
Not required, but blending gives a smoother consistency.
Can I add fruit chunks?
Yes, small fruit pieces add flavor and texture.
How do I unmold neatly?
Dip the mold briefly in warm water before turning out.
Nutrition
(approx per serving)
Calories: 210–240
Carbohydrates: 35g
Protein: 5g
Fat: 6g
Fiber: 2g
Sugar: 25g
Conclusion
Banana Mousse in 5 Minutes is a wonderful reminder that delicious desserts do not need complicated steps or fancy ingredients. With its silky texture and comforting banana flavor, it offers a perfect balance between lightness and sweetness while remaining easy enough for everyday preparation. The combination of bananas, milk, and gentle gelatin setting creates a mousse that is creamy without feeling heavy, making it suitable for family meals, festive occasions, or simple weekend treats. Its versatility also means you can easily adapt the recipe with different flavors, toppings, or textures depending on your mood or available ingredients. Whether served plain in elegant glasses or layered with fruits and biscuits for a more decorative look, this mousse delivers consistent results and crowd-pleasing taste. Once chilled and set, each spoonful feels smooth, airy, and satisfying, making it a dessert you will likely return to whenever you want something quick, reliable, and homemade.