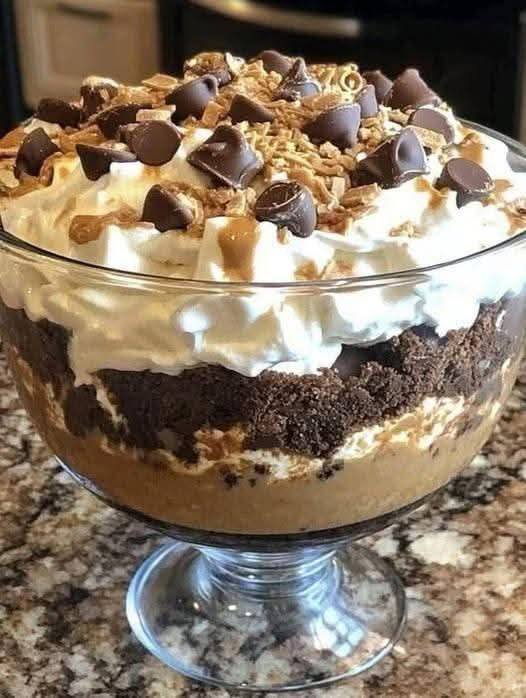
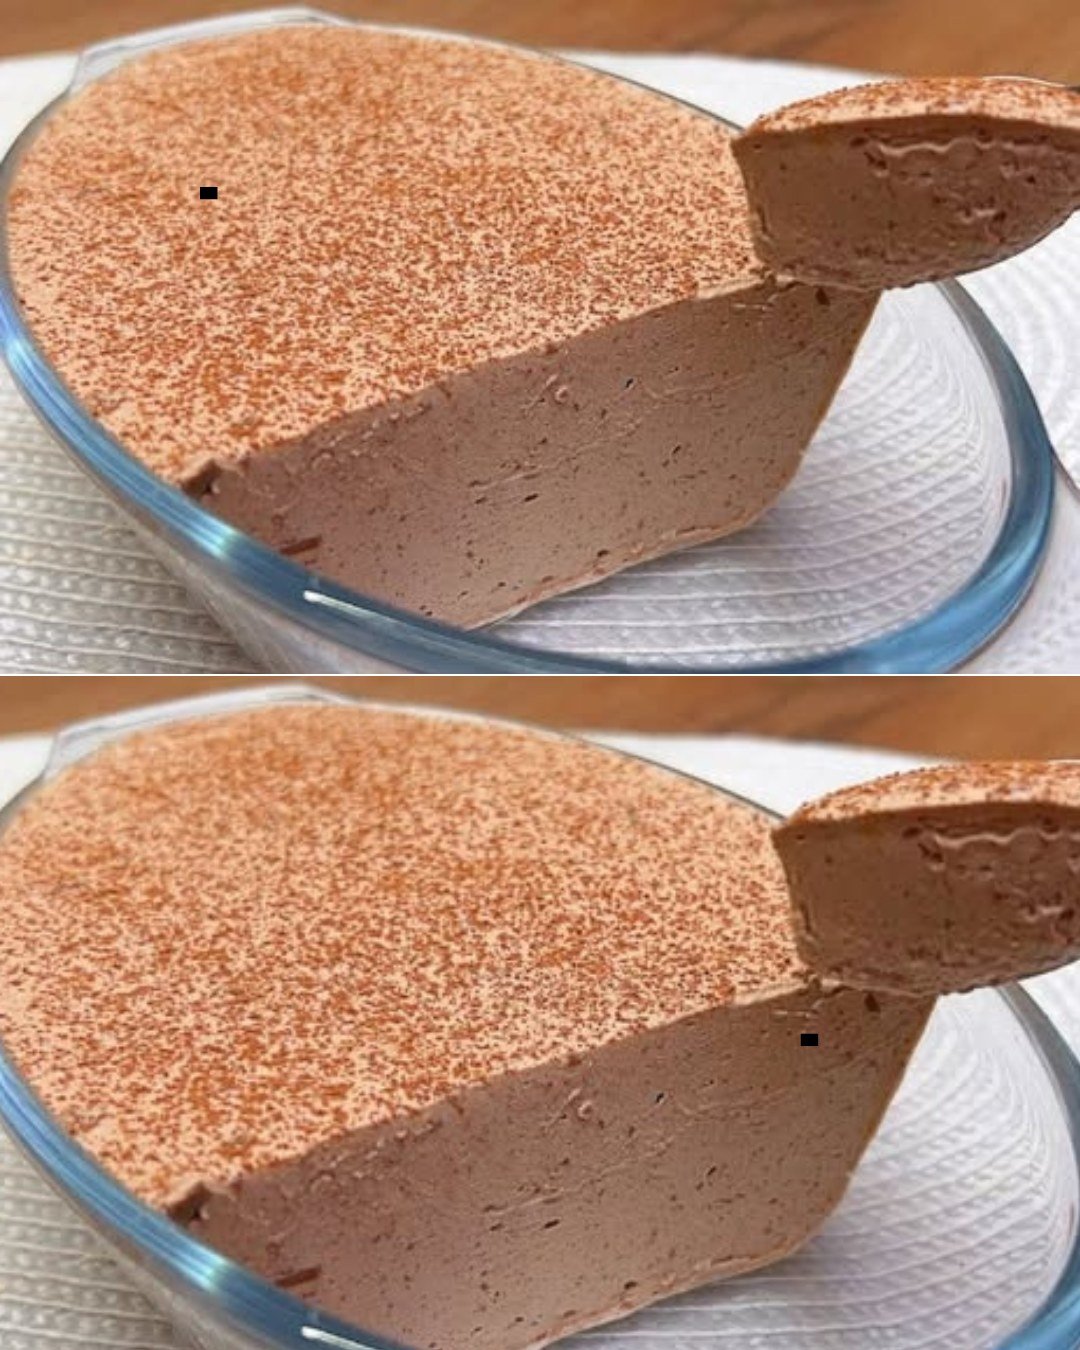
No-Bake Coffee Mousse Cake

No-Bake Coffee Mousse Cake

Yield: 1 round cake (8–10 slices)
Prep Time: 20 minutes
Chill Time: 4–6 hours

This dessert has a soft, creamy texture with a light coffee flavor. It sets beautifully in the refrigerator and can be sliced like a cake without baking.


🧾 Ingredients

For the Coffee Mousse

  • 2 cups heavy cream (cold)

  • 2 tablespoons instant coffee or espresso powder

  • 3 tablespoons hot water

  • ½ cup powdered sugar

  • 1 teaspoon vanilla extract

  • 2 teaspoons unflavored gelatin

  • 3 tablespoons warm milk


For the Base (optional, but recommended)

  • 150 g crushed biscuits (tea biscuits or digestive)

  • 5 tablespoons melted butter


👩‍🍳 Instructions

1. Prepare the Coffee

In a small bowl, dissolve the coffee in hot water.
Set aside to cool to room temperature.


2. Prepare the Base

Mix crushed biscuits with melted butter until evenly combined.
Press mixture firmly into the bottom of a lined cake ring or springform pan.
Refrigerate while preparing the mousse.


3. Activate the Gelatin

In a small bowl, mix gelatin with warm milk.
Stir gently until completely dissolved.
Let cool slightly (not hot).


4. Whip the Cream

In a large bowl, whip cold cream until soft peaks form.
Add powdered sugar and vanilla extract.
Continue whipping until smooth and fluffy.


5. Combine

Slowly pour the cooled coffee into the whipped cream while gently folding.
Add the dissolved gelatin and fold carefully until fully mixed.


6. Assemble

Pour the mousse over the chilled base.
Smooth the top with a spatula.


7. Chill

Refrigerate for at least 4–6 hours, or until fully set.


8. Serve

Carefully remove from the mold.
Slice with a warm knife for clean cuts.


🌟 Helpful Tips

  • Use cold cream for best volume.

  • Let coffee cool before mixing to avoid thinning the cream.

  • You can flavor with cocoa powder or caramel if desired.

  • Store in refrigerator up to 3 days.

Classic Apple Pie with Lemon Cream Filling

Classic Apple Pie with Lemon Cream Filling

Yield: 1 round pie (8–10 slices)
Prep Time: 25 minutes
Bake Time: 40–45 minutes

This apple pie features a soft buttery crust, a smooth lemon cream layer, and tender apple slices on top. It is lightly sweet, gently citrusy, and perfect for tea time or dessert.


🧾 Ingredients

For the Dough

  • 2 large eggs

  • 5 tablespoons sugar (100 g)

  • 1 packet vanilla sugar (8 g) or 1 teaspoon vanilla extract

  • 5 tablespoons butter (100 g), softened

  • 3 cups all-purpose flour (360 g)

  • 2 teaspoons baking powder (8 g)


For the Lemon Cream Filling

  • 2 cups milk (500 ml)

  • 2 egg yolks

  • 4 tablespoons sugar

  • 3 tablespoons cornstarch

  • Zest of 1 lemon

  • 2 tablespoons lemon juice

  • 1 teaspoon vanilla extract


For the Apple Layer

  • 3–4 medium apples, peeled and sliced

  • 2 tablespoons sugar

  • 1 teaspoon cinnamon (optional)

  • 1 tablespoon lemon juice


For Topping

  • Powdered sugar, for dusting

  • Sliced almonds or walnuts (optional)


👩‍🍳 Instructions

1. Prepare the Dough

In a bowl, whisk eggs, sugar, and vanilla until smooth.
Add softened butter and mix until creamy.
Add flour and baking powder gradually and mix until a soft dough forms.

Divide the dough into two parts:
✔ One larger portion (for base)
✔ One smaller portion (for top)

Wrap and refrigerate for 20 minutes.


2. Make the Lemon Cream

In a saucepan, whisk milk, egg yolks, sugar, and cornstarch until smooth.
Cook over medium heat, stirring constantly, until thick and creamy.
Remove from heat and stir in lemon zest, lemon juice, and vanilla.
Set aside to cool slightly.


3. Prepare the Apples

In a bowl, mix apple slices with sugar, lemon juice, and cinnamon.
Set aside for 5 minutes to soften slightly.


4. Assemble the Pie

Preheat oven to 180°C (350°F).
Grease a round baking pan.

Roll out the larger dough portion and press into the pan, forming a base and sides.
Spread lemon cream evenly over the dough.
Arrange apple slices on top of the cream.

Roll out the remaining dough and place over apples in strips or decorative pattern.


5. Bake

Bake for 40–45 minutes, until golden and set.
Let cool completely before slicing so layers stay neat.


6. Finish and Serve

Dust with powdered sugar and sprinkle nuts if desired.
Serve plain or with tea, coffee, or vanilla sauce.


🌟 Helpful Tips

  • Use firm apples (Granny Smith, Fuji, or Golden).

  • Chill dough for easier handling.

  • For extra shine, brush top with a little milk before baking.

  • Store in refrigerator up to 3 days.

Orange–Carrot Cake with Coconut Cream

Orange–Carrot Cake with Coconut Cream

Yield: 1 loaf (8–10 slices)
Prep Time: 20 minutes
Bake Time: 45–55 minutes

This moist carrot cake is gently flavored with fresh orange zest, crunchy walnuts, coconut flakes, and sesame seeds. It is finished with a light, dairy-free coconut cream topping for a naturally rich and fragrant dessert.


🧾 Ingredients

For the Cake

  • 4 medium carrots, finely grated

  • 4 tablespoons unsweetened coconut flakes

  • 2 tablespoons sesame seeds

  • ½ cup walnuts, chopped (plus extra for topping)

  • 1½ cups all-purpose flour

  • 1 teaspoon baking soda

  • 1 teaspoon baking powder

  • 1 teaspoon ground cinnamon

  • ½ teaspoon salt

  • 3 large eggs, at room temperature

  • ¾ cup granulated sugar or brown sugar

  • ½ cup vegetable oil or melted coconut oil

  • Zest of 1 orange

  • 2 tablespoons fresh orange juice

For the Coconut Cream Topping

  • 1 can (14 oz / 400 ml) full-fat coconut milk, chilled overnight

  • 2 tablespoons maple syrup or powdered sugar

  • ½ teaspoon vanilla extract


👩‍🍳 Instructions

1. Prepare the Pan and Oven

Preheat the oven to 350°F (175°C).
Lightly grease a loaf pan and line it with parchment paper so the cake can be lifted out easily after baking.


2. Mix the Dry Ingredients

In a medium bowl, whisk together:

  • flour

  • baking soda

  • baking powder

  • cinnamon

  • salt

Stir in the coconut flakes, sesame seeds, and chopped walnuts until evenly combined.


3. Prepare the Wet Ingredients

In a large bowl, whisk the eggs and sugar until pale and slightly thick.
Slowly add the oil while whisking continuously.
Mix in the orange zest and orange juice.
Fold in the grated carrots until well distributed.


4. Combine the Batter

Add the dry ingredients to the wet mixture in two parts.
Gently fold with a spatula just until no dry flour is visible.
Do not mix too much—this helps keep the cake soft and tender.


5. Bake

Pour the batter into the prepared pan and smooth the top.
Bake for 45–55 minutes, or until a skewer or toothpick inserted in the center comes out clean.

Let the cake cool in the pan for 15 minutes, then lift it out and allow it to cool completely on a rack.


🥥 Coconut Cream Topping

6. Prepare the Coconut Cream

Open the chilled coconut milk can carefully.
Scoop out only the thick cream from the top into a bowl (reserve the liquid for drinks or smoothies).

Add the maple syrup (or powdered sugar) and vanilla extract.
Whisk or beat until smooth and creamy.


7. Decorate

Spread the coconut cream evenly over the cooled cake.
Sprinkle with extra chopped walnuts and a few sesame seeds if desired.


🌟 Helpful Tips

  • Orange Flavor: The zest gives the strongest orange taste, so use fresh orange peel for best results.

  • Cold Coconut Milk: Chilling is essential for thick, spreadable cream.

  • Storage: Keep the cake in the refrigerator for up to 3 days because of the coconut topping.

  • Serving: Best served slightly cool or at room temperature.

Easy and Fluffy Vanilla Muffins

Easy and Fluffy Vanilla Muffins

Prep Time: 10 minutes
Bake Time: 20–25 minutes
Yields: 12 standard muffins

Soft, airy, and golden muffins that are simple to make and perfect for breakfast, snacks, or dessert.


🧾 Ingredients

  • 2 eggs

  • 125 ml (½ cup) vegetable oil

  • 250 ml (1 cup) milk

  • 200 g (1 cup) sugar

  • 360 g (3 cups) all-purpose flour

  • 1 teaspoon baking powder

  • ½ teaspoon salt

  • 100 g (⅔ cup) raisins or chocolate chips (optional)

  • 1 teaspoon vanilla extract (optional, for extra flavor)


👩‍🍳 Step-by-Step Instructions

🔥 Step 1: Prepare Oven and Muffin Pan

  1. Preheat oven to 375°F (190°C).

  2. Line a 12-cup muffin tin with paper liners or grease each cup lightly with butter or oil.


🥄 Step 2: Whisk Wet Ingredients

  1. In a large mixing bowl, whisk eggs and sugar until pale and slightly frothy.

  2. Add vegetable oil, milk, and vanilla extract (if using).

  3. Whisk until fully combined.


🥣 Step 3: Combine with Dry Ingredients

  1. Sift flour, baking powder, and salt directly into the wet mixture.

  2. Use a spatula or wooden spoon to fold gently until just combined.

    • Stop mixing when flour streaks disappear to keep muffins light and fluffy.


🍫 Step 4: Add Mix-ins (Optional)

  1. Gently fold in raisins or chocolate chips if desired.


🧁 Step 5: Fill Muffin Cups

  1. Divide batter evenly among the 12 cups, filling about ¾ full.

  2. Place the tin in the center of the oven.


🔥 Step 6: Bake

  1. Bake for 20–25 minutes.

  2. Muffins are done when:

    • Tops are golden brown

    • They spring back when lightly pressed

    • Toothpick inserted comes out clean or with a few moist crumbs


❄ Step 7: Cool

  1. Let muffins cool in the tin for 5 minutes.

  2. Transfer to a wire rack to cool completely.


🌟 Pro-Tips for Success

  • Room Temperature Ingredients: Eggs and milk at room temperature give a smoother, well-incorporated batter.

  • Storage: Keep in an airtight container at room temperature for up to 3 days. Freeze for up to 2 months.

  • Optional Flavors: Add cinnamon, nutmeg, or lemon zest for a flavor twist.

5-Minute Marshmallow Quark Cream

5-Minute Marshmallow Quark Cream

Prep Time: 5 minutes
Servings: 3–4 cups

A light, airy, and creamy dessert with a “marshmallow” texture that’s ready in just a few minutes. Perfect as a quick treat or layered in dessert glasses.


🧾 Ingredients

  • 400 g low-fat quark (or Greek yogurt if quark is unavailable)

  • 1 pack (approx. 8 g) vanilla sugar

  • 200 ml whipping cream (well chilled)

  • 2 tablespoons powdered sugar (adjust to taste)

Optional Mix-ins / Decorations

  • Chocolate chips or shavings

  • Fresh berries

  • Crumbled cookies or nuts


👩‍🍳 Step-by-Step Instructions

🥄 Step 1: Whip the Cream

  1. In a chilled bowl, combine the cold whipping cream, vanilla sugar, and powdered sugar.

  2. Beat with an electric hand mixer until stiff peaks form.

    • Do not overmix, or it will turn into butter.


🥣 Step 2: Prepare the Quark

  1. In a separate bowl, whisk the quark until smooth and creamy.

  2. This prevents lumps and creates a silky texture in the final dessert.


☁️ Step 3: Fold to Create “Marshmallow” Texture

  1. Gently fold the whipped cream into the quark using a spatula.

  2. Use a cut-and-fold motion, lifting from the bottom and folding over the top.

    • This incorporates air, giving the cream its light, fluffy consistency.


🍫 Step 4: Add Mix-ins (Optional)

  1. Fold in chocolate chips, shavings, or berries as desired.

  2. Mix gently to maintain the airy texture.


🍮 Step 5: Serve and Decorate

  1. Spoon the mixture into dessert glasses or a large serving bowl.

  2. Top with additional chocolate, berries, or nuts if desired.

  3. Can be enjoyed immediately or chilled for 30 minutes for a firmer texture.


🌟 Quick Tips

  • Thicker Quark: If your quark is very liquid, strain through a cheesecloth for 15 minutes before using.

  • Adjust Sweetness: Add an extra tablespoon of powdered sugar during whipping if you prefer a sweeter dessert.

  • Storage: Keep covered in the refrigerator for up to 1 day.

Oat, Apple & Cranberry Cake (Flour-Free)

Oat, Apple & Cranberry Cake (Flour-Free)

Prep Time: 15 minutes
Resting Time: 10 minutes
Bake Time: 35–40 minutes
Servings: 8 slices

Soft, lightly sweet, and naturally hearty, this oat-based cake is made without flour and filled with apples and cranberries for a fresh, fruity bite.


🧾 Ingredients

  • 200 g (2¼ cups) rolled oats (certified gluten-free if needed)

  • A small pinch of salt

  • 400 ml (1⅔ cups) hot milk (dairy or plant-based)

  • 2 eggs

  • 40 g (¼ cup) erythritol or preferred sweetener

  • 1 teaspoon ground cinnamon

  • 1¾ teaspoons baking powder

  • 1 small apple, finely chopped

  • Handful of dried cranberries

  • Butter or oil for greasing the pan


👩‍🍳 Step-by-Step Instructions

🥣 Step 1: Soften the Oats

  1. Place rolled oats and salt into a large bowl.

  2. Pour hot milk over the oats and stir.

  3. Cover and let sit for 10 minutes so the oats absorb the milk and soften.


🥄 Step 2: Prepare the Batter

  1. In another bowl, whisk eggs with sweetener and cinnamon.

  2. Add this egg mixture to the soaked oats.

  3. Add baking powder and stir until smooth and well combined.


🍏 Step 3: Add the Fruit

  1. Fold in:

    • About ⅔ of the chopped apple

    • Half of the cranberries

  2. Mix gently so the fruit spreads evenly.


🧁 Step 4: Assemble

  1. Preheat oven to 350°F (180°C).

  2. Grease or line a 7–8 inch (18–20 cm) round pan.

  3. Pour batter into the pan and level the top.

  4. Scatter remaining apple pieces and cranberries over the surface.


🔥 Step 5: Bake

  1. Bake for 35–40 minutes.

  2. The cake is ready when:

    • The top feels firm

    • A toothpick inserted comes out clean


❄ Step 6: Cool & Serve

  1. Let cake cool in the pan for 15 minutes.

  2. Remove, slice, and serve warm or at room temperature.


🌟 Helpful Tips

✔ Use sweet apples for best flavor
✔ Add walnuts or almonds for crunch
✔ Serve with yogurt for a breakfast-style cake
✔ Store covered in the fridge up to 3 days

Creamy Milk & Fruit Terrine (Agar-Agar Dessert)

Creamy Milk & Fruit Terrine (Agar-Agar Dessert)

Prep Time: 15 minutes
Setting Time: 2–3 hours
Servings: 6–8 slices

This colorful terrine is a light, refreshing dessert made with fresh fruit and creamy milk, set naturally with agar-agar. Each slice looks like stained glass and tastes cool, smooth, and fruity.


🧾 Ingredients

🍊 Fruit Layer

  • 2–3 tangerines, peeled and separated

  • 2 kiwis, peeled and sliced

  • 1–2 persimmons, peeled and sliced

  • ½ grapefruit, peeled and segmented (white pith removed)

  • 1 apple, cored and finely chopped

  • 1 banana, sliced


🥛 Milk Layer

  • 500 ml (2 cups) milk

  • 3–4 tablespoons sugar or honey (adjust to taste)

  • 8 g agar-agar powder

  • 50 ml water (to dissolve agar)

  • 1 teaspoon vanilla extract (optional)


👩‍🍳 Step-by-Step Instructions

🍓 Step 1: Prepare the Fruit

  1. Wash, peel, and slice all fruits as listed.

  2. Arrange the fruit evenly inside a rectangular glass dish or silicone loaf mold.

  3. Mix colors and shapes for a bright, mosaic look in every slice.


🌿 Step 2: Dissolve the Agar-Agar

  1. In a small bowl, combine agar-agar powder and water.

  2. Stir until smooth and lump-free.

  3. Let it sit for 1 minute.


🔥 Step 3: Heat the Milk Mixture

  1. Pour milk and sugar (or honey) into a saucepan.

  2. Heat gently over medium heat until warm.

  3. Add the agar mixture to the milk and stir well.


🍲 Step 4: Activate the Agar-Agar

  1. Bring the mixture to a gentle boil while stirring continuously.

  2. Let it boil for 1–2 minutes to fully activate the agar.

  3. Remove from heat and stir in vanilla extract.


🥄 Step 5: Assemble the Terrine

  1. Let the milk mixture cool for 3–5 minutes (it must remain liquid).

  2. Slowly pour over the arranged fruit.

  3. Use a spoon to gently press down floating fruit so everything stays covered.


❄ Step 6: Set and Chill

  1. Allow the dish to cool at room temperature until it begins to firm.

  2. Transfer to the refrigerator for 2–3 hours until fully set and chilled.


🔪 Step 7: Serve

  1. Run a thin knife around the edges of the dish.

  2. Turn out onto a serving plate.

  3. Slice and serve chilled.


🌟 Helpful Tips

✔ Use firm fruit for clean slices
✔ Adjust sweetness to taste
✔ Coconut milk can replace regular milk
✔ Add a little citrus zest for extra aroma
✔ Best served cold

No-Bake Nut & Date Bars

No-Bake Nut & Date Bars

Prep Time: 15 minutes
Chilling Time: 1–2 hours
Yield: 8–10 bars

Naturally sweet, rich in texture, and packed with nuts and fruit, these no-bake bars are perfect for quick snacks or healthy treats. No oven needed and very easy to prepare.


🧾 Ingredients

  • 75 g (½ cup) almonds

  • 50 g (½ cup) walnuts

  • 50 g (½ cup) pumpkin seeds

  • 250 g (1⅔ cups) dates, pitted

  • 100 g (⅓ cup) natural peanut butter (creamy or crunchy)

  • 40 g (¼ cup) dried cranberries

  • Optional: a small pinch of sea salt (for flavor balance)


👩‍🍳 Step-by-Step Instructions

🥜 Step 1: Prepare the Nuts & Seeds

  1. Add almonds, walnuts, and pumpkin seeds to a food processor.

  2. Pulse several times until they are chopped into small, chunky pieces.
    (Do not grind into powder — a little texture gives a better bite.)

  3. Transfer the chopped mixture to a large mixing bowl.


🍯 Step 2: Process the Dates

  1. Make sure all dates are pitted.

  2. If they are firm, soak them in warm water for 5 minutes, then drain well.

  3. Place the dates in the food processor and blend until they form a thick, sticky paste.


🥣 Step 3: Combine the Mixture

  1. Add the date paste to the bowl with the nuts and seeds.

  2. Add peanut butter and dried cranberries.

  3. Mix using a strong spoon or lightly oiled hands until:

    • All ingredients are evenly combined

    • The mixture holds together when pressed


📐 Step 4: Press into the Pan

  1. Line a small rectangular or square pan (about 8 × 4 inches) with parchment paper, leaving extra paper on the sides.

  2. Transfer the mixture into the pan.

  3. Press down firmly and evenly using:

    • A spatula

    • Or the bottom of a flat glass

This helps the bars hold their shape when sliced.


❄ Step 5: Chill to Set

  1. Place the pan in the refrigerator for 1–2 hours until firm.
    (For faster setting, you can freeze for 30 minutes.)


🔪 Step 6: Slice and Store

  1. Lift the firm block out using the parchment paper.

  2. Cut into bars or small squares with a sharp knife.


🧊 Storage Tips

Refrigerator:
Store in an airtight container for up to 2 weeks.

Freezer:
Wrap bars individually in parchment paper and store in a freezer-safe bag for up to 3 months.

Lotus Biscoff Dessert Cups

Lotus Biscoff Dessert Cups

Prep Time: 20 minutes
Chilling Time: 1–2 hours
Servings: 4–6 cups (depending on cup size)

Creamy, layered dessert with crunchy Biscoff biscuit base, smooth custard, and fluffy whipped cream. Simple, elegant, and perfect for serving in cups.


🧾 Ingredients

Biscuit Layer

  • 200 g Lotus Biscoff biscuits

Custard Layer

  • 300 ml milk

  • 1½ tablespoons custard powder

  • 1 tablespoon sugar

Cream Layer

  • 300 ml whipping cream (well chilled)

  • 1 tablespoon sugar

  • Pinch of vanilla powder or a few drops of vanilla essence

Decoration

  • Extra Lotus Biscoff biscuits

  • Extra biscuit crumbs (optional)


👩‍🍳 Step-by-Step Instructions

🥄 Step 1: Prepare the Biscuit Base

  1. Place the Lotus Biscoff biscuits into a food processor and grind into fine crumbs.
    (You can also crush them in a sealed bag using a rolling pin.)

  2. Divide about two-thirds of the crumbs between your serving cups.

  3. Press gently with a spoon to form an even base.

  4. Keep the remaining crumbs aside for the middle layer.


🍮 Step 2: Make the Custard

  1. In a saucepan, add custard powder and sugar.

  2. Add a few tablespoons of milk and mix until smooth.

  3. Pour in the remaining milk and mix well.

  4. Place over medium heat and cook while stirring continuously.

  5. Cook until the custard becomes thick and smooth.

  6. Remove from heat and let it cool slightly.
    Stir occasionally so it stays creamy.


🧁 Step 3: Whip the Cream

  1. In a cold bowl, add whipping cream, sugar, and vanilla.

  2. Beat with an electric mixer until soft, fluffy peaks form.

  3. Stop mixing once it holds shape.


🏗 Step 4: Assemble the Dessert Cups

Layer 1: Spoon custard over the biscuit base.
Layer 2: Sprinkle the reserved biscuit crumbs over the custard.
Layer 3: Pipe or spoon whipped cream generously on top.


❄ Step 5: Decorate and Chill

  1. Decorate each cup with:

    • One whole Lotus biscuit

    • A light sprinkle of crumbs

  2. Refrigerate for at least 1 hour before serving.


🌟 Serving Tips

✔ Serve chilled
✔ Use clear cups to show layers
✔ Can be prepared 1 day in advance
✔ Keep refrigerated until serving

Apple Hurricane Cake 

Apple Hurricane Cake

Prep Time: 20 minutes
Bake Time: 35–40 minutes
Servings: 8 slices
Pan Size: 8–9 inch (20–22 cm) round pan

A soft apple cake with a beautiful custard spiral baked right on top. Moist inside, lightly golden outside, and stunning when sliced.


🥚 Cream Filling (Custard Spiral)

Ingredients

  • 2 egg yolks

  • ¼ cup (60 g) sugar

  • 1 tablespoon (15 g) cornstarch

  • 1 cup (240 ml) milk

  • 1 teaspoon vanilla essence

Method

  1. In a small saucepan, whisk together the egg yolks, sugar, and cornstarch until smooth.

  2. Slowly pour in the milk while whisking continuously to prevent lumps.

  3. Place the pan over medium heat and stir constantly using a whisk or spatula.

  4. Cook until the mixture thickens into a smooth, creamy custard.

  5. Remove from heat and stir in the vanilla essence.

  6. Transfer to a bowl and cover with plastic wrap touching the surface.

  7. Allow it to cool completely before using.


🍏 Apple Preparation

Ingredients

  • 3 medium apples (peeled and diced)

Method

  1. Peel, core, and cut the apples into small cubes (about 1 cm).

  2. Set aside for later use.


🍰 Cake Batter

Ingredients

  • 2 whole eggs

  • 2 egg whites (leftover from custard)

  • ½ cup (100 g) sugar

  • Pinch of salt

  • ½ cup (120 ml) milk

  • ⅓ cup (80 ml) vegetable oil or melted butter

  • 2 cups (250 g) all-purpose flour

  • 1 tablespoon (12 g) baking powder

  • Prepared diced apples

Method

  1. In a large bowl, beat the whole eggs, egg whites, sugar, and salt until pale and frothy.

  2. Add the milk and oil and mix until smooth.

  3. Sift in the flour and baking powder.

  4. Fold gently until just combined. Do not overmix.

  5. Fold in the diced apples evenly.


🌪 Assembly (Hurricane Design)

  1. Preheat oven to 350°F (180°C).

  2. Grease and line an 8–9 inch round pan with parchment paper.

  3. Pour the apple batter into the pan and level the top.

  4. Transfer the cooled custard to a piping bag or plastic bag with the tip cut off.

  5. Starting from the center, pipe the custard in a spiral pattern moving outward to the edge.


🔥 Baking

  1. Place the pan in the center of the oven.

  2. Bake for 35–40 minutes.

  3. The cake is ready when:

    • The top is lightly golden

    • A toothpick inserted into the cake portion comes out clean


🍽 Cooling & Serving

  1. Let the cake cool in the pan for 10 minutes.

  2. Remove from the pan and cool completely on a rack.

  3. Dust generously with powdered sugar to highlight the spiral pattern.

  4. Slice and serve.


✅ Tips

  • Use firm apples for best texture.

  • Custard must be fully cooled before piping.

  • Store covered at room temperature for 1 day or refrigerate up to 3 days.

  • Best served slightly warm or at room temperature.

Carnivore Blender Dessert (No-Bake, No Plants

Carnivore Blender Dessert (No-Bake, No Plants)
Description
This rich and creamy carnivore dessert is a simple, no-bake treat made entirely from animal-based ingredients. Everything goes into the blender, making it quick, easy, and perfect for satisfying cravings while staying fully carnivore. Smooth, filling, and naturally indulgent, it’s ideal as a dessert or high-fat snack.
🥩 Ingredients (Carnivore)
1 cup heavy cream
3–4 egg yolks (raw or gently pasteurized)
2 tbsp unsalted butter (softened or melted)
1–2 tbsp collagen peptides (optional)
Pinch sea salt (optional)
🔄 Instructions
Add all ingredients to a blender.
Blend until completely smooth and creamy (30–60 seconds).
Pour into a bowl or glass.
Chill for 30–60 minutes for a thicker texture, or enjoy immediately.
🍽️ Serving Suggestions
Serve cold with a spoon
Freeze for 1–2 hours for an ice-cream-like texture
Portion into small jars for meal prep
🔄 Variations
Extra Rich: Add 1 more egg yolk
Frozen Treat: Freeze in silicone molds
Dairy-Light: Reduce cream and add melted butter
📊 Nutrition (Approx. per serving)
Calories: 350–400
Fat: 35–40g
Protein: 8–10g
Carbs: ~0g
❓ Related Questions
Is this safe with raw egg yolks?
Use fresh, high-quality eggs or pasteurized yolks if preferred.
Is this a strict carnivore?
Yes—only animal-based ingredients.
How often can I eat it?
Great as an occasional dessert or fat-boosting snack.
🧠 Final Thoughts
This blender carnivore dessert proves that staying carnivore doesn’t mean giving up indulgence. It’s fast, satisfying, and easy enough to make twice a week—or more.
If you liked this recipe…

Perfect Crinkle Top Brownies

Perfect Crinkle Top Brownies

Rich, fudgy, and decadent, these brownies feature a dense, chewy center topped with the classic paper-thin, crackly crust that makes every bite irresistible.


Ingredients (8×8-inch pan, 16 squares)

  • 1/2 cup (115 g) unsalted butter, melted

  • 1 cup (200 g) granulated sugar

  • 2 large eggs

  • 1 teaspoon vanilla extract

  • 1/3 cup (35 g) unsweetened cocoa powder

  • 1/2 cup (60 g) all-purpose flour

  • 1/4 teaspoon salt

  • 1/4 teaspoon baking powder


Instructions

1. Preheat and Prep

  1. Preheat the oven to 175°C (350°F).

  2. Grease an 8×8-inch square baking pan or line it with parchment paper, leaving a slight overhang for easy removal of the brownies after baking.


2. Cream the Butter and Sugar

  1. In a large mixing bowl, combine the melted butter and granulated sugar.

  2. Whisk vigorously for 1–2 minutes until the mixture looks glossy and slightly thickened.

Tip for the Crinkle Top: Thoroughly whisking the sugar into the butter helps dissolve the sugar, which is key to forming that signature shiny, crackly crust.


3. Add Wet Ingredients

  1. Add the eggs and vanilla extract to the butter-sugar mixture.

  2. Whisk for another minute until the batter turns pale and smooth.


4. Incorporate Dry Ingredients

  1. Sift together the cocoa powder, flour, salt, and baking powder.

  2. Using a spatula, gently fold the dry ingredients into the wet mixture.

  3. Mix only until the streaks of flour disappear. Overmixing can make brownies tough instead of fudgy.


5. Bake

  1. Pour the batter into the prepared pan and smooth the top with a spatula.

  2. Bake in the preheated oven for 20–25 minutes.

Toothpick Test: Insert a toothpick in the center; it should come out with a few moist crumbs. A fully clean toothpick may indicate the brownies are slightly overbaked.


6. Cool and Slice

  1. Allow the brownies to cool completely in the pan. This ensures the fudgy interior sets and the crinkle top firms up.

  2. Lift the brownies out using the parchment paper and cut into 16 equal squares.


Why This Recipe Works

  • Cocoa Ratio: Using 1/3 cup of cocoa powder gives a deep chocolate flavor without drying out the brownies.

  • Fudgy Texture: The combination of 1/2 cup flour and 2 eggs creates a dense, chewy texture rather than a cake-like structure.

  • Shiny Crinkle Top: Thoroughly whisking the sugar into melted butter and eggs ensures that classic crackly surface.


Pro Tips for Perfect Brownies

  • Do not overbake: Even a minute too long can dry out the edges. Keep an eye on the toothpick test.

  • Let them cool fully: Cutting brownies too soon can result in crumbling and a less defined top.

  • Optional add-ins: Fold in chocolate chips, nuts, or a swirl of caramel for extra indulgence.

Chocolate-Covered Marshmallow Mousse Squares

Chocolate-Covered Marshmallow Mousse Squares

Indulgent, airy, and rich, these mousse squares have a delicate marshmallow-mousse interior coated in a crisp chocolate shell. Perfect for dessert platters, gifts, or a special treat.


Ingredients (Makes about 16 squares)

For the Mousse Filling

  • 1 cup (240 ml) whole milk

  • 1 ½ cups (150 g) mini marshmallows (white)

  • 4 oz (115 g) semisweet chocolate, finely chopped

  • 1 tablespoon unsweetened cocoa powder

  • 1 teaspoon gelatin powder, bloomed in 1 tablespoon cold water

For the Chocolate Coating

  • 8 oz (225 g) milk or dark chocolate melting wafers

  • 1 tablespoon coconut oil (helps coating stay smooth and snap cleanly)


Instructions

1. Prepare the Cocoa Base

  1. In a small saucepan over medium-low heat, combine the milk and cocoa powder.

  2. Whisk gently until the cocoa dissolves and the milk is steaming but not boiling.


2. Melt the Marshmallows and Chocolate

  1. Add the mini marshmallows and chopped chocolate to the warm milk.

  2. Stir constantly with a whisk until the marshmallows and chocolate are fully melted and the mixture is silky smooth.


3. Add the Gelatin

  1. Remove the pan from heat.

  2. Stir in the bloomed gelatin while the mixture is still hot.

  3. Whisk vigorously for 1 minute to ensure the gelatin is fully incorporated and to introduce tiny air bubbles for a light, porous texture.

Tip: For an even airier texture, you can whip the mixture with a hand mixer for 1–2 minutes before pouring into the mold.


4. Set the Mousse

  1. Line an 8×8 inch square baking dish with parchment paper, leaving an overhang on the sides for easy removal.

  2. Pour the mousse mixture into the dish and tap lightly on the counter to level it.

  3. Refrigerate for at least 4 hours, or until firm to the touch.


5. Cut into Squares

  1. Lift the mousse block from the dish using the parchment overhang.

  2. Use a sharp, warm knife to cut the block into equal squares.

  3. Wipe the knife clean between cuts for crisp, clean edges.


6. Dip and Coat

  1. Melt the chocolate wafers and coconut oil in a microwave-safe bowl in 30-second intervals, stirring each time until smooth.

  2. Using a fork, dip each mousse square into the melted chocolate.

  3. Shake off excess chocolate and place the squares on parchment paper.

  4. Let the coating harden at room temperature, or refrigerate for 5 minutes.


Pro Tips for Perfection

  • Airier Texture: Whipping the chocolate-marshmallow mixture slightly before setting creates a more porous interior, similar to a premium aerated chocolate bar.

  • Clean Edges: Warm your knife slightly and wipe it after each cut to maintain perfect square shapes.

  • Chocolate Shell: Adding coconut oil to the melted chocolate ensures a smooth finish that snaps when bitten.

  • Storage: Keep the mousse squares in an airtight container in the refrigerator for up to 5 days.

Silky Deep Chocolate Gelato

Silky Deep Chocolate Gelato

Indulge in rich, velvety chocolate perfection with this custard-based gelato. Dense, smooth, and intensely chocolatey, it’s a homemade treat that rivals any gelateria.


Ingredients (Serves 4–6)

  • 2 cups (480 ml) whole milk

  • 1 cup (240 ml) heavy cream

  • 1/2 cup (100 g) granulated sugar, divided

  • 1/4 cup (25 g) unsweetened cocoa powder (Dutch-processed for a darker color)

  • 4 oz (115 g) high-quality dark chocolate (60% cacao or higher), finely chopped

  • 4 large egg yolks

  • 1 teaspoon vanilla extract

  • 1/4 teaspoon sea salt


Instructions

1. Heat the Dairy

  1. In a medium saucepan, combine the milk, heavy cream, and half of the sugar (1/4 cup).

  2. Sift in the cocoa powder to prevent lumps.

  3. Heat over medium heat, stirring occasionally, until the mixture begins to steam gently. Do not allow it to boil.


2. Melt the Chocolate

  1. Remove the pan from the heat.

  2. Add the chopped dark chocolate and sea salt. Let it sit for 1 minute.

  3. Whisk until the chocolate is fully melted and the mixture is smooth and glossy.


3. Temper the Egg Yolks

  1. In a separate bowl, whisk the egg yolks with the remaining sugar until pale yellow and slightly thickened.

  2. Slowly pour about 1/2 cup of the hot chocolate mixture into the yolks while whisking constantly.

  3. This gradual process, called tempering, prevents the eggs from cooking too quickly.


4. Thicken the Custard

  1. Pour the tempered egg mixture back into the saucepan with the remaining chocolate dairy.

  2. Place over low heat and stir constantly with a wooden spoon or silicone spatula.

  3. Cook until the custard thickens enough to coat the back of a spoon (about 77°C–82°C / 170°F–180°F).

Tip: Do not let the custard boil, or it may curdle.


5. Chill the Base

  1. Strain the custard through a fine-mesh sieve into a clean bowl to remove any lumps.

  2. Stir in the vanilla extract.

  3. Cover the surface directly with plastic wrap to prevent a skin from forming.

  4. Refrigerate for at least 4–6 hours, or preferably overnight, for full flavor and texture.


6. Churn the Gelato

  1. Pour the chilled custard into an ice cream maker.

  2. Churn according to the manufacturer’s instructions (usually 20–25 minutes) until the gelato reaches a soft, creamy consistency.


7. Freeze for Scoopable Texture

  1. Transfer the gelato to a pre-chilled container.

  2. Cover and freeze for an additional 2 hours for a scoopable texture that holds shape beautifully.


Pro Tips for the Perfect Gelato

  • Serving Temperature: Gelato is best served slightly warmer than ice cream. Let it sit 5 minutes at room temperature before scooping to reveal those smooth ridges.

  • Prevent Ice Crystals: Press a piece of parchment paper directly onto the gelato surface before sealing the container.

  • Chocolate Choice: Use high-quality chocolate for a richer, more complex flavor. Avoid low-cacao blends.

  • Optional Add-Ins: Stir in chocolate chips, caramel swirls, or toasted nuts after churning for extra texture.


This gelato has a deep, luxurious chocolate flavor and a texture so smooth it practically melts in your mouth. Perfect for a decadent dessert or a special treat for chocolate lovers!

Fast Flourless Oatmeal Breakfast Bread

Fast Flourless Oatmeal Breakfast Bread

Caption: ✨ Healthy breakfast has never been this easy! This flourless, butter-free oatmeal bread is a total game-changer for your morning routine. Just three main ingredients to create a gluten-free loaf that is hearty, wholesome, and perfectly golden! 🍞🥣🌿


Ingredients (Makes 1 loaf)

  • 280 g (3 cups) rolled oats (use certified gluten-free if needed)

  • 2 large eggs

  • 250 g (1 cup) plain yogurt or Greek yogurt

  • 1 tsp baking powder (optional, for extra lift)

  • ½ tsp salt (optional, to enhance flavor)

Optional Mix-ins:

  • Chopped walnuts, pumpkin seeds, or sunflower seeds

  • Extra oats for topping


Instructions

1. Prep Oven and Pan

  1. Preheat your oven to 350°F (180°C).

  2. Line a standard loaf pan with parchment paper or lightly grease it to ensure the bread comes out easily.


2. Mix Wet Ingredients

  1. In a large bowl, whisk the eggs until smooth.

  2. Stir in the yogurt until the mixture is creamy and well combined.


3. Add the Oats

  1. Gradually add the oats to the wet mixture.

  2. If using, add baking powder and salt.

  3. Stir thoroughly until the oats are fully moistened.

  4. If adding nuts or seeds, fold them in now.


4. Let the Batter Rest

  • Let the batter sit for 10 minutes.

  • This allows the oats to absorb moisture, creating a better texture in the bread.


5. Bake

  1. Pour the batter into the prepared loaf pan and smooth the top with a spatula.

  2. Bake in the oven for 35–45 minutes, or until the top is golden brown and firm to the touch.


6. Cool and Slice

  1. Let the bread cool in the pan for 10 minutes.

  2. Transfer to a wire rack and cool completely before slicing.


Serving Suggestions

  • Savory: Toast a slice and top with avocado, tomato, or a poached egg.

  • Sweet: Serve warm with honey, nut butter, or a sprinkle of cinnamon.


Why You’ll Love This

  • Flourless & Gluten-Free: Perfect for sensitive stomachs or gluten-free diets.

  • Quick & Easy: Just 3 main ingredients and 10 minutes prep time.

  • Healthy & Hearty: Rolled oats provide fiber and yogurt adds protein, making it a filling breakfast.

Fluffy Mini Pizza Soft Rolls

Fluffy Mini Pizza Soft Rolls

Caption: 🍕✨ The perfect snack for pizza lovers! These “Mini Pizza Soft Rolls” combine a cloud-like homemade dough with all your favorite savory toppings. They’re fun to make, beautiful to serve, and guaranteed to disappear in minutes! ☁️🥨

Ingredients

For the Homemade Dough:

  • 200 ml (¾ cup) warm milk (ensure it is warm to the touch, not hot)

  • 10 g (2 tsp) active dry yeast

  • 1 tablespoon (12 g) sugar

  • 60 ml (¼ cup) vegetable oil

  • 4 g (¾ tsp) salt

  • 420 g (3 ½ cups) all-purpose flour

For the Filling & Toppings (Based on Images):

  • Shredded Mozzarella cheese (for that perfect melt)

  • Diced Salami or Pepperoni

  • Black Olives, sliced

  • Red and Green Bell Peppers, finely diced

  • Optional: A light spread of pizza sauce or pesto


Preparation Steps

  1. Activate the Yeast:

    • In a large mixing bowl, combine the warm milk, sugar, and yeast.

    • Stir gently and let it sit for about 5–10 minutes until it becomes frothy.

  2. Mix the Dough:

    • Add the oil and salt to the yeast mixture.

    • Gradually sift in the flour and mix until a dough starts to form.

    • Knead the dough on a lightly floured surface for 5–7 minutes until it is smooth and elastic.

    • Place the dough in a greased bowl, cover with a warm damp cloth, and let it rise in a warm spot for about 1 hour or until doubled in size.

  3. Roll and Fill:

    • Punch down the risen dough and roll it out into a large, thin rectangle on a floured surface.

    • Spread a thin layer of sauce (if using) and sprinkle a generous amount of mozzarella cheese over the dough.

    • Evenly distribute the salami, peppers, and black olives across the surface.

  4. Shape the Rolls:

    • Starting from one of the long edges, carefully roll the dough into a tight log.

    • Use a sharp knife or a piece of unflavored dental floss to cut the log into 8–10 equal slices.

  5. Bake to Perfection:

    • Preheat your oven to 375°F (190°C).

    • Place the rolls onto a baking sheet lined with parchment paper, leaving space for them to expand.

    • Bake for 20–25 minutes until the edges are golden brown and the cheese is bubbly.

  6. Cool and Serve:

    • Let the rolls rest for 5 minutes before serving. Enjoy them warm for the softest texture!

Golden Walnut & Jam Swirl Cake

Golden Walnut & Jam Swirl Cake

Caption:The cake of your dreams is only 5 minutes away! This soft, fluffy sponge features a sweet jam swirl and a crunchy walnut topping. It’s incredibly simple and absolutely delicious! 🍰🥨

Ingredients

  • Eggs: 2 large

  • Vanilla Sugar: 1 packet (8g)

  • Salt: A pinch

  • Sugar: 120g (2/3 cup)

  • Oil: 120ml (1/2 cup)

  • Milk: 120ml (1/2 cup)

  • Flour: 220g (1 ¾ cups)

  • Baking Powder: 1 tablespoon

  • Jam: 50g (your favorite variety, like strawberry or apricot)

  • Walnuts: 50g, chopped

  • Baking Dish: 24 cm Bundt or round pan


Preparation Steps

  1. Prep the Pan and Oven:

    • Preheat your oven to 350°F (180°C).

    • Grease your 24 cm baking dish with a little oil or butter and dust lightly with flour to prevent sticking.

  2. Mix the Batter:

    • In a large bowl, whisk the 2 eggs, vanilla sugar, salt, and 120g of sugar until the mixture is light and frothy.

    • Pour in the 120ml of oil and 120ml of milk. Whisk until well combined.

  3. Add Dry Ingredients:

    • Sift the 220g of flour and 1 tablespoon of baking powder into the wet mixture.

    • Gently whisk until you have a smooth batter with no lumps.

  4. Assemble with Jam and Nuts:

    • Pour the batter into your prepared baking dish.

    • Drop small spoonfuls of the 50g of jam over the surface of the batter. Use a toothpick or knife to gently swirl it in for a marbled effect.

    • Sprinkle the 50g of chopped walnuts evenly over the top.

  5. Bake to Perfection:

    • Bake for 35–40 minutes.

    • The cake is ready when it is golden brown and a toothpick inserted into the center comes out clean.

  6. Cool and Serve:

    • Let the cake cool in the pan for 10 minutes before carefully turning it out onto a wire rack to cool completely.

Peanut Butter Oat Energy Balls (No-Bake Snack)

🥜 Peanut Butter Oat Energy Balls (No-Bake Snack)

These soft and chewy peanut butter energy balls are quick to prepare and made with simple ingredients. They are perfect for snacks, lunchboxes, or a small sweet bite during the day.


📝 Ingredients

  • ⅔ cup creamy peanut butter

  • 1 cup old-fashioned oats (plus extra for rolling, if desired)

  • 1½ tablespoons honey

  • ¼ cup mini dark chocolate chips (optional)

  • 1 tablespoon flax seeds or chia seeds (optional)


👩‍🍳 Step-by-Step Instructions

1️⃣ Mix the Base

In a medium mixing bowl, add:

  • Peanut butter

  • Honey

Stir well until smooth and evenly blended.


2️⃣ Add the Dry Ingredients

Add the oats to the peanut butter mixture.
If using chocolate chips or seeds, add them now.

Mix thoroughly until everything is well combined and the mixture becomes thick and slightly sticky.


3️⃣ Chill the Mixture (Optional but Helpful)

Place the bowl in the refrigerator for 15–30 minutes.
This helps the mixture firm up and makes shaping easier.


4️⃣ Shape the Balls

Scoop about 1 tablespoon of the mixture at a time.
Roll it gently between your palms to form a small ball (about 2.5 cm / 1 inch wide).

If desired, roll each ball in dry oats for extra texture.


5️⃣ Set and Store

Place the balls on a tray or plate.
Refrigerate for 30 minutes until firm.

Transfer to an airtight container.


📦 Storage

  • Refrigerator: up to 7 days

  • Freezer: up to 1 month


⭐ Helpful Tips

  • Use smooth peanut butter for easy mixing

  • Add a little extra oats if mixture feels too soft

  • Add a small splash of milk if mixture feels too dry

  • Keep chilled for best texture


💛 Why You’ll Enjoy This Recipe

  • No baking needed

  • Made with simple pantry ingredients

  • Easy to prepare

  • Soft, chewy, and lightly sweet

Golden Apple Sponge Pie (Soft & Light)

Golden Apple Sponge Pie (Soft & Light)

This apple sponge pie has a fluffy cake base topped with tender, lightly sweetened apples. It’s made with simple pantry ingredients and has a beautiful golden finish.


📝 Ingredients

For the Apple Topping

  • 2 large apples, peeled and sliced

  • 25 g butter

  • 1 tablespoon lemon juice

  • 20 g sugar

For the Sponge Batter

  • 2 large eggs

  • 130 g sugar

  • 60 ml milk

  • 150 g self-rising flour
    (or 150 g all-purpose flour + 1 teaspoon baking powder)


👩‍🍳 Step-by-Step Instructions

1️⃣ Prepare the Apples

  • Peel and core the apples.

  • Slice them evenly so they cook uniformly.

  • Heat a pan over medium heat and melt the butter.

  • Add the apple slices, lemon juice, and sugar.

  • Cook gently for 3–5 minutes, stirring lightly, until the apples soften and become lightly golden.

  • Remove from heat and allow them to cool slightly.


2️⃣ Make the Batter

  • In a large bowl, whisk the eggs and sugar together until pale and fluffy.

  • Add the milk and mix gently until combined.


3️⃣ Add the Flour

  • Sift the flour (and baking powder if using).

  • Fold it into the batter gently using a spatula.

  • Mix only until combined to keep the batter light and airy.


4️⃣ Assemble the Pie

  • Preheat oven to 180°C (350°F).

  • Line a round baking tin with parchment paper.

  • Pour the batter evenly into the tin.

  • Arrange the cooked apple slices on top in a neat pattern.


5️⃣ Bake

  • Bake for 30–35 minutes or until a toothpick inserted in the center comes out clean.

  • The surface should be golden in color.


6️⃣ Cool and Serve

  • Let the pie cool in the pan for 10 minutes, then remove carefully.

  • Serve warm or at room temperature.

Optional toppings:
✔ Light dusting of powdered sugar
✔ Spoon of whipped cream
✔ Vanilla ice cream


⭐ Helpful Tips

  • Slice apples evenly for even cooking

  • Do not overmix the batter

  • Let the pie cool slightly before slicing

  • Store in an airtight container for up to 2 days


✨ Optional Finish

For a shiny top, lightly brush the warm apples with a little apricot jam or honey after baking.

Classic Airy Chocolate Mousse (Light & Creamy)

🍫 Classic Airy Chocolate Mousse (Light & Creamy)

This chocolate mousse is smooth, fluffy, and rich in flavor, made with simple ingredients and gentle folding to keep it airy.


📝 Ingredients

  • 1 cup (170 g) semi-sweet chocolate, finely chopped

  • 3 tablespoons (45 ml) water

  • 3 large eggs, separated

  • 2 tablespoons (25 g) granulated sugar

  • ¾ cup (180 ml) heavy cream (cold)

  • A small pinch of salt


👩‍🍳 Step-by-Step Instructions

1️⃣ Melt the Chocolate

Place the chopped chocolate and water into a heat-safe bowl.
Melt using one of these methods:

  • Double boiler: Set the bowl over gently heated water and stir until smooth.

  • Microwave: Heat in 20-second intervals, stirring each time until fully melted.

Set aside and allow the chocolate to cool slightly so it is warm, not hot.


2️⃣ Add the Egg Yolks

Add the egg yolks to the melted chocolate one at a time, whisking well after each addition.
The mixture should become smooth and glossy.


3️⃣ Whip the Cream

In a separate bowl, beat the cold heavy cream until stiff peaks form.
This means the cream holds its shape when you lift the whisk.

Gently fold the whipped cream into the chocolate mixture using a spatula.
Use light movements to keep the texture fluffy.


4️⃣ Whip the Egg Whites

In a clean, dry bowl, beat the egg whites with a pinch of salt until they become foamy.
Slowly add the sugar and continue beating until stiff, shiny peaks form.


5️⃣ Fold the Mixture

Add the whipped egg whites to the chocolate mixture in two portions.
Fold gently using a cut-and-fold motion until just combined.
Do not stir, as this removes the air and makes the mousse heavy.


6️⃣ Chill and Set

Spoon the mousse into serving cups or glasses.
Cover and refrigerate for at least 2 to 4 hours until set and creamy.


🌱 Bonus: Basil Seed Chocolate Mousse Topping

Basil seeds (Sabja) add a refreshing texture and visual beauty.

How to Prepare Basil Seeds

  • Soak 1 tablespoon basil seeds in ½ cup water for 15 minutes

  • They will swell and form a gel-like coating

  • Drain excess water before using

How to Use

As a topping: Spoon soaked seeds over chilled mousse
As a layer: Add seeds to the bottom of the glass before filling with mousse


⭐ Helpful Tips

  • Eggs whip better at room temperature

  • Always fold gently to keep mousse light

  • Chill thoroughly for best texture

  • Use good-quality chocolate for richer taste

High-Protein Cheesecake Jars (No-Bake & Meal-Prep Friendly)

These High-Protein Cheesecake Jars are rich, creamy, and surprisingly close to classic cheesecake—without the heavy sugar, butter, or baking. Made with Greek yogurt and cottage cheese, they’re packed with protein and perfect for dessert, post-workout fuel, or a satisfying snack that won’t derail your goals. Best of all, they come together in minutes and set beautifully in the fridge.

If you’re looking for a cheesecake-style treat that supports weight loss, muscle recovery, or balanced eating, this recipe delivers big flavor with smart ingredients.

 Ingredients

Base Cheesecake

  • 1 cup low-fat or fat-free cottage cheese
  • 1 cup plain Greek yogurt (non-fat or low-fat)
  • 2–3 tablespoons sugar-free cheesecake or vanilla pudding mix
    OR
    2 tablespoons honey or maple syrup + 1 teaspoon vanilla extract
  • 1–2 tablespoons milk (as needed for blending)
  • Optional: 2 oz light cream cheese (for extra richness)

Add-Ins & Toppings

  • Fresh strawberries, sliced
    (blueberries, raspberries, or cherries also work well.)
  • Graham cracker crumbs (optional)
  • Sugar-free chocolate chips, caramel drizzle, or lemon zest (optional)

 Instructions

  1. Blend the cottage cheese first
    Add the cottage cheese to a blender or food processor and blend until completely smooth. This step is essential for achieving a silky, cheesecake-like texture.
  2. Build the cheesecake base
    Add the Greek yogurt, pudding mix (or sweetener and vanilla), and 1 tablespoon of milk. Blend again until thick, creamy, and lump-free. Add more milk only if needed.
  3. Adjust and customize
    Taste the mixture and adjust sweetness if desired. For extra protein, blend in ½ scoop vanilla protein powder. For a richer texture, add the optional light cream cheese.
  4. Assemble the jars
    Spoon the cheesecake mixture evenly into four small jars or containers. Fold in chopped strawberries if you want fruit throughout, or leave the base plain.
  5. Top and chill
    Add fresh fruit, graham crumbs, or optional toppings. Cover and refrigerate for at least 1 hour to allow the cheesecake to thicken and set.
See also  Banana Oatmeal Chocolate Cake with Walnuts

 Pro Tips

  • Less milk = thicker cheesecake
  • Chill overnight for the best texture
  • Add a graham layer at the bottom for a crust-style jar
  • Lemon zest adds a bright, classic cheesecake flavor

 Storage & Nutrition

  • Keeps 4–5 days refrigerated in sealed jars
  • Approx. 150–180 calories and 14–18 g of protein per jar
  • Lower sugar, high protein, and no baking required

Creamy, satisfying, and shockingly close to real cheesecake—these jars prove that healthy desserts don’t have to taste “healthy.” 😏

⭐ Keto-Friendly Chocolate Mousse (Rich, Creamy & Sugar-Free)

⭐ Keto-Friendly Chocolate Mousse (Rich, Creamy & Sugar-Free)

Servings: 4
Prep Time: 10 minutes
Chill Time: 1 hour
Total Time: 1 hour 10 minutes
Diet: Keto, Low-Carb, Gluten-Free, Sugar-Free, WW Friendly


🍫 Introduction

Keto-Friendly Chocolate Mousse is a rich and creamy low-carb dessert made with simple ingredients and easy steps. This smooth and fluffy mousse delivers full chocolate flavor without added sugar or flour, making it a great option for low-carb lifestyles.

This recipe is quick to prepare and requires only a few basic ingredients. It works well for family desserts, special occasions, or whenever you want a chocolate treat that fits into your meal plan.

Traditional chocolate mousse usually contains sugar and high-carb ingredients. This version uses sugar-free chocolate, low-carb sweetener, and fresh cream to create a dessert that is light, smooth, and satisfying.

The texture is soft, airy, and creamy, giving it a classic mousse consistency. It looks elegant when served and tastes rich without being heavy.

One of the best features of this recipe is how flexible it is. You can adjust the sweetness, chocolate level, and toppings based on your preference.

This mousse stores well in the refrigerator, making it useful for preparing ahead of time. You can enjoy it over several days while keeping its creamy texture.

It is also a good dessert choice for guests, including those who are not following a low-carb plan. Many people enjoy it without realizing it is sugar-free.

For WW users, this dessert stays moderate in SmartPoints because the main ingredient is cream, while the sweetener and chocolate contain no added sugar.

The combination of fats and low carbohydrates helps keep the dessert filling and enjoyable as part of a balanced plan.


📝 Ingredients

Base Mousse

  • 1 cup heavy whipping cream

  • ½ cup sugar-free dark chocolate chips

  • 2 tablespoons powdered erythritol (or keto-approved sweetener)

Extra Chocolate Option

Choose one:

  • 1 tablespoon unsweetened cocoa powder
    OR

  • 2 tablespoons shaved sugar-free chocolate

Optional Toppings

  • Sugar-free whipped cream

  • Fresh berries

  • Mint leaves

  • Extra cocoa powder

  • Sugar-free chocolate curls


👩‍🍳 Instructions

Step 1: Melt the chocolate
Place the chocolate chips in a microwave-safe bowl. Heat in 20-second intervals, stirring each time, until smooth. Set aside to cool slightly.

Step 2: Whip the cream
Add the cream and powdered sweetener to a chilled bowl. Beat until stiff peaks form. Do not overmix.

Step 3: Mix in the chocolate
Slowly drizzle the melted chocolate into the whipped cream while mixing on low speed.

Step 4: Add extra chocolate flavor
Gently fold in cocoa powder or shaved chocolate.

Step 5: Chill the mousse
Divide into serving cups and refrigerate for 1 hour.

Step 6: Garnish and serve
Top with whipped cream, berries, mint, or chocolate curls before serving.


🍽 Serving Suggestions

Serve alone or with low-carb berries such as raspberries or blackberries.
It can also be used as a filling for keto crepes or low-carb cakes.


🧊 Storage

Store in an airtight container in the refrigerator for up to 4 days.
Freezing is not recommended because the texture may change.


📊 Nutrition (Per Serving – Approximate)

Calories: 210
Fat: 20g
Net Carbs: 4g
Fiber: 2g
Sugar: 0g
Protein: 3g

Banana Oat Breakfast Bread

Banana Oat Breakfast Bread

Prep Time: 10 minutes
Bake Time: 35–40 minutes
Servings: 1 loaf (about 8 slices)


Ingredients

  • 2 cups (200g) rolled oats

  • 2 ripe bananas (approx. 200g)

  • 2 eggs

  • ½ cup (70g) dried cranberries

  • ½ cup (75g) raisins

Optional for extra flavor:

  • 1 tsp cinnamon

  • 1 tsp vanilla extract

Optional for texture:

  • 1 tsp baking powder (helps the bread rise slightly)


Instructions

Step 1: Prepare the Pan

  1. Preheat your oven to 180°C (350°F).

  2. Grease a loaf pan with butter or oil, or line it with parchment paper for easy removal after baking.


Step 2: Blend or Mash the Base

Option A – Smooth, cake-like texture:

  1. Place the rolled oats, bananas, and eggs in a blender or food processor.

  2. Blend until smooth and well combined.

Option B – Rustic, hearty texture:

  1. Mash the bananas in a large bowl until they become liquidy.

  2. Stir in the eggs until fully incorporated.

  3. Fold in the rolled oats gently; do not overmix to maintain texture.


Step 3: Add Flavor and Fruit

  1. If using, mix in the cinnamon, vanilla extract, and baking powder.

  2. Gently fold in the dried cranberries and raisins, ensuring they are evenly distributed in the batter.


Step 4: Bake the Bread

  1. Pour the batter into your prepared loaf pan and smooth the top.

  2. Optional: Sprinkle a few extra raisins or cranberries on top for decoration.

  3. Bake in the preheated oven for 35–40 minutes, or until a toothpick inserted into the center comes out clean.


Step 5: Cool and Serve

  1. Let the bread cool in the pan for 10 minutes.

  2. Carefully transfer it to a wire rack to cool completely before slicing.

  3. Optional: Drizzle a small amount of yogurt or honey over slices before serving for extra flavor.


Tips for Success

  • Use very ripe bananas: The riper, the sweeter, and more flavorful the bread will be without any added sugar.

  • Moisture matters: This bread is naturally moist. Store leftovers in an airtight container in the refrigerator for up to 5 days.

  • Customize: Add chopped nuts, seeds, or even a handful of chocolate chips for variety.

  • Texture preference: Blend for smooth bread or fold for rustic, hearty slices.

Pineapple Dream Dessert

Pineapple Dream Dessert

Prep Time: 15 minutes
Chill Time: 4 hours minimum (overnight is ideal)
Servings: 12–15

Ingredients

For the Crust & Topping:

  • 2 ½ cups graham cracker crumbs (divided)

  • ½ cup unsalted butter, melted

For the Creamy Filling:

  • ½ cup unsalted butter, softened to room temperature

  • 2 cups powdered sugar

  • 1 package (8 oz) cream cheese, softened to room temperature

  • 1 can (20 oz) crushed pineapple, well-drained

  • 1 container (8 oz) whipped topping (like Cool Whip) or 2 cups stiffly whipped heavy cream


Instructions

Step 1: Prepare the Crust

  1. Preheat your oven to 350°F (175°C) if you prefer a slightly firmer crust. (Optional: You can skip baking for a softer crust.)

  2. In a medium bowl, combine 2 cups of graham cracker crumbs with the ½ cup melted butter. Mix until the texture resembles wet sand.

  3. Reserve ½ cup of this crumb mixture for the topping later.

  4. Firmly press the remaining crumbs into the bottom of a 9×13 inch baking dish to form an even crust layer.

  5. Optional: Bake for 8–10 minutes for a slightly crisp crust. Let it cool completely before adding the filling.


Step 2: Make the Creamy Base

  1. In a large mixing bowl, add the softened butter and cream cheese. Beat with an electric mixer on medium speed until smooth and creamy (about 2–3 minutes).

  2. Gradually add powdered sugar and continue to beat until the mixture is fluffy and well combined (about 3–5 minutes).


Step 3: Fold in the Pineapple

  1. Drain the crushed pineapple very well. Press through a fine-mesh strainer with a spoon to remove excess juice, which could make the dessert runny.

  2. Gently fold the drained pineapple into the cream cheese mixture using a spatula, ensuring it is evenly distributed.


Step 4: Add the Whipped Topping

  1. Gently fold in the whipped topping or stiffly whipped heavy cream until fully combined.

  2. Be careful not to overmix; you want to keep as much air in the mixture as possible for a light, fluffy texture.


Step 5: Assemble the Dessert

  1. Spread the creamy pineapple filling evenly over the graham cracker crust.

  2. Sprinkle the reserved ½ cup of graham cracker crumbs evenly on top as a finishing touch.


Step 6: Chill

  1. Cover the dish with plastic wrap or a lid.

  2. Refrigerate for at least 4 hours, but for best results, chill overnight. This allows the layers to firm up and the flavors to meld beautifully.


Tips for Perfect Pineapple Dream Dessert

  • Drain the pineapple thoroughly: Use a fine-mesh strainer and press gently with a spoon to remove extra juice.

  • Room temperature ingredients: Make sure your butter and cream cheese are soft before mixing to avoid lumps in the filling.

  • Gentle folding: Folding preserves the air in the whipped topping, keeping the dessert light and airy.

  • Optional garnishes: Top with toasted coconut, chopped nuts, or extra pineapple chunks for a decorative touch.

Double Chocolate Loaf Cake

🍫 Double Chocolate Loaf Cake

A rich, moist chocolate loaf packed with chocolate chips. Perfect for breakfast, dessert, or an afternoon treat.


📝 Ingredients

  • 2 large eggs

  • ⅓ cup (100 g) sugar

  • ⅓ cup (80 ml) neutral oil (vegetable or canola)

  • ⅓ cup (80 ml) milk

  • 1 teaspoon vanilla extract

  • 1 cup (125 g) all-purpose flour

  • ¼ cup (20 g) cocoa powder

  • 1 teaspoon baking powder

  • ½ teaspoon baking soda

  • 3 tablespoons chocolate chips (white or dark, or a mix)

  • Extra chocolate chips for topping


👩‍🍳 Instructions

1️⃣ Mix the Wet Ingredients

  1. In a medium bowl, whisk the eggs and sugar until slightly pale and well combined.

  2. Add the oil, milk, and vanilla extract. Stir until smooth.


2️⃣ Combine with Dry Ingredients

  1. Sift together the flour, cocoa powder, baking powder, and baking soda.

  2. Gently fold the dry ingredients into the wet mixture until just combined. Avoid overmixing to keep the cake tender.

  3. Fold in 3 tablespoons of chocolate chips.


3️⃣ Prepare for Baking

  1. Preheat the oven to 175°C (350°F).

  2. Grease a standard loaf pan or line it with parchment paper.

  3. Pour the batter into the pan and smooth the top with a spatula.

  4. Sprinkle extra chocolate chips over the surface.


4️⃣ Bake

  1. Bake for 35–45 minutes.

  2. Test doneness by inserting a toothpick into the center; it should come out clean or with a few moist crumbs.

  3. Let the cake cool in the pan for 10 minutes, then transfer to a wire rack to cool completely.


🍽 Serving Suggestions

  • Serve slightly warm so chocolate chips are melty

  • Pair with a cold glass of milk or a cup of coffee

  • Slice thick for an indulgent snack


🧁 Tips

✔️ Use high-quality cocoa powder for deeper flavor
✔️ Fold gently to keep the cake soft and airy
✔️ Store in an airtight container for 2–3 days
✔️ Freeze slices for up to 1 month