Light, Crisp, Hydrating & Low WW SmartPoints
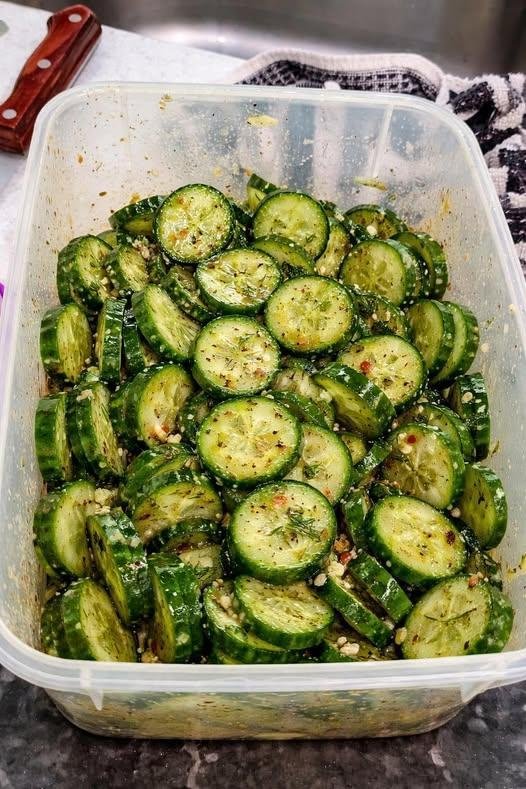
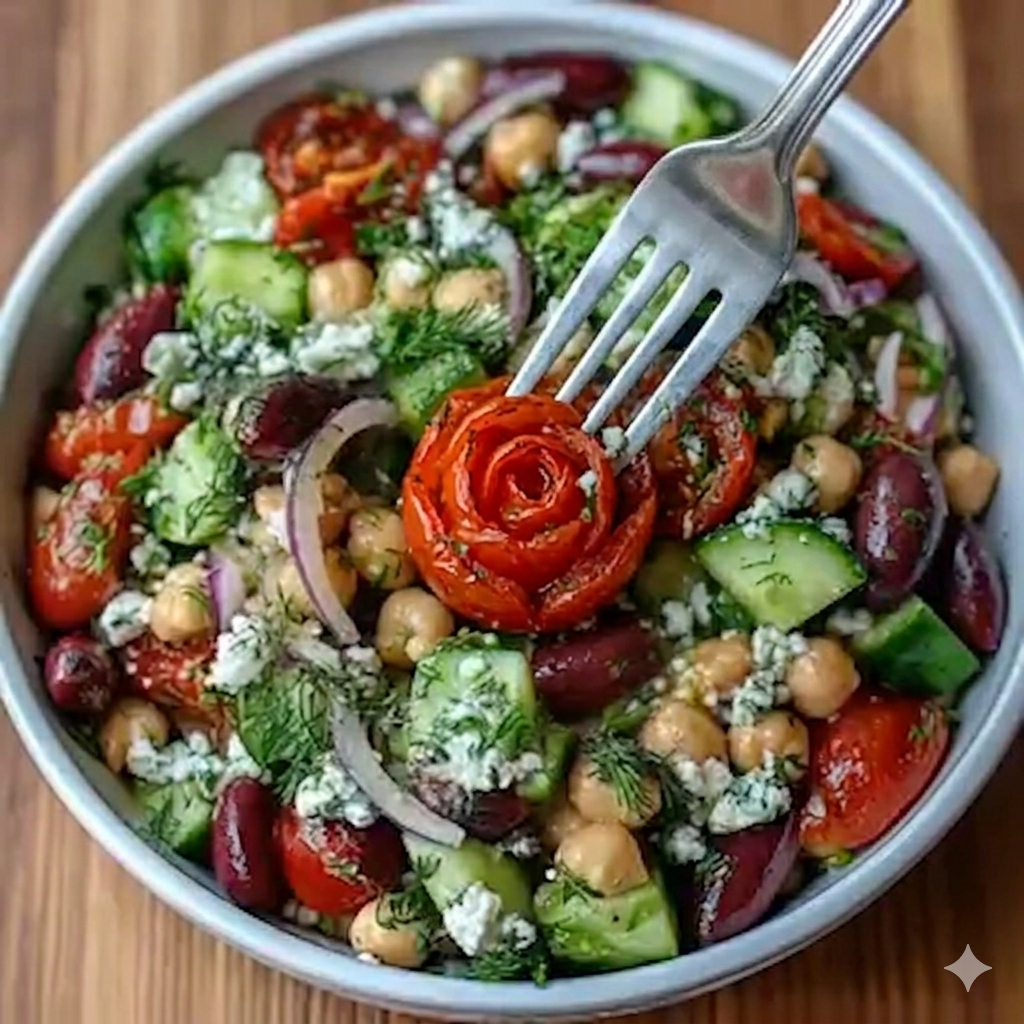
If you are searching for a light, refreshing, and incredibly crunchy salad that is both healthy and satisfying, this Crunchy Cucumber & Veggie Refresh Salad is exactly what you need. Made with fresh baby cucumbers, sweet carrots, and juicy tomatoes, this vibrant salad is simple yet packed with flavor, nutrients, and hydration.
This recipe is perfect for warm weather, quick lunches, healthy side dishes, and meal prep. It is low in calories, naturally gluten-free, vegetarian, and Weight Watchers friendly. Best of all, it takes less than 10 minutes to prepare.
The crisp texture of cucumbers combined with the natural sweetness of carrots and the juiciness of tomatoes creates a balanced bite in every spoonful. The light dressing enhances the vegetables without overpowering their freshness.
This salad fits beautifully into Mediterranean-style eating, weight loss plans, diabetic-friendly meal planning, and clean eating lifestyles.
Why You Will Love This Salad
This salad is:
• Extremely refreshing
• Naturally low in calories
• High in fiber
• Hydrating
• Quick and easy
• Budget-friendly
• Perfect for meal prep
• Low WW SmartPoints
It is the kind of recipe you will make again and again because it pairs well with almost everything — grilled chicken, fish, wraps, rice bowls, or even as a snack on its own.
Ingredients (Serves 2–3)
For the Salad:
3 baby cucumbers, thinly sliced (about 2 cups / 300g)
1 small carrot, peeled and finely diced (½ cup / 60g)
1 medium tomato, diced (1 cup / 150g)
For the Light Dressing:
1 tablespoon fresh lemon juice
1 teaspoon olive oil
¼ teaspoon salt (or to taste)
¼ teaspoon black pepper
½ teaspoon dried oregano (optional)
Optional additions (low point friendly):
1 tablespoon chopped fresh parsley
1 tablespoon finely diced red onion
Step-by-Step Instructions
Step 1: Prepare the Cucumbers
Wash the baby cucumbers thoroughly. Slice them thinly using a sharp knife or mandoline for even thickness. Thin slices give the best texture and allow the dressing to coat evenly.
Step 2: Dice the Carrot
Peel the carrot and cut into very small cubes. Finely diced carrot adds crunch and subtle sweetness.
Step 3: Chop the Tomato
Dice the tomato into small pieces. Remove excess seeds if you prefer less moisture.
Step 4: Combine Vegetables
Add cucumbers, carrots, and tomatoes into a large mixing bowl.
Step 5: Prepare the Dressing
In a small bowl, whisk together lemon juice, olive oil, salt, pepper, and oregano until well combined.
Step 6: Toss the Salad
Pour the dressing over the vegetables and toss gently until evenly coated.
Step 7: Rest Before Serving
Allow the salad to sit for 5–10 minutes so the flavors blend together.
Step 8: Final Taste Adjustment
Taste and adjust salt or lemon juice if needed.
Serve immediately for maximum crunch.
Flavor Profile & Texture
This salad delivers:
• Crisp crunch from cucumbers
• Sweetness from carrots
• Juicy freshness from tomatoes
• Bright acidity from lemon
• Light Mediterranean herb notes
It is refreshing, clean, and never heavy.
Nutritional Information (Per Serving – Makes 3 Servings)
Approximate values:
Calories: 55
Protein: 2g
Carbohydrates: 9g
Fiber: 2g
Sugars: 4g (natural from vegetables)
Fat: 2g
Sodium: 120mg
Values may vary slightly based on ingredient size.
WW SmartPoints (Estimated)
Blue Plan: 1 Point
Green Plan: 2 Points
Purple Plan: 1 Point
Most vegetables are zero points, and the only counted ingredient is olive oil.
To make it 0 points, you may omit olive oil completely.
Health Benefits
Hydration Boost
Cucumbers are over 95% water, helping keep the body hydrated.
Rich in Antioxidants
Tomatoes provide lycopene, a powerful antioxidant.
Fiber for Digestion
Carrots contain fiber that supports digestive health.
Heart Healthy
Olive oil (in moderation) supports heart health.
How This Salad Supports Weight Loss
Because it is low in calories and high in volume, this salad helps you feel full without consuming excess calories. The fiber content slows digestion and reduces cravings.
It is an excellent side dish for portion control and mindful eating.
Mediterranean Diet Friendly?
Yes. This salad aligns with Mediterranean principles:
• Fresh vegetables
• Olive oil in moderation
• Simple natural ingredients
• Minimal processing
Meal Prep & Storage
Store in an airtight container in the refrigerator.
Best consumed within 24 hours for maximum crunch.
If storing longer, keep dressing separate and mix before serving.
Serving Suggestions
• Pair with grilled chicken
• Serve alongside baked fish
• Add to a wrap
• Top with feta cheese (adds points)
• Mix with chickpeas for protein
Variations
Spicy Version
Add red chili flakes.
Creamy Version
Add 1 tablespoon Greek yogurt (adds minimal points).
Protein Boost
Add grilled tofu or shredded chicken.
Middle Eastern Style
Add fresh mint and a splash of apple cider vinegar.
Common Mistakes to Avoid
• Cutting vegetables too thick
• Adding too much salt
• Letting it sit too long (loses crunch)
• Overdressing
Expert Tips
• Use firm cucumbers for best texture
• Chill ingredients before preparing
• Add dressing just before serving for maximum freshness
Frequently Asked Questions
Can I make it ahead of time?
Yes, but store dressing separately.
Is it diabetic friendly?
Yes, it contains low glycemic vegetables.
Can I skip olive oil?
Yes, and it becomes zero points.
Why This Salad Is Better Than Store-Bought
Store-bought salads often contain preservatives, excess sodium, and heavy dressings. This homemade version is clean, fresh, and customizable.