MSG (A tiny pinch—as the “Cucumber Guy” Logan says, “obviously!”)
Instructions
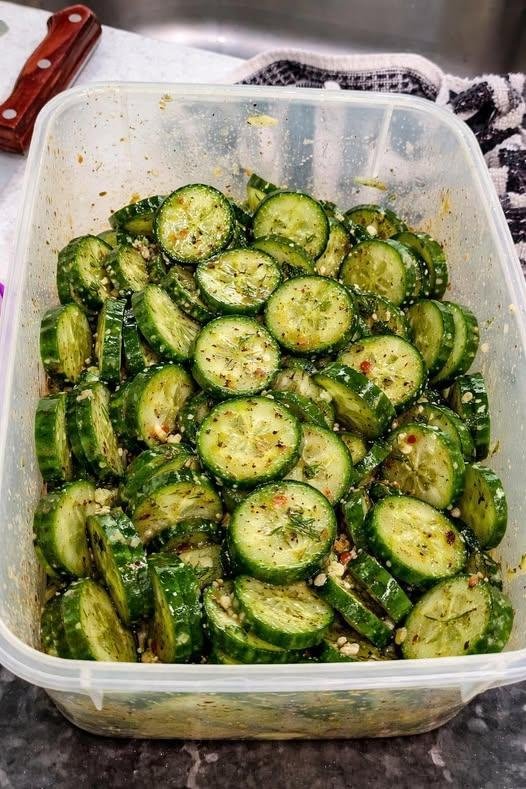
Slice: Use a mandoline or a sharp knife to slice the cucumbers into thin rounds.
Combine: Toss the cucumbers into a large container (like the one in your photo).
Season: Add the liquid ingredients first, then pile on the garlic, spices, seeds, and fresh dill.
The Shake: Close the lid tightly and shake vigorously for about 30 seconds. This bruises the cucumbers slightly, allowing the dressing to penetrate instantly.
Serve: You can eat it immediately, but it’s even better after 10 minutes in the fridge.
Variations to Try
Creamy Version: Add 1 tbsp of Greek yogurt or mayo and a squeeze of lemon.
Extra Heat: Add a teaspoon of Chili Crisp (like Lao Gan Ma).
The “Everything” Vibe: Lean heavier on the Everything Bagel seasoning and add a smear of cream cheese to the side.
Pro Tip: If you aren’t eating it all at once, keep in mind that cucumbers release a lot of water over time. It’s best eaten within 24 hours to maintain that signature crunch!
Vegan Raspberry Ice Cream is a refreshing, naturally sweet, and dairy-free dessert that combines the vibrant flavor of raspberries with a creamy plant-based base. It is perfect for those following a vegan, low-calorie, or weight-conscious lifestyle.
Why This Recipe is Special
Unlike traditional ice cream made with heavy cream and sugar, this version uses wholesome ingredients like fruit and plant-based yogurt, making it lighter, healthier, and easier to digest.
Perfect for Modern Diets
This recipe fits into vegan, dairy-free, and even weight-loss meal plans. It is also suitable for those avoiding refined sugar when natural sweeteners are used.
Flavor Profile
The ice cream delivers a balance of tart and sweet flavors. Raspberries bring a natural tang, while the creamy base softens the sharpness, resulting in a refreshing dessert.
Texture Description
Expect a smooth, creamy, and slightly fluffy texture similar to soft-serve ice cream. Freezing longer creates a firmer scoopable consistency.
Ideal Occasions
This dessert is perfect for summer days, after-meal treats, family gatherings, or healthy snacking.
Ingredients (Serves 4)
Main Ingredients
2 cups frozen raspberries
2 ripe bananas (sliced and frozen)
½ cup coconut milk (light) or almond milk
2–3 tbsp maple syrup or low-calorie sweetener
1 tsp vanilla extract
Ingredient Insights
Raspberries are rich in antioxidants and fiber. Bananas provide natural sweetness and creaminess. Plant-based milk ensures a smooth blend without dairy.
Ketosis Guide Subscription
Choosing Raspberries
Frozen raspberries work best for texture. Fresh raspberries can also be used but should be frozen beforehand.
Instructions
Prepare Ingredients
Freeze bananas and raspberries for at least 4–6 hours or overnight.
Dairy & Eggs
Blend Base
Add frozen raspberries, bananas, and plant-based milk into a high-speed blender.
Add Sweetener
Add maple syrup or your preferred sweetener along with vanilla extract.
Blend Until Smooth
Blend until creamy and smooth. Scrape sides as needed to ensure even blending.
Adjust Consistency
Add a little more milk if needed for smoother blending, but keep it thick.
Serve Soft or Freeze
Serve immediately for soft-serve texture or freeze for 1–2 hours for a firmer ice cream.
Scoop & Enjoy
Scoop into bowls and enjoy as a refreshing dessert.
Serving Ideas
With Fresh Fruit
Top with fresh raspberries, blueberries, or sliced strawberries.
With Crunch
Add crushed nuts, granola, or coconut flakes for texture.
Helpful Tips
Keep It Creamy
Do not add too much liquid; this keeps the texture thick and creamy.
Natural Sweetness
Use ripe bananas to reduce the need for extra sweetener.
Storage Tips
Store in an airtight container for up to 1 week. Let it sit for a few minutes before scooping.
Nutrition (Per Serving – Approx.)
Calories: 130 kcal
Protein: 2 g
Carbohydrates: 28 g
Fat: 2 g
Fiber: 4 g
WW SmartPoints (Approximate)
Per Serving: 2–3 SmartPoints
(Using light coconut milk and minimal sweetener.)
Dairy & Eggs
Health Benefits
This ice cream is rich in antioxidants, supports digestion due to fiber content, and is naturally low in fat compared to traditional ice cream.
Weight Loss Friendly
Low calories and natural ingredients make this dessert suitable for controlled diets and portion-based eating plans.
Customization Options
You can add cocoa powder for a chocolate twist, mix in chia seeds for added fiber, or swirl in peanut butter for richness.
Keto Chocolate Treats
Why It’s Perfect for Your Website
This recipe is SEO-optimized, easy to follow, and appeals to a wide audience including vegan, health-conscious, and weight-loss communities.
This vibrant juice combines the sweetness of carrots and beets with the crispness of cucumber and celery.
Ingredients
5 Medium carrots
8 Ribs of celery
1 Medium cucumber
1 Small beetroot
1/4 Lemon (peeled)
1-inch piece Fresh ginger
Instructions
1. Prepare the Produce
Wash all your vegetables thoroughly under cold water.
Peel the beetroot and the lemon (leaving the white pith is fine, but the yellow zest can sometimes be too bitter for juice).
If your carrots and cucumber are organic, you can leave the skins on; otherwise, give them a quick peel.
2. Juice the Ingredients
Pass the carrots, celery, cucumber, and beetroot through your juicer one by one.
Follow with the ginger and lemon to make sure all the flavorful juices are pushed through the machine.
3. Stir and Serve
Stir the juice well to combine all the vibrant layers.
Serve immediately over ice for the best flavor and nutrient boost.
A Quick Note on Wellness Tonics
The first image you shared mentions a tonic that can help with several conditions, including nerve pain, anxiety, and fatigue. While fresh vegetable juices and herbal infusions are a wonderful way to support your overall health and hydration, they work best as a part of a healthy lifestyle. For serious conditions like chronic depression or severe nerve pain, it’s always important to keep following the specialized care from your doctor alongside these healthy habits!
Helpful Tips
No Juicer? You can blend all the ingredients with a half-cup of water and then strain the mixture through a nut milk bag or a fine-mesh sieve.
Flavor Balance: If the beet flavor is too strong for you, try adding half a green apple to the mix for a little extra natural sweetness.
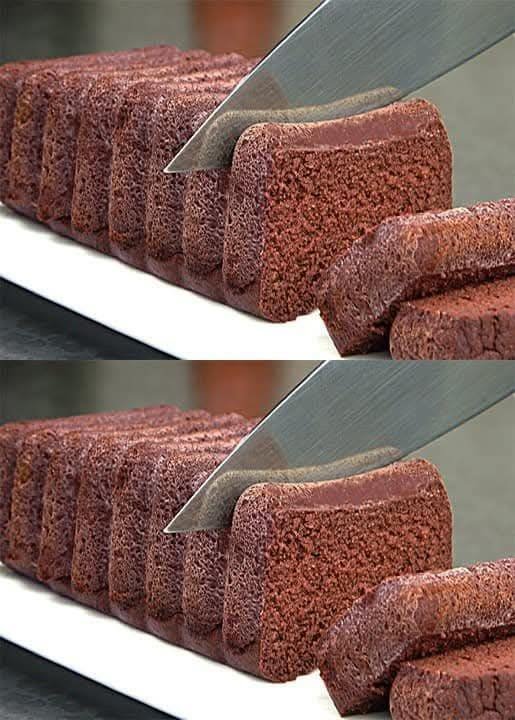
A dense, fudge-like dessert that relies on the natural pectin in apples to set. No flour, no eggs, and no added sugar needed!
Ingredients
4 large Apples (sweet varieties like Fuji, Gala, or Honeycrisp work best)
1/2 cup (50g) Unsweetened cocoa powder (high-quality cocoa will give the best flavor)
Optional: A pinch of cinnamon or 1/2 teaspoon vanilla extract for extra depth.
Instructions
Step 1: Prepare the Apples
Peel and core the apples, then cut them into small, even chunks.
Place the apple pieces in a saucepan with 2 tablespoons of water. Cover and cook over medium-low heat for about 10–12 minutes until they are very soft and can be easily mashed with a fork.
Alternatively, you can steam the apples until tender.
Step 2: Blend until Smooth
Transfer the hot, softened apples into a blender or food processor.
Blend until you have a completely smooth apple puree. It is important to do this while the apples are still warm.
Step 3: Add the Cocoa
Add the unsweetened cocoa powder (and optional cinnamon or vanilla) to the blender.
Blend again until the cocoa is fully incorporated and the mixture looks like a thick chocolate ganache.
Step 4: Set the Cake
Line a small loaf pan or a round 6-inch silicone mold with parchment paper (or lightly grease with a tiny bit of coconut oil).
Pour the chocolate-apple mixture into the mold and smooth the top with a spatula.
Let it cool to room temperature, then place it in the refrigerator for at least 4–6 hours (overnight is best) to allow the natural pectin to set the cake into a firm, sliceable texture.
Step 5: Serve
Once firm, carefully lift the cake out of the mold.
Slice into thick pieces. You can enjoy it plain or dust the top with a little extra cocoa powder or some fresh raspberries.
Helpful Tips
Sweetness: Since there is no added sugar, the sweetness depends entirely on your apples. If your apples are tart, you may want to stir in 1 tablespoon of honey or a few drops of stevia during the blending stage.
Texture: Ensure the apple puree is very smooth. Any lumps will affect the “fudge” consistency of the final cake.
Storage: Keep this cake in an airtight container in the refrigerator. It stays fresh and delicious for up to 4 days.
A quick, flavorful meal that brings together bright citrus and savory garlic butter. Perfect for a busy weeknight!
Ingredients
For the Fish:
4 white fish fillets (cod, tilapia, or haddock)
1 teaspoon Paprika
1 teaspoon Garlic powder
1 teaspoon Onion powder
2 tablespoons Olive oil
Salt and pepper, to taste
For the Lemon Butter Sauce:
3 tablespoons Unsalted butter
2 cloves Garlic, minced
1 tablespoon Fresh lemon juice
1 teaspoon Lemon zest
Fresh parsley, chopped (for garnish)
Instructions
1. Season the Fillets
Pat the fish fillets completely dry with paper towels.
In a small bowl, mix the paprika, garlic powder, onion powder, salt, and pepper.
Sprinkle the seasoning evenly over both sides of each fillet.
2. Sear the Fish
Heat the olive oil in a large skillet over medium-high heat.
Once the pan is hot, add the fillets. Cook for 3–4 minutes on the first side until a golden-brown crust forms.
Carefully flip the fillets and cook for another 2–3 minutes until the fish is opaque and flakes easily with a fork. Remove the fish from the pan and set aside on a plate.
3. Make the Sauce
In the same skillet, reduce the heat to medium and add the butter.
Once melted, add the minced garlic and cook for about 1 minute until fragrant (be careful not to burn it).
Stir in the lemon juice and lemon zest. Whisk for 30 seconds to combine.
4. Finish and Serve
Spoon the lemon butter sauce generously over the cooked fillets.
Garnish with fresh parsley and extra lemon slices if desired.
A Note on the Wellness Tonic
The first image you shared mentions a tonic for “bone pain, nerve pain, and anxiety.” While ingredients like ginger and turmeric (which we’ve looked at before!) are great for general wellness and inflammation, it’s important to remember that a drink can’t “cure” conditions like depression or chronic rheumatism on its own. It’s always a good idea to keep using these as a supplement to the advice your doctor gives you!
The green ring is actually a harmless chemical reaction between sulfur (from the egg white) and iron (from the egg yolk). When an egg is heated for too long or at a temperature that is too high, these two elements combine to form ferrous sulfide on the surface of the yolk.
The Main Causes
Overcooking: This is the most common reason. Leaving eggs in boiling water for too long triggers the reaction.
High Heat: Boiling the water too aggressively instead of using a gentle simmer.
Slow Cooling: If eggs aren’t cooled down quickly after cooking, the residual heat continues the “cooking” process.
Is it safe to eat?
Yes. While the texture might be a little drier and the flavor slightly more “sulfury,” the green ring is perfectly safe to eat and does not affect the nutritional value of the egg.
How to Avoid the Green Ring
To get perfectly yellow yolks every time, try the “Perfect Hard-Boiled Egg” method:
Place eggs in a pot and cover them with about an inch of cold water.
Bring to a boil over medium-high heat.
Turn off the heat immediately once the water reaches a rolling boil.
Cover the pot with a lid and let the eggs sit in the hot water for exactly 10–12 minutes.
Shock them in an ice bath: Transfer the eggs to a bowl of ice water for at least 5 minutes. This stops the cooking process instantly and makes them much easier to peel!
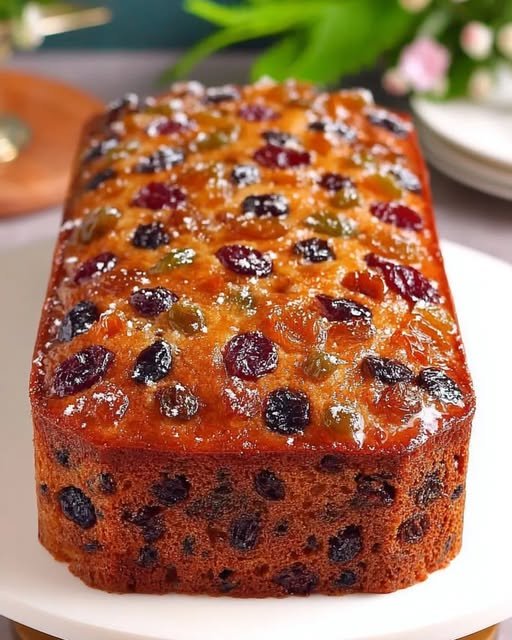
This moist and tender loaf is packed with warm spices and sweet dried fruits. It’s the perfect “quick bread” style fruit cake for when you want a holiday-worthy treat without the extra work.
Ingredients
1 1/2 cups (200g) All-purpose flour
3/4 cup (150g) Light brown sugar (firmly packed)
2 cups (300g) Dried or candied fruits (raisins, currants, dates, figs, cranberries, apricots, or mixed peel)
1 cup (240ml) Buttermilk (room temperature)
1/2 cup (113g) Unsalted butter (melted and cooled)
A silky, pudding-like dessert topped with a crunchy biscuit crumble.
Ingredients
2 cups (500 ml) Whole milk
1 can (395 g) Condensed milk
1 packet (approx. 200 g) Marie biscuits (or any plain tea biscuits/graham crackers)
Optional Thickener: 3 tablespoons cornstarch (if you prefer a firmer, sliceable texture rather than a soft pudding).
Instructions
Step 1: Prepare the Biscuit Base and Topping
Take about half of the biscuits and crush them into fine crumbs. You can do this by placing them in a zip-top bag and rolling over them with a rolling pin.
If you want a base, press some of the crumbs into the bottom of a glass dish. Reserve the rest of the crumbs for the top.
Step 2: Cook the Creamy Filling
In a medium saucepan, combine the whole milk and the condensed milk.
(Optional) If using cornstarch for a thicker set, whisk it into the cold milk before turning on the heat to ensure there are no lumps.
Place the pan over medium heat and stir constantly.
Bring the mixture to a gentle simmer. Continue stirring for about 5–8 minutes until the mixture thickens and coats the back of a spoon.
Step 3: Assemble
Pour the warm creamy mixture into your prepared glass dish (over the bottom biscuit layer, if you made one).
Smooth the top with a spatula.
Sprinkle the remaining biscuit crumbs evenly over the entire surface.
Step 4: Chill
Let the dessert cool to room temperature for about 20 minutes.
Place in the refrigerator for at least 2–3 hours (or overnight) to set completely.
Serve chilled directly from the dish.
Helpful Tips
Texture Variation: For more texture, you can layer whole biscuits between the cream layers instead of just using crumbs on top.
Flavor Boost: While not part of the 3 ingredients, a teaspoon of vanilla extract stirred into the cream at the end adds a lovely depth of flavor.
Serving: This is best enjoyed within 2 days to keep the biscuit topping from getting too soft from the moisture of the cream.
Optional: A slice of lemon or a small amount of honey for taste
Instructions
Step 1: Prepare the Spices
Wash the fresh ginger and slice it into thin rounds (no need to peel if it is clean).
Lightly crush the cloves and the cinnamon stick to help release their natural oils.
Step 2: Simmer the Mixture
Pour 2 cups of water into a small saucepan and bring it to a gentle boil.
Add the sliced ginger, cloves, cinnamon stick, and bay leaves.
Reduce the heat to low and let the mixture simmer for 10–15 minutes.
Step 3: Strain and Serve
Remove the saucepan from the heat.
Strain the liquid into a mug, discarding the whole spices.
If desired, add a squeeze of lemon or a touch of honey once the drink has cooled slightly.
Enjoy while warm, typically in the morning or before bed.
Helpful Tips & Notes
Flavor Profile: This drink has a strong, spicy, and slightly woody flavor. If it is too intense, you can dilute it with more warm water.
Storage: You can make a larger batch and store it in the refrigerator for up to 2 days, reheating it gently when you’re ready to drink.
Safety Note: While these kitchen spices are generally safe for cooking, it is always a good idea to check with a healthcare professional before drinking herbal tonics daily, especially if you are taking medications for blood pressure or blood sugar.
A colorful and refreshing chilled drink featuring creamy milk, soft tapioca pearls, and fruity jelly cubes.
Ingredients
For the Jelly:
4 cups Water
25 grams White unflavored jelly powder
1/4 cup White sugar
Food coloring: Red, Yellow, and Green
For the Drink Base:
835 grams Fruit cocktail (well-drained) or fresh chopped mango, pineapple, and strawberries
1 cup Small tapioca pearls (cooked)
250 ml All-purpose cream (or heavy cream)
300 ml Condensed milk
2 cups Evaporated milk (or fresh milk)
Instructions
Step 1: Prepare the Jelly
In a medium pot, bring 4 cups of water to a boil.
Stir in the jelly powder and 1/4 cup sugar, continuing to stir until the powder is fully dissolved and the liquid is clear.
Remove from heat and divide the hot mixture into three separate heat-safe bowls.
Add a few drops of red coloring to the first bowl, yellow to the second, and green to the third. Stir each until the color is even.
Pour each color into a shallow container. Let them cool at room temperature, then refrigerate until firm.
Once set, cut the jelly into small, even cubes and set aside.
Step 2: Create the Creamy Base
In a large mixing bowl, whisk together the all-purpose cream, condensed milk, and evaporated milk.
Stir gently until the mixture is smooth and well-combined.
Step 3: Assemble the Drink
Add the drained fruit cocktail (or your fresh fruit pieces) into the creamy milk base and stir.
Carefully fold in the cooked tapioca pearls and the colored jelly cubes.
Use a gentle folding motion to ensure the jelly cubes stay intact and don’t break apart.
Step 4: Chill and Serve
Transfer the mixture into a large pitcher or individual serving glasses.
Refrigerate for at least 1 hour before serving. This allows the flavors to meld and the drink to become perfectly chilled.
Serve cold, ideally with a wide straw or a long spoon to enjoy the fruit and jelly bits.
Helpful Tips for Success
Drain Well: Ensure your canned fruit is thoroughly drained. Excess syrup can thin out the creamy base and make the drink overly sweet.
Sweetness Control: You can easily adjust the sweetness by adding more or less condensed milk to suit your preference.
Texture: For the best results, make sure your jelly is completely firm before you attempt to slice it into cubes.
Storage: This drink is best enjoyed fresh but can be stored in a covered container in the refrigerator for up to 2 days. Give it a very gentle stir before serving again.
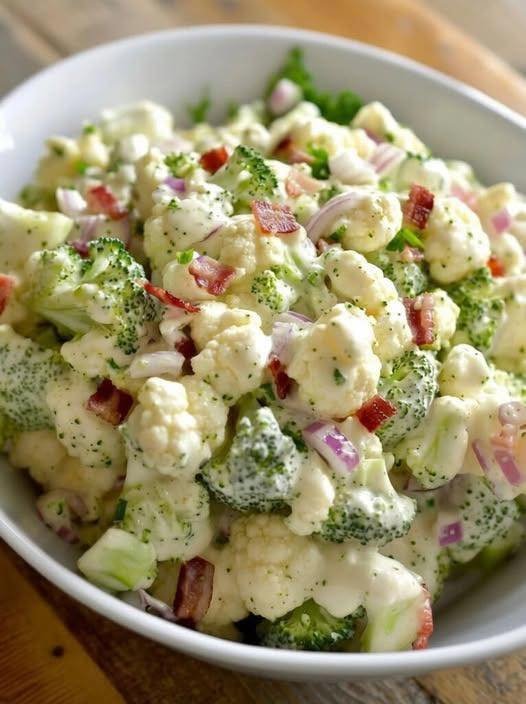
A refreshing, hearty salad that combines crisp vegetables with a smooth, flavorful dressing.
Ingredients
The Salad Base:
3 cups Fresh broccoli florets (cut into bite-sized pieces)
3 cups Fresh cauliflower florets (cut into small pieces)
6 slices Bacon (cooked until crisp and crumbled)
3/4 cup Sharp cheddar cheese (freshly grated)
1/3 cup Red onion (finely diced)
1/2 cup Roasted sunflower seeds (or chopped almonds)
The Creamy Dressing:
3/4 cup Mayonnaise
1/4 cup Plain Greek yogurt (or sour cream)
2 tablespoons Apple cider vinegar
2 tablespoons Granulated sweetener (monk fruit or stevia work well here)
1/2 teaspoon Salt
1/4 teaspoon Black pepper
Instructions
1. Prepare the Vegetables
Wash the broccoli and cauliflower thoroughly.
Important: Pat them completely dry with a clean towel. Drying the vegetables ensures the dressing clings to them instead of sliding off.
Chop them into small, even pieces so you get a bit of everything in every bite.
2. Cook the Bacon
Fry the bacon in a skillet or bake in the oven until it is very crispy.
Drain on paper towels, let it cool, and then crumble it into small pieces.
Pro Tip: Keep the bacon separate until you are ready to serve to ensure it stays crunchy.
3. Whisk the Dressing
In a medium bowl, whisk together the mayonnaise, Greek yogurt, apple cider vinegar, sweetener, salt, and pepper.
Stir until the dressing is completely smooth and creamy.
4. Assemble the Salad
In a large mixing bowl, toss together the broccoli, cauliflower, red onion, cheese, and sunflower seeds.
Pour the dressing over the vegetables and fold gently until everything is evenly coated.
5. Chill and Serve
Cover the bowl and refrigerate for at least 30 minutes. For the best flavor, let it chill for 3–4 hours to allow the flavors to meld.
Just before serving, stir in the crumbled bacon (or sprinkle it on top for a nice presentation).
Variations & Storage
Low-Carb Tip: This recipe is naturally low-carb if you use a sugar-free sweetener and skip any added dried fruit like raisins.
Make Ahead: You can chop the vegetables and make the dressing up to 24 hours in advance. Keep them in separate containers and mix them 1–2 hours before your meal.
Storage: Store leftovers in an airtight container in the fridge for up to 3 days. Stir well before serving as the vegetables may release a little moisture over time.
A simple, reliable recipe for fresh bread with a crispy crust and soft interior.
Ingredients
1 1/3 cups (320 ml) Warm water (ensure it is lukewarm, not hot)
1 tablespoon (10 g) Dry yeast
4 tablespoons (60 ml) Olive oil
1 teaspoon Salt
4 3/4 cups (570 g) Plain flour (plus extra for dusting)
Instructions
Step 1: Activate the Yeast
In a large mixing bowl, combine the warm water and dry yeast.
Let it sit for about 5–10 minutes until it becomes frothy and bubbly.
Stir in the olive oil.
Step 2: Mix the Dough
Gradually add the flour and the salt to the yeast mixture.
Stir with a wooden spoon until a shaggy dough forms.
Turn the dough out onto a lightly floured surface and knead by hand for 8–10 minutes (or use a stand mixer with a dough hook) until the dough is smooth, elastic, and no longer sticky.
Step 3: First Rise
Lightly grease a large bowl with a little olive oil.
Place the dough inside, cover with a clean damp cloth or plastic wrap, and let it rise in a warm, draft-free spot for 1 to 1.5 hours, or until it has doubled in size.
Step 4: Shape the Baguettes
Gently punch down the dough to release the air.
Divide the dough into 3 equal portions.
Roll each piece into a long log shape (baguette style).
Place the loaves on a baking tray lined with parchment paper. Cover and let them rise again for another 30 minutes.
Step 5: Prepare for Baking
Preheat your oven to 200°C (400°F).
Using a very sharp knife or a razor, make 3 to 4 diagonal slashes across the top of each loaf.
Optional: Lightly dust the tops with a little flour for a rustic look.
Step 6: Bake
Place the tray in the oven. For a crispier crust, you can place a small oven-safe pan with an inch of water on the bottom rack to create steam.
Bake for 20–25 minutes or until the loaves are deep golden brown and sound hollow when tapped on the bottom.
Let the bread cool on a wire rack before slicing.
Helpful Tips
The “Windowpane” Test: To see if you’ve kneaded enough, stretch a small piece of dough; it should be thin enough to see light through without tearing.
Storage: Homemade bread has no preservatives, so it is best enjoyed the same day. To keep it longer, wrap it tightly and store it in a cool place, or freeze slices to toast later.
This concentrated blend is often used in traditional wellness routines. Since it is highly acidic, it is best enjoyed diluted in a glass of water.
Ingredients
1 cup Fresh lemon juice (approx. 4–6 lemons)
1 cup Garlic juice (freshly blended and strained)
1 cup Ginger juice (freshly blended and strained)
1 cup Raw Apple Cider Vinegar (with “the mother”)
1 cup Raw honey (optional, to balance the strong flavors)
Instructions
1. Prepare the Juices
Peel the garlic and ginger.
Blend them separately (adding a tiny splash of water only if needed to get the blades moving).
Strain through a fine-mesh cloth or sieve to extract one cup of clear juice for each.
2. Simmer the Mixture
In a non-reactive saucepan (stainless steel or ceramic), combine the lemon juice, garlic juice, ginger juice, and apple cider vinegar.
Bring the mixture to a very gentle simmer over low heat.
3. Reduce the Liquid
Allow the mixture to simmer uncovered for 20–30 minutes.
The goal is to reduce the liquid by about one-quarter to concentrate the ingredients.
4. Cool and Sweeten
Remove the pot from the heat and let it cool completely to room temperature.
Important: Once cooled, stir in the raw honey. Adding honey to hot liquid can destroy its natural enzymes.
5. Storage
Pour the finished tonic into a clean glass bottle or jar and store it in the refrigerator.
Usage and Safety
How to take: A common way to use this is to stir 1 to 2 tablespoons into a glass of warm water in the morning.
Consistency: Use a glass container for storage, as the acidity can react with plastic or certain metals over time.
Note: Because garlic and ginger can have natural blood-thinning effects, it is a good idea to check with a healthcare professional if you are taking any daily medications for blood pressure or heart health.
Golden on the outside, soft and fluffy inside, these cake squares have a delicate crisp sugar crust and a moist, buttery crumb. Perfect as a snack, dessert, or with coffee/tea.
Servings
Makes: 16 squares
Serving size: 1 square
Ingredients
1 cup (225g) unsalted butter, melted
1 ½ cups (300g) granulated sugar
3 large eggs
1 tbsp vanilla extract
1 ½ cups (190g) all-purpose flour
1 tsp baking powder
½ tsp salt
½ cup (120ml) milk
2–3 tbsp sugar (for topping, optional but recommended)
Instructions
1. Prep
Preheat oven to 350°F (175°C)
Grease or line an 8×8 or 9×9 baking pan
2. Mix Wet Ingredients
Whisk melted butter + sugar until smooth
Add eggs one at a time
Stir in vanilla
3. Combine Dry Ingredients
In a separate bowl: flour, baking powder, salt
4. Make Batter
Add dry ingredients to wet mixture
Pour in milk and mix until smooth (do not overmix)
5. Bake
Pour batter into pan
Sprinkle sugar evenly on top (creates that crispy crust)
Bake 30–35 minutes until golden and set
6. Cool & Slice
Let cool 10–15 minutes
Cut into squares and serve warm or at room temp
Tips for Best Results
Use real butter for best flavor
Don’t skip the sugar topping—it creates that signature crust
Slightly underbake for extra moist centers
Add lemon zest or almond extract for variation
For extra crisp edges, bake in a metal pan (not glass)
Optional Variations
Cinnamon Sugar: Mix cinnamon with topping sugar
Coconut Twist: Add shredded coconut to batter
Glaze: Drizzle with powdered sugar + milk icing
Nutritional Info (Approx per serving)
Calories: 220
Fat: 11g
Carbs: 28g
Sugar: 18g
Protein: 3g
Benefits
Simple pantry ingredients
Quick to make (under 45 minutes)
Versatile base recipe
Kid-friendly and crowd-pleasing
Q&A
Q: Why is my cake dense? A: Overmixing or too much flour can make it dense. Mix just until combined.
Q: How do I make it crispier? A: Add more sugar on top or broil for 1–2 minutes at the end (watch closely).
Q: Can I store it? A: Yes! Store in an airtight container for up to 3 days at room temp.
Q: Can I freeze it? A: Absolutely—freeze up to 2 months and thaw at room temperature.
Q: Can I make it dairy-free? A: Substitute butter with plant-based butter and milk with almond/oat milk.
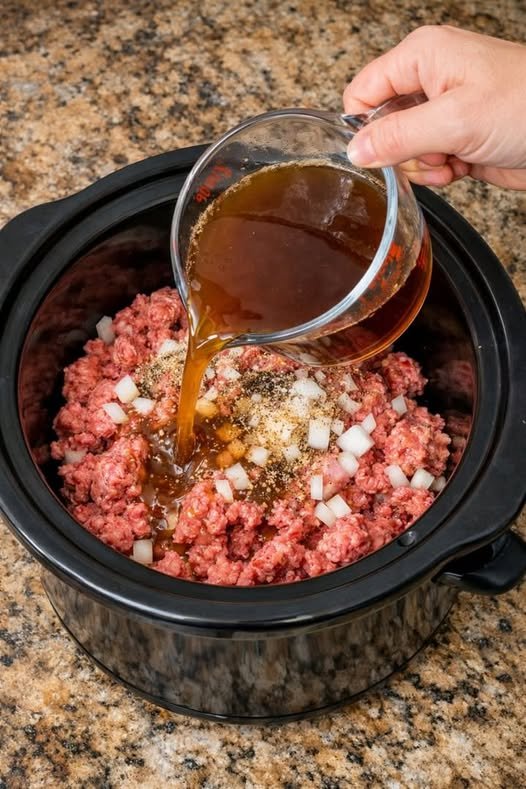
1 1/2 lbs Ground beef (leaner blends like 90/10 work best here)
4 medium Russet potatoes, peeled and diced
3 medium Carrots, peeled and sliced
1 medium Yellow onion, diced
4 cups Beef broth
Pantry Staples: 1 tsp salt, 1/2 tsp black pepper
Instructions
Layer the Base: Place the raw ground beef at the bottom of a 6-quart slow cooker. Break it up slightly into large chunks.
Add Vegetables: Scatter the potatoes, carrots, and onions over the beef. Season evenly with salt and pepper.
The Slow Simmer: Pour the beef broth over the mixture. Cover and cook on LOW for 7–8 hours or HIGH for 4–5 hours.
The “Finish”: About 1 hour before serving, use a sturdy spoon to break the beef into smaller crumbles. Stir the pot thoroughly.
Adjust Texture: Taste for seasoning. If you prefer a thicker consistency, mash a few of the tender potato pieces directly into the broth to create a natural thickener.
Serve: Ladle into bowls and top with shredded cheese or parsley if desired.
Quick Tips for Success
Fat Content: Because the beef isn’t drained, using a lean ground beef prevents the stew from becoming too oily. If you use a higher fat percentage (like 80/20), you can skim any excess oil off the top with a spoon before serving.
Potato Choice: Russets are great for thickening the stew (they fall apart easily), but if you prefer potatoes that hold their shape perfectly, try Yukon Golds.
The “Diner” Secret: If you try the tomato-style variation mentioned in your notes, adding a splash of Worcestershire sauce along with the tomato sauce adds a massive boost of savory “umami” flavor.
That photo looks incredibly cozy—there’s nothing quite like those crispy, fork-patterned peaks on a well-baked potato crust.
Since your list cut off at the half-and-half, I’ve rounded out the rest of the recipe for you. Here is the complete breakdown to get that golden-brown finish and savory filling.
Classic Shepherd’s Pie
Ingredients
For the Mashed Potato Topping:
2 lbs russet potatoes, peeled and cubed
¼ cup half-and-half (or whole milk)
4 tbsp unsalted butter
1 egg yolk (the secret for that golden color)
Salt and pepper to taste
For the Filling:
1 ½ lbs ground lamb (use beef for “Cottage Pie”)
1 large onion, diced
2 carrots, diced
2 cloves garlic, minced
1 cup frozen peas and corn
2 tbsp all-purpose flour
1 cup beef broth
1 tbsp Worcestershire sauce
1 tsp fresh thyme (plus sprigs for garnish)
Instructions
Prepare the Topping: Boil the potatoes in salted water until tender (about 15 minutes). Drain and mash with butter, half-and-half, and the egg yolk until smooth. Set aside.
Sauté the Base: In a large skillet, brown the ground lamb over medium-high heat. Drain excess fat, then add onions and carrots. Cook until softened (about 5 minutes).
Build the Sauce: Stir in the garlic, thyme, and flour. Cook for 1 minute to toast the flour, then slowly pour in the broth and Worcestershire sauce. Simmer until thickened, then fold in the peas and corn.
Assemble: Pour the meat mixture into a baking dish. Spread the mashed potatoes over the top. Use a fork to create ridges—those are what get crispy in the oven!
Bake: Bake at 400°F (200°C) for 25–30 minutes, or until the top is golden and the edges are bubbling.
Pro-Tip for the Texture
If the top isn’t as brown as you’d like after 25 minutes, pop it under the broiler for 2–3 minutes at the very end. Keep a close eye on it so it doesn’t burn!
2-3 Large Eggs (The photo looks quite thick, so 3 might give you that extra lift)
1 Small Onion (finely diced)
1/4 cup Shredded Cheese (Parmesan or Mozzarella work best)
2 tbsp Flour or Breadcrumbs (This is the secret to getting that solid, cake-like structure)
Salt, Pepper, and Garlic Powder to taste
Fresh Herbs (Parsley or Chives for the garnish)
The Step-by-Step
The Squeeze: This is the most important step! Grate your zucchini, sprinkle with a little salt, and let it sit for 5 minutes. Then, use a clean kitchen towel to squeeze out every drop of water. If it’s too wet, it won’t get that golden crust.
The Mix: In a bowl, beat the eggs. Stir in the squeezed zucchini, onions, cheese, flour, and seasonings.
The Sear: Heat a small non-stick skillet with a drizzle of olive oil over medium-low heat. Pour the mixture in and flatten it with a spatula.
The Flip: Cover with a lid and cook for 5–7 minutes until the bottom is golden. Carefully flip it (use a plate to help!) and cook the other side for another 3–5 minutes.
Finish: Garnish with fresh herbs and slice it like a cake.
Pro Tip: For that extra “puffy” look in the photo, you can separate the egg whites, whisk them to soft peaks, and fold them back into the zucchini mixture before frying!
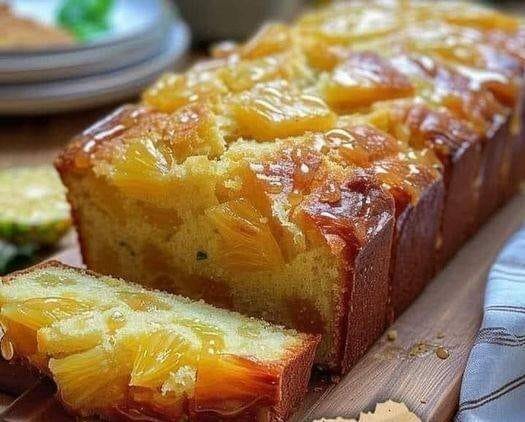
Prep time: 20 mins | Bake time: 50–60 mins | Servings: 1 loaf
Ingredients
For the Cake
For the Pineapple Topping
For the Glaze
1 ½ cups All-purpose flour
1 cup Pineapple chunks (fresh or canned)
½ cup Powdered sugar
1 tsp Baking powder
2 tbsp Brown sugar
1 tbsp Pineapple juice
½ tsp Salt
1 tbsp Butter (melted)
½ tsp Lime or lemon zest
½ cup Unsalted butter (softened)
1 cup Granulated sugar
2 Large eggs
½ cup Sour cream (or Greek yogurt)
1 tsp Vanilla extract
Instructions
1. Prepare the Pineapple
In a small bowl, toss your pineapple chunks with the melted butter and brown sugar. Set this aside; the sugar will draw out the juices to create a natural syrup.
2. Cream the Base
Preheat your oven to 350°F (175°C). Grease and line a 9×5 inch loaf pan with parchment paper. In a large bowl, cream the softened butter and granulated sugar until light and fluffy (about 3–4 minutes).
3. Mix the Wet & Dry
Beat in the eggs one at a time, then stir in the vanilla and sour cream. Gradually fold in the flour, baking powder, and salt. Do not overmix! Fold until just combined for a tender crumb.
4. The Layering Secret
Pour half the batter into the pan.
Scatter half of your prepared pineapple chunks over the batter.
Top with the remaining batter.
Press the rest of the pineapple chunks into the top (this creates that beautiful “sunken” look from the photo).
5. Bake
Bake for 50–60 minutes, or until a toothpick comes out clean. If the pineapple on top starts browning too fast, tent the pan loosely with foil for the last 15 minutes.
6. The Finishing Glaze
While the cake cools, whisk the powdered sugar, pineapple juice, and zest until smooth. Drizzle it generously over the cake while it is still slightly warm so it seeps into the nooks.
Pro Tip: For an extra “glistening” look like the image, brush the pineapple chunks with a little apricot jam or extra pineapple syrup right before serving!
1 tsp Baking soda (dissolved in 1 Tbsp warm water or milk)
1 ½ tsp Ground cinnamon
½ tsp Ground allspice or nutmeg (optional, for extra warmth)
1 lb (approx. 2 cups) Pitted dates, chopped
1 ½ cups Walnuts, chopped
1 cup Raisins (optional—some families used half dates/half raisins)
The Instructions
Prep: Preheat your oven to 350°F (175°C). Lightly grease your cookie sheets or line them with parchment paper.
Cream: In a large bowl, cream together the softened butter and brown sugar until light and fluffy. Add the eggs one at a time, beating well after each, then stir in the vanilla.
The Secret Step: Dissolve the baking soda in the tablespoon of warm water/milk and stir it into the creamed mixture. (This was an old-school trick to ensure the soda distributed evenly in thick doughs!)
Dry Ingredients: Whisk the flour, cinnamon, and spices together. Gradually add this to the wet ingredients, mixing until just combined.
The “Rocks”: Fold in the chopped dates, walnuts, and raisins by hand. The dough will be very thick and heavy—this is normal!
Bake: Drop by rounded tablespoonfuls (about 2 inches apart) onto the baking sheets. Bake for 10–12 minutes.
Finish: They are done when the edges are set and the tops spring back slightly when touched. Let them cool on the pan for a few minutes before moving to a wire rack.
A Few “Mom” Tips:
The Date Trick: If your dates are sticky and hard to chop, toss them in a little bit of the flour from the recipe first. It keeps them from clumping together in the dough.
Texture: These cookies actually get better after a day or two in an airtight container as the moisture from the fruit softens the cookie even more.
Variations: Some versions of this recipe from the 1950s used a splash of white wine or bourbon instead of water to dissolve the soda for a deeper holiday flavor!
These Ham and Cheese Egg Cups are a fantastic way to start the morning with something savory and simple. They are naturally high in protein and can be customized to fit various dietary goals.
Instructions
Prep: Preheat your oven to 400°F (200°C) and lightly grease a standard 6-cup muffin tin.
The “Crust”: Press one slice of ham into each muffin cup, molding it against the sides and bottom to create a little bowl.
Cheese & Fillings: Divide the shredded cheese (about 2-3 tablespoons per cup) and any optional add-ins like onions evenly among the ham cups.
The Eggs: Carefully crack one egg into each cup on top of the cheese. Season with salt and pepper to taste.
Bake: Place in the oven for 12–15 minutes. For runny yolks, check them around 12 minutes; for fully set eggs, leave them in for the full 15.
Serve: Let them cool for a minute before using a knife to pop them out. Garnish with fresh herbs if desired!
Why They’re a Great Choice
Protein-Packed: Each cup provides a solid dose of protein, keeping you energized.
Low Carb: These are naturally low in carbohydrates, making them ideal for keto or low-carb lifestyles.
Meal Prep Friendly: You can easily double the batch and keep them in the fridge for a quick grab-and-go breakfast during the week.
Description: Guava leaves have been traditionally used in herbal medicine to help manage blood sugar levels. This tea is simple, natural, and can be a healthy addition to your morning routine.
This traditional soup is slow-simmered to develop deep flavor from smoked ham hocks, tender beans, and aromatic vegetables. It’s thick, nourishing, and budget-friendly—often even better the next day as the flavors deepen.
Grains & Pasta
Get updates on the latest posts and more from https://techiecycle.com/ straight to your inbox.
We use your personal data for interest-based advertising, as outlined in our Privacy Notice.
Ingredients
Main Ingredients:
2 smoked ham hocks
2 cups dried white beans (navy or great northern), soaked overnight
1 onion, chopped
2 carrots, diced
2 celery stalks, chopped
3 cloves garlic, minced
6–8 cups water or low-sodium chicken broth
1 bay leaf
1 tsp dried thyme
½ tsp black pepper
Salt (add later, since ham is salty)
Optional Add-ins:
1 potato, diced (for extra thickness)
1 cup chopped spinach or kale
1 tsp smoked paprika for deeper flavor
Instructions
Discover more
Food
salad
Meat
1. Prepare Beans
Soak dried beans overnight
Drain and rinse before cooking
2. Sauté Base
In a large pot, sauté onion, carrots, and celery until softened
Fruits & Vegetables
Add garlic and cook for 1 minute
Subscribe to https://techiecycle.com/!
Get updates on the latest posts and more from https://techiecycle.com/ straight to your inbox.
We use your personal data for interest-based advertising, as outlined in our Privacy Notice.
3. Simmer Soup
Add beans, ham hocks, broth/water, bay leaf, thyme, and pepper
Bring to a boil, then reduce to low heat
Simmer for 1.5–2.5 hours, until beans are tender
4. Shred Meat
Remove ham hocks
Shred meat, discard bones and excess fat
Grains & Pasta
Return meat to the pot
5. Finish
Adjust salt if needed
Add greens if using, cook for 5–10 minutes more
Notes
The soup thickens naturally as beans break down
Stir occasionally to prevent sticking
Garlic
Flavor improves after resting
Tips for Best Results
Use smoked ham hocks for authentic flavor
Don’t add salt early—it can toughen beans
Mash some beans for a creamier texture
Add a splash of vinegar or lemon juice before serving to brighten flavor
Makes 6–8 servings
Meat & Seafood
Nutritional Info (Approx. per serving)
Calories: 300–350 kcal
Protein: 20–25 g
Carbohydrates: 30–35 g
Fat: 10–15 g
Fiber: 8–10 g
Benefits
High in protein and fiber (great for fullness)
Soups & Stews
Supports gut health
Provides iron and essential minerals
Budget-friendly and meal-prep friendly
Q&A
Q: Can I make this in a slow cooker? A: Yes—cook on low for 7–8 hours or high for 4–5 hours.
Q: Can I skip soaking beans? A: You can, but cooking time will increase significantly.
Get updates on the latest posts and more from https://techiecycle.com/ straight to your inbox.
We use your personal data for interest-based advertising, as outlined in our Privacy Notice.
Q: Can I use canned beans? A: Yes—reduce cooking time to about 45 minutes and use 3–4 cans (drained).
Pork
Q: How do I store it? A: Refrigerate up to 4 days or freeze for up to 3 months.
Q: What can I serve with it? A: Crusty bread, cornbread, or a simple side salad

 Introduction
 Why This Recipe is Special
 Perfect for Modern Diets
 Flavor Profile
 Texture Description
 Ideal Occasions
 Ingredients (Serves 4)
 Main Ingredients
 Ingredient Insights
 Choosing Raspberries
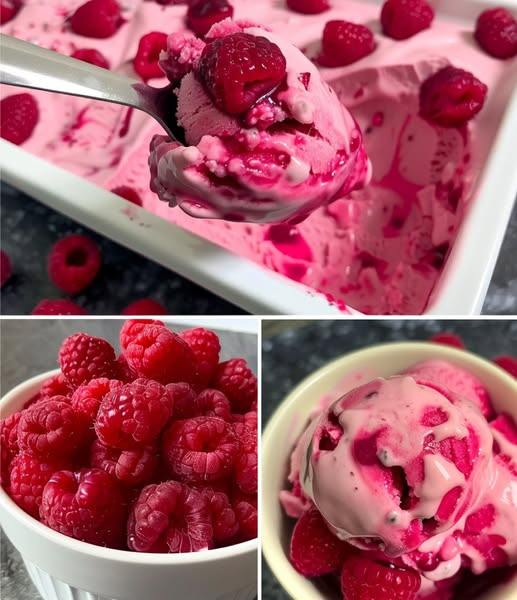
 Instructions
 Prepare Ingredients
 Blend Base
 Serving Ideas
 Helpful Tips
 Storage Tips
 Nutrition (Per Serving – Approx.)
 WW SmartPoints (Approximate)
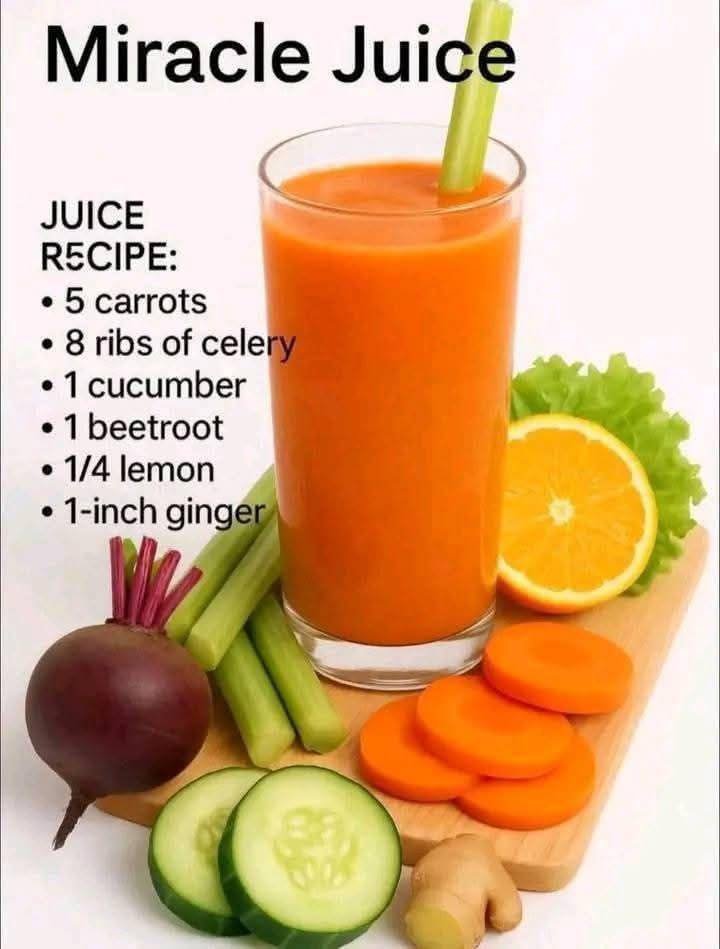


 Bean and Ham Hock Soup
 Main Ingredients:
 Optional Add-ins: