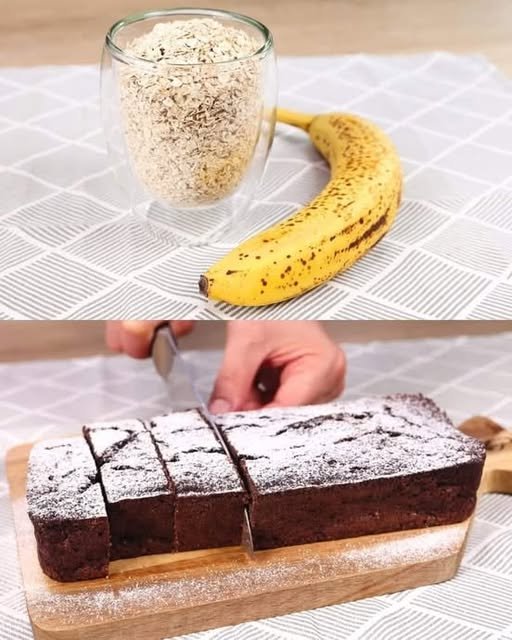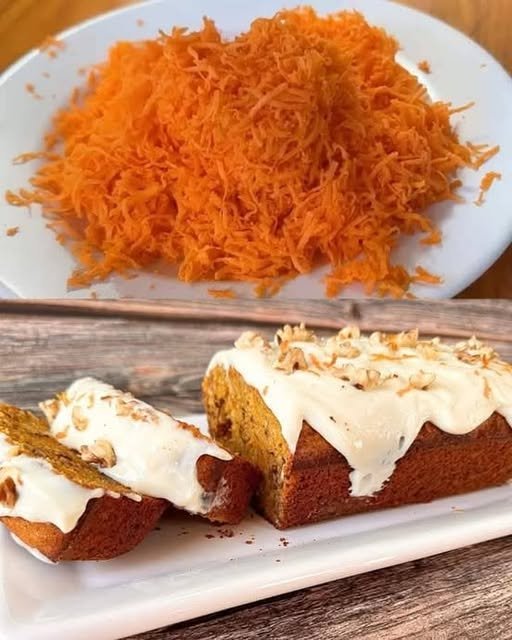
Flourless Almond Carrot Cake (Low-Carb Style)
A naturally sweetened cake made without wheat flour, using ground almonds and fresh carrots for a moist, gently textured result.
Preparation Overview
-
Preparation time: 15 minutes
-
Baking time: 30–35 minutes
-
Cooling time: 30 minutes
-
Total time: About 1 hour 20 minutes
Yield
-
Makes 8–10 small slices
Ingredients
Base Ingredients
-
200 g carrots, peeled and finely grated
-
200 g ground almonds (almond flour)
Wet Ingredients
-
2 large eggs (room temperature)
-
2–3 tablespoons honey (adjust to taste)
Leavening & Flavoring
-
1 teaspoon baking soda
-
2–3 drops mild vinegar (such as wine or apple vinegar)
-
A small pinch of ground cinnamon
-
A small pinch of salt
Optional Topping
-
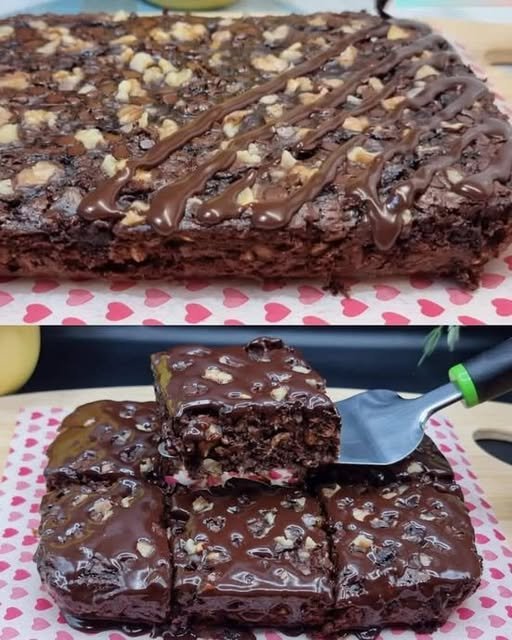
Low-fat Greek yogurt or cream cheese, lightly sweetened with honey
-
A light dusting of cocoa powder or finely grated dark chocolate
Step-by-Step Instructions
1. Prepare the Carrots
Peel and finely grate the carrots using a fine grater.
If the carrots release a lot of liquid, gently press them with a paper towel or clean cloth to remove excess moisture. This helps maintain a balanced texture in the finished cake.
Set aside.
2. Mix the Wet Ingredients
In a large mixing bowl, crack in the eggs. Add the honey and salt.
Whisk until the mixture looks smooth and slightly airy. This helps distribute the sweetness evenly throughout the batter.
3. Prepare the Leavening
In a small spoon or cup, combine the baking soda with the vinegar. The mixture will foam briefly.
Immediately add this mixture to the egg mixture and stir gently until combined.
4. Combine All Ingredients
Add the grated carrots and cinnamon to the bowl with the egg mixture. Stir gently.
Gradually fold in the ground almonds, mixing slowly until everything is evenly combined.
The batter should be thick but spreadable. The almonds will absorb moisture as the mixture rests.
5. Prepare for Baking
Preheat the oven to 180°C (350°F).
Line a small square or rectangular baking dish with parchment paper, or lightly grease it.
Transfer the batter into the prepared dish and smooth the surface with a spatula.
6. Bake
Place the dish on the middle rack of the oven.
Bake for 30–35 minutes, or until:
-
The top looks lightly golden
-
A wooden skewer inserted into the center comes out clean
If the top browns too quickly, loosely cover with parchment paper for the remaining baking time.
7. Cooling and Finishing
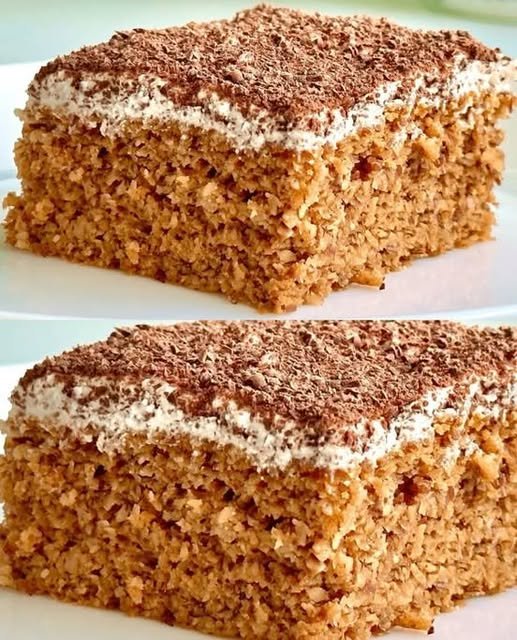
Remove the cake from the oven and allow it to cool completely in the pan.
Once cooled, spread a thin layer of sweetened Greek yogurt or cream cheese on top, if desired.
Finish with a light sprinkle of cocoa powder, cinnamon, or finely grated dark chocolate.
Serving Suggestions
-
Slice and serve at room temperature or chilled
-
Pairs well with herbal tea, coffee, or almond milk
-
Suitable as a light dessert or afternoon snack
Storage
-
Store covered in the refrigerator for up to 3 days
-
Bring to room temperature before serving for best texture
Optional Notes
-
Honey can be adjusted based on preference
-
Cinnamon may be replaced or combined with nutmeg
-
The cake has a naturally dense texture due to the almond base