Creamy Coconut Pie Recipe

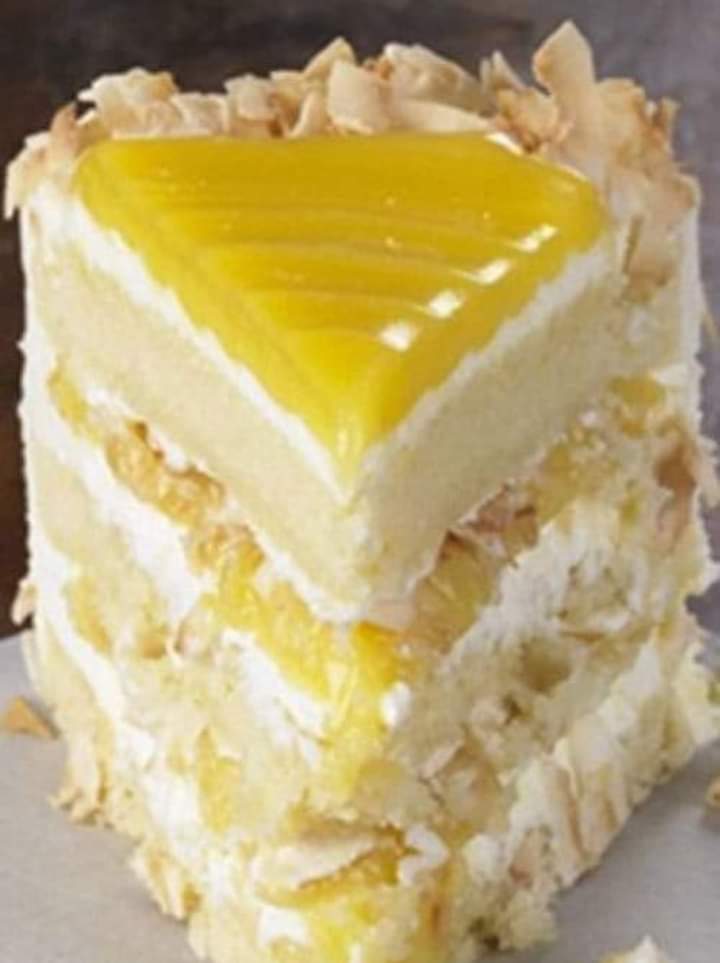
Cream Coconut  pie is a creamy, flavorful pie with toasted coconut, a rich center, and a lot of happiness in every bite.

This the best coconut cream pie and it’s easy to make. It’s a perfect and comforting addition to any meal, including the Thanksgiving and Christmas holidays.

This pie was a massive hit at my house. The dessert recipe is super easy to make, it’s hard to mess up, and the recipe calls for just a few basic ingredients that you most likely have most of.

So, if you’re not typically a pie-cooking person, have no fear, this will turn out perfectly.

YIELD: 8 PIECES 

PREP TIME: 30 minutes

COOK TIME: 15 minutes

ADDITIONAL TIME: 2 hours

TOTAL TIME: 2 hours 45 minutes

Ingredients:

  • 3/4 cup sweetened flaked coconut + 1/4 cup, toasted
  • 3 cups of half and half
  • 2 eggs, beaten
  • 3/4 cup sugar
  • 1/2 cup flour
  • 1/4 teaspoon salt
  • 2 teaspoons vanilla extract
  • 9″ pie shell, baked
  • 8 ounces whipped topping

Instructions:

Bake the pie shell according to the package directions.

Spread all of the coconut out on a cookie sheet and toast for about five to six minutes on 350-degrees. Open the oven and move the coconut around every two minutes to keep the coconut from burning.

In a medium to large saucepan, add the half and half, sugar, eggs, flour, and salt and mix well with a whisk.

Bring to a boil over medium heat, stirring often, until thick.

Once the pie filling is thick, remove from the heat and stir in the vanilla extract.

Next, add 3/4 cup of toasted coconut to the pie filling and mix well.

Pour the pie filling into the pie crust and refrigerate for at least two hours.

Finally, spread the whipped topping on the pie filling and sprinkle the remainder of the toasted coconut on top.

Nutritional Info:

YIELD: 8 SERVING SIZE: 1

Amount Per Serving: CALORIES: 690TOTAL FAT: 34gSATURATED FAT: 19gTRANS FAT: 0gUNSATURATED FAT: 14gCHOLESTEROL: 78mgSODIUM: 444mgCARBOHYDRATES: 89gFIBER: 3gSUGAR: 52gPROTEIN: 9g


Broccoli Cheese Balls

Broccoli Cheese Balls

Broccoli Cheese Balls are crispy fried baslls with a melty broccoli and 3-cheese interior. They are amazing!!

Broccoli Cheese Balls make a delicious finger food for holiday parties or game day. Make them as an after school snack and your kids will think you are the coolest parent ever. Next to Fried Mac and Cheese, I think these fried broccoli balls are the best kid snack ever.

Crispy on the outside with a Panko crumb coating and totally cheesy on the inside with 3 kinds of cheese. The little bits of fresh broccoli are totally coated in gooey, melted cheese.

Are Broccoli Cheese Balls Spicy?

I add 1/2 teaspoon red pepper flakes to give them some spice. You can reduce it to 1/4 teaspoon if you like.

Fried Broccoli Cheese Balls

You’ll need to go ahead and make the Broccoli Cheese Ball mix a little ahead of time and then shape them into balls. You want to refrigerate them at this point for at least 30 minutes so they hold their shape better.

Then they’re coated in flour, dipped in egg wash, coated in Panko crumbs, and fried until golden. For best results, use a thermometer to keep the oil at about 375 degrees.

Recipe Tip

For extra flavor, try adding 5 cooked and crumbled pieces of bacon to the filling.

Broccoli Cheese Balls

PREP TIME: 1 hr

COOK Time: 15mins

TOTAL TIME: 1 hr 15 mins

 SERVINGS: 8 balls

Ingredients:

  • 1 1/2 heaping cups fresh broccoli florets
  • 1 cup shredded Colby cheese
  • 1 cup shredded cheddar cheese
  • 4 ounces Velveeta, cut into small chunks
  • 1/2 teaspoon crushed red pepper flakes
  • 2 1/4 cups Panko crumbs, divided
  • 1 egg, lightly beaten
  • 1/2 cup all-purpose flour
  • 2 eggs, lightly beaten
  • Vegetable or Canola oil

Instructions:

  1. Steam broccoli until slightly softened. Let cool.
  2. Finely chop broccoli. You want the pieces to be 1/4-inch or less. Place in a large bowl.
  3. Add cheese, red pepper flakes, 1/4 cup Panko crumbs, and 1 egg to bowl with broccoli. Stir well.
  4. Use your hands to shape mixture into balls using about a rounded tablespoon for each ball. You should get 12-14.
  5. Place balls on a plate and refrigerate for at least 30 minutes.
  6. Place flour in a bowl.
  7. Place the 2 lightly beaten eggs in a second bowl and mix in 1 tablespoon water.
  8. Place remaining 2 cups Panko crumbs in a third bowl.
  9. Pour about 2 inches of oil in a Dutch oven or heavy pot. Heat oil to 375 degrees. For best results use a thermometer.
  10. Remove broccoli balls from refrigerator, coat in flour, dip in egg mixture, and then coat in Panko crumbs.
  11. Fry about 4 balls at a time cooking until golden brown on all sides.
  12. Drain on a paper towel-lined plate.

Notes:

For more flavor, add 5 pieces of cooked and crumbled bacon to the filling.

Nutritional Info:

Calories: 322kcal


Crockpot Ranch Pork Chops and Potatoes

Crockpot Ranch Pork Chops and Potatoes is a super quick, easy and no-fuss weekday dinner recipe. Just drop everything in your slow cooker and forget about it. Crockpot Ranch pork chops will be a new family favorite!

Prep Time: 20 min

Cook Time:  6 hrs

Additional Time:  35 min

Total Time: 6 hr 55 min

Ingredients:

  • 3 lbs. Red Potatoes – quartered
  • 1 onion – sliced
  • 3 cloves of garlic – chopped
  • 6 (about 1-1 ½ inches thick) Bone-In Pork Chops
  • 1/2 Cup Olive Oil
  • 4 Tbsp. Dry Ranch Seasoning (2 one-ounce packets)
  • 2 tsp. Apple Cider Vinegar
  • 3 Tbsp. Salted Butter – cut into 6 pieces

Instructions:

  1. Spray the bottom of the Crockpot with oil and place the quartered potatoes in the bottom.
  2. Open one ranch packet and pour into shallow dish.
  3. Pat the pork chops dry and dredge each one in the ranch powder.
  4. In a heavy skillet (preferably cast iron), heat 1 Tbsp. of olive oil medium/high heat.
  5. When oil is hot, carefully place the pork chops into the pan and sear for 2-3 minutes on each side – they should have a nice brown color.
  6. Remove the pork chops from the pan and place on top of the potatoes in the Crockpot.
  7. In the same skillet, add a little more oil if needed to coat the pan (leave any bits from the pork chops in the pan) and heat on medium until the oil is hot.
  8. Throw in the onions and stir for 1-2 minutes.
  9. If they are browning too quickly, turn the heat down a little.
  10. Then throw in the garlic and stir for about 30 seconds.
  11. Remove from heat and put the onion/garlic mixture in the Crockpot.
  12. Scrape any bits from the pan and add them to the Crockpot.
  13. In a bowl, whisk together the olive oil, ranch seasoning packet and apple cider vinegar.
  14. Pour over the potatoes and pork chops.
  15. Top the pork chops with the butter pieces.
  16. Cook on low heat for 5-6 hours or on high for about 3 hours.
  17. Don’t lift the lid while cooking or you will lose moisture.
  18. Using a meat thermometer, ensure the pork has an internal temperature of 145° F.
  19. Salt/Pepper to taste.

Notes:

Some readers have expressed that this dish was not flavorful enough. If you prefer extra flavor follow the tips below:

  • Sear pork chops
  • Increase dry ranch mix amount to 4 Tablespoons
  • Add 1 chopped sweet onion and 8 whole garlic cloves to potatoes

Nutritional Info:

Yield: 6

Serving Size: 1

Amount Per Serving

Calories460/TotalFat/25g/SaturatedFat/6g/TransFat/0g/UnsaturatedFat0gCholesterol5mgSodium157mgCarbohydra/18g/Cholesterol/32mg/Sodium351mg/Carbohydrates/46g/Fiber/4g/Sugar/4g/Protein/13g

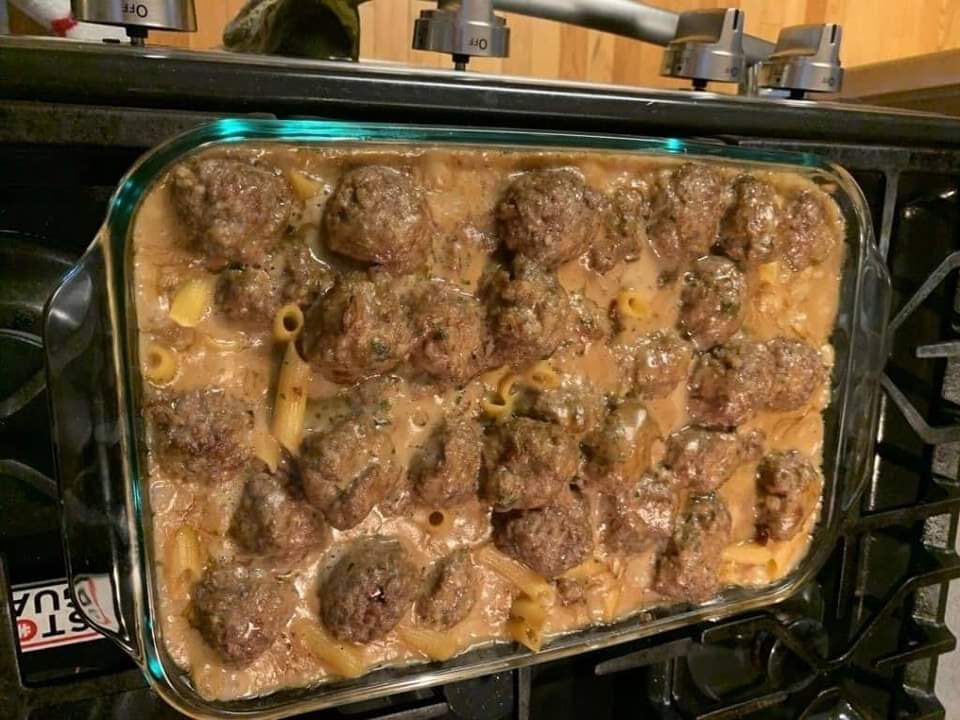
Swedish Meatballs With Noodles

Swedish meatballs with noodles

Swedish meatball with noodles is a simple, hearty dinner option that the whole family will love! Pan-fried, homemade Swedish meatballs are mixed with noodles and slathered in a creamy, flavorful sauce, and baked to perfection.

SWEDISH MEATBALLS WITH NOODLES

Swedish meatball pasta bake is super hearty and delicious. It’s the perfect comfort dish for a chilly fall evening! This is one of the best homemade meatball recipes, and pairing them with pasta and a creamy, gravy-style sauce makes this dish irresistible.

This is a highly requested dinner with my family, so I like to double my batch of meatballs and save them for the next time around! It saves me so much time on those busy weeknights.

WHY WE LOVE THIS SWEDISH MEATBALL PASTA BAKE RECIPE
  • Creamy, delicious pasta bake.
  • Easy dish for a weeknight dinner.
  • Can be made ahead and stored in the fridge until ready to bake.
  • Homemade meatball recipe.
SUBSTITUTIONS AND ADDITIONS

BREAD CRUMBS: Regular bread crumbs can be substituted for the panko bread crumbs if you’d like.

GROUND BEEF: Ground pork or venison -or a combination could be used instead of ground beef.

PASTA: Feel free to use any small-sized pasta such as bowtie, rotini, or rigatoni in place of the shells.

MUSHROOMS: If you’re a mushroom lover, you could saute them and add them to the sauce!

SPICES & SEASONINGS: This dish has a very mild flavor, which is how the classic dish is meant to be. However, if you want to add a little extra flavor you can add your favorite spices and seasonings!

Swedish meatballs with noodles

Swedish meatball with noodles is a delicious casserole filled with homemade meatballs, smothered in a creamy sauce and baked with noodles.

Prep Time: 30 mins

Cook Time:30 mins

Chill time:30mins

Total Time: 1hr 30 mins

Ingredients:

  • 1½ cups Panko Bread Crumbs
  • 1½ sticks Salted Butter 12 Tbsp
  • 1 Medium Sweet Onion diced
  • 1 tsp Black Pepper
  • ½ tsp All Spice
  • ¼ tsp Nutmeg
  • 3 Cloves Garlic minced
  • ⅔ cup Whole Milk
  • 2 Large Eggs
  • 2 lb Ground Meat Beef, pork or venison – or a combination
  • 3 tbsp Olive Oil
  • 2 cups Shell Pasta
  • ½ cup Flour All purpose
  • 5 cups Beef Broth
  • ½ cup Water
  • 1 tbsp Worcestershire Sauce
  • ½ cup Heavy Cream
  • 1 tbsp Chopped fresh Parsley

Instructions:

  1. In a medium sized mixing bowl add the breadcrumbs and set aside.
  2. In a skillet add ½ stick of butter (4Tbsp) then add the diced onion, All Spice, Nutmeg and Black Pepper and cook until the onion is translucent.
  3. Add the minced garlic and cook a further 2 minutes.
  4. Add milk and bring to a simmer. Add mixture to the breadcrumbs, mix well then set aside to cool.
  5. In another medium sized mixing bowl add the eggs and beat. Add the ground meat and combine well. Once the breadcrumb mixture has cooled enough add the meat/egg and mix together using hands (I know, it’s yucky, but it’s the best way).
  6. Shape into golf ball sized balls (or bigger/smaller, whatever your preference for meatballs) and set onto a baking sheet lined with parchment paper.
  7. Put into the refrigerator for 30 mins. Turn on the oven to preheat to 375°F.
  8. While the meatballs are setting, add water to a pot (enough to cook the pasta – about 8 cups) and bring to a boil. Add salt to water.
  9. Add pasta and boil, uncovered until the pasta is Al Dente (still has a little crunch) – about 7-8 mins. Drain the pasta from the water and put into a 9X13 casserole dish. Set aside.
  10. Wipe out the skillet you used to cook the onions using a paper towel, then add the olive oil. Bring to a heat on medium and add half of the meatballs You want enough room for the meatballs to not be crowded. Brown the meatballs on all sides and put into the casserole dish with the pasta.
  11. Do the same with the second batch of meatballs. Set aside.
  12. Using the pot you cooked the pasta in add 1 stick of butter (8Tbsp) and melt.
  13. Add the flour and stir continuously for about 5 minutes. This will cook the flour.
  14. Add the beef broth, water, worcestershire sauce, 1 Tsp. black pepper, cream and bring to a simmer. Cook, simmering for about 10-15 minutes. The sauce should thicken up and reduce a little.
  15. Pour the sauce all over the meatballs and pasta. It will seem like there’s too much sauce but don’t worry, it will reduce in the oven and won’t be as much.
  16. Put the casserole dish into the oven and cook for 30 minutes.
  17. Remove, sprinkle with chopped parsley and serve with garlic bread and salad.

Notes:

To Store: Store in an airtight container in the fridge for 3 days. Be sure that the pasta is cooled before storing.

To Freeze: This dish will freeze well for up to 3 months. You can also make a double batch of meatballs and freeze half of them for a later date.

To Reheat: If frozen, it’s best to let thaw before reheating. For refrigerated leftovers you can simply pop them in the microwave to reheat.

Nutritional Info:

Calories: 1013kcal | Carbohydrates: 51g | Protein: 40g | Fat: 72g | Saturated Fat: 33g | Polyunsaturated Fat: 4g | Monounsaturated Fat: 28g | Trans Fat: 3g | Cholesterol: 253mg | Sodium: 1233mg | Potassium: 813mg | Fiber: 3g | Sugar: 6g | Vitamin A: 1183IU | Vitamin C: 5mg | Calcium: 155mg | Iron: 6mg

Mocha Layer Cake with Chocolate-Rum Cream Filling

This ultra-rich dessert is inspired by the classic Rigo Jancsi cake, named for the legendary Hungarian Gypsy violinist. Make it one day ahead to allow the flavors to meld.

Ingredients:

Filling and Topping

4 cups whipping cream
1/4 cup (1/2 stick) unsalted butter
1/4 cup sugar
20 ounces semisweet chocolate, finely chopped; plus 2 ounces, chopped separately
1/3 cup dark rum
2 teaspoons vanilla extract

Syrup

  • 1/4 cup water
  • 2 tablespoons sugar
  • 2 tablespoons dark rum

Cake

  • 1 1/2 teaspoons vanilla extract
  • 3/4 teaspoon instant coffee powder
  • 2/3 cup cake flour
  • 3 tablespoons unsweetened cocoa powder
  • 1/2 teaspoon baking soda
  • 3 large eggs, separated
  • 3/4 cup sugar
  • 1/4 teaspoon cream of tartar
  • 1/4 teaspoon salt

Instructions:

For filling and topping:
Step 1
  1. Stir first 3 ingredients in heavy large saucepan over medium-high heat until sugar dissolves and cream comes to simmer.
  2. Remove from heat. Add 20 ounces chocolate; whisk until melted and smooth.
  3. Whisk in rum and vanilla. Transfer 1 cup warm chocolate mixture to small bowl; whisk remaining 2 ounces chocolate into mixture in bowl and set aside for topping. Cover; let stand at room temperature.
  4. Transfer remaining chocolate mixture to large bowl to use as filling; chill until cold and thick, at least 6 hours and up to 1 day.

For syrup:

Step 2

  1. Stir water and sugar in small saucepan over low heat just until sugar dissolves.
  2. Remove from heat; mix in rum. Cover and let stand up to 1 day.

For cake:
Step 3

  1. Preheat oven to 350°F.
  2. Butter 9x9x2-inch metal baking pan.
  3. Line bottom with waxed paper; butter paper.
  4. Combine vanilla and coffee powder in cup; swirl to dissolve coffee.
  5. Sift flour, cocoa, and baking soda into small bowl.
  6. Using electric mixer, beat egg yolks and 1/2 cup sugar in medium bowl until very thick and light in color, about 3 minutes.
  7. Beat in vanilla-coffee mixture.
  8. Using clean dry beaters, beat egg whites, cream of tartar, and salt in large bowl until soft peaks form.
  9. Gradually add remaining 1/4 cup sugar, beating until stiff but not dry.
  10. Fold 1/3 of whites into yolk mixture.
  11. Fold in half of flour mixture. Fold in half of remaining whites, then remaining flour mixture, then remaining whites.
  12. Transfer batter to prepared pan; gently spread to even thickness.

Step 4

  1. Bake cake until puffed and tester inserted into center comes out clean, about 18 minutes. Cool in pan on rack (cake may shrink slightly).

Step 5

  1. Cut around pan to loosen cake.
  2. Turn out onto work surface; peel off paper.
  3. Using long serrated knife, cut cake horizontally in half.
  4. Place 1 half, cut side up, on platter. Drizzle half of syrup (about 3 1/2 tablespoons) over.
  5. Using electric mixer, beat cold chocolate filling until thick and lighter in color, less than 1 minute.
  6. Spread all of filling evenly over cake layer, aligning with sides of cake (filling will be about 1 inch thick).
  7. Drizzle remaining syrup over cut side of second cake layer. Place layer, syrup side down, atop filling; press to adhere.
  8. Rewarm topping over low heat just until pourable.
  9. Pour topping onto top center of cake.
  10. Using small spatula, spread topping to edges, being careful to keep it from spilling over.
  11. Chill cake up to 1 day, covering loosely with foil or with cake dome after 2 hours.

Step 6

  1. Cut cake into 16 squares and serve.


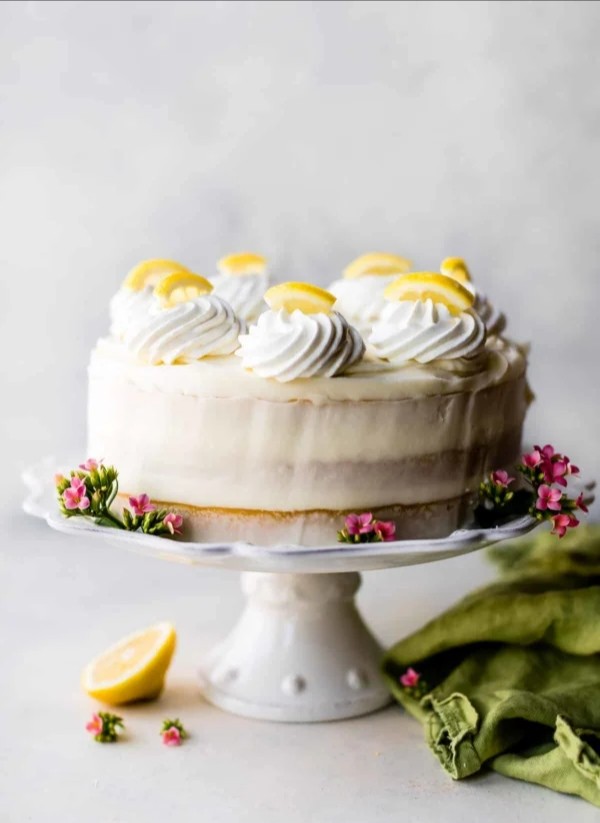
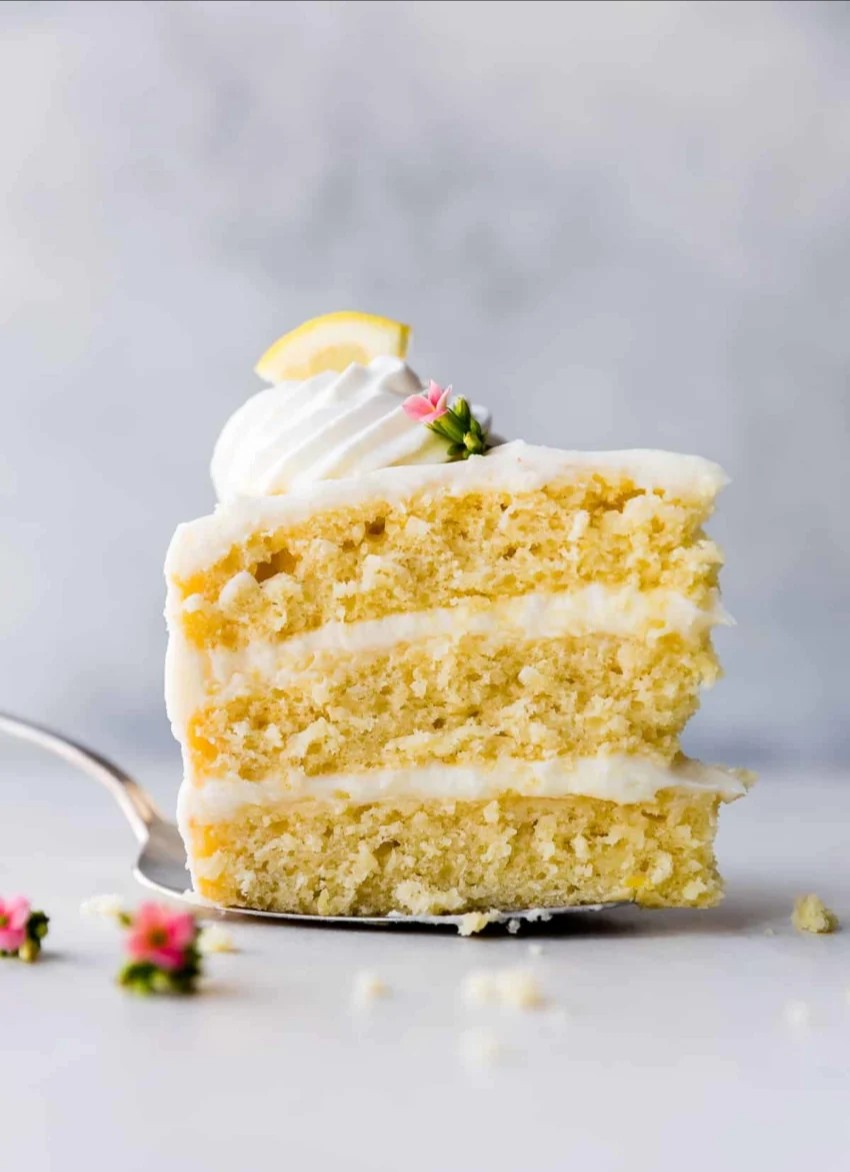
Lemon Cake Recipe

The lemon cake batter is velvety and thick. Divide between 3 9-inch or 8-inch cake pans—roughly the same bake time for both sizes. For a 2 layer cake, divide batter evenly between two 9-inch cake pans. Bake time will be longer, but you can use a toothpick to test for doneness. This lemon cake batter will fit into a 9×13-inch pan. Bake time will be close to 40 minutes. And while we’re on the subject of different size cakes, this recipe yields at least 30 lemon cupcakes. For 1 dozen cupcakes, here is our lemon cupcakes recipe. They taste identical to the cake!

Lemon Cream Cheese Buttercream

We were torn between cream cheese frosting and lemon buttercream, so we combined the two by adding 8 ounces of cream cheese and a little extra confectioners’ sugar to lemon buttercream. The result is an infinitely CREAMY and BUTTERY lemon cream cheese frosting that we know you’ll love!!! Look at this stuff!!!

Lemon Cake Recipe

Prep Time: 30 minutes

Cook Time: 25 minutes

Total Time: 4 hours

Yield: serves 10-12

This 3 layer lemon layer cake is made completely from scratch with real lemons. It’s deliciously moist and light and is remarkable paired with tangy cream cheese buttercream.

Ingredients:
  • 3 cups (354g) sifted all-purpose flour* (spooned & leveled)
  • 2 and 1/2 teaspoons baking powder
  • 1/2 teaspoon baking soda
  • 1/2 teaspoon salt
  • 1 cup (16 Tbsp; 226g) unsalted butter, softened to room temperature
  • 1 and 3/4 cups (350g) granulated sugar
  • 3 large eggs, at room temperature
  • 2 teaspoons pure vanilla extract
  • 1 cup (240ml) whole milk, at room temperature
  • 1 heaping Tablespoon lemon zest (about 2 lemons)
  • 1/3 cup (80ml) fresh lemon juice (about 2 lemons)
CREAM CHEESE BUTTERCREAM FROSTING
  • 1 cup (16 Tbsp; 226g) unsalted butter, softened to room temperature
  • 8 ounces (226g) full-fat brick cream cheese, softened to room temperature*
  • 4 and 1/2 cups (540g) confectioners’ sugar
  • 2 Tablespoons (30ml) fresh lemon juice
  • 1 teaspoon pure vanilla extract
  • pinch salt, to taste
Lemon cake recipe
Instructions:
  1. Preheat oven to 350°F (177°C). Grease three 8-inch cake pans, line with parchment paper rounds, then grease the parchment paper.
  2. Parchment paper helps the cakes seamlessly release from the pans. (If it’s helpful, see this parchment paper rounds for cakes video & post.)
  3. Make the cake: Whisk the flour, baking powder, baking soda, and salt together. Set aside.
  4. Using a handheld or stand mixer fitted with a paddle or whisk attachment, beat the butter and sugar together on high speed until smooth and creamy, about 3 minutes.
  5. Scrape down the sides and up the bottom of the bowl with a rubber spatula as needed.
  6. Beat in the eggs and vanilla extract on high speed until combined, about 2 minutes.
  7. Scrape down the sides and up the bottom of the bowl as needed. With the mixer on low speed, add the dry ingredients just until combined.
  8. With the mixer still running on low, add the milk, lemon zest, and lemon juice and mix just until combined.
  9. You may need to whisk it all by hand to make sure there are no lumps at the bottom of the bowl. The batter will be a little thick.
  10. Pour batter evenly into cake pans. Bake for around 21-26 minutes or until the cakes are baked through. To test for doneness, insert a toothpick into the center of the cake.
  11. If it comes out clean, it’s done. Allow cakes to cool completely in the pans set on a wire rack.
  12. The cakes must be completely cool before frosting and assembling. The baked cakes are fluffy, but they are not thick– about 1 – 1.5 inches.
  13. Make the frosting: In a large bowl using a hand-held mixer or stand mixer fitted with a whisk or paddle attachment, beat the butter on medium speed until creamy, about 2 minutes.
  14. Add the cream cheese and beat until completely smooth and combined.
  15. Add confectioners’ sugar, lemon juice, and vanilla extract with the mixer running on low. Increase to high speed and beat for 3 minutes.
  16. Add more confectioners’ sugar if frosting is too thin, more lemon juice if frosting is too thick, or add a pinch of salt if frosting is too sweet. (I always add a pinch of salt!)
  17. Assemble and decorate: Using a large serrated knife, slice a thin layer off the tops of the cakes to create a flat surface. Discard (or crumble over ice cream!).
  18. Place 1 cake layer on your cake stand, cake turntable, or serving plate. Evenly cover the top with about 1 cup of frosting.
  19. Top with 2nd cake layer and evenly cover the top with about 1 cup of frosting. Top with the third cake layer. Spread the remaining frosting all over the top and sides.
  20. I like to top mine with homemade whipped cream (I used Wilton 8B piping tip).
  21. Refrigerate for at least 30-45 minutes before slicing. This helps the cake hold its shape when cutting.
  22. Cover leftover cake tightly and store in the refrigerator for 5 days.

Notes

Make Ahead Instructions: The cake layers can be baked, cooled, and covered tightly at room temperature overnight. Likewise, the frosting can be prepared then covered and refrigerated overnight. Let the frosting sit at room temperature to slightly soften for 10 minutes before assembling and frosting. Frosted cake or unfrosted cake layers can be frozen up to 2-3 months. Thaw overnight in the refrigerator and bring to room temperature before decorating/serving.

Flour: Sift all-purpose flour before measuring.

Whole Milk: You can use lower fat or nondairy milks in a pinch, but the cake won’t taste nearly as rich and moist.

The amount of leaveners are now 2 and 1/2 teaspoons baking powder and 1/2 teaspoon baking soda. (Increased from 2 teaspoons and 1/4 teaspoon respectively.) The amounts listed above amount help provide extra rise, which creates a lighter cake. I also now recommend whole milk instead of buttermilk so the cake batter is slightly less acidic.

Vanilla Cream Cheese Buttercream: For a vanilla cream cheese buttercream, replace lemon juice with milk or heavy cream in the frosting. Add an additional 1/4 teaspoon pure vanilla extract.

2 Layer Cake: For a 2 layer cake, divide batter evenly between two 9-inch cake pans. Bake time will be longer; use a toothpick to test for doneness.

Lemon Cupcakes: This recipe yields about 30 lemon cupcakes. Bake for 18-22 minutes. Use a toothpick to test for doneness. For 1 dozen cupcakes, here is my lemon cupcakes recipe. They taste identical to the cake!

9×13 inch Cake: This batter will fit into a 9×13-inch pan. Fill 2/3 full. If there’s extra batter, you can make a few cupcakes. Bake time will be close to 40 minutes; use a toothpick to test for doneness.


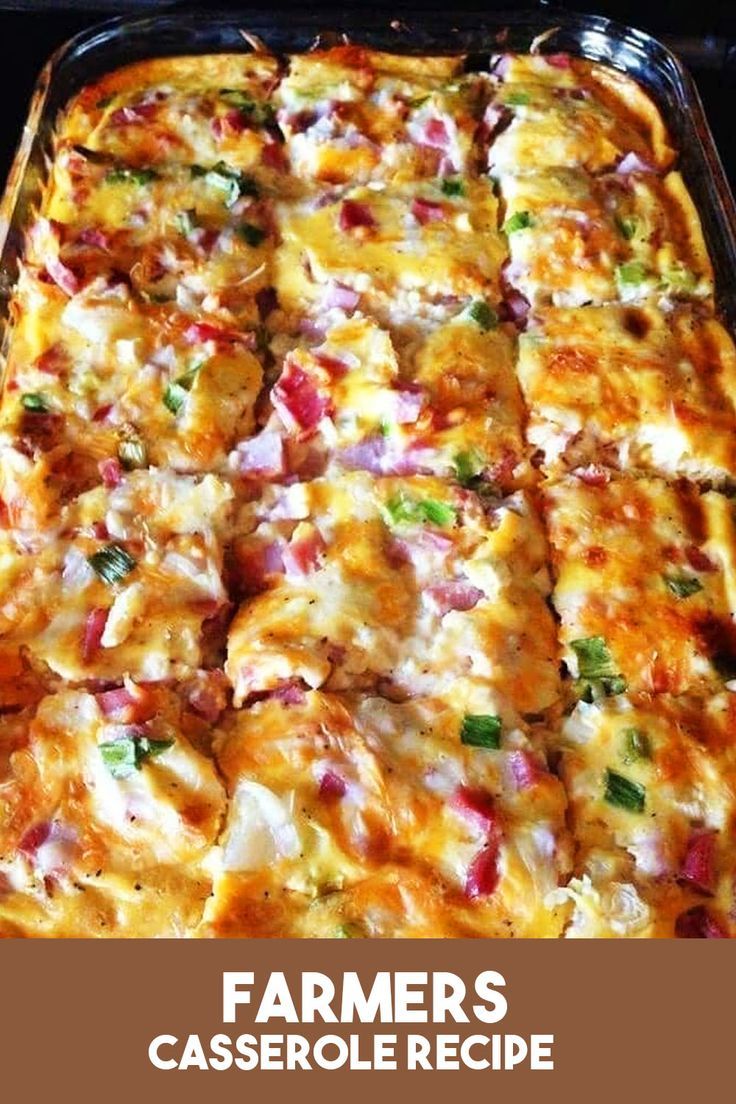
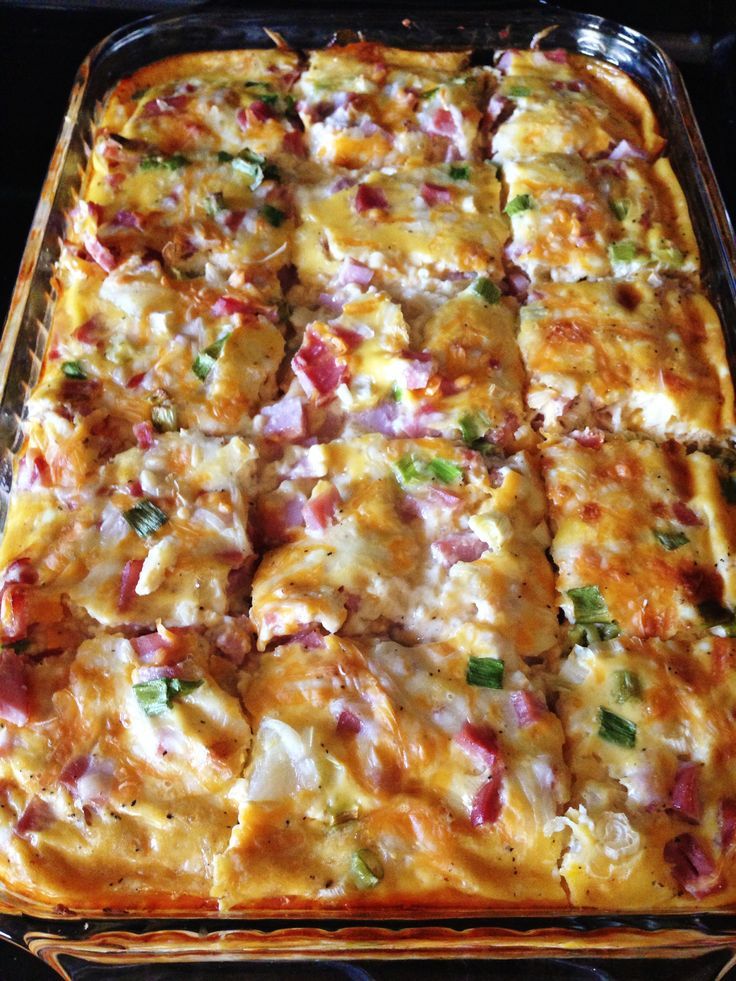
Farmer’s Casserole Recipe

FARMER’S CASSEROLE

Just a great breakfast casserole, and it’s super easy to make!

Course: Breakfast

Cuisine:  American

Keyword:  breakfast, casserole, farmer’s

Prep Time:  20 minutes

Cook Time:  50 minutes

Total Time:1 hour 10 minutes

Servings: 12 servings 

This low carb breakfast casserole is hearty and filling, because it’s packed full of protein from the sausage, bacon, and eggs. Add in any vegetables or meat you like!

INGREDIENTS:
  • 1 pound sausage
  • 1 pound bacon
  • 1 dozen eggs
  • 1/2 cup milk
  • 2 cups grated cheddar
  • 1/2 sweet onion diced
  • 1 bell pepper diced
  • 1 tablespoon Frank’s red hot
  • 1/2 teaspoon salt
  • 1/2 teaspoon pepper
INSTRUCTIONS:
  1. Brown the sausage in a large skillet, crumbling as it cooks. Drain grease and set aside.
  2. Dice the bacon into bite-sized chunks and cook in a large skillet, stirring often, until crisp. Drain the grease and set aside.
  3. Pre-heat the oven to 350 degrees. Spray a 9×13 baking dish with non-stick spray.
  4. Crack the eggs into a large mixing bowl and add the milk. Whisk together until well combined.
  5. Stir in the sausage, bacon, cheddar, onion, pepper, hot sauce, salt, and pepper. Stir until well combined.
  6. Pour the mixture into the prepared baking dish and bake for 35-40 minutes or until eggs are set and edges are golden brown.
  7. Let cool 5 minutes before slicing and serving.

Farmer's Casserole Recipe

RECIPE NOTES:

To keep this a bit lower in carbs, swap in 1/4 cup of heavy cream + 1/4 cup of water for the milk. Serve with a dollop of sour cream and sprinkle with chives, as desired.

Nutritional Info:

Amount Per ServingCalories 425Calories from Fat 315% Daily Value*Total Fat 35g54%Saturated Fat 13g65%Cholesterol 236mg79%Sodium 811mg34%Potassium 298mg9%Total Carbohydrates 3g1%Sugars 1gProtein 21g42%Vitamin A15.9%Vitamin C16.5%Calcium 18%Iron8.6%

Bacon Cheeseburger Bites

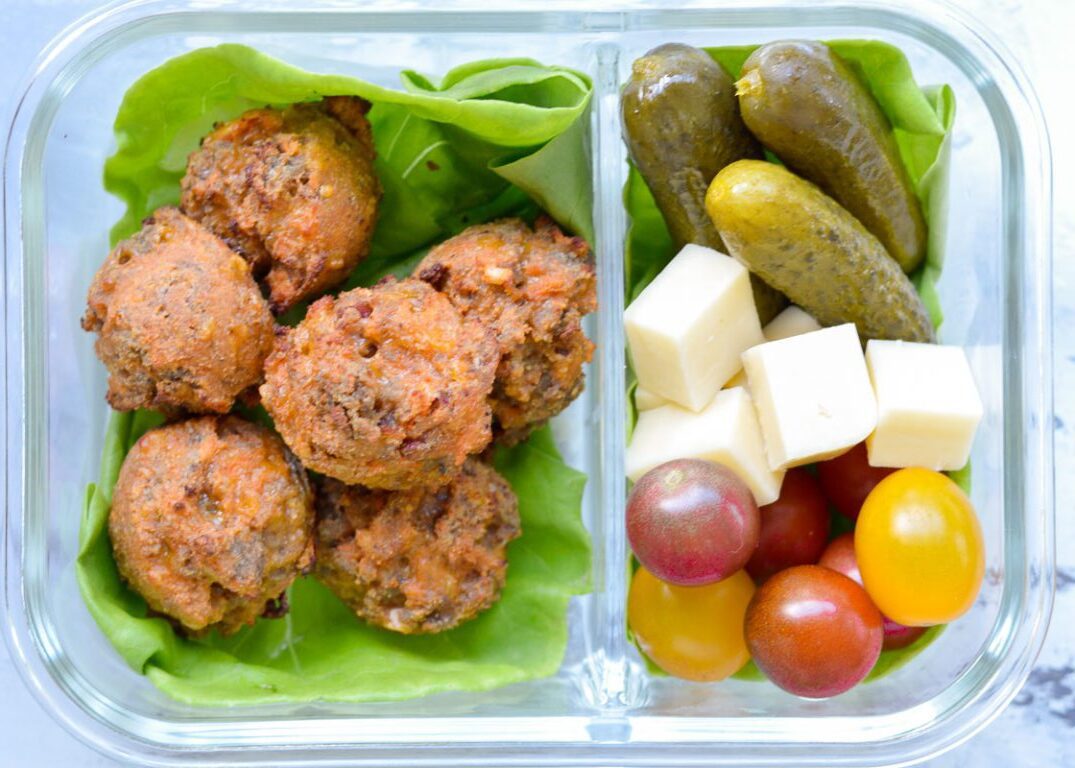
It's taken to tell you how you can pack a lunch box for you and your kids.

Yummy Bacon Cheeseburger Bites Recipe: These tasty Bacon Cheeseburger Bites are ideally suited for a youngster well disposed keto feast. Sans gluten, nut free, simple to dinner prep, and under 1 net carb each! These heavenly Bacon Cheeseburger Bites are ideal for a youngster cordial keto feast. Sans gluten, nut free, simple to feast prep, … Read more