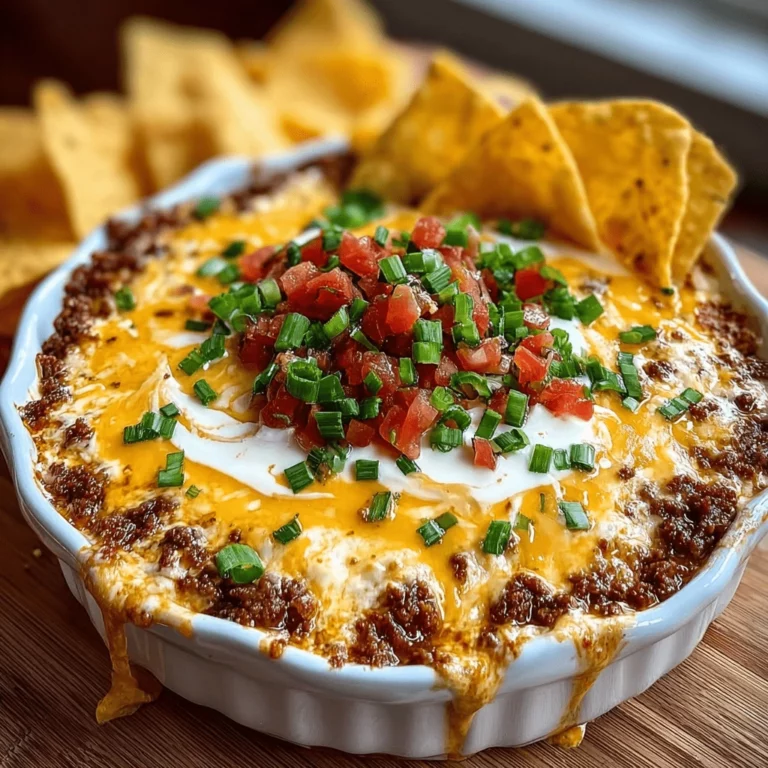
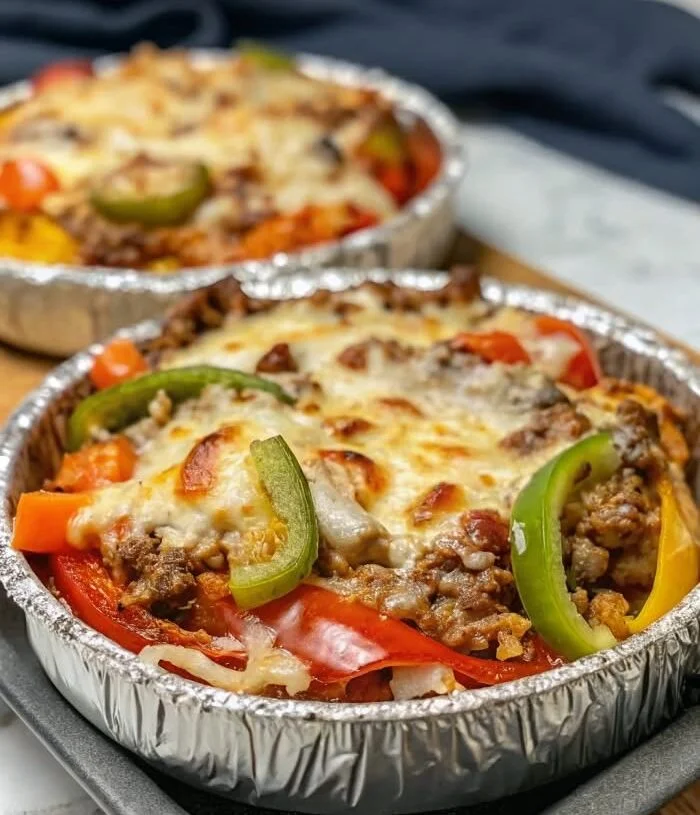
Beef and Bean Nacho Casserole

In this delicious Mexican dinner, layers of ground beef, black beans, cheddar cheese, and more cover tortilla chips. Pop it in the oven for 30 minutes and you’re done!

Prep Time: 20 mins

Cook Time: 30 mins

Servings: 8 as a main dish

Ingredients:

  • 1 lb. ground beef
  • 1 15-oz. can black beans, drained
  • 2 c. salsa
  • 1 1/2 Tbsp. taco seasoning
  • 1/2 c. frozen corn kernels, preferably fire-roasted
  • 5 c. tortilla chips, roughly crushed
  • 1 c. sour cream
  • 2 c. shredded cheddar
  • 1/2 c. cherry tomatoes, sliced in half
  • 1/4 c. green onions, sliced

Instructions:

  1. Preheat oven to 350 degrees. Spray a 9 x 13 inch baking dish with cooking spray.
  2. In a large skillet, brown ground beef. Drain, then add black beans, salsa, taco seasoning, and frozen corn. Cook until heated through.
  3. Spread half the crushed tortilla chips in a layer in the prepared pan. Top with half the beef-bean mixture. Dollop with half the sour cream and sprinkle with half the cheddar. Repeat these layers: chips, beef-bean mixture, sour cream, shredded cheddar. Distribute halved cherry tomatoes, cut side down, over the top of the casserole and sprinkle with slicedgreen onions.
  4. Bake 25-30 minutes or until heated through and cheese has melted.

Notes:

A Love Letter to Food Original Recipe.

Oven Barbeque Ribs Recipe

Oven Barbecue Ribs slathered in the most delicious sticky barbecue sauce with a kick of garlic and optional heat! Juicy melt-in-your-mouth oven baked Barbecue Pork Ribs are fall-off-the-bone delicious! Double up on incredible flavour with an easy to make dry rub first, then coat them in a seasoned barbecue sauce mixture so addictive you won’t stop at one! Finger licking good ribs right here! 

Prep Time: 10mins

Cook Time: 2hrs 15mins

Total Time: 2hrs 25mins

Course: Dinner

Cuisine: American

Keyword: Oven, Pork Ribs Servings: 4 – 6 people 

Ingredients

RIBS:

  • 4 pounds (2 kg) baby back pork ribs
  • 2 teaspoons garlic powder
  • 1 teaspoon onion powder
  • 2 teaspoons paprika
  • 2 teaspoons salt
  • 1 teaspoon cracked black pepper
  • 1/2 teaspoon cumin
  • 1 teaspoon chili or Cayenne powder (optional)
  • 2 tablespoons olive oil
  • SAUCE:
  • 2 cups (500ml) barbecue sauce
  • 3 tablespoons minced garlic
  • 2 tablespoons olive oil
  • 1 tablespoon Worcestershire sauce
  • 1/2 – 1 tablespoon cayenne pepper (optional for heat)
  • 1 teaspoon salt

Instructions:

  1. Preheat oven to 350°F (180°C).
  2. Peel off tough membrane that covers the underside/bony side of the ribs. Place on a baking sheet or tray lined with foil (or parchment paper).
  3. Combine together garlic powder, onion powder, paprika, salt, pepper, cumin and chili or Cayenne. Sprinkle seasoning over ribs and drizzle with oil. Rub the seasoning all over the ribs on both sides. Cover tray with foil and bake for 2 hours.
  4. During the last 5 minutes of cook time, mix together sauce ingredients.
  5. Remove ribs from the oven, remove foil and spread the tops of the ribs with the barbecue sauce mixture.
  6. Increase oven temperature to 460°F (240°C). Return ribs to the oven, uncovered, and bake for a further 10 minutes. Change oven settings to broil (or grill) on medium-high heat to lightly char and caramelise the edges (about 3 minutes).
  7. Rest for 10 minutes to allow the juices to recirculate back into the meat before slicing.
  8. Enjoy!
NUTRITIONAL INFO:

Calories: 630kcal | Carbohydrates: 32g | Protein: 45g | Fat: 34g | Saturated Fat: 6g | Cholesterol: 167mg | Sodium: 1776mg | Potassium: 951mg | Fiber: 1g | Sugar: 24g | Vitamin A: 500IU | Vitamin C: 2.5mg | Calcium: 86mg | Iron: 2.9mg

Chinese Pepper Steak with Onions

If you love restaurant-style Chinese Pepper Steak with onions, you’ll love this quick and easy stir-fry recipe! Featuring tender slices of beef stir-fried in a sticky, rich garlic pepper sauce with onions, bell peppers, and plenty of delicious flavor. It’s a simple 30-minute weeknight dinner that’s sure to impress!

If you love the popular Pepper Steak with Onions at your favorite Chinese restaurant, you’ll love this quick and easy recipe! Featuring tender steak stir-fried in a sticky, rich garlic pepper sauce with onions and peppers, this is a weeknight dinner that’s sure to impress.

Prep Time: 20 mins

Cook Time: 10 mins

Total Time: 30 mins

Course: entree, Main Course

Cuisine: Chinese

Keyword: black pepper beef, Pepper Steak, pepper steak with onions

Servings: 4 servings

INGREDIENTS:

Steak:

  • 1 TBS EACH: Low-Sodium Soy Sauce, Mirin & Cornstarch
  • 1 pound Steak(s) – excess fat trimmed & thinly sliced into ½ to ¼-inch thick strips (SEE NOTES)
  • Pepper Sauce
  • ½ Cup Low-Sodium Beef Broth (sub: chicken broth or ½ bouillon cube dissolved in water)
  • 3 TBS Low-Sodium Soy Sauce
  • 3 TBS Honey
  • 2 TBS Oyster Sauce
  • 2 TBS Chinese Cooking Wine or Mirin (sub: dry sherry)
  • 1 TBS Cornstarch
  • 1 ¼ tsp Coarsely-Ground Black Pepper (SEE NOTES)
  • ¼ tsp Kosher Salt

Stir-fry:

  • 3 TBS Peanut Oil – DIVIDED (sub: neutral oil, such as canola)
  • 1 medium White Onion – peeled & medium dice
  • 2 small Bell Peppers – seeded & medium dice
  • 2 cloves Garlic – peeled & minced
  • 1 ½ tsp Grated Ginger
  • Optional Garnishes: Sliced Scallions & Toasted Sesame Seeds
  • Serving Suggestions: Steamed Rice/Cauliflower Rice or Cooked Noodles

INSTRUCTIONS:

  1. Marinate steak: In a medium bowl, combine the soy sauce, mirin, and cornstarch. Pat the pieces of beef dry and add them to bowl. Gently stir to completely coat the beef in the marinade. Set aside for 10-15 minutes and continue with the recipe.
  2. Mix pepper sauce: In a glass measure or small bowl, add all the ingredients for the sauce. Whisk well to combine. Set aside.
  3. Cook steak: Heat 1 ½ tablespoons of oil in a wok or large heavy-bottom skillet over HIGH heat. When the oil is shimmering, add the steak to the pan in an even, single layer. Cook – undisturbed – for 30 to 45 seconds or until bottom side is lightly browned. Flip, and continue to cook, stir-frying, for an additional 30 seconds or until almost cooked to your liking. Immediately remove the beef from the pan and transfer to a plate. Set aside (Tip: Do not crowd the pan as that will cause the beef to steam, instead of stir-fry. If necessary to prevent over-crowding, cook the steak in two batching, adding more oil as needed.) (Note: Don’t overcook your steak! If anything, UNDERCOOK it during this step. You will be adding the steak back to the pan in the next steps.)
  4. Cook veggies, then aromatics: Return the pan to stove over MEDIUM heat. Add the remaining 1 ½ tablespoons of oil to the pan. When the oil is hot, add the onions and peppers to the pan. Season with a pinch of salt and pepper. Stir fry the vegetables for 3-4 minutes, or until they are starting to soften. Add the garlic and ginger to the pan. Stir-fry for 30 seconds.
  5. Add the sauce: Give your stir-fry sauce a good whisk to make sure everything is combined, and the cornstarch is fully dissolved. Add the stir fry sauce to the pan and immediately stir the mixture. Reduce the heat to maintain a simmer and cook, stirring occasionally, for 1 minute, or until the sauce resembles a thick syrup and coats the back of a spoon. (Note: The stir-fry garlic pepper sauce will simmer quickly when you add it to the pan, don’t be alarmed).
  6. Add beef: Add the cooked steak back to the pan, along with any juices pooled on the plate. Quickly stir-fry to coat the steak in the sauce, about 30 seconds. Immediately remove from heat.
  7. Serve: Transfer to a large serving platter or individual plates. Top with scallions and sesame seeds if using and serve with rice or noodles. Enjoy!

Notes:

  • Recipe: I recommend reading this recipe all the way through before cooking. Stir fry recipes are quick paced, so you’ll want to have everything prepared and ready to go *before* starting the recipe. Heads up – you need to marinate the steak for at least 10 minutes in step 1!
  • Steak: You can use any steak you love that’s suitable for stir-frying and quick stove-top cooking. For this recipe, I typically use sirloin as it’s the most economical option. However, tenderloin, NY strip and flank steak work well too! Just remember to the flank steak against the grain.
  • Cutting steaks: It’s easiest to cut cold meat. I like to transfer my steaks from the refrigerator to the freezer for 30-45 minutes before slicing to make my life easier. Just don’t forget the steaks in the freezer!!
  • Ground Pepper: The size of your pepper grinds matter in this recipe! If you are using regular ground black pepper (like from a tin), reduce the pepper by half (3/4 tsp). The measurement in the recipe is written for coarsely ground black pepper (like from a pepper mill).

Nutritional Info:

Calories: 440kcal | Carbohydrates: 27g | Protein: 25g | Fat: 27g | Saturated Fat: 9g | Polyunsaturated Fat: 4g | Monounsaturated Fat: 13g | Cholesterol: 69mg | Sodium: 1038mg | Potassium: 547mg | Fiber: 1g | Sugar: 19g | Vitamin A: 1176IU | Vitamin C: 50mg | Calcium: 27mg | Iron: 2mg

Cherry Cheesecake Chimichangas

Cherry Cheesecake Chimichangas are a quick and easy dessert – and perfect for all cheesecake lovers! These homemade chimichangas are irresistibly crispy, deep-fried burritos filled with sweet cherry cheesecake, and rolled in cinnamon-sugar – what could be better? Description Cherry Cheesecake Chimichangas are a quick and easy dessert – and perfect for all cheesecake lovers! These homemade … Read more

STEAK WITH ONIONS AND GRAVY

Steak with onions and gravy is a classic comfort food dish that’s both hearty and delicious. Here’s a simple recipe to make it: Ingredients for STEAK WITH ONIONS AND GRAVY 2 boneless beef steaks (such as ribeye or sirloin) 2 large onions, thinly sliced 2 tablespoons olive oil 2 cloves garlic, minced 1 cup beef … Read more

Traditional Irish Beef Guinness Stew

Traditional Irish Beef Guinness Stew Recipe INGREDIENTS For Traditional Irish Beef Guinness Stew 6 ounces bacon ,diced 2 pounds beef chuck 3 tablespoons all-purpose flour 2 medium-large yellow onions ,chopped 3 cloves garlic ,minced 4 medium firm ,waxy potatoes (e.g., Yukon Gold), cut in 1-inch pieces 2 large carrots ,chopped in 1/2 inch pieces 2 ribs celery ,chopped in 1/2 inch pieces 1 large parsnip ,chopped into 1/2 inch pieces 1 bottle (1 pint or 16 ounces) … Read more

Easy Homemade Artisan Bread

Ingredients for Easy Homemade Artisan Bread 3 cups warm water 1 1/2 tsp. granulated yeast 1 1/2 tsp. Kosher or other salt 6 1/2 cups all-purpose unbleached flour optional cornmeal pizza peel Instructions forEasy Homemade Artisan Bread 1. In a very large bowl, combine the flour, baking powder, and salt. 2Add water and mix until … Read more

Classic Cherry Delight Recipe

This Classic Cherry Delight is so easy to make and never fails to impress. It comes together in just minutes and is made of three simple layers. If you want a dessert that’s not overly sweet yet delicious, this is it!   

This Classic Cherry Delight takes me back to my high school days. My mom made this often to serve with lunch after church on Sundays. Not only is it super easy to make, but it’s not heavy or super sweet. It’s just perfect!  

 PREP TIME: 30 MINS

TOTAL TIME: 30 MINS

Yield: 9 SERVINGS

INGREDIENTS:

CRUST
  • 7 tablespoons unsalted butter
  • 1 1/2 cups graham cracker crumbs (about 9 whole crackers)
  • 3 tablespoons granulated sugar
FILLING
  • 8 ounces cream cheese, softened
  • 1 cup powdered sugar
  • 1 teaspoon pure vanilla extract
  • 1 container cool whip, 8 ounces
  • 1 can cherry pie filling, 21 ounces

INSTRUCTIONS:

CRUST
  1. Add the butter to a medium bowl. Microwave for 30 seconds or until melted.
  2. Add the graham cracker crumbs and sugar and mix well to combine.
  3. Pat the crumb mixture firmly into the bottom of a sprayed 8 x 8 baking dish. Set aside.
FILLING
  1. Add the cream cheese to a large bowl.
  2. Mix with a mixer until the cream cheese of smooth and free of any lumps.
  3. Add the powdered sugar and vanilla and mix well.
  4. Add the cool whip and mix until the cool whip and cream cheese are combined, but don’t overmix.
  5. Spread the filling evenly over the graham cracker crust, using a spoon or offset spatula.
  6. Spoon the cherry pie filling over the top and carefully spread it evenly over the filling.
  7. Refrigerate for at least 2 hours before serving. I like to leave it overnight.
  8. Refrigerate leftovers.

NOTES

Tip from reader Jody…This is a great recipe. To remove easily, put hot water in the sink. Just enough so the bottom and a tiny bit of the sides of the pan are covered. Hold for under a minute and that will release the crust and it came out of the pan and cut wonderfully. Make sure the water is very hot.”


Strawberry Bomb Recipe

Delicious and Easy Strawberry Bombs Recipe to Satisfy Your Sweet Tooth

Are you in the mood for something sweet, fruity, and easy to make? Then you’re in the right place! In this article, we’ll be sharing our favorite Strawberry Bombs recipe with you. Not only are they incredibly delicious, but they’re also quick and easy to make. So, let’s get started!

INGREDIENTS:

  • 300g (2 cups) flour
  • 1 egg
  • 45g (1/4 cup) sugar
  • pinch of salt
  • 7g dry yeast
  • 140ml (3/5 cup) warm milk
  • 40g (1/4 cup) softened butter
For decoration:
  • Whipped cream
  • Strawberries, chopped
  • Powdered sugar

METHOD:

  1. In a medium bowl combine sugar, yeast, and milk and stir to dissolve.
  2. Whisk in egg. Add flour and salt, and start to mix the dough with a spatula. Then continue to knead it with your hands until you receive an elastic dough.
  3. Add softened butter and continue to knead until butter is fully incorporated into the dough.
  4. Form a ball from the dough, cover with a kitchen cloth or plastic wrap, and allow to rise for an hour.
  5. Divide the dough into 8 parts and roll each into a ball. Cover and let sit for 30 minutes.
  6. Flatten each ball a bit and roll it again into a ball. Cover and let sit for another 30 minutes.
  7. Fry balls in hot oil on low for 2-3 minutes on each side.
  8. Let cool a bit and cut in half lengthwise, like a burger bun.
  9. Top one half with whipped cream and chopped strawberries, close with the other half, sprinkle with powdered sugar and serve.
Second recipe:

Here’s a recipe for strawberry bombs, a delicious and simple dessert that’s perfect for any occasion:

Ingredients:

  • 1 pound fresh strawberries, washed and hulled
  • 8 oz cream cheese, softened
  • 1/2 cup powdered sugar
  • 1 tsp vanilla extract
  • 1 cup graham cracker crumbs
  • 1/4 cup unsalted butter, melted
  • Whipped cream, for topping (optional)

Instructions:

  1. Preheat your oven to 350°F.
  2. In a small bowl, combine the graham cracker crumbs and melted butter until well blended.
  3. Using a spoon, press the mixture into the bottom and sides of a muffin tin, making sure to press down firmly.
  4. Bake for 5-7 minutes, or until golden brown. Remove from the oven and let cool.
  5. In a mixing bowl, beat the cream cheese, powdered sugar, and vanilla extract until smooth.
  6. Using a piping bag or a spoon, fill each graham cracker crust with the cream cheese mixture.
  7. Cut the strawberries in half and place one half on top of each cream cheese-filled crust.
  8. Chill the strawberry bombs in the fridge for at least 30 minutes.
  9. Before serving, you can add a dollop of whipped cream on top of each strawberry bomb.
  10. Your strawberry bombs are ready to serve! Enjoy their sweet and tangy flavors!

Tips:

  • Make sure the cream cheese is softened before mixing it with the powdered sugar and vanilla extract. This will make it easier to mix and create a smoother consistency.
  • You can also try adding different toppings to your Strawberry Bombs, such as chocolate chips or chopped nuts.
  • If you don’t have a piping bag, you can use a plastic bag with the corner cut off instead. This will work just as well and is a great alternative.

Brioche Donuts Recipe

This recipe for brioche donuts is decadent and a true treat. If you’re looking to flex your brioche-making skills as well as get more comfortable with frying, this is the recipe to take on. You can do any flavor of jam, curd or pastry cream you want to fill, or leave them plain!

Homemade brioche doughnuts — heavenly fried brioche donuts that will send you into outerspace from pleasure

PREP TIME: 16 hrs

COOK TIME: 30 mins

TOTAL TIME: 16 hrs 30 mins

COURSE: Baking

CUISINE: American, Brioche, Donuts, Fried Foods

SERVINGS: 20 doughnuts

CALORIES: 201 kcal

EQUIPMENT:

KitchenAid with dough hook

Candy thermometer for frying

Pastry bag with small tip for filling the doughnuts

INGREDIENTS:

  • 1 packet of active dry yeast 7g hydrated with ¼ cup of 110-120F water and ½ teaspoon sugar
  • 1 cup water
  • 4 cups bread flour more as needed
  • ¼ cup caster sugar
  • 2 teaspoons fine sea salt
  • 4 eggs
  • ½ lemon zest
  • ½ cup unsalted butter, cubed
  • 64 oz neutral oil for frying

for the filling:

  • 1 cup of any store bought jam you want! or
  • pastry cream or
  • citrus curd
  • more caster sugar for tossing

INSTRUCTIONS:

Making the brioche dough

  1. Mix yeast packet with the warm water and sugar, and let the foam double in size.
  2. Mix the flour, sugar, water, activated yeast, lemon zest, salt and eggs into the bowl of an electric mixer with a dough hook attachment and mix on medium speed for 1-2 minutes, until it’s all combined. Then turn up the speed to medium high and let it run for about 5 minutes, or until the dough starts coming away from the sides and forms a ball. Turn off the mixer and let the dough rest for a minute. Slowly add the butter to the dough, about 25g at a time. Once it is all incorporated, mix on high speed for 5min until the dough is glossy, smooth and very elastic when pulled.
  3. Cover the bowl with saran wrap and leave to proof in the bowl until it has doubled in size – about 1-2 hours.
  4. Punch down the dough – then re-cover the bowl and put into the fridge to chill overnight.
  5. The next day, take the dough out of the fridge and cut it into equal, palm size pieces (you should get about 18).
  6. Roll them into smooth, taut, tight buns and place them on a floured baking tray, leaving plenty of room for them – so they don’t stick together while they proof.
  7. Cover lightly with Saran wrap and leave out in a 75F room for about 4hr, or until about doubled in size.

Frying and finishing

  1. In a big cast iron pot, prepare the deep fryer; fill it up to the halfway point with the oil.
  2. Heat the oil to 350F, then carefully remove the doughnuts from the tray by sliding a floured pastry scraper or fish spatula underneath them, taking care not to deflate them, and put them into the oil.
  3. Don’t overcrowd the fryer – do two to three per batch, depending on the size of your pan.
  4. Remove from the oil and place on a paper towel, then toss them in a bowl of caster sugar while still warm. Set aside to cool before filling.
  5. To fill the donuts, make a hole in the white strip in between the brown tops/bottoms.
  6. Fill a piping bag with jam (or any other filling you see fit!) and pipe into the doughnut until a little bit peeks out on top.

NOTES:

I’ve included volume ingredients here but BAKING TURNS OUT BETTER WHEN YOU MEASURE IN WEIGHT

NUTRITIONAL INFO:

Serving: 1donutSodium: 305mgCalcium: 14mgVitamin C: 2mgVitamin A: 251IUSugar: 11gFiber: 1gPotassium: 53mgCholesterol: 33mgCalories: 201kcalSaturated Fat: 1gFat: 6gProtein: 4gCarbohydrates: 32gIron: 1mg

CARROT CHEEES CAKE

CARROT CHEEES CAKE RECIPE Ingredients for CARROT CHEEES CAKE 1 1/2 cups graham cracker crumbs 1/4 cup granulated sugar 1/2 cup unsalted butter, melted For the Cheesecake Filling: 24 ounces (3 packages) cream cheese, softened 1 cup granulated sugar 3 large eggs 1 teaspoon vanilla extract 1/4 cup sour cream 1/4 cup heavy cream For … Read more

Peach Cobbler Recipe

Best Peach Cobbler Recipe Baking Tips Use ripe, fresh peaches for this easy cobbler recipe. Ripe peaches will deliver a sweet, juicy flavorful peach cobbler. See below for tips on how to ripen peaches more quickly. I used around 5 cups of peaches for my four ingredient peach cobbler. That was 8 medium peaches. Cut … Read more

Fashioned Chicken and Dumplings

Fashioned Chicken and Dumplings   Ingredients For chicken soup: 6 tablespoons butter 1 cup chopped yellow onion 1 cup matchstick carrots 1 cup diced celery 1 pound chicken thigh, cut into 1-inch pieces 1 teaspoon salt 1/2 teaspoon dried thyme 1/2 teaspoon ground black pepper 4 garlic cloves (chopped) 3 tbsp all-purpose flour 6 cups … Read more

Flaky Apple Pie Bars

Flaky Apple Pie Bars Recipe Prep Time: 30 mins Cook Time: 1 hr Total Time: 1 hr 30 mins Servings: 12 Yield: 1 9×13-inch pan Ingredients For Flaky Apple Pie Bars 2 ½ cups all-purpose flour 1 teaspoon salt 1 cup shortening 1 egg yolk ½ cup milk 10 apples – peeled, cored and thinly sliced ½ cup light brown sugar ¼ cup white sugar ½ teaspoon ground cinnamon ¼ teaspoon ground nutmeg … Read more

Lemon Garlic Butter Chicken Recipe

Lemon-Garlic Butter Chicken Recipe– If you are looking for an easy but delicious crock pot dinner idea, then this crockpot chicken thighs recipe is for you! The chicken thighs cook up tender and juicy in a buttery lemon garlic sauce. This chicken recipe is very easy to make in the crock pot and the flavor is outstanding. We guarantee your family will love this slow cooker chicken thighs recipe and put it on the family favorite rotation list! Serve the chicken thighs over a bed of cauliflower rice (ideal for keto or low carb diet) or rice with a salad and dinner is done. Hint, if you make rice (or cauliflower rice) in the Instant Pot, this crockpot chicken dinner gets crazy easy.

INGREDIENTS:

  • 6-8 boneless chicken thighs, skinless or with skin
  • Salt and pepper, to taste
  • 1 teaspoon garlic powder
  • 1 teaspoon onion powder
  • 1/2 teaspoon crushed red chili pepper flakes, or Cayenne (optional)
  • 1/2 teaspoon paprika
  • 4 garlic cloves, sliced or minced
  • 1 teaspoon Italian seasoning
  • 1/2 stick butter, diced
  • Zest of half a lemon
  • Juice of one lemon
  • 1/3 cup low sodium chicken broth
  • Chopped fresh parsley and lemon slices, for garnish

How To Make Chicken in the Crockpot:

  1. This crockpot chicken thighs recipe is SUPER easy to make. Simply place the chicken thighs in the slow cooker. Combine 1/3 cup chicken broth, lemon juice, and zest. Pour the broth over the chicken. Season the chicken with Italian seasoning, onion powder, garlic powder, paprika, crushed red chili pepper flakes, salt, and pepper. Top chicken with fresh minced garlic and diced butter. Cook on High for 3-4 hours.
  2. Once the chicken thighs are cooked, serve the chicken over white rice, pasta, cauliflower rice, mashed potatoes, zucchini noodles, or egg noodles.
  3. If you want a thinner sauce, add about 1/2 to 1 cup of water or chicken broth to the soup mixture.

Recipe tips for the crockpot chicken recipe:

  1. This chicken thighs recipe in the slow cooker is very accommodating and you can customize it to your taste.
  2. The chicken thighs is super quick to prep and the delicious garlic lemon butter herb sauce is to die for! Here are a few tips to make it even better!
  3. Try cooking the chicken over a bed of chunky cauliflower florets. This instantly turns the crockpot chicken thighs recipe into a one-pot dinner, and the cauliflower side is packed with flavor since it will soak up the fat and juices from the chicken thighs.
  4. If you’re not on a Keto or low carb diet, cook the crockpot chicken thighs over a bed of baby or new potatoes instead.
  5. If you want to give your crockpot chicken thighs dinner a zesty touch to brighten the flavor, add a dash of fresh lemon juice at the end of cooking.
  6. Make sure to use skinless chicken thighs. Chicken skin contains fat that will make the crockpot dish too greasy, especially when we use butter in the sauce.
  7. If you’re not fond of chicken thighs, go for skinless chicken breasts instead–They are lean and shred easily after being slow-cooked!
  8. Shredding chicken meat is also a great option. Simply remove the cooked chicken thighs from the crockpot and shred on a cutting board after removing the bone.
  9. Add chicken back to the crockpot and mix with the sauce to combine and reheat quickly before serving the crockpot chicken.

Directions:

1. To make this crockpot chicken recipe:

Place chicken thighs at the bottom of your slow cooker. Combine 1/3 cup chicken broth, lemon juice, and zest, and pour over chicken thighs. In a small bowl, combine Italian seasoning, onion powder, garlic powder, paprika, crushed red chili pepper flakes, salt, and pepper. Sprinkle the spice mix over the chicken thighs. Top with fresh minced garlic and diced butter.

2. Cover the crockpot and cook the chicken thighs for 3-4 hours on HIGH or 6-8 hours on LOW.

3. Sprinkle your crockpot chicken thighs dinner with chopped parsley and garnish with lemon slices. Serve hot with cauliflower rice, spiralized zucchini noodles, rice, pasta or quinoa. Enjoy! ❤️

What to serve with the crockpot chicken?

As said above, cauliflower rice or zucchini noodles are a great and healthy option, especially for those on low-carb/keto diets. This slow cooker chicken thighs recipe is also awesome on top of regular pasta or rice of course!

Cream Puff Recipe

Perfect Cream Puff Recipe: These bake up light as air every time! Filled with sweet whipped cream & dusted with powdered sugar. The ultimate!

Just in time for the weekend, I’m bringing you a classic dessert recipe that just can’t go wrong, no matter the occasion or the time of year: cream puffs!

Like so many other French pastries such as Madeleine cookies, brioche bread, and macarons, cream puffs have a specific set of ingredients and a specific technique. But unlike those others, this recipe is very easy to make.

If you’re aware of the major pitfalls (more on that below), you’ll be able to make this cream puff recipe like a pro! It’s pretty much foolproof!

Prep Time: 20mins

Cook Time: 40mins

Total Time: 1hr

Course: Dessert, Snack

Cuisine: French

Servings: 12 cream puffs

Ingredients:

For the Choux Pastry Puffs:

  • 1 cup water
  • 1/2 cup unsalted butter (1 stick)
  • 1/2 teaspoon granulated sugar
  • 1/4 teaspoon kosher salt
  • 1 cup all-purpose flour
  • 4 eggs, large
  • 1 tablespoon powdered sugar, for garnish
  • For the Cream Puff Filling:
  • 8 ounces cream cheese*
  • 1 cup powdered sugar
  • 2 3/4 cups heavy cream, cold
  • 1 teaspoon vanilla bean paste (extract can be substituted)

Instructions:

To Make the Choux Pastry Puffs:

  1. Preheat the oven to 425 degrees F and line baking sheets with parchment paper.
  2. Place the water, butter, sugar, and salt in a small pot and cook over medium-high heat until the butter is completely melted and the mixture is simmering.
  3. Add in the flour all at once, and continue to cook, whisking, for about 5 minutes, or until the dough gathers itself into a ball and a film begins to form on the bottom of the pot.
  4. Transfer the mixture to a mixing bowl, and beat on medium speed.
  5. Drop in the eggs, one at a time, while continuing to beat. (Allow each egg to become fully incorporated before adding the next.)
  6. Pipe or spoon the dough in 1 1/2-inch balls onto the prepared baking sheets, allowing about 3 inches in between each puff.
  7. Bake for 35 to 45 minutes, or until puffed, golden brown, hollow, dry, and light.
  8. Allow the pastries to cool completely, then slice open horizontally, sandwich with cream puff filling, and dust with powdered sugar.

To Make the Cream Puff Filling:

  1. Place the cream cheese and powdered sugar in a large bowl and beat on medium speed until smooth.
  2. Turn the mixer down to medium-low speed and pour the heavy cream down the side of the bowl in a very slow and steady stream, stopping every now and then to scrape the bottom and sides of the bowl with a silicone spatula.
  3. When all the cream has been added, turn the mixer up to medium-high and whip until the filling holds stiff peaks.
  4. Fold in the vanilla.

Notes:

*Full-fat cream cheese in brick form works best.

Nutritional Info:

Serving: 1cream puff | Calories: 239kcal | Carbohydrates: 20g | Protein: 4g | Fat: 16g | Saturated Fat: 9g | Polyunsaturated Fat: 1g | Monounsaturated Fat: 4g | Trans Fat: 1g | Cholesterol: 97mg | Sodium: 133mg | Potassium: 61mg | Fiber: 1g | Sugar: 12g | Vitamin A: 587IU | Vitamin C: 1mg | Calcium: 32mg | Iron: 1mg

Honey Garlic Butter Salmon In Foil Recipe

THIS honey garlic butter salmon in foil recipe is an easy dinner to throw together on your busy weeknights or weekends!

A delicious 4-ingredient honey garlic butter sauce is baked with a whole side of salmon, wrapped in foil, baked and broiled (or grilled) for that extra golden, crispy, caramelised and flakey finish! The BEST Salmon In Foil IS RIGHT HERE! So simple with minimal mess to clean up!


Honey Garlic Butter Salmon In Foil in under 20 minutes, then broiled (or grilled) for that extra golden, crispy and caramelised finish! So simple and only 4 main ingredients, with minimal clean up!

Prep Time: 10mins

Cook Time: 15mins

Total Time: 25mins

Course: Dinner

Cuisine: American

Servings: 8 people 

Ingredients:

  • 1/4 cup butter
  • 1/3 cup honey
  • 4 large cloves garlic , crushed
  • 2 tablespoons fresh lemon juice (juice of 1/2 a lemon)
  • 1.2 kg | 2 1/2 pound side of salmon
  • Sea salt , to taste
  • Cracked pepper , to taste (optional)
  • Lemon slices (to serve)
  • 2 tablespoons fresh chopped parsley

Instructions:

  1. Position a rack in the middle of the oven. Preheat oven to 375°F | 190°C.
  2. Line a baking tray / sheet with a large piece of foil, big enough to fold over and seal to create a packet (or 2 long pieces of foil over lapping each other lengthways to create your salmon packet, depending on the width of you fillet).
  3. In a small saucepan, melt the butter over low-medium heat.
  4. Add the honey, garlic and lemon, and whisk until the honey has melted through the butter and the mixture is well combined.
  5. Place the salmon onto lined baking tray | sheet.
  6. Pour the butter/honey mixture over the salmon, and using a pastry brush or spoon, spread evenly over the salmon.
  7. Sprinkle with a good amount of salt (about 2 teaspoons) and cracked pepper.
  8. Fold the sides of the foil over the salmon to cover and completely seal the packet closed so the butter does not leak.
  9. Bake until cooked through (about 15-18 minutes, depending on the thickness of your fish and your preference of doneness).
  10. Open the foil, being careful of any escaping steam, and grill / broil under the grill / broiler for 2-3 minutes on medium heat to caramelise the top.
  11. Garnish with parsley and serve immediately with lemon slices.

Nutritional Info:

Calories: 310kcal | Carbohydrates: 9g | Protein: 30g | Fat: 14g | Saturated Fat: 5g | Cholesterol: 97mg | Sodium: 118mg | Potassium: 753mg | Sugar: 11g | Vitamin A: 320IU | Vitamin C: 3.2mg | Calcium: 24mg | Iron: 1.4mg

Loaded Steak Quesadilla Recipe

Are you looking for an easy, filling, 30 minutes or less recipe for dinner? Simple prep and not a lot of clean up? Well, today I gotcha covered! Because I needed a nice, easy breezy meal that would keep me full, keep the kitchen decent, and not take me forever to make. And guess what? Success!!! Meet these 30 Minute Loaded Steak Quesadillas.

Loaded you ask? Not only are these steak quesadillas layered with a pound of top sirloin, there’s also black beans, fire roasted corn, cherry tomatoes, avocado, and of course, two layers of cheese. This amount of goodness brings the basic cheese quesadilla up a bit higher in the world wouldn’t you agree? Like “Instead of as a snack…I’m going to make steak quesadillas for DINNER!” level.

Total Time: 25 mins

Yield: 2 

Delicious, easy, family friendly meal done in just 30 minutes! Great for both an appetizer AND dinner!

INGREDIENTS:

FOR THE STEAK

  • 3/4 – 1 lbs sirloin steak
  • 1 teaspoon ancho chili powder
  • 1/2 teaspoon paprika
  • 1/4 teaspoon ground mexican oregano
  • 1/4 teaspoon cumin
  • 1/4 teaspoon garlic powder
  • 1/4 teaspoon onion powder
  • Pinch of cayenne pepper
  • 1/4 teaspoon salt

FOR THE QUESADILLAS

  • 4 large flour tortillas
  • 2 cups Mexican Cheese Blend
  • 1/2 cup cherry tomatoes, thinly sliced
  • 1/2 cup canned fire roasted corn kernels, drained
  • 1/2 cup canned black beans, drained
  • 1/2 an avocado, diced
  • Limes wedges and fresh minced cilantro for garnish
INSTRUCTIONS:
  1. Preheat oven to 425˚F. Prepare a baking sheet with a piece of parchment paper.
  2. In a small bowl, mix together all spices and salt for the steak. Generously coat steak with spice blend.
  3. Heat 2 tablespoons olive oil in a large skillet over medium high heat. Sear steak, no more than 3 minutes per side. The steak will cook more in the oven so make sure it’s just a sear! Remove from heat and let rest for 5 minutes while prepping quesadillas.
  4. Place 2 tortillas on the prepared sheet and sprinkle each one with 1/2 cup of the cheese.
  5. Top with tomatoes, corn, black beans, and avocado.
  6. Thinly slice steak against the grain. Place slices on top of the loaded tortillas.
  7. Sprinkle the rest of the cheese evenly over both quesadillas and cover with remaining tortillas.
  8. Bake in the oven for 6-8 minutes, until cheese is melted and tortillas are warmed through.
  9. Remove from oven and slice as desired. Top with cilantro and serve with lime wedges, a dollop of sour cream and your favorite salsa and guacamole!
NUTRITIONAL INFO:

Calories: 798kcal | Carbohydrates: 64g | Protein: 50g | Fat: 38g | Saturated Fat: 14g | Polyunsaturated Fat: 19g | Trans Fat: 1g | Cholesterol: 142mg | Sodium: 1156mg | Fiber: 10g | Sugar: 4g

Easy Corn Arepas Recipe

For many, corn arepas are the favorite of the immense variety of arepas that we have in Colombia, due to the ideal contrast between sweet and salty in its composition. Just out of the fire they are a delight for the diner and combine perfectly with the scrambled eggs for breakfast, although I dare to assure you that they are enjoyed very well alone and at any time of the day.

The preparation of corn arepas dates back to before the time of the conquest, when the Indians kneaded the tender grains of the ears, which they later put on the fire. Currently, this kind of arepas is part of the diet of the inhabitants of the Antioquia and Cundiboyacense regions

Like all the typical mixes from my land, pre-cooked flours are already available on the market that facilitate the preparation of these delicacies. However, and as always, I share the traditional recipe. Of course, the quantities of the ingredients vary according to the taste of the diner. For a softer dough, a greater quantity of milk or butter can be added, the same happens when graduating the taste of sweet and salt.

Servings: 5

Prep Time: 15min

Cook Time: 10min

Total Time: 25min

INGREDIENTS:

  • 2 cups of corn kernels
  • ½ cup of milk
  • 1 cup of cornmeal (the one used to make arepas)
  • 2 butter spoons
  • ¼ cup grated brown sugar (or brown sugar)
  • Salt to taste (optional)
  • White cheese (In the USA I use Cotija cheese or fresh cheese)

INSTRUCTIONS:

  1. In the blender, mix the corn kernels and milk.
  2. Transfer the mixture to a container and add the flour, panela and salt to taste.
  3. Knead and check the seasoning.
  4. Make balls and flatten them to form the arepas.
  5. Heat them in a non-stick frying pan and let them cook until golden brown on both sides.
  6. A little before removing them from the heat, cover them with slices of white cheese and let it melt.

Moist Lemon Loaf Recipe

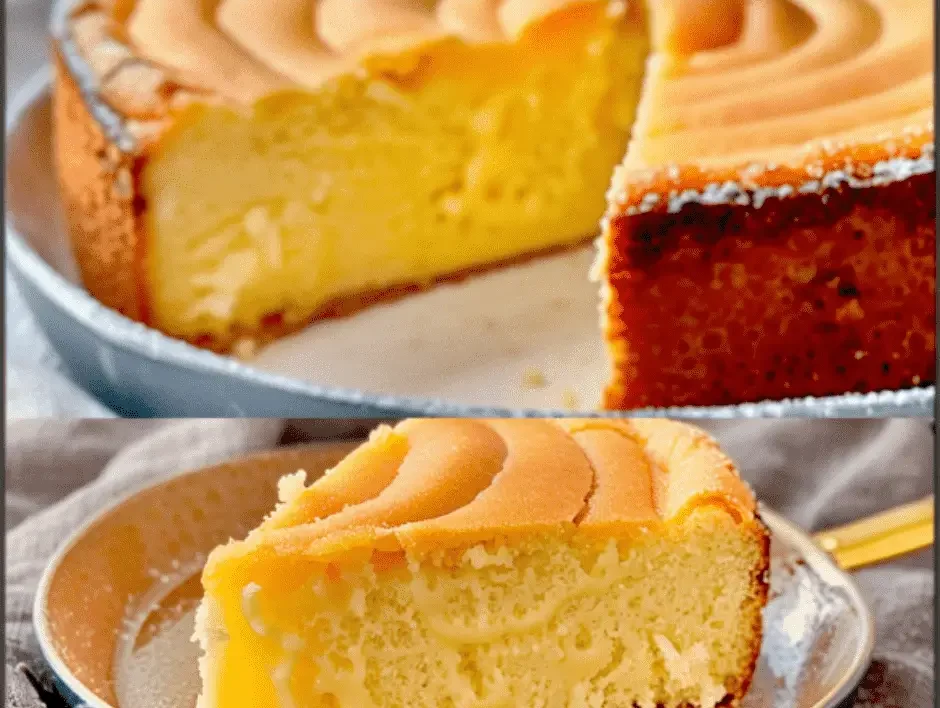
This moist Lemon Cake Recipe is fluffy, tangy and so easy to make from scratch! Every bite of this supremely moist pound cake is bursting with fresh lemon flavor and the easy lemon glaze on top will have you hooked after just one bite.

This homemade lemon pound cake tastes even better than the Starbucks Lemon Loaf!

If you like the Starbucks Lemon Loaf then you’ll love this delicious, moist lemon cake recipe that’s made completely from scratch in less than 10 minutes. It’s one of my favorite afternoon or breakfast treats and it always gets rave reviews, everyone loves it! It’s gone in minutes whenever I make it.

This batter is made with freshly grated lemon zest and fresh lemon juice. When it the cake comes out of the oven it is infused with a homemade lemon syrup to give it an extra lemon kick, and then after cooling down the pound cake is topped with the most delicious lemon glaze.

This easy lemon cake is not dry and not fudgy, it’s perfectly moist while still being fluffy and it keeps fresh for a few days! A perfect cake for every occasion. If you like lemon desserts, you have got to give this cake a try!

Tips and Tricks for Making This Easy Lemon Cake Recipe

You can also make this recipe in a bundt pan. It looks prettier than in a loaf pan but make sure to grease your bundt pan generously so that your cake will come out of the pan.

Don’t leave out the lemon zest, that is what gives it the wonderful lemony flavor! I always use organic lemons and my favorite grater that I’ll like below.

For the best flavor use freshly squeezed lemon juice! Don’t use the bottled stuff, trust me fresh lemon juice tastes so much better.

When you make the lemon glaze for this pound cake don’t add too much liquid. You want the glaze to be nice and thick not runny. Start with 1 tbsp lemon juice and 1 tbsp milk and add the remaining 1/2 tbsp as needed.

This cake keeps well covered at room temperature for up to 4 days.

This moist Lemon Cake Recipe is fluffy, tangy and so easy to make from scratch! Every bite of this supremely moist pound cake is bursting with lemon flavor. If you like the Starbucks Lemon Loaf then you’ll love this homemade lemon pound cake!

Prep Time: 15minutes

Cook Time: 45minutes

Total Time: 1hour 

INGREDIENTS:

For the lemon pound cake:
  • 1 1/2 cups all-purpose flour
  • 1 1/2 tsp baking powder
  • 1 Tbsp lemon zest
  • 1/2 tsp salt
  • 1/2 cup unsalted butter room temperature
  • 1 cup granulated sugar
  • 2 large eggs room temperature
  • 1 tsp vanilla extract
  • 2 Tbsp lemon juice about 1/2 lemon
  • 1/2 cup buttermilk see below for substitution
For the lemon syrup:
  • 1/4 cup lemon juice about 1 lemon
  • 3 Tbsp powdered sugar
For the lemon icing:
  • 1 cup powdered sugar sifted
  • 1.5 Tbsp lemon juice
  • 1 Tbsp milk

INSTRUCTIONS:

  1. Preheat oven to 350°F (177°C). Grease a 9×5-inch (or 8×4-inch) loaf pan (see note).
  2. In a medium bowl combine the flour, baking powder, lemon zest, and salt. Set aside.
  3. In the bowl of a stand mixer fitted with the paddle attachment (or using an electric mixer), cream the butter and sugar together at medium-high speed until pale and fluffy, about 4-6 minutes. Scrape the sides of the bowl as needed.
  4. With the mixer running on low-speed, add the eggs one at a time, then beat in the vanilla extract and lemon juice. Beat on medium-high speed until combined.
  5. With the mixer on low, add about one-third of the flour mixture and mix until almost combined, then add half the buttermilk and mix until just combined. Repeat with another third of flour mixture and then the last half of the buttermilk, ending with the last third of the flour. Beat until just incorporated.
  6. Scrape the batter into the prepared loaf pan and bake for 45-55 minutes until the cake is golden brown and a toothpick comes out mostly clean with only a couple moist crumbs. Baking times vary, so keep an eye on yours.
  7. Let the cake cool for about 15 minutes in the pan. Stir together the lemon juice and confectioners’ sugar for the lemon syrup. Carefully invert the loaf pan, and transfer the cake to a cooling rack, then brush the syrup on the cake while it’s still warm. Allow cake to cool completely.
  8. When the cake is cooled, combine all the icing ingredients, start with 1 tbsp lemon juice and milk and add the remaining lemon juice as needed. The icing should be thick and not runny. Pour icing over cake and let dry before serving.

NOTES:

If you don’t have buttermilk, you can make your own by combining 1/2 cup of milk with 1.5 tsp lemon juice or white vinegar. Let the mixture sit for a few minutes until it starts to curdle.

The longer you beat the sugar and butter, the better the result will be because this process incorporates air into the batter and makes the cake fluffy and tender

I recommend using fresh lemon juice but you can also bottled lemon juice

This cake would also taste great with lime juice or orange juice

NUTRITIONAL INFO:

Calories: 306kcal | Carbohydrates: 49g | Protein: 3g | Fat: 10g | Saturated Fat: 6g | Cholesterol: 58mg | Sodium: 144mg | Potassium: 98mg | Sugar: 34g | Vitamin A: 350IU | Vitamin C: 0.9mg | Calcium: 48mg | Iron: 1.1mg

Easy Layered Taco Bake Recipe

This layered Taco Bake is a simple and quick weeknight meal with layers of tortillas, ground beef and salsa con queso!

One food item I always seem to have in my pantry or in my fridge are flour tortillas. They are good for so many things. Tortillas can be made into so many different types of snacks for kids (and grownups). You can cut them up and fry them or bake them. You can make cinnamon chips, quesadillas, tortilla pizzas. The possibilities are endless and easy on the wallet too.

TIPS FOR MAKING LAYERED TACO BAKE:

Flour tortillas work best in this but if you absolutely must have corn tortillas, then you can certainly switch it out.

Ground turkey and chicken can be substituted for the ground beef.

Try making your own Taco Seasoning for this recipe!

If you like this recipe, you should give these Navajo Tacos a try!

A springform pan makes this easy to remove but an 8-inch round baking pan will work as well.

This meal is delicious served with Spanish style rice

If you are very sensitive to spices, you can certainly use a regular cheese dip instead of the salsa con queso.

Prep Time: 15minutes 

Cook Time: 30minutes 

Total Time: 45minutes

Servings: 6

Ingredients:

  • 1 pound ground beef
  • 1 packet taco seasoning
  • water as called for on back of seasoning packet (usually 3/4 cup water)
  • 1/2 cup salsa con queso
  • 3 (8-inch) flour tortillas (soft taco size)
  • 2 cups shredded Mexican cheese blend (divided use)

Instructions:

  1. Brown and crumble 1 pound ground beef. Drain excess grease.
  2. Add in 1 packet taco seasoning and water as called for on back of seasoning packet (usually 3/4 cup) following directions on back of seasoning packet.
  3. Once the taco meat is ready, turn off heat and add in 1/2 cup salsa con queso. Give it a good stir until thoroughly combined.
  4. Preheat oven to 350F degrees. Spray an 8-inch round baking pan with nonstick cooking spray.
  5. Layer the bottom of the pan with one of the 3 (8-inch) flour tortillas.
  6. Now add about 1/3 of the ground beef taco filling on the the first layer.
  7. Then add 1/3 of the 2 cups shredded Mexican cheese blend.
  8. Continue until you are done with all the layers: another tortilla, more taco mixture, more cheese.
  9. Bake at 350F degrees for about 15-20 minutes until cheese is melted and edges are slightly golden brown.
  10. Allow to cool for a couple of minutes. Slice and serve. Top with desired toppings.

Southern Fried Chicken Recipe

Southern Fried Chicken – One bite of this chicken’s crunchy, spicy outer layer followed by the tender, juicy meat inside, and you’ll understand why this is a true-blue Southern classic. Infused with spices for intense flavor and soaked in buttermilk tender juiciness, this is the perfect addition to your collection of chicken recipes!

Honestly, this is one of those recipes that is just plain irresistible. I never have leftovers, and everyone always goes back for seconds. Give this fried chicken a try, and you’ll understand what all the fuss is about. 😋

Besides being utterly tantalizing, this Southern-fried chick recipe is super affordable. Marinate simple chicken cuts in buttermilk, then coat them with seasoned flour, and voila!

Prep Time: 4hours 10minutes

Cook Time: 20minutes

Cooling Time: 10minutes

Total Time: 4hours 40minutes

Servings: 10

INGREDIENTS:

  • 1 whole chicken, cut into 10 pieces
  • 1½-2 teaspoons salt, adjust to preference
  • ½ -1 tablespoon hot sauce
  • 3-4 cloves garlic, crushed
  • 2-3 teaspoons Creole seasoning
  • 4 cups buttermilk (for both marinating and coating)
Chicken Coating
  • 3 cups all-purpose flour
  • 1 cup cornstarch
  • 2 teaspoons baking powder
  • 1 tablespoon paprika
  • 2 tablespoon garlic powder
  • 2 tablespoon onion powder
  • 1-1½ tablespoon dried herbs (thyme, oregano, parsley, etc.)
  • 1 teaspoon cayenne pepper
  • 1 teaspoon white pepper
  • 1 teaspoon salt, adjust to taste

INSTRUCTIONS:

Prepping the Chicken and Coating
  1. Place the chicken pieces in a large bowl. Then season it with salt, crushed garlic, hot sauce, and Creole seasoning.
  2. Pour some of the buttermilk over the marinated chicken, transfer the chicken to a gallon-sized zipper-lock freezer bag, and refrigerate for at least 4 hours (or overnight).
  3. Whisk together the flour, cornstarch, baking powder, paprika, garlic powder, onion powder, herbs, cayenne pepper, white pepper, and salt in a large bowl.
  4. Remove the marinated chicken from the buttermilk. Then dredge it in the flour mixture, shaking off any excess flour. You could use a Ziploc bag for this process, too.
  5. Double dip the chicken in the remaining buttermilk (add fresh buttermilk as needed), followed by the flour mixture – shake off any excess flour. Let the chicken rest for 10-15 minutes while preparing the oil. That will help the coating to stay on better.
Frying the Chicken
  1. Heat oil in a deep fryer or cast iron skillet to 375℉/190℃. The temperature will drop once you add chicken.
  2. Slowly and carefully place the chicken in the hot oil using a tong. Work in batches, and don’t overcrowd the skillet.
  3. Fry the chicken until golden brown, turning once every 10-15 minutes – depending on the size of the pieces. Chicken is done when it is no longer pink inside and its juices run clear, or your instant-read thermometer reads 165℉/75℃. You may do a test by piercing the chicken with a fork.
  4. Drain the chicken on paper towels and then transfer them to a wire rack.
  5. Repeat with remaining chicken pieces. Let them cool for at least 10 minutes before serving.

NOTES:

  • After you coat the chicken with the flour mixture and dip your chicken in buttermilk, let it rest first before frying it. That will allow your chicken to form a crust and warm to room temperature, which will help it cook evenly.
  • When frying, ensure your oil is at the right preheated temperature. If it’s too hot, the outside of your chicken will get burned; if it’s cold, the chicken will get soggy and greasy.
  • Don’t ever use extra virgin olive oil on fried chicken because it’ll result in bitter-tasting meat. Go for a neutral-tasting oil like canola, vegetable, or, preferably, peanut oil.
  • Don’t overcrowd your pan with chicken because it will lower the oil’s temperature and slow the cooking time (soggy chicken isn’t good). Do it in small batches instead.
  • A cast-iron pan is a must for a perfectly cooked fried chicken because it holds the temperature better and heats evenly, resulting in perfectly cooked chicken.
  • Rather than deep frying or submerging your chicken entirely into the pan or deep fryer, only ¾ of the chicken should be covered in hot oil. The weight of the chicken will cause it to sit just almost above the oil’s surface, creating a crispy crust without burning.
  • Don’t let anything fried sit on a paper towel too long because it’ll start to steam. Then your chicken might get soggy and stick to the paper towel. Instead, drain your chicken using a wire rack over a baking sheet, and they’ll cool crispy and dry all at once easily.
  • Please remember that the nutritional information is a rough estimate and can vary significantly based on the products used in the recipe.

NUTRITIONAL INFO:

Serving: 1piece | Calories: 242kcal | Carbohydrates: 49g | Protein: 8g | Fat: 2g | Saturated Fat: 1g | Polyunsaturated Fat: 0.3g | Monounsaturated Fat: 0.3g | Cholesterol: 4mg | Sodium: 764mg | Potassium: 338mg | Fiber: 2g | Sugar: 5g | Vitamin A: 665IU | Vitamin C: 3mg | Calcium: 175mg | Iron: 3mg

Peach Cobbler Recipe

Mouth watering and easy, simple peach cobbler with self rising flour, sugar, butter and peaches.

Strike up the cobbler, because it’s fresh peach season. I have been waiting for July 1, so I can fresh peach bake, especially peach cobbler bake.

Best Peach Cobbler Recipe Baking Tips

Use ripe, fresh peaches for this easy cobbler recipe. Ripe peaches will deliver a sweet, juicy flavorful peach cobbler. See below for tips on how to ripen peaches more quickly.

I used around 5 cups of peaches for my four ingredient peach cobbler. That was 8 medium peaches.

Cut peaches in bite size pieces and all around the same size. Cutting your peaches all around the same size will allow even cooking and optimal texture in every bite.

Start checking your peach cobbler after it’s been in the over around 40 minutes. I have had it take up to an hour to cook. Make sure it is golden brown when you remove it from the oven.

You can substitute frozen peaches for fresh peaches. You will probably need 2.5 to 3.5 pounds of frozen peaches. See below for using frozen peaches in peach cobbler.

You can substitute canned peaches for fresh peaches. You will probably need 2.5 to 3 cans of canned peaches. See below for details.

This easy 4 ingredient peach cobbler is ridiculously delicious by itself, but friends you can always elevate your peach cobbler experience with a scoop of vanilla ice cream. Your taste buds will love that delicious, delightful dynamic duo.

Easy, tangy and delicious and only 4 ingredients.

Prep Time: 15mins

Cook Time: 45mins

Total Time: 1hr 

Servings: 16 servings 

Equipments

  • 9×13 baking dish
  • Dry Measuring Cups
  • Large Mixing Bowl
  • Spatula

INGREDIENTS:

  • 1¼ cups sugar
  • 1¼ cups butter
  • 1½ cups plus 2 TBS self rising flour
  • 4¼ to 5½ cups peaches cut in bite size pieces. I used around 5 cups (8 medium peaches).

INSTRUCTIONS:

  1. Preheat oven to 350°
  2. Place peaches, that have been cut into bite sized pieces, in 13×9 baking pan that has been greased or sprayed with baking spray. Set aside.
  3. 4¼ to 5½ cups peaches
  4. In large mixing bowl combine sugar, butter and self rising flour until crumbly.
  5. 1¼ cups sugar,1¼ cups butter,1½ cups plus 2 TBS self rising flour
  6. Sprinkle over peaches.
  7. Bake at 350° for 45 – 60 minutes or until golden brown.
  8. No need to cool. Eat up right away if you like.

Notes

  • Use ripe, fresh peaches for this easy cobbler recipe. Ripe peaches will deliver a sweet, juicy flavorful peach cobbler. See below for tips on how to ripen peaches more quickly.
  • Cut peaches in bite size pieces and all around the same size. Cutting your peaches all around the same size will allow even cooking and optimal texture in every bite.
  • Start checking your peach cobbler after it’s been in the over around 40 minutes. I have had it take up to an hour to cook. Make sure it is golden brown when you remove it from the oven.
  • You can substitute frozen peaches for fresh peaches. You will probably need 2.5 to 3.5 pounds of frozen peaches. See below on using frozen peaches in peach cobbler.
  • You can substitute canned peaches for fresh peaches. You will probably need 1.5 to 2 cans of canned peaches. See below for details.
  • This easy 4 ingredient peach cobbler is ridiculously delicious by itself, but friends you can always elevate your peach cobbler experience with a scoop of vanilla ice cream. Your taste buds will love that delicious, delightful dynamic duo.
Nutritional Info:

Calories: 252kcal

Stuffed Cabbage Rolls Recipe

This cabbage rolls recipe is super easy to prep with cabbage leaves, ground beef, rice, and condensed tomato soup. I have been using this recipe for well over 20 years and still love it! To speed things up the rolls are cooked in a skillet on the stovetop but this recipe also works well in a slow cooker.

Prep Time: 15 mins

Cook Time: 1 hr

Total Time: 1 hr 15 mins

INGREDIENTS:

  • ⅔ cup water
  • ⅓ cup uncooked white rice
  • 8 cabbage leaves
  • 1 pound lean ground beef
  • ¼ cup chopped onion
  • 1 egg, slightly beaten
  • 1 (10.5 ounce) can condensed tomato soup, divided
  • 1 teaspoon salt
  • ¼ teaspoon ground black pepper

INSTRUCTIONS:

  1. Bring water and rice to a boil in a saucepan. Reduce heat to low, cover, and simmer until rice is tender and liquid has been absorbed, about 20 minutes.
  2. Meanwhile, bring a large, wide saucepan of lightly salted water to a boil. Add cabbage leaves and cook for 2 to 4 minutes or until softened; drain.
  3. Combine ground beef, 1 cup of cooked rice, onion, egg, 2 tablespoons of tomato soup, salt, and pepper in a large bowl; mix thoroughly.
  4. Spoon about 2 tablespoons of beef mixture onto each cabbage leaf; bring one end of the cabbage leaf over the mixture, rolling and tucking in the ends to prevent the filling from falling out.
  5. Place cabbage rolls in a large skillet over medium heat; pour remaining tomato soup on top. Cover and bring to a boil; reduce heat to low and simmer for about 40 minutes, stirring and basting with the liquid often.

NUTRITIONAL INFO:

CALORIES 223 Total Fat 13g Saturated Fat 5g Cholesterol 66mg Sodium 657mg Total Carbohydrates 13g Dietary Fiber 1g Total Sugars 3g Protein 13g Vitamin C 25mg Calcium 33mg Iron 2mg Potassium 338mg