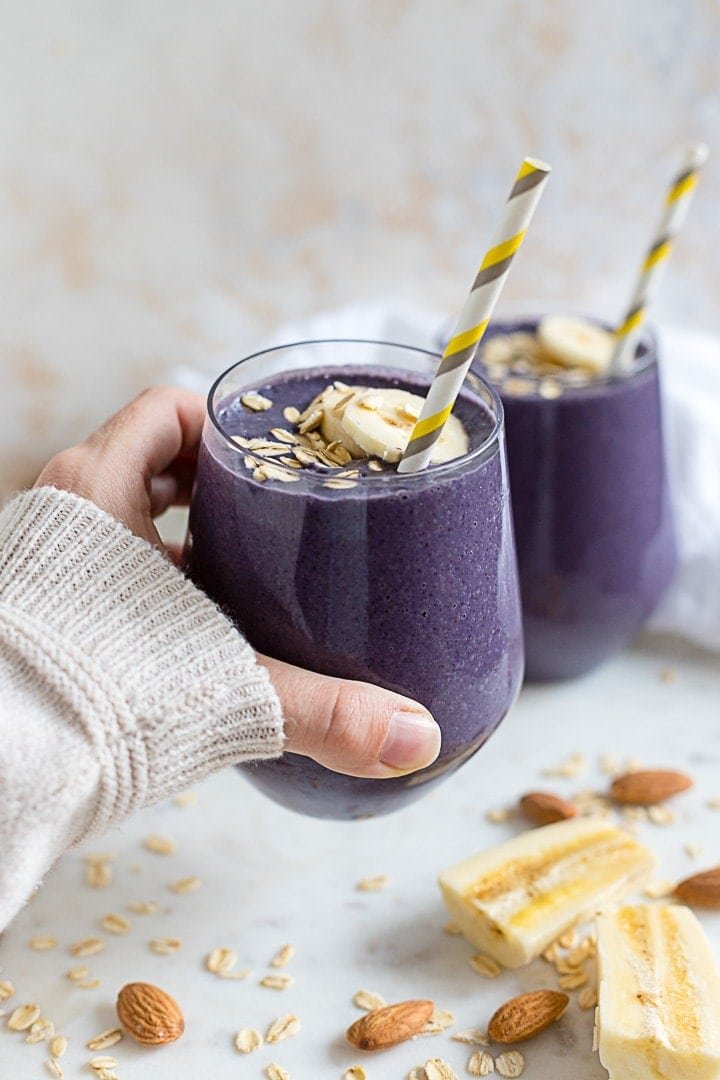
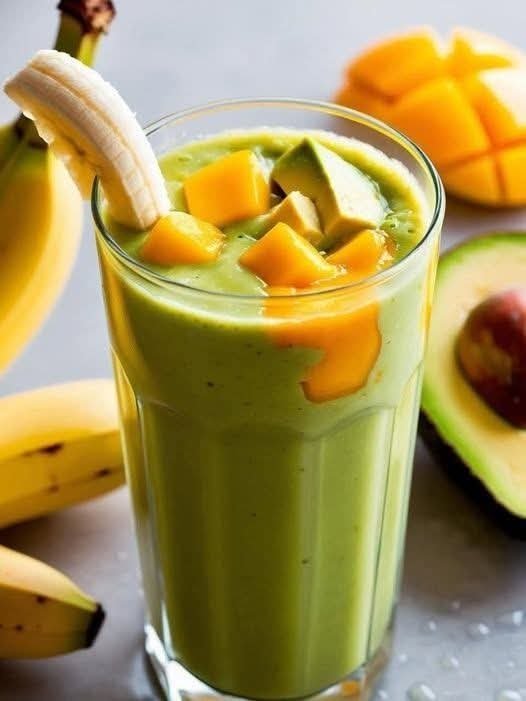
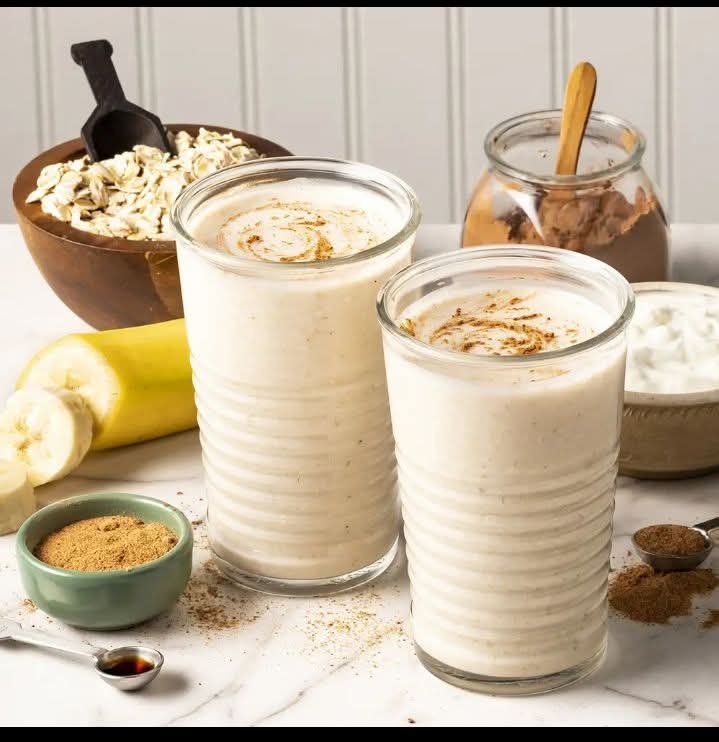
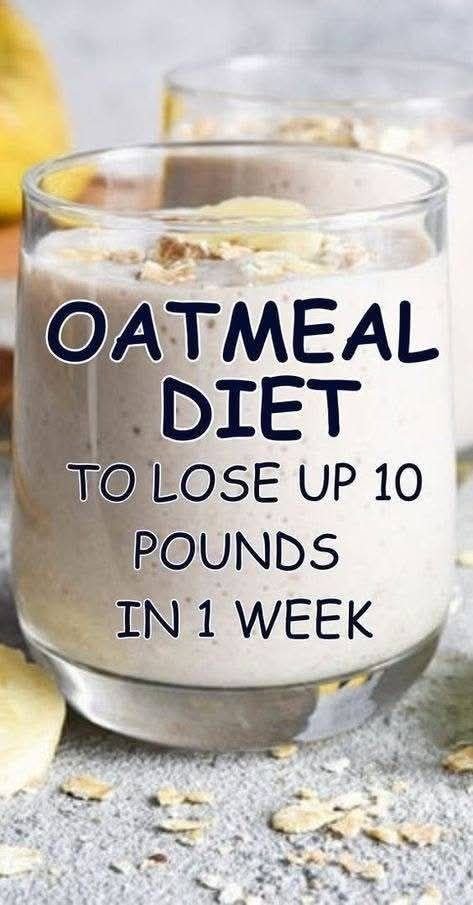
Apple & Banana Oatmeal Breakfast Loaf

Apple & Banana Oatmeal Breakfast Loaf

A moist, naturally sweet loaf perfect for breakfast or a snack

This wholesome breakfast loaf combines the fiber of oats with the natural sweetness of apples and banana. Raisins, cherries, and a crunchy nut topping make it a satisfying treat for mornings or anytime you want a nutritious snack.


Recipe Overview

  • Prep Time: 15 minutes

  • Bake Time: 45–50 minutes

  • Total Time: About 1 hour 5 minutes

  • Yield: 1 loaf


Ingredients

  • 1 cup (100 g) rolled oats or oatmeal

  • 2 medium apples, peeled and grated

  • 1 ripe banana, mashed

  • 2 large eggs

  • 100–120 ml water

  • 100 g raisins (or sultanas)

  • 100 g pitted cherries

  • 1 teaspoon baking powder

  • 50 g Brazil nuts, chopped (for topping)

  • Vegetable oil (for greasing the pan)


Step-by-Step Instructions

1. Hydrate the Oats

  • In a large mixing bowl, combine the oats with 100–120 ml of water.

  • Let the mixture sit for about 10 minutes so the oats soften and absorb moisture.


2. Prepare the Fruit

  • Peel and grate the apples.

  • In a small bowl, mash the banana with a fork until smooth.


3. Mix the Batter

  • Add the mashed banana and eggs to the soaked oatmeal. Whisk together until fully incorporated.

  • Stir in the grated apples, raisins, and cherries. Mix gently to combine.


4. Add Baking Powder

  • Sprinkle the baking powder over the mixture.

  • Fold everything together carefully with a spatula until evenly distributed. Avoid overmixing, which can make the loaf dense.


5. Prepare the Pan

  • Preheat your oven to 350°F (180°C).

  • Grease a loaf pan with vegetable oil.

  • Optional: Line a standard metal pan with parchment paper for easier removal.


6. Top and Bake

  • Pour the batter into the prepared pan and smooth the surface.

  • Evenly sprinkle the chopped Brazil nuts on top.

  • Bake for 45–50 minutes, or until the loaf is golden brown and a toothpick inserted into the center comes out clean.


7. Cool and Serve

  • Allow the loaf to cool in the pan for at least 10 minutes.

  • Remove from the pan and slice.

  • Serve warm or at room temperature.


Tips for Success

  • Smoother texture: Pulse the oats in a blender for a few seconds before hydrating to create a finer, cake-like crumb.

  • Storage: Store leftovers in an airtight container in the refrigerator for 3–4 days.

  • Nut swaps: Use walnuts, almonds, or pecans instead of Brazil nuts for a different flavor.

  • Optional additions: Add a pinch of cinnamon or nutmeg for extra warmth, or a handful of sunflower seeds for extra texture.


This loaf works well for meal prep, breakfast on the go, or as a wholesome afternoon snack.

Turkish Milk Flatbread (Pan-Cooked)

Turkish Milk Flatbread (Pan-Cooked)

Soft, pillowy flatbread with a subtle milk flavor, perfect for sandwiches or dipping

This Turkish milk bread is cooked on a stovetop pan rather than baked, giving it a soft, tender texture with a slightly crisp exterior. A touch of milk enriches the dough, and a drizzle of oil with fresh parsley and chili flakes finishes it beautifully.


Recipe Overview

  • Prep Time: 15 minutes

  • Rising Time: 1 hour

  • Cook Time: 5–6 minutes per flatbread

  • Yield: 6 medium flatbreads


Ingredients

Dough

  • 500 g (about 1 pound) all-purpose flour

  • 150 ml (5 fl. oz) warm milk

  • 150 ml (5 fl. oz) warm water

  • 1 teaspoon salt

  • 2 tablespoons dry yeast

  • 3 tablespoons olive oil

Optional Topping

  • 1–2 tablespoons olive oil or melted butter (for brushing)

  • 2 tablespoons chopped fresh parsley

  • A pinch of chili flakes (optional)


Step-by-Step Instructions

1. Prepare the Dough

  • In a large mixing bowl, combine the flour, salt, and dry yeast. Whisk briefly to distribute evenly.

  • Add the warm milk and warm water. Mix gently with a wooden spoon or your hands until the liquids are mostly absorbed.


2. Knead

  • Add the olive oil.

  • Knead the dough for about 8–10 minutes until it is smooth, soft, and slightly elastic.

  • Shape the dough into a ball.


3. First Rise

  • Lightly oil the mixing bowl. Place the dough ball inside and turn it to coat it with a thin layer of oil.

  • Cover with a clean kitchen towel or plastic wrap.

  • Set aside in a warm place for about 1 hour, or until the dough doubles in size.


4. Divide and Shape

  • Once risen, gently punch down the dough to release air.

  • Divide it into 6 equal pieces.

  • Roll each piece into a smooth ball.

  • Using a rolling pin, roll each ball into a flat circle about ½–1 cm thick.


5. Cook the Flatbreads

  • Heat a non-stick pan or cast-iron skillet over medium-high heat.

  • Place one flatbread in the pan. Cook for 2.5–3 minutes, until bubbles start to form.

  • Flip and cook the other side for another 2.5–3 minutes.

  • The flatbread should puff slightly and form a small pocket in the center.

  • Repeat with the remaining dough, adjusting heat as needed to prevent burning.


6. Finish and Serve

  • Brush each hot flatbread lightly with olive oil or melted butter.

  • Sprinkle with chopped parsley and a pinch of chili flakes, if using.

  • Serve warm as a side, for sandwiches, or with dips.


Tips for Success

  • Warm liquids: Make sure milk and water are warm (not hot) to activate the yeast without killing it.

  • Even thickness: Roll flatbreads to a consistent thickness for even cooking.

  • Pan choice: A heavy-bottomed or non-stick pan helps prevent sticking and ensures even browning.

  • Soft bread: Cover cooked flatbreads with a towel to keep them soft until serving.

Air Fryer Garlic Parmesan Potato Rounds

Air Fryer Garlic Parmesan Potato Rounds

Crisp on the outside, tender on the inside, with garlic and cheese flavor

These air fryer potato rounds are evenly sliced, lightly seasoned, and cooked until golden and crisp. Garlic and Parmesan add depth of flavor, while the air fryer method uses a modest amount of oil to achieve a satisfying texture. This recipe works well as a side dish, snack, or appetizer.


Recipe Overview

  • Prep Time: 15 minutes

  • Soaking Time: 20 minutes

  • Cook Time: 16–18 minutes

  • Total Time: About 55 minutes

  • Servings: 4


Ingredients

For the Potatoes

  • 4 medium potatoes, scrubbed clean and sliced into ½ cm (¼-inch) rounds

  • 2 tablespoons olive oil or avocado oil

  • 3 cloves garlic, finely minced

  • 1 teaspoon sea salt

  • ½ teaspoon freshly ground black pepper

  • ½ teaspoon smoked paprika (optional)

For Finishing

  • ⅓ cup freshly grated Parmesan cheese

  • 1 tablespoon fresh parsley, finely chopped

  • A small pinch of red pepper flakes (optional)


Step-by-Step Instructions

1. Prepare the Potatoes

  • Wash and scrub the potatoes thoroughly.

  • Leave the skins on for texture and flavor.

  • Slice evenly into ½ cm (¼-inch) rounds using a sharp knife or mandoline for uniform thickness.


2. Soak for Better Texture

  • Place the sliced potatoes in a large bowl.

  • Cover with cold water and add 1 teaspoon salt.

  • Let soak for 20 minutes to remove excess surface starch, which helps with even browning.


3. Drain and Dry

  • Drain the potatoes completely.

  • Pat them very dry with a clean kitchen towel or paper towels.

  • Removing surface moisture helps the potatoes cook evenly.


4. Season the Potatoes

  • Transfer the dried potato slices to a large mixing bowl.

  • Add olive oil, minced garlic, salt, black pepper, and smoked paprika (if using).

  • Toss gently until every slice is evenly coated.


5. Air Fry

  • Preheat the air fryer to 200°C (390°F) for 3 minutes.

  • Arrange the potato slices in a single layer in the basket.

  • Cook in batches if needed to avoid overlapping.

  • Air fry for 10 minutes, then flip each slice.

  • Continue cooking for 6–8 minutes, until golden and lightly crisp at the edges.


6. Finish and Serve

  • Transfer the hot potato rounds to a serving bowl or platter.

  • Immediately sprinkle with Parmesan cheese and chopped parsley.

  • Add a small pinch of red pepper flakes if desired.

  • Serve warm.


Helpful Tips & Variations

  • Even cooking: Uniform slices ensure consistent texture.

  • Cheese options: Pecorino Romano can be used for a sharper flavor.

  • Batch cooking: Avoid stacking slices for best results.

  • Serving time: These are best enjoyed shortly after cooking.

  • Flavor additions: Try dried herbs or a squeeze of lemon before serving.


Serving Suggestions

  • Serve with yogurt-based sauce, garlic dip, or ranch-style dressing

  • Pair with grilled vegetables, chicken, or fish

  • Add to salads for added texture


Approximate Nutrition (Per Serving)

  • Calories: ~180

  • Protein: 4 g

  • Carbohydrates: 26 g

  • Fat: 7 g

  • Fiber: 3 g

Chocolate Peanut Butter Crunch Balls

Chocolate Peanut Butter Crunch Balls

No-bake treats with a crisp center and smooth chocolate coating

These Chocolate Peanut Butter Crunch Balls are easy, no-bake treats made with simple pantry ingredients. A creamy peanut butter center mixed with crisp rice cereal is coated in smooth melted chocolate, creating a balanced texture that is both crunchy and tender. They are ideal for gatherings, gifting, or make-ahead snacks.


Recipe Overview

  • Yield: About 30–35 balls

  • Prep Time: 20 minutes

  • Chill Time: 1 hour

  • Total Time: About 1 hour 20 minutes


Ingredients

Peanut Butter Center

  • 1 cup creamy peanut butter

  • 2 cups crispy rice cereal

  • 1 cup powdered sugar, sifted

  • 2 tablespoons unsalted butter, melted

  • ¼ teaspoon salt

Chocolate Coating

  • 1½ cups semi-sweet or milk chocolate chips

  • 1 tablespoon coconut oil or shortening

Optional Topping

  • A light sprinkle of sea salt flakes


Step-by-Step Instructions

1. Prepare the Peanut Butter Mixture

  • In a large mixing bowl, combine the peanut butter, melted butter, and salt.

  • Stir until smooth and evenly blended.

  • Gradually add the powdered sugar, mixing until a thick, smooth mixture forms.


2. Add the Crunch

  • Gently fold in the crispy rice cereal using a spatula.

  • Mix carefully to keep the cereal intact, ensuring even distribution throughout the mixture.


3. Shape the Balls

  • Scoop about 1 tablespoon of the mixture and roll it between your palms to form a ball approximately 1 inch in size.

  • Place each ball onto a baking sheet lined with parchment paper.

Tip:
If the mixture feels too soft to shape, refrigerate it for 10–15 minutes before rolling.


4. Chill the Centers

  • Transfer the baking sheet to the freezer for 20–30 minutes.

  • This step helps the balls hold their shape during coating.


5. Melt the Chocolate

  • Place the chocolate chips and coconut oil in a microwave-safe bowl.

  • Heat in 30-second intervals, stirring after each, until fully melted and smooth.

  • Allow the chocolate to cool slightly before dipping.


6. Coat the Balls

  • Using a fork or toothpick, dip each chilled ball into the melted chocolate.

  • Lift out, allowing excess chocolate to drip off.

  • Return the coated balls to the parchment-lined tray.

  • Sprinkle lightly with sea salt if desired.


7. Set and Store

  • Let the chocolate set at room temperature or refrigerate until firm.

  • Store in an airtight container in the refrigerator for freshness.


Helpful Tips & Variations

  • Chocolate choice: Dark, milk, or dairy-free chocolate all work well.

  • Smoother finish: Tap the fork gently on the bowl edge to remove excess coating.

  • Flavor option: Add a small pinch of cinnamon or vanilla to the peanut butter mixture.

  • Storage: These treats keep well for several days when chilled.

Bubbly Garlic Cheese Toast

Bubbly Garlic Cheese Toast

Golden, crisp bread topped with a creamy garlic base and melted cheese

This garlic cheese toast features thick slices of bread topped with a smooth garlic cream spread and a generous layer of melted cheese. Baking on a rack keeps the bread crisp underneath, while a short broil at the end creates a lightly browned, bubbly surface.


Recipe Overview

  • Prep Time: 10 minutes

  • Cook Time: 10 minutes

  • Total Time: 20 minutes

  • Yield: 4–6 slices


Ingredients

Garlic Cream Sauce

  • 4 tablespoons unsalted butter, softened

  • 1 tablespoon all-purpose flour

  • ½ cup whole milk or heavy cream

  • 2 garlic cloves, finely minced (or 1 teaspoon garlic powder)

  • ¼ teaspoon salt

  • A small pinch of black pepper

Bread & Cheese

  • 4–6 thick slices sturdy bread (such as Texas toast, sourdough, or brioche)

  • 1½ cups shredded mozzarella or Gruyère cheese

  • ½ cup shredded Parmesan cheese

  • Fresh parsley, finely chopped (optional garnish)


Step-by-Step Instructions

1. Prepare the Oven and Bread

  • Preheat the oven to 400°F (200°C).

  • Line a baking sheet with foil or parchment paper and place a wire rack on top.

  • Arrange the bread slices in a single layer on the rack to allow heat to circulate and keep the bottoms crisp.


2. Make the Garlic Cream Sauce

  • Place a small saucepan over medium heat and melt the butter.

  • Add the garlic and cook gently for about 1 minute, stirring frequently.

  • Whisk in the flour and cook for another 1 minute, creating a smooth base.

  • Slowly pour in the milk or cream while whisking constantly.

  • Continue stirring until the sauce thickens to a spreadable consistency.

  • Remove from heat and season with salt and black pepper.

Tip: For extra coverage, the sauce ingredients can be doubled.


3. Assemble the Toast

  • Spread a generous layer of the warm garlic sauce evenly over each slice of bread, reaching the edges.

  • Sprinkle the mozzarella (or Gruyère) evenly over the sauce.

  • Finish with a layer of Parmesan cheese.


4. Bake

  • Place the tray in the oven and bake for 5–7 minutes, or until the cheese is fully melted.


5. Lightly Brown the Top

  • Switch the oven setting to broil.

  • Broil for 1–2 minutes, watching closely, until the cheese develops light golden spots.


6. Finish and Serve

  • Remove from the oven and allow the toast to rest for 2 minutes.

  • Sprinkle with chopped parsley if desired.

  • Serve warm.


Helpful Tips & Variations

  • Bread choice: Thick, sturdy bread holds the sauce and cheese best.

  • Cheese texture: Freshly shredded cheese melts more smoothly than pre-packaged shredded cheese.

  • Flavor options: Add a pinch of dried herbs or chili flakes to the sauce.

  • Serving idea: Serve alongside soup, salad, or pasta dishes.

Banana Bread Protein Smoothie

Banana Bread Protein Smoothie

A creamy, filling smoothie inspired by classic banana bread flavors

This Banana Bread Protein Smoothie is thick, smooth, and naturally sweet. It blends oats, banana, yogurt, and cottage cheese into a satisfying drink that works well for breakfast, a light meal, or a post-workout refreshment. Once blended, the texture is completely smooth with no lumps.


Recipe Overview

  • Servings: 1

  • Prep Time: 5 minutes

  • Total Time: 5 minutes


Ingredients

Base Ingredients

  • ½ cup old-fashioned rolled oats

  • ½ cup low-fat or 2% cottage cheese

  • 1 large ripe banana (fresh or frozen, cut into chunks)

  • ½ cup plain or vanilla Greek yogurt

  • ½ cup milk of choice (dairy, almond, oat, or soy)

Optional Flavor Additions

  • ½ teaspoon vanilla extract

  • A small pinch of ground cinnamon

  • 1 teaspoon honey or maple syrup (optional, for added sweetness)


Step-by-Step Instructions

1. Prepare the Oats

  • Add the rolled oats to the blender first, before any liquids.

  • Pulse for 10–15 seconds until the oats turn into a fine powder.

  • This step ensures a smooth texture and prevents graininess.


2. Add the Creamy Ingredients

  • Add the cottage cheese and Greek yogurt to the blender.

  • Pour in the milk to help everything blend evenly.


3. Add the Banana and Flavorings

  • Add the banana chunks to the blender.

  • If using, add vanilla extract, cinnamon, and sweetener at this stage.


4. Blend Until Smooth

  • Start blending on low speed, then gradually increase to high.

  • Blend for 45–60 seconds, stopping to scrape down the sides if needed.

  • Continue blending until the mixture is completely smooth and creamy.


5. Adjust Texture (Optional)

  • If the smoothie is too thick, add a small splash of milk and blend again.

  • For a colder drink, add a few ice cubes and blend briefly.


Why This Smoothie Works Well

  • Oats: Help thicken the smoothie and provide steady energy.

  • Cottage cheese: Blends smoothly and adds a rich, creamy consistency.

  • Greek yogurt: Enhances thickness and balances flavor.

  • Banana: Adds natural sweetness and a classic banana bread taste.


Helpful Tips & Variations

  • Extra flavor: Add a pinch of nutmeg or a spoon of peanut butter.

  • Dairy-free option: Use plant-based yogurt and milk alternatives.

  • Thicker texture: Use a frozen banana instead of fresh.

  • Lighter version: Reduce oats slightly and add more milk.

Crispy Golden Baked Cauliflower Steaks

Crispy Golden Baked Cauliflower Steaks

A flavorful oven-baked vegetable dish with crisp edges and a tender center

These baked cauliflower steaks transform a simple vegetable into a satisfying and hearty dish. A well-seasoned coating and high-heat roasting bring out deep flavor and a beautifully golden surface, while the inside stays soft and tender. This recipe works equally well as a main dish or a side.


Recipe Overview

  • Prep Time: 10 minutes

  • Bake Time: 30–40 minutes

  • Total Time: 40–50 minutes

  • Servings: 4


Ingredients

Main Ingredient

  • 1 large head cauliflower, outer leaves removed, core intact

Seasoning & Oil

  • 3 tablespoons olive oil

  • 2 tablespoons finely grated Parmesan cheese (optional)

    • For a plant-based option, use nutritional yeast

  • 1 teaspoon smoked paprika

  • 1 teaspoon garlic powder

  • 1 teaspoon salt, or to taste

  • ½ teaspoon black pepper

Garnish

  • 1 tablespoon fresh parsley, finely chopped


Step-by-Step Instructions

1. Prepare the Oven and Cauliflower

  • Preheat the oven to 400°F (200°C).

  • Line a large baking sheet with parchment paper for easy cleanup.

  • Remove the outer leaves from the cauliflower while keeping the core intact.

  • Using a sharp knife, slice the cauliflower from top to bottom into 1-inch-thick slices.

  • You should get 3–4 full steaks; reserve any loose florets for roasting alongside.


2. Make the Seasoning Mixture

  • In a small bowl, combine:

    • Olive oil

    • Parmesan cheese (if using)

    • Smoked paprika

    • Garlic powder

    • Salt

    • Black pepper

  • Stir until well blended and smooth.


3. Season the Cauliflower

  • Arrange the cauliflower steaks and florets in a single layer on the prepared baking sheet.

  • Brush both sides generously with the seasoning mixture.

  • Make sure the coating reaches all surfaces—this helps develop a golden finish during baking.


4. Bake the First Side

  • Place the baking sheet in the oven.

  • Bake for 15–20 minutes, until the underside begins to turn golden.


5. Flip and Finish Baking

  • Carefully turn each cauliflower piece using a spatula.

  • Return to the oven and bake for another 15–20 minutes, until:

    • The cauliflower is tender when pierced with a fork

    • The edges are deeply golden and lightly crisp


6. Serve

  • Transfer the baked cauliflower to a serving platter.

  • Sprinkle with freshly chopped parsley.

  • Serve immediately while warm.


Helpful Tips & Variations

  • Extra flavor: Add onion powder, dried herbs, or a squeeze of lemon before serving.

  • Crispier finish: Use convection or broil for the last 2 minutes, watching closely.

  • Meal idea: Serve over grains, with a yogurt-based sauce, or alongside roasted vegetables.

  • Leftovers: Reheat in the oven or air fryer to restore crispness.

Chef’s Italian Christmas Bread

Chef’s Italian Christmas Bread

This traditional Italian Christmas bread is softly enriched with butter, eggs, citrus zest, and dried fruit. A slow-rise method allows the dough to develop flavor while keeping the crumb tender and light for several days. Shaped into a festive wreath, it is perfect for celebrations, gifting, or enjoying with coffee or tea.


Recipe Overview

  • Cuisine: Italian

  • Category: Sweet Bread / Holiday Baking

  • Prep Time: 30 minutes (plus rising time)

  • Rising Time: About 2½–3 hours total

  • Bake Time: 30–35 minutes

  • Total Time: About 4 hours

  • Yield: 1 large wreath (10–12 slices)


Ingredients

For the Dough

  • 500 g strong bread flour (about 4 cups)

  • 250 ml warm milk (lukewarm, not hot)

  • 7 g active dry yeast (1 standard sachet)

  • 80 g granulated sugar

  • 1 teaspoon salt

  • 1 large egg + 1 egg yolk, at room temperature

  • 100 g unsalted butter, very soft and cubed

  • Zest of 1 orange

  • Zest of 1 lemon


For the Fruit Filling

  • 150 g mixed dried fruit (raisins, sultanas, dried cranberries)

  • 50 g candied orange peel (optional)

  • 2 tablespoons dark rum or fresh orange juice


For the Glaze & Finish

  • 1 egg beaten with 1 tablespoon milk

  • Pearl sugar or powdered sugar, for topping


Step-by-Step Instructions

1. Soak the Dried Fruit

  • At least 30 minutes before mixing the dough, place the dried fruit and candied peel (if using) in a bowl.

  • Pour over the rum or orange juice and stir.

  • Let soak, then drain well before adding to the dough.

  • This step keeps the fruit soft and prevents it from drawing moisture from the bread.


2. Activate the Yeast

  • In a small bowl, combine:

    • Warm milk

    • Yeast

    • 1 tablespoon of the sugar

  • Stir gently and let stand for 10 minutes, until foamy and slightly bubbly.

  • If no foam appears, the yeast may not be active.


3. Mix the Dough

  • In a large bowl or stand mixer, combine:

    • Flour

    • Remaining sugar

    • Salt

    • Orange and lemon zest

  • Add the yeast mixture, whole egg, and egg yolk.

  • Mix until a rough, shaggy dough forms.


4. Add the Butter (Key to Soft Texture)

  • Begin kneading the dough.

  • Add the softened butter one cube at a time, allowing each piece to fully blend before adding the next.

  • Knead:

    • By hand: about 10 minutes

    • By mixer: 6–7 minutes on medium speed

  • The dough should be smooth, elastic, and slightly tacky but not sticky.

  • Gently knead in the drained dried fruit at the very end.


5. First Rise

  • Shape the dough into a ball and place it in a lightly greased bowl.

  • Cover with a clean cloth.

  • Let rise in a warm place for 1½ to 2 hours, until doubled in size.


6. Shape the Wreath

Option 1: Braided Wreath

  • Gently press down the dough to release excess air.

  • Divide into three equal portions and roll each into a long rope.

  • Braid loosely and join the ends to form a circle.

Option 2: Twisted Wreath

  • Roll the dough into a large rectangle.

  • Roll up tightly into a log.

  • Slice lengthwise down the center.

  • Twist the two halves together, keeping the cut sides facing outward.

  • Shape into a circle and seal the ends.


7. Second Rise

  • Place the shaped wreath on a parchment-lined baking tray or in a greased bundt pan.

  • Cover lightly and let rise for 45 minutes, until puffy.


8. Bake

  • Preheat oven to 180°C (350°F).

  • Brush the top gently with the egg-and-milk glaze.

  • Bake for 30–35 minutes, until:

    • Deep golden brown

    • Bread sounds hollow when tapped underneath


9. Cool and Finish

  • Remove from the oven and allow to cool completely on a wire rack.

  • Finish with pearl sugar or a light dusting of powdered sugar before serving.


Helpful Tips & Variations

  • Extra aroma: Add a pinch of ground cardamom or cinnamon to the dough.

  • Alcohol-free: Use orange juice instead of rum.

  • Storage: Wrap well; the bread stays soft for up to 3 days at room temperature.

  • Serving: Slice and enjoy plain or lightly toasted with butter.

Cheesy Air Fryer Hasselback Potatoes

Cheesy Air Fryer Hasselback Potatoes

Crispy edges, soft centers, and melty cheese in every bite

These Cheesy Air Fryer Hasselback Potatoes are a comforting side dish made with simple ingredients and big flavor. Thinly sliced potatoes fan open as they cook, allowing buttery garlic seasoning and cheese to melt into every layer. The air fryer creates a crisp exterior while keeping the inside tender and fluffy.


Recipe Overview

  • Prep Time: 10 minutes

  • Cook Time: 45 minutes

  • Total Time: 55 minutes

  • Servings: 2


Ingredients

  • 2 medium russet potatoes, scrubbed clean

  • 4 tablespoons butter, melted

  • 1 tablespoon garlic paste or finely minced garlic

  • Kosher salt, to taste

  • Black pepper, to taste

  • 3–5 slices Colby Jack cheese, each slice cut into fourths

Optional Toppings

  • Sour cream

  • Fresh chives, finely chopped


Step-by-Step Instructions

1. Prepare the Potatoes

  • Rinse and scrub the potatoes thoroughly.

  • Slice a very thin piece off the bottom of each potato so it sits flat and stable.


2. Create the Hasselback Cuts

  • Place one potato between two chopsticks or wooden spoons.

  • Using a sharp knife, slice across the potato at ¼-inch intervals.

  • The chopsticks will prevent cutting all the way through, keeping the base intact.

  • Repeat with the second potato.


3. Prepare the Air Fryer Basket (Layer-Lifting Method)

  • Place the small potato slices removed from the bottoms into the air fryer basket.

  • Set the sliced potatoes on top of these pieces.

  • This helps the slices fan open during cooking, allowing better crisping and seasoning.


4. Season the Potatoes

  • In a small bowl, combine:

    • Melted butter

    • Garlic

    • Salt

    • Black pepper

  • Gently fan open the potato slices with your fingers.

  • Brush the garlic butter generously over the tops and into the gaps.

  • Sprinkle lightly with additional salt and pepper.


5. First Air Fry Stage

  • Set the air fryer to 370°F (188°C).

  • Cook the potatoes for 20 minutes.


6. Second Air Fry Stage

  • Remove the basket and brush the potatoes with any remaining garlic butter.

  • Return to the air fryer and cook for 20–25 minutes, until:

    • The edges are crisp

    • The centers are fork-tender

    • The slices are fully opened


7. Add the Cheese

  • Carefully tuck the cheese pieces between the potato slices.

  • You can add cheese to every slice or every other slice, depending on preference.

  • Return to the air fryer and cook for 1–2 minutes, just until the cheese melts and becomes lightly bubbly.


8. Serve

  • Remove from the air fryer and let rest for 2–3 minutes.

  • Top with sour cream and fresh chives if desired.

  • Serve hot as a side dish or light meal.


Helpful Tips & Variations

  • Even cooking: Choose potatoes similar in size.

  • Extra flavor: Add paprika, onion powder, or dried herbs to the butter.

  • Cheese swaps: Cheddar, mozzarella, or Monterey Jack work well.

  • Crispier texture: Brush a little butter between slices halfway through cooking.

Apple & Blueberry Yogurt Cake

Apple & Blueberry Yogurt Cake

A soft, fruit-filled cake with a tender crumb and gentle sweetness

This Apple & Blueberry Yogurt Cake is a simple, rustic dessert made with everyday ingredients. Yogurt gives the cake a moist, creamy texture, while fresh apple slices and blueberries add natural sweetness and bursts of fruit flavor. It’s ideal for tea time, family gatherings, or a light dessert after meals.


Recipe Overview

  • Cuisine: European-style home baking

  • Category: Dessert

  • Prep Time: 15 minutes

  • Bake Time: 40–45 minutes

  • Total Time: About 1 hour

  • Servings: 8–10 slices


Ingredients

Wet Ingredients

  • 1 cup plain Greek yogurt (room temperature)

  • 3 large eggs (room temperature)

  • ¾ cup granulated sugar

  • ½ cup vegetable oil (or light olive oil)

  • 1 teaspoon vanilla extract

Dry Ingredients

  • 1½ cups all-purpose flour

  • 2 teaspoons baking powder

  • 1 pinch salt

Fruit Topping

  • 1 medium apple, peeled if desired and thinly sliced

  • ½ cup fresh blueberries (washed and dried)

Optional

  • Powdered sugar, for light dusting before serving


Step-by-Step Instructions

1. Prepare the Pan and Oven

  • Preheat your oven to 350°F (175°C).

  • Line the bottom of an 8-inch round cake pan with parchment paper.

  • Lightly grease the sides to prevent sticking.


2. Mix the Wet Ingredients

  • In a large mixing bowl, add the yogurt, eggs, sugar, oil, and vanilla extract.

  • Whisk until the mixture is smooth, pale, and well blended.

  • Make sure there are no visible egg streaks.


3. Combine the Dry Ingredients

  • In a separate bowl, sift together the flour, baking powder, and salt.

  • This helps keep the cake light and evenly textured.


4. Make the Batter

  • Gradually add the dry ingredients to the wet mixture.

  • Gently fold using a spatula or whisk just until combined.

  • Do not overmix; stop as soon as the batter is smooth.


5. Assemble the Cake

  • Pour the batter evenly into the prepared pan.

  • Arrange the apple slices neatly on top in a circular or fan pattern.

  • Scatter the blueberries evenly over the surface, pressing them slightly into the batter.


6. Bake

  • Place the pan in the center of the oven.

  • Bake for 40–45 minutes, or until:

    • The top is lightly golden

    • A toothpick inserted in the center comes out clean or with a few moist crumbs


7. Cool and Serve

  • Remove from the oven and allow the cake to cool in the pan for 15 minutes.

  • Transfer to a wire rack and cool completely before slicing.

  • Dust lightly with powdered sugar if desired.


Tips & Variations

  • Flavor boost: Add lemon zest or a small pinch of cinnamon to the batter.

  • Fruit options: Replace blueberries with raspberries, pears, peaches, or plums.

  • Texture choice:

    • Greek yogurt gives a richer, denser crumb

    • Regular plain yogurt makes the cake lighter and softer

  • Serving idea: Serve slightly chilled or at room temperature with fresh fruit or cream.

Classic Homemade Artisan Bread

🍞 Classic Homemade Artisan Bread

Crisp Crust • Soft Interior • Simple Ingredients

This Classic Homemade Artisan Bread is perfect for everyday baking. It uses basic pantry ingredients and simple techniques to create two beautiful loaves with a golden crust and light, airy inside. The dough is easy to work with, making it ideal for both beginners and experienced home bakers.


🧾 Yield & Timing

  • Makes: 2 loaves

  • Preparation Time: 20 minutes

  • Rising Time: 1½–2 hours

  • Baking Time: 30–35 minutes


🧺 Ingredients

  • Warm Water: 600 ml total (about 3 glasses)

    • 200 ml for starting the yeast

    • 400 ml added later

  • Dry Yeast: 10 grams (1 standard packet)

  • All-Purpose Flour: 840 grams total (7 cups)

    • 120 g (1 cup) for the yeast mixture

    • 720 g (6 cups) for the dough

  • Sugar: 1 tablespoon (helps awaken the yeast)

  • Salt: 2 teaspoons

  • Olive Oil: 1 tablespoon (optional, for lightly coating the bowl)


🥣 Step-by-Step Instructions

1️⃣ Prepare the Yeast Mixture

In a large mixing bowl, add:

  • 200 ml warm water

  • Dry yeast

  • Sugar

  • 120 g (1 cup) flour

Whisk gently until smooth. Cover the bowl with a clean cloth and let it rest for 10–15 minutes.

What to look for:
The surface should become foamy and slightly bubbly, showing the yeast is active and ready.


2️⃣ Build the Dough

Once the yeast mixture is ready, pour in the remaining 400 ml warm water and add the salt.

Gradually add the remaining 720 g (6 cups) flour, one cup at a time, mixing with a wooden spoon or dough hook until a soft, rough dough forms.


3️⃣ Knead Until Smooth

Transfer the dough to a lightly floured surface. Using gentle, steady motions, knead for 8–10 minutes.

As you work:

  • The dough will become smoother

  • It should feel elastic and slightly springy

Tip: If the dough sticks too much, sprinkle in small amounts of flour—just enough to handle comfortably. A soft dough creates lighter bread.


4️⃣ First Rise

Lightly coat a clean bowl with olive oil. Place the dough inside and turn it once so the surface is lightly coated.

Cover and place in a warm, draft-free area. Allow the dough to rest until it has doubled in size, about 1 to 1½ hours.


5️⃣ Divide and Shape

Gently press the dough to release excess air. Divide it evenly into two portions.

Shape each portion into a smooth, round loaf by tucking the edges underneath. Place both loaves on a parchment-lined baking sheet, leaving space between them.


6️⃣ Second Rise & Surface Design

Cover the loaves and let them rest again for 30 minutes.

While resting:

  • Preheat your oven to 200°C (400°F)

Just before baking, use a sharp knife to gently make a shallow “X” or cross on top of each loaf. This helps the bread expand evenly while baking.


7️⃣ Bake

Place the baking sheet in the oven and bake for 30–35 minutes, until:

  • The crust turns deep golden

  • The loaf sounds hollow when lightly tapped underneath

Optional Bakery-Style Finish:
Place a small oven-safe pan with 1 cup of water on the lower rack during the first 15 minutes to create steam, giving the bread a crisp, professional crust.


8️⃣ Cool Before Slicing

Transfer the baked loaves to a wire rack. Allow them to cool for at least 20 minutes before slicing. This helps the interior texture finish setting properly.


⭐ Helpful Tips

  • Warm water should feel pleasantly warm, not hot

  • Letting the bread cool improves slicing and texture

  • Store cooled bread wrapped in cloth or paper for best freshness

Biscoff Creamy Pudding Parfaits

Biscoff Creamy Pudding Parfaits

Smooth • No-Bake • Ready in Minutes

These Biscoff Creamy Pudding Parfaits are an easy, no-bake dessert that comes together quickly while still looking elegant and indulgent. Layers of finely crushed Biscoff cookies, smooth vanilla pudding blended with Biscoff spread, and fluffy whipped cream create a perfectly balanced dessert that’s sweet, creamy, and comforting.

Ideal for family gatherings, celebrations, or anytime you want a quick dessert that feels special.


🧾 Yield & Time

  • Servings: 4–6 parfaits

  • Preparation Time: About 10 minutes

  • Chilling Time (Optional): 30 minutes


🧺 Ingredients

Cookie Layers

  • Biscoff Cookies (Speculoos) – 1 pack (about 200 g)

  • Butter – 2 tablespoons, melted (optional, for a richer cookie base)

Creamy Pudding Layer

  • Instant Vanilla Pudding Mix – 1 standard box

  • Cold Milk – As directed on pudding package (usually 2 cups)

  • Biscoff Spread – 2 tablespoons, gently warmed until smooth

Topping

  • Whipped Cream – 1 cup (store-bought or homemade)

  • Extra Biscoff Cookies or Crumbs – for garnish


🥣 Step-by-Step Instructions

1️⃣ Prepare the Cookie Crumbs

Place about 15 Biscoff cookies into a zip-top bag or food processor. Crush until you have fine, even crumbs.

If you prefer a more structured base:

  • Transfer crumbs to a bowl

  • Stir in the melted butter until evenly combined

Set aside.


2️⃣ Make the Creamy Pudding Filling

In a medium mixing bowl, add the instant vanilla pudding mix and cold milk. Whisk for about 2 minutes, until the mixture thickens and becomes smooth.

Add the gently warmed Biscoff spread and whisk again until fully blended. The pudding should be creamy, evenly colored, and glossy.

Tip: Warming the spread slightly helps it blend smoothly without lumps.


3️⃣ Assemble the Parfaits

Use clear glasses or dessert cups so the layers are visible.

Layering order:

  • Bottom Layer:
    Add about 2 tablespoons of cookie crumbs to each glass. Gently press down with a spoon.

  • Middle Layer:
    Spoon or pipe the pudding mixture over the crumbs until the glass is about halfway full.

  • Second Cookie Layer:
    Sprinkle a thin layer of cookie crumbs on top of the pudding.

  • Top Layer:
    Finish with a generous spoonful or piped swirl of whipped cream.


4️⃣ Garnish and Finish

Sprinkle extra cookie crumbs over the whipped cream.
For a polished look, place one whole cookie gently into the cream at a slight angle.


5️⃣ Serve or Chill

  • These parfaits can be enjoyed immediately

  • For a softer, more blended texture, refrigerate for 30 minutes before serving

Chilling allows the cookie layers to gently soften, creating a dessert that feels smooth and cake-like.


⭐ Helpful Tips for Best Results

  • Use cold milk for the pudding so it thickens properly

  • Fine cookie crumbs give a smoother texture

  • Mini dessert cups are perfect for portion control

  • Keep covered if chilling longer than 30 minutes


🔄 Easy Variations

🍰 Cheesecake-Style

Fold 4 oz (115 g) softened cream cheese into the pudding for a richer, slightly tangy flavor.

🍌 Fruit Addition

Add a thin layer of sliced bananas between the pudding and whipped cream for a naturally sweet contrast.

🍫 Chocolate Touch

Drizzle melted chocolate over the whipped cream or mix chocolate chips into the pudding.

No-Churn Coffee Chocolate Chip Ice Cream

No-Churn Coffee Chocolate Chip Ice Cream

Creamy • Smooth • No Machine Needed

This No-Churn Coffee Chocolate Chip Ice Cream is rich, silky, and incredibly easy to make at home—no special equipment required. The combination of lightly sweetened cream, smooth coffee flavor, and chocolate chips creates a dessert that feels indulgent yet simple. Because it uses condensed milk instead of eggs, the texture stays soft and scoopable straight from the freezer.

Perfect for summer days, family treats, or anytime you crave a café-style frozen dessert at home.


🧾 Ingredients

Base Ingredients

  • Whipping Cream – 450 ml (about 2 cups), very cold

  • Sweetened Condensed Milk – 200 g (about ¾ cup), chilled

  • Instant Coffee – 2 tablespoons + 2 teaspoons
    (Adjust to taste for lighter or stronger coffee flavor)

  • Warm Water or Warm Milk – 1 to 2 tablespoons (for dissolving coffee)

Mix-Ins

  • Chocolate Chips – ½ cup

  • Extra Chocolate Chips – for topping (optional)

Optional Enhancers

  • A small pinch of salt (balances sweetness)

  • Cocoa Powder – 1 tablespoon (for mocha flavor)


🥣 Step-by-Step Instructions

1️⃣ Prepare the Coffee Mixture

In a small bowl, add the instant coffee and warm water or milk. Stir well until the coffee is fully dissolved and the mixture looks smooth, with no granules remaining.

Set aside and allow it to cool completely to room temperature.
(Adding warm coffee directly to cream can affect texture, so cooling is important.)


2️⃣ Whip the Cream

Pour the cold whipping cream into a large mixing bowl.
Using a hand mixer or stand mixer, whip on medium-high speed until the cream becomes thick and holds its shape.

How to tell it’s ready:
When you lift the beaters, the cream should stand upright and keep its form without falling over.

Tip: Stop mixing as soon as this stage is reached to maintain a light, smooth texture.


3️⃣ Combine the Base

Gently add the chilled condensed milk to the whipped cream.
Next, pour in the cooled coffee mixture.

Using a spatula, fold gently by scooping from the bottom and turning the mixture over itself. Continue until the color is even and the mixture looks smooth and airy.


4️⃣ Add Chocolate Chips

Sprinkle in the chocolate chips and gently fold again just until evenly distributed.

At this stage, you may also add:

  • A pinch of salt

  • Cocoa powder (sifted) for a mocha-style flavor


5️⃣ Transfer and Freeze

Spoon the mixture into a freezer-safe container.
Smooth the top with the back of a spoon and sprinkle extra chocolate chips if desired.

Cover tightly with a lid or wrap to keep the surface fresh and smooth.


6️⃣ Freeze Until Set

Place the container in the freezer for at least 6 hours, or preferably overnight.

Thanks to the condensed milk, the ice cream will remain soft and easy to scoop once frozen.


🍦 Serving Tips

  • Let the ice cream sit at room temperature for 2–3 minutes before scooping for best texture

  • Serve in bowls, cones, or alongside brownies or cookies

  • Sprinkle with cocoa powder or drizzle with chocolate syrup if desired


⭐ Pro Tips for Best Results

  • Cold Tools Matter: Chill your bowl and beaters for 10–15 minutes before whipping for maximum volume

  • Flavor Control: Adjust coffee quantity to suit your taste

  • Texture Boost: Mini chocolate chips distribute more evenly

  • Storage: Keep covered tightly to maintain smoothness

Comforting Chicken Soup with Potatoes!

🍲 Comforting Chicken Soup with Potatoes

Servings

6

Total Time

45–55 minutes


🛒 Ingredients

  • 1½ lbs chicken (bone-in thighs or drumsticks; or boneless thighs)

  • 1 tbsp olive oil or butter

  • 1 medium onion, diced

  • 3 carrots, sliced

  • 2 celery stalks, sliced

  • 3 cloves garlic, minced

  • 3 medium potatoes (Yukon Gold or russet), diced

  • 6–7 cups chicken broth (low sodium)

  • 1 bay leaf

  • 1 tsp dried thyme

  • ½ tsp dried rosemary (optional)

  • Salt & black pepper, to taste

  • 2 tbsp fresh parsley, chopped

  • Optional: squeeze of lemon juice


👩‍🍳 Instructions

  1. Sauté the aromatics
    Heat oil/butter in a large pot over medium heat.
    Add onion, carrots, and celery. Cook 5–6 minutes until softened.

  2. Add garlic & herbs
    Stir in garlic, thyme, rosemary, and bay leaf. Cook 30 seconds until fragrant.

  3. Add chicken & broth
    Place chicken in the pot. Pour in broth until just covered.

  4. Simmer
    Bring to a gentle boil, then reduce heat.
    Simmer 20–25 minutes (until chicken is cooked through).

  5. Shred chicken
    Remove chicken, shred, discard bones/skin if needed.
    Return meat to the pot.

  6. Add potatoes
    Stir in diced potatoes. Simmer 12–15 minutes until tender.

  7. Finish
    Season with salt and pepper. Remove bay leaf.
    Add parsley and optional lemon juice.

Serve hot with crusty bread.


❓ Q & A

Q: What potatoes work best?

A: Yukon Gold for creamy texture, russet for heartier soup, red potatoes if you want them to hold shape.


Q: Can I use rotisserie chicken?

A: Yes!

  • Add shredded chicken during the last 10 minutes

  • Simmer potatoes separately or add them earlier


Q: Can I make this in a slow cooker?

A: Absolutely.

  • Add everything except parsley & lemon

  • Cook 6–7 hours on LOW or 3–4 hours on HIGH

  • Shred chicken, then add potatoes for last hour


Q: How do I make it extra comforting?

A:

  • Add a splash of cream or milk

  • Stir in a knob of butter at the end

  • Add egg noodles or rice


Q: Can I freeze this soup?

A: Yes, but potatoes soften after freezing.

  • Freeze up to 3 months

  • For best texture, freeze before adding potatoes


Q: How do I thicken it slightly?

A:

  • Mash a few potatoes in the pot

  • Or add 1 tsp cornstarch mixed with water


Q: What can I serve with it?

A:

  • Crusty bread or biscuits

  • Grilled cheese

  • Simple green salad.

Spinach & Feta Egg Muffins!

🧁 Spinach & Feta Egg Muffins

A healthy, high-protein breakfast you can make ahead and grab on the go.


🥣 Ingredients (Makes 10–12 muffins)

  • 8 large eggs

  • 1 cup fresh spinach, chopped
    (or ½ cup frozen spinach, thawed + squeezed dry)

  • ½ cup feta cheese, crumbled

  • ¼ cup milk (any type: dairy, almond, oat, etc.)

  • 1 small onion, finely diced (optional)

  • 1 clove garlic, minced (optional)

  • ½ tsp salt

  • ¼ tsp black pepper

  • ¼ tsp dried oregano (optional)

  • Olive oil or cooking spray


👩‍🍳 Instructions

  1. Preheat the oven to 350°F (175°C). Grease a muffin tin or use silicone liners.

  2. Optional step: In a small pan, sauté onion and garlic in a teaspoon of oil over medium heat until softened. Set aside to cool.

  3. In a large bowl, whisk together eggs, milk, salt, pepper, and oregano until well combined.

  4. Stir in spinach, feta, and the cooled onion/garlic.

  5. Fill each muffin cup about ¾ full with the egg mixture.

  6. Bake for 18–22 minutes, or until the tops are set and slightly golden.

  7. Let cool a few minutes before removing from the pan.


🌟 Tips

  • Use silicone muffin cups—they make removing the muffins effortless.

  • Don’t overfill the cups; the muffins will puff up as they bake.

  • Crumble the feta finely to help distribute flavor evenly.


❓ Q&A Section

Q1: Can I use frozen spinach instead of fresh?

A: Yes! Use ½ cup frozen spinach, thaw it, and squeeze out all excess water so the muffins don’t become watery.


Q2: Can I make these dairy-free?

A: Absolutely.

  • Replace milk with a non-dairy alternative (almond, soy, oat, etc.).

  • Either omit the feta or substitute a dairy-free feta-style cheese.


Q3: How do I store and reheat them?

A:

  • Fridge: Store in an airtight container for 4–5 days.

  • Freezer: Freeze individually, then store in a freezer bag for up to 2 months.

  • Reheat: 20–30 seconds in the microwave from chilled; 45–60 seconds from frozen.


Q4: Can I add more vegetables?

A: Yes! Try bell peppers, mushrooms, tomatoes, or zucchini. Just sauté watery veggies first to avoid sogginess.


Q5: Can I use egg whites instead of whole eggs?

A: Yes. Use 12 egg whites (≈ 1½ cups). Muffins will be lighter and lower in fat.


Q6: What other cheeses go well with this recipe?

A: Goat cheese, mozzarella, cheddar, Monterey Jack, or pepper jack work great.


Q7: Why did my egg muffins deflate?

A: This is normal—they puff up while baking and settle as they cool.
To reduce sinking, avoid overmixing and don’t overbake.


Q8: How can I make these more filling?

A: Add:

  • Diced cooked potatoes

  • Cooked turkey sausage or ham

  • Extra veggies

  • Serve with whole-grain toast or fruit


Q9: Are these good for meal prep?

A: They’re perfect for meal prep! They store well, freeze well, reheat quickly, and can be customized for variety.


Q10: Are these keto or low-carb?

A: Yes—this recipe is naturally low in carbohydrates and fits keto, low-carb, and high-protein diets.

Oatmeal and Apples (No Flour, No Sugar!)

Oatmeal and Apples (No Flour, No Sugar!)

Description

This simple and nutritious recipe combines oats, apples, and eggs to create a warm, lightly sweet, and satisfying bake — with no refined sugar or flour. The natural sweetness from apples, creaminess from warm milk, and a touch of vanilla make it taste like a dessert while keeping it healthy and filling.
It’s rich in fiber, protein, and antioxidants, helping to support digestion and maintain energy levels — perfect if you’re looking to lose weight or eat clean without giving up flavor.

⏱️ Preparation Time

  • Prep Time: 10 minutes
  • Cook Time: 25–30 minutes
  • Total Time: 35–40 minutes

🍴 Ingredients

  • 1 cup (90 g) oatmeal (old-fashioned or quick oats)
  • 150 ml (⅔ cup) warm milk (dairy or plant-based)
  • apples, peeled and diced
  • 20 g (1 ½ Tbsp) butter, melted (or coconut oil for a lighter version)
  • ½ tsp vanillin or vanilla extract
  • large eggs

Optional additions:

  • ½ tsp cinnamon (pairs perfectly with apples!)
  • A handful of raisinsnuts, or seeds for texture
  • A pinch of salt to enhance flavor

🔥 Instructions

  1. Preheat the Oven:
    Set oven to 350°F (175°C) and lightly grease a small baking dish or line it with parchment paper.
  2. Soak the Oats:
    In a bowl, pour warm milk over the oats. Let it sit for 5–10 minutes so the oats soften.
  3. Prepare Apples:
    Peel and dice the apples into small chunks. For extra sweetness, you can sauté them in a teaspoon of butter for 2–3 minutes until slightly soft.
  4. Mix the Batter:
    In a separate bowl, whisk eggsmelted butter, and vanilla (plus cinnamon if using). Add soaked oats and apples, and stir until well combined.
  5. Bake:
    Pour the mixture into your prepared dish and bake for 25–30 minutes, or until golden brown and set in the center.
  6. Serve:
    Serve warm or chilled. It’s delicious plain, or with a dollop of Greek yogurt, a drizzle of honey (optional), or a sprinkle of nuts.

🍽️ Servings

Makes: 2–3 servings
Serving Size: About 1 cup (200 g)

🧮 Nutritional Information (per serving, approx.)

Nutrient Amount
Calories 250 kcal
Protein 9 g
Carbohydrates 32 g
Sugars 10 g (from apples only)
Fiber 5 g
Fat 9 g
Saturated Fat 3 g
Sodium 60 mg
Calcium 10% DV
Iron 8% DV

(Values may vary slightly depending on milk type and apple variety.)

🌿 Health Benefits

  • 🧠 Oats: High in soluble fiber (beta-glucan) which helps lower cholesterol, supports digestion, and keeps you full longer.
  • 🍎 Apples: Rich in antioxidants, pectin fiber, and natural sweetness that stabilizes blood sugar levels.
  • 🥚 Eggs: Great source of protein and healthy fats, helping maintain lean muscle during weight loss.
  • 🧈 Butter (or coconut oil): Adds healthy fats for sustained energy and better nutrient absorption.
  • 🌸 Vanilla: Enhances sweetness naturally without added sugar.

Weight Loss Benefit:
High fiber + protein combination keeps you full longer, curbs sugar cravings, and stabilizes energy — ideal for eating three times a day as part of a balanced plan!

💡 Chef’s Notes & Tips

  1. Consistency Control:
    For a softer, pudding-like texture, add 2–3 extra tablespoons of milk. For firmer bars, reduce milk slightly.
  2. Batch Prep:
    Make a larger batch and store in the fridge — it reheats beautifully in the microwave or air fryer.
  3. Flavor Variations:
    Add spices like nutmeg or cardamom, or mix in grated carrots or pears for variation.
  4. Sweetness Upgrade (Still Natural!):
    Add 1 mashed banana or a few chopped dates if you want a bit more natural sweetness.
  5. Portable Snack:
    Bake in muffin tins for portioned “oat-apple cups” — great for on-the-go eating.

❓ Q & A

Q1: Can I make this without eggs?
👉 Yes! Replace each egg with 1 tablespoon ground flaxseed + 3 tablespoons warm water (let sit for 10 minutes).

Q2: Can I use water instead of milk?
👉 You can, but milk makes it creamier and adds protein. For a lighter version, use almond or oat milk.

Q3: Can I skip the butter?
👉 Yes. Use coconut oil or even unsweetened applesauce instead — still moist and flavorful.

Q4: Can I eat this cold?
👉 Definitely! It’s great cold as a breakfast bar or chilled dessert.

Q5: How long does it last?
👉 Store covered in the fridge for up to 4 days. You can also freeze portions for up to 1 month.

Q6: Is it really good for weight loss?
👉 Yes — it’s nutrient-dense, high in fiber and protein, and naturally low in calories and sugar, helping reduce hunger and stabilize metabolism.

🍯 Serving Suggestion

Serve warm with a sprinkle of cinnamon, a spoonful of Greek yogurt, and a few slices of fresh apple on top. It feels like dessert but nourishes like a balanced meal!

Banana Oat Chia Smoothie Recipe

Banana Oat Chia Smoothie Recipe

This banana oat chia smoothie is a simple, nourishing, and naturally creamy drink that works well for breakfast, a midday refreshment, or a light evening option. The ingredients shown in the image come together beautifully to create a smooth texture and mild sweetness without needing refined additions. It is easy to prepare, uses everyday kitchen items, and can be adjusted to suit personal taste.

Ingredients

  • 2 ripe bananas, peeled and sliced

  • 2 tablespoons chia seeds

  • ½ cup rolled oats

  • 1½ to 2 cups milk of choice (dairy or plant-based)

  • ½ teaspoon ground cinnamon (optional)

  • 1 teaspoon honey or dates paste (optional)

  • A few ice cubes (optional, for a chilled texture)

Preparation Method

Start by preparing the oats. If you prefer an extra smooth drink, soak the rolled oats in warm water or milk for about 10 minutes. This step softens the oats and helps them blend more easily. While the oats soak, slice the bananas into small pieces so they blend evenly and smoothly.

Next, add the soaked oats to the blender jar. Sprinkle the chia seeds over the oats, allowing them to sit briefly so they begin to absorb moisture. This helps create a naturally thick and creamy consistency. Add the banana slices on top, followed by your chosen milk. If you enjoy gentle spice notes, add a small amount of cinnamon at this stage.

Blend everything on medium speed for about 30 seconds, then increase to high speed for another 30–45 seconds. Pause once to scrape down the sides if needed. The mixture should become pale, creamy, and evenly blended, with no visible oat pieces. If the smoothie feels too thick, add a little more milk and blend again briefly.

Taste the smoothie and adjust sweetness if desired by adding honey or dates paste. Blend once more for a few seconds. If you like it chilled, add ice cubes and blend until smooth.

Serving Suggestions

Pour the smoothie into a tall glass and enjoy immediately. It can also be topped with a few chia seeds or oat flakes for visual appeal. This smoothie pairs well with fresh fruit or a light snack and can be stored in the refrigerator for a few hours if needed, though it tastes best fresh.

This banana oat chia smoothie is a comforting, balanced option that feels satisfying while staying simple and wholesome.

Mediterranean Garden Slaw with Creamy Lemon-Tahini Dressing

Mediterranean Garden Slaw with Creamy Lemon-Tahini Dressing

A vibrant, crunchy slaw packed with shredded cabbage, carrots, and broccoli, tossed in a silky lemon-tahini dressing. This salad is light yet satisfying, perfect as a side dish or a healthy main.

 Time

  • Prep: 15 minutes

  • Cook: None

  • Total: 15 minutes

 Ingredients

Slaw

  • 4 cups green cabbage, finely shredded

  • 1 cup carrots, julienned or grated

  • 1½ cups broccoli stems or florets, thinly sliced

  • 2 tablespoons fresh parsley or dill, finely chopped (optional)

  • 1 tablespoon sesame seeds or black seeds (optional, as seen in image)

Creamy Lemon-Tahini Dressing

  • ¼ cup tahini

  • 3 tablespoons fresh lemon juice

  • 1 tablespoon olive oil

  • 1 small garlic clove, finely grated

  • 2–4 tablespoons warm water (to thin)

  • Salt and black pepper, to taste

 Instructions

  1. Place cabbage, carrots, broccoli, and herbs in a large bowl.

  2. In a separate bowl, whisk tahini, lemon juice, olive oil, garlic, salt, and pepper.

  3. Slowly add warm water, whisking until smooth and creamy.

  4. Pour dressing over vegetables and toss until evenly coated.

  5. Sprinkle with sesame seeds if using.

  6. Chill 10 minutes before serving for best flavor.

 Description Notes

  • The slaw softens slightly as it rests while staying crisp.

  • Broccoli stems are ideal here—sweet, crunchy, and less bitter.

  • Dressing thickens naturally as it sits.

Tips & Variations

  • Extra protein: Add chickpeas, grilled chicken, or tofu

  • More Mediterranean: Add olives or sun-dried tomatoes

  • Low-fat option: Reduce tahini and add extra lemon juice

  • Spicy kick: Add chili flakes or a dash of cayenne

 Servings

  • Serves: 4 as a side

  • Serves: 2 as a main salad

Approximate Nutritional Info (per serving)

  • Calories: ~180

  • Protein: ~5 g

  • Fat: ~13 g

  • Carbohydrates: ~12 g

  • Fiber: ~5 g

(Values vary depending on tahini amount)

 Health Benefits

  • ✅ Rich in fiber for digestion

  • ✅ Healthy fats from tahini & olive oil

  • ✅ Anti-inflammatory ingredients

  • ✅ Naturally gluten-free

  • ✅ Supports heart & gut health

 Q & A

Q: Can I make this ahead of time?
A: Yes! Keeps well refrigerated for up to 2 days.

Q: Is tahini strong in flavor?
A: Lemon and garlic balance it beautifully—smooth, not bitter.

Q: Can I use red cabbage?
A: Absolutely! It adds color and extra antioxidants.

Q: Is this keto-friendly?
A: It’s low-carb but not strict keto due to carrots and tahini.

Savory Puff Pastry with Minced Meat and Cheese!

🥐 Savory Puff Pastry with Minced Meat & Cheese

Flaky golden puff pastry filled with seasoned minced meat, onions, herbs, and melted cheese. Perfect for snacks, appetizers, lunchboxes, or party trays!

✅ Ingredients (Makes 8–12 pastries)

For the Filling

  • 1 lb (450 g) minced beef or lamb

  • 1 small onion, finely chopped

  • 2–3 garlic cloves, minced

  • 1 tablespoon olive oil

  • ½ teaspoon paprika

  • ½ teaspoon cumin

  • ½ teaspoon black pepper

  • ½ teaspoon dried oregano or thyme

  • ¼–½ teaspoon chili flakes (optional)

  • 2 tablespoons tomato paste

  • 2 tablespoons chopped parsley (optional)

  • Salt to taste

For the Pastry

  • 1 sheet puff pastry (thawed)

  • 1 cup shredded cheese (mozzarella, cheddar, or a mix)

  • 1 egg (for egg wash)

  • Sesame seeds or nigella seeds (optional)


🍳 Instructions

1. Make the minced meat filling

  1. Heat olive oil in a pan.

  2. Sauté onions until soft.

  3. Add garlic and cook 30 seconds.

  4. Add minced meat and cook until browned.

  5. Add tomato paste, spices, herbs, and salt.

  6. Cook 3–4 minutes until mixture thickens (no excess liquid).

  7. Let cool completely before assembling.


2. Prepare the puff pastry

  1. Preheat oven to 400°F (200°C).

  2. Roll out the puff pastry sheet lightly.

  3. Cut into squares or rectangles (about 3–4 inches each).


3. Assemble

  1. Add 1–2 tablespoons of cooled meat filling onto the center.

  2. Top with a pinch of cheese.

  3. Fold pastry into desired shape:

    • triangles

    • rectangles

    • parcels

    • rolls

  4. Press edges with a fork to seal.


4. Bake

  1. Brush tops with egg wash.

  2. Sprinkle sesame or nigella seeds if desired.

  3. Bake 15–20 minutes, until puffed and golden brown.


5. Serve

Enjoy warm with:

  • ketchup

  • garlic sauce

  • yogurt dip

  • chili sauce

  • tzatziki


⭐ Tips for Best Results

  • Cool the filling completely so pastry stays crisp.

  • Don’t overfill; puff pastry expands.

  • Keep pastry cold — return it to the fridge if it becomes too soft.

  • For extra flavor, add shredded cheese inside and on top.

  • Use pre-rolled pastry for quick assembly.


❓ Q&A About Savory Puff Pastry with Minced Meat & Cheese

Q1: Can I use chicken or turkey mince instead of beef?

Yes! Any ground meat works — just adjust seasoning to taste.


Q2: Can I make these ahead of time?

Yes. Assemble them and refrigerate up to 24 hours before baking.


Q3: Can I freeze them?

Absolutely!

  • Freeze unbaked pastries on a tray, then store in bags.

  • Bake from frozen at 400°F (200°C) for 20–25 minutes.


Q4: What cheese works best?

Mozzarella (melty), cheddar (flavorful), gouda, provolone, or a cheese blend.


Q5: Why is my puff pastry not rising?

Possible reasons:

  • Oven wasn’t hot enough

  • Pastry became warm before baking

  • Overfilled, weighing it down


Q6: How do I prevent soggy bottoms?

  • Let filling cool fully

  • Bake on a preheated tray

  • Avoid watery sauces in the filling


Q7: Can I make them vegetarian?

Yes! Replace meat with:

  • sautéed mushrooms

  • spinach + feta

  • mashed potatoes + cheese

  • lentils + spices.

Diabetic-Friendly Stuffed Phyllo Cups with Spinach, Feta & Sundried Tomatoes!

🧁 Diabetic-Friendly Stuffed Phyllo Cups with Spinach, Feta & Sundried Tomatoes

⭐ Servings: 12 mini cups

⭐ Prep Time: 10 min

⭐ Cook Time: 12 min

⭐ Total Time: 22 min


📝 Ingredients

For the Cups

  • 12 mini phyllo shells (store-bought, pre-baked)

  • 1 tsp olive oil or light cooking spray

For the Filling

  • 1 ½ cups fresh spinach, finely chopped
    (or ¾ cup frozen spinach—thawed & drained completely)

  • ⅓ cup low-fat feta cheese, crumbled

  • egg (optional – helps binding)

  • 1 tbsp Greek yogurt (optional – adds creaminess)

  • 1 clove garlic, minced

  • 1 tbsp fresh parsley, chopped

  • pinch of salt

  • Black pepper to taste

  • 1–2 tbsp oil-free, unsweetened sundried tomatoes, finely chopped


👩‍🍳 Instructions

1. Preheat Oven

  • Heat oven to 180°C / 350°F.


2. Prepare Spinach

If fresh:

  1. Cook in a dry pan 2–3 minutes until wilted.

  2. Squeeze out all excess water.

If frozen:

  • Thaw and squeeze very dry.


3. Make Filling

In a mixing bowl combine:

  • Spinach

  • Low-fat feta

  • Egg (optional)

  • Greek yogurt (optional)

  • Garlic

  • Parsley

  • Salt & pepper

Mix well to form a light, creamy filling.


4. Fill the Phyllo Cups

  • Lightly brush cups with olive oil or spray.

  • Spoon the filling inside each cup.

  • Add a tiny amount of chopped sundried tomatoes on top.


5. Bake

  • Arrange cups on a baking tray.

  • Bake for 10–12 minutes until the edges turn golden brown.


6. Serve

  • Serve hot or warm.

  • Garnish with parsley if desired.


📊 Nutrition (Approx. per 1 Cup)

  • Calories: 45–60

  • Carbs: 4–6g

  • Protein: 2–3g

  • Fat: 2–3g

(Values can vary depending on brands and portion sizes.)


❓ Q&A Section

Q1: Are phyllo cups safe for diabetics?

A: Yes—in small portions. Phyllo dough has carbs, so limit to 1–2 cups per serving.


Q2: Can I make these without feta cheese?

A: Yes! Replace with:

  • Low-fat ricotta

  • Cottage cheese

  • Or skip cheese and add extra spinach + herbs


Q3: Do sundried tomatoes increase sugar levels?

A: They contain natural sugars, so use oil-free, unsweetened, and add only a small amount (1–2 tsp divided among all cups).


Q4: Can I make this recipe egg-free?

A: Absolutely. The egg just helps binding. Without egg:

  • Increase Greek yogurt
    OR

  • Add 1 tbsp almond flour for structure


Q5: Can I prepare these cups ahead of time?

A: Yes.

  • Option 1: Make filling ahead and assemble before baking.

  • Option 2: Bake completely and reheat in the oven for 5 minutes before serving.
    Avoid microwaving (makes phyllo soggy).


Q6: Can I add more vegetables?

A: Yes! These work well:

  • Mushrooms

  • Bell peppers

  • Green onions

  • Zucchini (grated & squeezed)

More vegetables = more fiber = better for diabetics.


Q7: Can I use whole-wheat phyllo instead?

A: Yes, if available—it’s even better because it has more fiber and is lower GI.


Q8: What can I serve these with?

They pair well with:

  • Green salad

  • Grilled chicken

  • Lentil soup

  • Roasted vegetables

All diabetic-friendly options.

Ginger Water (Ginger–Lemon Detox Drink)

Ginger Water (Ginger–Lemon Detox Drink)

Prep & Cook Time

  • Prep: 5 minutes

  • Cook: 10–15 minutes

  • Total: ~20 minutes

Servings

  • Makes 4–6 servings (or 1 large bottle for the day)

Ingredients

  • 2–3 inches fresh ginger root

  • 1–2 lemons (optional but recommended)

  • 1 liter (4 cups) water

  • Optional:

    • 1 tsp raw honey (after cooling)

    • A pinch of turmeric

    • A few mint leaves

Instructions

  1. Wash and peel the ginger (peeling optional).

  2. Slice or grate the ginger thinly.

  3. Bring water to a boil.

  4. Add ginger, reduce heat, and simmer for 10–15 minutes.

  5. Turn off heat and let cool slightly.

  6. Strain into a bottle or jar.

  7. Add fresh lemon juice (and honey if using).

  8. Store in the refrigerator for up to 2 days.

Description

Ginger water is a warming herbal infusion known for its thermogenicdigestive, and anti-inflammatory properties. Lemon adds vitamin C and supports liver detox pathways.

Health Benefits (Evidence-Based)

✔ Supports Weight Loss

  • Boosts metabolism

  • Reduces appetite & cravings

  • Improves fat oxidation

✔ Reduces Bloating & Water Retention

  • Aids digestion

  • Relieves gas and constipation

✔ Improves Blood Circulation

  • Helps mobilize stored fat

  • Supports cardiovascular health

✔ Anti-Inflammatory

  • Reduces chronic inflammation linked to obesity

✔ Blood Sugar Control

  • Helps stabilize insulin response

What It Does NOT Do

  • ❌ Spot-reduce fat

  • ❌ Replace exercise or calorie control

  • ❌ Melt fat overnight

How & When to Drink

  • Morning (best): 1 cup on an empty stomach

  • Before meals: Reduces overeating

  • Daily limit: 2–3 cups

Tips for Best Results

  • Drink warm, not ice cold

  • Combine with:

    • Walking or light exercise

    • High-protein meals

    • Reduced sugar & refined carbs

  • Be consistent for 2–4 weeks

Nutritional Information (per cup)

  • Calories: ~5–10

  • Carbs: ~2g

  • Sugar: 0g

  • Fat: 0g

  • Vitamin C: ~10–15%

Q & A

Q: Can I drink it every day?
✔ Yes, in moderation.

Q: Can pregnant women drink ginger water?
⚠️ Small amounts are usually safe, but consult a doctor.

Q: Will it burn belly fat fast?
👉 It supports fat loss over time, not instant results.

Q: Can I drink it cold?
✔ Yes, but warm is more effective for digestion.

Best Grilled Cheese Sandwich

The Best Grilled Cheese Sandwich: A Step-by-Step Guide to Golden Perfection

Few foods are as universally comforting as a perfectly grilled cheese sandwich. Crisp, golden bread hugging melty, gooey cheese is a classic combination that satisfies the soul. But what makes a grilled cheese truly the best? The secret lies in choosing the right ingredients, using the right techniques, and giving it just the right amount of love and patience. Here’s a complete guide to making a grilled cheese sandwich that will become your go-to comfort food.


Ingredients You’ll Need

  • Bread: 2 slices (choose sturdy white, sourdough, or whole wheat for the best crunch)
  • Cheese: 2–3 slices or ½ cup shredded (cheddar, American, Swiss, or a mix for depth of flavor)
  • Butter: 1–2 tablespoons, softened
  • Optional extras: Tomato slices, caramelized onions, bacon, or avocado for a gourmet twist

Step 1: Prep the Ingredients

  1. Butter the bread – Spread softened butter evenly on one side of each slice. The butter ensures a golden, crispy exterior and a rich flavor.
  2. Slice or shred your cheese – Thin slices melt quickly and evenly. Mixing cheeses (like cheddar and mozzarella) can give both flavor and stretchiness.

Tip: Let the butter sit at room temperature for 10–15 minutes before using; it spreads more easily and prevents tearing the bread.

Step 2: Assemble the Sandwich

  1. Place one slice of bread butter-side down on a plate or cutting board.
  2. Layer your cheese evenly on the bread. Avoid overstuffing, which can make the sandwich hard to flip.
  3. Add any optional extras, like tomato or bacon.
  4. Top with the second slice of bread, butter-side up.

Step 3: Cook the Sandwich

  1. Heat a skillet over medium-low heat. Medium-low is key: it allows the cheese to melt without burning the bread.
  2. Place the sandwich in the skillet. Press gently with a spatula to ensure even contact.
  3. Cook slowly for 3–4 minutes, checking occasionally. You want a deep golden-brown crust.
  4. Flip carefully using a spatula. Cook the other side for another 3–4 minutes until golden brown and the cheese is fully melted.

Pro tip: Covering the skillet with a lid for a minute helps trap heat and melt the cheese evenly.


Step 4: Check for Perfection

  • The bread should be golden and crispy.
  • The cheese should be fully melted, gooey, and stretchy.
  • If the bread is browning too fast before the cheese melts, lower the heat slightly and continue cooking.

Step 5: Serve and Enjoy

  1. Remove the sandwich from the skillet and let it rest for 1 minute. This helps the cheese settle slightly, making it easier to cut.
  2. Slice diagonally for a classic presentation.
  3. Serve hot, optionally with ketchup, tomato soup, or pickles on the side.

Tips for the Ultimate Grilled Cheese

  • Bread choice matters: Sourdough gives a tangy bite, whole wheat adds nuttiness, and white bread provides classic nostalgia.
  • Cheese blend: Combining cheddar (flavor) with mozzarella (stretch) or Swiss (nutty notes) creates a gourmet touch.
  • Butter vs. mayo: Some chefs use mayonnaise on the outside for an even crispier, golden finish.
  • Low and slow wins: Cooking at lower heat ensures melty cheese without burnt bread.

Conclusion

The perfect grilled cheese sandwich is more than just melted cheese between bread; it’s a combination of technique, timing, and high-quality ingredients. With these step-by-step instructions, you’ll have a sandwich that’s golden, crisp, and satisfyingly gooey every single time. Whether it’s a quick lunch, a late-night snack, or comfort food on a rainy day, your homemade grilled cheese will be legendary.


If you want, I can also create a creative variation section with 5 unique grilled cheese recipes that take this classic to the next level. That would make it extra fun! Do you want me to do that?

ABC Drink (Apple, Beetroot, Carrot)

ABC Drink (Apple, Beetroot, Carrot)

A fresh, colorful homemade juice made with simple fruits and vegetables

The ABC Drink is a naturally sweet and refreshing juice made from apples, beetroot, and carrots. It can be prepared easily at home using either a juicer or a blender. This drink is popular for its vibrant color, balanced flavor, and simplicity.


Ingredients

  • 2 medium apples (red or green), washed and cored

  • 1 medium beetroot, peeled and washed

  • 3 large carrots, washed and trimmed

  • 1 tablespoon fresh lemon juice (optional, for brightness)

  • ½ inch fresh ginger, peeled (optional, for warmth)

  • ½ cup cold water (only if using a blender)


Equipment Needed

  • Juicer or blender

  • Knife and cutting board

  • Fine-mesh strainer or nut-milk bag (for blender method)

  • Glass or jug for serving


Method 1: Using a Juicer

Step 1: Prepare the Produce

  • Wash all fruits and vegetables thoroughly

  • Peel the beetroot

  • Core the apples

  • Cut ingredients into sizes suitable for your juicer

Step 2: Juice

  • Pass the carrots, beetroot, apples, and ginger (if using) through the juicer one at a time

Step 3: Finish and Serve

  • Stir in lemon juice if using

  • Serve immediately, plain or over ice


Method 2: Using a Blender

Step 1: Chop

  • Cut apples, beetroot, carrots, and ginger into small pieces

Step 2: Blend

  • Add chopped ingredients to the blender

  • Pour in ½ cup cold water

  • Blend on high speed until completely smooth

Step 3: Strain

  • Pour the mixture through a fine strainer or nut-milk bag

  • Press gently to extract the liquid

  • Transfer juice to a glass or jug

Step 4: Serve

  • Add lemon juice if desired

  • Serve chilled


Flavor Notes

  • Apples add natural sweetness

  • Carrots give a mild, smooth base

  • Beetroot contributes deep color and earthy notes

  • Lemon brightens the flavor

  • Ginger adds gentle warmth


Helpful Tips

  • Use fresh, firm produce for the best taste

  • If beetroot flavor feels strong, add one extra apple

  • Chill ingredients before blending for a cooler drink

  • Shake or stir before serving if stored briefly


Storage

  • Best enjoyed immediately after preparation

  • Can be stored in a tightly sealed glass container in the refrigerator for up to 24 hours

  • Stir well before drinking


Serving Ideas

  • Morning refreshment

  • Afternoon drink

  • Served cold with meals

  • Poured into small glasses for sharing

Mary Berry–Style Boiled Fruit Cake

Mary Berry–Style Boiled Fruit Cake

A classic, moist fruit loaf made with a simple boiling method

Why You’ll Love This Cake

This traditional boiled fruit cake is loved for its deep flavor, soft texture, and easy preparation. The gentle simmering step plumps the dried fruit and blends the flavors beautifully, resulting in a cake that improves with time.

  • Naturally moist from simmered fruit

  • Simple method — no mixer needed

  • Perfect for make-ahead baking

  • Great for tea time, gifting, or celebrations

  • Customizable with fruit, citrus, or nuts


Ingredients

For the Cake

  • 225 g (1 cup) unsalted butter

  • 225 g (1 cup) soft brown sugar

  • 225 g (1½ cups) mixed dried fruit
    (raisins, currants, sultanas, or chopped dates)

  • Zest and juice of 1 orange

  • 1 teaspoon ground cinnamon

  • 1 teaspoon mixed spice

  • 2 large eggs, lightly beaten

  • 225 g (1¾ cups) self-raising flour

Optional flavor boost (non-alcoholic):

  • 1 teaspoon orange extract or vanilla extract


Equipment Needed

  • Medium saucepan

  • Mixing spoon

  • 900 g (2 lb) loaf tin

  • Baking parchment


Step-by-Step Instructions

Step 1: Prepare the Oven and Tin

  • Preheat your oven to 160°C (325°F) or 140°C fan

  • Grease and line a 900 g loaf tin with parchment paper


Step 2: Boil the Fruit Mixture

  • Place the butter in a medium saucepan over low heat

  • Add the brown sugar, dried fruit, orange zest, orange juice, cinnamon, and mixed spice

  • Stir gently until the butter melts

  • Bring to a gentle simmer and cook for 5 minutes, stirring occasionally

  • Remove from heat and allow to cool for 10–15 minutes

This step softens the fruit and evenly distributes sweetness throughout the cake.


Step 3: Make the Batter

  • Once the mixture is warm (not hot), stir in the beaten eggs

  • Add the optional extract, if using

  • Sift in the self-raising flour

  • Fold gently until smooth and fully combined


Step 4: Bake

  • Spoon the batter into the prepared loaf tin

  • Smooth the top evenly

  • Bake for 1½ to 1¾ hours, or until a skewer inserted in the center comes out clean

  • If the top browns too quickly, loosely cover with foil during the final baking time


Step 5: Cool and Rest

  • Cool in the tin for 10 minutes

  • Transfer to a wire rack and cool completely

  • Wrap the cake in parchment and store in an airtight container

  • Resting the cake for 1–2 days improves flavor and texture


Tips for Best Results

  • Use fresh spices for the best aroma

  • Chop larger dried fruits for even distribution

  • Do not rush cooling — the structure sets as it cools

  • This cake slices best the next day


Variations

  • Nut version: Add ½ cup chopped walnuts or almonds

  • Fruit swap: Use dried apricots, cranberries, or figs

  • Citrus twist: Add lemon zest along with orange

  • Festive style: Add a small amount of candied peel


Storage

  • Room temperature (airtight): up to 7 days

  • Refrigerator: up to 2 weeks

  • Freezer: up to 3 months (wrap well)


Serving Suggestions

  • Enjoy with tea or coffee

  • Serve lightly warmed with butter

  • Pair with fresh fruit or mild cheese

  • Slice thinly for afternoon snacks

Sponge Chocolate Cake

Sponge Chocolate Cake

A soft, light chocolate cake with a tender crumb

Introduction

This Sponge Chocolate Cake is wonderfully soft, moist, and full of chocolate flavor. It’s made with simple ingredients and comes together easily, making it perfect for everyday baking or special occasions. Enjoy it plain with a dusting of powdered sugar or dress it up with a smooth chocolate glaze or sprinkles.


⏱️ Time & Yield

  • Prep Time: 15 minutes

  • Bake Time: 30–35 minutes

  • Cooling Time: 20 minutes

  • Total Time: About 1 hour

  • Pan Size: 7-inch or 8-inch round cake tin

  • Servings: 8 slices


🧾 Ingredients

  • 2 large eggs, room temperature

  • 130 g sugar

  • 70 g vegetable oil

  • 170 g all-purpose flour

  • 40 g unsweetened cocoa powder

  • 3 g baking soda

  • 120 ml milk or water

Optional for topping: powdered sugar, chocolate glaze, or chocolate sprinkles


👩‍🍳 Step-by-Step Instructions

1. Prepare the Pan and Oven

Preheat your oven to 180°C (350°F).
Grease a 7-inch or 8-inch round cake pan and line the bottom with parchment paper. Set aside.


2. Whisk Eggs and Sugar

In a large mixing bowl, add the eggs and sugar.
Whisk using a hand mixer or whisk for several minutes until the mixture becomes pale, thick, and noticeably increased in volume. This step helps give the cake its light texture.


3. Add the Liquid Ingredients

Slowly pour in the vegetable oil while whisking gently.

Add the milk or water and mix until smooth and evenly combined.


4. Prepare the Dry Ingredients

In a separate bowl, sift together:

  • Flour

  • Cocoa powder

  • Baking soda

Sifting helps remove lumps and ensures a smooth batter.


5. Combine Wet and Dry Mixtures

Add the dry ingredients to the wet mixture in two parts.
Use a spatula to gently fold everything together just until combined. Avoid over-mixing to keep the cake soft and airy.


6. Bake

Pour the batter into the prepared cake pan and smooth the top.

Bake for 30–35 minutes, or until a toothpick inserted into the center comes out clean.


7. Cool and Finish

Let the cake cool in the pan for 10 minutes, then turn it out onto a wire rack to cool completely.

Once cooled, decorate as desired with a chocolate glaze, powdered sugar, or sprinkles.


🍽️ Serving Suggestions

  • Serve plain with powdered sugar

  • Top with chocolate ganache or glaze

  • Pair with tea, coffee, or milk

  • Add fresh berries on the side


💡 Helpful Tips

  • Whisking the eggs and sugar well helps create a lighter texture

  • Use natural cocoa powder for a richer chocolate flavor

  • Let the cake cool completely before adding glaze

  • This cake can be sliced and layered with cream or frosting


🧊 Storage

  • Store covered at room temperature for up to 2 days

  • Refrigerate for up to 4 days

  • Wrap slices tightly and freeze for up to 2 months