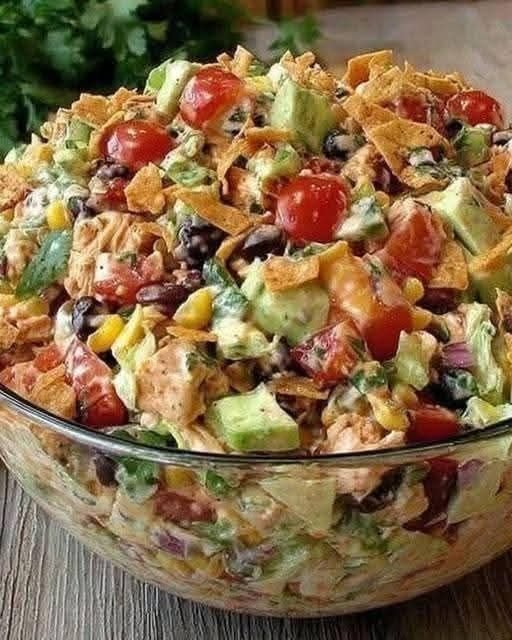
A vibrant and hearty salad bursting with flavors, combining tender chicken, fresh vegetables, and a zesty ranch dressing with a kick of taco seasoning. Perfect for a light meal or a satisfying side dish!
Ingredients:
Dressing:
1 cup ranch dressing
2 tablespoons taco seasoning (hot or mild)
Salad:
3 cups cooked, cooled, and diced chicken
4 cups Romaine lettuce, chopped (about 1 head)
2 Roma tomatoes, diced
1 cucumber, seeded and diced
1 cup corn kernels (fresh or frozen)
4-5 green onions, sliced
1 (15 oz) can black beans, drained and rinsed
4 oz sharp cheddar cheese or pepper jack, cut into ¼” cubes
1/4 cup cilantro, chopped
Juice of 1/2 of a lime
1 cup tortilla chips, crushed
Jalapeño, diced, toasted pumpkin seeds, diced avocado, or jicama for garnish (optional)
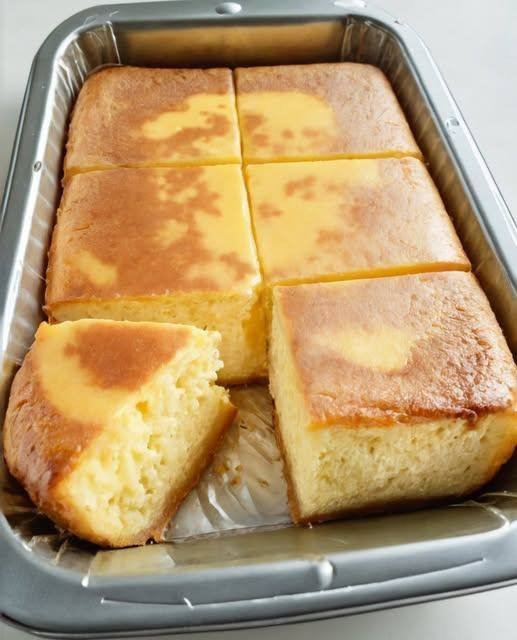
This classic Mediterranean-style dessert uses simple pantry ingredients and bakes into a custardy, melt-in-the-mouth cake—no flour, no fuss.
Ingredients (6–8 servings)
1 cup short-grain rice (or arborio)
4 cups whole milk
¾ cup sugar (adjust to taste)
2 eggs
1 tsp vanilla extract
1 strip lemon peel (or orange peel)
½ tsp cinnamon (plus extra for topping)
Pinch of salt
1 tbsp butter (for greasing)
Optional Mediterranean touches
2 tbsp raisins
1 tbsp orange blossom water or rose water
Slivered almonds or pistachios for topping
Instructions
Cook the rice In a saucepan, combine rice, milk, lemon peel, and salt. Simmer on low heat, stirring often, for 25–30 minutes until rice is very soft and mixture is thick and creamy. Remove lemon peel and let cool slightly.
Sweeten & flavor Stir sugar, vanilla, and cinnamon into the warm rice mixture.
Add eggs Beat eggs in a bowl. Slowly whisk a few spoonfuls of the warm rice mixture into the eggs (to temper), then stir everything back into the pot. Mix until smooth. Add orange blossom water or raisins if using.
Bake Preheat oven to 180°C / 350°F. Butter a baking dish or cake pan. Pour in the mixture and smooth the top. Bake for 30–35 minutes, until set with a slight jiggle in the center.
Cool & finish Let cool completely—it will firm up as it sets. Dust with cinnamon and top with nuts if desired.
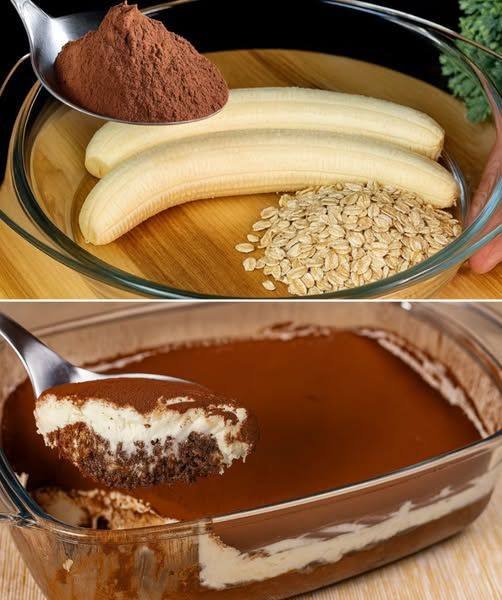
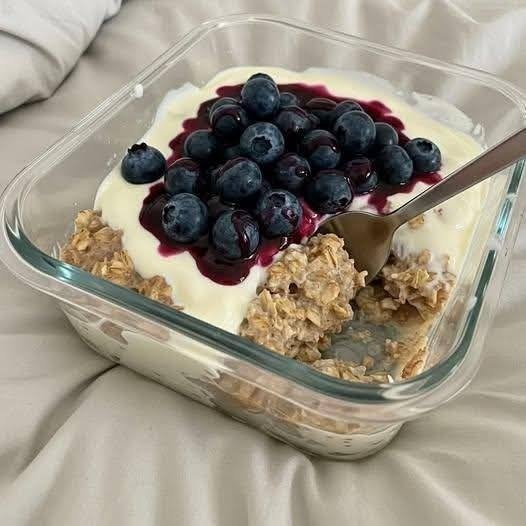
A creamy, coffee-kissed breakfast that tastes like dessert but keeps things healthy and naturally sweet.
Serves 1
Ingredients
½ cup rolled oats ½ cup unsweetened almond milk (or any milk of choice) ¼ cup strong brewed coffee or espresso, cooled ¼ cup plain Greek yogurt or mascarpone-style yogurt (unsweetened) 1 to 2 teaspoons sugar-free sweetener (stevia, monk fruit, or erythritol, to taste) ½ teaspoon vanilla extract ¼ teaspoon cocoa powder, plus extra for dusting Pinch of salt
Optional toppings Dark chocolate shavings (sugar-free) Cocoa nibs A light dusting of cocoa powder
Instructions
1. In a jar or bowl, combine the oats, almond milk, brewed coffee, sweetener, vanilla extract, cocoa powder, and salt. Stir well until fully mixed.
2. Cover and refrigerate for at least 4 hours or overnight, allowing the oats to soften and absorb the flavors.
3. Once chilled, gently fold in the Greek yogurt to create a creamy, tiramisu-like texture.
4. Serve cold, dusted with extra cocoa powder on top. Add optional sugar-free chocolate shavings or cocoa nibs if desired.
Tips
For extra creaminess, use full-fat Greek yogurt. If you prefer warm oats, heat gently after soaking, then add yogurt once slightly cooled. Adjust coffee strength based on how strong you like the tiramisu flavor.
Healthy, indulgent, and perfect for a dessert-style breakfast without added sugar.
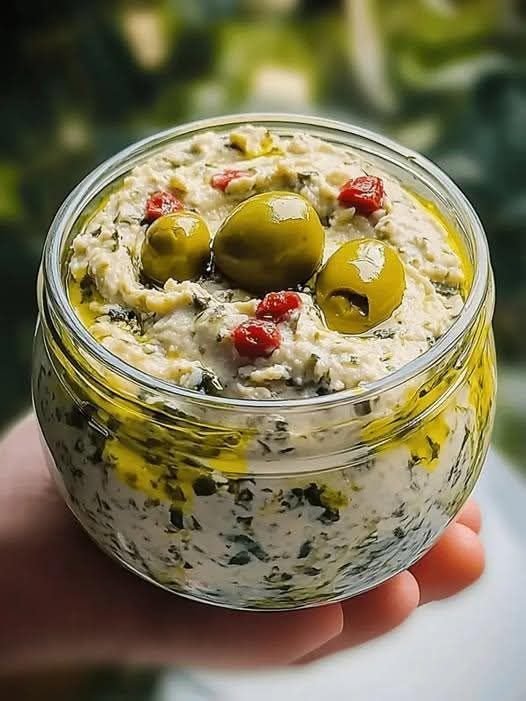
Olive Lovers’ Dream Dip Creamy, zesty, and simply irresistible
Serves 6–8
Prep time 10 minutes Chill time (optional) 20–30 minutes
Ingredients
1 cup pitted mixed olives (green, Kalamata, black), finely chopped ¾ cup cream cheese, softened ½ cup Greek yogurt or labneh 2 tablespoons extra virgin olive oil 1 tablespoon fresh lemon juice 1 small garlic clove, minced 2 tablespoons fresh parsley, finely chopped 1 tablespoon fresh dill or oregano, finely chopped (optional) ¼ teaspoon black pepper Pinch of chili flakes (optional)
Instructions
1. In a bowl, mix the cream cheese and Greek yogurt until smooth and creamy. 2. Stir in olive oil, lemon juice, and minced garlic until well combined. 3. Add chopped olives, parsley, dill or oregano, black pepper, and chili flakes if using. 4. Mix gently until evenly distributed. 5. Taste and adjust lemon, salt (usually not needed due to olives), or spice. 6. Chill for 20–30 minutes for best flavor, or serve immediately.
Serving suggestions
Serve with warm pita bread, whole wheat crackers, sliced cucumbers, cherry tomatoes, or as a spread for wraps and sandwiches.
Storage
Store in an airtight container in the refrigerator for up to 3 days.
Mediterranean tip
For extra richness, drizzle a little olive oil on top and garnish with chopped olives and herbs before serving.
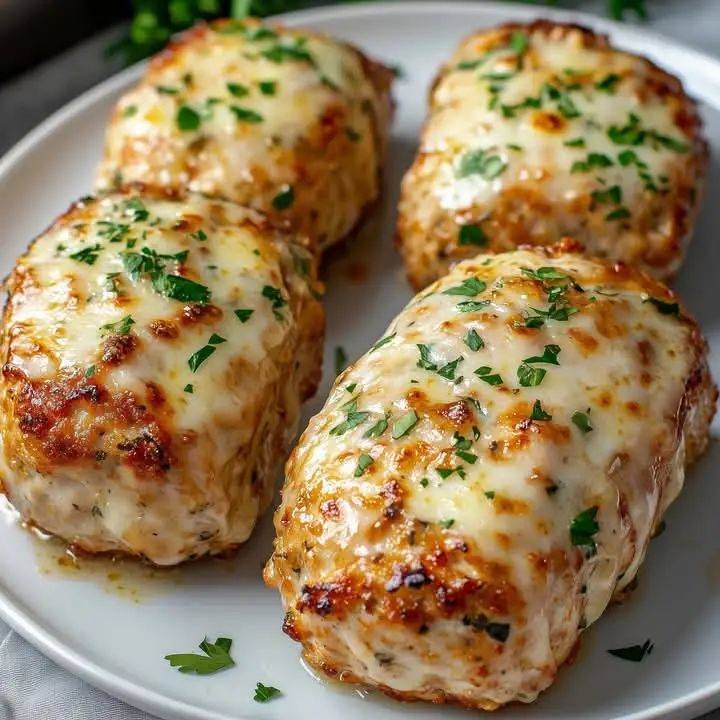
These are juicy, cheesy, and perfect as an appetizer, meal prep protein, or quick dinner
Ingredients • 1 lb chicken breast, cut into bite-sized pieces • 1/3 cup grated Parmesan cheese • 2 tablespoons olive oil • 1 teaspoon garlic powder • 1 teaspoon onion powder • 1 teaspoon Italian seasoning • 1/2 teaspoon paprika • Salt and black pepper, to taste • Optional garnish: fresh parsley or extra Parmesan
Instructions
In a large bowl, add olive oil, Parmesan cheese, garlic powder, onion powder, Italian seasoning, paprika, salt, and pepper. Mix well.
Add the chicken pieces and toss until fully coated with the Parmesan mixture. Let marinate for 10–15 minutes if you have time (optional but recommended).
Preheat grill pan or outdoor grill to medium-high heat. Lightly oil the grates.
Place chicken pieces on the grill in a single layer.
Grill for 3–4 minutes per side, turning once, until golden, lightly crispy, and cooked through (internal temp 165°F / 74°C).
Remove from grill and let rest for 2 minutes.
Garnish with fresh parsley or extra Parmesan if desired.
Serving Ideas • Serve with garlic yogurt dip, ranch, or marinara • Pair with salad, roasted veggies, or low-carb sides • Great for meal prep bowls or wraps
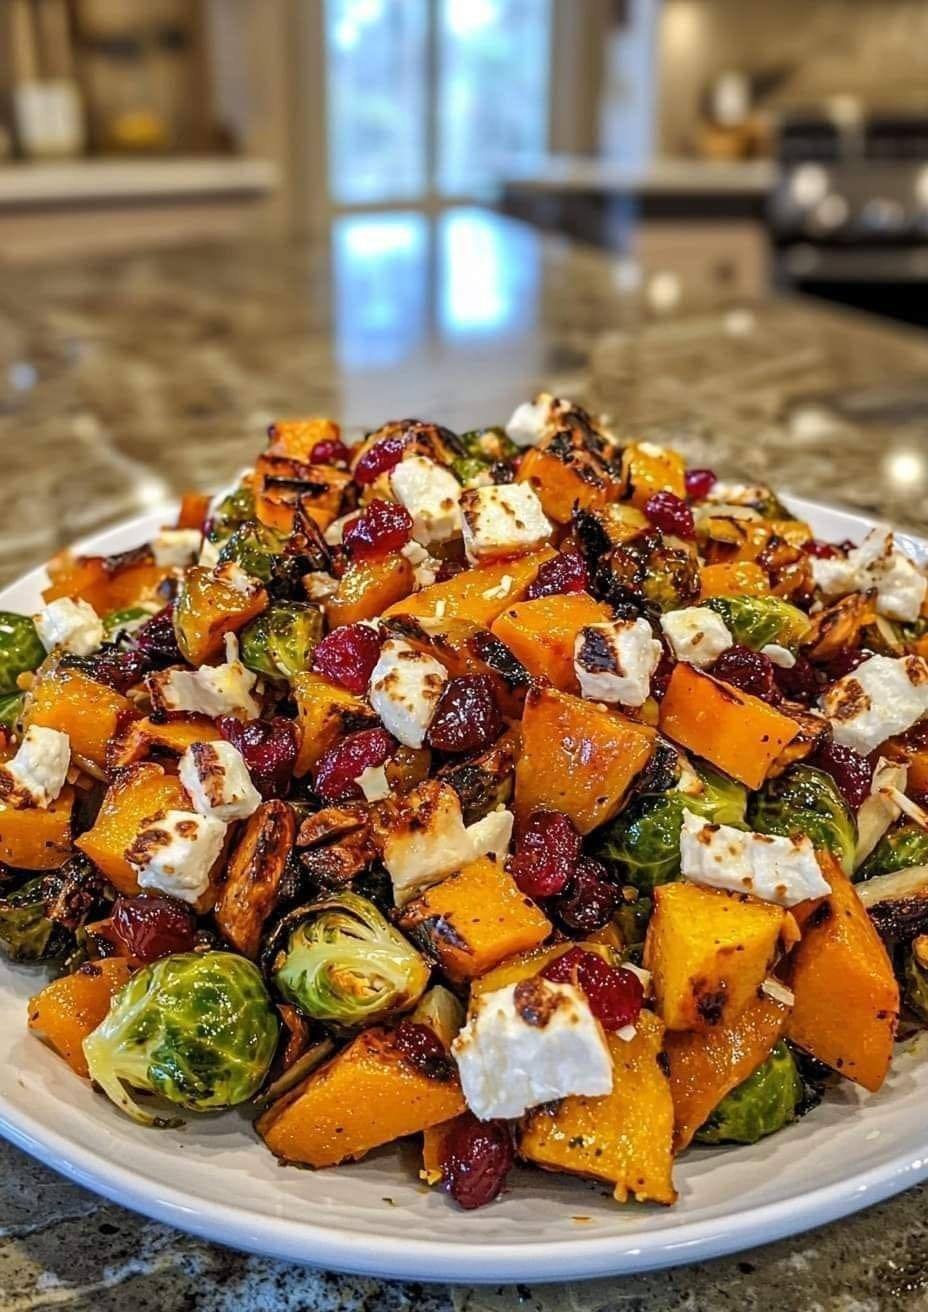
Cranberry-Glazed Roasted Butternut Squash, Brussels Sprouts, and Sweet Potato Salad with Cranberries and Goat Cheese full recipe
Ingredients
For the roasted vegetables • 2 cups butternut squash, peeled and cubed • 2 cups Brussels sprouts, halved • 1 large sweet potato, peeled and cubed • 3 tbsp olive oil • ½ tsp salt • ½ tsp black pepper • ½ tsp dried thyme or rosemary
For the cranberry glaze • ⅓ cup cranberry sauce (whole berry or jellied) • 2 tbsp olive oil • 1 tbsp balsamic vinegar or apple cider vinegar • 1 tbsp maple syrup or honey • ¼ tsp cinnamon (optional)
For the salad • ½ cup dried cranberries • ⅓ cup crumbled goat cheese • ¼ cup toasted pecans or walnuts (optional) • Optional greens: baby spinach, arugula, or mixed greens
Instructions
Preheat oven to 400°F (200°C). Line a large baking sheet with parchment paper.
In a large bowl, toss butternut squash, Brussels sprouts, and sweet potato with olive oil, salt, pepper, and dried herbs.
Spread vegetables in a single layer on the baking sheet. Roast for 30–35 minutes, flipping halfway, until tender and caramelized.
While vegetables roast, whisk together cranberry sauce, olive oil, balsamic vinegar, maple syrup or honey, and cinnamon until smooth.
Remove roasted vegetables from the oven and drizzle with cranberry glaze while still warm. Toss gently to coat.
Let vegetables cool slightly.
Assemble salad: place greens (if using) on a platter, top with roasted glazed vegetables, dried cranberries, goat cheese, and toasted nuts.
Serve warm or at room temperature.
Serving ideas • Perfect holiday or fall-inspired salad • Great side dish for roasted chicken, turkey, or salmon • Can be served as a vegetarian main with crusty bread
Tips • For extra tang, add a splash of fresh lemon juice • For vegan version, omit goat cheese or use dairy-free cheese • Stores well in the fridge for up to 3 days
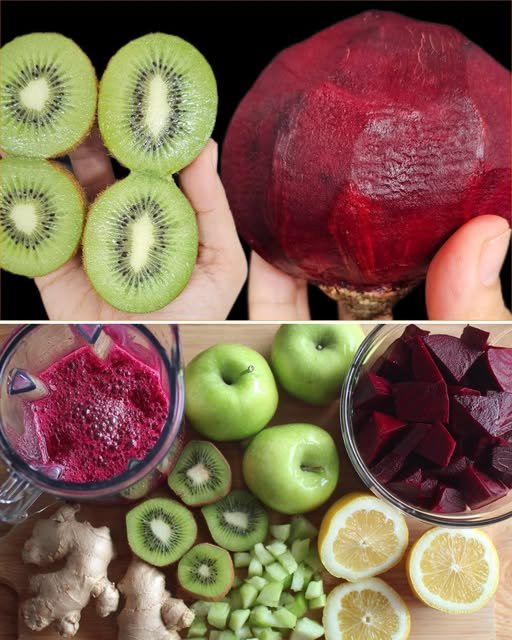
Easy Homemade Detox Your Liver Recipe with Beetroot and Fruits
Are you looking for a delicious way to help detox your liver? This easy homemade detox your liver recipe features a vibrant blend of fresh fruits and vegetables, making it both tasty and nutritious. The earthy sweetness of beetroot pairs perfectly with the tangy citrus and the bright flavors of apple and kiwi. Each sip is refreshing and revitalizing, ideal for anyone wanting to boost their wellness routine with a natural drink.
Prep Time: 10 minutes Cook Time: 0 minutes Total Time: 10 minutes Servings: 2 Estimated Calories: 150 per serving
Ingredients
1 medium raw beetroot, peeled and chopped (≈ 150 g / 5 oz)
1 green apple, cored and chopped (≈ 150 g / 5 oz)
2 kiwis, peeled and chopped (≈ 150 g / 5 oz total)
1 lemon, juiced (≈ 30 ml / 2 tbsp)
1 orange, peeled and segmented (≈ 180 g / 6 oz)
10–15 g fresh ginger, peeled and chopped (≈ 1 tbsp)
700 ml water (≈ 3 cups)
Instructions
Peel and chop the beetroot into small cubes.
Core and chop the green apple.
Peel and chop the kiwis.
Peel the orange and separate it into segments.
Peel and finely chop the ginger.
Juice the lemon.
Place all prepared fruits, beetroot, ginger, and lemon juice into a blender.
Add the water.
Blend on high speed until completely smooth and evenly combined.
Pour into a glass and consume fresh immediately.
Why This Recipe is Popular
People love this detox your liver recipe because it’s a simple, wholesome drink that’s packed with nutrients. Beetroot is known for its liver-cleansing properties, and the colorful combination of fruits makes it not just healthy but also enjoyable to drink. It’s a great recipe to whip up in spring or summer when fresh ingredients are in abundance.
Serving Suggestions
Enjoy this detox drink first thing in the morning for a refreshing start to your day. It also pairs wonderfully with a light breakfast, such as oatmeal or toast with avocado. For an afternoon pick-me-up, it’s perfect on its own or alongside a healthy snack.
Tips and Variations
Storage: Consume the drink immediately for the best flavor and nutritional value, but you can keep it in the fridge for up to 24 hours in an airtight container.
Texture: For a thicker consistency, you can add a small banana or some yogurt before blending.
Flavor Ideas: Experiment with adding a handful of spinach or kale for more greens, or a tablespoon of honey for added sweetness.
Simple Swaps: If you don’t have beetroot, carrots can be used for a different flavor profile.
Extra Kick: Add a pinch of cayenne pepper to give it a spicy twist!
FAQs
1. How often should I drink this detox recipe?
It’s best enjoyed 1-2 times a week to support your liver health naturally.
2. Can I use frozen fruits for this recipe?
Yes, frozen fruits can be used, but they may change the texture slightly.
3. What’s the best way to peel beetroot?
You can use a peeler or a sharp knife. Wearing gloves can prevent your hands from staining.
4. Can I adjust the sweetness of the drink?
Absolutely! If you prefer a sweeter taste, add more apple or a touch of honey.
Give this easy homemade detox your liver recipe a try! It’s a wonderful way to boost your health with deliciousness. You’ll love how refreshing and nourishing it is—it’s the perfect addition to your wellness routine. Enjoy every sip!
Ingredients
Fruits and Vegetables
1mediumraw beetroot, peeled and chopped≈ 150 g / 5 oz
1green applecored and chopped≈ 150 g / 5 oz
2kiwispeeled and chopped≈ 150 g / 5 oz total
1lemonjuiced≈ 30 ml / 2 tbsp
1mediumorange, peeled and segmented≈ 180 g / 6 oz
10–15gfresh ginger, peeled and chopped≈ 1 tbsp
700mlwater≈ 3 cups
Method
Preparation
Peel and chop the beetroot into small cubes.
Core and chop the green apple.
Peel and chop the kiwis.
Peel the orange and separate it into segments.
Peel and finely chop the ginger.
Juice the lemon.
Blending
Place all prepared fruits, beetroot, ginger, and lemon juice into a blender.
Add the water.
Blend on high speed until completely smooth and evenly combined.
Pour into a glass and consume fresh immediately.
Notes
Consume the drink immediately for the best flavor and nutritional value, but you can keep it in the fridge for up to 24 hours in an airtight container. For a thicker consistency, add a small banana or some yogurt before blending. Experiment with adding spinach or kale for more greens, or a tablespoon of honey for added sweetness. If you don’t have beetroot, carrots can be used for a different flavor profile. Add a pinch of cayenne pepper for a spicy twist!
Q: Can I use instant oats instead of rolled oats?
A: Instant oats will work but may result in a mushier texture. Rolled oats are preferred for creaminess and structure.
Q: Can I add other fruits?
A: Yes, raspberries, strawberries, or blackberries are excellent alternatives.
Q: Can I prep more than one serving at a time?
A: Absolutely. Multiply ingredients and layer in a larger container or multiple jars for meal prep.
Q: Will it be too thick in the morning?
A: If it thickens too much, stir in a small splash of almond milk to reach desired creaminess.
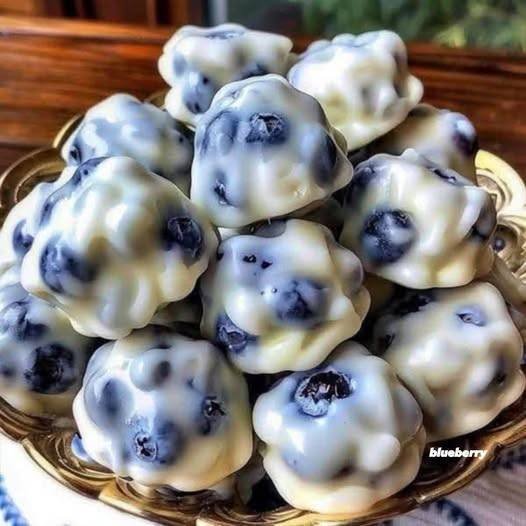
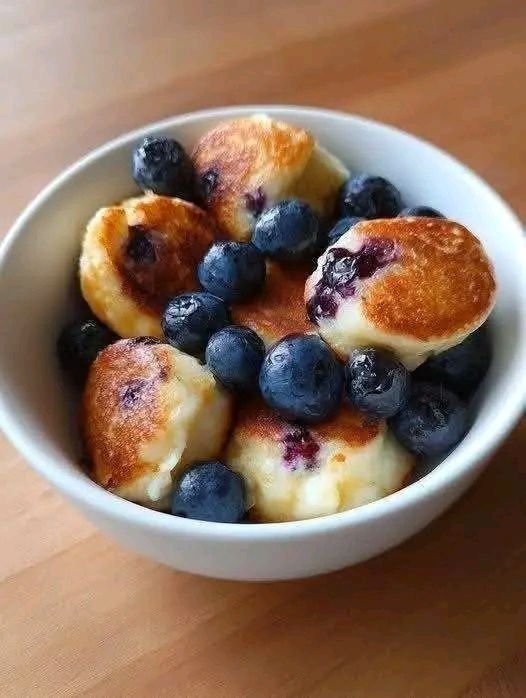
Optional Personal Story
I developed this high-protein overnight oats recipe for mornings when I wanted a quick, filling breakfast without sacrificing flavor. I experimented with Greek yogurt layers to make it rich and creamy, and the blueberries give it a naturally sweet pop without excess sugar. It’s become my go-to make-ahead breakfast that keeps me full until lunch.
Call-to-Action: Try this creamy, high-protein overnight oats for a fast, low-carb breakfast. Leave a comment to share your favorite toppings or how you customized it for your taste!
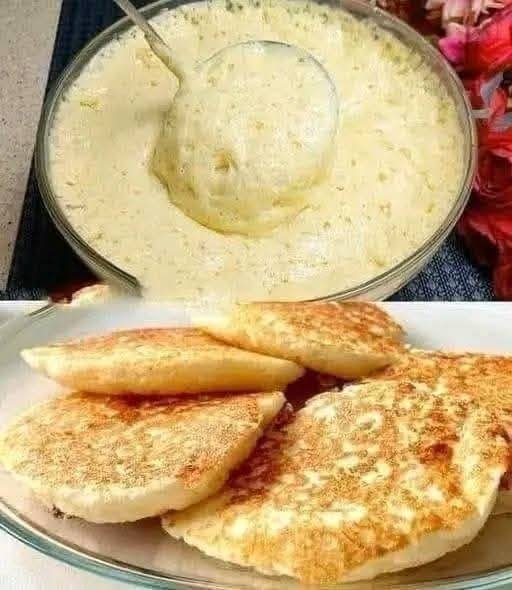
Description:
These pancakes are soft, fluffy, and naturally rich in protein thanks to cottage cheese and eggs. They’re slightly golden on the outside and tender inside—perfect for breakfast or a snack.
Ingredients (Makes ~6 pancakes)
1 cup cottage cheese
2 large eggs
½ cup all-purpose flour or oats (for a healthier version, use rolled oats)
½ teaspoon baking powder
¼ teaspoon salt
¼ teaspoon cinnamon (optional)
1–2 tablespoons sugar or honey (optional, for sweetness)
1 teaspoon vanilla extract (optional)
Butter or coconut oil, for cooking
Instructions
Prepare the Batter:
In a large bowl, mix together cottage cheese and eggs until smooth.
Add flour or oats, baking powder, salt, cinnamon, and sugar/honey if using. Stir until combined. The batter should be thick but scoopable.
Optional: Add vanilla extract for extra flavor.
Heat the Pan:
Heat a non-stick skillet or frying pan over medium-low heat.
Add a small amount of butter or coconut oil to grease the pan.
Cook the Pancakes:
Scoop 3–4 tablespoons of batter per pancake into the skillet.
Spread slightly to form a round shape.
Cook for 3–4 minutes until the bottom is golden brown.
Flip carefully and cook another 3–4 minutes until cooked through.
Reduce heat if they brown too quickly before the inside cooks.
Serve:
Serve warm with honey, maple syrup, fresh fruit, or yogurt.
Store leftovers in an airtight container in the fridge for up to 3 days.
Tips:
For extra fluffiness, blend the cottage cheese slightly before mixing with the other ingredients.
You can also fold in mashed banana for natural sweetness and extra moisture.
These pancakes can be reheated in a skillet or microwave.
These Mediterranean-style low-carb tortillas are soft, bendable, and shockingly sturdy—without flour, starches, or sugar. Made with just eggs and cheese (plus one secret ingredient), they’re perfect for wraps, gyros, quesadillas, or breakfast roll-ups while staying low-carb and protein-rich.
Unlike eggy flatbreads that crack or tear, these tortillas cool into a flexible, almost wheat-like texture. The key is gentle heat, full blending, and allowing them to rest after cooking. Simple ingredients. Smart technique. Big payoff.
Ingredients (Makes 4 Tortillas)
2 large eggs
½ cup shredded mozzarella (low-moisture works best)
1 tablespoon cream cheese (the secret to flexibility)
Optional (still carnivore, improves strength):
½ tablespoon beef gelatin
Equipment
Blender or food processor
Non-stick skillet (8–10 inch)
Silicone spatula
Instructions
1️⃣ Blend Until Silky
Add eggs, shredded mozzarella, cream cheese, and gelatin (if using) to a blender or food processor.
Blend until completely smooth—no cheese bits, no streaks. This step is crucial for even cooking and flexibility.
2️⃣ Heat the Pan Gently
Place a non-stick skillet over medium-low heat.
Lightly grease with butter or beef tallow.
The pan should be warm, not hot—too much heat causes rubbery tortillas.
3️⃣ Cook Thin & Even
Pour ¼ of the batter into the center of the pan.
Immediately swirl to form a thin, even circle.
Cook for 60–90 seconds, until:
The edges lift easily
The surface looks set with no wet spots
4️⃣ Flip Carefully
Flip gently using a silicone spatula.
Cook the second side for 30–40 seconds, then remove to a plate or cooling rack.
👉 Do not overcook — they continue to firm up as they cool.
Cooling = Flexibility
Let tortillas cool for 2–3 minutes before using.
This resting phase is where the magic happens—they become bendable, strong, and tear-resistant.
Texture Troubleshooting
Too eggy? Use 1 whole egg + 1 egg white
Breaking? Add a little more cream cheese or gelatin
Rubbery? Heat was too high
Storage
Fridge: 3–4 days (store with parchment between)
Freezer: Up to 1 month
Simple, clean, and endlessly versatile—these tortillas prove low-carb doesn’t mean low-satisfaction. 💪🌯
A creamy, fluffy, protein-packed spread that’s naturally very low in carbs, flour-free, and perfect for keto or low-carb lifestyles. Great as a dip, sandwich filling (lettuce wraps), or side dish.
Note: “Zero carb” is a common phrase, but eggs and dairy contain trace carbs. This recipe is very low carb (≈1g net carb per serving), not absolute zero.
Ingredients (6 servings)
6 large eggs, hard-boiled
4 oz (115g) full-fat cream cheese, softened
2 tbsp mayonnaise (sugar-free)
1 tsp Dijon mustard (optional)
2 tbsp finely chopped green onions
1 tbsp fresh chopped parsley or chives
Salt & black pepper to taste
Optional add-ins: pinch paprika, garlic powder, or shredded cheddar
Instructions
Boil Eggs Place eggs in cold water, bring to boil, then simmer 9–10 minutes. Cool in ice water and peel.
Mash Base In a bowl, mash eggs with a fork to desired texture (chunky or smooth).
Mix Creamy Ingredients Add softened cream cheese, mayonnaise, mustard, salt, and pepper. Mix until fluffy.
Add Herbs Fold in green onions and herbs.
Chill (Optional but Recommended) Refrigerate 30–60 minutes for best flavor and texture.
Serve Eat alone, in lettuce wraps, stuffed in celery, or as a side with grilled meat.
Description
This spread is:
High protein
High healthy fats
Low carb
Gluten-free
Flour-free
Quick (15 minutes prep)
It’s rich, creamy, slightly tangy, and very satisfying.
Tips for Best Results
Use room temperature cream cheese for smoother texture.
For extra fluffiness, use a hand mixer.
Add crispy bacon bits for more flavor.
For dairy-free: replace cream cheese with mashed avocado (will slightly increase carbs).
Store in airtight container up to 3 days in refrigerator.
Servings
Makes: 6 servings
Serving size: About ½ cup
Nutritional Information (Per Serving – Approximate)
Calories: 210
Protein: 10g
Fat: 19g
Net Carbs: 1g
Fiber: 0g
Sugar: <1g
(Values vary depending on brands used.)
Benefits
Supports low-carb & keto diets Helps reduce cravings High satiety (keeps you full longer) Quick meal prep option No flour or starch
Q & A
Q: Is this really zero carb? A: Not technically. Eggs and dairy contain tiny amounts of carbs, but it’s extremely low carb.
Q: Can I eat this while cutting weight? A: Yes, if it fits your calorie goals. It’s low carb but still calorie-dense due to fat.
Q: Can I freeze it? A: Not recommended — texture changes after thawing.
Q: How can I make it spicier? A: Add hot sauce, jalapeños, cayenne, or pepper flakes.
Q: Can I meal prep this? A: Yes, keeps well refrigerated for 3 days.
Asparagus-Stuffed Chicken Breast – A Homemade Delight
When hunger strikes, fast food may seem like the quickest solution. But nothing compares to the satisfaction of preparing a wholesome meal at home—especially when it’s something as flavorful and elegant as Asparagus-Stuffed Chicken Breast. Homemade cooking gives you full control over ingredients, flavors, and portion sizes, while also allowing you to enjoy the creative side of cooking.
Choosing homemade meals over fast food isn’t just about nutrition; it’s a lifestyle upgrade. Home-cooked meals typically contain fewer calories, less sodium, and better quality ingredients. With dishes like Asparagus-Stuffed Chicken Breast, you get lean protein from chicken, fiber and vitamins from asparagus, and rich flavor from herbs and cheese—all in one satisfying meal.
Cooking at home also creates opportunities to connect with loved ones. A cooking night with friends or family can turn an ordinary meal into a shared experience. Plus, this dish works beautifully for meal prep. Make a few portions in advance and enjoy stress-free dinners during busy weekdays.
Preparing meals from scratch encourages mindfulness about what you eat and how it affects your body. The next time you’re choosing between takeout and cooking, remember that a homemade dish like this offers nourishment, comfort, and pride in every bite.
Ingredients for Asparagus-Stuffed Chicken Breast
Chicken Breasts: 2 large, boneless, skinless
Asparagus: 1 cup, trimmed and chopped
Turkey Bacon: 4 slices, cooked and chopped
Cream Cheese: 4 ounces, softened
Garlic: 2 cloves, minced
Parmesan Cheese: ¼ cup, grated
Spices: Salt, black pepper, and dried herbs (thyme or oregano)
Olive Oil: For searing (optional)
Step-by-Step Preparation
1. Preheat the Oven
Preheat your oven to 375°F (190°C). This ensures even cooking and keeps the chicken juicy while the filling becomes tender.
2. Prepare the Chicken
Place each chicken breast between two sheets of plastic wrap or parchment paper.
Gently pound with a meat mallet or rolling pin until about ½ inch thick.
Season lightly with salt and pepper.
3. Make the Filling
Trim asparagus into 2–3 inch pieces.
In a bowl, mix together:
Cream cheese
Garlic
Parmesan cheese
Turkey bacon
Salt, pepper, and herbs
4. Stuff the Chicken
Lay asparagus on one side of each chicken breast.
Spoon cream cheese mixture over the asparagus.
Fold or roll the chicken over the filling.
Secure with toothpicks or kitchen twine.
5. Sear the Chicken (Optional but Recommended)
Heat olive oil in a skillet over medium-high heat.
Sear chicken seam-side down for 2–3 minutes per side until golden brown.
6. Bake
Transfer chicken to a baking dish or oven-safe skillet.
Bake for 25–30 minutes, or until internal temperature reaches 165°F (75°C).
7. Rest and Serve
Let the chicken rest for 5–10 minutes before slicing.
Slice to reveal the asparagus filling and serve hot.
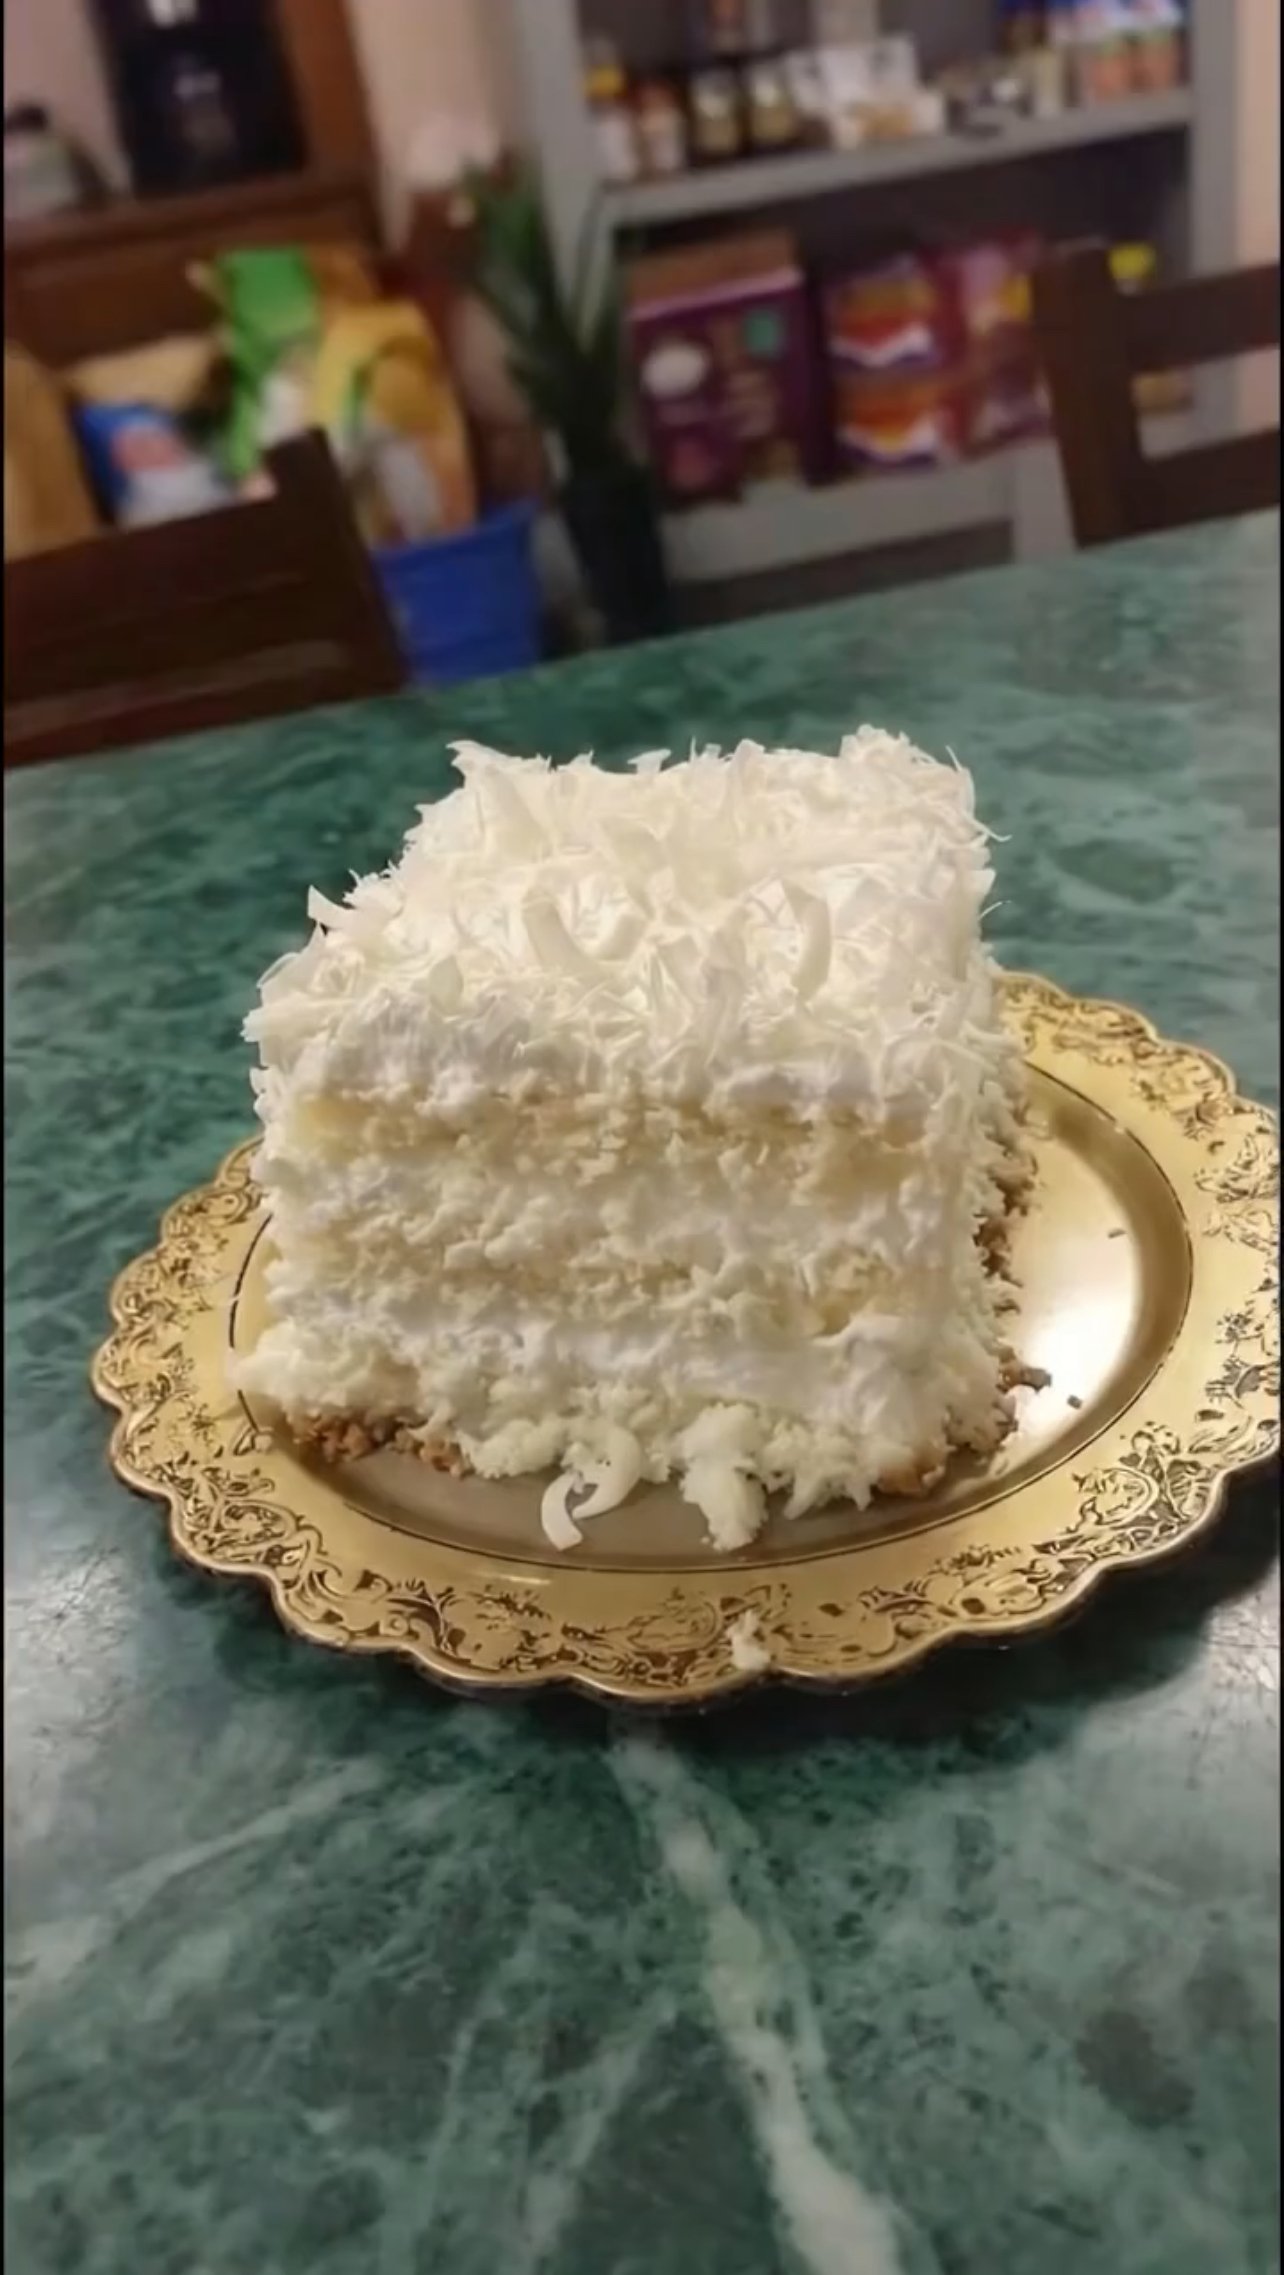
Optional for flavor: 1 teaspoon vanilla extract or a pinch of stevia (if you prefer a sweeter taste)
Optional for topping: A dusting of powdered stevia or fresh berries
Detailed Instructions
Preparation: Preheat your oven to 170°C (340°F). Line the bottom and sides of a 6-inch round cake pan with parchment paper. This is a delicate cake, so the paper helps it release without breaking.
Mix the Base: In a medium bowl, whisk the 4 egg yolks with the 1 ½ cups of Greek yogurt until the mixture is completely smooth. If you are using vanilla or a sweetener, stir it in now.
Whip the Egg Whites: In a separate, very clean glass or metal bowl, beat the 4 egg whites using an electric mixer until they form stiff peaks. You should be able to lift the beaters and have the foam stand straight up without drooping.
Fold Gently: Gently fold about one-third of the whipped egg whites into the yogurt mixture to lighten it. Then, very carefully fold in the remaining egg whites. Do not overmix, or you will lose the “cloud” airiness.
Bake: Pour the batter into your prepared pan. Place the cake pan inside a larger baking dish and fill the larger dish with about an inch of hot water (a water bath). Bake for 35–40 minutes.
Cool and Set: Turn off the oven and leave the door slightly ajar, letting the cake cool inside for 10 minutes (this prevents it from collapsing too quickly). Remove from the oven and let it cool completely before refrigerating for at least 2 hours.
Serve: Dust with a little powdered sweetener or top with fresh fruit before serving cold.
Why This Recipe Works
Protein-Packed: By using Greek yogurt and eggs, this dessert provides a high amount of protein with very little fat or carbohydrates.
Texture: The whipped egg whites act as the leavening agent, giving the cake its signature “cloud” lift.
These cheesy toast sandwiches are incredibly easy and unbelievably delicious. Crispy and golden on the outside with perfectly melted cheese inside, they’re so good that you’ll want to make them again and again. Perfect for breakfast, snacks, or quick dinners — and made with only 3 ingredients!
Ingredients (3 Only)
8 slices of bread
1½ cups cheddar cheese or mozzarella (grated)
2–3 tablespoons butter
Instructions
Spread butter on one side of each bread slice
Place grated cheese between two slices (buttered side facing out)
Close the sandwich
Cook on a pan, grill, or air fryer over medium heat
Toast until both sides are golden brown and the cheese is fully melted
Cooking Options
Pan: 2–3 minutes per side
Air Fryer: 180°C (350°F) for 6–8 minutes
Oven: 190°C (375°F) for 10 minutes
Servings
Makes 4 sandwiches
Nutritional Information (Per Sandwich – Approx.)
Nutrient
Amount
Calories
280
Protein
9 g
Carbohydrates
26 g
Fat
16 g
Calcium
High
Sugar
3 g
Benefits
Quick and budget-friendly Loved by kids and adults Rich in calcium and protein No special equipment needed Ultimate comfort food
Notes & Tips
Mozzarella gives the best cheese stretch
Use garlic butter for extra flavor
Cook on low to medium heat so the cheese melts properly
Add a little butter on the outside for extra crispiness
Q & A
Q: Can I use brown bread? Yes, it works perfectly and is a bit healthier.
Q: Can I add extra ingredients? Yes, but the classic version tastes amazing with just 3 ingredients.
Q: Are these good for kids’ lunch boxes? Yes, best when packed fresh.
Q: How often can I make them? They’re best enjoyed in moderation — 2–3 times a week.
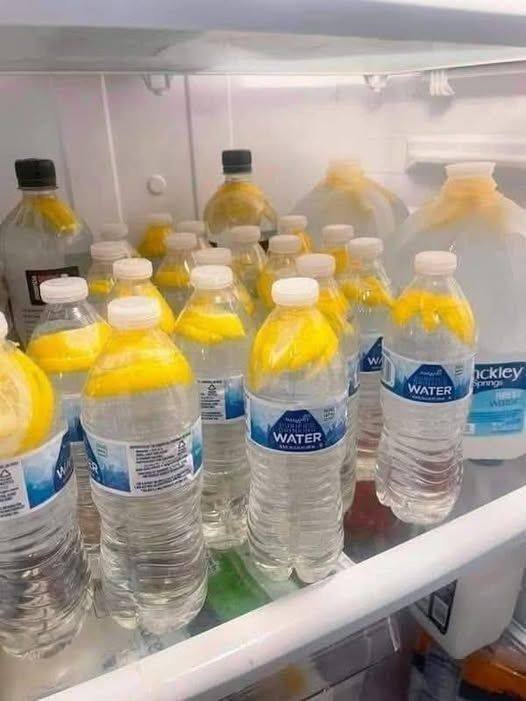
A refreshing, metabolism-supporting drink that helps reduce bloating, curb cravings, and support overall fat loss when paired with healthy habits. This simple ginger water is hydrating, soothing, and easy to prep for the whole week.
Description
Ginger water is a natural wellness drink made by infusing fresh ginger (and optional lemon) into water. It’s known for supporting digestion, reducing inflammation, easing bloating, and gently boosting metabolism — which can help with fat loss over time, especially in stubborn areas like the abdomen, arms, back, neck, and thighs when combined with balanced nutrition and movement.
Ingredients
1–2 inches fresh ginger root, peeled and sliced
1 liter (4 cups) water
½ fresh lemon, sliced or juiced (optional, but recommended)
Instructions
Prepare ginger Peel and thinly slice fresh ginger.
Boil water Bring water to a boil, add ginger, and simmer for 10–15 minutes.
Cool & strain Remove from heat, let cool slightly, then strain.
Add lemon (optional) Stir in lemon juice or add lemon slices.
Store Pour into bottles and refrigerate for up to 3 days.
Serve warm or cold.
Notes & Tips
Stronger flavor? Simmer longer or add more ginger
Great cold for summer, warm for digestion
Add a small drizzle of honey if needed (optional)
Shake before drinking if infused overnight
Servings
4 servings (1 cup each)
Nutritional Info (Per Serving – Approx.)
Calories: 5–10
Carbs: 1–2g
Fat: 0g
Protein: 0g
Sugar: 0g
WW Points: 0
Benefits
Supports digestion and gut health
Helps reduce bloating and water retention
Anti-inflammatory properties
May support metabolism and appetite control
Naturally detoxifying and hydrating
Caffeine-free and sugar-free
Q & A
Q: Does ginger water burn belly fat? Ginger water doesn’t burn fat on its own, but it supports fat loss by improving digestion, reducing bloating, and helping control appetite when paired with a healthy lifestyle.
Q: When should I drink it? Best times are morning on an empty stomach or between meals.
Q: How much can I drink daily? 1–3 cups per day is ideal.
Q: Can I drink it every day? Yes, most people can safely enjoy it daily.
Q: Who should avoid it? If you’re pregnant, on blood thinners, or have gallbladder issues, check with a healthcare professional first.
Walnuts or Almonds: ½ cup, chopped (optional for added texture)
Detailed Instructions
Hydrate the Oats: In a large mixing bowl, combine the 1 cup of rolled oats with the ⅔ cup of warm milk. Stir well and allow the mixture to sit for 10 minutes so the oats can soften and absorb the liquid.
Prepare the Fruit and Nuts: While the oats are soaking, peel and either grate or finely dice the 2 apples. If using walnuts or almonds, chop them into small pieces to ensure even distribution.
Create the Batter: Add the 2 eggs, 2 tablespoons of melted butter, and ½ teaspoon of vanilla extract to the soaked oats. Mix thoroughly until the eggs are fully incorporated. Fold in the prepared apples and nuts.
Fill the Molds: Lightly grease a silicone mold or muffin tin. Using a spoon, fill each cavity nearly to the top with the batter, as these bites do not rise significantly.
Bake: Preheat your oven to 180°C (350°F). Bake for 25–30 minutes until the tops are golden brown and the centers are firm.
Cool and Serve: Let the dessert cool in the mold for at least 5 minutes before removing. This helps the structure set, making them easy to grab as a portable energy snack.
Why This Works
Natural Sweetness: Grated apples provide moisture and sweetness without the need for refined sugar.
Satiety: The combination of fiber from the oats and protein from the eggs helps keep you feeling full and energized.


 Tips:
Tips: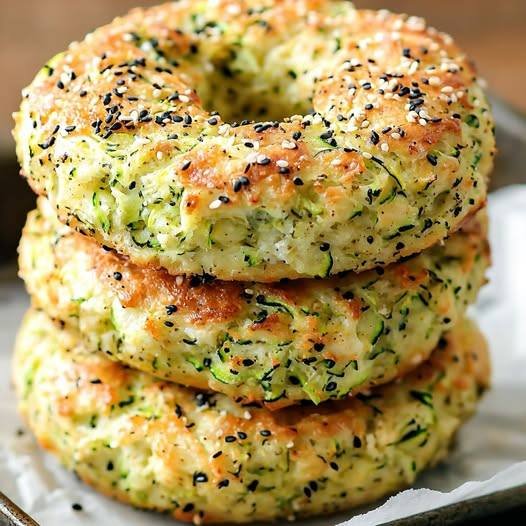
 Why they’re anti-inflammatory
 Ingredients (Makes 6 Bagels)
 Instructions
 Serving Ideas
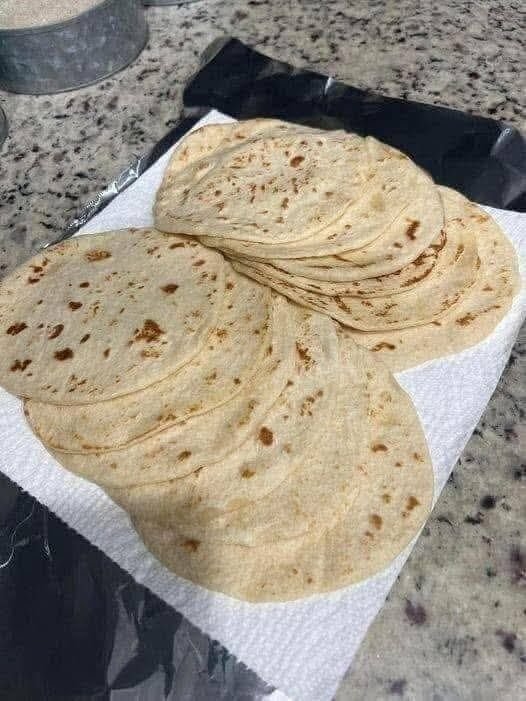


 Note: “Zero carb” is a common phrase, but eggs and dairy contain trace carbs. This recipe is very low carb (≈1g net carb per serving), not absolute zero.
 Supports low-carb & keto diets

 Nutritional Info (Approximate per cup)
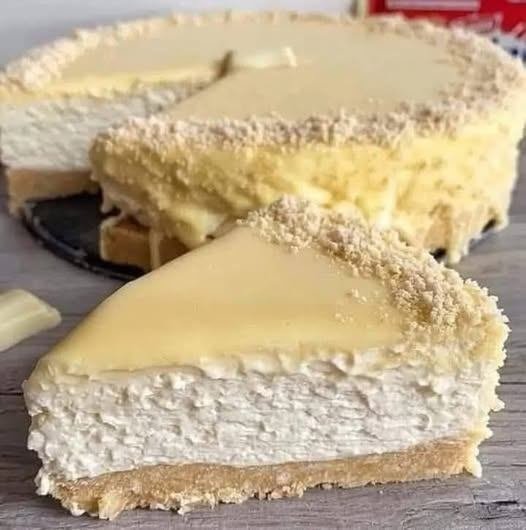

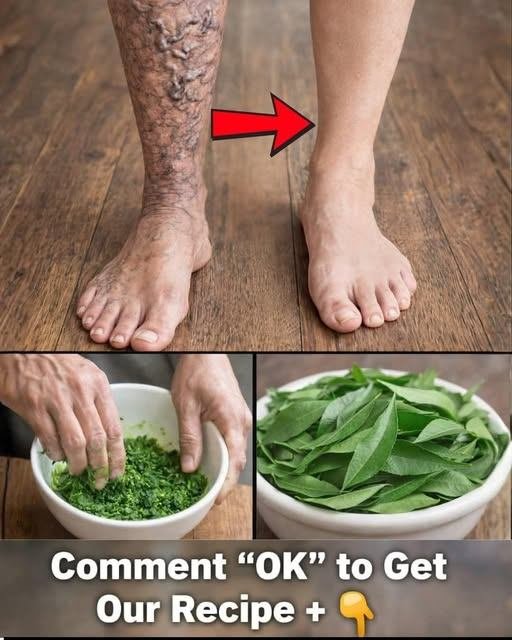
 Prepare the Leaves
 Boil
Boil Steep
Steep Strain & Serve
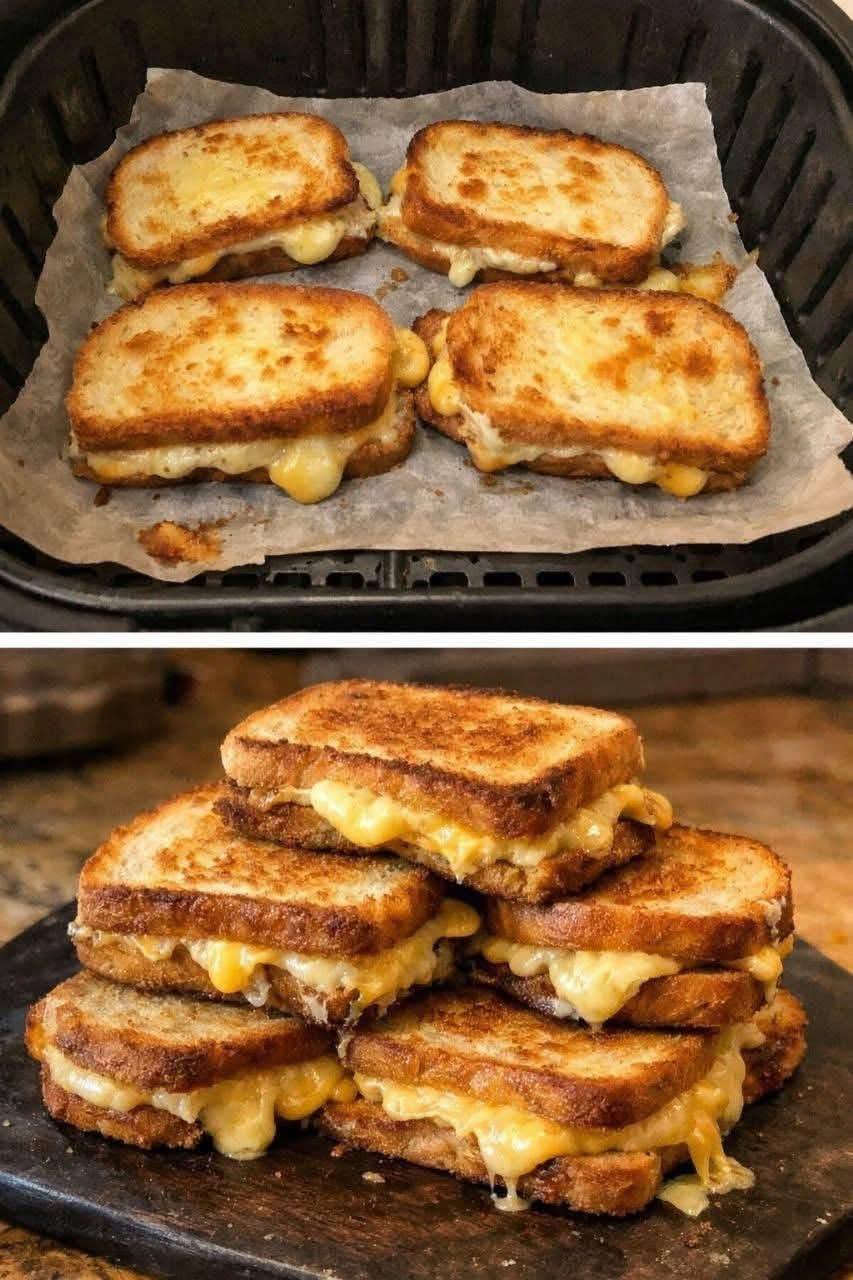
 Stronger flavor? Simmer longer or add more ginger
 Great cold for summer, warm for digestion
 Add a small drizzle of honey if needed (optional)
 Shake before drinking if infused overnight