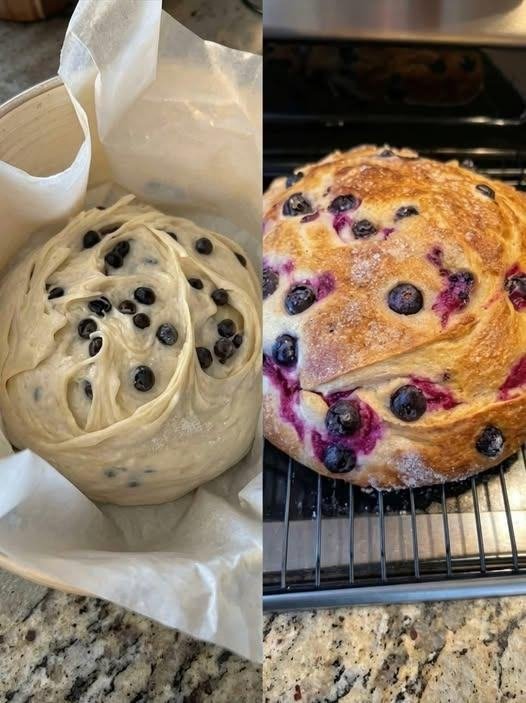
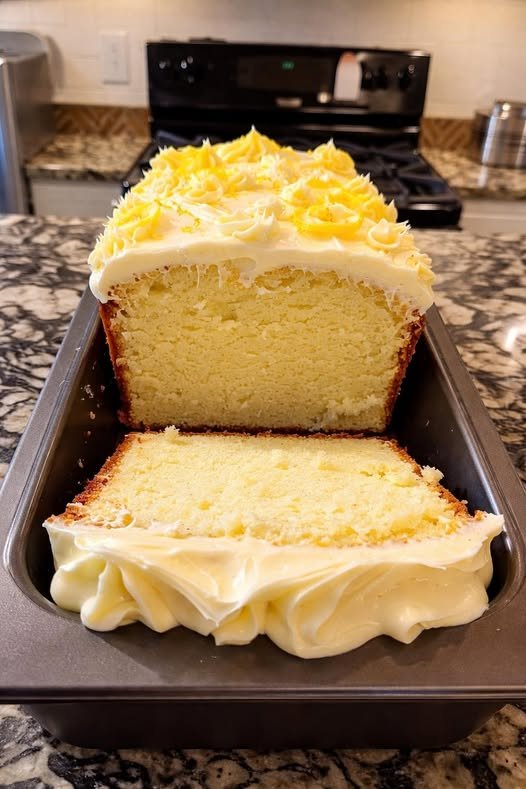
Blueberry Cream Cheese Loaf
A soft, tender loaf swirled with cream cheese and bursting with juicy blueberries. Lightly sweet, beautifully marbled, and perfect for breakfast, brunch, or a not-too-sweet dessert.
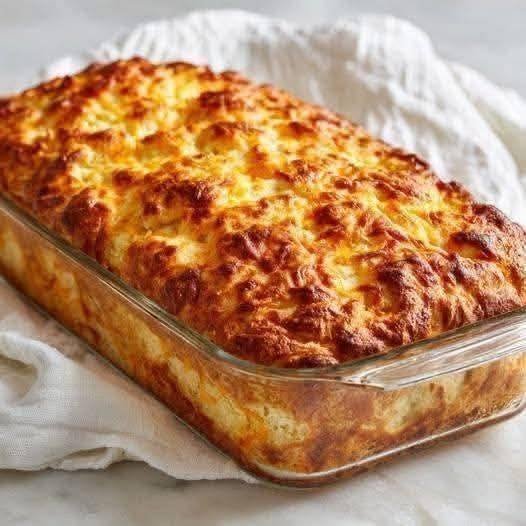
Description
This blueberry cream cheese loaf is moist and rich without being heavy. The cream cheese adds tang and silkiness, while blueberries create pockets of jammy sweetness. It bakes up golden on the outside with a pillowy crumb inside — sliceable, giftable, and freezer-friendly.
Servings
-
1 loaf (9×5 inch pan)
-
8–10 slices
Ingredients
Loaf Batter
-
1 ½ cups (190g) all-purpose flour
-
1 ½ tsp baking powder
-
¼ tsp salt
-
½ cup (115g) unsalted butter, softened
-
¾ cup (150g) granulated sugar
-
2 large eggs, room temperature
-
½ cup (120ml) milk or buttermilk
-
1 tsp vanilla extract
-
1 cup fresh or frozen blueberries
-
1 tbsp flour (for coating blueberries)
Cream Cheese Swirl
-
4 oz (115g) cream cheese, softened
-
¼ cup (50g) sugar
-
1 egg yolk
-
½ tsp vanilla extract
Instructions
-
Preheat oven to 175°C / 350°F.
Line a loaf pan with parchment paper. -
Make the cream cheese swirl
Beat cream cheese, sugar, egg yolk, and vanilla until smooth. Set aside. -
Prepare dry ingredients
Whisk flour, baking powder, and salt. -
Cream butter & sugar
Beat until light and fluffy (2–3 minutes). -
Add eggs & vanilla
Beat in eggs one at a time, then vanilla. -
Combine
Alternate adding dry ingredients and milk, starting and ending with dry. Mix just until combined. -
Fold in blueberries
Toss blueberries with 1 tbsp flour, then gently fold into batter. -
Assemble
-
Spread half the batter into the pan
-
Dollop cream cheese mixture
-
Add remaining batter
-
Swirl gently with a knife
-
-
Bake
Bake 55–65 minutes, until a toothpick comes out mostly clean. -
Cool
Rest 15 minutes in pan, then cool completely on a rack.
Notes & Tips
-
Frozen blueberries: Use straight from freezer (don’t thaw)
-
Prevent sinking: Flour-coating blueberries helps
-
Extra swirl: Double the cream cheese mixture if you love it rich
-
Golden top: Tent loosely with foil if browning too fast
-
Storage:
-
Room temp: 1 day
-
Fridge: up to 5 days
-
Freezer: up to 2 months (wrapped tightly)
-
Nutritional Info (per slice, approx.)
-
Calories: 280–320 kcal
-
Carbs: 35g
-
Fat: 14g
-
Protein: 5g
-
Sugar: 18g
(Values vary by brands and slice size)
Benefits
-
Blueberries: High in antioxidants & fiber
-
Cream cheese: Adds calcium and satiety
-
Lower sweetness: Not overly sugary — great for breakfast
-
Versatile: Works as loaf, muffins, or mini breads
Q & A
Q: Can I make this into muffins?
A: Yes! Bake at 175°C / 350°F for 20–25 minutes.
Q: Can I use Greek yogurt instead of milk?
A: Absolutely — thin it slightly with water if very thick.
Q: Why did my loaf crack on top?
A: Totally normal and desirable — it means a good oven spring.
Q: Can I reduce sugar?
A: Yes, reduce by up to ¼ cup without affecting texture much.


 Optional add-ins:
 Microwave Method (Fastest)