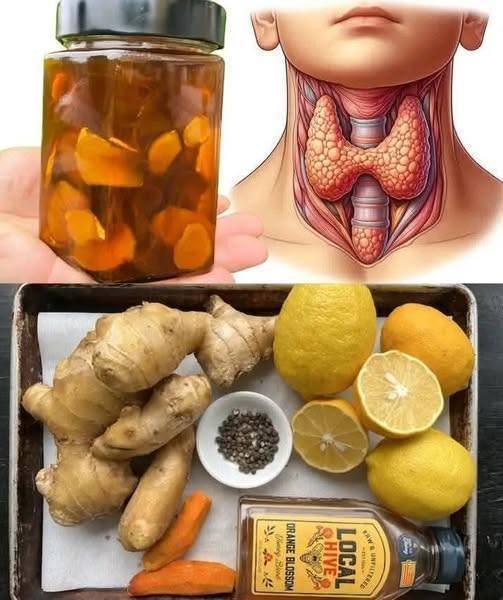
Turmeric & Ginger Wellness Soak
This formula creates a potent concentrate that can be added to warm water or tea to help reduce inflammation throughout the body.
Ingredients
-
1 cup Raw Honey: Preferably local, raw, and unfiltered.
-
4–5 inches Fresh Ginger Root: Sliced or grated.
-
3–4 inches Fresh Turmeric Root: Sliced or grated (or 2 tablespoons high-quality turmeric powder).
-
2 Whole Lemons: Sliced thinly or juiced.
-
1 tsp Black Peppercorns: Whole or cracked (essential for helping the body absorb the curcumin in the turmeric).
Instructions
-
Prepare the Roots: Scrub the ginger and turmeric thoroughly. You don’t necessarily need to peel them if they are organic, but slicing them thinly increases the surface area for the “soak”.
-
Layer the Jar: In a clean glass quart jar, layer the sliced ginger, turmeric, and lemons.
-
Add Activators: Add the black peppercorns to the jar.
-
The Honey Soak: Pour the raw honey over the ingredients until they are completely submerged.
-
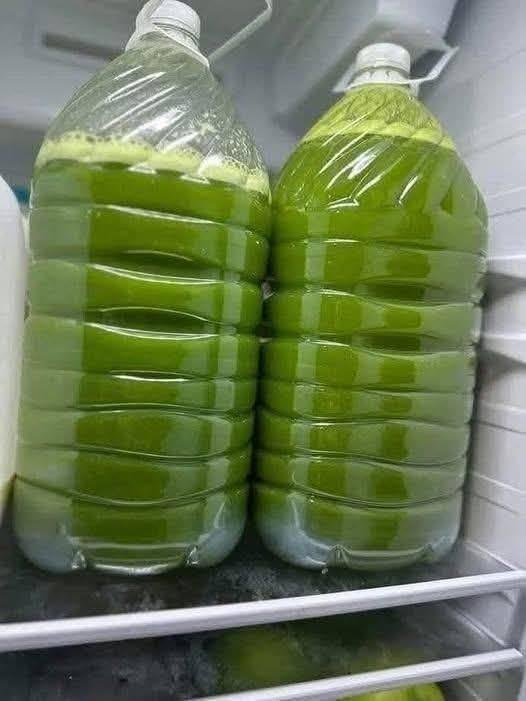
The Infusion: Close the jar tightly and let it sit on your counter for 24 hours. The honey will draw out the juices from the lemon and roots, turning into a thinner, potent syrup.
-
Store: After the initial 24 hours, move the jar to the refrigerator. It will keep for several weeks.
How to Use It
-
The Tonic: Add 1 to 2 tablespoons of the honey syrup (and a few slices of the ginger/lemon) to a mug of warm (not boiling) water.
-
The Timing: Many find it beneficial to drink this first thing in the morning or before bed to support the body’s natural anti-inflammatory processes.
A Peer-to-Peer Note on Health
While turmeric and ginger are fantastic for reducing systemic inflammation, thyroid health is often tied to specific minerals like iodine, selenium, and zinc. If you are experiencing symptoms like extreme fatigue, sudden weight changes, or hair loss, it’s a good idea to have a simple blood test with a doctor to check your actual hormone levels.


 Roast uncovered at the end for caramelization.
 Rich in Beta-Carotene
 Antioxidant Boost
 Fiber-Rich
 Natural Sweetness

 Ingredients
 How to Prepare
 Benefits (Realistic & Safe)