Italian Croissants Recipe

Cornetti: the delicious recipe for making soft, fragrant Italian croissants like the bars

Cornetti (pronounced kr-neh-tee) is a delicious, sweet recipe for making Italian croissants. People usually enjoy at breakfast or even as a snack together with a cup of coffee or cappuccino. The Italian word cornetto means “little horn” in English and it stands for are soft leavened brioches made with a lemon and vanilla scented dough.

Said cornetto in the singular, it is a delicious and fragrant recipe like those you can find in the so-called Italian bars (café). You can enjoy a cornetto plain or filled with creams and fruit jams.

With a shiny surface, Italian croissants are made with genuine, simple ingredients such as flour, eggs, milk, butter and sugar. Thanks to the quick puff pastry technique, it is possible to save precious time, obtaining not too sweet nor buttery treats.

Italian cornetti are also called 8-ply croissants precisely because they are made up of eight layers of dough overlapped and stuffed with a delicate cream of butter and sugar. In this way you will avoid having to make the classic folds. The cream of butter should be very soft but not liquid, otherwise it will come out of the sheets, ruining the croissants.

Once you have the triangles of brioche dough, you can leave them empty or fill them with jams, custard or a chocolate spread. In any case, Italian croissants will be delicious and irresistible, the perfect treat to start the day in the best possible way.

Cornetti vs. Croissants

Cornetti are the Italian version of the classic French croissants. Cornetti are as soft as a brioche, but less buttery and rich than croissants yet denser and sweeter.

Another difference is that croissants are often flavored with vanilla and the grated peel of lemons or oranges, while typical French ones are not.

Tips for making Italian Croissants

You can flavor the dough with grated orange zest, cinnamon, vanilla, lemon or orange blossom.

Use high-quality ingredients for this recipe.

How to store Cornetti

Italian croissants can be stored at room temperature, in a special food bag, for 2-3 days. Before serving, heat them for a few minutes in the oven.

Can you freeze Cornetti?

You can also freeze baked or raw cornetti before the second leavening. Arrange them on a baking sheet, store them in the freezer and transfer them to plastic bags once solid. Thaw them at room temperature for 2 to 3 hours, then brush an egg yolk on top and bake cornetti as directed.

Ingredients:

FOR THE LEAVENING
  • FLOUR 0: 70 g
  • WATER: 70 g
  • FRESH BREWER’S YEAST: 15 g
FOR THE DOUGH
  • MANITOBA’S FLOUR: 230 g
  • FLOUR: 230 g
  • FRESH WHOLE MILK: 180 g
  • EGGS: 2
  • GRANULATED SUGAR: 100 g
  • BUTTER, SOFTENED: 60 g
  • LEMON, ZESTED: 1
  • VANILLA EXTRACT: 1 tsp
  • FINE SALT: 8 g
FOR THE BUTTER CREAM
  • BUTTER: 70 g
  • GRANULATED SUGAR: 70 g
FOR BRUSHING AND DECORATING
  • EGG YOLK: 1
  • MILK
  • POWDERED SUGAR
How to make Cornetti Italian Croissants

Step 1

Prepare a leaven by mixing the flour with the water in which you have dissolved the brewer’s yeast. Double the volume, then add the remaining flour.

Step 2

Also combine all the other ingredients: eggs, sugar and milk. Work the dough and, when it takes on consistency, start incorporating the soft butter, a few pieces at a time, the salt and finally the flavorings.

Step 3

Work the dough until it is smooth and stringed (possibly with the stand mixer), form a ball and let it rise for 2-3 hours, until doubled in volume.

Step 4

When the dough has doubled in volume, it is ready to be used.

Step 5

Divide the dough into 8 equal pieces.

Step 6

Shape each of them into balls and let them rest for 10 minutes.

Step 7

Partially roll out each ball with a rolling pin on a lightly floured surface. Let rest for another 10 minutes.

Step 8

Roll out the sheets again until thin and as large as a flat plate.

Step 9

Spread the butter cream and sugar on each sheet.

Step 10

Overlap one sheet on top of the other after spreading the cream on the one below.

Step 11

Place the last sheet that will obviously not be brushed.

Step 12

Let it rest for 10 minutes, then seal the edges well and roll out the 8 sheets with a rolling pin until they are a few mm thick.

Step 13

Cut the resulting circle into quarters using a pastry cutter wheel.

Step 14

Divide each quarter into 3 parts to get 12 triangles.

Step 15

Make a small cut at the base of each triangle, then roll it tightly until you get a crescent shape.

Step 16

Place the Italian croissants on a dripping pan, lined with parchment paper, and let rise until doubled in volume, covered with cling film.

Step 17

When they are swollen, the croissants are ready to be baked

Step 18

Brush the cornetti with the egg yolk, beaten with a drop of milk.

Step 19

Bake the cornetti at 200°C/390°F for about 20 minutes. Take them out of the oven and let them cool.

Step 20

Sprinkle the Italian croissants with a little powdered sugar.

Step 21

Serve and enjoy cornetti.


Syn Free Spinach Chicken Recipe

Syn Free Ricotta Spinach Topped Chicken is the ultimate family meal. Tender Chicken breasts over a rich tomato sauce topped with garlicky ricotta and spinach. Yum!!

Ingredients:

  • 4 Skinless/Boneless Chicken Breasts, raw (approx 160g/5.6oz per breast)
  • salt and black pepper
  • cooking oil spray
for the tomato sauce
  • 1 onion, diced
  • 1 clove of garlic, crushed
  • pinch of mixed Italian herbs
  • 1 cup (240ml) of crushed tomatoes (or passata)
  • 1 tbs of tomato paste
  • 1 cup (240ml) of chicken stock
  • for the ricotta and spinach
  • 2 cloves of garlic, crushed
  • 3 large handfuls of spinach, roughly chopped
  • 270g/9.5oz of ricotta – 3 HEa’s
  • 15g of parmesan – 1/2 HEa
  • 25g of mozzarella – 1/2 HEa
  • 1 egg

Instructions:

  1. Place the chicken breast on a chopped board, cover with cling film, and flatten down with a meat mallet/tenderizer, season both sides with salt and black pepper.
  2. Spray a frying pan over a medium high heat with some cooking oil spray, once hot, add the chicken and brown till lightly golden on both sides. Remove and set aside.
For the tomato sauce:
  1. Spray the pan with some more cooking oil spray, add the onion and garlic and fry for a few minutes to soften.
  2. Add the crushed tomatoes, mixed herbs, tomato paste and stock, bring to a boil and reduce heat and simmer until the sauce reduces down and thickens.
  3. Add this to an oven proof dish and spray all across the bottom. Then place in the chicken breast.
For the ricotta spinach:
  1. Wipe the frying pan clean and spray with some more cooking oil spray.
  2. Add the spinach and garlic and fry until the spinach just starts to wilt.
  3. Remove from heat, add in the ricotta until all combined and then stir in the egg.
  4. Spoon this over the top of the chicken.
  5. Crumble the parmesan and mozzarella together and loosely scatter over the top.
  6. Preheat oven to 180c/350f
  7. Cover over the dish with foil and bake for about 20 mins, remove foil then continue to bake for another 10-15 mins, until the cheese on top has all melted and is lightly golden and chicken is cooked through.
  8. Serve and enjoy!!

Notes:

This recipe is gluten free, Slimming World and Weight Watchers friendly

Extra Easy – 1 HEa per serving

Original/SP – 1 HEa per serving

WW Smart Points – 6 per serving

suitable for freezing

Nutritional Info:

Yield:4

Serving Size: 1

Calories385TotalFat12.7gSaturatedFat7.6gCholesterol88mgSodium497mgCarbohydrates12.4gFiber2.3gSugar5.1gProtein53.3g


Traditional Irish Beef Guinness Stew

Traditional Irish Beef Guinness Stew Recipe INGREDIENTS For Traditional Irish Beef Guinness Stew 6 ounces bacon ,diced 2 pounds beef chuck 3 tablespoons all-purpose flour 2 medium-large yellow onions ,chopped 3 cloves garlic ,minced 4 medium firm ,waxy potatoes (e.g., Yukon Gold), cut in 1-inch pieces 2 large carrots ,chopped in 1/2 inch pieces 2 ribs celery ,chopped in 1/2 inch pieces 1 large parsnip ,chopped into 1/2 inch pieces 1 bottle (1 pint or 16 ounces) … Read more

Cinnamon Apple Cake Recipe

The harmonious blend of cinnamon and apple is truly a match made in culinary heaven. While each stands strong on its own, together they create an iconic flavor profile known and loved as apple-cinnamon. This pairing, accompanied by the subtle crunch of walnuts, crafts a delightful essence for a delightful everyday cake. Ingredients for Cinnamon … Read more

Easy Homemade Artisan Bread

Ingredients for Easy Homemade Artisan Bread 3 cups warm water 1 1/2 tsp. granulated yeast 1 1/2 tsp. Kosher or other salt 6 1/2 cups all-purpose unbleached flour optional cornmeal pizza peel Instructions forEasy Homemade Artisan Bread 1. In a very large bowl, combine the flour, baking powder, and salt. 2Add water and mix until … Read more

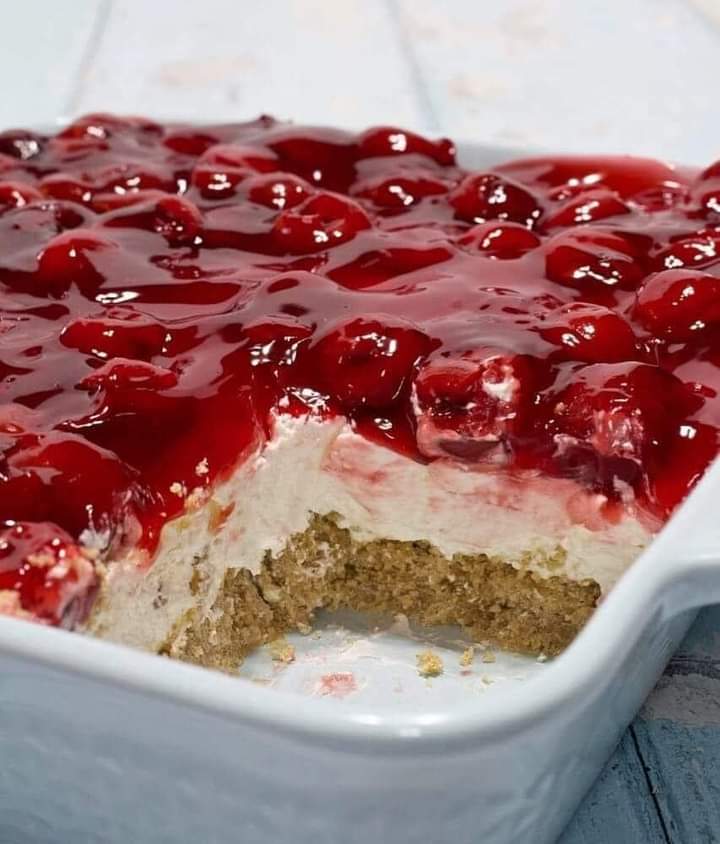
Classic Cherry Delight Recipe

This Classic Cherry Delight is so easy to make and never fails to impress. It comes together in just minutes and is made of three simple layers. If you want a dessert that’s not overly sweet yet delicious, this is it!   

This Classic Cherry Delight takes me back to my high school days. My mom made this often to serve with lunch after church on Sundays. Not only is it super easy to make, but it’s not heavy or super sweet. It’s just perfect!  

 PREP TIME: 30 MINS

TOTAL TIME: 30 MINS

Yield: 9 SERVINGS

INGREDIENTS:

CRUST
  • 7 tablespoons unsalted butter
  • 1 1/2 cups graham cracker crumbs (about 9 whole crackers)
  • 3 tablespoons granulated sugar
FILLING
  • 8 ounces cream cheese, softened
  • 1 cup powdered sugar
  • 1 teaspoon pure vanilla extract
  • 1 container cool whip, 8 ounces
  • 1 can cherry pie filling, 21 ounces

INSTRUCTIONS:

CRUST
  1. Add the butter to a medium bowl. Microwave for 30 seconds or until melted.
  2. Add the graham cracker crumbs and sugar and mix well to combine.
  3. Pat the crumb mixture firmly into the bottom of a sprayed 8 x 8 baking dish. Set aside.
FILLING
  1. Add the cream cheese to a large bowl.
  2. Mix with a mixer until the cream cheese of smooth and free of any lumps.
  3. Add the powdered sugar and vanilla and mix well.
  4. Add the cool whip and mix until the cool whip and cream cheese are combined, but don’t overmix.
  5. Spread the filling evenly over the graham cracker crust, using a spoon or offset spatula.
  6. Spoon the cherry pie filling over the top and carefully spread it evenly over the filling.
  7. Refrigerate for at least 2 hours before serving. I like to leave it overnight.
  8. Refrigerate leftovers.

NOTES

Tip from reader Jody…This is a great recipe. To remove easily, put hot water in the sink. Just enough so the bottom and a tiny bit of the sides of the pan are covered. Hold for under a minute and that will release the crust and it came out of the pan and cut wonderfully. Make sure the water is very hot.”


Instant Pot Ham and Bean Soup Recipe

Smoky ham and white bean soup made easy in the Instant Pot.

I think my favorite thing to make in my Instant Pot so far, has been soup. I’ve made a lot of soups and my pressure cooker is my go-to for making chicken stock (or bone broth, if you prefer). Instant Pot Ham and White Bean Soup is so easy and so good. We love it.

I used to never make soups from dried beans because I was always turned off by having to soak them overnight. Don’t have to do that with the Instant Pot. I didn’t and they were perfectly tender. I wanted cannellini beans, but couldn’t find dried, so I used Great Northern beans, which is probably the preferred white bean to use anyway. You need a one-pound bag of beans.

I love ham shanks for soups, they are meaty and add so much flavor. You could use a smoked ham hock but you won’t get any meat to shred for the soup. You’re better off with shanks or a meaty ham bone with some extra meat added. Just sayin’

I flavored the soup a couple different ways, each time I made it. I like fresh rosemary and thyme (or dried) a lot. I also like herbs de Provence. Whatever you got and like. And a bay leaf. That’s it. Well, along with the onion, celery, carrot and garlic, that’s it.

Prep Time: 10mins

Cook Time: 35mins

Bring to pressure/release: 45mins

Total Time: 1hr 30mins

Course: Soup

Cuisine: American

Servings: 8 servings 

Ingredients:

  • 1 pound dried Great Northern white beans, picked over and rinsed
  • 1 tablespoon olive oil
  • 1 small yellow onion, diced
  • 2 ribs celery, chopped
  • 1 medium carrot, peeled and chopped
  • 3 cloves garlic, finely chopped
  • 2 tablespoons fresh rosemary and thyme, minced or 2 teaspoons dried, or 2 teaspoons herbs de Provence
  • 1 bay leaf
  • 2 pounds meaty, smoked ham shanks
  • 8 cups water
  • 2 sprigs parsley

Instructions:

  1.  Turn Instant Pot on sauté setting and heat olive oil in insert. I use the medium heat setting for sautéing. Add onion, celery and carrots and sauté until starting to soften, a few minutes. Add garlic, stir a few seconds until fragrant, then add herbs and bay leaf, stir and turn off sauté function.
  2. Add the dried beans to the pot along with the ham shanks. Pour in 8 cups of water and combine gently. Toss in 2 sprigs of parsley.
  3. Close lid and seal pressure cooker. Cook on high pressure and set timer for 35 minutes. It will take about 25 minutes to reach pressure and then the timer will start. When finished cooking, let pressure naturally release for 20 minutes.
  4. Manually release any remaining pressure, carefully open pot. Remove ham shanks to cutting board and shred/cut meat into bite-sized pieces. Add back to soup and season with kosher salt and black pepper to taste. Ladle into bowls and serve with a little hot sauce on the side.
Recipe Notes and Tips
  • I do not presoak the beans and never have a problem with them cooking all the way. Use the manual pressure cook setting, set at high pressure. Do not use the bean or soup setting. I can not stress this enough.
  • Make sure to use a natural release of at least 20 minutes before you open the pot.
  • If the beans are not tender, remove the ham shanks and cook the beans under high pressure an additional 5 to 10 minutes.
  • The soup will thicken upon standing as well as after refrigeration. I like it on the broth-y side but also like it after it sits for awhile and thickens.
  • Use a ham bone, either leftover or shanks, to cook with the beans to make the best flavored broth. Add any leftover ham not on the bone at the end.
  • Total time to make this soup is about an hour and a half. It takes some time to come to pressure and then the natural release time, but it’s all hands off and easy.
  • If the beans aren’t tender enough, remove the ham shanks and cook for another 5 minutes under high pressure, release pressure manually and continue with recipe.
Nutritional Info:

Calories: 215kcal | Carbohydrates: 37g | Protein: 14g | Fat: 2g | Saturated Fat: 1g | Polyunsaturated Fat: 1g | Monounsaturated Fat: 1g | Sodium: 35mg | Potassium: 1090mg | Fiber: 9g | Sugar: 2g | Vitamin A: 1355IU | Vitamin C: 2mg | Calcium: 156mg | Iron: 6mg

Strawberry Bomb Recipe

Delicious and Easy Strawberry Bombs Recipe to Satisfy Your Sweet Tooth

Are you in the mood for something sweet, fruity, and easy to make? Then you’re in the right place! In this article, we’ll be sharing our favorite Strawberry Bombs recipe with you. Not only are they incredibly delicious, but they’re also quick and easy to make. So, let’s get started!

INGREDIENTS:

  • 300g (2 cups) flour
  • 1 egg
  • 45g (1/4 cup) sugar
  • pinch of salt
  • 7g dry yeast
  • 140ml (3/5 cup) warm milk
  • 40g (1/4 cup) softened butter
For decoration:
  • Whipped cream
  • Strawberries, chopped
  • Powdered sugar

METHOD:

  1. In a medium bowl combine sugar, yeast, and milk and stir to dissolve.
  2. Whisk in egg. Add flour and salt, and start to mix the dough with a spatula. Then continue to knead it with your hands until you receive an elastic dough.
  3. Add softened butter and continue to knead until butter is fully incorporated into the dough.
  4. Form a ball from the dough, cover with a kitchen cloth or plastic wrap, and allow to rise for an hour.
  5. Divide the dough into 8 parts and roll each into a ball. Cover and let sit for 30 minutes.
  6. Flatten each ball a bit and roll it again into a ball. Cover and let sit for another 30 minutes.
  7. Fry balls in hot oil on low for 2-3 minutes on each side.
  8. Let cool a bit and cut in half lengthwise, like a burger bun.
  9. Top one half with whipped cream and chopped strawberries, close with the other half, sprinkle with powdered sugar and serve.
Second recipe:

Here’s a recipe for strawberry bombs, a delicious and simple dessert that’s perfect for any occasion:

Ingredients:

  • 1 pound fresh strawberries, washed and hulled
  • 8 oz cream cheese, softened
  • 1/2 cup powdered sugar
  • 1 tsp vanilla extract
  • 1 cup graham cracker crumbs
  • 1/4 cup unsalted butter, melted
  • Whipped cream, for topping (optional)

Instructions:

  1. Preheat your oven to 350°F.
  2. In a small bowl, combine the graham cracker crumbs and melted butter until well blended.
  3. Using a spoon, press the mixture into the bottom and sides of a muffin tin, making sure to press down firmly.
  4. Bake for 5-7 minutes, or until golden brown. Remove from the oven and let cool.
  5. In a mixing bowl, beat the cream cheese, powdered sugar, and vanilla extract until smooth.
  6. Using a piping bag or a spoon, fill each graham cracker crust with the cream cheese mixture.
  7. Cut the strawberries in half and place one half on top of each cream cheese-filled crust.
  8. Chill the strawberry bombs in the fridge for at least 30 minutes.
  9. Before serving, you can add a dollop of whipped cream on top of each strawberry bomb.
  10. Your strawberry bombs are ready to serve! Enjoy their sweet and tangy flavors!

Tips:

  • Make sure the cream cheese is softened before mixing it with the powdered sugar and vanilla extract. This will make it easier to mix and create a smoother consistency.
  • You can also try adding different toppings to your Strawberry Bombs, such as chocolate chips or chopped nuts.
  • If you don’t have a piping bag, you can use a plastic bag with the corner cut off instead. This will work just as well and is a great alternative.

Strawberry Bombs

Ingredients for Strawberry Bombs 300 g (2 cups) flour 1 egg 45 g (1/4 cup) sugar pinch of salt 7g dry yeast 140 mL (3/5 cup) hot milk 40 g (1/4 cup) softened butter For the decoration: Whipped cream INSTRUCTIONS for Strawberry Bombs In a medium bowl, combine sugar, yeast, and milk and stir to … Read more

Brioche Donuts Recipe

This recipe for brioche donuts is decadent and a true treat. If you’re looking to flex your brioche-making skills as well as get more comfortable with frying, this is the recipe to take on. You can do any flavor of jam, curd or pastry cream you want to fill, or leave them plain!

Homemade brioche doughnuts — heavenly fried brioche donuts that will send you into outerspace from pleasure

PREP TIME: 16 hrs

COOK TIME: 30 mins

TOTAL TIME: 16 hrs 30 mins

COURSE: Baking

CUISINE: American, Brioche, Donuts, Fried Foods

SERVINGS: 20 doughnuts

CALORIES: 201 kcal

EQUIPMENT:

KitchenAid with dough hook

Candy thermometer for frying

Pastry bag with small tip for filling the doughnuts

INGREDIENTS:

  • 1 packet of active dry yeast 7g hydrated with ¼ cup of 110-120F water and ½ teaspoon sugar
  • 1 cup water
  • 4 cups bread flour more as needed
  • ¼ cup caster sugar
  • 2 teaspoons fine sea salt
  • 4 eggs
  • ½ lemon zest
  • ½ cup unsalted butter, cubed
  • 64 oz neutral oil for frying

for the filling:

  • 1 cup of any store bought jam you want! or
  • pastry cream or
  • citrus curd
  • more caster sugar for tossing

INSTRUCTIONS:

Making the brioche dough

  1. Mix yeast packet with the warm water and sugar, and let the foam double in size.
  2. Mix the flour, sugar, water, activated yeast, lemon zest, salt and eggs into the bowl of an electric mixer with a dough hook attachment and mix on medium speed for 1-2 minutes, until it’s all combined. Then turn up the speed to medium high and let it run for about 5 minutes, or until the dough starts coming away from the sides and forms a ball. Turn off the mixer and let the dough rest for a minute. Slowly add the butter to the dough, about 25g at a time. Once it is all incorporated, mix on high speed for 5min until the dough is glossy, smooth and very elastic when pulled.
  3. Cover the bowl with saran wrap and leave to proof in the bowl until it has doubled in size – about 1-2 hours.
  4. Punch down the dough – then re-cover the bowl and put into the fridge to chill overnight.
  5. The next day, take the dough out of the fridge and cut it into equal, palm size pieces (you should get about 18).
  6. Roll them into smooth, taut, tight buns and place them on a floured baking tray, leaving plenty of room for them – so they don’t stick together while they proof.
  7. Cover lightly with Saran wrap and leave out in a 75F room for about 4hr, or until about doubled in size.

Frying and finishing

  1. In a big cast iron pot, prepare the deep fryer; fill it up to the halfway point with the oil.
  2. Heat the oil to 350F, then carefully remove the doughnuts from the tray by sliding a floured pastry scraper or fish spatula underneath them, taking care not to deflate them, and put them into the oil.
  3. Don’t overcrowd the fryer – do two to three per batch, depending on the size of your pan.
  4. Remove from the oil and place on a paper towel, then toss them in a bowl of caster sugar while still warm. Set aside to cool before filling.
  5. To fill the donuts, make a hole in the white strip in between the brown tops/bottoms.
  6. Fill a piping bag with jam (or any other filling you see fit!) and pipe into the doughnut until a little bit peeks out on top.

NOTES:

I’ve included volume ingredients here but BAKING TURNS OUT BETTER WHEN YOU MEASURE IN WEIGHT

NUTRITIONAL INFO:

Serving: 1donutSodium: 305mgCalcium: 14mgVitamin C: 2mgVitamin A: 251IUSugar: 11gFiber: 1gPotassium: 53mgCholesterol: 33mgCalories: 201kcalSaturated Fat: 1gFat: 6gProtein: 4gCarbohydrates: 32gIron: 1mg

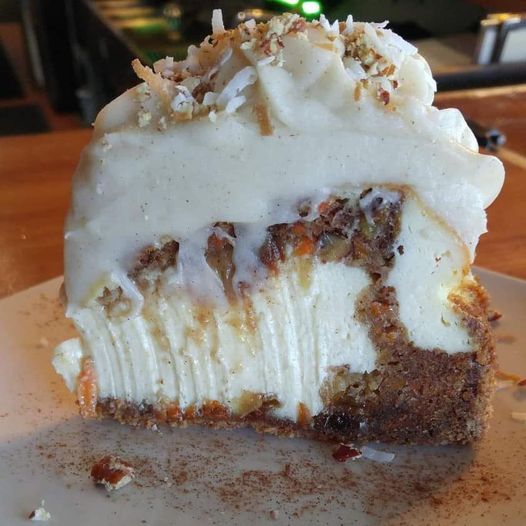
CARROT CHEEES CAKE

CARROT CHEEES CAKE RECIPE Ingredients for CARROT CHEEES CAKE 1 1/2 cups graham cracker crumbs 1/4 cup granulated sugar 1/2 cup unsalted butter, melted For the Cheesecake Filling: 24 ounces (3 packages) cream cheese, softened 1 cup granulated sugar 3 large eggs 1 teaspoon vanilla extract 1/4 cup sour cream 1/4 cup heavy cream For … Read more

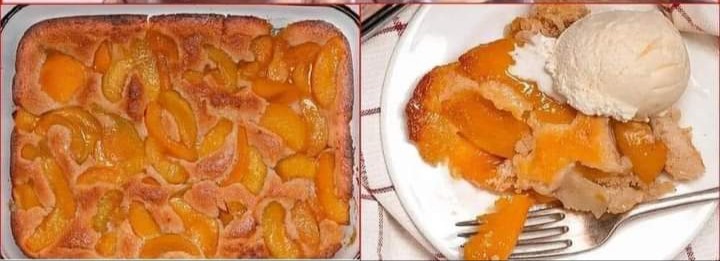
Peach Cobbler Recipe

Best Peach Cobbler Recipe Baking Tips Use ripe, fresh peaches for this easy cobbler recipe. Ripe peaches will deliver a sweet, juicy flavorful peach cobbler. See below for tips on how to ripen peaches more quickly. I used around 5 cups of peaches for my four ingredient peach cobbler. That was 8 medium peaches. Cut … Read more

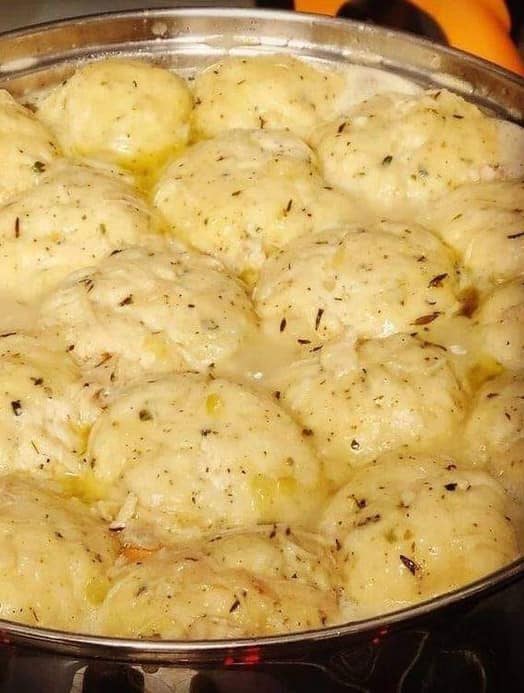
Fashioned Chicken and Dumplings

Fashioned Chicken and Dumplings   Ingredients For chicken soup: 6 tablespoons butter 1 cup chopped yellow onion 1 cup matchstick carrots 1 cup diced celery 1 pound chicken thigh, cut into 1-inch pieces 1 teaspoon salt 1/2 teaspoon dried thyme 1/2 teaspoon ground black pepper 4 garlic cloves (chopped) 3 tbsp all-purpose flour 6 cups … Read more

Flaky Apple Pie Bars

Flaky Apple Pie Bars Recipe Prep Time: 30 mins Cook Time: 1 hr Total Time: 1 hr 30 mins Servings: 12 Yield: 1 9×13-inch pan Ingredients For Flaky Apple Pie Bars 2 ½ cups all-purpose flour 1 teaspoon salt 1 cup shortening 1 egg yolk ½ cup milk 10 apples – peeled, cored and thinly sliced ½ cup light brown sugar ¼ cup white sugar ½ teaspoon ground cinnamon ¼ teaspoon ground nutmeg … Read more

Hamburger Steak with Mushroom Onion Gravy

Let the sizzle of this hearty hamburger steak cooking in the skillet call your family to the dinner table. Hamburger Steak with Mushroom Onion Gravy Ingredients for Hamburger Steak with Mushroom Onion Gravy 2 pounds ground chuck 2 tablespoons Worcestershire sauce 1 tablespoon prepared horseradish 2 teaspoons minced garlic 1/4 teaspoon salt 1/4 teaspoon ground black … Read more

Big Boys Fresh Strawberry Pie

Big Boys Fresh Strawberry Pie Recipe Ingredients: For the Pie Crust: 1 pre-made pie crust (or use your favorite homemade crust recipe) For the Strawberry Filling: 4 cups fresh strawberries, hulled and halved 3/4 cup granulated sugar 2 tablespoons cornstarch 1/2 cup water 1 teaspoon lemon juice Red food coloring (optional, for a more vibrant … Read more

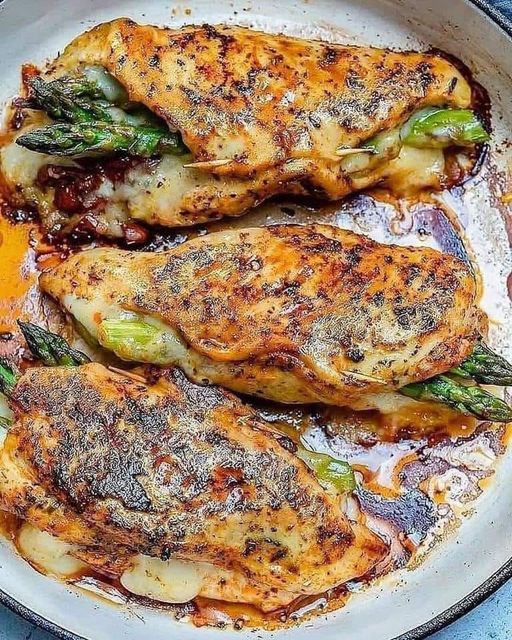
ASPARAGUS STUFFED CHICKEN BREAS

Greek Stuffed Chicken Breast with Asparagus Mediterranean-Style Stuffed Chicken Breast with Asparagus, Sun-dried Tomatoes, and Fresh Mozzarella Ingredients: 4 Boneless skinless chicken breasts Olive Oil 1 tsp. Italian seasoning mix 1 tsp. Garlic Powder 1 tsp. Smoked Paprika ½ tsp. Salt ¼ tsp. Cracked Pepper 1 Tbsp. Lemon zest 3 tsp. garlic – minced and … Read more

Lemon Garlic Butter Chicken Recipe

Lemon-Garlic Butter Chicken Recipe– If you are looking for an easy but delicious crock pot dinner idea, then this crockpot chicken thighs recipe is for you! The chicken thighs cook up tender and juicy in a buttery lemon garlic sauce. This chicken recipe is very easy to make in the crock pot and the flavor is outstanding. We guarantee your family will love this slow cooker chicken thighs recipe and put it on the family favorite rotation list! Serve the chicken thighs over a bed of cauliflower rice (ideal for keto or low carb diet) or rice with a salad and dinner is done. Hint, if you make rice (or cauliflower rice) in the Instant Pot, this crockpot chicken dinner gets crazy easy.

INGREDIENTS:

  • 6-8 boneless chicken thighs, skinless or with skin
  • Salt and pepper, to taste
  • 1 teaspoon garlic powder
  • 1 teaspoon onion powder
  • 1/2 teaspoon crushed red chili pepper flakes, or Cayenne (optional)
  • 1/2 teaspoon paprika
  • 4 garlic cloves, sliced or minced
  • 1 teaspoon Italian seasoning
  • 1/2 stick butter, diced
  • Zest of half a lemon
  • Juice of one lemon
  • 1/3 cup low sodium chicken broth
  • Chopped fresh parsley and lemon slices, for garnish

How To Make Chicken in the Crockpot:

  1. This crockpot chicken thighs recipe is SUPER easy to make. Simply place the chicken thighs in the slow cooker. Combine 1/3 cup chicken broth, lemon juice, and zest. Pour the broth over the chicken. Season the chicken with Italian seasoning, onion powder, garlic powder, paprika, crushed red chili pepper flakes, salt, and pepper. Top chicken with fresh minced garlic and diced butter. Cook on High for 3-4 hours.
  2. Once the chicken thighs are cooked, serve the chicken over white rice, pasta, cauliflower rice, mashed potatoes, zucchini noodles, or egg noodles.
  3. If you want a thinner sauce, add about 1/2 to 1 cup of water or chicken broth to the soup mixture.

Recipe tips for the crockpot chicken recipe:

  1. This chicken thighs recipe in the slow cooker is very accommodating and you can customize it to your taste.
  2. The chicken thighs is super quick to prep and the delicious garlic lemon butter herb sauce is to die for! Here are a few tips to make it even better!
  3. Try cooking the chicken over a bed of chunky cauliflower florets. This instantly turns the crockpot chicken thighs recipe into a one-pot dinner, and the cauliflower side is packed with flavor since it will soak up the fat and juices from the chicken thighs.
  4. If you’re not on a Keto or low carb diet, cook the crockpot chicken thighs over a bed of baby or new potatoes instead.
  5. If you want to give your crockpot chicken thighs dinner a zesty touch to brighten the flavor, add a dash of fresh lemon juice at the end of cooking.
  6. Make sure to use skinless chicken thighs. Chicken skin contains fat that will make the crockpot dish too greasy, especially when we use butter in the sauce.
  7. If you’re not fond of chicken thighs, go for skinless chicken breasts instead–They are lean and shred easily after being slow-cooked!
  8. Shredding chicken meat is also a great option. Simply remove the cooked chicken thighs from the crockpot and shred on a cutting board after removing the bone.
  9. Add chicken back to the crockpot and mix with the sauce to combine and reheat quickly before serving the crockpot chicken.

Directions:

1. To make this crockpot chicken recipe:

Place chicken thighs at the bottom of your slow cooker. Combine 1/3 cup chicken broth, lemon juice, and zest, and pour over chicken thighs. In a small bowl, combine Italian seasoning, onion powder, garlic powder, paprika, crushed red chili pepper flakes, salt, and pepper. Sprinkle the spice mix over the chicken thighs. Top with fresh minced garlic and diced butter.

2. Cover the crockpot and cook the chicken thighs for 3-4 hours on HIGH or 6-8 hours on LOW.

3. Sprinkle your crockpot chicken thighs dinner with chopped parsley and garnish with lemon slices. Serve hot with cauliflower rice, spiralized zucchini noodles, rice, pasta or quinoa. Enjoy! ❤️

What to serve with the crockpot chicken?

As said above, cauliflower rice or zucchini noodles are a great and healthy option, especially for those on low-carb/keto diets. This slow cooker chicken thighs recipe is also awesome on top of regular pasta or rice of course!

Garlic always fresh and intact for 1 year: only cooks know this trick in the kitchen

Garlic is a small, pungent, super savory ingredient that adds a punch of flavor to meat, vegetables, rice and so much more. Learn how to store garlic, whole, cloves or peeled, along with tips on how to buy and how to make it last longer.

Make the most of your garlic and preserve its flavor for longer with these tried and tested storage tips!

I don’t think there is any other ingredient that can be compared to the small but mighty flavor of fresh garlic. It’s incredibly savory with a strong, pungent aroma that transforms into a sweet flavor addition.

My family and I love the garlic-y flavor and I put it in just about everything. Which is why I always have extra on hand. Because of this, I thought it best to share my tried and true tips on how to store garlic properly, to make it last longer.

And if you love this, be sure to check out How to Peel, Cut & Mince Garlic and make Garlic Paste, too!

Learn how to store garlic, whole, cloves or peeled, along with tips on how to buy and how to make it last longer.

Prep Time: 15mins

Total Time: 15mins

Course: Meal Prep, Spice Blend

Cuisine: Asian, Indian, Mediterranean, Thai

Diet: Gluten Free, Vegan, Vegetarian

Servings: 12 cloves

Ingredients:

1 head garlic

Instructions:

Garlic can be stored in a number of different ways – as a whole bulb, individual cloves, peeled or even as garlic paste. Follow any of the methods below, depending on your needs.

How to Store Fresh Garlic

Whole Bulb: Store the whole bulb in a cool, dark, well-ventilated cupboard. Garlic will last the longest stored in a temperature between 60 – 65 degrees F. Because of this, I keep it in a cupboard away from the stove and near the floor. The garlic should last a few months.

Individual, Unpeeled Cloves: Store these right alongside the whole bulbs of garlic in your cupboard. Use within 10 days.

How to Store Peeled Garlic

Break apart the clove and peel away the thin, papery skin. Place the peeled cloves in an airtight container or plastic storage bag, seal tight and store in the fridge. Use within 5-7 days.

How to Store Garlic Paste

To make garlic paste: Peel the entire head of garlic and slice off the stem ends. Place in a blender or food processor with 1 Tablespoon olive oil and blend until smooth, scraping down the sides as needed. Place in an airtight container and store in the fridge to use within 1 week.

How to Freeze Garlic

Whole Heads and Individual, Unpeeled Cloves: Place the garlic in a freezer safe plastic storage bag, push out all the air, seal tight, label, date and freeze. The garlic should last indefinitely.

Peeled Cloves: Spread the individual cloves out on a small baking sheet, cover with plastic wrap and freeze for 1 hour. Wrap the frozen cloves in foil, then place in a freezer safe plastic storage bag, seal tight, label, date and freeze.

Garlic Paste: Place in a small silicone ice cube tray and freeze until firm, about 1 hour. Transfer the cubes to a plastic freezer storage bag, label, date, seal tight and freeze for up to 6 months.

Garlic intact for a year: how to store it

  • Experienced cooks will surely be familiar with this method of preserving garlic. First, take half a kilo of garlic cloves and soak them for about an hour in lukewarm water. After drying them, peel them and you will see that they will flake easily because the skin has softened.
  • Next, place all the garlic cloves in a sterilized glass jar. Next, pour in two tablespoons of coarse salt, this should make about 30 grams of salt. Now you can add a few tablespoons of apple cider vinegar or, if you prefer, pour in the wine vinegar, this ingredient will help keep the garlic intact.
  • Finally, bring some water to a boil and let it cool. Before closing the container with its cap, cut a slice of lemon and place it on the garlic. Close the jar very tightly and shake it so that all the ingredients are mixed.
  • Thus, you will keep your garlic cloves for more than a year in perfect condition and they will not rot. Not only that, because you can consume them whenever you want, without having to peel them every time you need them. This method is used by many cooks, it is practical and above all effective.

Notes:

Keep the bulb whole. This ensures the bulbs stay cool and dry, which are exactly the conditions garlic needs.

Store in a cool, dark, uncrowded cupboard. Garlic will spoil under conditions of heat and light, so it’s best to keep it in the coolest part of your kitchen, ideally away from the stove and near the floor. A well ventilated cupboard or pantry works best.

Do not store in a plastic bag, unless freezing. Garlic needs ventilation and air to breathe, which is why an uncrowded (or empty) cabinet is best. If you would prefer to store it in a bag, mesh bags are the best and paper bags are a close second. However, when storing in the freezer, use a plastic bag to keep all the moisture out.

NUTRITIONAL INFO:

Calories: 3kcal | Carbohydrates: 1g | Protein: 1g | Fat: 1g | Saturated Fat: 1g | Sodium: 1mg | Potassium: 9mg | Fiber: 1g | Sugar: 1g | Vitamin A: 1IU | Vitamin C: 1mg | Calcium: 4mg | Iron: 1mg

Cream Puff Recipe

Perfect Cream Puff Recipe: These bake up light as air every time! Filled with sweet whipped cream & dusted with powdered sugar. The ultimate!

Just in time for the weekend, I’m bringing you a classic dessert recipe that just can’t go wrong, no matter the occasion or the time of year: cream puffs!

Like so many other French pastries such as Madeleine cookies, brioche bread, and macarons, cream puffs have a specific set of ingredients and a specific technique. But unlike those others, this recipe is very easy to make.

If you’re aware of the major pitfalls (more on that below), you’ll be able to make this cream puff recipe like a pro! It’s pretty much foolproof!

Prep Time: 20mins

Cook Time: 40mins

Total Time: 1hr

Course: Dessert, Snack

Cuisine: French

Servings: 12 cream puffs

Ingredients:

For the Choux Pastry Puffs:

  • 1 cup water
  • 1/2 cup unsalted butter (1 stick)
  • 1/2 teaspoon granulated sugar
  • 1/4 teaspoon kosher salt
  • 1 cup all-purpose flour
  • 4 eggs, large
  • 1 tablespoon powdered sugar, for garnish
  • For the Cream Puff Filling:
  • 8 ounces cream cheese*
  • 1 cup powdered sugar
  • 2 3/4 cups heavy cream, cold
  • 1 teaspoon vanilla bean paste (extract can be substituted)

Instructions:

To Make the Choux Pastry Puffs:

  1. Preheat the oven to 425 degrees F and line baking sheets with parchment paper.
  2. Place the water, butter, sugar, and salt in a small pot and cook over medium-high heat until the butter is completely melted and the mixture is simmering.
  3. Add in the flour all at once, and continue to cook, whisking, for about 5 minutes, or until the dough gathers itself into a ball and a film begins to form on the bottom of the pot.
  4. Transfer the mixture to a mixing bowl, and beat on medium speed.
  5. Drop in the eggs, one at a time, while continuing to beat. (Allow each egg to become fully incorporated before adding the next.)
  6. Pipe or spoon the dough in 1 1/2-inch balls onto the prepared baking sheets, allowing about 3 inches in between each puff.
  7. Bake for 35 to 45 minutes, or until puffed, golden brown, hollow, dry, and light.
  8. Allow the pastries to cool completely, then slice open horizontally, sandwich with cream puff filling, and dust with powdered sugar.

To Make the Cream Puff Filling:

  1. Place the cream cheese and powdered sugar in a large bowl and beat on medium speed until smooth.
  2. Turn the mixer down to medium-low speed and pour the heavy cream down the side of the bowl in a very slow and steady stream, stopping every now and then to scrape the bottom and sides of the bowl with a silicone spatula.
  3. When all the cream has been added, turn the mixer up to medium-high and whip until the filling holds stiff peaks.
  4. Fold in the vanilla.

Notes:

*Full-fat cream cheese in brick form works best.

Nutritional Info:

Serving: 1cream puff | Calories: 239kcal | Carbohydrates: 20g | Protein: 4g | Fat: 16g | Saturated Fat: 9g | Polyunsaturated Fat: 1g | Monounsaturated Fat: 4g | Trans Fat: 1g | Cholesterol: 97mg | Sodium: 133mg | Potassium: 61mg | Fiber: 1g | Sugar: 12g | Vitamin A: 587IU | Vitamin C: 1mg | Calcium: 32mg | Iron: 1mg

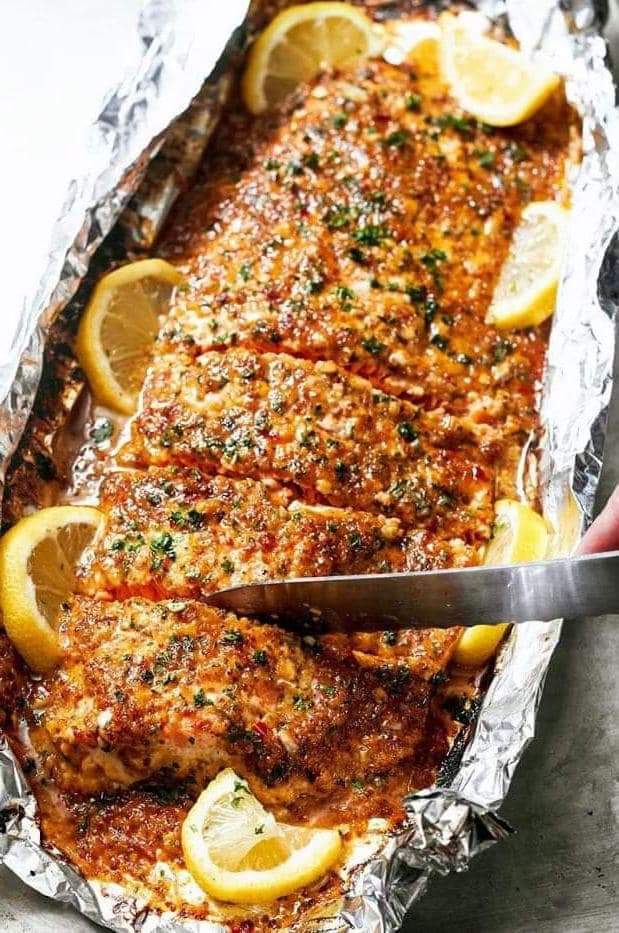
Honey Garlic Butter Salmon In Foil Recipe

THIS honey garlic butter salmon in foil recipe is an easy dinner to throw together on your busy weeknights or weekends!

A delicious 4-ingredient honey garlic butter sauce is baked with a whole side of salmon, wrapped in foil, baked and broiled (or grilled) for that extra golden, crispy, caramelised and flakey finish! The BEST Salmon In Foil IS RIGHT HERE! So simple with minimal mess to clean up!


Honey Garlic Butter Salmon In Foil in under 20 minutes, then broiled (or grilled) for that extra golden, crispy and caramelised finish! So simple and only 4 main ingredients, with minimal clean up!

Prep Time: 10mins

Cook Time: 15mins

Total Time: 25mins

Course: Dinner

Cuisine: American

Servings: 8 people 

Ingredients:

  • 1/4 cup butter
  • 1/3 cup honey
  • 4 large cloves garlic , crushed
  • 2 tablespoons fresh lemon juice (juice of 1/2 a lemon)
  • 1.2 kg | 2 1/2 pound side of salmon
  • Sea salt , to taste
  • Cracked pepper , to taste (optional)
  • Lemon slices (to serve)
  • 2 tablespoons fresh chopped parsley

Instructions:

  1. Position a rack in the middle of the oven. Preheat oven to 375°F | 190°C.
  2. Line a baking tray / sheet with a large piece of foil, big enough to fold over and seal to create a packet (or 2 long pieces of foil over lapping each other lengthways to create your salmon packet, depending on the width of you fillet).
  3. In a small saucepan, melt the butter over low-medium heat.
  4. Add the honey, garlic and lemon, and whisk until the honey has melted through the butter and the mixture is well combined.
  5. Place the salmon onto lined baking tray | sheet.
  6. Pour the butter/honey mixture over the salmon, and using a pastry brush or spoon, spread evenly over the salmon.
  7. Sprinkle with a good amount of salt (about 2 teaspoons) and cracked pepper.
  8. Fold the sides of the foil over the salmon to cover and completely seal the packet closed so the butter does not leak.
  9. Bake until cooked through (about 15-18 minutes, depending on the thickness of your fish and your preference of doneness).
  10. Open the foil, being careful of any escaping steam, and grill / broil under the grill / broiler for 2-3 minutes on medium heat to caramelise the top.
  11. Garnish with parsley and serve immediately with lemon slices.

Nutritional Info:

Calories: 310kcal | Carbohydrates: 9g | Protein: 30g | Fat: 14g | Saturated Fat: 5g | Cholesterol: 97mg | Sodium: 118mg | Potassium: 753mg | Sugar: 11g | Vitamin A: 320IU | Vitamin C: 3.2mg | Calcium: 24mg | Iron: 1.4mg

Loaded Steak Quesadilla Recipe

Are you looking for an easy, filling, 30 minutes or less recipe for dinner? Simple prep and not a lot of clean up? Well, today I gotcha covered! Because I needed a nice, easy breezy meal that would keep me full, keep the kitchen decent, and not take me forever to make. And guess what? Success!!! Meet these 30 Minute Loaded Steak Quesadillas.

Loaded you ask? Not only are these steak quesadillas layered with a pound of top sirloin, there’s also black beans, fire roasted corn, cherry tomatoes, avocado, and of course, two layers of cheese. This amount of goodness brings the basic cheese quesadilla up a bit higher in the world wouldn’t you agree? Like “Instead of as a snack…I’m going to make steak quesadillas for DINNER!” level.

Total Time: 25 mins

Yield: 2 

Delicious, easy, family friendly meal done in just 30 minutes! Great for both an appetizer AND dinner!

INGREDIENTS:

FOR THE STEAK

  • 3/4 – 1 lbs sirloin steak
  • 1 teaspoon ancho chili powder
  • 1/2 teaspoon paprika
  • 1/4 teaspoon ground mexican oregano
  • 1/4 teaspoon cumin
  • 1/4 teaspoon garlic powder
  • 1/4 teaspoon onion powder
  • Pinch of cayenne pepper
  • 1/4 teaspoon salt

FOR THE QUESADILLAS

  • 4 large flour tortillas
  • 2 cups Mexican Cheese Blend
  • 1/2 cup cherry tomatoes, thinly sliced
  • 1/2 cup canned fire roasted corn kernels, drained
  • 1/2 cup canned black beans, drained
  • 1/2 an avocado, diced
  • Limes wedges and fresh minced cilantro for garnish
INSTRUCTIONS:
  1. Preheat oven to 425˚F. Prepare a baking sheet with a piece of parchment paper.
  2. In a small bowl, mix together all spices and salt for the steak. Generously coat steak with spice blend.
  3. Heat 2 tablespoons olive oil in a large skillet over medium high heat. Sear steak, no more than 3 minutes per side. The steak will cook more in the oven so make sure it’s just a sear! Remove from heat and let rest for 5 minutes while prepping quesadillas.
  4. Place 2 tortillas on the prepared sheet and sprinkle each one with 1/2 cup of the cheese.
  5. Top with tomatoes, corn, black beans, and avocado.
  6. Thinly slice steak against the grain. Place slices on top of the loaded tortillas.
  7. Sprinkle the rest of the cheese evenly over both quesadillas and cover with remaining tortillas.
  8. Bake in the oven for 6-8 minutes, until cheese is melted and tortillas are warmed through.
  9. Remove from oven and slice as desired. Top with cilantro and serve with lime wedges, a dollop of sour cream and your favorite salsa and guacamole!
NUTRITIONAL INFO:

Calories: 798kcal | Carbohydrates: 64g | Protein: 50g | Fat: 38g | Saturated Fat: 14g | Polyunsaturated Fat: 19g | Trans Fat: 1g | Cholesterol: 142mg | Sodium: 1156mg | Fiber: 10g | Sugar: 4g