Old Fashioned Stuffed Cabbage Rolls Recipe

Old Fashioned Stuffed Cabbage Rolls make a delicious and healthy dinner for a cozy night in. This easy traditional Polish-style cabbage roll recipe is a healthy, gluten-free, and lower-carb comfort food dish your family is sure to love!

 Course Dinner

 Cuisine Polish

 Prep Time 30 minutes

 Cook Time 1 hour

 Total Time 1 hour 30 minutes

 Servings 6 servings

INGREDIENTS:

1 large head of cabbage green*

Tomato Sauce:

2 Tbsp. oil olive or avocado

1 cup sweet onion finely chopped, divided

2 cloves garlic crushed

15 oz. tomato sauce canned

15 oz. crushed tomatoes canned

1 Tbsp. Worcestershire sauce

1 Tbsp. sugar optional

1 tsp. salt to taste

½ tsp. black pepper to taste

Filling:

1 lb. ground beef or turkey, uncooked*

1 cup rice cooked, white or brown*

½ cup sweet onion finely chopped, divided

1 clove garlic crushed

1 egg

1 tsp. salt

¼ tsp. black pepper

3 Tbsp. fresh parsley finely chopped

¼ tsp. paprika

⅛ tsp. cayenne pepper

INSTRUCTIONS:

Preheat oven to 350°F.

Bring a large pot of water to a boil.

Cut and remove about 1 inch from the bottom of the head of cabbage.

Place the entire head of cabbage into the pot of boiling water and boil for 4-5 minutes or until the leaves peel easily and are pliable. Remove the boiled head of cabbage from the pot and place on a dish towel to let drain.

Once cool to the touch, peel 12 cabbage leaves from the head, being careful not to tear them.

Tomato Sauce:

Add oil and chopped onion to a large skillet over medium heat. Sauté for 2-3 minutes, or until the onion has softened. Add crushed garlic and continue sautéing for an additional minute.

Add in tomato sauce, crushed tomatoes, Worcestershire sauce, sugar, 1 teaspoon salt and ½ teaspoon black pepper. Stir to combine.

Increase heat to high and bring sauce to a boil. Once boiling, reduce heat to low and simmer, uncovered, for 10-15 minutes.

Cabbage Rolls:

Add all filling ingredients to a large bowl. Mash the ingredients together using a potato masher until well combined.

Place one cabbage leaf on a cutting board. Cut a V-shaped incision at the base of each leaf to remove the bottom 1-2 inches of the tough rib.

Add in about 3-4 tablespoons of the filling mixture into each leaf. Fold the right side of the leaf over the filling and then fold the left side over. Starting at the base, begin rolling the cabbage leaf up. Repeat the previous steps with the remaining filling and cabbage leafs.

Spray a large 9×13 inch baking dish with non-stick cooking spray. Pour in tomato sauce and spread it out along the bottom of the dish. Place cabbage rolls, seam-side-down, in two rows of six rolls. Cover the baking dish with a piece of aluminum foil and bake in preheated oven for 60-75 minutes.

Recipe Notes:

A medium-large head of green cabbage is recommended. Larger leaves are easier to fill up and then roll without them tearing.

Substitute with uncooked cauliflower rice if on a low-carb diet.

Can use 90/10 or 93/7 ground meat.

To Store: Seal leftover stuffed cabbage rolls in an airtight container and refrigerate for up to 3-5 days.

EXPERT TIPS:

Soften it. Boiling an entire head of cabbage ensures you get the most number of leaves that are fully intact with no tears.

Get the right size. Make sure you choose a medium to large head of cabbage. This makes stuffing them with the filling MUCH easier.

Cut it out. Removing the rib from the base of each leaf helps the cabbage to become even more pliable and easier to roll.

Use the right tools. Mix the filling ingredients together first with a potato masher to ensure all of the meat is thoroughly mixed with the other ingredients.

Check for doneness. Use a meat thermometer to make sure the ground beef is cooked all of the way.

Shhhhhh! Worcestershire sauce is a secret ingredient that replaces the traditional vinegar found in other recipes.

Homemade Crispy Kremes Recipe

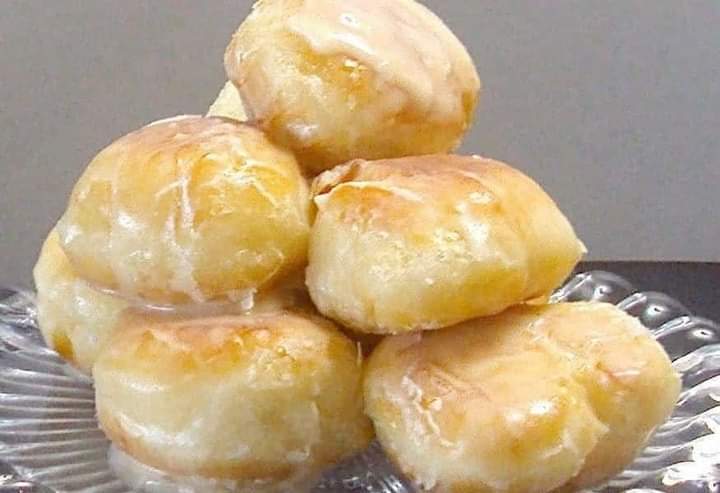
Homemade Krispy Kremes Donut Holes

You might have to play with this recipe depending on elevation and humidity differences for different areas. I live in Colorado and use 1 1/2 to 1 3/4 cups of flour. Good luck! 🙂

Ingredients:

DONUT RECIPE:

3 Tbsp milk

3 Tbsp boiling water

1 tsp dry active yeast

1 1/2 c all purpose flour (you might need up to 2 cups of flour. depending on where you live) see note above

3 Tbsp sugar

1 egg, slightly beaten

2 Tbsp butter, cold to room temperature (do not melt)

dash of salt

enough oil to cover the bottom few inches of a wok, or a deep fryer.

GLAZE:

1/3 c cup butter

2 c confectioners’ sugar

1 1/2 tsp vanilla

4 Tbsp hot water or as needed

Directions:

1. In a large measuring bowl, combine the milk and boiling water. Add a teaspoon of the sugar and the yeast. Stir it gently, then leave it in a warm place for the yeast to activate. It will look foamy

2. In a large mixing bowl, combine the flour, the rest of the sugar, and the salt. Cut in the butter using your fingers or a pastry blender, until it resembles crumbs.

3. Add the egg and yeast mixture to the flour mix, and mix into a smooth dough. This usually takes about 5 minutes of mixing.

4. Turn the dough out onto a lightly-floured counter and knead for about 5 to 10 minutes—it should feel springy and little bubbles should form under the surface. Place it back in the bowl, cover with a cloth or plastic wrap, and let rise for about an hour until double in size.

5. Once risen, place the dough onto the counter and cut it into 4 pieces. One piece at a time, stretch it into a long rope about an inch to an inch and a half wide. Cut strips about an inch long, ball em up with your hands, and place them on a baking tray or wire rack to wait.Cover the donut holes with a cloth to rise. Cover the donut holes with a cloth to rise

6. Heat the oil to 375F. Place the donuts into the oil and fry until golden brown on each side, about 2 minutes. Only cook a few at a time so they don’t overcrowd and stick together.

7. Drain on a paper towel or wire rack over a cloth, before glazing them.

8. Combine ingredients for glaze. Dunk cooked donuts in warm glaze and place on paper towel or wire rack to dry. Reheat glaze if it cools too much. It needs to be warm while dunking donuts to get that yummy Krisp Kreme affect.

Fluffy Condensed Milk Bread Recipe

This sweet and fluffy condensed milk bread is a real showstopper! It’s deliciously buttery and just the right amount of sweet, which makes it perfect to balance out a strong cup of morning coffee. If you’re looking for an easy yet delicious sweet treat recipe, then this condensed milk bread will be sure to hit the spot! With just a few simple pantry ingredients—flour, egg, condensed milk, and butter—you can make this rich, sweet bread without a lot of hassle. The texture is light and soft, while the sweet flavor of the condensed milk makes it totally moreish!

What is Condensed Milk Bread?

Condensed milk bread is a homemade bread recipe made with simple pantry staples and one special ingredient… condensed milk! Inspired by Japanese milk bread, the condensed make creates a super fluffy, soft textured bread, that’s slightly sweet, without being too overpowering.

Tips

When it comes to baking, it’s best to do it by weight measurement. This means the flour will be measured more accurately and your bread will more likely be a success.

If you prefer the bread to have a chewy texture, use bread flour.

The dough will be sticky, so oil your hands to prevent it from sticking.

How To Serve Condensed Milk Bread

This bread tastes good on its own with a bit of butter. But you can also use it to make French toast or a sandwich.

How to Store Condensed Milk Bread

The condensed milk bread can be wrapped in plastic wrap and store it at room temperature for up to 3 days.

INGREDIENTS:

  • WARM MILK: 240ml
  • CONDENSED MILK: 75g
  • EGG: 1
  • SUGAR: 30g
  • DRY YEAST: 7g
  • FLOUR: 520g
  • SALT: 1tsp
  • BUTTER: 50g

INSTRUCTIONS:

  1. Whisk warm milk with sugar and condensed milk. Add the dry yeast and an egg, whisk again.
  2. Add the dry ingredients (flour and salt) to the wet ingredients.
  3. Mix the dough with the dough hooks until it comes together.
  4. Add the softened butter and mix again with the dough hooks for 10 minutes. Set the dough aside to rest for one hour or until doubled in size.
  5. Punch down the dough.
  6. Cut ⅔ of the dough and roll it out into a 25×40 cm (10 x 16 inches) rectangle.
  7. Roll the dough into a log and cut it into pieces.
  8. Place pieces of dough into a prepared baking pan and set aside.
  9. To make smaller buns, cut the remaining dough into smaller pieces, and place in small baking tins.
  10. Set the buns aside for 1 hour.
  11. Brush the top of each bun with egg wash before baking, then bake at 180°C/350°F for 25-30 minutes. For smaller buns, 20 minutes will be enough.
  12. Whisk equal parts of butter and condensed milk. Brush buns with this mixture while they are still warm.
  13. Remove from the baking molds when they have cooled completely.


Low-Carb Chicken Taco Lettuce Wraps

Lettuce wraps filled with spicy taco-spiced chicken, avocado, tomato, and drizzled with a zesty cilantro lime sauce. This healthy nutritious low-carb meal is a delicious protein packed option and great if you are on a low-carb, paleo or keto diet! 

Low-Carb Tacos!! If you’re a fan of tacos but don’t are watching you’re weight or carbs, then you’re going to fall in love with these taco lettuce wraps. They’re a great option if you’re on a low-carb, paleo or keto diet. The tortilla is replaced with lettuce and filled with chicken and all your favorite taco fillings. The result is healthy flavor packed tacos without all the added carbs!

The chicken is marinated in a spicy homemade taco seasoning and grilled (or pan-fried) to perfection. While the chicken is cooking, blend together the cilantro sauce. It takes just 1 minute in the blender and makes a DELICIOUS zesty topping for the tacos!

 Cuisine: Mexican

 Prep Time: 15 minutes

 Cook Time: 15 minutes

 Total Time: 30 minutes

 Servings: 4 people

 Calories161kcal

INGREDIENTS:

Grilled Taco Chicken

1 pound Boneless, skinless chicken breasts or thighs

2 tablespoons taco seasoning

2 cloves garlic minced

1 tablespoon olive oil

To Assemble

8 leaves Romaine Lettuce rinsed

1 avocado diced

1 tomato diced

1/4 cup onion diced

Cilantro Sauce

1/2 cup loosely packed cilantro

1/2 cup Greek Yogurt or sour-cream or mayo

2 tablespoons olive oil

1 jalapeno optional

1 clove garlic minced

Juice of 1/2 lime

Pinch of salt

INSTRUCTIONS:

To Cook Chicken

Add the chicken, garlic, olive oil, and spices in a large bowl or zip-seal bag. Place in fridge and let marinate for at least 15-30 minutes or up to 24 hours.

Remove chicken from marinade and discard marinade. Place chicken on a grill or pan heated to medium-high heat. Let chicken cook until it is no longer pink on the inside, about 9-10 minutes per side (or until it has reached an internal temperature of 165 degrees F).

To Make Cilantro Sauce

Place all the ingredients in the food processor and blend for 1 minute or until creamy.

To Assemble

Layer lettuce wraps with chicken, tomatoes, onion, and avocado. Drizzle with cilantro sauce or your favorite taco sauce.

Nutritional Info:

Serving: 1tacos | Calories: 161kcal | Carbohydrates: 6.1g | Protein: 14.5g | Fat: 9.1g | Saturated Fat: 1.5g | Cholesterol: 42.5mg | Sodium: 382.9mg | Fiber: 1.2g | Sugar: 2.3g

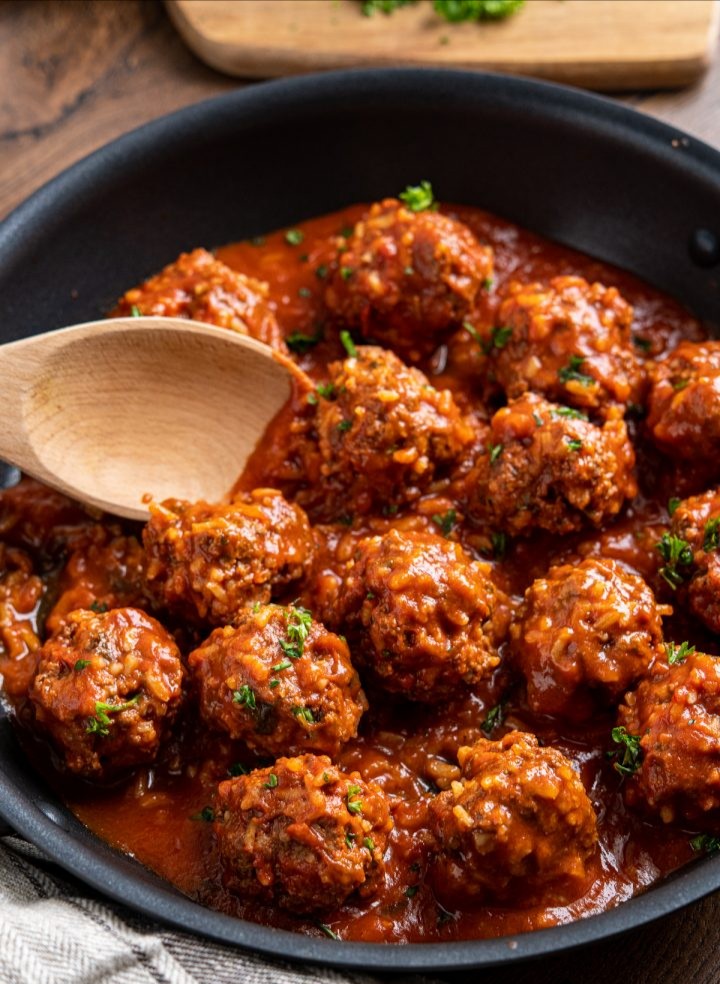
Porcupine Meatballs Recipe

Tender beef meatballs with rice in a rich and delicious tomato sauce – A perfect recipe for the whole family.

Porcupine Beef Meatballs

Despite the name, these delicious meatballs definitely do not contain any porcupine, intead they get their name from because they resemble little porcupine balls from the rice that is combined into the meatball mix.

These are one of my kids favourites. I mean what is not to love about meatballs in a yummy rich sauce. So simple to make an will be a regular feature on your meal plan.

Best Rice For Porcupine Meatballs

I use just basic long grain rice for these meatballs, this is neither Jasmine (a sticky long grain rice) or Basmati which is an extra long grain rice.

Sides for Meatballs

Because these meatballs contain rice, they are quite filling, so my family likes to enjoy these just a they are in a bowl with a little grated cheese (parmesan or cheddar0 on top and then vegetables on the side.

You can serve these with any vegetables you like, but some of my favourites are:

  • Grilled Zucchini
  • Roasted Green Beans
  • Roasted Asparagus
  • Broccoli or Cauliflower

If you prefer a more substantial side, these are great with some mashed potatoes, or a baked potato too.

YIELD: SERVES 4

PREP TIME: 15 minutes

COOK TIME: 40 minutes

TOTAL TIME: 55 minutes

INGREDIENTS:

For the meatballs

500g (17.5oz) extra lean beef mince (ground beef)

2 tablespoons of tomato paste (puree)

60ml of water

90g (½ cup) of uncooked long grain rice

1.5 tablespoons of fresh chopped parsley

1 teaspoon of onion powder

½ teaspoon of garlic powder

1 teaspoon of salt

1 teaspoon of Worcestershire sauce

pinch of black pepper

spray oil

For the sauce

400g (14oz) of passata (sieved tomatoes)

2 tablespoons of tomato paste (puree)

300ml of chicken stock

1 tablespoon of maple syrup

1 tablespoon of balsamic vinegar

½ tablespoon of paprika

1 teaspoon of Worcestershire sauce

salt and black pepper

fresh chopped parsley to serve

INSTRUCTIONS:

Combine all the ingredients for the meatballs together in a bowl and form into meatballs (I make 16).

Spray a frying pan over a medium high heat with spray oil, add the meatballs a lightly brown.

Mix all the sauce ingredients together ina large bowl.

Pour into the frying pan, bring a to a boil, reduce heat, then cover and simmer for approx 30-35 minutes, carefully turning once to cover in sauce.

Sauce should have reduced down and thickened around meatballs and rice in meatballs should be cooked after this time. If it the sauce reduces too much just add in a little more stock or water.

Taste and season as needed with salt and black pepper.

Sprinkle with some fresh chopped parsley

Enjoy with your favourites sides.

Notes:

WW Points and other Slimming or Weight Loss programs – due to plans regularly changing and updating, we recommend calculating with the official tools you get as a member to those plans to ensure accuracy of values.

NUTRITIONAL INFO:

Yield: 4

Serving Size: 1 SERVING

Amount Per Serving

Calories:304/Total Fat:7g/Saturated Fat:3g/Trans Fat:0g/Unsaturated Fat:0g/Cholesterol:21mg/Sodium:844mg/Carbohydrates:31g/Fiber:2g/Sugar:9g/Protein:28g


No-Bake Biscuit Cake Recipe

This No Bake Chocolate Biscuit Cake Recipe is one of the most delicious desserts. The cake takes no time at all to whip up, is so simple and easy to make and doesn’t require an oven which makes it perfect to get kids involved. Add your own spin with nuts or fruit or keep it as is!

A no-bake chocolate biscuit cake is cake that reminds memories of childhood for many of us. Such an easy to make cake, but yet, we all love it. What’s makes it so popular is probably the simple ingredients, digestive biscuits, butter, cocoa powder and other basic ingredients that we all have at home. Chocolate fridge cake is one of my favorite cake and I hope you will like it too.

YIELDS: 12 

PREP TIME: 20 Minutes 

WORK TIME: 20 Minutes 

INGREDIENTS:

For the cake:

500g Digestive biscuits/crackers

150g Walnuts/hazelnuts/almonds, roasted (optional)

3/4 cup (150g) Sugar

2/3 cup (150g) Butter

1/2 cup (50g) Cocoa powder

1 cup (240ml) Water/coffee

For the ganache:

120g Dark chocolate

1/2 cup (120ml) Heavy cream

DIRECTIONS:

Crush/ break the biscuits into small pieces. Place them in a large bowl. if you are using nuts, crush them as well and add to the bowl. set aside.

In a saucepan combined sugar, butter, cocoa powder and water/coffee. Place the saucepan over medium heat and bring to a boil. Cook for 5-6 minutes, stirring constantly.

Pour chocolate syrup over the biscuits and stir until well coated.

Transfer the mixture into a 9-inch (23cm) pan. Press firmly to create flat surface cake. Refrigerate while making the ganache.

Make chocolate ganache: chop the chocolate and place in a heatproof bowl. In a small saucepan heat the cream, when starts to simmer remove from heat and pour over the chocolate. Let sit for 1-2 minutes and stir until melted and smooth.

Pour the ganache over the cake and refrigerate for at least 2-3 hours before serving.

Decorate with nuts.

Cheesy Taco Lasagna Recipe

This dish is assembled casserole-style and filled with the most irresistible mixture of seasoned ground beef and black beans, tortillas, sour cream, and plenty of melted cheese.

What Is Taco Lasagna?

Take everything there is to love about ground beef tacos — the browned ground beef kissed with warm spices, the tortillas, cheese, and salsa — and then borrow some inspiration from the ways you’d layer a lasagna, and you’ve got taco lasagna. 

This version of taco lasagna is layered with corn or flour tortillas (pick your favorite one!), seasoned ground beef and black beans mixed with salsa, lots of shredded cheese, and creamy sour cream. And of course, don’t forget the toppings! Any of your favorite taco toppings are fair game here. We especially love shredded romaine, chopped tomatoes, avocado, fresh cilantro, pickled jalapenos, and extra sour cream. 

What’s the Best Way to Reheat Taco Lasagna?

Taco lasagna is at its best when eaten right after it’s cooked. With that said, the leftovers (which will keep for a couple of days in the fridge) are still pretty amazing and reheat well. As taco lasagna sits, the sour cream layer will soak into the tortillas, and the tortillas will soften a little, but you’ll still get clean, layered slices.

For the best results, reheat taco lasagna in a covered baking dish in a 350℉ oven until heated through, 10 to 20 minutes. Total cook time will vary depending on how big the pieces are. Covering the baking dish with foil will prevent the lasagna from drying out. 

SERVES: 6 to 8

PREP: 20 minutes

COOK Time: 43 minutes to 45 minutes

INGREDIENTS:

  • 1 medium yellow onion
  • 1 medium red bell pepper
  • 2 cloves garlic
  • 1 (about 15-ounce) can black bean
  • 2 tablespoons olive oil, divide
  • 1 pound lean ground bee
  • 1 tablespoon chili powder
  • 2 teaspoons ground cumin
  • 1 teaspoon dried oregano
  • 1 teaspoon kosher salt
  • 1/4 teaspoon freshly ground black pepper
  • 1 (about 16-ounce) jar tomato salsa, divide
  • 12 (8-inch) corn or flour tortillas, divide
  • 16 ounces sour cream, divide
  • 16 ounces shredded Mexican cheese blend (about 4 cups), divide
FOR SERVING (OPTIONAL)
  • Shredded romaine lettuce
  • Chopped tomatoes
  • Fresh cilantro leave
  • Sliced avocado
  • Pickled jalapeño slice

INSTRUCTION:

  1. Arrange a rack in the middle of the oven and heat the oven to 350℉
  2. Dice 1 medium yellow onion (about 1 cup). Core, seed, and dice 1 medium red bell pepper (about 1 1/2 cups). Mince 2 garlic cloves. Drain and rinse 1 can black beans
  3. Heat 1 tablespoon of the olive oil in a large, high-sided skillet over medium-high heat until shimmering. Add 1 pound lean ground beef and cook, breaking up the meat with a wooden spoon, until browned and cooked through, 6 to 8 minutes. Using a slotted spoon, transfer the meat to a plate, then pour off any fat from the skillet
  4. Reduce the heat to medium. Add the remaining 1 tablespoon olive oil and heat until shimmering. Add the onion, bell pepper, and garlic, and cook, stirring occasionally, until softened, about 5 minutes. Return the beef and any accumulated juices to the skillet, add the black beans, and stir to combine.
  5. Add 1 tablespoon chili powder, 2 teaspoons ground cumin, 1 teaspoon dried oregano, 1 teaspoon kosher salt, and 1/4 teaspoon black pepper, and stir to combine. Cook for 2 minutes
  6. Remove from skillet from the heat. Transfer 1/4 cup tomato salsa from a 16-ounce jar into a 9×13-inch baking dish, then pour the remaining salsa into the skillet and stir to combine
  7. Assemble the lasagna: Spread the salsa out in the baking dish into a thin layer. Arrange 4 (8-inch) tortillas in a single layer on top of the salsa, overlapping them as needed. Dollop and spread 2/3 cup of the sour sour cream.
  8. Spoon half of the meat mixture over the sour cream and spread in an even layer. Sprinkle with 1 1/3 cups of the shredded Mexican cheese blend
  9. Repeat layering the following: 4 tortillas, 2/3 cup sour cream, the remaining meat mixture, and 1 1/3 cups shredded cheese. Top with the remaining 4 tortillas and remaining 2/3 cup sour cream. Sprinkle with the remaining 1 1/3 cups cheese
  10. Bake uncovered until the cheese is melted and lightly browned, 30 minutes. Let cool for at least 15 minutes before serving. Garnish with the desired toppings

RECIPE NOTE:

Beef substitutions: Substitute an equal amount of plant-based meat alternative (like Beyond Beef or Impossible Burger), soyrizo, or crumbled tempeh for the ground beef

Storage: Refrigerate in an airtight container for up to 2 days. Reheat in a covered baking dish in the oven until heated through baking dish in the oven until heated through.

What’s the Best Way to Reheat Taco Lasagna?

Taco lasagna is at its best when eaten right after it’s cooked. With that said, the leftovers (which will keep for a couple of days in the fridge) are still pretty amazing and reheat well. As taco lasagna sits, the sour cream layer will soak into the tortillas, and the tortillas will soften a little, but you’ll still get clean, layered slices.

For the best results, reheat taco lasagna in a covered baking dish in a 350℉ oven until heated through, 10 to 20 minutes. Total cook time will vary depending on how big the pieces are. Covering the baking dish with foil will prevent the lasagna from drying out.

Chocolate Cake Recipe

An easy to make, rich Chocolate Cake is the most craved cake recipe. One bowl, minimal ingredients = a fluffy, tender-moist chocolate cake!

Prep Time

15 mins

Cook Time: 30 mins

Total Time: 45 mins

Servings: 12 serves

Ingredients:

CHOCOLATE CAKE

1 3/4 cups all purpose flour, or (plain flour), (8 oz | 227 g)

3/4 cup unsweetened cocoa powder, (2.6 oz | 75 g) or regular Hershey’s cocoa powder

1 1/2 teaspoon baking powder

1 1/2 teaspoon baking soda, (or bi-carb soda)

1 teaspoon salt

2 cups white granulated sugar, (14 oz | 410 g)

2 large eggs

1 cup milk, (250 ml)

1/2 cup vegetable oil, (125 ml)

2 teaspoons pure vanilla extract

1 cup boiling water (250 ml)

CHOCOLATE BUTTERCREAM FROSTING

4 oz butter, (120 g | 1/2 cup)

2/3 cup unsweetened cocoa powder, or regular HERSHEY’S (2.4 oz | 65 g)

3 cups powdered sugar, (confectioners or icing sugar)

1/3 cup milk

1 teaspoon pure vanilla extract

Instructions:

CHOCOLATE CAKE

Preheat oven to 350°F (180°C) standard or 320°F (160°C) fan/convection.

Lightly grease 2x 9-inch (22cm) round cake pans with butter. Line base with parchment paper.

Sift together flour, cocoa, baking powder, baking soda and salt into a large bowl. Whisk in sugar, then add eggs, milk, oil and vanilla. Whisk well to combine until lump free, about 30 seconds.

Pour boiling water into batter, mixing well. Cake batter is thin in consistency.

Pour batter into cake pans and bake for 30-35 minutes or until a wooden skewer inserted into the centre comes out clean.

Let cool for 10 minutes, then turn out onto wire racks to cool completely before frosting.

CHOCOLATE BUTTERCREAM FROSTING

Melt butter, then whisk in cocoa powder. Alternately add powdered sugar and milk, beating to spreading consistency (add a small amount of additional milk, if needed). Stir in vanilla.

Notes:

COCOA POWDER:

I use a combination of 1/2 cup Dutch processed and 1/4 cup regular unsweetened cocoa powder for a richer cake.

COFFEE:

For a richer chocolate flavour, DISSOLVE 2 teaspoons instant coffee or espresso in the boiling water before adding into the batter. You can’t taste the coffee!

SUGAR:

White granulated sugar is used here. You can also use superfine or caster sugar.

VARIATIONS FOR CHOCOLATE CAKE SIZES FROM HERSHEY’S

Preheat oven to 350°F (180°C) standard or 320°F (160°C) fan/convection.

ONE-PAN CAKE: Use 13x9x2-inch baking pan. Bake 35-40 minutes.

THREE LAYER CAKE: You’ll need 8-inch round baking pans. Bake 30-35 minutes.

BUNDT CAKE: Use a 12-cup fluted tube pan. Bake 50-55 minutes.

CUPCAKES: Line muffin cups (2-1/2 inches in diameter) with paper bake cups. Fill cups 2/3 full with batter. Bake 22-25 minutes. Makes about 30 cupcakes.

Nutritional Info:

Calories: 351kcal | Carbohydrates: 55g | Protein: 6g | Fat: 16g | Saturated Fat: 12g | Fiber: 4g | Sugar: 36g

Baked King Crab Recipe

Baked King Crab – King crab is everyone’s favorite crustacean and this king crab recipe is baked with Sriracha lemon butter. The crab legs are so delicious!

Prep Time: 10 mins

Cook Time: 20 mins

Total Time: 30 mins

Ingredients:

2 lbs. king crab legs

1 stick unsalted butter room temperature and softened

1 teaspoon Sriracha

1 1/2 tablespoons lemon juice

1/2 tablespoon sugar

3 dashes smoked paprika and more for dusting

1 tablespoon chopped parsley and/or chives

Instructions

Preheat oven to 400°F (207°C).

Cut the king crab legs into shorter segments using a pair of scissors. Cut the crab leg segments lengthwise to expose the crab meat. Alternatively, you can also cut the top part of the shell to expose the crab meat.

King Crab

Arrange the king crab legs in a baking tray and bake for 20 minutes. Cover with aluminum foil to avoid drying out the crab.

In the meantime, make the Sriracha Lemon Butter by whipping the softened butter with a whisk. Add the Sriracha, lemon juice and sugar, whisk to combine well. Set aside.

As soon as the crab is out of the oven, spoon the butter over the crab meat. Dust with more smoked paprika and garnish with chopped parsley and/or chives. Serve immediately.

Nutritional Info:

Serving: 4people | Calories: 388kcal | Carbohydrates: 2g | Protein: 42g | Fat: 24g | Saturated Fat: 15g | Cholesterol: 156mg | Sodium: 1927mg | Fiber: 1g | Sugar: 2g

CHERRY CHEESECAKE LUSH

Ingredients

  •             1-14 ounce package of golden oreos, crushed in processor
  •             ⅓ cup butter, salted and melted
  •             1 tbsp for preparing the pan
  •             8 ounces cream cheese, softened to room temp
  •             ¾ cup white sugar
  •             16 ounces frozen whipped topping, thawed
  •             2 small boxes of Cheesecake flavored instant pudding mix
  •             3 cups whole milk
  •             2 large cans of cherry pie filling
  •             1 cup chopped pecans or chopped walnuts

Instructions

  • Butter the inside of a 9×13 baking dish and set to the side
  • Crush the cookies until small crumbs form
  • Add the melted butter and pulse until combined
  • Place the cookie mix into the bottom of the baking dish, press down and make the layer as even as possible
  • Place the crust into the freezer for 10 minutes while you make the filling.
  • In a bowl beat together the cream cheese, sugar, vanilla and 1 cup of the whipped topping.
  • Mix until smooth
  • Spread this mixture over the cookie crust and place back into the freezer for another 10 minutes
  • In another bowl combine the 2 packages of pudding mix, the milk and ½ cup of whipped topping mix. Using a whisk, whisk until it begins to thicken
  • Spread the pudding over the chilled cream cheese layer, smooth evenly and chill for 30 minutes or until the pudding is set
  • After 30 minutes, pour the Cherry pie filling over the pudding layer very carefully so as to not mix layers together
  • Carefully spread the remaining whipped topping over the entire dessert
  • Top with chopped pecans and chill for 1 to 2 hours before serving.
  • Enjoy!


Greek Yogurt Smoothie Recipe

A creamy Greek yogurt smoothie garnished with blueberries.

Greek Yogurt Smoothie

A healthy Greek yogurt smoothie recipe to use as a base! Try this fun combo of pineapple and berries, or explore your own favorite flavors. The sky is the limit.

A Greek Yogurt Smoothie is a great way to start the day off with beneficial probiotics, protein, and a variety of fruits and vegetables. It’s super creamy, and turns smoothies into a dessert-like consistency. Turn this recipe into your favorite flavor combo! Add strawberries, blueberries, mango, bananas, a variety of greens, or even flavors like cocoa powder or chai spice.

A GREEK YOGURT SMOOTHIE FORMULA

Smoothies are a great way to pack in nutrients. I love starting my day with a smoothie, and knowing I am front-loading my day with protein, fruits, veggies, and healthy fats.

They are ideal for busy lifestyles. I can’t imagine an easier way to get such a variety of healthy foods in! When the mood strikes, a smoothie is a perfect quick snack.

Greek yogurt has long been a favorite smoothie addition of mine. It adds a creamy and tangy flavor. The Greek yogurt taste compliments the sweetness fruit!

When making smoothies, I like to think of this balanced approach:

1-2 servings of vegetables (think spinach, kale, cauliflower, and zucchini)

1-2 servings of fresh fruits (fruit is high in sugar, but that is mediated by the fiber and protein in a balanced smoothie!)

1 T healthy fat (coconut oil, MCT oil, avocado, or nut butter)

20-45 g of protein (depending on whether it’s a meal or a snack. This can be a combination of Greek yogurt and protein powder).

Unsweetened liquid (such as almond milk, coconut milk, oat milk, or green tea. Avoid apple juice or other liquids that add sugar without fiber.)

Extra Ingredients: Add flavor and healthy nutrients by throwing in some superfoods! Matcha, cinnamon, turmeric, vanilla extract, and cacao powder are great options

WHY IS GREEK YOGURT GOOD FOR SMOOTHIES?

Greek yogurt has a range of health benefits!

It’s a great way to add protein to a smoothie. 1/2 cup of Greek yogurt has 15-20 grams of protein. It’s a great option for people who prefer not to use protein powders. Adding protein to smoothies makes them more satiating.

Greek yogurt is UBER creamy! Honestly, yogurt adds a tangy flavor and creamy consistency that makes smoothies dessert-like. I use it in my Chocolate Chip Mint Smoothie!

It’s a fermented food, meaning it has probiotics that help improve gut health. Be sure to buy a plain, high quality Greek yogurt with multiple bacteria strains for the most benefits.

IS IT BETTER TO PUT MILK OR YOGURT IN A SMOOTHIE?

Dairy milk is often difficult to digest. Yogurt contains bacteria that is more beneficial to digestion. In addition, Greek yogurt has more concentrated protein.

Non-dairy milks are great for thinning smoothies out. I recommend a combination of unsweetened, non-dairy milk and plain, unsweetened Greek yogurt.

Creamy yogurt also gives smoothies a tangy flavor and better consistency!


A healthy Greek yogurt smoothie recipe to use as a base! Try this fun combo of pineapple and berries, or explore your own favorite flavors. The sky is the limit.

Prep Time: 5 mins

Cook Time: 0 mins

Total Time: 5 mins

Course: Breakfast

Cuisine: American

Servings: 1 smoothie

Ingredients

1/2 cup pineapple frozen

1/2 cup strawberries frozen

1/2 cup blueberries frozen

2 cups fresh spinach

1/2 cup Greek yogurt

1/2 cup almond milk

collagen protein

protein powder I like unflavored whey isolate

Instructions

All all ingredients into a blender.

Process on high for about a minute, until the smoothie is very smooth and creamy. Adjust the thickness by adding more/less almond milk, or throwing in a few extra frozen berries.

Notes

Strawberry Greek Yogurt Smoothie

A delicious strawberry banana Greek yogurt smoothie, perfect for those who enjoy sweet and fruity flavors!

1 cup frozen strawberries

1/2 frozen banana

1/2 cup Greek Yogurt

1/2 cup almond milk

Optional: Greens or frozen zucchini

Optional: Protein Powder or Collagen

Blueberry Greek Yogurt Smoothie

This banana-free Greek yogurt smoothie is packed with antioxidants. I have heard nutrition experts claim that blueberries are the most beneficial food to include in your diet daily. Opt for wild blueberries for the maximum benefits.

1 1/2 cups frozen blueberries

1/2 cup Greek Yogurt

1/2 cup almond milk

Optional: Greens or frozen zucchini

Optional: Protein Powder or Collagen

Optional: Chia seeds, cinnamon, MCT oil, coconut oil

Mango Greek Yogurt Smoothie

Sweet mango tastes delicious with a burst of orange flavor! Other great flavors with mango are strawberry, banana, or dragon fruit. You might also love this Dragon Fruit Smoothie.

1 cup frozen mango

1 frozen mandarin orange (or 1/4 cup orange juice)

1/2 cup Greek Yogurt

1/2 cup almond milk

Optional: Greens

Optional: Protein Powder or Collagen

Optional: Matcha, MCT oil, coconut oil

Chocolate Greek Yogurt Smoothie

I love using MCT oil in my Greek yogurt smoothie. It adds a great creamy texture, and is known to be energizing for your body and brain. If you’d rather, opt for a nut butter.

1 frozen banana (cut into quarters)

1/2 cup Greek Yogurt

1/2 cup almond milk (or full fat coconut milk!)

2 tablespoons cacao powder

1 tablespoon MCT or Coconut Oil (adds creaminess)

Optional: Greens

Optional: Protein Powder or Collagen

Chai Spice Greek Yogurt Banana Smoothie

The sky is the limit when it comes to adding flavor! Chai spice, cinnamon, turmeric, ginger, and vanilla are great flavor enhancers for smoothies (and it doesn’t hurt that they all have anti inflammatory properties!).

1 frozen banana (cut into quarters)

1/2 cup Greek Yogurt

1/2 cup almond milk (or full fat coconut milk!)

1-2 teaspoons chai spice (depending on how spicy you like it!)

1-2 teaspoons of honey or maple syrup, if desired

1 tablespoon MCT or Coconut Oil (adds creaminess)

Optional: Greens

Optional: Protein Powder or Collagen

Amp up your Greek Yogurt Fruit Smoothie!

Add superfoods and spices to give your smoothie more power!

Hemp seeds (for more protein + fiber)

Chia Seeds (fiber!)

Matcha Green Tea powder (flavor + antioxidants)

MCT Oil or MCT Oil Powder (creamy consistency plus ketone-producer, which helps with mental clarity. Studies have shown it increases brain energy by 8-9%.)

Spirulina (has a dense nutrient content, including protein, iron, and copper. Make things really fun by using a BLUE spirulina!

Nut Butters (healthy fats!): Sunflower seed butter, cashew butter, or almond butter are my favs. If you opt for peanut butter, find one without added oils or sugars.

A little bit of honey. Honey has anti microbial and anti viral properties, in addition to adding a sweet flair to your smoothie.

Nutritional Info:

Calories: 199kcal | Carbohydrates: 33g | Protein: 14g | Fat: 3g | Saturated Fat: 0.2g | Polyunsaturated Fat: 1g | Monounsaturated Fat: 1g | Trans Fat: 0.01g | Cholesterol: 5mg | Sodium: 248mg | Potassium: 733mg | Fiber: 6g | Sugar: 23g | Vitamin A: 5727IU | Vitamin C: 106mg | Calcium: 347mg | Iron: 2mg

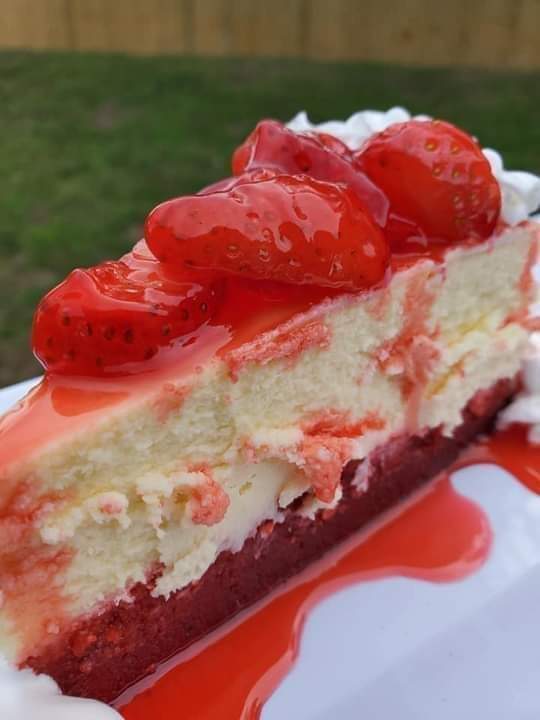
Strawberry Cheesecake Recipe

The perfect summer dessert, this Strawberry Cheesecake recipe comes together easily in a few straightforward steps. A rich, creamy, and smooth cheesecake topped with strawberries, you won’t be able to get enough of it!

Course: Dessert

Cuisine: American

Prep Time: 30mins

Cook Time: 1hr 35mins

Total Time: 9hrs 5 mins

Servings: 8 servings

Ingredients:

For the Crust:

2 ¼ cups graham cracker crumbs (270 g)

3 tablespoons granulated sugar

5 tablespoons unsalted butter melted (70 g)

For the Filling:

3 blocks cream cheese room temperature (8-ounce/227g)

1 ¼ cups granulated sugar (250 g)

¼ teaspoon salt

½ cup sour cream room temperature (120 g)

2 teaspoons lemon zest

2 teaspoons vanilla extract

3 large eggs room temperature, and lightly beaten

For the Topping:

2 pounds fresh strawberries halved and divided (900g)

½ cup granulated sugar (100g)

2 teaspoons vanilla extract

2 teaspoons cornstarch

¾ cup water (180ml)

Instructions:

For the Crust:

Preheat the oven to 350°F. Lightly spray a 9-inch springform pan with baking spray.

In a medium bowl, combine the graham cracker crumbs and sugar. Stir in butter until well incorporated and mixture holds together when tightly squeezed. Transfer the mixture to the prepared pan. Using a tall flat-bottomed glass, press the graham cracker mixture into the bottom and 1 inch up the sides of the pan. (I find it easiest to start with the sides, then press the remaining crumbs into the bottom.) Place the pan on a rimmed baking sheet.

Bake for 10 to 15 minutes or until the crust is fragrant and starting to turn golden brown on the edges. Let cool completely.

For the Filling:

In the bowl of a stand mixer fitted with a whisk attachment, add the cream cheese. Beat on medium-low speed until very smooth, about 2 minutes. Add the sugar and salt and beat until fully incorporated, about 2 minutes more, stopping to scrape down the sides of the bowl a few times during mixing.

Add the sour cream, lemon zest, and vanilla. Beat on medium speed until fully incorporated, about 1 minute. Scrape down bowl. Add the eggs, and beat just until fully combined, about 1 minute, stopping to scrape down the bowl once during mixing. Pour the filling into the cooled crust. (It should come up over the side of the crust and will be very full).

Bake for 15 minutes. Reduce the oven temperature to 300°F and bake until lightly puffed, the filling around edges is set, and the center has a slight jiggle, about 1 hour. Leaving the oven door shut, turn the oven off, and allow the cheesecake to cool for 1 hour. Remove the cheesecake from the oven and let it cool to room temperature. Loosely cover with a tea towel or paper towel and refrigerate overnight or for at least 6 hours.

For the Topping:

In a medium saucepan, combine 1 pound of strawberries, water, and sugar. Sprinkle with cornstarch and stir to combine.

Place the saucepan over medium heat and bring the mixture to a boil, stirring frequently. Boil for 5 minutes. Using a potato masher, mash the strawberries until they are very broken down. Continue cooking until the sauce is thickened, about 10 minutes. Remove from the heat and stir in the remaining 1 pound of strawberries and vanilla. Transfer to a bowl and let cool until lukewarm.

When ready to serve, run a knife around the edge of the cheesecake. Release the spring and removed the sides. Transfer the cheesecake to a serving plate and top with the cooled strawberry sauce. Refrigerate the cheesecake covered for up to 4 days.

Notes:

Do not overwhip the filling as it will introduce too much air to the batter. Overwhipping the batter will make the cheesecake rise too much and collapse in the middle.

Do not open the oven to peek at your strawberry cheesecake. The hot air from the oven will escape, and the cold air enters the oven, causing the cheesecake to fall or crack.

Make sure you budget enough time to make this cheesecake, as it requires several hours to cool.

Room temperature ingredients are ideal as they mix easier without accidentally over mixing. If your eggs are cold, place them in a bowl of warm water.

To bring your cream cheese to room temperature, leave it out the night before or heat it in the microwave for 20 seconds at 50% power.

Nutritional Info:

Calories: 449kcal | Carbohydrates: 76g | Protein: 5g | Fat: 15g | Saturated Fat: 7g | Polyunsaturated Fat: 1g | Monounsaturated Fat: 4g | Trans Fat: 1g | Cholesterol: 97mg | Sodium: 265mg | Potassium: 267mg | Fiber: 3g | Sugar: 60g | Vitamin A: 428IU | Vitamin C: 67mg | Calcium: 66mg | Iron: 2mg

Low Syn Skinny Trifle Recipe

Delicious Fruity Low Syn Skinny Trifle – a perfect summer time treat

We have had some glorious summer weather here the last few days and so I really fancied a summery fruity treat to enjoy while sat out in the garden.

I don’t know why but summer time always makes me crave jelly, probably because it is nice and cold and fruit when out of the fridge.

However rather than just make up a bowl of jelly, I decided on this lovely Skinny Trifles, which are perfect for enjoying while sat out in the garden.

Traditionally Trifle is Jelly with sponge fingers, thick creamy custard and fresh cream. My mum made the most amazing trifles, occasionally though she would add Sherry, but truth be told, I hated it with sherry and wasn’t keen on the sponge fingers either. I much prefer just jelly, custard and cream with a few sprinkles on top.

As these are a skinny trifle version, I’ve skipped the custard and instead gone for a layer of banana yoghurt and berries. It’s a perfect combination, lovely and fruity and refreshing for a warm summers day.

YIELD: 4 SERVINGS

PREP TIME: 10 minutes

TOTAL TIME: 10 minutes

Ingredients:

  • 1 box of sugar free jelly (I used raspberry) – 2 syns
  • 4x80g fat free yoghurt (I used banana)
  • 1.5 cups of mixed berries
  • 4×4 tbs of light aerosol cream – 6 syns
  • 1 tbs of rainbow sprinkles – 1 syn

Instructions:

  1. Make up the jelly by packet instructions
  2. Equally divided among 4 glasses and refrigerate too set.
  3. Top each glass with 80g of yoghurt and mixed berries, then 4 tbs of light aerosol cream.
  4. Sprinkle each glass with 1 tsp of sprinkles.
  5. If only using one, I recommend layering when ready to eat.
  6. Add to a glass, top with the yoghurt, then some fresh fruit and lastly the squirty cream.
  7. ENJOY!!!

A yummy and quick dessert

Notes

This recipe is gluten free, Slimming World and Weight Watchers friendlyExtra Easy – 2.5 syns per servingOriginal – 2.5 syns per servingGreen – 2.5 syns per servingWW Smart Points – 3Gluten Free – ensure all toppings are gluten free

Nutritional information is an estimate and is to be used for informational purposes only.

Nutritional Info:

Yield: 4

Serving Size: 1 serving

Amount Per Serving

Calories99TotalFat2.4gSaturatedFat2.1gSodium97mgCarbohydrates13.2gFiber1.9gSugar9.4gProtein4.6g

Crispy Chicken Strips Recipe

Crispy chicken strips are a kid-friendly dinner that’s perfect for a weeknight! Skip the fast food drive-thru and make perfectly juicy, crispy chicken at home!

Prep Time: 10mins

Cook Time: 10mins

Course: Main Course

Cuisine: American

Keyword: chicken, chicken strips, crispy chicken strips

Servings: 4 

INGREDIENTS:

  • 1 lb boneless skinless chicken breasts cut into strips or chicken tenders
  • 2 eggs
  • 1 cup Panko breadcrumbs
  • ¼ cup grated parmesan cheese
  • ½ teaspoon paprika
  • ½ teaspoon garlic powder
  • salt and pepper to taste
  • olive oil
  • honey mustard dipping sauce

INSTRUCTIONS:

  1. Sprinkle with salt and pepper.
  2. Lightly beat the eggs in a shallow bowl.
  3. In another bowl mix together the breadcrumbs, cheese, paprika, and garlic powder.
  4. Dip the chicken first into the eggs and then into the breadcrumb mixture.
  5. Transfer to a plate while you finish all the pieces this way.
  6. Heat a thin layer of oil in a large nonstick sauté pan over medium heat.
  7. Cook the chicken nuggets for several minutes on each side until they are golden brown. Make sure the nuggets are cooked all the way through.
  8. Transfer the nuggets to a plate lined with paper towels to help drain off any excess oil.
  9. Serve with honey mustard dipping sauce.

Nutritional Info:

Calories: 249kcal | Carbohydrates: 12g | Protein: 31g | Fat: 8g | Saturated Fat: 3g | Polyunsaturated Fat: 1g | Monounsaturated Fat: 2g | Trans Fat: 1g | Cholesterol: 160mg | Sodium: 369mg | Potassium: 497mg | Fiber: 1g | Sugar: 1g | Vitamin A: 330IU | Vitamin C: 1mg | Calcium: 116mg | Iron: 2mg

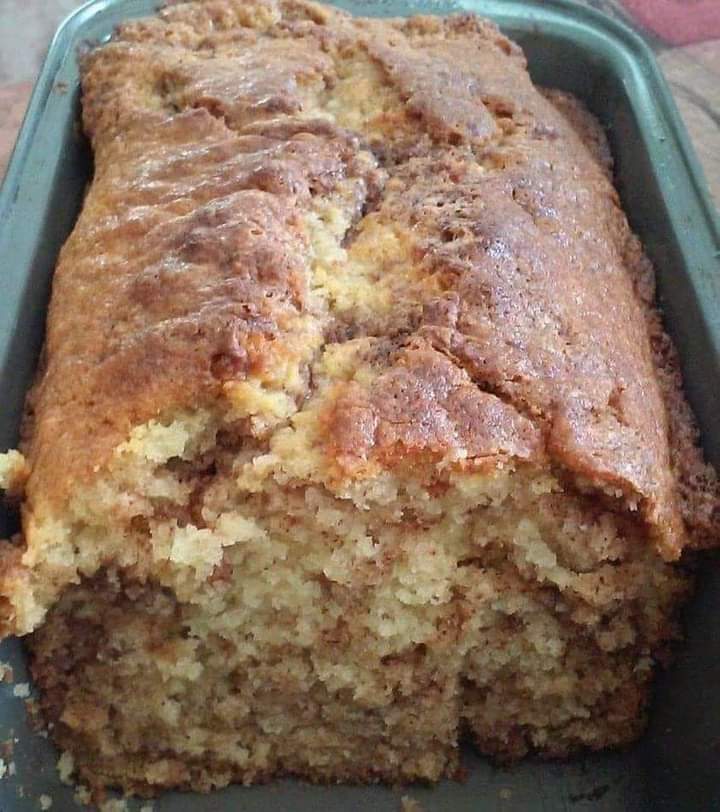
Amish Cinnamon Bread Recipe

This one bowl recipe for Amish Cinnamon Bread is easy to make, filled with cinnamon flavor, and perfect for serving with a hot cup of coffee.

Prep Time: 10 minutes

Cook Time: 1hour 10 minutes

Total Time: 1hour 20minutes 

Servings: 12 Slices 

Ingredients:

▢½ cup softened butter salted

▢¾ cup granulated sugar

▢¼ cup packed brown sugar

▢1 large egg

▢1 teaspoon vanilla extract

▢1 cup buttermilk

▢2 cups all purpose flour

▢1 teaspoon baking soda

Cinnamon Sugar Filling and Topping

▢⅓ cup sugar

▢1 ½ teaspoons cinnamon

▢2 tablespoons melted butter

Instructions:

Preheat the oven to 350ºF and grease a 9X5 loaf pan with butter or oil.

Add the softened butter to a large bowl with a hand mixer, OR a stand mixer fitted with the paddle attachment.

Add in granulated sugar and brown sugar to the butter and mix on medium-high speed until the butter and sugars have creamed and are light and fluffy, about 2-3 minutes.

Add the egg, vanilla and buttermilk and mix until fully incorporated.

Sift the flour and baking soda into the bowl and mix just until it starts to come together. Use a silicone spatula to fold everything together until the flour is absorbed and no large lumps remain.

Stir together ⅓ cup of sugar and 1 ½ teaspoons of cinnamon and set aside.

Add half of the batter to the prepared loaf pan, and add half of the cinnamon sugar mixture evenly on top of the batter. Use a butter knife to swirl it into the batter.

Add the remaining half of the batter on top, smoothing it out evenly.

Add the remaining cinnamon sugar mixture and swirl it into the top layer of batter using a butter knife.

Drizzle 2 tablespoons of melted butter on top of the loaf.

Bake in the preheated oven for 50-70 minutes, or until a cake tester (or toothpick) comes out clean when inserted into the center.

Allow to cool in the pan for 20 minutes, and then gently coax it out of the loaf pan and transfer to a wire rack. Allow to cool to room temperature before wrapping and storing.

Notes:

Storing: Wrap your loaf in a triple layer of plastic wrap. Store at room temperature for 2-3 days, or in the refrigerator for 5 days. For longer storage, add the wrapped loaf to a freezer bag and label. Freeze for up to 2 months.

Softened Butter: It’s important that you use softened butter, otherwise it will be very difficult to cream the butter and sugars together. In a pinch melted butter can work, but it will make for a less moist loaf.

Nutritional Info:

Serving: 1g | Calories: 261kcal | Carbohydrates: 39g | Protein: 3g | Fat: 10g | Saturated Fat: 6g | Polyunsaturated Fat: 3g | Cholesterol: 42mg | Sodium: 227mg | Fiber: 1g | Sugar: 23g

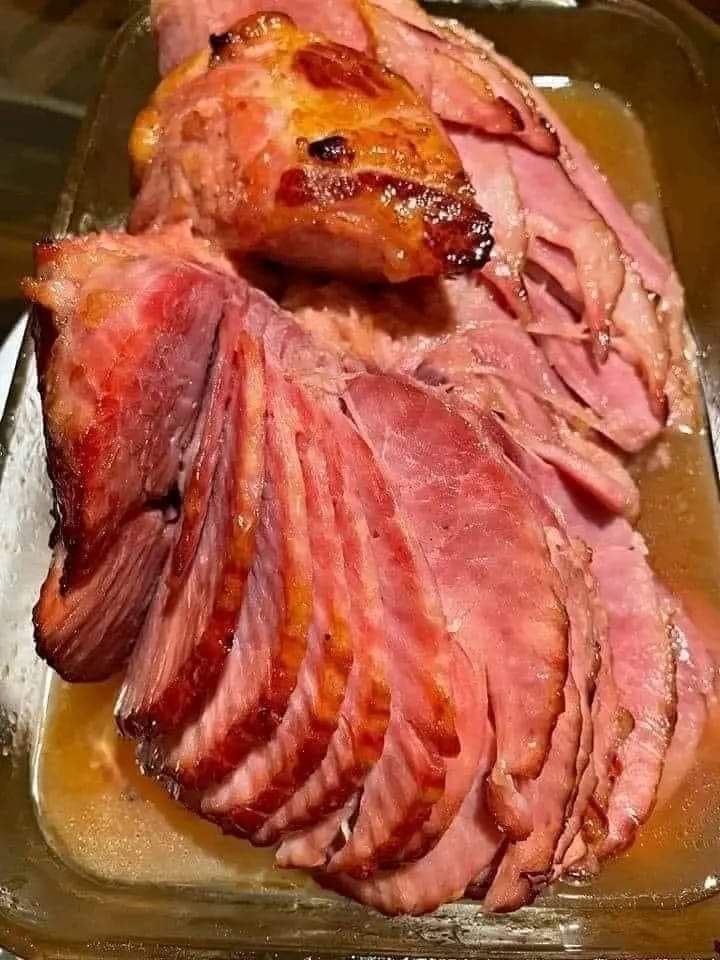
Baked Ham Recipe

Baked Ham is my kids’ all time favorite meal! They’d pass up a turkey dinner any day of the week (or any holiday) for ham.

This easy baked ham is moist, tender and delicious inside while the outside is brushed with a brown sugar glaze and caramelized for a hint of sweetness. We serve this baked ham for special occasions (like Easter and Christmas) but it’s simple enough to make any time of year!

How much ham per person

If you’re using a bone in ham, you’ll want about 3/4 pound of ham per person and a bit more if you want leftovers (for Ham and Corn Chowder or Cheesy Ham and Potato Casserole). An 8lb ham should feed about 9 people.

What to Serve With Glazed Ham

This beautiful brown sugar ham is most often served at Christmas dinner or Easter dinner at our house! We serve it with our favorite sides for the perfect meal!


PREP TIME: 5minutes

COOK TIME: 2 hours 30 minutes

TOTAL TIME: 2hours 35minutes 

SERVINGS: 12 Servings

Baked ham is moist, tender and delicious inside while the outside is brushed with a brown sugar glaze and caramelized for a hint of sweetness.

INGREDIENTS:

  • 1 spiral cut ham with bone-in approx 7-9 pounds
  • 2 tablespoons dijon mustard
  • ¼ cup pineapple juice or orange juice
Brown Sugar Glaze
  • ½ cup pineapple juice or orange juice
  • ½ cup brown sugar
  • 2 tablespoons dijon mustard
  • ¼ teaspoon ground ginger
  • 2 teaspoons cornstarch

INSTRUCTIONS:

  1. Preheat oven to 325°F.
  2. Combine dijon mustard and pineapple juice. Brush over ham.
  3. If your ham has a plastic disk on the bone, this should be removed and discarded. Place the ham, flat side down in a roasting pan, and cover tightly with foil. Roast 12-15 minutes per pound (or according to package directions).
  4. Meanwhile, combine glaze ingredients and bring to a boil. Turn heat down and simmer 2-3 minutes. Cool.
  5. 15 minutes before ham is done, remove from the oven and turn the oven up to 425°F.
  6. Brush with glaze and return to the oven until the glaze is caramelized and the ham has reached the safe cook temperature.

Notes:

If you purchase a smoked ham, it has been cooked, be sure to check the package to ensure it says it is “fully cooked”. If your ham is fully cooked on the package (as most spiral hams are), it will need to cook to 140°F (basically just to heat it).

NUTRITIONAL INFO:

Calories: 690, Carbohydrates: 11g, Protein: 57g, Fat: 44g, Saturated Fat: 15g, Cholesterol: 164mg, Sodium: 3200mg, Potassium: 795mg, Sugar: 10g, Vitamin C: 1.5mg, Calcium: 30mg, Iron: 2.5mg

Turmeric Honey: The Most Powerful Antibiotic That Not Even Doctors Can Explain

Turmeric and honey – The most potent antibiotic

Since ages Indian spices have been used as a medicine to cure several ailments. Indian spices have for long been used as medicines. Right from burns to minor cuts, turmeric was used as an instant remedy to treat such issues. This was simply because of the miraculous properties of turmeric.
From common cold to soar throat both honey and turmeric are very potent and important alternatives to conventional medicines because of their benefits and antibiotic properties! In fact, these two wonder ingredients are easily and most affordable items to be used as medicines, honey and turmeric would be it! Honey and turmeric both are used for a variety of problems like cold, digestive issues, cuts, wounds, muscles and sprains along with many other health and skin issues.
We are not even joking when we say, the majority of your health problems has turmeric and honey as their solution!
They have been used intensely in Ayurvedic, Indian and Chinese medicines for thousands of years.

What makes turmeric so powerful?

Turmeric has a very important compound in it, called the curcuminoids. Just like polyphenol, curcuminoid has several healing properties which makes turmeric so strong that it can fight almost all health issues in one go! It is also a very strong anti-oxidant which is why it is very good for the skin and it contains antiseptic, antibacterial, anti-fungal and anti-inflammatory properties which help it to treat wounds and allergies very easily!

What makes honey so powerful?

Honey has the power to fight infections without creating resistant bacterias like modern antibiotics. It is so potent that it should be the first method to be used when fighting infections. Many scientists have claimed that honey is more powerful than most of the conventional antibiotics. Honey can also be used to treat infections, cuts and wounds by applying on them directly. Honey can also be taken orally to treat health problems.

Benefits of turmeric

– Reduces inflammation
– Improves digestion
– Reduces pain
– Prevents cancer
– Improves anxiety and depression

How to use natural antibiotic using honey and turmeric?

Many of you must be very confused about using these wonderful items instead of your regualr medicines. You should give it a try. Here is a simple recipe that you can use when you fall sick.

Ingredients:

1/4th cup raw honey,
2 drops of lemon essential oil
1 tsp of ground turmeric

Instructions:

Mix all the ingredients together and stir well. Pour the mixture in a container with a lid and store in room temperature. Consume half teaspoon thrice a day to get rid of allergies, cold or flu.

Ingredients:

1 teaspoon turmeric powder
2 tablespoons pure honey (preferably raw honey)
A pinch of freshly ground black pepper

PREPARATION:

Make sure you use good quality turmeric powder and pure honey. Raw honey is preferred as it offers additional health benefits.
Mix: In a small bowl, add 1 teaspoon of turmeric powder and 2 tablespoons of honey. Add a pinch of freshly ground black pepper. The black pepper increases the bioavailability of the curcumin in turmeric, allowing your body to absorb it better.
Mix Thoroughly: Stir the ingredients thoroughly until they come together into a smooth paste.
Storage: Pour the mixture into an airtight jar or container. Store in a cool, dry place, preferably the refrigerator, to preserve freshness.
Application:
Turmeric honey can be used in different ways:
As a natural antibiotic: If you have signs of cold or infection, you can take 1 teaspoon of turmeric honey to boost your immune system and reduce inflammation.
As an anti-inflammatory: This mixture can be applied to inflamed areas of skin to relieve itching, redness and swelling.
As a calming tea: Add a teaspoon of turmeric honey to a cup of warm water to make a calming tea.
Note:
Before using turmeric honey as a remedy, consult your doctor, especially if you have any allergies or medical concerns.
Turmeric honey is a fascinating natural remedy that combines the healing powers of two amazing ingredients. It is an example of how nature provides us with simple but effective solutions to our health problems. Try it and experience the amazing benefits of this natural antibiotic for yourself.

Fruit And Yogurt Smoothie Recipe

This easy fruit smoothie recipe calls for just three ingredients: yogurt, fruit juice and frozen fruit. Mix up your fruit combinations from day to day for a healthy breakfast or snack that never gets boring.

Active Time: 10 mins

Total Time: 10 mins

INGREDIENTS:

  • 3/4 cup nonfat plain yogurt
  • 1/2 cup 100% pure fruit juice
  • 1 1/2 cups (6 1/2 ounces) frozen fruit, such as blueberries, raspberries, pineapple or peaches

Directions:

  1. Puree yogurt with juice in a blender until smooth.
  2. With the motor running, add fruit through the hole in the lid and continue to puree until smooth.

Nutritional Info:

Serving Size 2 cups 

Calories279 total carbohydrate 56g dietary fiber 7g total sugars 46g protein 12g total fat 2g saturated fat 0g cholesterol 4mg vitamin a 121iu vitamin c 9mg folate 38mcg sodium 149mg calcium 394mg iron 1mg magnesium 53mg potassium 719mg

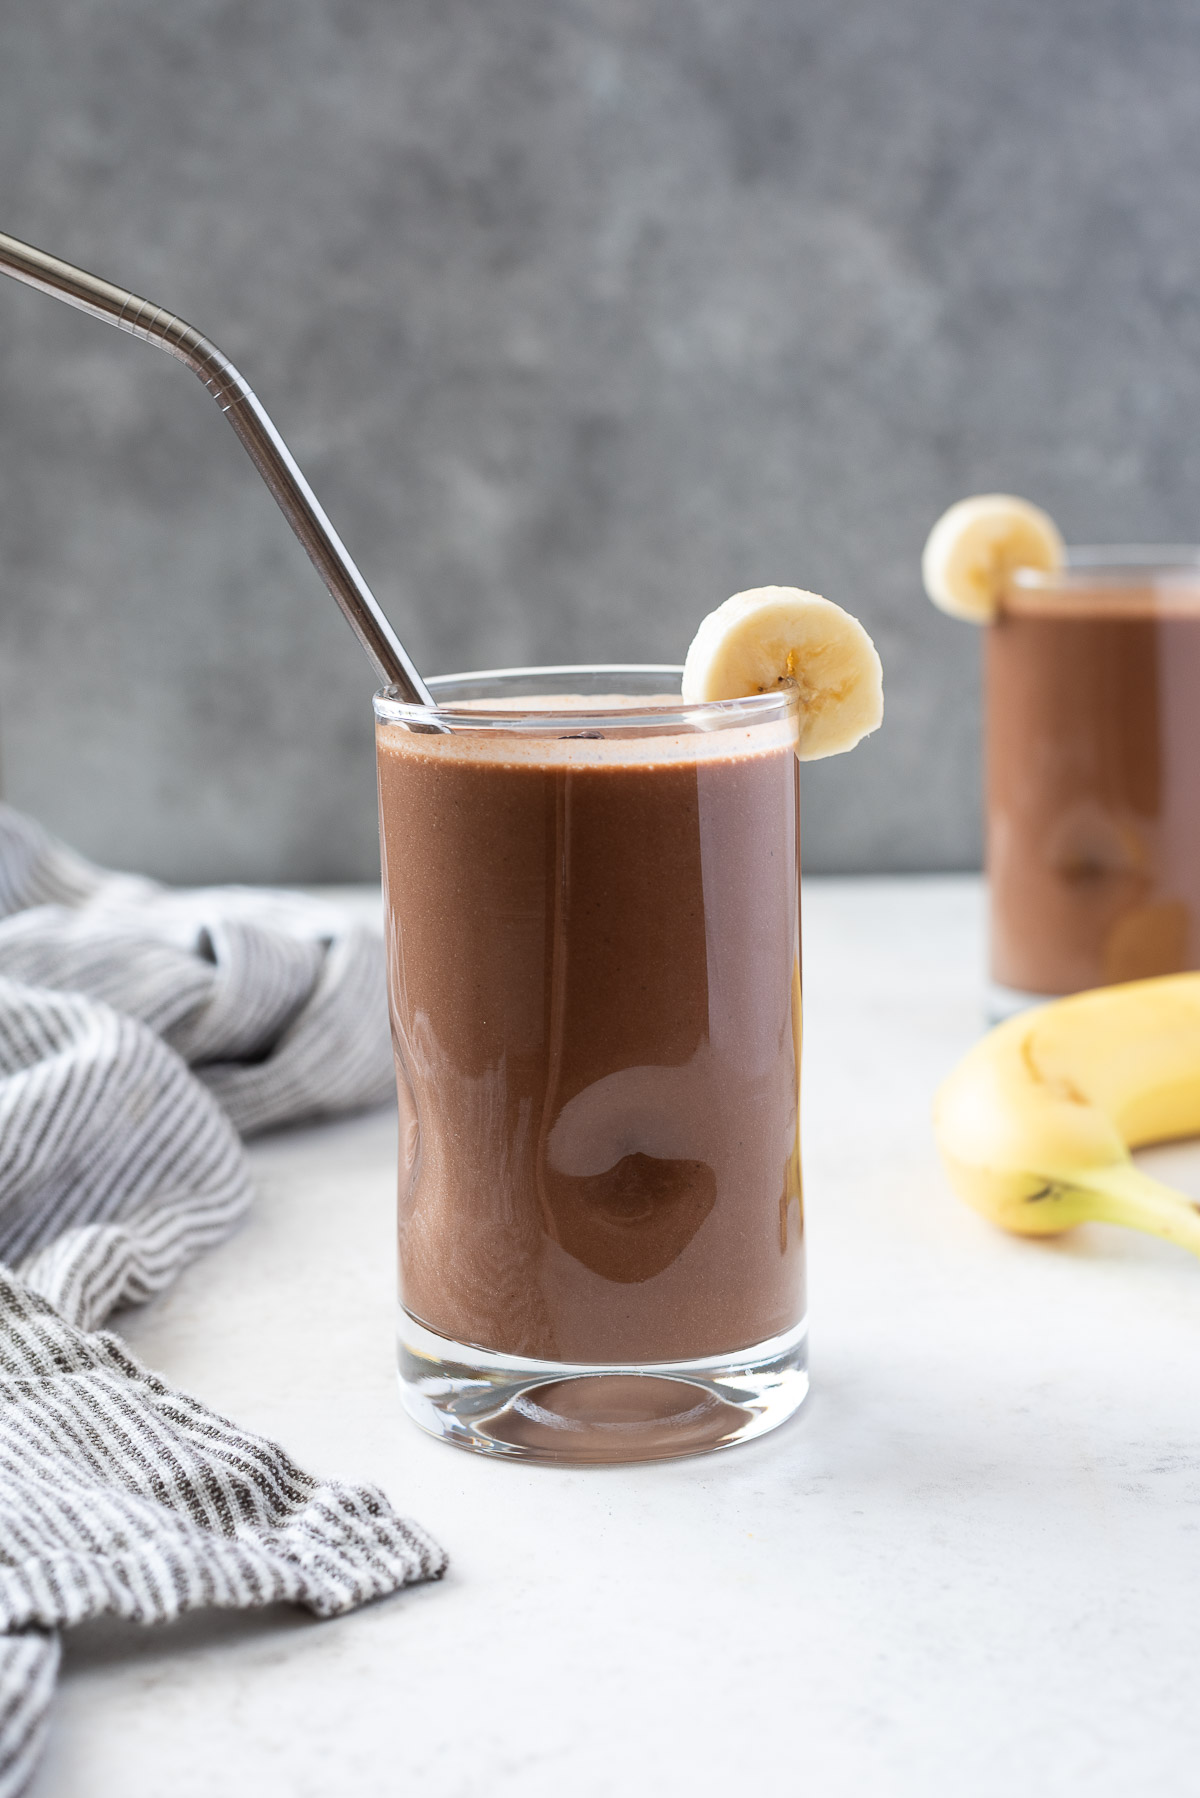
Chocolate banana protein smoothie

Red lentils give this smoothie a plant-based protein boost. To make this smoothie vegan, try using unsweetened coconut beverage or almond milk in place of the dairy milk.

Prep Time: 5 mins

Total Time: 5 mins

INGREDIENTS:

1 banana, frozen

½ cup cooked red lentils

½ cup nonfat milk

2 teaspoons unsweetened cocoa powder

1 teaspoon pure maple syrup

Directions:

  1. Combine banana, lentils, milk, cocoa and syrup in a blender.
  2. Puree until smooth.

Nutritional Info:

Serving Size 1 smoothie 

Calories 310 total carbohydrate 64g dietary fiber 9g total sugars 25g added sugars 4g protein 15g total fat 2g saturated fat 1g cholesterol 3mg vitamin a 348iu vitamin c 11mg folate 109mcg sodium 57mg calcium 185mg iron 4mg magnesium 87mg potassium 939mg

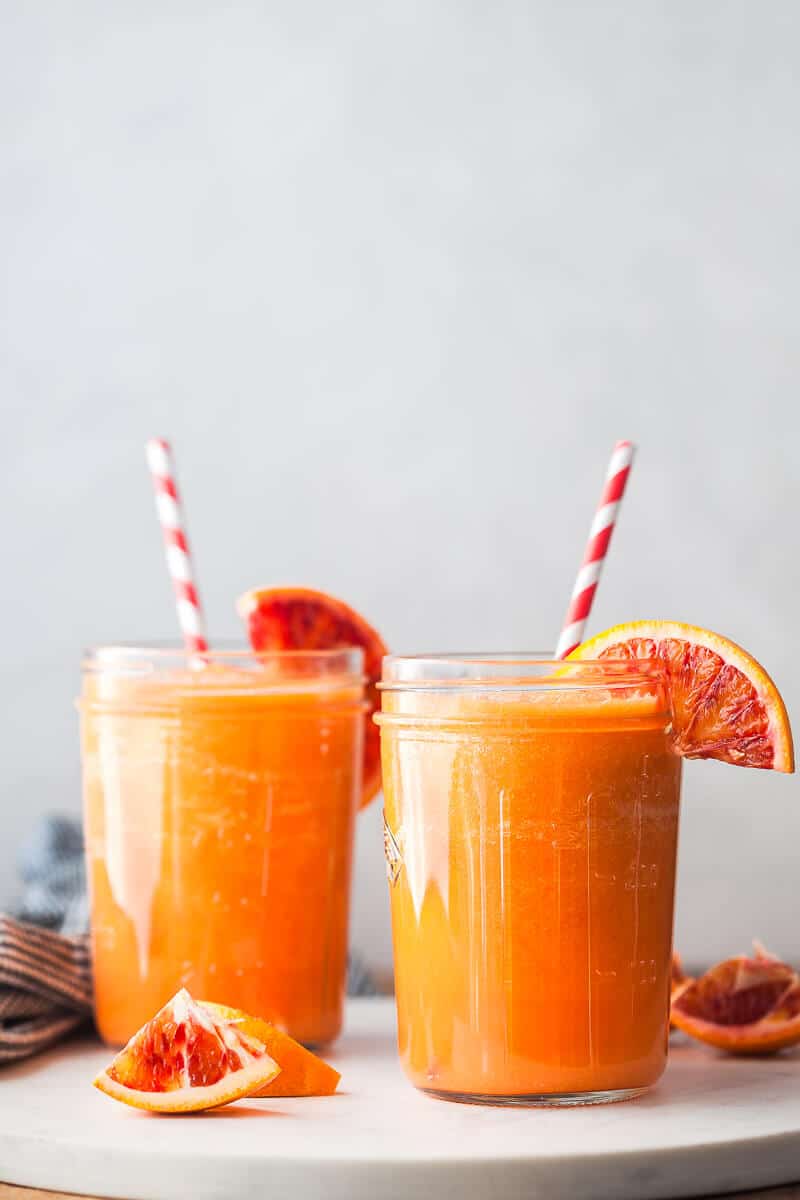
Carrot Smoothie Recipe

This type of drink tends to be pricey in the big city juice bars. Now you can make the recipe at home.

Prep Time: 10 mins

Additional Time: 25 mins

Total Time: 35 mins

INGREDIENTS:

  • 1 cup sliced carrots
  • ½ teaspoon finely shredded orange peel
  • 1 cup orange juice
  • 1 ½ cups ice cubes
  • 3 (1 inch) pieces Orange peel curls

Directions:

  1. In a covered small saucepan, cook carrots in a small amount of boiling water about 15 minutes or until very tender.
  2. Drain well. Cool.
  3. Place drained carrots in a blender.
  4. Add finely shredded orange peel and orange juice.
  5. Cover and blend until smooth. Add ice cubes; cover and blend until smooth.
  6. Pour into glasses. If desired, garnish with orange peel curls.

Nutritional Info:

Serving Size 5 ounces

Calories 55 total carbohydrate 13g dietary fiber 1g protein 1g sodium 16mg

Strawberry Blueberry Banana Smoothie Recipe

A smoothie with strawberries, blueberries and banana is delicately sweet and entirely kid-friendly, even with a boost of protein from hemp seeds. Freeze the fruits ahead of time for an extra frosty texture once blended.

Prep Time: 5 mins

Total Time: 5 mins

INGREDIENTS:

½ cup frozen strawberries

½ cup frozen blueberries

1 small ripe banana (frozen, if desired)

¾ cup chilled unsweetened cashew milk, plus more if needed

1 tablespoon cashew butter

1 tablespoon hulled hemp seeds

Directions:

  1. Combine strawberries, blueberries, banana, cashew milk, cashew butter and hemp seeds in a blender.
  2. Process until smooth, adding more cashew milk, if needed, for desired consistency.
  3. Serve immediately.

Nutritional Info:

Serving Size 2 cups

Calories335 total carbohydrate 46g dietary fiber 7g total sugars 24g protein 7g total fat 17g saturated fat 2g vitamin a 510iu vitamin c 42mg folate 58mcg sodium 115mg calcium 115mg iron 3mg magnesium 166mg potassium 705mg

Syn Free HomeMade Chicken Nuggets

A Healthy Slimming World Fakeaway Recipe

If you love a good Fakeaway, then you’ll love these Homemade Syn Free Chicken Nuggets! They’re the same texture as the unhealthy kind you’d buy at a fast food restaurant, but are oven baked and 100% syn free using your Healthy Extra B on Slimming World.

Not only are these the perfect Slimming World family dinner recipe, they’re also freezer friendly, packed with flavour and super simple to make. You can freeze them before cooking, once you’ve covered the chicken with the breadcrumbs (best done flat to avoid the nuggets losing their shape), or you can freeze once cooked.

This recipe for Homemade Syn Free Chicken Nuggets is a healthy, family friendly recipe that knocks any unhealthy takeaway out of the park!

This recipe uses breadcrumbs to coat the chicken, mixed with some delicious spices to give them tonnes of flavour! The recipe below shows you how to make your breadcrumbs from scratch using wholemeal bread, which keeps these totally syn free too. The full recipe includes two Healthy Extra B servings on Slimming World, which simply needs to be divided between the number of servings.

These Syn Free Chicken Nuggets are a delicious Slimming World fakeaway recipe that the whole family will love!

Prep Time: 15 min

Cook Time: 20 min

Total Time: 35 min

Serves: 6

INGREDIENTS:

Breadcrumbs

120g Wholemeal Bread (2-3 slices aprox.)

1/2tsp Garlic Powder

1/2tsp Salt

1/2tsp Paprika

1/4tsp Mustard Powder

1/2 Chicken Oxo Cube (crushed)

1/4tsp Cumin

Chicken Nuggets

2x Chicken Breasts

1/2tsp Garlic Powder

1/2tsp Salt

Handful Fresh Parsley

Low Calorie Cooking Spray

2x Eggs (plus a pinch of salt)

INSTRUCTIONS:

  1. Break 120g wholemeal bread into chunks and toast until browned and crispy.
  2. Blitz the toasted bread in a food processor with the remaining breadcrumb ingredients until you have an evenly textured mixture.
  3. Whisk two eggs with a pinch of salt. The salt helps to break down the egg yolk and makes it easier to bread your syn free chicken nuggets.
  4. Chop two chicken breasts and combine with garlic powder, salt and fresh parsley and blitz in the food processor until you have a chunky paste.
  5. Wet your hands and shape the chicken mince into nuggets by rolling out balls of the mixture and then pressing them flat between your fingers.
  6. Once formed, dip your syn free chicken nuggets into the whisked egg yolks and then into the breadcrumbs, making sure to completely coat each one.Place on to a baking tray sprayed liberally with low calorie cooking spray.
  7. Bake your syn free chicken nuggets at 180 degrees for 20-25 minutes, or until crispy and cooked all the way through. Serve with your choice of sides and sauces!

NOTES:

Serves 2-4 people depending on the size of the nuggets. Recipe is SYN FREE on Slimming World using 2x Healthy Extra B portions. Divide the number of Healthy Extra B portions by the number of servings made. This recipe is the property of Basement Bakehouse (owned by Atuin Digital Ltd) and is therefore subject to Copyright laws. Do not copy, or use the images or text in this recipe or blog post without permission.

If cooking raw from frozen, cook for aprox. 30 minutes or until cooked through and crispy. To reheat frozen cooked nuggets, you can use the microwave or oven. Please ensure that they are piping hot all the way through before serving.

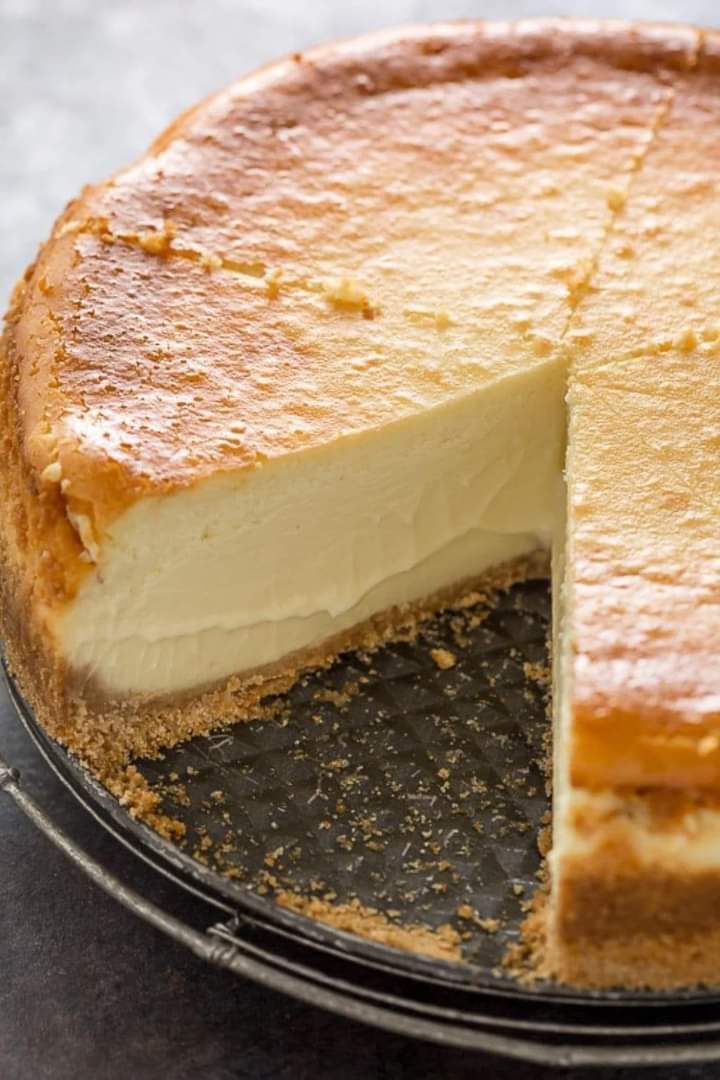
Easy Cheesecake Recipe

Today I’m so excited to show you how to make the best Cheesecake Recipe of your life. Simple, classic, and no water bath required!! The texture is smooth, rich, and creamy, served over a crisp homemade graham cracker crust. 

I’ve included tons of detailed tips and important info in today’s post so you can make the perfect creamy cheesecake every time. For a visual how-to, be sure to check out my step-by-step video beneath the recipe!

How to make the creamiest, BEST Cheesecake Recipe! Oh, and there’s no water bath required!

Course: Dessert

Cuisine: American

Prep Time: 20minutes

Cook Time: 1hour 15minutes 

Cooling Time: 6hours

Total Time: 7hours 35minute

Servings: 12 slices


INGREDIENTS:

  • Graham Cracker Crust¹
  • 1 ½ cups graham cracker crumbs (170g)
  • 2 Tablespoons sugar
  • 1 Tablespoon brown sugar (can substitute white)
  • 7 Tablespoons butter melted
Cheesecake
  • 32 oz cream cheese² softened to room temperature (910g)
  • 1 cup sugar (200g)
  • ⅔ cups sour cream (160g)
  • 1 ½ teaspoons vanilla extract
  • ⅛ teaspoon salt
  • 4 large eggs room temperature, lightly beaten

INSTRUCTIONS:

  1. Preheat oven to 325F (160C).
  2. Prepare Graham Cracker crust first by combining graham cracker crumbs, sugar, and brown sugar, and stirring well. Add melted butter and use a fork to combine ingredients well.
  3. Pour crumbs into a 9” Springform pan and press firmly into the bottom and up the sides of your pan. Set aside.
Cheesecake
  1. In the bowl of a stand mixer or in a large bowl (using a hand mixer) add cream cheese and stir until smooth and creamy (don’t over-beat or you’ll incorporate too much air).
  2. Add sugar and stir again until creamy.
  3. Add sour cream, vanilla extract, and salt, and stir until well-combined. If using a stand mixer, make sure you pause periodically to scrape the sides and bottom of the bowl with a spatula so that all ingredients are evenly incorporated.
  4. With mixer on low speed, gradually add lightly beaten eggs, one at a time, stirring just until each egg is just incorporated. Once all eggs have been added, use a spatula to scrape the sides and bottom of the bowl again and make sure all ingredients are well combined.
  5. Pour cheesecake batter into prepared springform pan. To insure against leaks, place pan on a cookie sheet that’s been lined with foil.
  6. Transfer to the center rack of your oven and bake on 325F (160C) for about 75 minutes. Edges will likely have slightly puffed and may have just begun to turn a light golden brown and the center should spring back to the touch but will still be Jello-jiggly. Don’t over-bake or the texture will suffer, which means we all suffer.
  7. Remove from oven and allow to cool on top of the oven³ for 10 minutes. Once 10 minutes has passed, use a knife to gently loosen the crust from the inside of the springform pan (this will help prevent cracks as your cheesecake cools and shrinks). Do not remove the ring of the springform pan.
  8. Allow cheesecake to cool another 1-2 hours or until near room temperature before transferring to refrigerator and allowing to cool overnight or at least 6 hours. I remove the ring of the springform pan just before serving then return it to the pan to store. Enjoy!

NOTES:

I have not tested this recipe in a convection oven.

1) For more details on making this crust or to use whole graham crackers, please see my Graham Cracker Crust Recipe.

2) Make sure that you use the brick-style cream cheese, not the spreadable version that is available in tubs.

3) I recommend the top of the oven because it is usually the warmest place in my house (after it’s been on for over an hour). This will help to cool the cheesecake more gradually and will also help avoid cracks).

NUTRITIONAL INFO:

Serving: 1slice | Calories: 500kcal | Carbohydrates: 32g | Protein: 8g | Fat: 36g | Saturated Fat: 22g | Polyunsaturated Fat: 1g | Monounsaturated Fat: 3g | Cholesterol: 179mg | Sodium: 450mg | Potassium: 45mg | Fiber: 1g | Sugar: 24g | Vitamin A: 1200IU | Calcium: 80mg | Iron: 0.9mg


California Pasta Salad Recipe

This delicious and colorful California Pasta Salad is always a hit as part of a party menu. Make this easy pasta salad recipe up to a day ahead if you like; the flavors only get better as it marinates.

Course: Salad

Cuisine: American

Prep Time: 15minutes

Cook Time: 2hours 25minutes 

Total Time: 2 hours 40minutes

Servings: 16 (1-cup) servings

INGREDIENTS:

For the Salad Dressing:
  • 1 cup olive oil
  • 1/2 cup red wine vinegar
  • 1/4 cup Parmesan cheese
  • 1 tablespoon sesame seeds
  • 2 teaspoons dried oregano
  • 2 teaspoons poppy seeds
  • 1/4 teaspoon garlic or two cloves fresh, finely minced
  • 1 teaspoon paprika
  • 1/2 teaspoon celery seed
  • 1/4 teaspoon salt or more to taste
For the Pasta Salad:
  • 1 pound thin spaghetti broken into thirds (see note 1)
  • 2 medium zucchini diced
  • 1 pint grape tomatoes halved (see note 2)
  • 1 large hot house cucumber diced
  • 1 medium green bell pepper diced
  • 1 medium red bell pepper diced
  • 1 red onion diced (optional)
  • 1 (6.5 ounce) can sliced black olives drained (see note 3)

INSTRUCTIONS:

  1. In a small bowl with a whisk, or in a jar with a tight-fitting lid, combine olive oil, red wine vinegar, Parmesan cheese, sesame seeds, oregano, poppy seeds, garlic, paprika, celery seed, and salt.
  2. Mix well and allow flavors to blend while preparing the salad.
  3. Bring 4 quarts water and 1 tablespoon salt to boil.
  4. Add spaghetti and cook according to package directions, about 9 minutes. Drain well and rinse in cold water.
  5. In a large bowl add zucchini, tomatoes, cucumber, bell peppers, onion, and black olives.
  6. Add rinsed pasta and drizzle with salad dressing to taste (you don’t have to use it all).
  7. Toss to combine, cover, and chill at least 2 hours or overnight.

Notes:

Thin spaghetti: Yes, I know Italian chefs will scoff at me recommending that you break the noodles into thirds. I strongly suggest that you follow suit, however; this allows the pasta to not only cook faster and fit easier into your pot, but also makes it easier to eat.

Grape tomatoes: Cherry tomatoes or chopped Roma, classic, or heirloom tomatoes can also pinch hit.

Canned black olives: I know these are polarizing, so feel free to omit. But I adore the briny element they add to the pasta salad.

Yield: This California Pasta Salad recipe makes a whopping 16 1-cup servings. Talk about perfect for parties, potlucks, or picnics! Feel free to halve the recipe if you’re sharing it with a smaller crew.

Storage: Transfer extra pasta salad to an airtight container in the refrigerator up to 4 days

Make ahead: California Pasta Salad can be assembled up to 3 days in advance. Store in an airtight container in the refrigerator until ready to serve. Toss gently before serving.

Cheese, please! If you enjoy your pasta salad with a bit of creamy dairy in the mix, toss in mozzarella bocconcini or crumble in some feta or goat cheese.

Nutritional Info:

Serving: 1cup | Calories: 257kcal | Carbohydrates: 26g | Protein: 5g | Fat: 15g | Saturated Fat: 2g | Polyunsaturated Fat: 2g | Monounsaturated Fat: 10g | Cholesterol: 1mg | Sodium: 70mg | Potassium: 278mg | Fiber: 2g | Sugar: 3g | Vitamin A: 647IU | Vitamin C: 25mg | Calcium: 54mg | Iron: 1mg

Cheesy Broccoli Souffle Recipe

Every holiday meal needs a solid side dish to round it out, Grandma’s Cheesy Broccoli Souffle Casserole is just that dish. It’s quick & easy, full of good for you veggies served in tasty cheesy form. It’s perfect for the holidays, but also easy enough for every day dinner.

If you grew up in the South, you know there’s one thing treasured above all else. A precious item handed down, or passed down, from generation to generation.

Some might argue it’s more precious than fine jewels, money, even gold. Every generation one matriarch is entrusted with it’s keeping. And with bringing it’s sacred, secret contents to every family gathering.

A cheesy vegetable casserole that pairs perfectly with any main meat for a comforting meal, fit for a crowd.

Prep Time: 10mins

Cook Time: 45mins

Total Time: 55mins

Course: Side Dish

Cuisine: American

Servings: 8 

Ingredients:

  • 2 10 oz pkgs frozen broccoli, thawed, drained, & chopped OR 20 oz fresh broccoli, steamed, and chopped
  • 1 medium onion, diced
  • 1 10 3/4 oz can cream of broccoli or cream of mushroom soup
  • 1 cup shredded sharp cheddar cheese, divided
  • 1/4 cup milk
  • 1/4 cup mayonnaise
  • 2 eggs beaten
  • pinch crushed red pepper flakes
  • smoked paprika

INSTRUCTIONS:

  1. Cook the broccoli, drain thoroughly, and spoon into a lightly greased, medium-large sized baking dish. Set aside.
  2. In a large mixing bowl, stir together the onion, soup, 1/2 cup of cheese, milk, mayo, eggs, and red pepper flakes until evenly combined.
  3. Spoon the mixture evenly out over the broccoli. Using the back of the spoon, spread out as necessary.
  4. Sprinkle the remaining 1/2 cup of cheddar evenly out over top the casserole. Sprinkle with smoked paprika.
  5. Bake the casserole at 350 degrees for 45 minutes. Let rest 5-8 minutes before serving.

Nutritional Info:

Calories: 202kcal | Carbohydrates: 2g | Protein: 12g | Fat: 16g | Saturated Fat: 6g | Cholesterol: 245mg | Sodium: 223mg | Potassium: 128mg | Fiber: 1g | Sugar: 1g | Vitamin A: 482IU | Vitamin C: 1mg | Calcium: 148mg | Iron: 1mg