Peanut Butter Cup Dessert Lasagna 🍰
-
Prep time: 30 minutes ⏱️
-
Chilling time: 4 hours (minimum) ❄️
-
Servings: 12–15 👥
-
Difficulty: Easy (No-Bake!) ✨
Ingredients List 🛒
-
Chocolate Sandwich Cookies: 1 package (approx. 36 cookies) — For the crunchy base. 🍪
-
Melted Butter: 6 tablespoons — To bind the crust. 🧈
-
Cream Cheese: 8 oz package — Softened to room temperature. 🧀
-
Peanut Butter: 1 cup — Creamy works best for a smooth texture. 🥜
-
Powdered Sugar: 1 cup — To sweeten the peanut butter layer. 🍬
-
Milk: 2 tablespoons — To thin the peanut butter mixture slightly. 🥛
-
Whipped Topping: 1 container (12 oz) — Thawed (divided into two parts). ☁️
-
Instant Chocolate Pudding: 2 boxes (3.9 oz each). 🍫
-
Cold Milk: 3 cups — For the chocolate pudding layer. 🥛
-
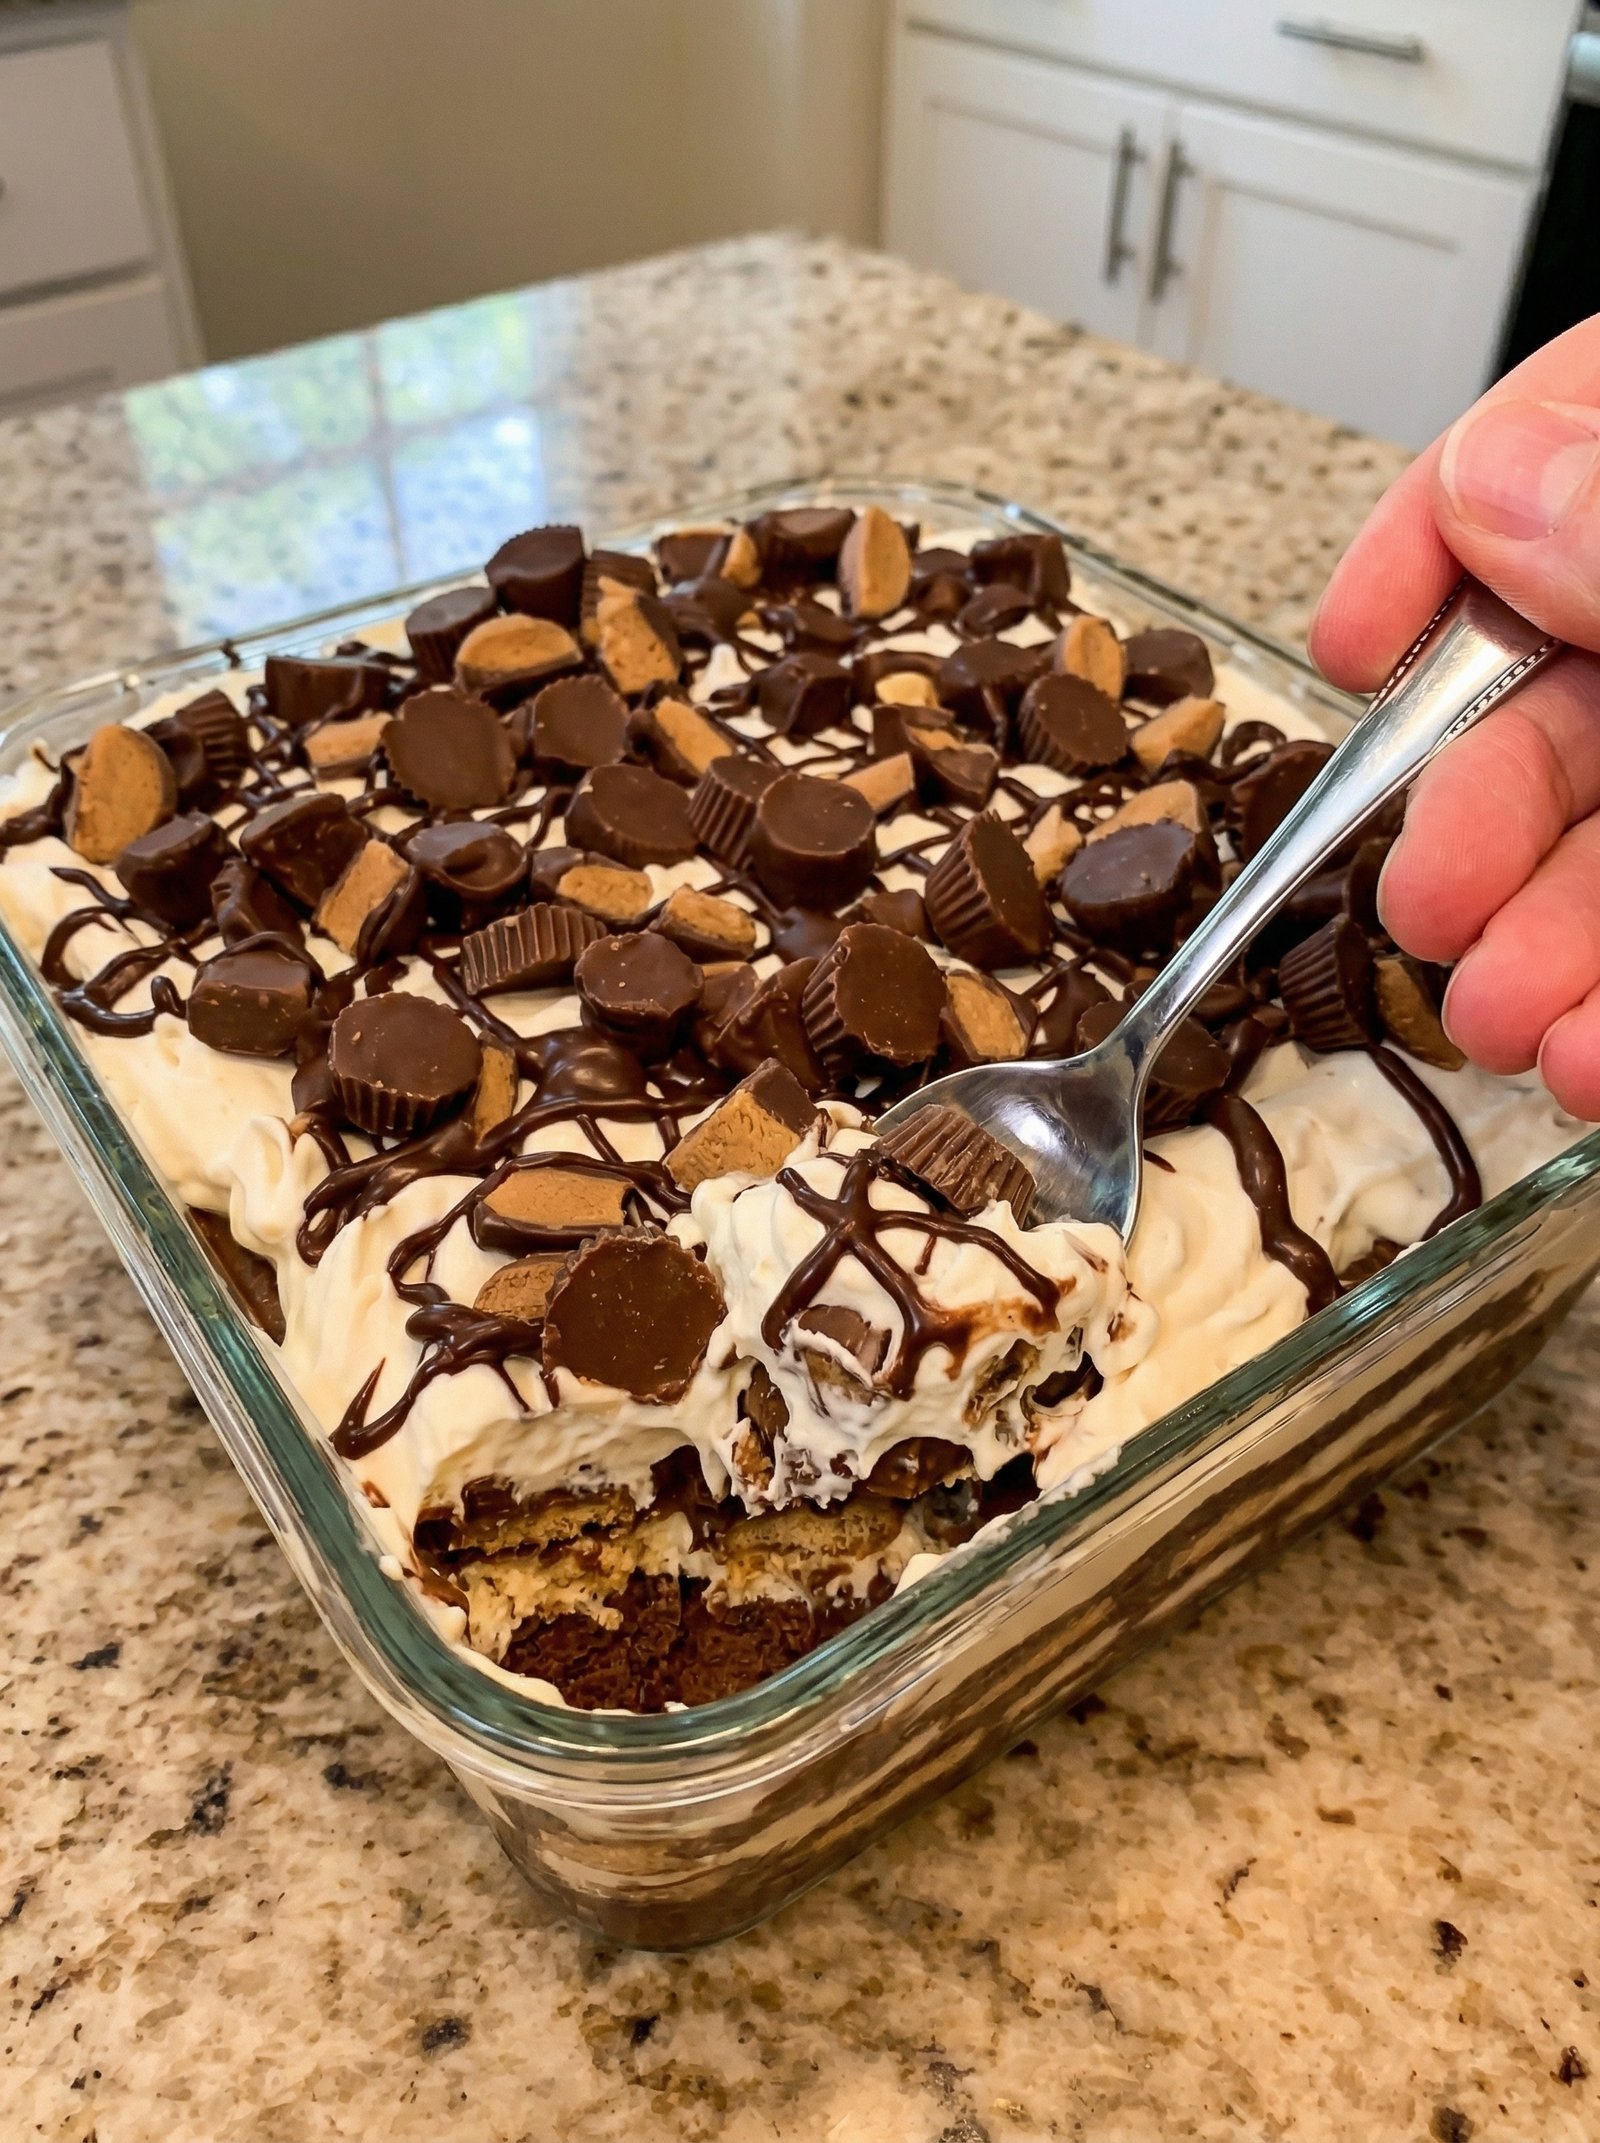
Mini Peanut Butter Cups: 1.5 cups — Chopped or halved for the topping. 🍬
-
Chocolate Syrup: For drizzling. 🍯
Step-by-Step Instructions 👩🍳
-
The Cookie Base 🍪
-
Crush the chocolate sandwich cookies into fine crumbs using a food processor or a rolling pin in a zip-top bag. ➡️ Mix the crumbs with melted butter until they look like wet sand. ➡️ Press the mixture firmly into the bottom of a 9×13 inch glass baking dish. ➡️ Place in the freezer for 10 minutes to set.
-
-
The Creamy Peanut Butter Layer 🥜
-
In a large bowl, beat the softened cream cheese, peanut butter, powdered sugar, and 2 tablespoons of milk until completely smooth. ➡️ Gently fold in half of the whipped topping (about 1.5 cups). ➡️ Spread this mixture evenly over the chilled cookie crust.
-
-
The Rich Chocolate Layer 🍫
-
In a separate bowl, whisk together both boxes of instant chocolate pudding and the 3 cups of cold milk for about 2 minutes until it starts to thicken. ➡️ Spread the pudding carefully over the peanut butter layer. ➡️ Let it sit for 5 minutes to firm up completely.
-
-
The Fluffy Topping ☁️
-
Spread the remaining whipped topping over the chocolate pudding layer, smoothing it out to the edges of the dish.
-
-
The Garnish 🍬
-
Sprinkle the chopped mini peanut butter cups generously over the top. ➡️ Drizzle with chocolate syrup in a zigzag pattern for that professional look.
-
-
The Chill Phase ❄️
-
Cover the dish and refrigerate for at least 4 hours, or ideally overnight. ➡️ This is crucial so the layers can set and be sliced cleanly.
-
Q/A Section ❓
Q: Can I use homemade whipped cream instead of store-bought whipped topping? A: ➡️ Yes! Use about 3-4 cups of heavy cream whipped with a little sugar until stiff peaks form. Note that the dessert may be slightly softer than the original version.
Q: Can I make this a lower-carb version? A: ➡️ You can swap the cookies for a nut-based crust, use sugar-free pudding mixes, and use a sugar-free whipped topping and sweetener. It still tastes delicious!
Q: What is the best way to slice this cleanly? A: ➡️ Use a sharp knife and wipe it clean with a damp paper towel between every single cut. This keeps the layers looking distinct and beautiful.
Q: How long will it stay fresh? A: ➡️ You can keep this in the refrigerator for up to 3–4 days. Keep it covered so it doesn’t absorb other fridge scents.
Pro-Tips 💡
-
Room Temperature Cheese: ➡️ Make sure your cream cheese is truly soft before mixing, or you will end up with small lumps in your peanut butter layer.
-
Cold Milk for Pudding: ➡️ Always use very cold milk for instant pudding to ensure it sets quickly and firmly.
-
Freeze for Quick Slicing: ➡️ If you are in a rush, pop the dessert in the freezer for 30 minutes before serving to get those perfect, clean squares.