All the hearty flavors of stuffed cabbage rolls in an effortless, one-pan casserole — no rolling required!
Servings: 8
Prep Time: 15 minutes
Cook Time: 1 hour 30 minutes
Rest Time: 5–10 minutes
Total Time: 1 hour 45 minutes
Dietary Badges: Contains Meat, Gluten-Free (if using GF broth and rice)
Ingredients
Main Ingredients
-
Ground beef
-
Cabbage, chopped
-
White onion, chopped
-
Uncooked white rice
-
Salt
Sauce and Liquid
-
Tomato sauce
-
Beef broth
Instructions
-
Preheat & Prep: Heat oven to 350°F (175°C). Gather and prep all ingredients.
-
Brown Beef: In a large skillet over medium-high heat, cook ground beef for 5–7 minutes until browned, breaking up as it cooks. Drain excess grease.
-
Mix Base: In a large bowl, combine chopped cabbage, tomato sauce, onion, uncooked rice, salt, and cooked beef. Stir well to combine.
-
Assemble: Transfer mixture to a 9×13-inch casserole dish and spread evenly.
-
Add Liquid: Pour beef broth evenly over the mixture. Cover tightly with foil.
-
First Bake: Bake covered for 1 hour.
-
Stir & Continue Baking: Remove from oven, stir gently, cover again, and bake an additional 20–30 minutes until cabbage is tender and rice is fully cooked.
-
Rest & Serve: Let casserole rest 5–10 minutes before serving.
Notes:
-
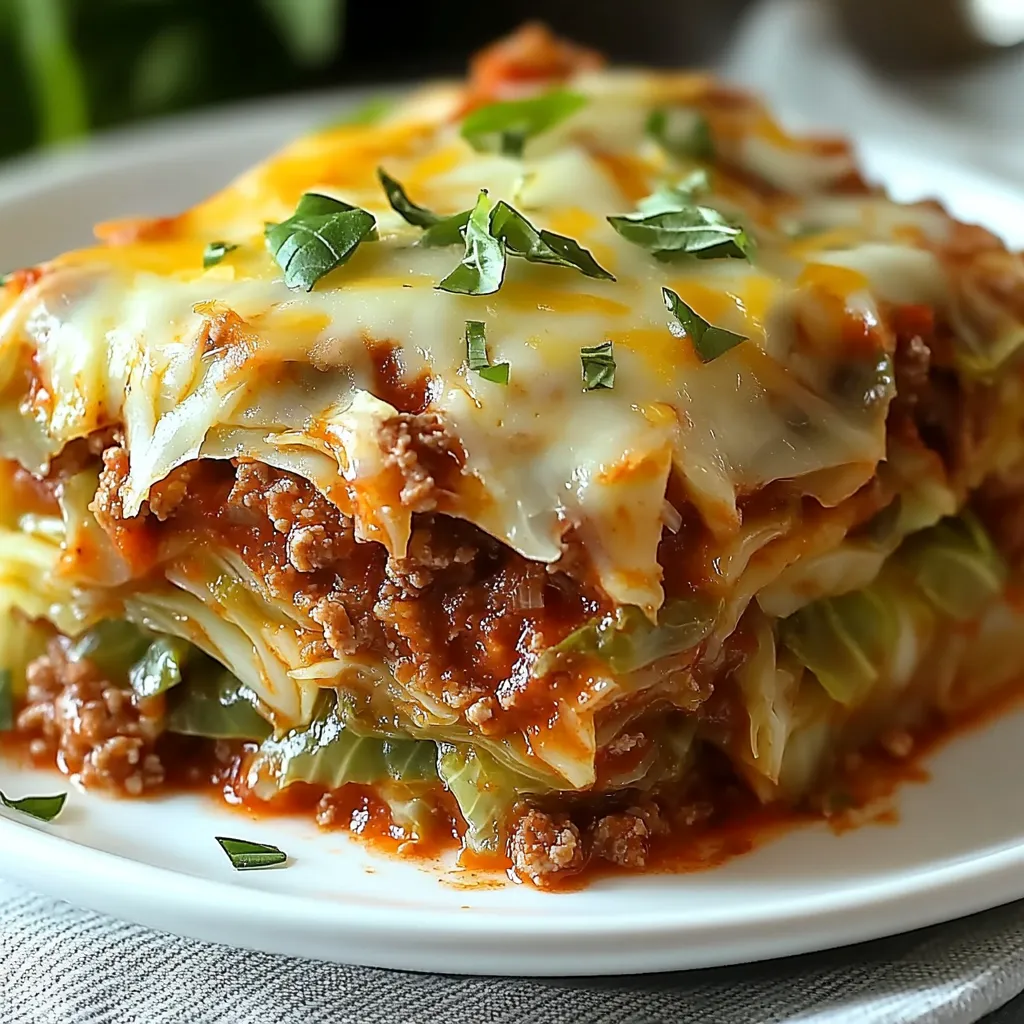
For a cheesy version, add shredded cheese on top during the last 10 minutes of baking.
-
Swap ground beef with turkey or pork for a lighter variation.
Brief Introduction
This casserole delivers the same cozy satisfaction as traditional stuffed cabbage rolls but skips the time-consuming rolling. It’s a simple, budget-friendly dish that makes a big batch — perfect for feeding a crowd or meal prepping.
Step-by-Step Cooking Guide
Preparing the Base
-
Brown the Beef: Cook in a large skillet until no longer pink. Drain excess fat for a lighter result.
-
Mix the Ingredients: Combine cabbage, onion, rice, tomato sauce, salt, and beef in a large bowl.
Layering & Baking
-
Assemble in Dish: Spread the mixture evenly in the casserole dish.
-
Add Broth & Bake: Pour beef broth over the top, cover tightly, and bake.
-
Final Bake: Stir after 1 hour, then continue baking until cabbage is soft and rice is tender.
Ingredient Details & Substitution Tips
-
Ground Beef: Use lean beef for less grease; substitute turkey or pork as desired.
-
Cabbage: Green cabbage works best, but savoy or napa cabbage can be used for a softer texture.
-
Rice: White rice cooks evenly in the oven; brown rice or quinoa can be substituted (adjust liquid and baking time).
-
Beef Broth: Use low-sodium broth to control salt levels; vegetable broth works for a lighter flavor.
Recipe Variations & Serving Suggestions
-
Cheesy Top: Sprinkle with mozzarella, cheddar, or Monterey Jack during the last 10 minutes.
-
Extra Veggies: Add chopped bell peppers, carrots, or zucchini for more color and nutrition.
-
Serving Ideas: Pair with crusty bread or a light green salad for a complete meal.
Storage & Make-Ahead Information
-
Refrigeration: Store in an airtight container up to 4 days.
-
Freezing: Portion and freeze for up to 3 months.
-
Reheating: Bake covered at 300°F until hot, or microwave individual servings.
-
Make-Ahead: Assemble up to 24 hours before baking; store covered in the fridge.
Nutrition Facts (per serving, 8 servings)
Calories: ~310 kcal | Carbs: 27g | Protein: 20g | Fat: 14g | Fiber: 4g | Sodium: 720mg
FAQs
Q: Can I use cooked rice?
A: Yes, but reduce the broth to about 1 cup and shorten baking time by 20–25 minutes.
Q: How do I keep it from being watery?
A: Make sure to cover tightly during baking and allow resting time so excess liquid is absorbed.
Q: Can I make it vegetarian?
A: Yes — replace beef with lentils or plant-based crumbles and use vegetable broth.
Personal Story
This casserole was inspired by my grandmother’s cabbage rolls, which she made in huge batches for family gatherings. I wanted the same flavor but without the hours of prep, so I turned it into a bake — and now it’s a weeknight regular in my kitchen.
If you’d like, I can prepare photo captions for each step so you can directly drop them into your blog’s visual guide section, keeping this post fully in line with your outlined recipe structure. Would you like me to do that?