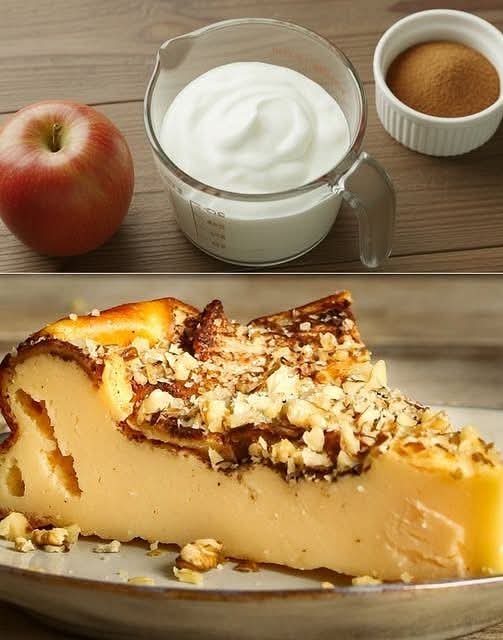
Apricot Custard Puff Cake
A layered pastry dessert with flaky dough, bright apricot fruit, and smooth vanilla custard
Yield
1 cake (20–22 cm / 8–9 inch)
Serves 8–10
Oven Temperature
180°C (350°F), conventional oven
Ingredients
Quick Puff-Style Yeasted Pastry
-
250 g all-purpose flour
-
150 g cold unsalted butter, cut into small cubes or coarsely grated
-
100 ml milk, lukewarm (not hot)
-
25 g granulated sugar
-
4 g instant yeast
-
1 large egg (room temperature)
-
10 g vanilla sugar (or 1 teaspoon vanilla extract)
-
20 ml melted butter (cooled)
Apricot Layer
-
300 g apricot jam or thick apricot compote
-
Optional: 1–2 teaspoons fresh lemon juice (for balance)
Vanilla Custard Cream
-
400 ml whole milk
-
2 large egg yolks
-
80 g granulated sugar
-
30 g cornstarch
-
50 g unsalted butter, softened
Decoration
-
50 g sliced almonds
-
Powdered sugar, for dusting
Instructions
1. Prepare the Dough
-
In a small bowl, combine the lukewarm milk, sugar, and instant yeast. Stir gently and let stand for 5 minutes until slightly foamy.
-
Add the egg, vanilla sugar, and melted butter to the yeast mixture. Whisk until smooth.
-
In a large mixing bowl, add the flour and cold butter. Using your fingertips or a pastry cutter, gently combine until the mixture resembles coarse crumbs.
-
Important: The butter pieces should remain visible. This creates flakiness.
-
-
Pour the liquid ingredients into the flour mixture. Mix just until a soft dough forms.
-
Do not knead excessively.
-
-
Shape the dough into a flat disc, cover with a clean cloth, and allow it to rest in a warm, draft-free place for 30 minutes, until slightly puffed.
2. Shape and Bake the Pastry Layers
-
Divide the rested dough into two equal portions.
-
Roll each portion into a circle approximately 20–22 cm (8–9 inches) in diameter.
-
Place both circles on parchment-lined baking trays.
-
Lightly score the top pastry circle into wedges using a sharp knife (do not cut all the way through). This will help with slicing after assembly.
-
Bake both layers at 180°C (350°F) for 15–20 minutes, until lightly golden and fully baked.
-
Remove from the oven and allow to cool completely.
3. Prepare the Custard Cream
-
In a bowl, whisk the egg yolks, sugar, and cornstarch with 3–4 tablespoons of the milk until smooth and lump-free.
-
Heat the remaining milk in a saucepan over medium heat until hot but not boiling.
-
Slowly pour the hot milk into the egg mixture while whisking continuously.
-
Return the mixture to the saucepan. Cook over medium heat, stirring constantly, until thick and smooth.
-
Remove from heat and immediately stir in the butter until fully incorporated.
-
Transfer the custard to a bowl, cover the surface directly with parchment or food-safe wrap to prevent a skin from forming, and allow to cool completely.
4. Assemble the Cake
-
Place the first pastry layer on a serving plate. Position a cake ring or springform ring around it.
-
Spread the apricot jam evenly over the pastry base.
-
Spoon the cooled custard over the apricot layer and smooth the surface.
-
Carefully place the second pastry layer (scored side up) on top.
-
Refrigerate for at least 4 hours, preferably overnight, to allow the custard to fully set.
5. Final Decoration
-
Remove the cake ring carefully.
-
Gently press almond slices onto the sides of the cake.
-
Dust the top generously with powdered sugar.
-
Optional: add a small spoon of apricot jam in the center for a polished finish.
Storage
-
Keep refrigerated
-
Best enjoyed within 48 hours


 No-Beat German Apple Pie