Simple Italian Cake with 12 Tablespoons


Classic New Orleans Bread Pudding ![]()
![]()
![]()
Ingredients:
1 large loaf French Bread (approximately 14 to 16 ounces)
4 cups milk
3 eggs, lightly beaten
2 cups sugar (granulated)
2 tablespoons pure vanilla extract
1/4 teaspoon allspice
1/4 to 1/2 teaspoon cinnamon, ground
1 cup raisins
3 tablespoons butter, melted
Bourbon Sauce:
1/2 cup butter
1 cup sugar (granulated)
1 egg, lightly beaten
2 tablespoons bourbon (whiskey) or to your taste
Directions:
Tear or cut French bread into 1-inch pieces and place in a large bowl. Add milk and let soak, crushing with hands until well mixed.
In a separate bowl, whisk together eggs, sugar, vanilla, allspice, and cinnamon. Stir in raisins and combine with the bread mixture. Let sit for 2 hours, stirring occasionally.
Preheat oven to 350°F. Melt butter and coat a 13×9-inch baking dish.
Pour mixture into the dish, and bake uncovered for 45-50 minutes until set. Let cool on a wire rack.
Serve with warm Bourbon Sauce, freshly made.
Prep Time: 15 minutes + 2 hours soaking
Cooking Time: 50 minutes
Total Time: 3 hours 5 minutes
Kcal: 560 kcal per serving
Servings: 8-10
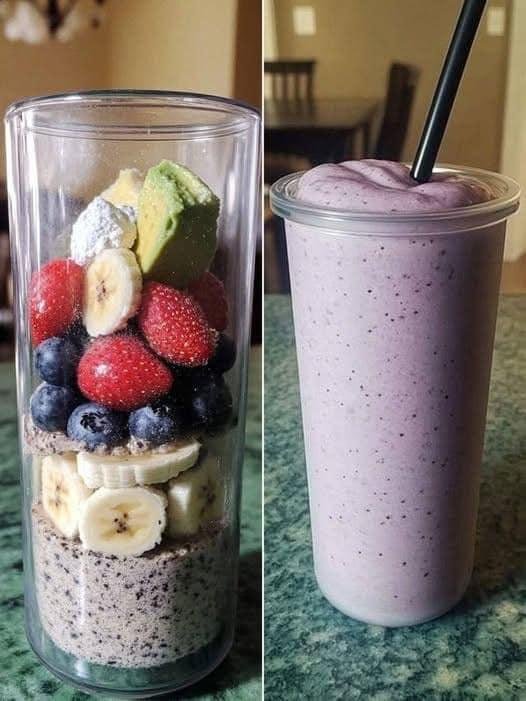
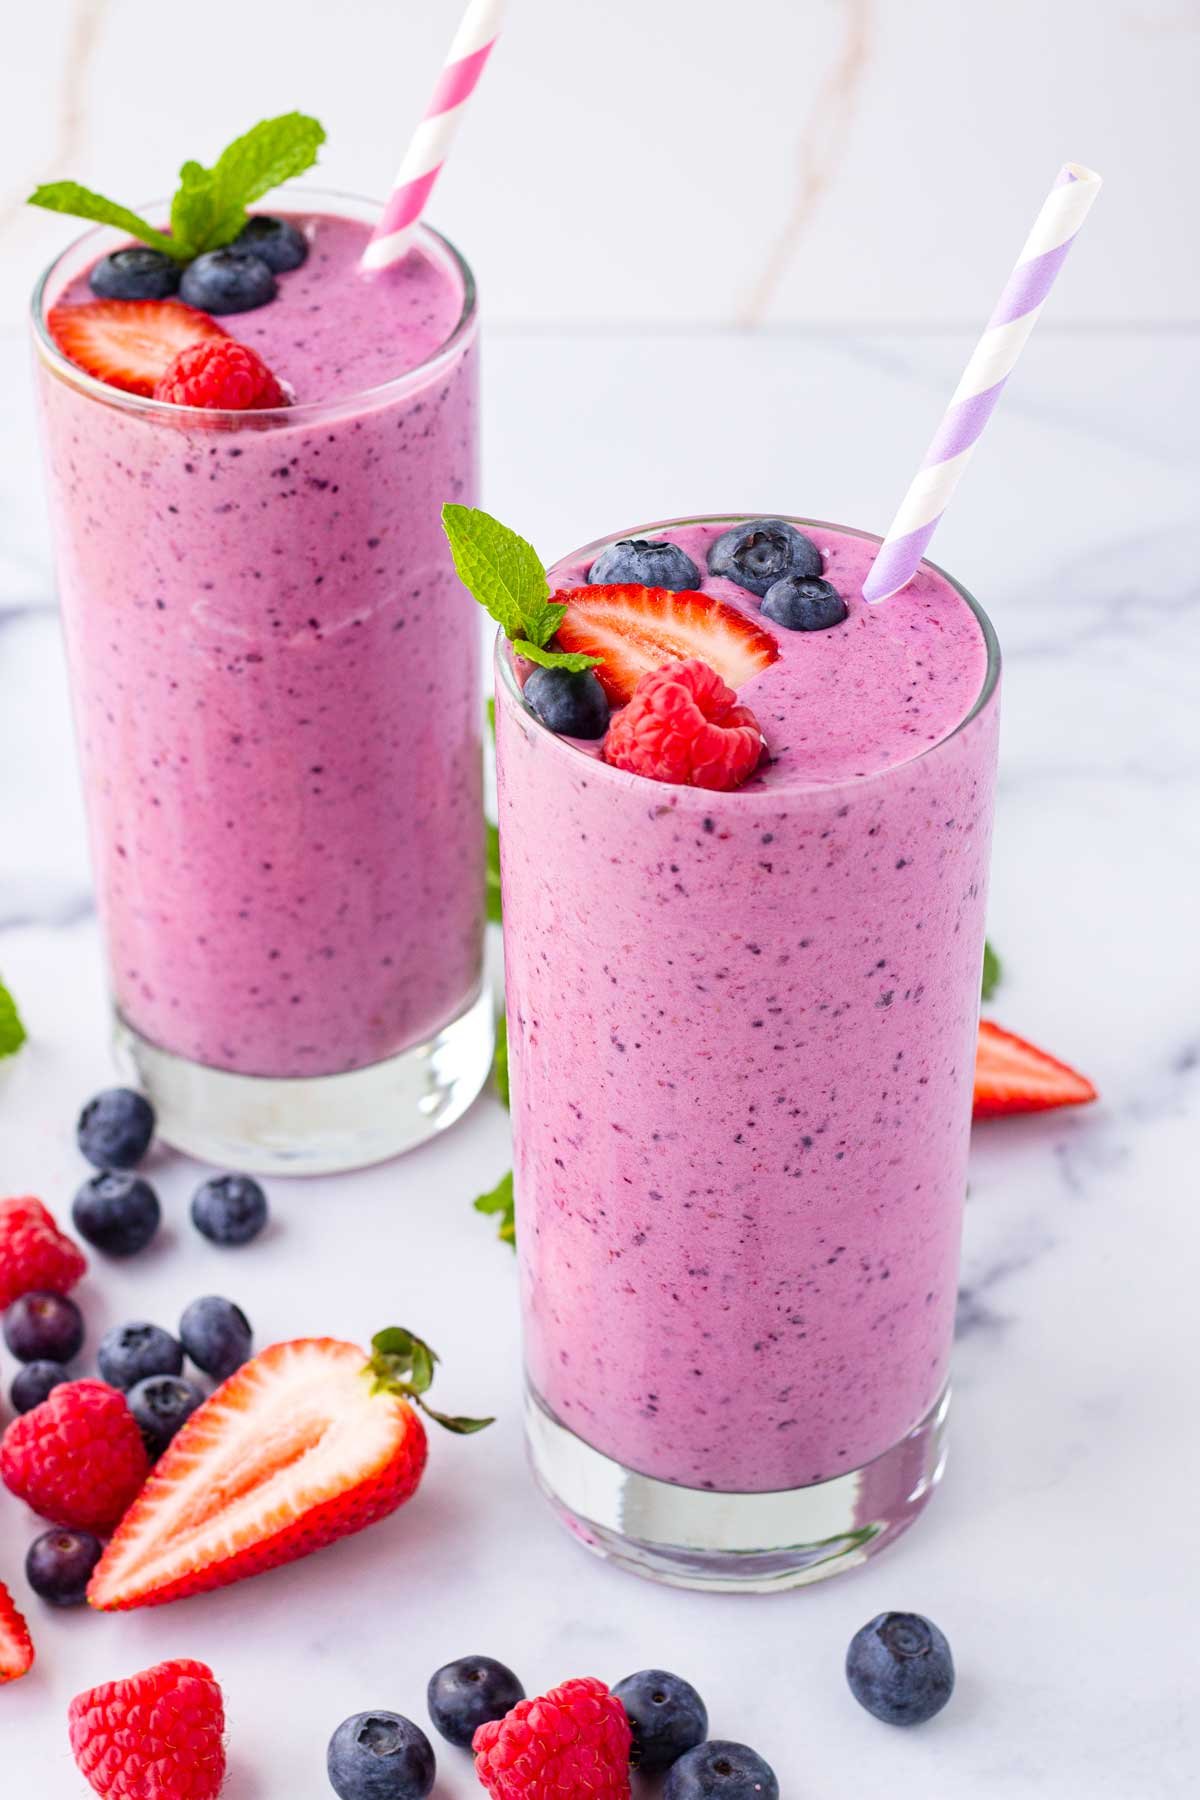
 Mixed Berry Banana Super Smoothie – Full Recipe
From the image, the smoothie appears to include:
½ cup banana slices
½ cup blueberries
½ cup strawberries
¼ avocado
1–2 tbsp oats or ground flax/chia mix (seen at the bottom as a grainy layer)
1 tbsp powdered sugar or protein powder (optional white powder visible)
1 cup milk (dairy or plant-based)
4–6 ice cubes (optional, for a thicker texture)
Honey or dates (optional) for extra sweetness
 Instructions
Prep Your Ingredients:
Slice the banana and wash the berries. Scoop out the avocado. Measure your oats, flax, or chia.
Layering (Optional, as shown in the image):
Start with the oats/flax mix.
Add banana slices.
Add blueberries.
Add strawberries.
Place avocado chunks and powdered sugar/protein powder on top.
This layering is mostly aesthetic for storage but blends the same.
Blend:
Pour everything into a blender. Add the milk and ice.
Blend for 30–40 seconds until velvety smooth.
Serve:
Pour into a tall cup and enjoy immediately for the freshest taste.
 Q&A Section
It has a naturally sweet and creamy flavor. The bananas and strawberries add sweetness, blueberries give a mild tang, and avocado adds a buttery richness without overpowering the fruitiness.
Yes! Almond milk, oat milk, coconut milk, or even yogurt works well. For a thicker smoothie, use ½ cup milk + ½ cup yogurt.
Not required, but highly recommended. It adds creaminess, healthy fats, and keeps the smoothie filling for longer.
Absolutely. Add 1 scoop of vanilla or unflavored protein powder. It blends perfectly with these fruits.
Use frozen bananas or frozen berries, or add extra ice cubes. You can also add a spoon of Greek yogurt.
Yes! It’s rich in fiber, antioxidants, potassium, and healthy fats. It provides long-lasting energy and supports digestion.

 Description
This no-oven cheese bread is soft on the inside, golden on the outside, and loaded with cheesy goodness. Perfect for those who don’t have an oven, this recipe uses a stovetop pan and comes together quickly. It’s ideal for breakfast, evening snacks, kids’ tiffin, or a quick party appetizer.
 Total Time
Preparation: 10 minutes
Cooking: 15 minutes
Total: 25 minutes
 Servings
Makes 4 small bread pieces
Serves 2–3 people
 Ingredients
All-purpose flour (maida) – 1 cup
Baking powder – 1 tsp
Salt – ½ tsp
Sugar – ½ tsp
Milk – ½ cup (adjust as needed)
Oil or melted butter – 1 tbsp
Grated cheese (mozzarella or processed) – ½ cup
Mixed herbs or oregano—½ tsp (optional)
Chili flakes – ¼ tsp (optional)
Butter – for greasing
 Method (Step-by-Step)
In a bowl, mix flour, baking powder, salt, and sugar.
Add oil/butter and milk gradually.
Knead into a soft, smooth dough.
Cover and rest for 5 minutes.
Roll the dough slightly and flatten it.
Sprinkle grated cheese, herbs, and chili flakes evenly.
Fold and knead gently to distribute cheese.
Divide the dough into equal portions.
Shape into small flat rounds or logs (like mini bread).
Heat a heavy pan or tawa on low flame.
Grease lightly with butter.
Place bread pieces and cover with lid.
Cook for 7–8 minutes, flip, and cook another 5–7 minutes until golden.
Brush with butter and serve warm.
 Tips for Best Results
Always cook on low flame to avoid burning.
Use a thick-bottom pan for even cooking.
Don’t overstuff cheese; it may ooze out.
Covering the pan helps cook bread evenly, like an oven.
You can add garlic paste or chopped olives for extra flavor.
 Variations
Whole wheat version: Replace maida with wheat flour (add extra milk).
Garlic cheese bread: Add ½ tsp garlic paste to dough.
Stuffed version: Keep cheese inside instead of mixing.
 Nutritional Information (Approx. per serving)
Calories: 210 kcal
Protein: 7 g
Carbohydrates: 25 g
Fat: 9 g
Calcium: 15% RDA
(Values may vary based on cheese type.)
 Health Benefits
Good source of calcium and protein from cheese
Provides quick energy
Homemade, no preservatives
Can be made healthier with whole wheat flour
Q & A (Frequently Asked Questions)Q1. Can I make this without baking powder? Baking powder helps with softness, but you can replace it with ¼ tsp baking soda + a few drops of lemon juice.
Q2. Which cheese works best? Mozzarella for stretch, processed cheese for strong flavor.
Q3. Can I store this bread? Best eaten fresh, but can be refrigerated for 1 day and reheated in a pan.
Q4. Can I make it vegan? Yes! Use plant-based milk, vegan cheese, and oil instead of butter.
Q5. Why is my bread hard? Overcooking or less milk can make it hard. Keep dough soft and flame low.
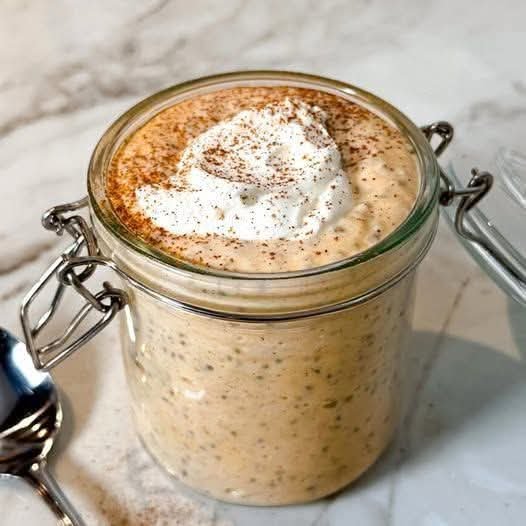
Instant Gingerbread Chia Pudding.
High-Protein • Gluten-Free • No Cooking
Introduction
This instant gingerbread chia pudding brings all the warm, cozy flavors of gingerbread into a creamy, protein-packed treat you can make in minutes. Naturally gluten-free and refined-sugar optional, it’s ideal for busy mornings, meal prep, or a light dessert that still feels indulgent.
Time & Servings
Prep Time: 5 minutes
Set Time: 10 minutes (or overnight)
Total Time: 15 minutes
Servings: 1–2
Ingredients
Base
3 tbsp chia seeds
1 cup milk (dairy or almond, oat, soy)
½ cup Greek yogurt or high-protein yogurt
1–2 tbsp maple syrup or honey (to taste)
Gingerbread Spices
½ tsp ground ginger
¼ tsp cinnamon
Pinch of nutmeg
Pinch of cloves or allspice
Tiny pinch of salt
Optional Boosts
1 scoop vanilla protein powder
1 tsp vanilla extract
1 tsp molasses (for classic gingerbread flavor)
Instructions
In a bowl or jar, whisk milk, yogurt, sweetener, vanilla, and molasses (if using).
Add chia seeds and all spices. Mix very well.
Let rest 5 minutes, then stir again to prevent clumps.
Chill for 10 minutes for instant pudding, or refrigerate overnight for best texture.
Stir before serving. Add a splash of milk if too thick.
Crushed walnuts or almonds
Coconut flakes
Banana slices
Extra yogurt drizzle
A dusting of cinnamon
High protein from yogurt/protein powder
Gluten-free & grain-free
High fiber & omega-3s from chia seeds
Naturally filling and blood-sugar friendly
Keeps in the fridge for 3 days
Perfect for meal prep jars
Final Thoughts
This instant gingerbread chia pudding is creamy, cozy, and packed with protein — all without cooking. It’s a festive-flavored breakfast you’ll want to enjoy year-round.
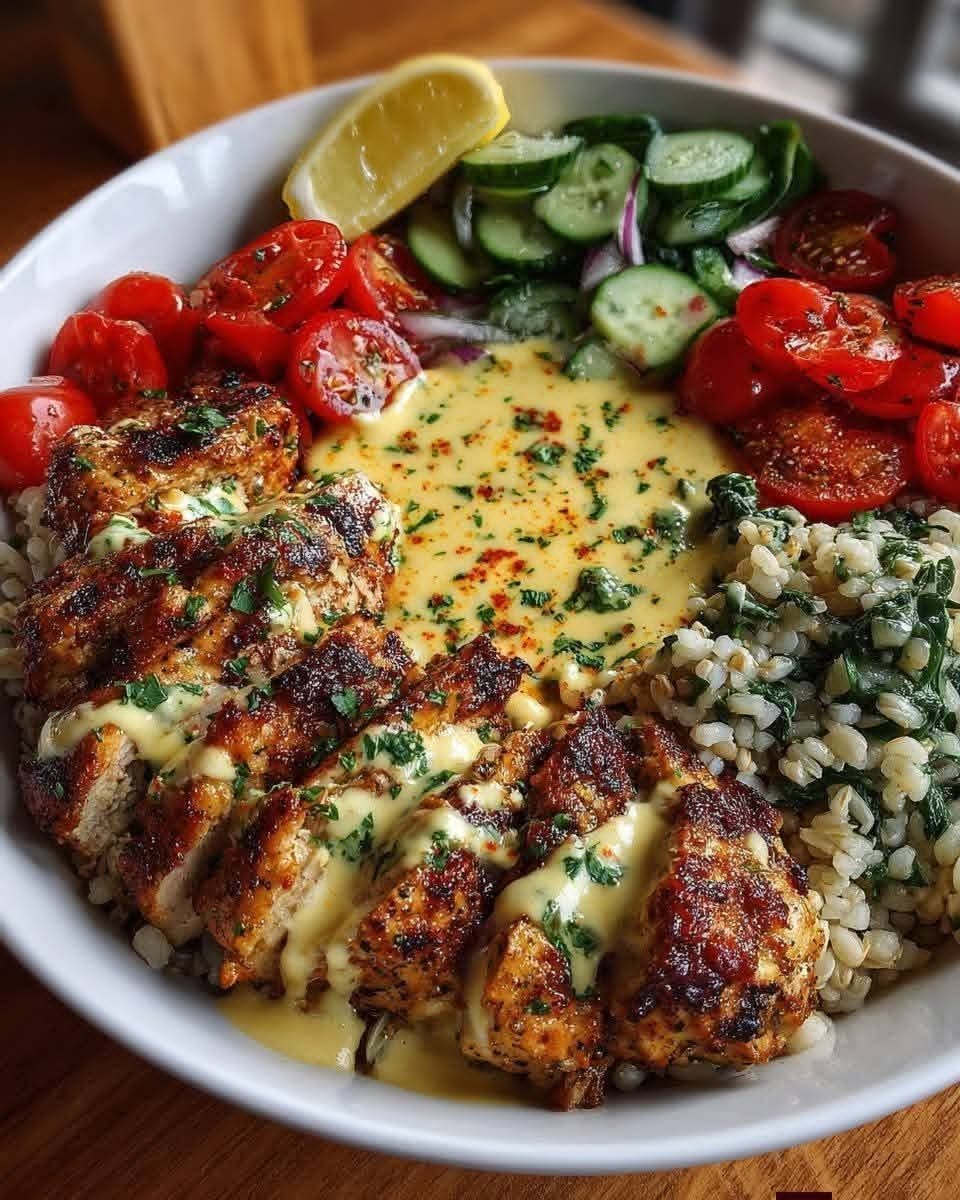
Greek Chicken Gyro Bowls with Lemon Tahini Sauce.
Ingredients
Greek Chicken
1½ lb (680 g) boneless skinless chicken thighs or breasts
2 tbsp extra-virgin olive oil
2 tbsp lemon juice
3 cloves garlic, minced
2 tsp dried oregano
1 tsp paprika
1 tsp cumin
½ tsp turmeric (anti-inflammatory powerhouse)
½ tsp black pepper
¾ tsp sea salt
Lemon Tahini Sauce
½ cup tahini
¼ cup fresh lemon juice
1 clove garlic, grated
¼–⅓ cup warm water (to thin)
½ tsp ground turmeric
Sea salt to taste
Bowls & Toppings
2 cups cooked farro, barley, or brown rice
1 cup cherry tomatoes, halved
1 cup cucumber, sliced
¼ cup thinly sliced red onion
1 cup baby spinach or kale (lightly sautéed optional..
Must express something to keep getting my recipes…. Thank you.
full recipe in comment..

Mango Coconut Chia Pudding
Prep time: 10 mins | Chill time: 4+ hours | Servings: 2
Ingredients
Layer Ingredients
Chia Base 1/4 cup chia seeds, 1 cup coconut milk (canned or carton), 1 tbsp maple syrup or honey, 1/2 tsp vanilla extract
Mango Puree 1 ripe mango (peeled and pitted), 1 tsp lime juice
Toppings Diced mango, toasted coconut flakes, fresh mint or lime zest
Instructions
Prepare the Pudding: In a jar or bowl, whisk together the chia seeds, coconut milk, sweetener, and vanilla. Stir well to ensure there are no clumps.
The First Set: Let it sit for 5–10 minutes, then give it one more stir. This prevents the seeds from sinking to the bottom. Cover and refrigerate for at least 4 hours (overnight is best).
Make the Puree: Blend half of your mango chunks with a squeeze of lime juice until smooth. Keep the other half diced for the top.
Assemble: Once the pudding is thick, spoon it into glasses. Pour the mango puree over the pudding, then pile on the diced mango.
Garnish: Finish with toasted coconut flakes and a tiny bit of lime zest or mint for that professional look.
Pro Tips for Success
Milk Choice: Use canned coconut milk if you want a very rich, dessert-like texture, or coconut milk from a carton for a lighter, everyday breakfast version.
Texture: If the pudding is too thick after chilling, stir in an extra splash of milk.
Layering: To get those clean lines like in the photo, use a spoon to gently place the mango puree over the set pudding rather than pouring it quickly.
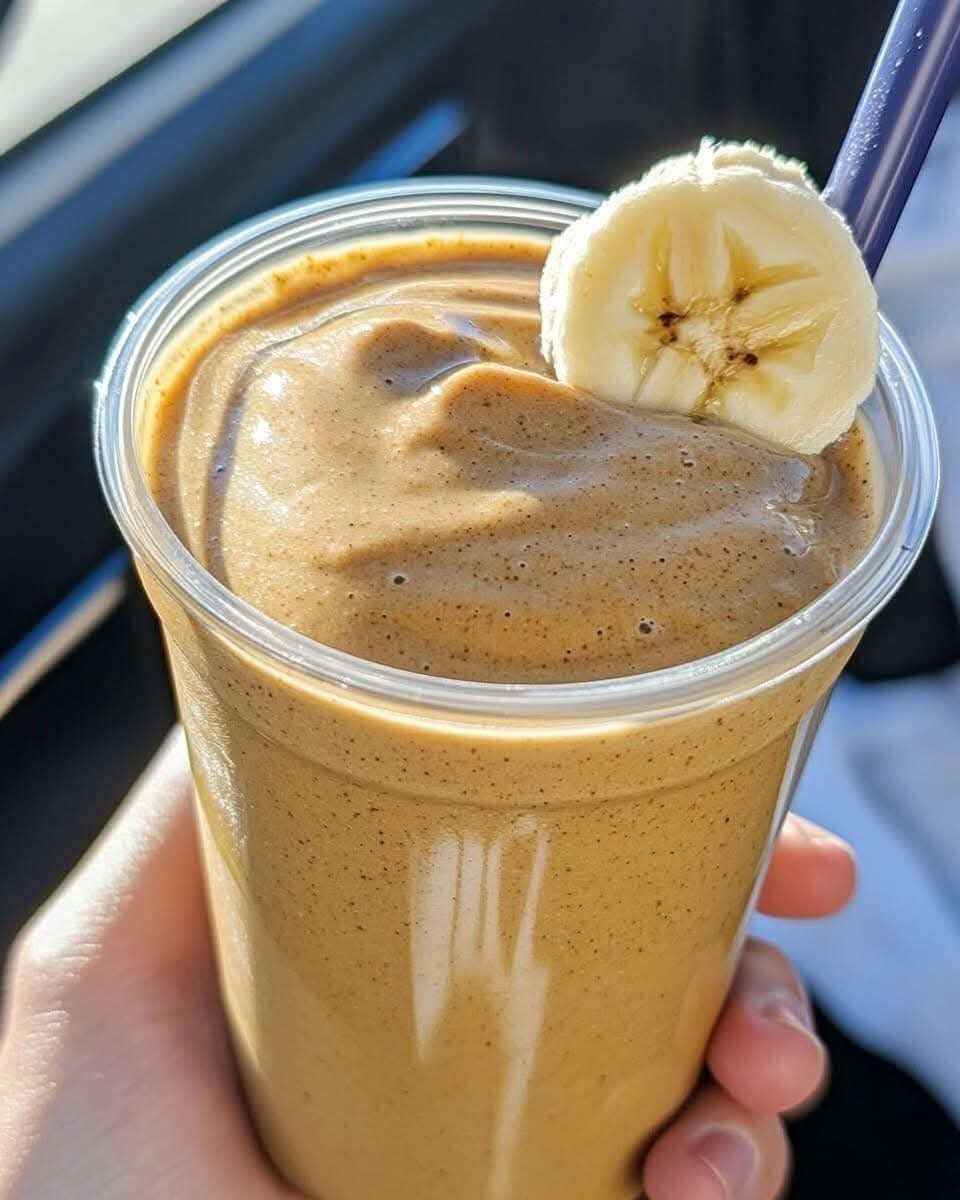
Creamy Banana Coffee Smoothie (No Ice Cream)
This rich and creamy banana ☕ smoothie is perfect for mornings, afternoon refreshment, or anytime you want something smooth, naturally sweet, and comforting. It has a thick texture, a beautiful light coffee color, and a naturally satisfying taste made from simple, wholesome ingredients. The smoothie looks elegant when topped with a banana slice and served cold, just like the image.
Ingredients (Serves 1–2)
1 ripe banana (fresh or frozen)
1 cup chilled milk (dairy or plant-based such as almond or oat milk)
1 tablespoon peanut butter or almond butter
1 teaspoon instant coffee or brewed coffee (cooled)
1 tablespoon honey or maple syrup (adjust to taste)
¼ teaspoon cinnamon powder
½ teaspoon vanilla extract
3–4 ice cubes (optional, for extra thickness)
Optional Additions
1 tablespoon oats for added body
1 teaspoon cocoa powder for a mocha-style flavor
A pinch of nutmeg for warmth
A scoop of plain yogurt for extra creaminess
Preparation Steps
Prepare the banana
Peel the banana and slice it into chunks. If you prefer a thicker smoothie, freeze the banana slices for at least one hour before blending.
Add liquids first
Pour the milk into the blender jar. This helps the blades move smoothly and creates a creamy base.
Add flavor ingredients
Add the coffee, nut butter, honey, vanilla extract, and cinnamon. These ingredients give the smoothie its rich aroma and balanced sweetness.
Add the banana
Place the banana pieces into the blender. If using oats or yogurt, add them at this stage.
Blend until smooth
Blend on high speed for 30–60 seconds until the mixture becomes thick, silky, and completely smooth. If needed, stop and scrape down the sides.
Adjust consistency
If the smoothie is too thick, add a splash of milk. If too thin, add a few ice cubes and blend again.
Serve immediately
Pour into a chilled glass. Garnish with a banana slice on the rim for a beautiful presentation.
Serving Tips
Serve with a reusable straw for easy sipping
Enjoy fresh for best flavor and texture
Pair with toast, oats, or fruit for a complete start to the day
Storage
This smoothie is best enjoyed fresh. If needed, it can be stored in a covered container in the refrigerator for up to 12 hours. Shake well before drinking.
If you want this recipe without coffee, extra thick, or made only with water, tell me and I’ll adjust it for you 😊
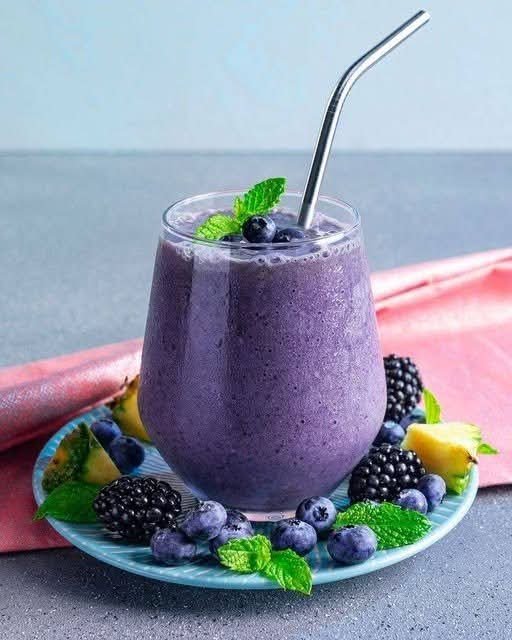
Tropical Berry Smoothie Recipe
Prep time: 5 minutes | Servings: 1 large glass
🛒 Ingredients
1 cup Frozen Blueberries (gives it that deep purple color)
½ cup Fresh or Frozen Pineapple chunks (adds the tropical zing)
½ cup Blackberries
1 Ripe Banana (preferably frozen for extra creaminess)
1 cup Unsweetened Almond Milk (or any milk of your choice)
½ cup Greek Yogurt (plain or vanilla)
1 tsp Honey or Maple Syrup (optional, for added sweetness)
🥣 Instructions
Layer the Liquid: Pour the almond milk and yogurt into the blender first. Adding liquids first helps the blades move freely.
Add the Fruit: Add the frozen blueberries, blackberries, pineapple, and banana.
Blend: Start on a low speed and gradually increase to high. Blend for about 45–60 seconds until the texture is completely smooth and “frothy” like the image.
Adjust Consistency: If it’s too thick, add a splash more milk. If you want it thicker, add a few more frozen blueberry pieces.
Assemble: Pour into a stemless glass.
✨ The “Pro” Presentation
To get the exact look from your photo:
The Garnish: Top the drink with 2–3 fresh blueberries and a small sprig of fresh mint.
The Plate: Scatter extra blackberries, blueberries, and small pineapple wedges around the base of the glass.
The Finish: Use a reusable metal straw for that sleek, modern touch.

Fluffy Turkish Bread
Ingredients
3 cups 375 g all-purpose flour
1 tbsp sugar
1 tsp salt
2¼ tsp 7 g instant dry yeast
¾ cup 180 ml warm milk (not hot)
¼ cup 60 ml warm water
3 tbsp olive oil
Optional topping
1 egg yolk
1 tbsp milk
Sesame seeds or nigella seeds
How To Make Fluffy Turkish Bread
Activate the yeast
In a bowl, mix the warm milk, warm water, sugar, and yeast. Let it sit for 5–7 minutes until slightly foamy.
Make the dough
Add olive oil, salt, and flour gradually. Mix until a soft dough forms.
Knead
Knead for 8–10 minutes by hand (or 5 minutes with a mixer) until smooth and elastic.
First rise
Place the dough in a lightly oiled bowl, cover, and let rise in a warm spot for about 1 hour, or until doubled in size.
Shape
Divide the dough into 2 pieces. Gently flatten each into a round or oval shape.
Add topping (optional)
Mix egg yolk with milk and brush over the surface. Sprinkle with seeds if using.
Bake
Bake in a preheated oven at 220°C (425°F) for 10–12 minutes, until puffed and lightly golden.
Cool slightly & enjoy
Let rest for a few minutes before serving
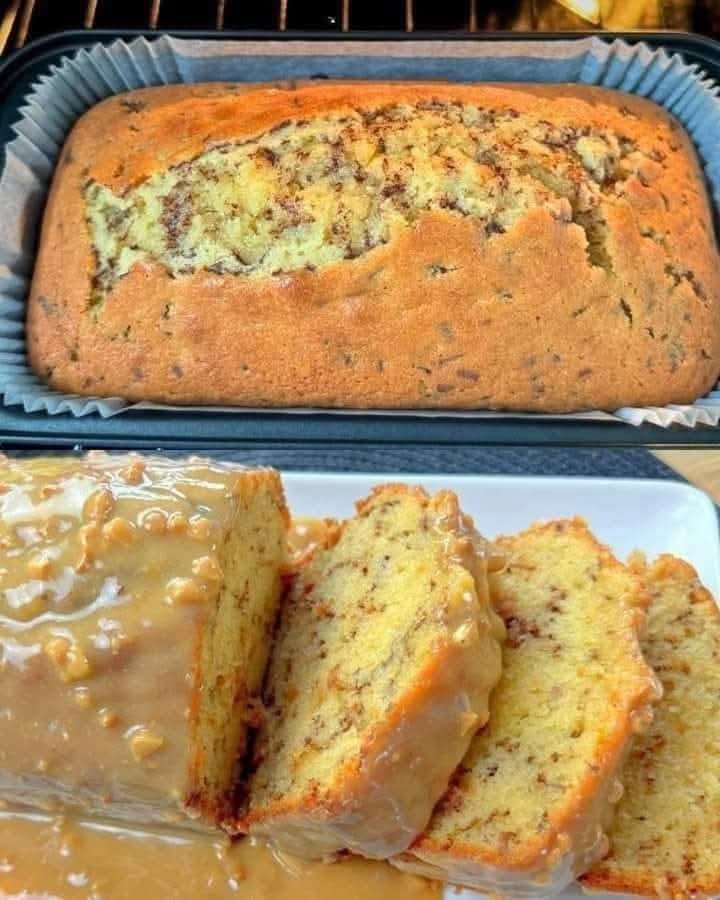
Melt in Your Mouth Banana Bread
🍌 Melt-in-Your-Mouth Banana Bread
🛒 Ingredients
1 ¾ cups all-purpose flour
1 teaspoon baking soda
½ teaspoon salt
1 teaspoon ground cinnamon
¼ teaspoon ground nutmeg
1 cup (2 sticks) unsalted butter, softened
¾ cup granulated sugar
2 large eggs, beaten
1 teaspoon vanilla extract
3 ripe bananas, mashed
½ cup chopped walnuts (optional)
👩🍳 Instructions
Preheat oven: Preheat your oven to 350°F (175°C). Grease and flour a 9×5 inch loaf pan.
Combine dry ingredients: In a medium bowl, whisk together the flour, baking soda, salt, cinnamon, and nutmeg.
Cream wet ingredients: In a large bowl, cream together the butter and sugar until light and fluffy. Beat in the eggs one at a time, then stir in the vanilla extract.
Combine wet and dry ingredients: Gradually add the dry ingredients to the wet ingredients, alternating with the mashed bananas. Mix until just combined, being careful not to overmix.
Add nuts (optional): If using, gently fold in the chopped walnuts.
Bake: Pour the batter into the prepared loaf pan. Bake for 50-60 minutes, or until a toothpick inserted into the center comes out clean.
Cool: Let the bread cool in the pan for 10 minutes before transferring it to a wire rack to cool completely.
💡 Optional Glaze
For a sweet glaze, you can mix together powdered sugar, milk, and a touch of vanilla extract. Drizzle over the cooled loaf.

Deviled Ham Salad
Let’s face it – the tastiest dishes are not always the prettiest ones and that’s definitely the case with Deviled Ham Salad. It’s a little much to look at but it’s SO good. If you haven’t had it before – just think egg salad or tuna salad, but with ham. See? Not so weird. It’s just chopped ham that’s folded into a creamy and flavorful base that makes for one delicious sweet and savory mixture. It makes an incredible sandwich, but it works just as well as a dip or a cracker spread too. And it’s super easy to make.
INGREDIENTS
4 cups diced ham
1/2 cup mayonnaise
1 tablespoon Worcestershire
2 teaspoons Dijon mustard
1/2 teaspoon apple cider vinegar
1/4 teaspoon hot sauce
Kosher salt and freshly ground black pepper, to taste
How to Make Deviled Ham Salad
In the bowl of a food processor, pulse ham until finely chopped.
In a large bowl, stir together mayonnaise, Worcestershire, mustard, vinegar, and hot sauce. Add ham and stir to combine.
Taste and adjust seasoning. Chill until ready to serve. Enjoy!
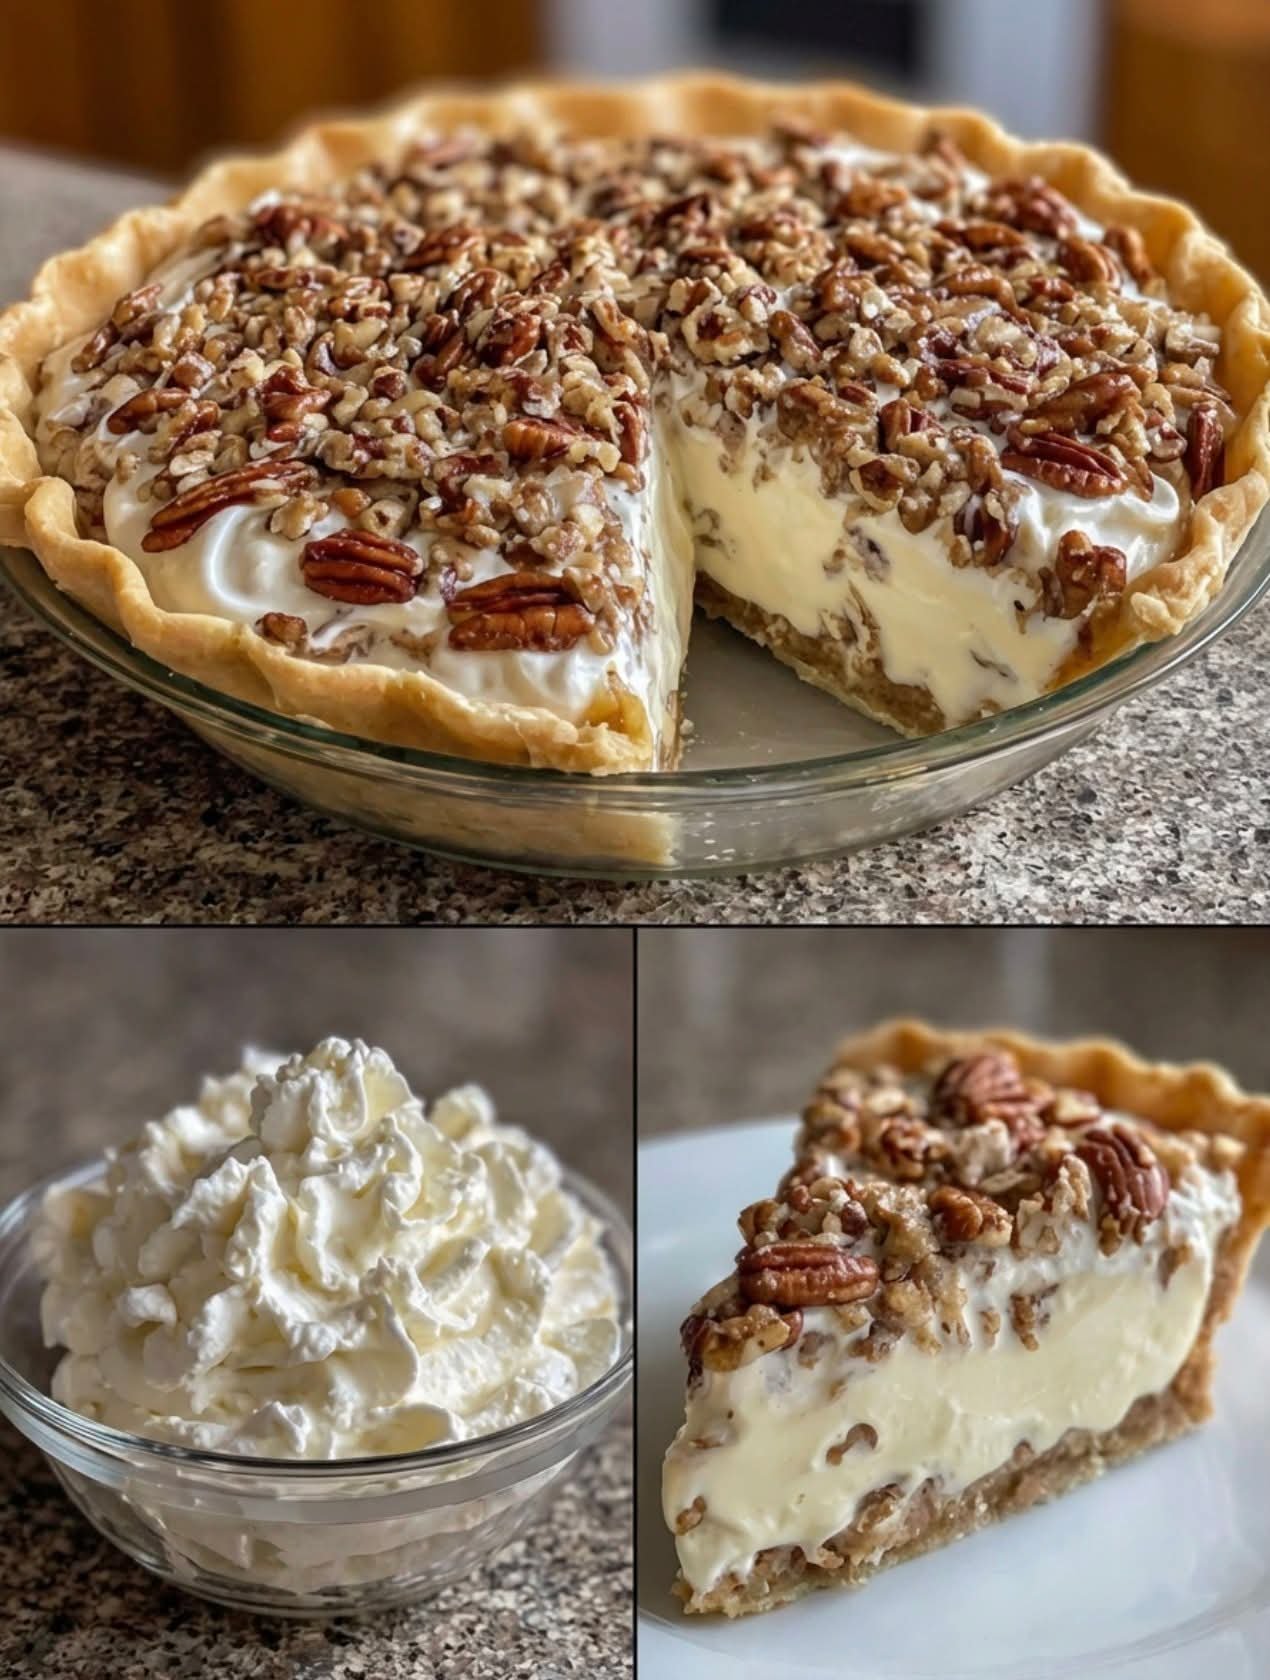
Pecan Cream Pie
INGREDIENTS
1 9-inch pie crust, unbaked
1 cup heavy whipping cream
1/3 cup powdered sugar
2 (8 oz) packages cream cheese, softened
1/2 cup light brown sugar
1/4 cup pure maple syrup
1 1/2 cups pecans, finely chopped
1/4 teaspoon salt
PREPARATION
Blind bake crust according to package directions. Let cool completely while you make the filling.
In a small bowl, beat the whipping cream and powdered sugar with an electric mixer until stiff peaks form.
In a separate large bowl, beat the cream cheese, brown sugar, salt, and maple syrup until smooth and creamy.
Fold the whipped cream into the cream cheese mixture until combined. Gently stir in 1 cup of the pecans.
Spread mixture into cooled pie crust and top with remaining pecans. Chill until firm, at least 2 hours and up to overnight.
Enjoy!

Apple Dumplings
INGREDIENTS:
A pair of Granny Smith apples
A single cup of water
half a cup of sugar
One butter stick
one-half teaspoon. Vanilla-based flavoring
Eight biscuits in a can (my favorite milk is Pillsbury)
four tablespoons of ground cinnamon
How does one go about making
Preheat the oven to 375°. After core and peeling the apples, cut them into eighths lengthwise. Cover with cold water to prevent browning while preparing the next ingredients.
In a medium saucepan, bring the water, 3/4 cup sugar, butter, and vanilla to a boil.
Half the biscuits lengthwise. Cover one apple slice with the biscuit dough, press the layers together to seal, and pull the dough taut so that it overlaps slightly.
Transfer the parcels that have been wrapped onto a 9 x 13 baking dish and reserve. To the heated sugar mixture, add the apple slices.
Add the cinnamon and 1/4 cup of the remaining sugar to the topping. Use this mixture to season the tops of the cabbage apples. After 35 minutes in the oven, brown the top of the dish. Warm up and enjoy with a dollop of vanilla ice cream!
Enjoy it.
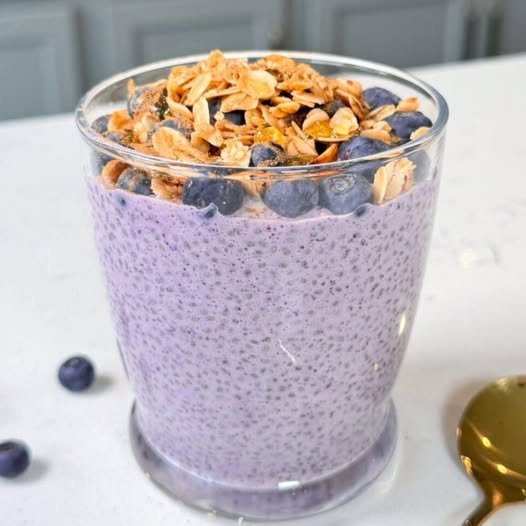
A high-protein, Omega-3-rich breakfast ready in 5 minutes.
Prep Time: 5 minutes
Servings: 1
Protein: 50g
Calories: ~350 kcal
2 tbsp chia seeds
1/4 cup very hot water
3/4 cup plain or vanilla Greek yogurt (nonfat for lowest calorie count)
1 serving Vanilla protein powder (Whey is recommended for texture)
1/3 cup blueberries (fresh or thawed)
Optional toppings: Granola, almond butter, honey, shredded coconut, or extra berries.
Flash-Gel the Chia: In a small bowl, combine the chia seeds and the very hot water. Stir continuously for about 30 seconds. The heat allows the seeds to absorb liquid and create a gel-like consistency almost instantly.
Blend the Base: In a blender, combine the Greek yogurt, protein powder, and blueberries. Blend until the mixture is smooth, creamy, and vibrant purple.
Combine: Pour the blended blueberry protein mixture into the bowl with the chia gel. Stir well until the seeds are evenly distributed.
Serve: Add your desired toppings and eat immediately. If you prefer a thicker, mousse-like consistency, let it sit in the fridge for 10–15 minutes.
Estimate based on nonfat Greek yogurt and whey protein.
| Calories | Protein | Carbs | Fat |
| 350 | 50g | 28g | 8g |
The “Muffin” Vibe: Top with almond butter and a dash of cinnamon.
Dairy-Free: Use a thick coconut or soy-based Greek-style yogurt and a plant-based protein powder (though you may need a splash more water as plant proteins absorb more liquid).
Frozen Fruit: If using frozen blueberries, thaw them slightly before blending so the pudding doesn’t turn into a “nice cream” (unless that’s what you’re going for!).

These 3-Ingredient Breakfast Arepas are golden, pan-toasted corn cakes with a soft, pillowy center. Naturally gluten-free, incredibly filling, and endlessly versatile, they’re a staple breakfast you can enjoy every single day. Simple ingredients, big comfort.
2 cups pre-cooked white cornmeal (such as PAN)
2½ cups warm water
1 tsp salt
(That’s it!)
In a bowl, mix warm water and salt.
Slowly add cornmeal while mixing with your hand.
Knead gently for 2–3 minutes until a smooth, soft dough forms (not sticky).
Divide dough into equal balls.
Flatten into discs about ½–¾ inch thick.
Heat a lightly oiled skillet or griddle over medium heat.
Cook arepas 5–7 minutes per side until golden with light char spots.
Optional: finish in oven at 350°F (180°C) for 10 minutes for extra fluffiness.
Dough should feel like soft clay—add a splash of water if dry.
Let dough rest 5 minutes before shaping for best texture.
They puff slightly as they cook—that’s the magic.
Crispier exterior: Cook longer on slightly lower heat.
Fluffier inside: Finish in the oven after pan-searing.
Daily breakfast hack: Make extra and reheat in a skillet.
Stuffable: Slice open and fill once cooked.
Makes 6–8 arepas, depending on size
2 arepas = 1 hearty serving
(Approximate)
Calories: ~180 kcal
Carbohydrates: ~36g
Protein: ~4g
Fat: ~2g
Fiber: ~3g
Sugar: 0g
Only 3 ingredients
Naturally gluten-free
Very filling and satisfying
Budget-friendly
Great base for sweet or savory toppings
Perfect for meal prep
Q: Can I eat these plain?
A: Absolutely—they’re delicious on their own, especially fresh and warm.
Q: What can I fill them with?
A: Cheese, eggs, shredded meat, butter, avocado, or anything you love.
Q: Can I store them?
A: Yes—refrigerate up to 4 days or freeze up to 1 month.
Q: Are they good for breakfast every day?
A: Yes! They’re simple, satisfying, and easy on digestion.
Q: Can I bake them instead?
A: You can, but pan-cooking gives the best flavor and texture.
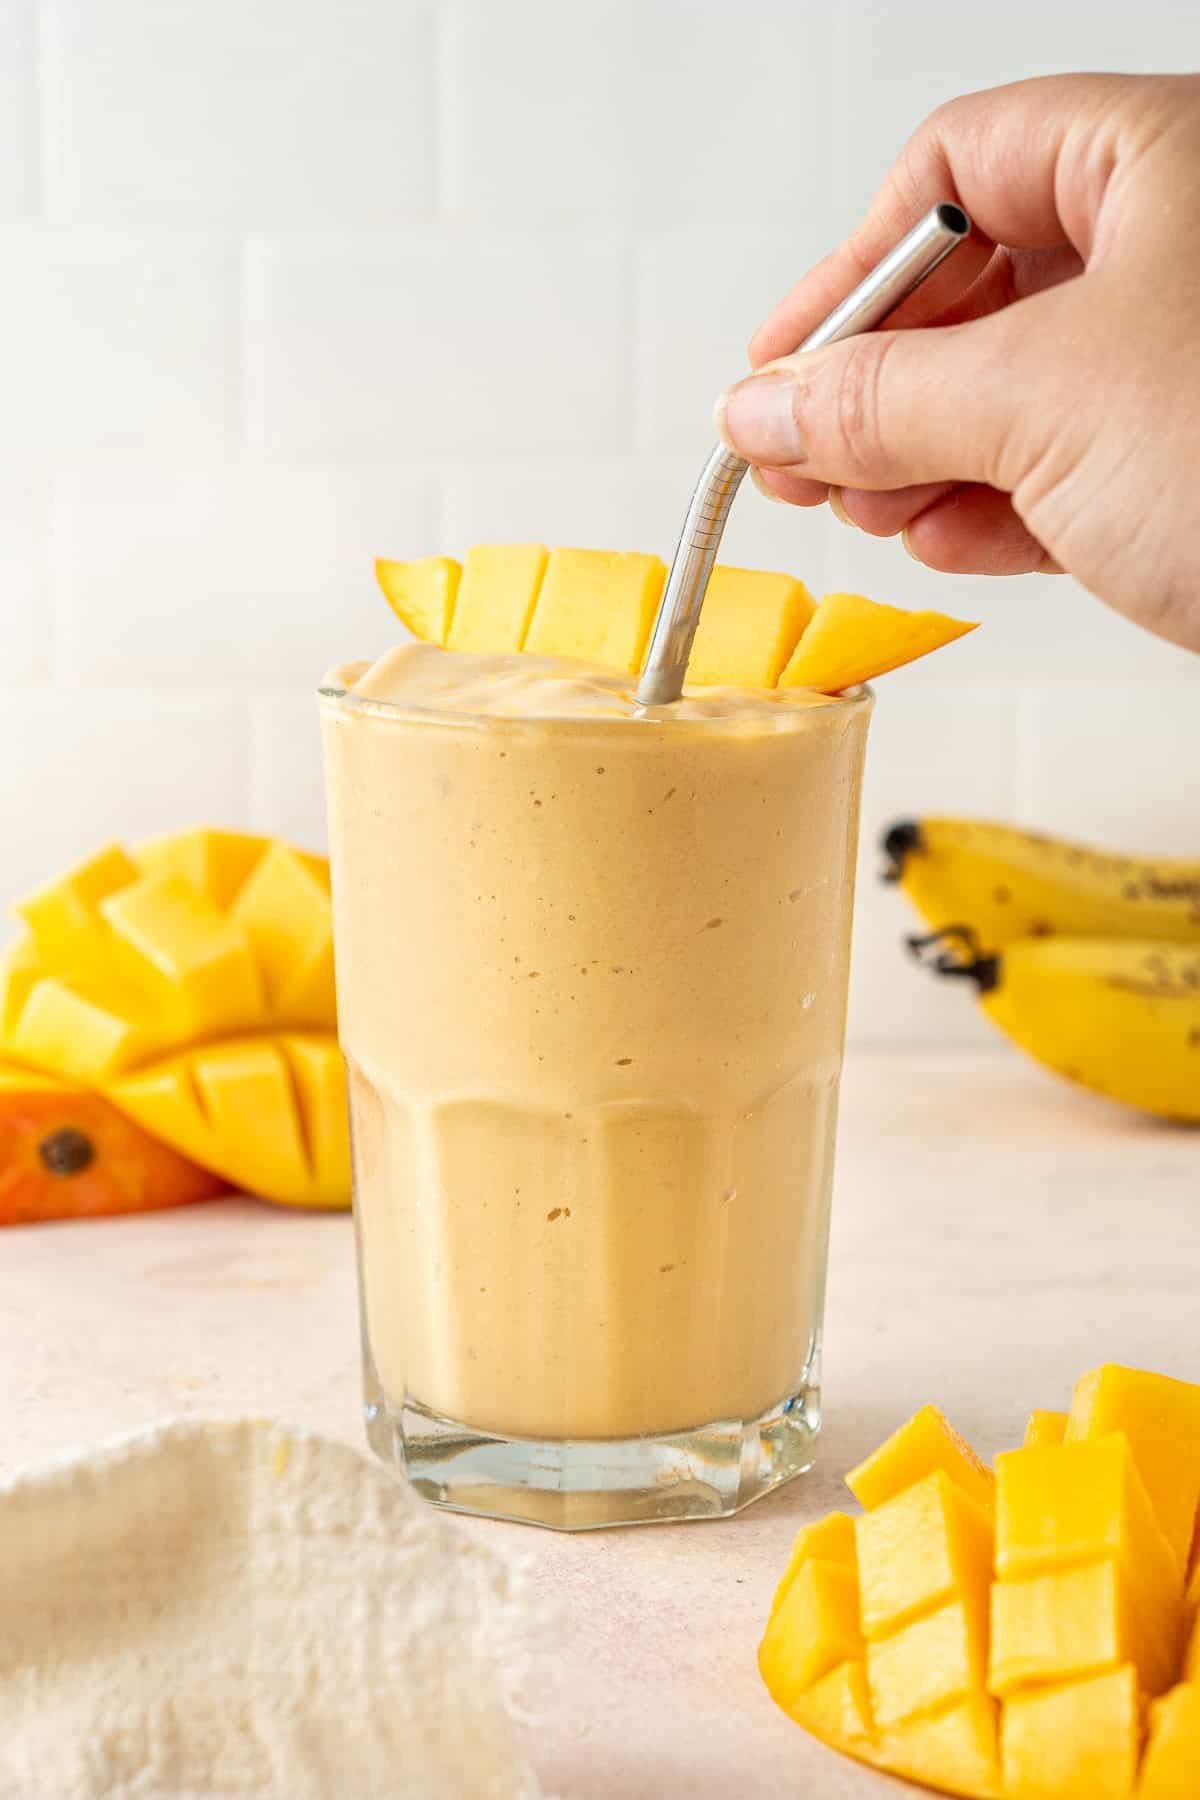
Creamy Mango Banana Smoothie
Prep time: 5 minutes
Servings: 1 large glass
Texture: Thick, “soft-serve” consistency
### Ingredients
1 cup Frozen Mango Chunks: Using frozen mango is the secret to that thick, frost-like texture without needing ice.
1 Ripe Banana: (Fresh or frozen). A spotty, ripe banana provides the best natural sweetness.
1/2 cup Greek Yogurt: Use plain for a tangier flavor or vanilla for extra sweetness.
1/2 cup Milk of Choice: (Dairy, Almond, or Coconut milk).
1 tsp Honey or Maple Syrup: (Optional) Add only if your fruit isn’t quite sweet enough.
Garnish: 1/2 a fresh mango, sliced into a “hedgehog” or cubes (as seen in the photo).
## Instructions
Layer the Blender: Start by pouring the milk and yogurt into the blender first. Adding liquids at the bottom helps the blades move more easily through the frozen fruit.
Add Fruit: Add the banana slices and the frozen mango chunks.
Blend: Start on a low speed to break up the frozen chunks, then increase to high. Blend for 45–60 seconds until completely smooth and “creamy” in appearance.
Adjust Consistency: * If it’s too thick, add a splash more milk.
If it’s too thin, add a few more frozen mango chunks or a couple of ice cubes.
Serve: Pour into a tall glass. Top with the fresh mango slices and serve with a reusable metal straw for that exact look!
## Pro-Tips for the Best Results
The “Hedgehog” Garnish: To get the look in the bottom right of your photo, slice the mango “cheek” off the pit, score it into a grid pattern without cutting through the skin, and push the skin side up to pop the cubes out.
No Added Sugar: If you use a very ripe (brown-spotted) banana, you likely won’t need any honey or sweetener at all.
Boost It: For a breakfast version, add a tablespoon of chia seeds or a scoop of vanilla protein powder before blending.

This Mediterranean-style baked cod is a light yet flavorful dish featuring tender, flaky cod fillets baked with a medley of roasted vegetables and topped with a luscious lemon-garlic yogurt sauce. It’s packed with healthy fats, lean protein, and vibrant Mediterranean flavors, making it a perfect dish for any occasion!
Prep Time: 15 minutes
Cook Time: 20-25 minutes
Total Time: 40 minutes
4 cod fillets (or another firm white fish like halibut or sea bass)
2 tbsp extra virgin olive oil
1 zucchini, sliced
1 red bell pepper, sliced
1 yellow bell pepper, sliced
1 small red onion, sliced
1 cup cherry tomatoes, halved
2 cloves garlic, minced
1 tsp dried oregano
1 tsp dried thyme
½ tsp paprika
½ tsp salt (adjust to taste)
½ tsp black pepper
½ tsp red pepper flakes (optional for heat)
Juice of 1 lemon
2 tbsp chopped fresh parsley (for garnish)
½ cup Greek yogurt
2 tbsp tahini
1 tbsp fresh lemon juice
1 clove garlic, minced
1 tbsp extra virgin olive oil
½ tsp salt
½ tsp ground cumin
2 tbsp chopped fresh dill
Preheat the oven to 400°F (200°C).
In a bowl, toss the zucchini, bell peppers, red onion, cherry tomatoes, and garlic with olive oil, oregano, thyme, paprika, salt, and black pepper.
Spread the vegetables evenly on a lined baking dish.
Pat the cod fillets dry and drizzle with a little olive oil and lemon juice.
Season with a pinch of salt, pepper, and red pepper flakes (if using).
Place the cod fillets over the bed of vegetables in the baking dish.
Bake for 20-25 minutes, until the cod is opaque and flakes easily with a fork.
Halfway through, baste the cod with its own juices for extra moisture.
In a small bowl, whisk together the Greek yogurt, tahini, lemon juice, garlic, olive oil, salt, cumin, and fresh dill until smooth.
Adjust seasoning as needed.
Drizzle the creamy Mediterranean sauce over the baked cod.
Garnish with chopped fresh parsley and extra lemon wedges.
Serve with warm pita bread, quinoa, or couscous for a complete meal!
For extra crispiness: Broil for the last 2-3 minutes for a golden top.
Make it dairy-free: Swap Greek yogurt for coconut yogurt or a tahini-only sauce.
Boost the citrus: Add preserved lemon or extra lemon zest for a tangy touch.
More veggie variety: Add eggplant, artichokes, or olives for extra Mediterranean flavors.
Calories: ~350 kcal
Protein: ~35g
Carbohydrates: ~15g
Fats: ~15g
Fiber: ~5g

Prep time: 10 mins | Cook time: 10 mins | Servings: 4-6 flatbreads
The Base:
1 cup Cottage cheese (Full fat works best for creaminess)
2 Large eggs
1 ½ cups All-purpose flour (or Oat flour for a gluten-free twist)
1 tsp Baking powder
½ tsp Salt
The Flavor Boosters:
¼ cup Fresh herbs, finely chopped (Parsley, dill, or scallions work beautifully)
2 cloves Garlic, minced
¼ cup Shredded mozzarella or crumbled feta (optional, for extra “pull”)
Butter or Oil for the pan
Blend the Base: For a smooth, bread-like texture, pulse the cottage cheese and eggs in a blender or food processor until completely smooth.
Pro Tip: If you like little “pockets” of cheese, skip the blender and just whisk them together.
Mix the Dough: In a medium bowl, combine the blended mixture with the flour, baking powder, salt, garlic, and fresh herbs. Stir until a soft, slightly sticky dough forms.
Shape: Divide the dough into 4–6 equal portions. With lightly floured hands, flatten them into discs about ½ inch thick.
Cook: Heat a non-stick skillet over medium heat with a little butter or oil. Place the flatbreads in the pan (don’t overcrowd).
Sear to Perfection: Cook for 3–4 minutes per side. You’re looking for that deep golden-brown crust shown in your photo and a slight rise from the baking powder.
Serve: Best enjoyed warm! They pair perfectly with a dollop of Greek yogurt, sour cream, or even a bit of chili oil.

Light, golden, and filling — perfect for a quick homemade breakfast.
Prep Time: 5 minutes
Cook Time: 15–20 minutes
Servings: 2–3
4 large eggs
1 cup milk
1 cup shredded cheese (cheddar, mozzarella, or a mix)
Optional (for flavor, not required):
Pinch of salt
Pinch of black pepper
Preheat oven to 180°C (350°F).
Lightly grease a small oven-safe baking dish or ramekin.
In a bowl, crack the eggs and whisk well until smooth and slightly frothy.
Add the milk and whisk again until fully combined.
Stir in the shredded cheese (reserve a little for topping if desired).
Add a small pinch of salt and pepper if using.
Pour mixture into the prepared baking dish.
Place in the center of the oven.
Bake for 15–20 minutes, until puffed and golden on top and set in the center.
Let rest for 2–3 minutes before slicing or scooping.
Serve warm with toast, fruit, or salad.
Extra protein: Add cooked chicken or turkey
Vegetables: Add chopped spinach, onions, or peppers
Creamier: Use half milk and half cream
Air fryer: 170°C (340°F) for 10–12 minutes
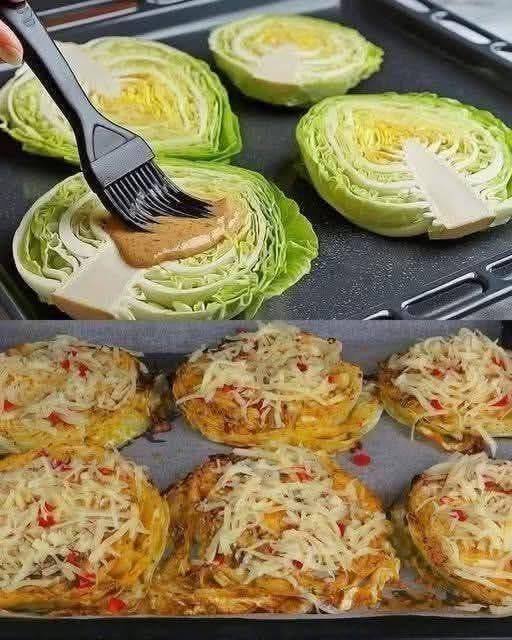
Oven-baked cabbage slices seasoned with oil and spices, cooked until tender inside and lightly browned on the outside.
Prep Time: 10 minutes
Bake Time: 25–30 minutes
Servings: 4
• 1 medium head of cabbage
• 50 ml (about 3 tablespoons) olive oil
• 1 teaspoon salt
• Ground black pepper, to taste
• Red pepper flakes or ground red pepper, to taste
Optional additions (as seen in photo style):
• Shredded cheese (mozzarella or cheddar)
• Garlic powder
• Paprika
• Dried herbs (oregano or thyme)
Preheat oven to 200°C (400°F).
Line a baking tray with parchment paper or lightly grease it with oil.
Remove any damaged outer leaves from the cabbage.
Cut the cabbage into thick round slices (about 2–3 cm / 1 inch thick).
Keep the core intact so the slices stay together.
Arrange the cabbage slices in a single layer on the baking tray.
Brush both sides with olive oil.
Sprinkle evenly with:
• Salt
• Black pepper
• Red pepper
Add any optional seasonings if using.
Place the tray in the oven.
Bake for 20 minutes, then turn the slices carefully with a spatula.
Bake for another 10 minutes, until:
• Edges are lightly browned
• Centers are tender
• Surface is lightly crisped
If using cheese:
Remove tray from oven.
Sprinkle shredded cheese on top of each cabbage slice.
Return to oven for 3–5 minutes until melted and lightly golden.
Serve warm as:
• A side dish
• A light main dish
• A vegetable snack
✔ Cut slices thick so they don’t fall apart
✔ Turn carefully using a wide spatula
✔ For softer cabbage, cover loosely with foil for the first 15 minutes
✔ For crispier edges, bake uncovered the whole time
• Store in an airtight container in the refrigerator for up to 2 days
• Reheat in oven or air fryer for best texture

These bright golden gummies are a soothing, immunity-supporting treat made with simple ingredients. Packed with turmeric, lemon, and honey, they offer gentle digestive support, natural anti-inflammatory benefits, and a comforting citrus sweetness. Perfect for kids and adults, they’re easy to make and store beautifully in the fridge.
In a small saucepan, combine:
Heat on low only, stirring gently. Warm the mixture for 2–3 minutes—avoid boiling because high heat reduces the natural nutrients in lemon and turmeric.
Remove the pot from heat and wait 1 minute so the mixture is warm but not hot.
Whisk in the honey until fully dissolved. Adding honey at a cooler temperature keeps its natural enzymes and antioxidants intact.
Slowly sprinkle the gelatin over the warm liquid while whisking continuously.
Let it rest for 1 minute to “bloom,” then whisk again until smooth and fully melted. This step is key to getting firm, springy gummies without graininess.
Carefully pour the mixture into silicone molds (bears, hearts, or simple squares) or into a shallow glass dish.
Refrigerate for 2 hours or until fully set.
Pop gummies out of the molds, or if using a dish, slice into small cubes.
Store gummies in an airtight container in the refrigerator for up to 10 days.
They can also be frozen and thaw instantly in seconds.
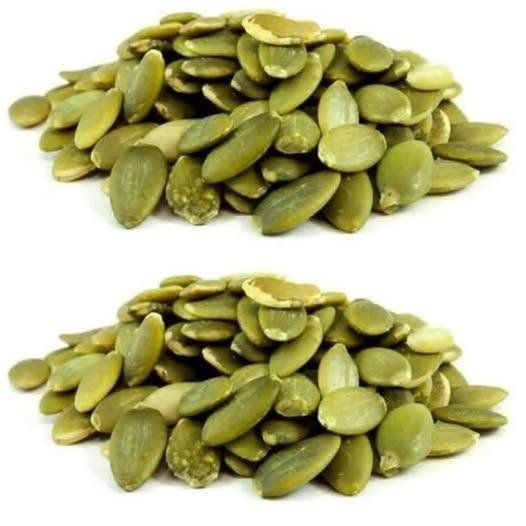
Pumpkin Seed Benefits for Your Body:
Even a Handful of Pumpkin Seeds Can Start an Irreversible Reaction in Your Body. Despite their small size, pumpkin seeds are incredibly beneficial to your health. These nutrient-dense seeds include vital vitamins, minerals, and antioxidants that can positively impact your body with just a handful. Here’s how eating pumpkin seeds might cause your body to go through an “irreversible” reaction and why you should think about including them in your regular diet.
1. Promotes Heart Health
2. Encourages Appropriate Blood Sugar Levels
3. Concealed Antioxidants
4. Enhances the Quality of Sleep
5. Encourages Health of the Prostate
6. Boosts Adaptability
7. Promotes Better Digestion
8. Combats Irritation
9. Lifts the Spirit and Eases Stress
10. Encourages Bone Health
In conclusion, a tiny seed can have a big impact.
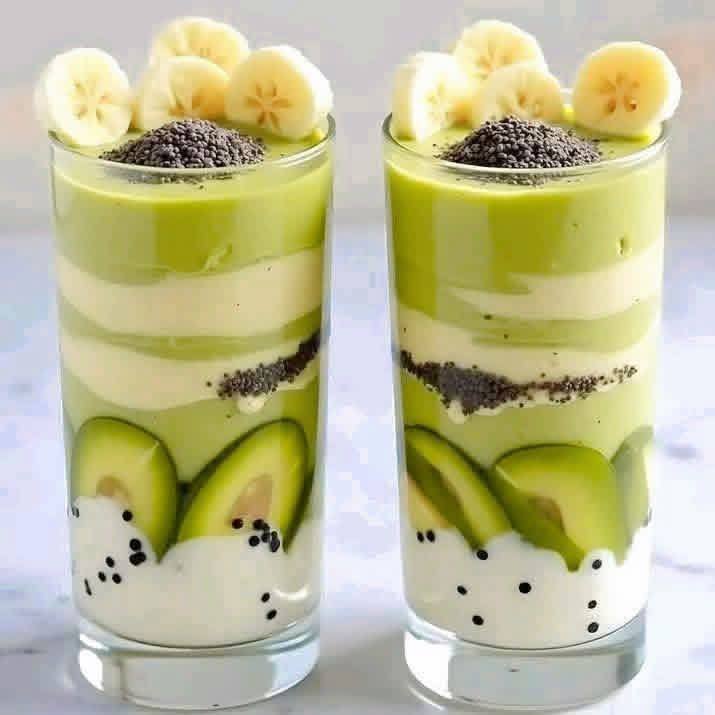
This layered avocado and banana smoothie is a nutrient-dense “Green Goddess” blend that combines healthy fats, antioxidants, and fiber. The specific visual presentation uses a thick yogurt base, decorative avocado slices, and distinct color layers achieved by adding matcha powder.
Prepare the Glass Decor:
Slice a few thin wedges of fresh avocado and press them firmly against the inside walls of the glass.
Spoon the yogurt into the bottom of the glass around the avocado slices. Sprinkle a few chia seeds into the yogurt layer so they are visible through the glass.
Blend the Light Green Layer:
Add the avocado, frozen banana, milk, and sweetener into a high-speed blender.
Blend on high until the consistency is thick and creamy. If it is too thick to pour, add a splash more milk.
Pour about half of this mixture into the glasses over the yogurt base.
Blend the Darker Matcha Layer:
Add the matcha powder to the remaining smoothie still in the blender.
Pulse or blend briefly until the color is a vibrant, darker green.
Carefully pour or spoon this matcha layer over the light green layer to maintain the distinct separation.
Garnish and Serve:
Top with fresh banana slices and a final dusting of chia seeds or extra matcha powder. Serve immediately while cold.
Use Frozen Fruit: Frozen bananas are essential for achieving a thick, “smoothie bowl” consistency that allows for distinct layering.
Prevent Browning: Avocados brown quickly; if preparing in advance, adding a squeeze of lime juice can help maintain the bright green color.
Layering Technique: For the cleanest layers, use the back of a large spoon to gently guide the smoothie down the side of the glass.
 Triple Berry Refresh Smoothie
Frozen Mixed Berries: 2 cups (a blend of blueberries, raspberries, and strawberries). Using frozen fruit is the secret to that thick, frost-like consistency.
Liquid Base: 1 ½ cups of your choice (Almond milk, oat milk, or coconut water work best).
Creaminess Booster: ½ cup Greek yogurt (plain or vanilla) OR 1 frozen banana.
Sweetener (Optional): 1 tablespoon honey, maple syrup, or 2 pitted dates if the berries are tart.
Garnish: Fresh mint leaves, extra berries, and a few slices of strawberry.
Layer the Ingredients: Add the liquid base to your blender first. This prevents the frozen fruit from getting stuck at the bottom and ensures a smoother blend.
Add the Solids: Add the yogurt (or banana) and the 2 cups of frozen berries on top.
The Blend: Start the blender on a low speed and gradually increase to high. Blend for 45–60 seconds until no large chunks remain and the color is a uniform, deep pink/purple.
Check Consistency: * Too thick? Add another splash of milk.
Too thin? Add 2–3 more frozen berries or a handful of ice.
Assemble: Pour into tall glasses. Top with a sprig of fresh mint, a whole raspberry, and a few blueberries as shown in your photo.
The Mint Hack: For a more “spa-like” refreshing taste, blend 2–3 mint leaves directly into the smoothie instead of just using them as a garnish.
Boost the Nutrition: You can easily hide a handful of baby spinach or a tablespoon of chia seeds in this recipe without changing the beautiful purple color or the flavor.