Apple & Chocolate “Magic” Cake

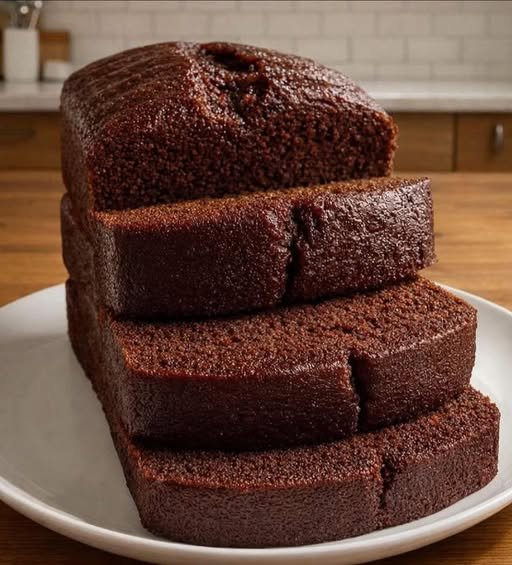
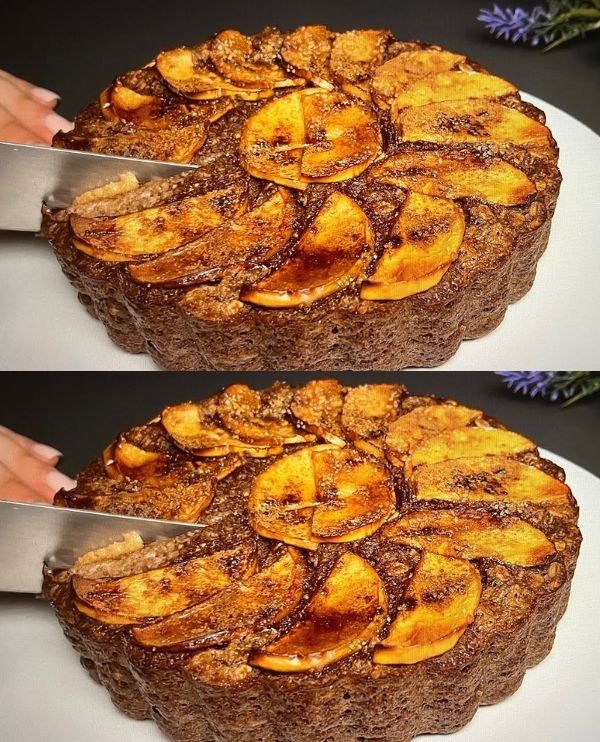
2-Ingredient Base: Apple & Chocolate “Magic” Cake

Sugar-Free, Flourless, and Dairy-Free

Ingredients

  • 4 Medium Sweet Apples: (Like Gala, Fuji, or Honeycrisp) peeled, cored, and sliced.

  • 4 Large Eggs: At room temperature.

  • 5 tbsp Unsweetened Cocoa Powder: Sifted to ensure a smooth batter.

  • 1 tsp Baking Powder: To give the cake its lift.

  • Olive Oil: Just a small amount for greasing the baking mold.

Step-by-Step Instructions

  1. Steam the Apples: Place your sliced apples in a steamer or a microwave-safe bowl with a splash of water. Cook until they are very soft and fork-tender (about 8–10 minutes). Drain any excess liquid.

  2. Puree: Place the softened apples into a blender or food processor. Blend until you have a completely smooth apple puree. Let it cool slightly so it doesn’t cook the eggs instantly.

  3. Combine: Add the 4 eggs, cocoa powder, and baking powder directly into the blender with the apple puree.

  4. Final Blend: Blend on medium speed until the mixture is uniform, dark, and glossy.

  5. Prepare the Mold: Lightly grease a 6 or 7-inch baking tin or silicone mold with a little olive oil.

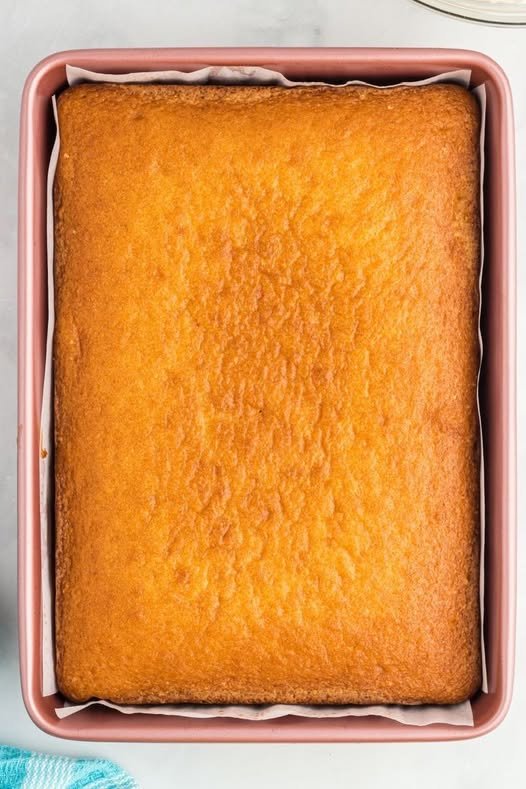
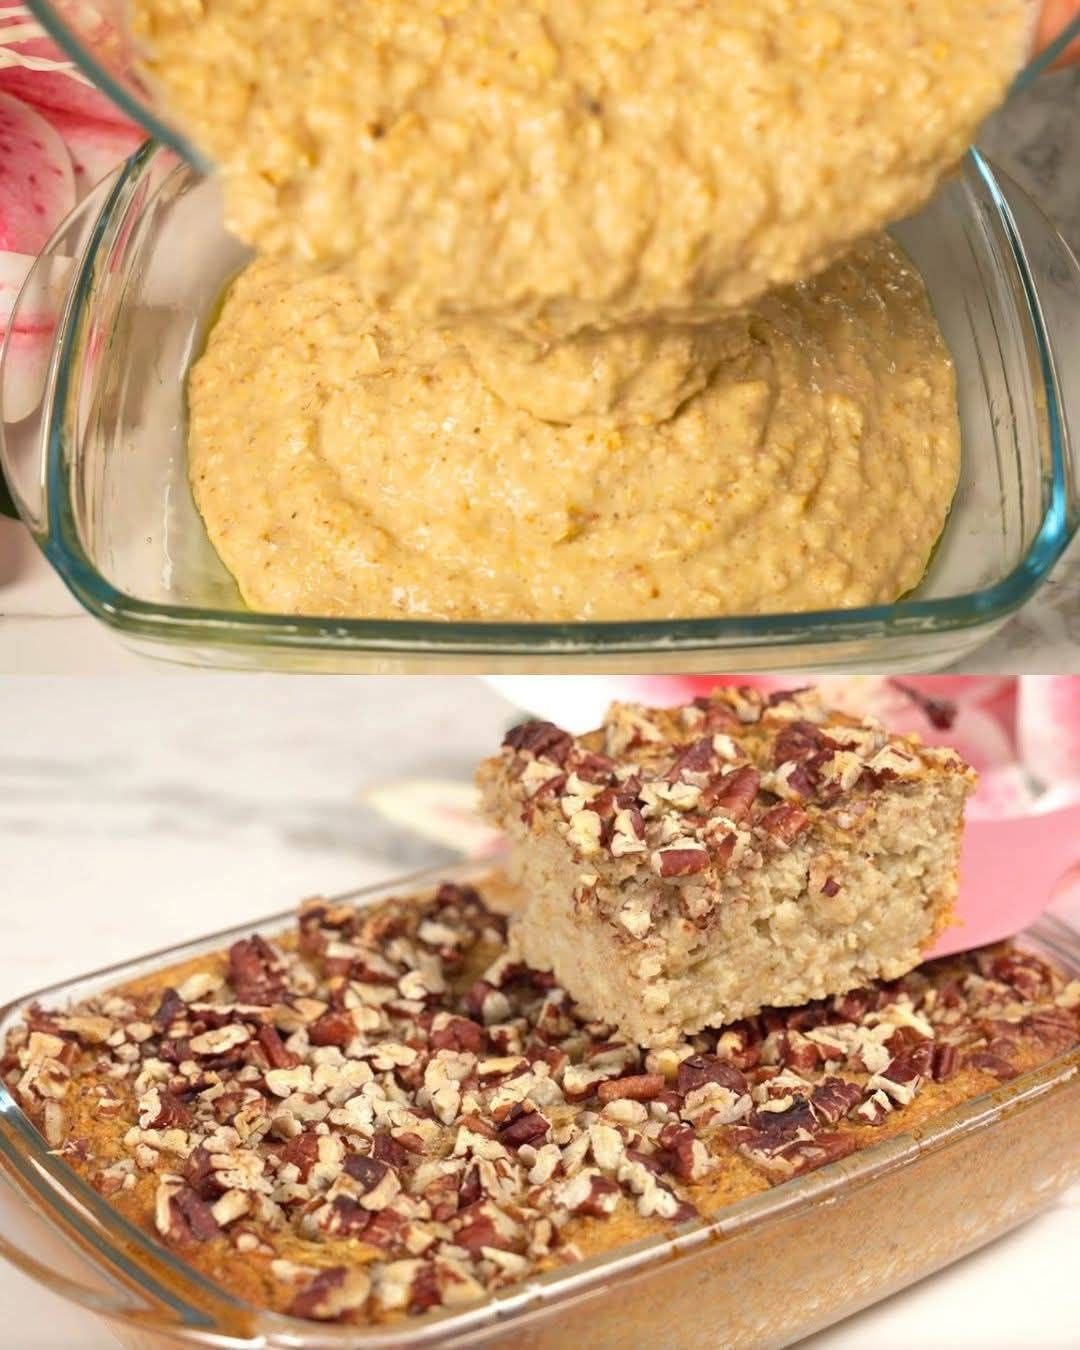
  6. Bake: Pour the batter into the mold.

    • Oven Method: Bake at 350°F (175°C) for 35–40 minutes.

    • Air Fryer Method: Bake at 320°F (160°C) for 25–30 minutes.

  7. The Test: Insert a toothpick into the center. If it comes out clean, the cake is ready.

  8. The Setting Phase: This is the most important part! Let the cake cool completely in the mold, then refrigerate for at least 2 hours (or overnight). This allows the natural fibers to set into a fudgy, truffle-like consistency.


Why this supports your weight loss:

  • High Fiber: The apples provide bulk and fiber, which helps you feel full without the heavy calories of flour.

  • Natural Sweetness: By using sweet apple varieties, you eliminate the need for any added sugars or artificial sweeteners.

  • Metabolic Boost: Pure cocoa is rich in antioxidants and can help satisfy chocolate cravings without the insulin spike.

Healthy Oats with Eggs and Milk (Skillet Breakfast)

Healthy Oats with Eggs and Milk (Skillet Breakfast)

Ingredients (1 serving)

  • 1 cup rolled oats (or quick oats)

  • 2 eggs

  • 1 cup milk (dairy or plant-based)

  • ½ teaspoon cinnamon

  • 1 teaspoon honey (optional)

  • ½ cup fresh berries or sliced banana (optional)


Instructions

  1. Mix

    • In a bowl, whisk eggs and milk until smooth.

    • Add oats and cinnamon.

    • Let sit 1–2 minutes so oats absorb liquid.

  2. Cook

    • Heat a non-stick skillet over medium heat.

    • Lightly grease if needed.

    • Pour mixture into pan like a thick pancake.

    • Cook 2–3 minutes per side until golden and firm.

  3. Serve

    • Drizzle with honey while warm.

    • Top with berries or banana.


Optional Add-Ins

For more protein:

  • 1 tablespoon protein powder or extra egg white

For fiber:

  • 1 tablespoon chia or flaxseed

For crunch:

  • Chopped nuts or seeds

For indulgence:

  • Peanut butter or dark chocolate chips

Savory version:

  • Skip cinnamon & honey

  • Add salt, herbs, and top with avocado or extra egg


Make-Ahead Tips

  • Mix batter the night before and refrigerate

  • Cook in batches and store in fridge (3 days)

  • Freeze cooked portions up to 1 month


Nutrition (Approx. per serving)

  • Calories: 350

  • Protein: 15g

  • Fiber: 5g

  • Carbs: 40g

  • Fat: 11g

Blueberry Lemon Cream Bars

Blueberry Lemon Cream Bars

Yields: 12–16 bars | Prep time: 30 mins | Chill time: 4+ hours

Ingredients

The Graham Crust

  • 1 ½ cups graham cracker crumbs

  • 6 tbsp unsalted butter, melted

  • 2 tbsp granulated sugar

  • A pinch of salt

The Blueberry Filling

  • 2 cups fresh or frozen blueberries

  • ¼ cup granulated sugar

  • 1 tbsp lemon juice

  • 1 tbsp cornstarch mixed with 1 tbsp water (slurry)

The Lemon Cream Layer

  • 8 oz cream cheese, softened

  • 1 cup heavy whipping cream, cold

  • ½ cup powdered sugar

  • 2 tbsp lemon curd (plus extra for drizzling)

  • 1 tsp lemon zest

  • 1 tsp vanilla extract

The Topping

  • Fresh blueberries

  • A drizzle of warmed lemon curd or honey for the “gloss”


Instructions

1. Prepare the Crust

  1. Line an 8×8 inch baking pan with parchment paper, leaving an overhang on the sides.

  2. Mix graham cracker crumbs, melted butter, sugar, and salt until it feels like wet sand.

  3. Press firmly into the bottom of the pan. Pro tip: Bake at 350°F (175°C) for 8 minutes to make it extra crunchy, or just freeze for 15 minutes if you want a true no-bake version.

2. Make the Blueberry Compote

  1. In a small saucepan, combine blueberries, sugar, and lemon juice.

  2. Cook over medium heat for 5–8 minutes until the berries burst and release their juices.

  3. Stir in the cornstarch slurry and simmer for 1 minute until thickened.

  4. Important: Let this cool completely before spreading it over the crust.

3. Whip the Lemon Cream

  1. In a large bowl, beat the softened cream cheese, powdered sugar, lemon curd, zest, and vanilla until smooth.

  2. In a separate bowl, whip the heavy cream to stiff peaks.

  3. Gently fold the whipped cream into the cream cheese mixture until light and fluffy.

4. Assembly

  1. Spread the cooled blueberry filling evenly over the crust.

  2. Top with the lemon cream mixture, smoothing the surface with a spatula.

  3. Spread a thin layer of lemon curd over the top (as seen in your photo).

  4. Refrigerate for at least 4 hours (ideally overnight) to allow the layers to set.

5. Serving

  1. Lift the bars out using the parchment overhang.

  2. Slice into squares using a hot, clean knife.

  3. Pile fresh blueberries on top of each square and drizzle with a little extra lemon curd for that professional shine.

Blueberry Cheesecake Delight

Blueberry Cheesecake Delight is the kind of dessert that instantly steals the spotlight on any table. With its velvety cream cheese layer, buttery crust, and glossy blueberry topping, it offers the perfect balance of sweetness, richness, and refreshing fruitiness. This dessert looks impressive, tastes luxurious, and is surprisingly easy to prepare. Whether you’re hosting a gathering, preparing a family treat, or simply craving a creamy berry dessert, this layered delight is guaranteed to satisfy.
This recipe combines a classic graham cracker crust, a smooth cheesecake filling that doesn’t require baking, and a luscious blueberry topping that soaks beautifully into the creamy layer as shown in the picture. Every bite delivers crunch, creaminess, and fruity brightness—a perfect harmony of textures and flavors.


Ingredients

For the Crust:
•2 cups graham cracker crumbs
•½ cup unsalted butter, melted
•2 tablespoons granulated sugar
For the Cheesecake Layer:
•16 oz (450 g) cream cheese, softened
•1 cup powdered sugar
•1 teaspoon vanilla extract
•1 cup heavy whipping cream, whipped to stiff peaks
For the Blueberry Topping:
•3 cups fresh or frozen blueberries
•½ cup granulated sugar
•1 tablespoon lemon juice
•1 tablespoon cornstarch mixed with 2 tablespoons water (slurry)
•½ cup water


Instructions

1. Prepare the Crust
1. In a mixing bowl, combine the graham cracker crumbs, melted butter, and sugar.
2. Press the mixture evenly into the bottom of a 9×13-inch glass baking dish or a pie dish.

3. Place the crust in the refrigerator while you prepare the filling to help it firm up.
2. Make the Cheesecake Layer
1. In a large bowl, beat the softened cream cheese until smooth and creamy.
2. Add powdered sugar and vanilla extract; continue beating until fully combined.
3. In a separate bowl, whip the heavy cream to stiff peaks, then fold it gently into the cream cheese mixture.
4. Spread the cheesecake filling evenly over the chilled crust.
5. Refrigerate to allow the layer to set.
3. Prepare the Blueberry Topping
1. In a saucepan over medium heat, combine blueberries, sugar, lemon juice, and water.
2. Let the mixture come to a gentle simmer and cook until the berries start releasing their juices.

3. Stir in the cornstarch slurry and cook until the mixture thickens into a glossy sauce.
4. Remove from heat and allow it to cool completely.
5. Once cooled, pour the blueberry topping over the cheesecake layer, spreading it evenly.
4. Chill and Serve
1. Refrigerate the dessert for at least 4 hours, or preferably overnight, to allow the layers to fully set.
2. Slice into squares or wedges and serve chilled, just like the photo—creamy, fruity, and irresistible.


Blueberry Cheesecake Delight is a dessert that delivers both elegance and comfort in every serving. The buttery crust provides the perfect foundation, the creamy cheesecake center adds luxurious texture, and the vibrant blueberry topping brings a refreshing finish. It’s a dessert that looks stunning, tastes even better, and requires no complicated steps—ideal for both everyday treats and special occasions.
Serve it at family gatherings, dinner parties, or as a weekend dessert, and watch your guests return for seconds. With its beautiful layers and unforgettable flavor, this cheerful blueberry creation truly earns its name: a delightful masterpiece in every bite.

🍌 Banana Oat Microwave Mug Cake

🍌 Banana Oat Microwave Mug Cake

A quick, healthy-style single-serve cake made in the microwave using simple pantry ingredients. Soft, lightly sweet, and perfect for breakfast or dessert.

🧾 Ingredients

  • 1 ripe banana, mashed until smooth

  • ¼ cup rolled oats (quick oats give a smoother texture)

  • ¼ cup milk (dairy or plant-based)

  • 1 tablespoon honey or maple syrup

  • ½ teaspoon baking powder

  • ½ teaspoon vanilla extract

  • Optional:

    • Pinch of cinnamon

    • 1 tablespoon chocolate chips or chopped nuts


🥣 Instructions

  1. Mash the banana
    In a large microwave-safe mug (12 oz or bigger), mash the banana with a fork until very smooth.

  2. Add wet ingredients
    Stir in the milk, honey (or maple syrup), and vanilla extract. Mix until fully combined.

  3. Add dry ingredients
    Add oats, baking powder, and cinnamon (if using). Stir well so there are no dry patches.

  4. Add mix-ins (optional)
    Gently fold in chocolate chips or nuts.

  5. Microwave
    Microwave on HIGH for 1 minute 30 seconds.

    • If the center still looks wet, microwave in 15–30 second intervals until set.

  6. Rest before eating
    Let it sit for 1 minute. This finishes cooking the center and improves texture.

  7. Serve
    Eat directly from the mug or turn it out onto a plate. Enjoy warm!


💡 Tips

  • For smoother texture, blend oats into flour before mixing.

  • For extra moisture, add 1 teaspoon oil or nut butter.

  • Top with yogurt, peanut butter, or sliced banana.


🍫 Flavor Variations

  • Chocolate Banana: Add 1 tsp cocoa powder

  • Apple Pie: Add diced apple + cinnamon

  • Peanut Butter: Swirl in 1 tbsp peanut butter

  • Protein Boost: Add 1 tbsp protein powder + 1 tbsp extra milk

Flourless Savory Cheese Loaf


Flourless Savory Cheese Loaf

This bread uses the protein in eggs and the structure of cream cheese to create a fluffy, bread-like texture without any grain.

Ingredients

  • 3 large eggs, separated (whites in one bowl, yolks in another)

  • 3 oz (approx. 85g) cream cheese, softened to room temperature

  • 1/8 tsp cream of tartar (essential for stabilizing the egg whites)

  • 1/2 cup shredded cheddar cheese (plus a little extra for the topping)

  • 1/2 tsp garlic powder (optional)

  • A pinch of salt


Instructions

  1. Prep the Oven and Pan: Preheat your oven to 300°F (150°C). Lightly grease a small glass loaf dish or line it with parchment paper to ensure easy removal.

  2. Mix the Yolks: In a medium bowl, blend the egg yolks, softened cream cheese, and salt until the mixture is completely smooth. If you are using garlic powder or other herbs, fold them in now.

  3. Whip the Whites: In a separate, very clean metal or glass bowl, add the egg whites and the cream of tartar. Use a hand mixer or stand mixer to beat them on high speed until stiff peaks form (the whites should stand straight up when you lift the beaters).

  4. Fold Gently: Slowly and gently fold the yolk mixture into the egg whites using a spatula. Do not stir vigorously, or you will deflate the air bubbles that make the bread rise. Once mostly combined, gently fold in the shredded cheddar.

  5. Bake: Pour the batter into your prepared loaf dish. Sprinkle the remaining bit of cheese on top for that golden crust. Bake for 25–30 minutes. The top should be golden brown and the center should feel firm to the touch.

  6. Cool: Let the loaf cool in the pan for at least 10 minutes before slicing. This allows the internal structure to set so it doesn’t collapse.


Quick Tips

  • The Cream Cheese: Make sure it is truly at room temperature. If it’s cold, you’ll end up with lumps in your batter.

  • Variations: You can add dried rosemary, jalapenos, or even “everything bagel” seasoning to the top for extra flavor.

Old Fashioned Oatmeal Cake

Old Fashioned Oatmeal Cake

A nostalgic, tender cake with a caramelized broiled topping.

  • Prep time: 15 minutes

  • Cook time: 35–45 minutes

  • Servings: 12

  • Pan Size: 9×13 inch


Ingredients

The Oatmeal Base

  • 1 cup Old-fashioned rolled oats (not instant)

  • 1 ¼ cups Boiling water

The Cake Batter

  • ½ cup Unsalted butter, softened

  • 1 cup Brown sugar, packed

  • ½ cup Granulated sugar

  • 2 Large eggs

  • 1 tsp Vanilla extract

  • 1 ½ cups All-purpose flour

  • 1 tsp Baking soda

  • 1 tsp Ground cinnamon

  • ½ tsp Salt

The Coconut-Pecan Topping

  • ½ cup Unsalted butter, melted

  • ¾ cup Brown sugar, packed

  • ½ cup Heavy cream (or evaporated milk)

  • 1 cup Shredded sweetened coconut

  • ½ cup Chopped pecans or walnuts

  • ½ tsp Vanilla extract


Instructions

1. Soak the Oats

In a small heat-proof bowl, combine the rolled oats and boiling water. Let this sit for 15–20 minutes. The oats will absorb the water and become soft and plump; do not drain them.

2. Prep the Oven and Pan

Preheat your oven to 350°F (175°C). Grease and flour a 9×13 inch baking pan (or use a non-stick baking spray).

3. Cream and Mix

In a large mixing bowl, cream together the softened butter, brown sugar, and granulated sugar until the mixture is light and fluffy. Beat in the eggs one at a time, then stir in the vanilla extract.

4. Combine

Stir the soaked oat mixture (liquid and all) into the butter and sugar mixture. In a separate bowl, whisk together the flour, baking soda, cinnamon, and salt. Gradually add the dry ingredients to the wet ingredients, stirring until just combined.

5. First Bake

Pour the batter into the prepared pan. Bake for 30–35 minutes, or until a toothpick inserted into the center comes out clean.

6. Add the Topping

While the cake is baking, mix all the topping ingredients (melted butter, brown sugar, cream, coconut, pecans, and vanilla) in a medium bowl.

Once the cake comes out of the oven, immediately spread the topping evenly over the hot cake.

7. Final Broil/Bake

Return the cake to the oven for 10–12 minutes (or pop it under the broiler for 2–3 minutes—watch it closely!) until the topping is bubbly, golden brown, and caramelized.

8. Cool and Serve

Let the cake cool for at least 15–20 minutes to allow the topping to set before slicing.


Pro-Tips for Success

  • Don’t overmix: When you add the flour, stir just until the white streaks disappear. This keeps the cake light rather than chewy.

  • Storage: This cake is famous for staying moist. Store it covered at room temperature for 2 days, or in the fridge for up to 5 days.

  • The “Crunch” Factor: If you aren’t a fan of coconut, you can double the pecans for a “Pecan Pie” style topping instead!

Glazed Brown Butter Honey Cakes

Glazed Brown Butter Honey Cakes

These cakes rely on the deep, nutty flavor of browned butter to create a dessert that tastes far more complex than the 10-minute prep time suggests.

Ingredients

For the Cake:

  • 1 cup (225g) Unsalted Butter: To be browned.

  • ¾ cup Granulated Sugar: Provides structure and sweetness.

  • ¼ cup Honey: Adds moisture and a distinct floral depth.

  • 2 Large Eggs: At room temperature for better emulsification.

  • 1 tsp Vanilla Extract: Enhances all the other flavors.

  • 1 ½ cups All-Purpose Flour: The base of the cake.

  • 1 tsp Baking Powder: For a perfect, airy rise.

  • ½ tsp Salt: Balances the sweetness of the honey.

  • ½ cup Whole Milk: Keeps the crumb tender.

For the Honey Glaze:

  • ¼ cup Honey: The star of the glaze.

  • 2 tbsp Water: To thin the glaze to a pourable consistency.

  • A pinch of Salt: To cut through the sugar.


Instructions

1. Brown the Butter

  • In a medium saucepan, melt the butter over medium heat.

  • Continue cooking, whisking occasionally. The butter will foam, then clear, and finally begin to turn golden brown with small dark specks at the bottom.

  • Once it smells nutty and looks like toasted hazelnuts, remove it from the heat immediately and pour into a heat-proof bowl to stop the cooking. Let it cool for 5 minutes.

2. Mix the Batter

  • Preheat your oven to 350°F (175°C). Grease individual foil baking tins or a standard muffin tin.

  • In a large bowl, whisk the browned butter with the sugar and honey until well combined.

  • Add the eggs one at a time, whisking well after each, then stir in the vanilla extract.

  • In a separate bowl, sift together the flour, baking powder, and salt.

  • Gradually add the dry ingredients to the butter mixture, alternating with the milk. Stir until just combined—do not overmix, or the cakes will be tough.

3. Bake

  • Divide the batter evenly among the prepared tins, filling them about two-thirds full.

  • Bake for 18–22 minutes, or until a toothpick inserted into the center comes out clean and the tops are a deep golden brown.

4. Glaze and Finish

  • While the cakes are baking, whisk the honey, water, and salt in a small bowl.

  • As soon as the cakes come out of the oven, brush the warm glaze generously over the tops. The warmth allows the glaze to soak into the top layer, creating a sticky, delicious crust.

  • Let the cakes cool in the tins for at least 10 minutes before serving.


Pro-Tip

For a dinner party presentation, serve these warm with a dollop of unsweetened whipped cream or a small scoop of vanilla bean ice cream to balance the richness of the honey.

Cloud Milk Cake (3 Ingredients)

Cloud Milk Cake (3 Ingredients)

Prep Time: 15 minutes
Bake Time: 30–35 minutes
Serves: 6–8 slices

A light, airy cake made with eggs, milk, and sweetener, with a soft texture similar to a soufflé-style sponge.


Ingredients

  • 5 large eggs, separated

  • 1 cup (240 ml) milk

  • ½ cup granulated sweetener (such as monk fruit or erythritol, adjust to taste)

Optional:

  • 1 teaspoon vanilla extract

  • Pinch of cream of tartar (for stabilizing egg whites)


Instructions

1. Prepare the Pan and Oven

Preheat your oven to 325°F (160°C).
Line the bottom of an 8-inch round or square baking pan with parchment paper.
Do not grease the sides of the pan so the batter can rise evenly.


2. Mix the Yolk Batter

Place the egg yolks in a medium bowl.
Add the milk and ¼ cup of the sweetener.
Whisk until smooth and slightly pale in color.
Stir in vanilla extract if using.


3. Whip the Egg Whites

In a clean, dry bowl, beat the egg whites with a mixer on medium-high speed.
Once foamy, gradually add the remaining ¼ cup sweetener.
Beat until stiff peaks form.
If using cream of tartar, add it at the foamy stage.


4. Combine the Mixtures

Add a small portion of the whipped egg whites to the yolk mixture and stir gently to loosen it.
Then gently fold the remaining egg whites into the batter using a spatula.
Fold slowly and carefully to keep the mixture airy.


5. Bake in a Water Bath

Pour the batter into the prepared pan.
Place the pan inside a larger baking dish and pour hot water into the outer dish until it reaches about 1 inch up the sides of the cake pan.

Bake for 30–35 minutes, or until:

  • The top is lightly golden

  • The cake feels springy when gently touched


6. Cool Gradually

Turn off the oven and crack the door open.
Let the cake sit inside for 10 minutes.
Remove and allow to cool completely in the pan before slicing.


Helpful Tips

  • Clean bowl: Any grease or water can prevent egg whites from whipping properly.

  • Gentle folding: Use a light hand to keep the batter fluffy.

  • Flavor ideas: Add lemon zest or almond extract for variation.

  • Serving: Serve plain or with fruit, cream, or a light glaze.

  • Storage: Keep covered in the refrigerator for up to 2 days.

Flourless Apple & Cocoa Cake

Flourless Apple & Cocoa Cake

Prep Time: 10 minutes
Bake Time: 35–40 minutes
Serves: 8 slices

A soft, dense chocolate-style cake made from blended apples, eggs, and cocoa powder.


Ingredients

  • 4 medium apples (such as Gala, Fuji, or Red Delicious), peeled and cored

  • 4 large eggs

  • 5 tablespoons unsweetened cocoa powder

  • 1 teaspoon baking powder

  • Olive oil, for greasing the pan

  • Optional: Pinch of salt


Instructions

1. Prepare the Apples

Peel and core the apples.
Cut them into small chunks so they blend easily.


2. Blend the Base

Place the apple pieces and eggs into a blender or food processor.
Blend until completely smooth and liquid, with no visible apple pieces.


3. Add Dry Ingredients

Add the cocoa powder, baking powder, and salt (if using).
Blend again until the mixture is fully combined and evenly colored.


4. Prepare the Pan and Oven

Preheat your oven to 350°F (180°C).
Lightly grease a silicone mold or line a loaf pan with parchment paper and brush with olive oil.


5. Bake

Pour the batter into the prepared pan.
Bake for 35–40 minutes, or until a toothpick inserted into the center comes out clean.


6. Cool and Set

Let the cake cool in the pan for 20 minutes.
Transfer to the refrigerator and chill for 1 hour before slicing.
This helps the cake firm up and develop its dense texture.


7. Serve

Slice and serve as is, or with an optional topping of melted dark chocolate drizzled over the top.


Helpful Tips

  • Smoother texture: Blend the apples very well to avoid chunks in the batter.

  • Flavor option: Add ½ teaspoon vanilla extract or cinnamon for extra aroma.

  • Pan choice: Silicone or parchment-lined pans release more easily.

  • Storage: Store covered in the refrigerator for up to 3 days.

Creamy Vanilla Cream Slice Dessert

Creamy Vanilla Cream Slice Dessert

Prep Time: 20 minutes
Chill Time: 4 hours (or overnight)
Serves: 8–10 slices

A smooth, rich dessert with a biscuit base, creamy vanilla filling, and a soft whipped topping.


Ingredients

For the Base

  • 200 g (about 2 cups) crushed plain biscuits or graham crackers

  • 100 g (½ cup) melted butter

For the Cream Filling

  • 2 cups milk

  • ½ cup sugar

  • ¼ cup cornstarch

  • 2 egg yolks

  • 1 tablespoon butter

  • 1 teaspoon vanilla extract

For the Whipped Layer

  • 1½ cups heavy whipping cream

  • 3 tablespoons powdered sugar

  • ½ teaspoon vanilla extract


Instructions

1. Prepare the Base

In a bowl, mix the crushed biscuits with melted butter until evenly combined.
Press the mixture firmly into the bottom of a rectangular dish lined with parchment paper.
Refrigerate while preparing the filling.


2. Make the Cream Filling

In a saucepan, whisk together:

  • Milk

  • Sugar

  • Cornstarch

  • Egg yolks

Place over medium heat and stir constantly until thickened and smooth (about 5–7 minutes).
Remove from heat and stir in:

  • Butter

  • Vanilla extract

Let the mixture cool slightly, then pour over the biscuit base.
Spread evenly and refrigerate for at least 1 hour until set.


3. Prepare the Whipped Layer

In a chilled bowl, beat the heavy cream with powdered sugar and vanilla until soft peaks form.


4. Assemble

Spread the whipped cream evenly over the set cream layer.
Use a spatula to smooth the top or create decorative lines.


5. Chill

Refrigerate for 3 more hours or until fully firm and easy to slice.


6. Serve

Lift out using the parchment paper and cut into neat squares or slices.
Serve cold.


Helpful Tips

  • Neater slices: Dip your knife in hot water and wipe between cuts.

  • Flavor variation: Add lemon zest or a little almond extract to the cream filling.

  • Topping idea: Sprinkle shredded coconut or white chocolate curls on top.

  • Storage: Keep covered in the refrigerator for up to 3 days.

Quick & Easy Chocolate Loaf Cake

Quick & Easy Chocolate Loaf Cake

Prep time: 10 mins | Cook time: 45–55 mins | Total time: ~1 hour

Ingredients

  • 1 cup Granulated sugar

  • 1 cup Milk

  • ½ cup Vegetable oil

  • 2 Large eggs

  • 1 tsp Vanilla extract (optional)

  • 1 ½ cups All-purpose flour

  • ½ cup Unsweetened cocoa powder

  • 1 tsp Baking powder

  • ½ tsp Baking soda

  • ¼ tsp Salt

For the Optional Ganache:

  • ½ cup Heavy cream

  • 1 cup Semi-sweet chocolate chips


Instructions

  1. Preheat and Prep: Preheat your oven to 350°F (175°C). Grease a 9×5-inch loaf pan with butter or cooking spray, or line it with parchment paper for easy removal.

  2. Mix Wet Ingredients: In a large mixing bowl, whisk together the sugar, milk, vegetable oil, eggs, and vanilla extract until well combined and smooth.

  3. Incorporate Dry Ingredients: Sift in the flour, cocoa powder, baking powder, baking soda, and salt. Gently whisk by hand until just combined. Tip: Do not overmix, or the cake will become tough rather than tender.

  4. Bake: Pour the batter into the prepared loaf pan. Bake for 45 to 55 minutes. To check for doneness, insert a toothpick into the center; it should come out clean or with just a few moist crumbs.

  5. Cool: Let the cake cool in the pan for about 10 minutes before transferring it to a wire rack to cool completely.

  6. Make the Ganache (Optional): While the cake cools, heat the heavy cream in a small saucepan or microwave until it just begins to simmer. Pour the hot cream over the chocolate chips in a bowl. Let it sit for 5 minutes, then whisk until glossy and smooth.

  7. Finish: Pour the warm ganache over the cooled loaf cake and let it set before slicing.


Tips for a Busy Kitchen

  • No Sifter? No problem. Just use a whisk to fluff up the dry ingredients in a separate bowl before adding them to the wet mixture to get rid of any cocoa clumps.

  • Storage: This cake stays incredibly moist for up to 3 days if kept in an airtight container at room temperature.

Vanilla Raisin Loaf Cake

Vanilla Raisin Loaf Cake

Prep Time: 15 minutes
Bake Time: 45–50 minutes
Servings: 8–10 slices

A soft, lightly sweet loaf cake flavored with vanilla and dotted with juicy raisins. Perfect for tea time or dessert.


🛒 Ingredients

  • 2 cups (250 g) all-purpose flour

  • 1½ teaspoons baking powder

  • ¼ teaspoon salt

  • ½ cup (115 g) unsalted butter, softened

  • ¾ cup (150 g) granulated sugar

  • 2 large eggs, at room temperature

  • 1 teaspoon vanilla extract

  • ½ cup (120 ml) milk

  • ½ cup (80 g) raisins
    (soaked in warm water for 10 minutes, then drained and patted dry)

Optional:

  • 1 tablespoon flour (for coating raisins)

  • Powdered sugar for dusting


👩‍🍳 Step-by-Step Instructions

1. Prepare the Pan

Preheat your oven to 180°C (350°F).

Grease a standard loaf pan (9×5 inch) with butter or oil and line with parchment paper for easy removal.


2. Mix Dry Ingredients

In a medium bowl, whisk together:

  • flour

  • baking powder

  • salt

Set aside.


3. Cream Butter and Sugar

In a large mixing bowl, beat:

  • softened butter

  • sugar

Mix until light and fluffy (about 2–3 minutes).

This step helps create a soft texture.


4. Add Eggs and Vanilla

Add eggs one at a time, mixing well after each addition.

Stir in vanilla extract.


5. Combine Wet and Dry

Add the flour mixture in two parts, alternating with milk:

  • Add half the flour → mix gently

  • Add milk → mix

  • Add remaining flour → mix just until combined

Do not overmix.


6. Add Raisins

Toss drained raisins with 1 tablespoon flour (optional, helps prevent sinking).

Fold raisins gently into the batter.


7. Bake

Pour batter into prepared pan and smooth the top.

Bake for 45–50 minutes, or until:

  • top is golden

  • a toothpick inserted in the center comes out clean


8. Cool

Let the loaf cool in the pan for 10 minutes, then transfer to a wire rack to cool completely.


🍽 Serving Ideas

  • Dust with powdered sugar

  • Serve plain or with butter

  • Pair with tea, coffee, or milk

  • Add sliced fruit on the side


💡 Helpful Tips

  • Soaking raisins keeps them soft and juicy.

  • Do not overmix the batter or the loaf may become dense.

  • You can replace raisins with chopped dates or dried apricots.

  • Store covered at room temperature for 2 days or refrigerate up to 5 days.

No-Bake Chocolate Marshmallow Pie

Why Is This Pie Called An “Easy” No-Bake Dessert?
This luscious chocolate pie comes together in just 30 minutes of active prep time. Aside from letting the filling chill for a few hours to set up, you’ll have this rich, dreamy dessert ready to dig into in no time. No need to turn on the oven during hot summer days or when you’re pressed for time around the holidays.

Whipping up the Oreo crust is a cinch in the food processor, while the silky chocolate-marshmallow filling beats together in just minutes. Before you know it, you’ll be topping buttery crisp crust and smooth mousse-like filling with fluffy sweet cream and pretty chocolate shavings. Simple ingredients come together for major decadence!

What Are The Key Ingredients That Make This Pie Ultra-Rich?
A trio of powerhouse ingredients gives this pie its ultra-rich flavor and luscious texture. High-quality dark chocolate lends deep, complex cocoa notes. Using a bar like Ghirardelli or Lindt makes a difference, so spring for the good stuff!

Sweet marshmallow crème intensifies the chocolate while making the filling light as air. And tangy cream cheese adds body and heightens the mouthwatering flavors. Using full-fat brick cream cheese instead of a tub leads to the best texture and taste.

And of course, Oreo cookies provide that signature flavor in the crust and give a fun nod with the crushed cookie garnish. This mighty trio of ingredients transforms simple pantry items into chocolate bliss!

How Do You Put Together This Showstopping Pie?
Crafting this beauty is surprisingly easy! Start by blitzing Oreos into fine crumbs for the crust. After pressing them into the springform pan and chilling, it’s time for the fun part.

Melt bittersweet chocolate bars until smooth for the filling. Then whip some cream to soft peaks before beating in cream cheese and marshmallow crème. Fold in the melted chocolate, followed by the airy sweet cream, until no streaks remain.

Pour this rich mixture over the Oreo crust, smoothing the top. Chill for at least 4 hours so flavors meld and it sets up. Finally, whip more cream and dollop it over the top of the pie. Finish off with crushed cookies or chocolate shavings if desired. Easy as (chocolate) pie!

How Can I Get The Perfect Sliceable Consistency?
The key to nailing that lush yet stable texture is in the whipped cream. Whip the heavy cream until it forms very stiff peaks with an airy, spreadable texture. This light and lofty whipped cream gives structure to the filling when folded together.

Using blocks of full-fat cream cheese instead of tubs also lends stability, tang, and richness. And be sure not to skip the long chill time to allow the filling to completely firm up. Follow those tips, and slicing beautiful wedges will be a breeze!

What Tips Help Streamline Prep?
I highly recommend using a springform pan here. Not only do the removable sides make serving a cinch, but you can also press the Oreo crust up the sides for a pretty presentation. Chilling that crust first gives it a head startdo on firming up too.

When melting chocolate, use 50% microwave power to prevent scorching. Check and stir every 30 seconds until smooth. And don’t forget to give yourself a few hours for the pie to chill and set—resisting sampling can be hard, but patience pays off in perfect slices!

How Should I Store Any Leftover Pie?
You likely won’t have to worry about leftovers with this vanishingly rich dessert! But if you do, it stores nicely covered in the fridge for 2-3 days. The crust retains its crunchy texture while the silky filling holds beautifully.

If making more than a day ahead, assemble the pie but wait to add the sweet whipped cream topping right before serving. A fresh, fluffy layer of sweet cream takes this treat over the top!

So now there’s no excuse not to dive into this easy yet elegant pie on your dessert table! In no time at all, you can be enjoying chocolate marshmallow decadence.

No-Bake Chocolate Marshmallow Pie Recipe
Ingredients:
Crust Components:
Oreos, 1 package (14 oz)—keep 2 aside for garnishing
Unsalted butter, 1/2 cup, melted
Mousse Filling:
Dark chocolate bars (your choice), Two 4 ounces (113g each)
Heavy whipping cream (cold), 1 cup (236 ml)
Cocoa powder, 3 tablespoons (15g)
Full-fat cream cheese (room temperature), 8 ounces (226g)
Granulated sugar, 2 tablespoons (24g)
Jet-Puffed Marshmallow Crème, 1 jar (7 oz)
Whipped Cream Topping:
Heavy whipping cream, 1 cup (236 ml)
Powdered sugar, 1/2 cup (65g)
Optional: Hot fudge sauce for drizzling
Optional: 2 crushed Oreos for garnish
Preparation Steps:
Crust Assembly:
Lightly grease a 9-inch springform pan with cooking spray, then wipe with a paper towel. Line with parchment paper.
Finely crush Oreos (using a food processor or blender).
Combine melted butter with crushed cookies until well mixed.
Press the mixture firmly into the pan’s bottom and sides. Chill while preparing the filling.
Mousse Filling:
Break one chocolate bar into pieces; melt in the microwave (60-90 seconds), stirring until smooth.
In a chilled metal bowl, beat cold whipping cream to stiff peaks. Gradually add cocoa powder; continue beating.
In a separate bowl, blend cream cheese and sugar until smooth. Add melted chocolate, then marshmallow crème. Mix well.
Fold whipped cream into the cream cheese mixture.
Chop the second chocolate bar; fold into filling.
Pour filling over crust. Refrigerate for 3-4 hours.
Whipped Cream Topping:
Beat heavy whipping cream in a chilled bowl to soft peaks. Gradually add powdered sugar; beat to stiff peaks.
Spread or pipe onto chilled pie. Garnish with crushed Oreos and hot fudge sauce (optional).
Storage Note: Keep pie covered in the refrigerator for 2-3 days for optimal freshness.

Enjoy this blissful, no-bake delight that’s perfect for any occasion!


Classic Homemade French Bread

Classic Homemade French Bread

This recipe yields a loaf with a crisp, golden exterior and a soft, airy crumb, much like the one you’ve shared.

  • Prep time: 20 minutes

  • Rise time: 1.5–2 hours

  • Bake time: 25–30 minutes

  • Yields: 1 large loaf

Ingredients

  • 2 ¼ tsp Active Dry Yeast (1 packet)

  • 1 ½ cups Warm water (approx. 110°F)

  • 1 tbsp Honey or sugar

  • 1 ½ tsp Salt

  • 3 ½ to 4 cups Bread flour (all-purpose works, but bread flour provides better chew)

  • 1 Egg white + 1 tbsp water (for the egg wash)

Instructions

1. Bloom the Yeast

In a large mixing bowl or the bowl of a stand mixer, combine the warm water, honey, and yeast. Let it sit for about 5–10 minutes until it becomes foamy.

2. Mix the Dough

Add the salt and 2 cups of flour. Stir until a shaggy dough forms. Gradually add the remaining flour, half a cup at a time, until the dough begins to pull away from the sides of the bowl.

3. Knead

  • By Hand: Turn the dough onto a floured surface and knead for 8–10 minutes until smooth and elastic.

  • Stand Mixer: Use the dough hook on medium-low speed for about 5–7 minutes. The dough should be slightly tacky but not sticky.

4. First Rise

Place the dough in a lightly oiled bowl, cover with a damp cloth, and let it rise in a warm, draft-free spot for 1 hour, or until it has doubled in size.

5. Shape and Score

Gently punch the dough down to release air. On a lightly floured surface, shape it into a long, tapered rectangle and roll it up tightly into a loaf shape. Place it on a baking sheet lined with parchment paper. Use a sharp knife or a lame to create 3–4 diagonal slashes across the top (just like in your photo!).

6. Second Rise

Cover the loaf loosely and let it rise again for 30–45 minutes. While it rises, preheat your oven to 375°F (190°C).

7. The Secret to the Crust

Whisk the egg white and water together. Generously brush the top and sides of the loaf with the egg wash—this creates that beautiful shiny, golden-brown finish. For an extra-crispy crust, you can place a shallow pan of water on the bottom rack of the oven to create steam.

8. Bake

Bake for 25–30 minutes. The bread is done when it is deep golden brown and sounds hollow when tapped on the bottom.


Perfect Pairing

To elevate your Monterey Sausage Pie experience, try slicing this bread warm and brushing it with a little garlic butter. It’s the perfect tool for cleaning up every last bit of that savory egg and cheese filling!

🍋 Lemon Blueberry Bread (Moist & Glazed)

🍋 Lemon Blueberry Bread (Moist & Glazed)

A soft, tender loaf bursting with juicy blueberries and fresh lemon flavor, finished with a simple lemon glaze.

⏱ Prep Time: 15 minutes

⏱ Bake Time: 50–55 minutes

🍞 Servings: 12 slices


🧾 Ingredients

For the Bread:

  • 1½ cups all-purpose flour

  • 1 teaspoon baking powder

  • ¼ teaspoon baking soda

  • ¼ teaspoon salt

  • ½ cup unsalted butter, softened

  • ¾ cup granulated sugar

  • 2 large eggs

  • 1 tablespoon lemon zest (from about 1 lemon)

  • 2 tablespoons fresh lemon juice

  • ½ cup plain yogurt or sour cream

  • 1 teaspoon vanilla extract

  • 1 cup blueberries (fresh or frozen—do not thaw)

  • 1 tablespoon flour (for coating blueberries)

For the Lemon Glaze (optional):

  • ½ cup powdered sugar

  • 1–2 tablespoons fresh lemon juice


👩‍🍳 Instructions

1. Preheat Oven

Preheat oven to 350°F (175°C).
Grease a 9×5-inch loaf pan and line with parchment paper.


2. Mix Dry Ingredients

In a bowl, whisk together:

  • flour

  • baking powder

  • baking soda

  • salt
    Set aside.


3. Cream Butter & Sugar

In a large bowl, beat butter and sugar until light and fluffy (2–3 minutes).
Add eggs one at a time, mixing well.

Mix in:

  • lemon zest

  • lemon juice

  • vanilla extract


4. Combine Wet & Dry

Add dry ingredients in two parts, alternating with yogurt.
Mix gently just until combined.
Do not overmix.


5. Add Blueberries

Toss blueberries with 1 tablespoon of flour.
Gently fold into batter.


6. Bake

Pour batter into pan and smooth the top.
Bake 50–55 minutes, or until a toothpick comes out clean.
If the top browns too fast, loosely cover with foil.


7. Cool

Cool in pan for 10 minutes, then remove and cool completely on a rack.


8. Make Glaze

Mix powdered sugar with lemon juice until smooth.


9. Glaze & Serve

Drizzle glaze over cooled loaf.
Slice and enjoy!


📦 Storage

  • Room temp: 3 days (airtight container)

  • Fridge: up to 5 days

  • Freezer: up to 2 months (unglazed)


🔄 Variations

  • Add 1 tbsp poppy seeds

  • Use oil instead of butter

  • Make mini loaves (bake 25–30 min)

  • Use gluten-free 1:1 flour blend

Carnivore Egg & Cottage Cheese Bake

 Carnivore Egg & Cottage Cheese Bake

Description

This Carnivore Egg & Cottage Cheese Bake is a soft, fluffy, and protein-packed dish made with just a few simple, animal-based ingredients. The cottage cheese melts into the eggs as it bakes, creating a creamy, custard-like texture that’s both filling and comforting. Perfect for breakfast, meal prep, or a quick dinner when you want something warm and nourishing.


Ingredients

  • 6 large eggs

  • 1½ cups full-fat cottage cheese

  • 1 cup shredded mozzarella or cheddar cheese (optional)

  • 1 tbsp melted butter or beef tallow

  • 1 tsp sea salt (or to taste)

  • ½ tsp black pepper (optional)


Instructions

  1. Preheat Oven
    Preheat oven to 375°F (190°C). Grease a small baking dish with butter or tallow.

  2. Mix the Base
    In a bowl, whisk eggs until smooth. Stir in cottage cheese, melted butter, salt, and pepper.

  3. Add Cheese (Optional)
    Fold in shredded cheese for extra richness.

  4. Bake
    Pour mixture into baking dish. Bake for 30–35 minutes, or until the center is set and the top is lightly golden.

  5. Rest & Serve
    Let rest 5–10 minutes before slicing. Serve warm.


Serving Suggestions

  • Top with a pat of butter for extra richness

  • Serve alongside crispy bacon or sausage patties

  • Pair with bone broth for a complete carnivore meal


Variations

  • Extra Fluffy: Blend the mixture before baking for a soufflé-style texture

  • Higher Fat: Add 2–3 tbsp heavy cream or cream cheese

  • Meaty Version: Mix in cooked ground beef or chopped bacon


Nutrition (Approx. Per Serving – 4 servings)

  • Calories: 300–350

  • Protein: 25–30g

  • Fat: 22–28g

  • Carbs: 2–4g

  • Sugar: 1–2g


Final Thoughts

This Carnivore Egg & Cottage Cheese Bake is simple, satisfying, and endlessly customizable. It’s a great way to pack in protein and healthy fats while keeping your meals comforting and easy—perfect for busy days or weekly meal prep.

Vanilla Custard Slice

Vanilla Custard Slice

A baked dessert that naturally forms three textures while cooking: a soft base, a creamy custard center, and a light sponge top.

Prep Time: 15 minutes
Bake Time: 45–50 minutes
Chill Time: Minimum 3 hours
Yield: 12 squares


🧾 Ingredients

• 4 large eggs, separated (room temperature)
• 150 g (¾ cup) granulated sugar
• 125 g (½ cup) unsalted butter, melted and slightly cooled
• 115 g (¾ cup) all-purpose flour
• 500 ml (2 cups) whole milk, lukewarm
• 1 tablespoon vanilla extract or vanilla bean paste
• Pinch of salt

For topping:
• Powdered sugar, for dusting


👩‍🍳 Instructions

1. Prepare the Pan and Oven

Preheat oven to 160°C (325°F).

Grease an 8 × 8 inch (20 × 20 cm) baking pan.
Line with parchment paper, leaving excess paper hanging over the sides to help lift the dessert out later.


2. Beat the Egg Whites

Place egg whites and a pinch of salt in a clean, dry bowl.

Beat with a mixer until stiff peaks form (the whites should stand upright when the whisk is lifted).

Set aside.


3. Mix Egg Yolks and Sugar

In a separate large bowl, beat egg yolks and granulated sugar together for about 2 minutes, until:
• Pale in color
• Thickened slightly
• Smooth in texture


4. Add Butter and Vanilla

Add melted butter and vanilla extract to the yolk mixture.

Beat for 1 minute until fully blended.


5. Add Flour

Sift flour into the bowl.

Mix gently until just combined and no dry flour remains.


6. Add Milk

Slowly pour in the lukewarm milk while mixing on low speed.

The batter will be very thin and liquid-like — this is expected.


7. Fold in Egg Whites

Add the beaten egg whites in 2–3 portions.

Using a spatula, gently fold them into the batter.
Do not mix until fully smooth — small lumps or “clouds” of egg white should remain floating.

These help create the light top layer during baking.


8. Bake

Pour batter into the prepared pan.

Bake for 45–50 minutes, until:
• Top is light golden
• Center jiggles slightly when shaken
• Surface is set, not wet

If the top browns too quickly, loosely cover with foil during the last 10 minutes.


9. Cool and Chill

Let the pan cool completely at room temperature.

Then refrigerate for at least 3 hours (overnight is best) so the layers can fully firm up.


10. Finish and Slice

Lift the dessert out using parchment paper.

Dust generously with powdered sugar.

Slice into 12 even squares using a sharp knife.


⭐ Helpful Tips

✔ Eggs should be at room temperature for smoother mixing
✔ Milk should be lukewarm, not hot
✔ Do not overmix after adding egg whites
✔ Chill fully before cutting for clean layers


🧊 Storage

• Store covered in the refrigerator
• Best within 2–3 days
• Serve chilled

Lemon Blueberry Cream Cheese Pound Cake

Spring has definitely arrived with this Lemon Blueberry Cream Cheese Pound Cake! This recipe balances zesty citrus with a rich, protein-friendly almond flour base for a dessert that feels indulgent but stays light.


Lemon Blueberry Cream Cheese Pound Cake

Zesty, moist, and perfectly topped with a tangy cream cheese frosting.

Prep time: 15 mins | Cook time: 35–40 mins | Yields: 1 loaf cake

Ingredients

The Cake Base

  • 4 Large Eggs

  • 4 oz Cream Cheese: Softened to room temperature.

  • 4 tbsp Unsalted Butter: Softened.

  • 2 tsp Vanilla Extract

  • 1 Lemon: Both the zest and the juice.

  • 1 ¼ cups Almond Flour

  • 3–4 tbsp powdered monk fruit or your preferred sugar-free sweetener.

  • 2 tsp Baking Powder

  • Pinch of Salt

  • ½ cup Blueberries: Fresh or frozen.

Tangy Lemon Frosting

  • 4 oz Cream Cheese: Softened.

  • 3 tbsp butter: softened.

  • ¼ cup Sweetener of choice

  • 1 tsp Vanilla Extract

  • 1–2 tsp Lemon Juice


Instructions

  1. Mix the Wet Base: In a large bowl, whisk together the eggs, softened cream cheese, butter, vanilla, lemon juice, and zest until the mixture is creamy and smooth.

  2. Incorporate Dry Ingredients: Add the almond flour, baking powder, salt, and sweetener one at a time. Stir gently until just combined.

  3. Prepare the Berries: Toss your blueberries lightly in a teaspoon of extra almond flour. This “secret” step keeps the blueberries from sinking to the bottom of your cake! Gently fold them into the batter.

  4. Bake: Pour the batter into a buttered loaf pan. Bake at 175°C (350°F) for 35–40 minutes until the top is golden and a toothpick comes out clean.

  5. Cool: Allow the cake to cool fully before frosting; otherwise, the cream cheese topping will melt!

  6. Frosting and Garnish: Beat the frosting ingredients until fluffy. Spread generously over the cake and garnish with extra blueberries and lemon zest for a professional finish.


Success Tip

For the best texture, ensure your cream cheese and butter are truly softened before mixing. This prevents lumps and ensures that beautiful, even crumb seen in the photo!

Sourdough Apple Fritter Bread Recipe

Sourdough Apple Fritter Bread 🍎 Prep: 15 mins | Bake: 50-60 mins | Yields: 1 Loaf

INGREDIENTS: The Batter:

  • 1 cup All-Purpose Flour

  • 1 cup Sprouted Wheat Flour (or more AP flour)

  • 1/2 cup Sourdough Discard (or active starter)

  • 1/2 cup Granulated Sugar

  • 2 Eggs

  • 1/4 cup Melted Butter

  • 1/4 cup Milk

  • 2 tsp Baking Powder + 1 tsp Baking Soda

  • 1 tsp Cinnamon + 1/2 tsp Salt

The Apple Filling:

  • 2 large Apples (peeled & diced)

  • 1/4 cup Sugar + 1 tsp Cinnamon

  • 1/4 tsp Nutmeg (optional)

The Glaze:

  • 1 cup Powdered Sugar + 2-3 tbsp Milk

INSTRUCTIONS: 1️⃣ Apples: Toss diced apples with sugar, cinnamon, and nutmeg. Let it sit for 10 mins. 2️⃣ Dry Mix: Whisk flours, baking powder, soda, cinnamon, and salt in a large bowl. 3️⃣ Wet Mix: In a separate bowl, whisk eggs, sugar, discard, melted butter, and milk. 4️⃣ Combine: Gently fold wet ingredients into dry. Do not overmix! Fold in the apples and their juices last. 5️⃣ Bake: Pour into a greased 9×5 loaf pan. Bake at 350°F (175°C) for 50-60 mins until a toothpick comes out clean. 6️⃣ Glaze: Let cool, then whisk glaze ingredients and drizzle over the top.

Enjoy warm with a cup of coffee! YUMM! 😋


💡 Pro-Tip for the Baker

If you want that authentic “fritter” crunch on top, sprinkle a little bit of coarse turbinado sugar or a simple streusel (flour, butter, brown sugar) over the batter right before you pop it in the oven. It adds a beautiful texture contrast to the soft bread!

Oil-Free Orange Cranberry Loaf

Oil-Free Orange Cranberry Loaf
This soft and flavorful loaf gets its moisture from applesauce instead of oil, making it light, tender, and perfect for tea time or holiday baking.


🧾 Ingredients

  • 2 cups all-purpose flour (or 1:1 gluten-free baking blend)

  • 1 cup fresh or frozen cranberries

  • 1 cup orange juice (freshly squeezed for best flavor)

  • 1 tablespoon orange zest

  • ¾ cup granulated sugar (or coconut sugar)

  • 1 teaspoon vanilla extract

  • 1 teaspoon baking powder

  • ½ teaspoon baking soda

  • ½ teaspoon salt

  • ½ cup unsweetened applesauce

Optional topping:

  • Sliced almonds or rolled oats


👩‍🍳 Instructions

1. Prepare the Oven and Pan

Preheat your oven to 175°C (350°F).

Line a standard loaf pan with baking paper or lightly grease it with a small amount of butter or non-stick spray to prevent sticking.


2. Mix the Dry Ingredients

In a large bowl, add:

  • Flour

  • Sugar

  • Baking powder

  • Baking soda

  • Salt

Whisk well until evenly mixed.

Add the cranberries to the dry mixture and gently toss them in the flour. This helps keep them evenly distributed while baking.


3. Mix the Wet Ingredients

In a separate bowl, combine:

  • Orange juice

  • Orange zest

  • Applesauce

  • Vanilla extract

Whisk until smooth.


4. Make the Batter

Pour the wet mixture into the dry mixture.

Using a spatula or spoon, mix gently until just combined.
Do not overmix — this keeps the loaf soft and tender.

The batter will be thick.


5. Bake

Pour the batter into the prepared loaf pan and smooth the top.

Sprinkle almonds or oats on top if using.

Place in the oven and bake for 50–60 minutes, or until:

  • The top is lightly golden

  • A toothpick inserted in the center comes out clean

If the top browns too quickly, cover loosely with foil during the last 10 minutes.


6. Cool

Remove from the oven and let the loaf rest in the pan for 10 minutes.

Carefully transfer to a wire rack and allow to cool completely before slicing.
This helps the loaf hold its shape.


🍽 Serving Suggestions

Serve:

  • Plain

  • With tea or coffee

  • With a light dusting of powdered sugar

  • With a simple orange glaze (powdered sugar + orange juice)


📦 Storage

  • Store covered at room temperature for 2 days

  • Refrigerate for up to 5 days

  • Freeze slices for up to 1 month


⭐ Helpful Tips

✔ Use unsweetened applesauce
✔ Fresh orange juice gives better flavor
✔ Do not overmix the batter
✔ Frozen cranberries can be used without thawing

Easy & Delicious Oatmeal Apple Cake

Easy & Delicious Oatmeal Apple Cake


🧾 Ingredients

  • 200 g oat flakes

  • 250 ml milk

  • 3 eggs (room temperature)

  • 2 ripe bananas

  • 1 apple

  • Cinnamon, to taste

Optional (for extra flavor or texture):

  • 1 tablespoon honey or maple syrup (only if bananas are not sweet)

  • A handful of chopped walnuts or pecans


👩‍🍳 Instructions

1. Soak the Oats

Place the oat flakes in a large mixing bowl.

Pour in the milk and stir well.

Let the mixture rest for 10 minutes so the oats soften and absorb the liquid. This helps create a moist and tender cake texture.


2. Prepare the Fruit

Peel the bananas and mash them with a fork until smooth.

Wash the apple, remove the core, and slice it into thin, even slices. Set aside for topping.


3. Make the Batter

Add the mashed bananas to the soaked oats.

Crack in the eggs.

Add cinnamon according to your taste.

Mix everything thoroughly with a whisk or spoon until the batter is smooth and evenly combined.

If using honey or maple syrup, stir it in now.


4. Prepare for Baking

Preheat your oven to 180°C (350°F).

Grease a round cake pan or line it with baking paper.

Pour the batter into the pan and spread it evenly.

Arrange the apple slices neatly on top in a circular or decorative pattern.

If using nuts, sprinkle them over the top.


5. Bake

Place the pan in the preheated oven.

Bake for 35–40 minutes, or until:

  • The cake feels firm in the center

  • A toothpick inserted into the middle comes out clean

  • The apple slices on top are lightly golden

Remove from the oven and let the cake cool in the pan for about 10–15 minutes.


🍽 Serving Suggestions

Serve:

  • Warm or cold

  • With tea or coffee

  • With yogurt or a light drizzle of honey

  • As a breakfast cake or snack


⭐ Helpful Tips

✔ Use ripe bananas for natural sweetness
✔ Thin apple slices bake more evenly
✔ Do not overbake to keep the cake soft
✔ You can add raisins or dates for extra sweetness


📦 Storage

  • Store covered at room temperature for 1 day

  • Refrigerate for up to 3 days

  • Can be frozen in slices for up to 1 month

Grandma’s Chocolate Yogurt Marble Cake

Grandma’s Chocolate Yogurt Marble Cake
This soft and moist cake combines rich chocolate batter with creamy yogurt filling, creating a beautiful marbled look and a tender texture in every slice.


🧾 Ingredients

For the Cake Batter:

  • 3 eggs (room temperature)

  • 150 g (¾ cup) sugar

  • 110 ml vegetable or sunflower oil

  • 110 ml milk

  • 250 g (about 1⅔ cups) all-purpose flour

  • 15 g baking powder

  • 20 g cocoa powder

  • 2 tablespoons milk (for cocoa mixture)

  • A dash of vanilla extract

  • A pinch of salt


For the Yogurt Filling:

  • 300 g thick yogurt or Greek yogurt

  • 1 egg

  • 50 g sugar

  • 1 tablespoon cornstarch


👩‍🍳 Instructions

1. Prepare the Base Batter

In a large mixing bowl, add:

  • Eggs

  • Sugar

  • Salt

  • Vanilla extract

Whisk well until the mixture becomes pale and slightly thick.

Slowly add:

  • Oil

  • Milk

Whisk again until fully combined.

Sift in:

  • Flour

  • Baking powder

Fold gently using a spatula until smooth and lump-free. Do not overmix.


2. Make the Chocolate Batter

Transfer about one-third of the batter into a separate bowl.

In another small bowl, mix:

  • Cocoa powder

  • 2 tablespoons milk

Stir to form a smooth paste.

Add this cocoa paste to the smaller portion of batter and mix until dark and well blended.


3. Prepare the Yogurt Filling

In a bowl, combine:

  • Yogurt

  • Egg

  • Sugar

  • Cornstarch

Whisk until smooth and creamy. Set aside.


4. Assemble the Cake

Preheat oven to 180°C (350°F).

Grease a round cake pan or springform pan.

Pour the chocolate batter into the pan and spread evenly.

Pour the plain batter over the chocolate layer.

Use a skewer or knife to gently swirl the batters together to create a marble effect.

Spoon small dollops of the yogurt mixture on top. They will sink slightly during baking and create creamy pockets inside the cake.


5. Bake

Place the pan in the oven and bake for 35–45 minutes.

Check doneness by inserting a toothpick into the cake portion (not the yogurt spots). It should come out clean.

Remove from oven and let the cake cool completely in the pan before removing.


🍽 Serving

Slice and serve:

  • Plain

  • With tea or coffee

  • Lightly dusted with powdered sugar

  • With fresh fruit


⭐ Helpful Tips

✔ Do not overmix the batter
✔ Use thick yogurt for best texture
✔ Let cake cool fully before slicing
✔ Add chocolate chips for extra richness


📦 Storage

  • Store covered at room temperature for 1 day

  • Refrigerate for up to 3 days

  • Can be frozen for up to 1 month

Classic Moist Vanilla Sheet Cake

Classic Moist Vanilla Sheet Cake

Ingredients

  • 2 1/2 cups All-purpose flour

  • 1 3/4 cups Granulated sugar

  • 1 1/4 cups Whole milk (room temperature)

  • 1/2 cup (1 stick) Unsalted butter (softened)

  • 1/2 cup Vegetable oil

  • 4 Large eggs (room temperature)

  • 1 tbsp Vanilla extract

  • 2 1/2 tsp Baking powder

  • 1/2 tsp Salt


Instructions

1. Prep and Preheat

  • Preheat your oven to 175°C (350°F).

  • Grease a 9×13 inch baking pan and line the bottom with parchment paper to ensure the cake releases easily, as seen in the provided image.

2. Mix Dry Ingredients

  • In a medium bowl, whisk together the flour, baking powder, and salt. Set this aside.

3. Cream Butter and Sugar

  • In a large mixing bowl (or stand mixer), beat the softened butter and granulated sugar together on medium-high speed until the mixture is light and fluffy (about 3 minutes).

  • Pour in the vegetable oil and mix until well combined.

4. Add Eggs and Vanilla

  • Add the eggs one at a time, beating well after each addition.

  • Stir in the vanilla extract.

5. Combine Everything

  • Reduce the mixer speed to low. Add the flour mixture in three parts, alternating with the milk, starting and ending with the flour.

  • Mix just until combined; do not overmix, or the cake may become dense.

6. Bake

  • Pour the batter into the prepared pan and smooth the top with a spatula.

  • Bake for 30–35 minutes, or until the top is golden brown and a toothpick inserted into the center comes out clean.

7. Cool and Serve

  • Place the pan on a wire rack and let the cake cool completely before frosting.


Pro Tip for the Best Texture

Using room temperature milk and eggs is essential! It allows the ingredients to emulsify properly, creating a uniform, velvety crumb that doesn’t crumble when sliced.

Simple Homemade Oatmeal & Fruit Bake

Simple Homemade Oatmeal & Fruit Bake
This baked oatmeal is naturally sweet from fruit and rich in fiber, making it a wholesome option for breakfast or a light dessert.


🧾 Ingredients

  • 1 cup oats (quick oats or rolled oats)

  • 250 ml milk

  • 1 egg

  • 1 apple

  • 1 ripe banana

  • 1 teaspoon baking powder

  • 1 teaspoon vanilla sugar OR vanilla extract

  • 50 g nuts (walnuts or pecans, chopped)

Optional Add-ins:

  • 1 teaspoon ground cinnamon

  • A pinch of salt

  • Raisins or chopped dates

  • A little honey or maple syrup (if you want extra sweetness)


🥣 Instructions

1. Prepare the Fruit

Peel the banana and place it in a bowl. Mash it well with a fork until smooth.

Wash the apple and grate it (you may keep the peel for extra fiber). Add the grated apple to the mashed banana and mix well.


2. Mix the Wet Ingredients

Add to the fruit mixture:

  • Egg

  • Milk

  • Vanilla sugar (or vanilla extract)

Whisk everything together until well combined.


3. Add the Dry Ingredients

Stir in:

  • Oats

  • Baking powder

Mix until evenly combined.

Let the mixture rest for 5 minutes so the oats absorb the liquid. This helps create a soft and moist texture.


4. Prepare for Baking

Lightly grease a small baking dish with oil or butter.

Pour the oatmeal mixture into the dish and spread it evenly.

Sprinkle chopped nuts over the top for a crunchy finish.


5. Bake

Preheat the oven to 180°C.

Bake for 30–35 minutes or until:

  • The center is firm

  • The top is lightly golden

  • A knife inserted comes out mostly clean


🍽 Serving

Let it cool slightly before cutting into squares.

Serve:

  • Warm for breakfast

  • Cold as a snack

  • With yogurt or a drizzle of honey if desired


🌟 Flavor Tip

Add 1 teaspoon cinnamon to the batter for warm flavor that pairs beautifully with apple and banana.


📦 Storage

  • Store in the refrigerator for up to 3 days

  • Reheat in microwave or oven

  • Can be frozen in slices for later use