A protein-packed, zero-point chicken salad you’ll actually crave. Creamy, crunchy, and endlessly customizable — it’s your new meal prep hero.
🧾 Recipe Card
🍽️ Servings: 4
⏱️ Prep Time: 10 minutes
🔥 Cook Time: 15 minutes (if cooking chicken)
🕒 Total Time: 25 minutes
🏷️ Dietary Info: Zero WW Points (Blue/Purple plans), Low-Carb, High-Protein, Gluten-Free, Dairy-Free
🛒 Ingredients List
Cooked, shredded chicken breast
Non-fat plain Greek yogurt
Dijon mustard
Celery
Red onion
Garlic powder
Salt and black pepper
Fresh parsley or dill (optional)
Fresh lemon juice or vinegar (optional for zing)
👨🍳 Instructions
Prep the Chicken:
If not using pre-cooked chicken, poach or bake boneless, skinless chicken breasts until cooked through. Let cool and shred.
Mix the Dressing:
In a large bowl, combine Greek yogurt, Dijon mustard, garlic powder, lemon juice (if using), salt, and pepper. Stir until smooth.
Add Crunch & Flavor:
Stir in finely chopped celery and red onion. Add parsley or dill if desired.
Combine:
Fold in the shredded chicken until evenly coated.
Taste & Adjust:
Add extra mustard for zing, more yogurt for creaminess, or lemon juice for brightness.
Chill (Optional):
For best flavor, refrigerate for 30 minutes before serving. Serve cold.
📝 Additional Notes
Best with shredded chicken: It absorbs the dressing better than chunks.
Naturally zero points: if you stick to zero-point WW ingredients.
No mayo needed: Greek yogurt keeps it creamy without fat.
Meal prep friendly: make a big batch and portion for the week.
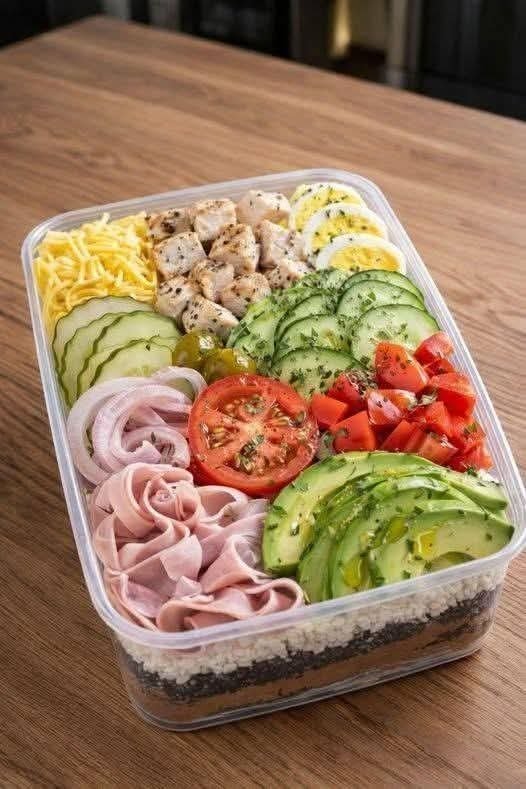
📸 Hero Image
(Insert high-quality image of chicken salad served in a bowl or on lettuce leaves)
✨ Brief Introduction
This isn’t your average diet chicken salad — it’s creamy, herby, crunchy, and satisfying enough to eat every single day. I made it for four weeks straight and still wasn’t tired of it — that’s how good it is. Whether you’re following WW or just trying to eat cleaner, this chicken salad hits all the marks: zero points, maximum flavor, minimal effort.
Pro tip: Double the batch. You’ll thank yourself later.
🍳 Step-by-Step Cooking Guide
🔥 Step 1: Cook or Prep the Chicken
If starting from raw: Poach chicken breasts in simmering water with salt and garlic until fully cooked (internal temp 165°F).
Shortcut: Use rotisserie chicken (remove skin and visible fat to keep it WW-friendly). Tip: Shred with two forks or pulse in a stand mixer for faster prep.
🥣 Step 2: Make the Dressing
In a large bowl, whisk together:
¾ cup non-fat plain Greek yogurt
1 tbsp Dijon mustard
½ tsp garlic powder
Juice of ½ lemon (or 1 tsp vinegar)
Salt and pepper to taste
🧅 Step 3: Add Flavor & Crunch
Finely chop and stir in:
1 stalk celery
2 tbsp red onion
Optional: 1 tbsp chopped fresh parsley or dill
🍗 Step 4: Fold in the Chicken
Add 2–3 cups of shredded chicken breast and mix until everything is well coated.
Tip: Taste and tweak! Add more lemon juice, mustard, or a dash of hot sauce if desired.
🧀 Ingredient Details & Substitution Tips
🧐 Ingredient Insights
Greek Yogurt: Non-fat keeps this recipe zero points. Thick and tangy like mayo — without the calories.
Mustard: Dijon adds depth and zip; yellow mustard works too.
Lemon Juice or Vinegar: Brightens the flavors and balances the creaminess.
🔁 Substitutions
No Greek yogurt? Use plain Skyr or fat-free sour cream.
No Dijon? Use yellow mustard or a dash of horseradish mustard.
No celery? Try diced cucumbers or bell pepper for crunch.
🧰 Equipment Notes
Shred Faster: Use a hand mixer or food processor to shred chicken.
Meal Prep Bonus: Store in glass containers for easy grab-and-go lunches.
🥗 Variations & Serving Suggestions
🔄 Flavor Variations
Curried Chicken Salad: Add 1 tsp curry powder + golden raisins.
Buffalo Style: Stir in a dash of hot sauce + sprinkle of ranch seasoning.
Herby: Add chopped fresh dill, chives, or basil.
🥦 Dietary Adaptations
Dairy-Free: Sub plant-based yogurt.
Keto: Already keto-friendly with minimal carbs.
Whole30: Use compliant yogurt and mustard.
🍽️ Serving Ideas
In lettuce wraps or romaine cups
Over chopped greens for a high-protein salad
Stuffed in bell peppers
With cucumber rounds or bell pepper strips for dipping
Inside a WW-friendly wrap or pita
🍷 Pairing Suggestions
Drink: Sparkling water with lime, unsweetened iced tea
Mood Music: Upbeat meal-prep playlist or chill acoustic vibes
❄️ Storage & Make-Ahead Info
🧊 Storage Instructions
Store in an airtight container in the fridge for up to 4 days.
Stir before serving — the yogurt may separate slightly over time.
🔁 Reheating Tips
No reheating needed — serve cold straight from the fridge
🕒 Make-Ahead Notes
Chicken and dressing can be made separately 2–3 days ahead and combined when needed.
Great for meal prepping lunches at the start of the week.
📊 Nutrition Facts (Per Serving, ~1 cup)
Calories: 120 kcal
Protein: 23g
Fat: 1g
Carbs: 2g
Sugar: 1g
Fiber: <1g
Allergens: Dairy (Greek yogurt)
WW Points: 0 (if using 0-point ingredients)
❓ Frequently Asked Questions (FAQs)
Q: Can I use canned chicken?
A: Yes! Drain well and shred before mixing. Choose low-sodium for best results.
Q: How do I keep the salad from getting watery?
A: Pat chicken dry and avoid watery veggies (like tomatoes). Stir before serving if separation occurs.
Q: Can I freeze it?
A: Not recommended — yogurt-based dressings don’t freeze well and may separate when thawed.
Q: What’s the best way to meal prep this?
A: Portion into 4 airtight containers with a handful of greens or veggies on the side.
❤️ The Story Behind the Recipe
I created this salad out of necessity — I needed a filling, healthy lunch that didn’t feel like a “diet food.” After a few tweaks, I landed on this version and haven’t looked back. It’s the perfect combo of creamy, savory, and crunchy, and best of all — it never gets boring.
I’ve made it for four weeks straight and still crave it. That’s saying something.
💬 Reader Interaction
Have you tried this zero-point chicken salad?
Leave a comment below or tag your version on Instagram with #ZeroPointChickenSalad — I’d love to see your take on it!
.


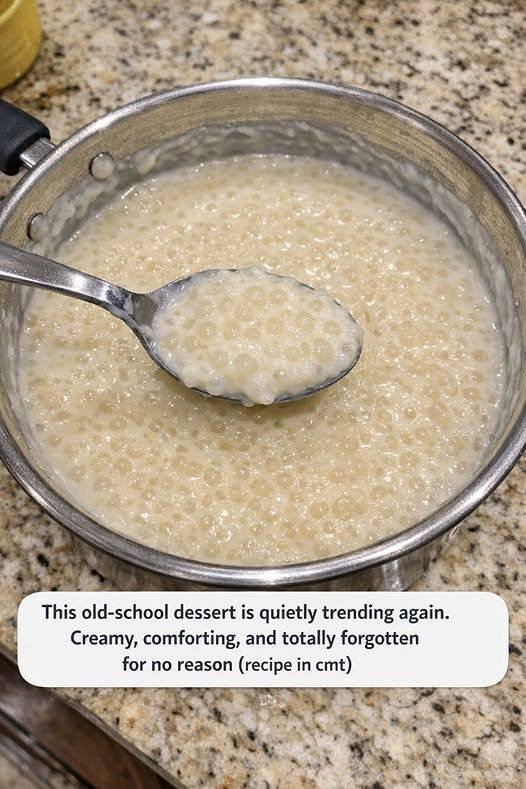
 4-Ingredient Stovetop Tapioca Pudding
 Ingredients
 Directions
 Simple, nostalgic, and endlessly comforting—this classic tapioca pudding shows that the best desserts are often the easiest.