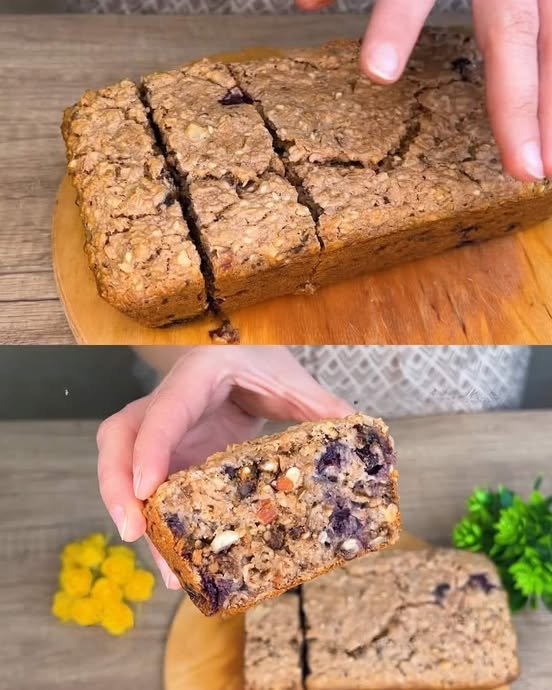
Lemon Ginger Immunity Drink

Lemon Ginger Immunity Drink

This lemon ginger drink is a powerful, natural beverage known for boosting immunity, aiding digestion, and refreshing the body. Made with simple ingredients, it can be enjoyed as a morning shot or a soothing drink during the day.

Ingredients

  • Fresh ginger root – 2 to 3 inches (peeled and sliced)

  • Fresh lemons – 3 to 4 (juiced)

  • Water – 2 cups

  • Honey – 2 to 3 tablespoons (adjust to taste)

  • Turmeric powder or fresh turmeric – ½ teaspoon (optional)

  • Black pepper – a pinch (optional, for better absorption)

  • Mint leaves – for garnish (optional)

Preparation Method

Start by thoroughly washing and peeling the ginger root. Slice it thinly to release maximum flavor and nutrients. In a saucepan, add the sliced ginger and water. Bring it to a gentle boil, then reduce the heat and let it simmer for about 10–15 minutes. This allows the ginger to infuse the water fully.

Once done, remove the saucepan from heat and allow the mixture to cool slightly. Strain the ginger water into a bowl or jug, discarding the ginger pieces. Next, squeeze fresh lemons and add the juice to the warm ginger infusion. Stir well.

Add honey while the mixture is still warm so it dissolves easily. If using turmeric and black pepper, add them now and mix thoroughly. Taste and adjust sweetness or lemon as desired.

Serving Suggestions

Pour the drink into small glasses for immunity shots or larger glasses for a refreshing beverage. Garnish with fresh mint leaves or a thin lemon slice if desired. It can be enjoyed warm for soothing effects or chilled for a refreshing boost.

Health Benefits

  • Ginger helps reduce inflammation, supports digestion, and eases nausea.

  • Lemon is rich in vitamin C, which strengthens the immune system and promotes clear skin.

  • Honey provides natural sweetness and has antibacterial properties.

  • Turmeric adds anti-inflammatory and antioxidant benefits.

Storage Tips

Store the drink in a sealed glass bottle in the refrigerator for up to 2–3 days. Shake well before serving.

This lemon ginger drink is perfect for daily wellness, especially in the morning on an empty stomach for maximum benefits.

Chickpea “Chicken” Salad on Cucumber Chips

Chickpea “Chicken” Salad on Cucumber Chips

This plant-based, high-protein salad uses chickpeas as a hearty base and is packed with flavor and texture.

⏰ Quick Glance

  • Prep Time: 15 minutes

  • Yields: 4 servings

  • Diet: Vegan/Vegetarian (depending on the mayonnaise)

🛒 Ingredients

Category Ingredient Quantity Notes
Salad Base Chickpeas 1 can (15 oz) Drained and rinsed, reserving the liquid (“aquafaba”).
Celery Stalk 1 large Diced fine.
Onion 2 tbsp Finely diced (red or white onion).
Red Grapes ¼ cup Halved or quartered (optional, for sweetness).
Dressing Vegan Mayonnaise (or regular mayo) ½ cup Adjust to desired creaminess.
Dijon Mustard 1 tsp For a little tang.
Apple Cider Vinegar (or Lemon Juice) 1 tsp
Salt ½ tsp Or to taste.
Black Pepper ¼ tsp Or to taste.
Garlic Powder ¼ tsp
Optional Add-ins Curry Powder or Turmeric ¼ tsp For color and spice (as suggested by the image).
Sriracha or Hot Sauce 1 tsp For a spicy kick (as suggested by the image).
Serving Cucumber 1–2 large Sliced into chips (about ¼ inch thick).


👩‍🍳 Instructions

  1. Prepare Chickpeas: Place the drained and rinsed chickpeas in a bowl. Use a fork or potato masher to lightly mash them. Mash until about two-thirds of the chickpeas are broken down, leaving the rest chunky for texture.

  2. Chop Vegetables: Finely dice the celery and onion. If using, halve the red grapes. Add all chopped ingredients to the bowl with the mashed chickpeas.

  3. Make Dressing: In a separate small bowl, whisk together the mayonnaise, Dijon mustard, apple cider vinegar/lemon juice, salt, black pepper, and garlic powder.

  4. Combine: Pour the dressing over the chickpea and vegetable mixture. Stir well until everything is evenly coated and the salad reaches your desired consistency.

  5. Add Flavor Boosts: If using, stir in the curry powder/turmeric (which gives it a yellowish color like in the photo) and the Sriracha/hot sauce (which gives it the visible red streaks).

  6. Chill: Cover the bowl and refrigerate the chickpea salad for at least 30 minutes to allow the flavors to meld.

  7. Serve: Slice the cucumber into rounds about ¼ inch thick. Use the cucumber slices as “chips” to scoop up and serve the chilled Chickpea “Chicken” Salad.

Enjoy your new favorite healthy lunch!

Chewy Coconut Bars

Chewy Coconut Bars

Chewy Coconut Bars are one of those desserts that feel nostalgic and timeless, yet never go out of style. They are simple to make, deeply satisfying, and rely on pantry staples rather than complicated techniques. The texture is the real star here. Soft and chewy in the center, lightly golden on top, and packed with coconut flavor in every bite. These bars are perfect for afternoon tea, lunchboxes, bake sales, or when you want something sweet without committing to a layered cake or frosted dessert. They store well, slice cleanly, and taste even better the next day, which makes them ideal for both casual home baking and sharing.

Prep time: 15 minutes

Bake time: 30 minutes

Cooling time: 20 minutes

Total time: 1 hour 5 minutes

Servings: 12 bars

Difficulty: Easy

Ingredients

2 cups shredded coconut, unsweetened or lightly sweetened

1 cup all-purpose flour

¾ cup granulated sugar

½ cup brown sugar, packed

½ cup unsalted butter, melted

2 large eggs, room temperature

1 teaspoon vanilla extract

½ teaspoon baking powder

¼ teaspoon salt

Optional: ¼ cup milk or cream for extra moisture

Instructions

Preheat your oven to 350°F (175°C) and line an 8×8-inch baking pan with parchment paper.

In a large bowl, whisk together flour, baking powder, and salt until evenly combined.

In a separate bowl, mix granulated sugar and brown sugar with the melted butter until smooth.

Add eggs one at a time, whisking well after each addition.

Stir in vanilla extract until fully incorporated.

Gradually fold the dry ingredients into the wet mixture until just combined.

Gently mix in shredded coconut, ensuring it is evenly distributed.

If the batter feels too thick, stir in milk or cream one tablespoon at a time.

Spread the batter evenly into the prepared pan, smoothing the top.

Bake for 28 to 32 minutes, until the top is lightly golden and the center is just set. Cool completely before slicing.

Tips

Use room temperature eggs to help the batter blend smoothly.

Do not overmix once flour is added to keep bars tender.

Line the pan with parchment for easy removal and clean slices.

Unsweetened coconut gives better control over sweetness.

Check doneness early to avoid dry bars.

Let bars cool fully before cutting for best texture.

Use a sharp knife and wipe between cuts.

Melt butter gently to avoid separating fats.

Slight underbaking keeps the bars chewy.

Store tightly covered to maintain moisture.

Variations

Add chocolate chips for a classic coconut-chocolate combo.

Mix in chopped nuts like almonds or pecans for crunch.

Add lemon zest for a fresh citrus note.

Replace half the flour with almond flour for richness.

Drizzle baked bars with melted dark chocolate.

Add a pinch of cinnamon for warmth.

Use coconut sugar instead of brown sugar.

Fold in dried fruit like cranberries or pineapple.

Top with toasted coconut before baking.

Add a thin layer of jam underneath for a surprise filling.

Q&A

Are Chewy Coconut Bars supposed to be soft?
Yes, the texture should be moist and chewy, not dry or crumbly.

Can I use sweetened coconut?
Yes, but reduce sugar slightly to balance sweetness.

Can these bars be frozen?
They freeze well for up to 2 months when wrapped tightly.

How do I know when they are done?
The edges should be set and the center slightly soft.

Can I make them dairy-free?
Yes, use plant-based butter and milk alternatives.

Why did my bars turn dry?
Overbaking is the most common reason.

Can I double the recipe?
Yes, use a larger pan and adjust baking time slightly.

Do these bars need refrigeration?
No, room temperature storage is fine for a few days.

Can I reduce sugar?
You can reduce by about ¼ cup without affecting texture too much.

Are these good for gifting?
Yes, they travel well and stay fresh for days.

Nutrition

(Approximate per bar)

Calories: 240

Carbohydrates: 30 g

Protein: 4 g

Fat: 12 g

Fiber: 2 g

Sugar: 18 g

Conclusion

Chewy Coconut Bars are proof that simple baking can still deliver big results. With minimal effort and familiar ingredients, you get a dessert that is comforting, versatile, and consistently satisfying. They work just as well for everyday treats as they do for special occasions, and the recipe is flexible enough to match your preferences. Whether enjoyed plain, dressed up with chocolate, or shared with friends, these bars are a dependable favorite that earns a permanent place in your baking rotation.

Savory Oatmeal & Cheese Pancakes

Savory Oatmeal & Cheese Pancakes

This recipe makes approximately 2 large pancakes (intended to be sliced) or 4–6 smaller ones.

Ingredients

  • 1 cup (90g) Oatmeal (Rolled or Instant)

  • 2 Large Eggs

  • 1 glass (200ml) Milk

  • 100g (3.5 oz) Cheese, grated (Cheddar or Mozzarella work best)

  • 2 tbsp Fresh Parsley, finely chopped

  • 1 tbsp Sesame seeds (for the topping)

  • ½ tsp Salt

  • ½ tsp Dry Provençal herbs

  • ¼ tsp Chili flakes (optional)

  • 1-2 tbsp Oil (for frying)


Instructions

  1. Prepare the Base: In a large mixing bowl, combine the oatmeal and milk. Let it sit for about 5–10 minutes. This softens the oats, ensuring the pancake isn’t “gritty.”

  2. Mix the Batter: Whisk the eggs into the soaked oats. Stir in the grated cheesechopped parsleysaltProvençal herbs, and chili flakes. Mix until well combined.

  3. Heat the Pan: Place a non-stick frying pan over medium-low heat and add a thin layer of oil.

  4. Cook and Garnish: Pour half of the batter into the pan (if making a large one) and spread it out evenly with a spatula. Sprinkle half of the sesame seeds over the top of the wet batter.

  5. The Flip: Cover the pan with a lid for 3–4 minutes; this helps the center cook through. Once the bottom is golden brown and the edges look set, carefully flip the pancake.

  6. Finish: Cook the other side for another 2–3 minutes until golden. Repeat with the remaining batter.

Crispy Cabbage Pancakes! Delicious Recipe

Crispy Cabbage Pancakes! Delicious Recipe

These are Cabbage & Carrot Vegetable Pancakes / Fritters 🥬🥕
Soft inside, crispy outside — perfect for breakfast or a light meal.
Here’s the FULL, clear recipe just like the picture 👇


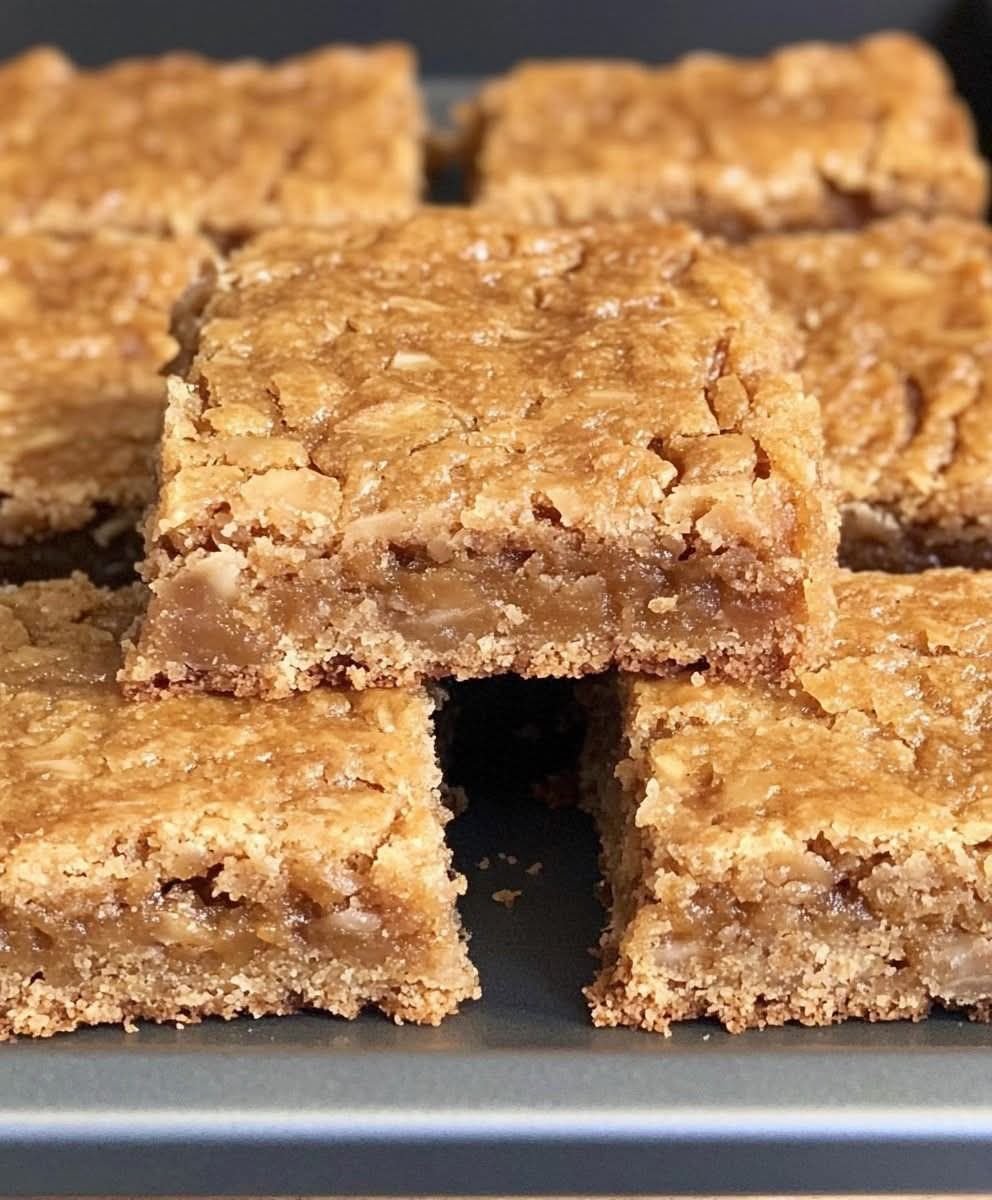
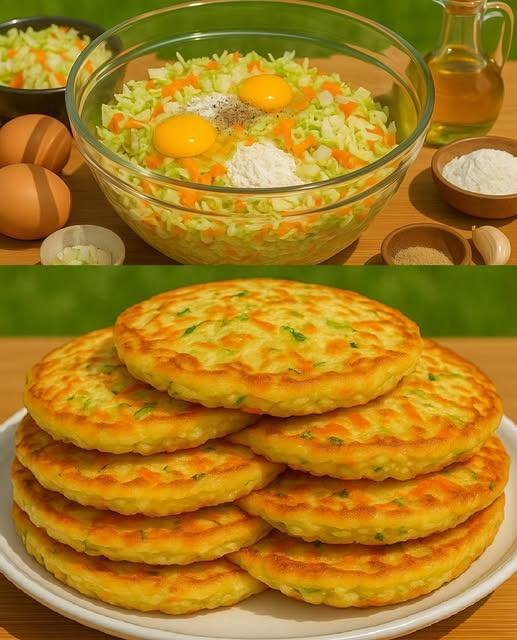
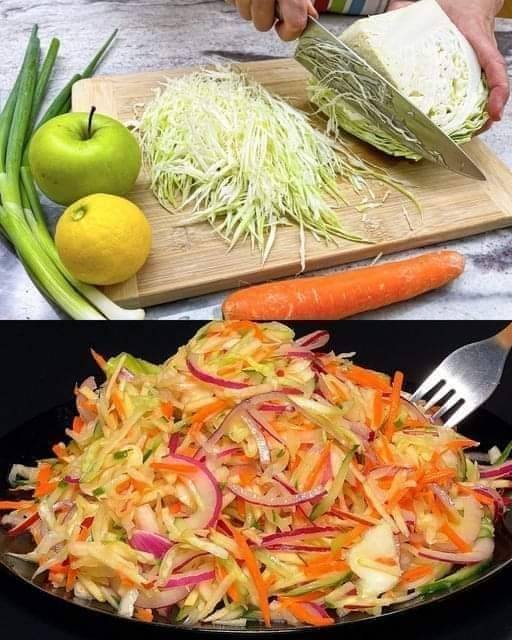
🥞 Cabbage & Carrot Pancakes (Full Recipe)

⏱ Time

  • Prep: 10 minutes
  • Cooking: 15 minutes

🍽 Makes

  • 8–10 pancakes

📝 INGREDIENTS

  • 2 cups finely shredded cabbage
  • 1 medium carrot, grated
  • eggs
  • 3–4 tbsp all-purpose flour
  • 1 tbsp cornflour (for crispiness)
  • 2 tbsp chopped green onion or coriander
  • ½ tsp salt (or to taste)
  • ¼ tsp black pepper
  • ¼ tsp red chili flakes (optional)
  • 1 clove garlic, minced (optional)
  • 2–3 tbsp oil for frying

👩‍🍳 STEP-BY-STEP INSTRUCTIONS

1️⃣ Prepare Vegetables

  • Finely shred cabbage.
  • Grate carrot.
  • Lightly squeeze excess water from cabbage.

2️⃣ Make the Batter

  1. In a bowl, add cabbage, carrot, eggs.
  2. Add flour, cornflour, salt, pepper, garlic & herbs.
  3. Mix well until a thick spoonable batter forms.
    • If too watery, add 1 more tbsp flour.

3️⃣ Cook the Pancakes

  1. Heat a non-stick pan with a little oil.
  2. Spoon batter into pan and flatten gently.
  3. Cook on medium heat for 3–4 minutes per side.
  4. Flip when golden brown.
  5. Cook until crispy outside & soft inside.

🌟 SERVING IDEAS

  • Serve hot with yogurt sauce
  • Garlic mayo
  • Chili sauce
  • Tomato ketchup

🔄 VARIATIONS

✔ Add cheese for cheesy pancakes
✔ Add chopped capsicum or onion
✔ Make gluten-free (use chickpea flour)
✔ Air-fry or shallow fry


💡 PRO TIPS

✔ Squeeze cabbage well
✔ Don’t overcrowd pan
✔ Medium heat for even cooking


✅ RESULT

🥬 Soft vegetable interior
🥞 Crispy golden surface
🍽 Healthy, filling & budget-friendly

🧀 Zero-Carb Cheese Crust Personal Pizza (Friendly)

Servings: 2 personal pizzas
Prep Time: 5 minutes
Cook Time: 12–15 minutes
Total Time: ~20 minutes
WW Points: 0–1 points (depends on toppings)

Ingredients

  • 1½ cups shredded mozzarella cheese, divided
  • 1 large egg
  • ¼ cup grated Parmesan cheese
  • Optional but highly recommended:
    • Sugar-free marinara sauce
    • Extra mozzarella or favorite low-point toppings

Instructions

  1. Preheat oven to 400°F (200°C). Line a baking sheet with parchment paper.
  2. In a bowl, mix 1 cup mozzarellaParmesan, and egg until a sticky dough forms.
  3. Spread the mixture into a thin circle or rectangle on the prepared baking sheet.
  4. Bake for 10–12 minutes, until golden, set, and slightly crispy.
  5. Remove from oven, spread with sugar-free marinara, sprinkle with remaining mozzarella.
  6. Return to oven and bake 2–3 more minutes, until cheese is melted and bubbly.
  7. Slice and enjoy your low-carb, high-protein pizza!

Tips & Variations

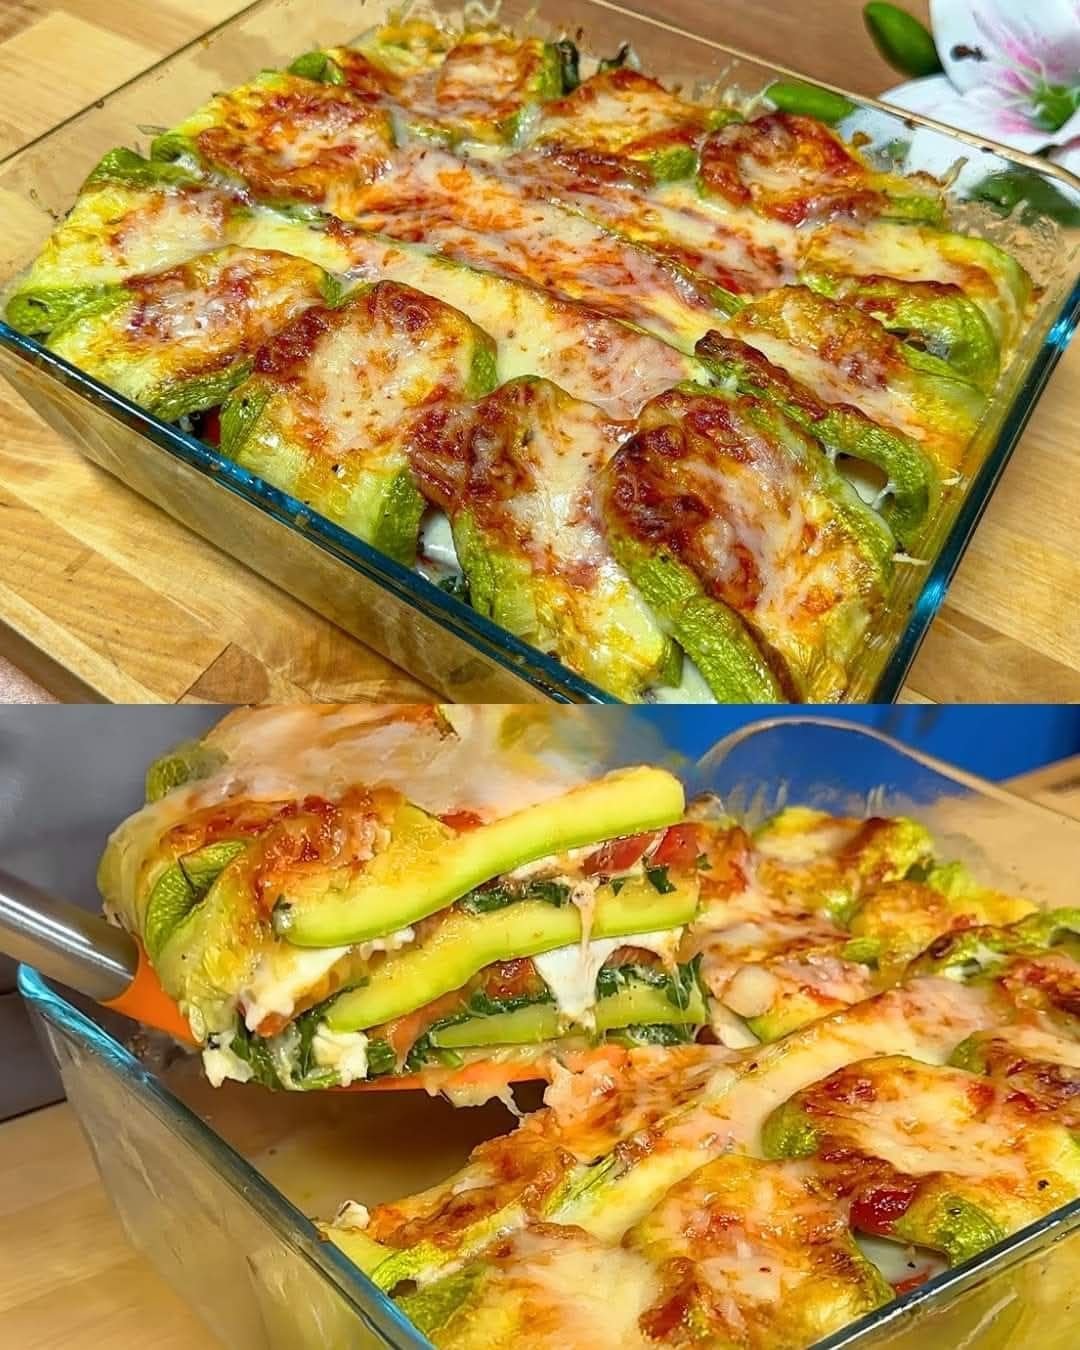
  • 🔥 For extra crispiness: broil for the last 30–60 seconds
  • 🍕 Add toppings like turkey pepperoni, mushrooms, olives, or bell peppers
  • 🧄 Sprinkle garlic powder or Italian seasoning into the crust for more flavor

Creamy Avocado & Banana Smoothie

Creamy Avocado & Banana Fuel Smoothie

Prep time: 5 minutes | Servings: 1


Ingredients

  • 1/2 Medium Avocado: Ripe (should be soft to the touch).

  • 1 Frozen Banana: Sliced (frozen gives it a colder, thicker texture).

  • 2 tbsp Whole Almonds: Or 1 tbsp of almond butter for an even smoother finish.

  • 1 cup Liquid: Unsweetened almond milk, oat milk, or coconut water work best.

  • Optional: A drizzle of honey or 1-2 pitted dates if you prefer it sweeter.


Instructions

  1. Prep the Almonds: If you have a high-speed blender, you can toss the whole almonds right in. If your blender is less powerful, soak the almonds in water for 15 minutes beforehand or use almond butter to avoid “gritty” bits.

  2. Layer the Blender: Add the liquid first, followed by the avocado and banana slices. This helps the blades spin freely and prevents stalling.

  3. Blend: Start on a low speed to break up the frozen banana and nuts, then crank it up to high for 45–60 seconds until the mixture is completely velvety and pale green.

  4. Adjust: If it’s too thick (more like a smoothie bowl), add an extra splash of liquid.


Quick Nutritional Tip

This smoothie is rich in monounsaturated fats (the heart-healthy kind) and potassium. Because it’s quite dense, it’s very satiating and works great as a meal replacement or a post-workout recovery drink.

Salted Caramel Banana Sundae

Salted Caramel Banana Sundae

Ingredients

The Base (The Scoops):

  • 4 large ripe bananas: Sliced and frozen for at least 6 hours.

  • 2 tbsp almond butter or peanut butter: For richness and a tan color.

  • 1 tsp vanilla extract: For depth.

  • A pinch of sea salt: To create that “salted” profile.

The Toppings (As seen in the photo):

  • Fresh Banana: 1/2 banana, sliced into rounds.

  • Caramel Sauce: 2 tbsp (store-bought or homemade using melted coconut sugar and coconut milk).

  • Crushed Pecans or Walnuts: 1/4 cup, roughly chopped for crunch.

  • Cinnamon: A light dusting over the top.


Instructions

  1. Prepare the Base: Place your frozen banana slices into a high-speed blender or food processor.

  2. Blend: Pulse until the bananas look like small crumbs. Add the nut butter, vanilla, and salt. Continue blending on high until the mixture transforms into a smooth, soft-serve consistency.

    • Note: If the blender struggles, add 1–2 tablespoons of milk (dairy or plant-based) to help it move.

  3. Firm Up (Optional): For those perfect round scoops shown in the image, transfer the mixture to a container and freeze for 30–60 minutes.

  4. Assemble: Use an ice cream scoop to place three large mounds into a bowl.

  5. Garnish: Drizzle the caramel sauce generously over the scoops. Press your fresh banana slices into the side and sprinkle the crushed nuts and a dash of cinnamon over everything.


Pro-Tip for Style

To get that glossy, professional look on the caramel, warm the sauce slightly before drizzling. It will flow over the cold “ice cream” just like it does in your picture!

Tropical Carrot & Pineapple Smoothie

Tropical Carrot & Pineapple Smoothie

This blend is naturally sweet with a creamy texture, perfect for a morning boost or a post-workout treat.

Ingredients

  • Carrots: 2 medium carrots (peeled and roughly chopped)

  • Pineapple: 1 cup frozen pineapple chunks (adds chill and sweetness)

  • Banana: 1 ripe banana (fresh or frozen for extra creaminess)

  • Liquid Base: 1 cup orange juice or coconut water

  • Optional Kick: ½ inch fresh ginger (peeled) for a spicy zing

  • Garnish: Diced carrots and a pineapple wedge (as seen in your image)


Instructions

  1. Prep the Carrots: If you don’t have a high-speed blender, you may want to steam the carrot chunks for 5 minutes and let them cool first. This ensures a silky-smooth texture without the “grit.”

  2. Layer the Blender: Add your liquid base first, followed by the banana, pineapple, and carrots.

  3. Blend: Start on a low speed and gradually increase to high. Blend for about 45–60 seconds until the mixture is completely uniform and frothy.

  4. Adjust Consistency: * Too thick? Add a splash more juice.

    • Too thin? Add a few ice cubes or more frozen pineapple.

  5. Serve: Pour into a tall glass. Top with small carrot cubes and a slice of pineapple on the rim to match your photo.


Pro-Tips for the Best Result

  • The “Glow” Factor: Adding a tiny pinch of turmeric and a drop of healthy oil (like coconut oil) helps your body absorb the fat-soluble Vitamin A from the carrots.

  • Natural Sweetness: If your pineapple isn’t very sweet, add a teaspoon of honey or a single pitted date.

Easy 4 Ingredient Bread Rolls Recipe

Those 4-ingredient bread rolls sound like a baker’s dream—minimal ingredients with maximum fluffiness! Since you love full recipes, I’ve distilled that long article into a clean, professional format for your kitchen.

Here is your master recipe for 4-Ingredient Magic Bread Rolls.


4-Ingredient Magic Bread Rolls

Golden, pillowy, and beginner-friendly rolls that melt in your mouth.

  • Prep time: 1 hour 45 minutes (includes rising)

  • Cook time: 15–18 minutes

  • Yields: 8–10 rolls

Ingredients

  • 3 cups (375g) All-purpose flour (plus a little extra for dusting)

  • 1 cup (240 ml) Warm milk (target $100^{\circ}F$ to $110^{\circ}F$)

  • 2 ¼ tsp (1 packet) Instant yeast

  • 1 tbsp Granulated sugar

  • Optional: A pinch of salt (if your palate prefers) or melted butter for brushing.


Instructions

1. Activate the Yeast

In a large mixing bowl, combine the warm milk, sugar, and instant yeast. Stir gently and let it sit for 5–10 minutes until the mixture becomes foamy on top.

Chef’s Note: If the milk is too hot (above $120^{\circ}F$), it will kill the yeast. If it doesn’t foam, your yeast may be expired.

2. Mix and Knead

Gradually add all-purpose flour to the yeast mixture. Stir with a wooden spoon until a shaggy dough forms. Transfer the dough to a lightly floured surface and knead for about 8 minutes. The goal is a dough that is smooth, elastic, and soft but not sticky.

3. First Rise

Place the kneaded dough into a lightly greased bowl. Cover with a clean kitchen towel and place in a warm, draft-free spot. Let it rise for 1 hour, or until it has doubled in size.

4. Shape the Rolls

Gently punch down the risen dough to release the air. Divide it into 8 to 10 equal pieces. Roll each piece into a smooth ball. Place the balls on a baking tray lined with parchment paper, leaving space between them. Cover and let them rise a second time for 30 minutes.

5. Bake

Preheat your oven to 375°F (190°C). Once the rolls have puffed up, bake for 15–18 minutes until the tops are a beautiful golden brown.


Chef’s Tips for Success

  • The “Hollow” Test: To ensure they are done, tap the bottom of a roll; it should sound hollow.

  • Glossy Finish: For that bakery-style shine, brush the tops with melted butter immediately after pulling them out of the oven.

  • Storage: Store in an airtight bag for up to 3 days. To revive that “fresh-baked” feel, microwave for 10 seconds or warm in a 300°F oven for 8 minutes.

Variations

  • Garlic Herb: Add 1 tsp garlic powder and 1 tsp dried Italian herbs to the flour.

  • Cheesy: Press a small cube of mozzarella into the center of each ball before the second rise.

Creamy Coconut Pudding

Creamy Coconut Pudding

A smooth, luscious tropical dessert that’s easy to whip up.

Ingredients

  • 2 cups whole milk

  • 1 cup coconut milk (use full-fat for the best creaminess)

  • 1/2 cup granulated sugar

  • 3 tbsp cornstarch

  • 2 tbsp unsalted butter

  • 1 tsp vanilla extract

  • 1/4 cup shredded coconut (plus extra for topping)

  • A pinch of salt


Instructions

  1. Combine Bases: In a medium saucepan, whisk together the whole milk and coconut milk.

  2. Dissolve Dry Ingredients: Add the sugar, cornstarch, and salt to the pan. Whisk vigorously while cold until the cornstarch is fully dissolved and no lumps remain.

  3. Thicken: Place the saucepan over medium heat. Cook, stirring constantly with a whisk or wooden spoon to prevent burning on the bottom.

  4. Finish the Texture: Once the mixture begins to bubble and thicken, lower the heat. Stir in the butter, vanilla extract, and shredded coconut. Continue to stir for 1–2 minutes until the pudding is glossy and smooth.

  5. Portion and Cool: Remove from heat and pour the pudding into individual serving bowls or ramekins.

  6. Chill: Let the pudding cool to room temperature on the counter. Once cool, cover with plastic wrap (press it directly onto the surface of the pudding if you want to prevent a “skin” from forming) and refrigerate for at least 2 hours.

  7. Garnish: Before serving, sprinkle with extra shredded coconut. For extra flavor, toast the coconut in a dry pan for 2 minutes until golden brown first!


Variations to Try

  • Nutty Twist: Add a few drops of almond extract along with the vanilla.

  • Piña Colada Style: Stir in a handful of crushed, drained pineapple before chilling.

  • Crunchy Base: Add a layer of crushed graham crackers or digestive biscuits at the bottom of the cups before pouring in the pudding.

Pro Tip

If you want an even more indulgent dessert, drizzle a little sweetened condensed milk over the top just before serving.

Double Bacon Cheeseburgers on Carnivore Bread

Juicy, cheesy, and stacked high—these Double Bacon Cheeseburgers are made entirely for the carnivore diet. Instead of traditional buns, we use carnivore bread made from eggs and cheese, keeping it zero-carb. Layered with crispy bacon, melty cheese, and thick beef patties, this burger is indulgent, high in protein, and perfect for anyone following a strict carnivore or keto diet.


Ingredients (Serves 2)

For the Carnivore Bread (Bun):

  • 4 large eggs

  • ½ cup shredded cheese (cheddar, mozzarella, or your favorite)

  • 1 tbsp butter, melted

  • Pinch salt

For the Burgers:

  • 1 lb (450 g) ground beef (80/20 for juiciness)

  • 4 slices bacon

  • 4 slices cheddar cheese (or your favorite)

  • ½ tsp salt

  • ¼ tsp black pepper

Optional toppings (still carnivore-friendly):

  • Fried egg

  • Extra cheese

  • Crispy bacon bits


Instructions

1. Make Carnivore Bread (Buns)

  1. Preheat oven to 350°F (175°C).

  2. In a bowl, whisk eggs, shredded cheese, melted butter, and salt.

  3. Pour batter into a greased muffin tin (makes 4 buns).

  4. Bake 15–20 minutes until golden and set. Let cool slightly before using as burger buns.

2. Cook the Bacon

  • Fry bacon in a skillet until crispy. Set aside on paper towels.

3. Form and Cook the Burger Patties

  • Divide ground beef into 4 equal patties (2 per burger).

  • Season with salt and pepper.

  • Cook in a hot skillet or grill 3–4 minutes per side for medium, or until desired doneness.

  • Add cheese slices on top of each patty in the last 1–2 minutes of cooking to melt.

4. Assemble the Burgers

  1. Place one carnivore bread bun half on the plate.

  2. Layer burger patty → cheese → bacon → patty → cheese → bacon.

  3. Top with the other carnivore bread half.

  4. Optional: add a fried egg or extra cheese on top.


Serving Suggestions

  • Serve with extra crispy bacon on the side.

  • Pair with eggs or bone broth for a full carnivore meal.

  • Add pickled eggs or cheese crisps for extra texture.


Variations

  1. Double Cheeseburger Only: Skip bacon; just stack double beef and cheese.

  2. Spicy Carnivore Burger: Add a pinch of smoked paprika or cayenne to patties.

  3. Egg-Topped Burger: Add a fried or poached egg on top for a breakfast-style burger.

  4. Fat-Rich Version: Mix extra tallow or butter into beef for juicier patties.


Related Questions

  • Q: Can I make this keto/carnivore-friendly?
    A: Yes—this is 100% carnivore-friendly if you skip veggies and use only eggs, meat, cheese, and animal fats.

  • Q: Can I make patties in advance?
    A: Yes—cook patties ahead and reheat in a skillet or oven. Assemble before serving.

  • Q: Can I freeze the carnivore buns?
    A: Yes—store baked buns in a freezer-safe bag for up to 1 month. Thaw and lightly toast before using.


Nutrition (Approximate per burger)

  • Calories: 700–800 kcal

  • Protein: 55–60 g

  • Fat: 50–55 g

  • Carbs: 1–2 g (from cheese/eggs)

  • Fiber: 0 g

(Values depend on cheese and meat fat content.)


Final Thoughts

These Double Bacon Cheeseburgers on Carnivore Bread are hearty, indulgent, and fully carnivore-friendly. Perfect for lunch, dinner, or even a weekend treat, they give you the full flavor of a burger without carbs. With crispy bacon, melty cheese, and juicy beef, you get a satisfying, protein-packed meal that fits perfectly into the carnivore or keto lifestyle.

No Bake Chocolate Oat Bars

Need a sweet treat that doesn’t require heat? Try our No Bake Chocolate Oat Bars! This simple delight whips up quickly and mixes crunch with chocolate taste.


Ingredients:

1 cup butter

1/2 cup packed brown sugar
1 teaspoon vanilla extract
3 cups quick cooking oats
1 cup semisweet chocolate chips
1/2 cup peanut butter

How To Make No Bake Chocolate Oat Bars:

Grease a 9×9 inch square pan.
Melt butter in large saucepan over medium heat. Stir in brown sugar and vanilla. Mix in the oats. Cook over low heat 2 to 3 minutes, or until ingredients are well blended. Press half of mixture into the bottom of the prepared pan. Reserve the other half for topping.
Meanwhile, melt chocolate chips and peanut butter in a small heavy saucepan over low heat, stirring frequently until smooth. Pour the chocolate mixture over the crust in the pan, and spread evenly with a knife or the back of a spoon.
Crumble the remaining oat mixture over the chocolate layer, pressing in gently. Cover, and refrigerate 2 to 3 hours or overnight. Bring to room temperature before cutting into bars

Pineapple Bake

If you’ve been following our recipes for very long, you’ve probably noticed that we’re big pineapple fans around here. From savory main dishes to desserts to afternoon snacks, we think most things are made better with the sweet tang of pineapple. If you feel similarly then I’m confident you will love this Pineapple Bake as much as we do! The sweet citrus flavor is truly front and center here. It makes for a perfect side dish or after dinner treat with a scoop of ice cream

Ingredients

  • 1 20oz can crushed pineapple with juice
  • ¾ cup sugar
  • 2 eggs
  • 2 tablespoons cornstarch
  • 2 teaspoons vanilla
  • 1 ½ tablespoons butter, sliced into pats
  • 1 teaspoon cinnamon

How To Make Pineapple Bake

  1. Preheat oven to 350 degrees F and grease a 9×9 baking pan.
  2. In a large bowl, combine pineapple, sugar, eggs, cornstarch, and vanilla. Mix until well combined.
  3. Transfer mixture to the prepared baking pan and top with the butter pans and cinnamon.
  4. Bake for 45 minutes or until edges begin to turn golden.

Chicken Quesadilla Recipe

Chicken Quesadilla Recipe is a simple, quick dinner idea. Turn your leftover chicken into a meal that everyone will love. Seasoned cooked chicken and melty cheese is cooked between two crisp tortillas to make a delicious quesadilla.


Make dinner time a breeze and make these Easy Chicken Quesadilla Recipe. You will be surprised how quickly you can get dinner done with this simple recipe. You can easily, make this for a crowd or a weeknight dinner.

Ingredients

  • 1 pound Chicken Breast diced into 1 inch piece
  • 1 Tbsp Vegetable Oil
  • 2 Tbsp Taco Seasoning
  • 3 cups Mexican Shredded Cheese
  • 4 Flour Tortillas burrito size

Instructions

  • Heat the vegetable oil in a large skillet over medium heat.
  • Add in the chicken. Season it with the taco seasoning. Sauté the chicken for 3-4 minutes per side until it’s browned and the chicken is cooked through
  • Remove the chicken from the skillet to a separate plate and set aside.
  • Heat a griddle over medium high heat or you can heat a cast iron skillet.
  • Place the tortillas on the griddle or skillet. Top each tortilla with a small amount of the Mexican shredded cheese, then layer the chicken on top and then add more shredded cheese. Carefully fold each tortilla in half making a half moon shape.
  • Cook over medium heat until one side of the tortilla is golden brown (3-4 minutes). Flip and then cook until the other side is golden brown as well (3-4 minutes). Watch them closely as they brown quickly.
  • Remove the quesadillas onto a cutting board. Slice them and they are ready to serve and enjoy!

Notes

I used vegetable oil in this recipe but any oil with a high smoke point will work great. Avocado oil, coconut oil or canola oil would work great in this recipe.

You can easily use your favorite type of cheeses in this quesadilla recipe. Use your favorite.

These are best served fresh but you can refrigerate the leftovers in an airtight container for up to 5 days.

You can use cooked chicken for this recipe if you prefer to save time on making these quesadilla recipes.

Layered Zucchini & Spinach Gratin

Layered Zucchini & Spinach Gratin

Prep Time: 15 minutes
Bake Time: 25–30 minutes
Servings: 4–6


Ingredients

  • 4 zucchini, sliced lengthwise into thin strips

  • 4 tomatoes, sliced into rounds

  • 150 g spinach, chopped

  • Fresh basil leaves (to taste)

  • 1 liter water (for blanching)

  • Olive oil, as needed

  • Salt, to taste

Optional (for topping):

  • 1 cup shredded mozzarella or parmesan cheese


Instructions

Step 1: Prepare the Zucchini

  1. Bring 1 liter of water with a small pinch of salt to a boil.

  2. Add the zucchini strips and blanch for 2–3 minutes, just until slightly tender but still firm.

  3. Drain immediately and pat dry with a clean kitchen towel or paper towel to remove excess moisture.


Step 2: Cook the Spinach

  1. Heat a small drizzle of olive oil in a pan over medium heat.

  2. Add the chopped spinach and basil leaves.

  3. Cook just until the spinach wilts (about 1–2 minutes).

  4. Season lightly with salt and remove from heat.


Step 3: Assemble the Layers

  1. Lightly grease a baking dish with olive oil.

  2. Arrange a layer of zucchini strips at the bottom.

  3. Add a layer of tomato slices.

  4. Add a layer of the spinach and basil mixture.

  5. Repeat layers until all ingredients are used, finishing with zucchini on top.


Step 4: Add the Topping

  1. Drizzle a little olive oil over the top.

  2. If using cheese, sprinkle it evenly over the top layer.


Step 5: Bake

  1. Preheat oven to 200°C (400°F).

  2. Bake for 25–30 minutes, until vegetables are tender and the top is lightly golden.


Step 6: Serve

  1. Let the dish rest for 5 minutes after baking.

  2. Slice and serve warm.


Tips for Best Results

  • Reduce moisture: Lightly salt zucchini and tomatoes and let them sit for 10 minutes, then pat dry before layering.

  • Extra flavor: Add garlic powder or black pepper to the spinach while sautéing.

  • Herb choice: Basil, parsley, or oregano work well.

  • Make it filling: Add cooked chicken, mushrooms, or lentils between layers if desired.

Nutty Oatmeal & Berry Breakfast Bread

Nutty Oatmeal & Berry Breakfast Bread

Prep Time: 15 minutes
Bake Time: 40–45 minutes
Servings: 1 loaf (about 10 slices)


Ingredients

  • 1 cup (130 g) oatmeal

  • 1 cup (250 ml) hot water

  • 2 eggs

  • 1 cup (120 g) natural yogurt

  • 3 tbsp sweetener (optional: honey or maple syrup)

  • 3 tbsp melted butter or coconut/olive oil

  • 1 cup walnuts, chopped

  • ½ cup almonds, chopped

  • 2 tbsp sesame seeds, lightly toasted

  • 1 cup berries (blueberries or preferred), rinsed and dried

  • 2 tbsp coconut flour or almond flour

  • 1 tbsp baking powder

  • A pinch of salt

  • A few drops of vanilla essence


Instructions

Step 1: Soften the Oats

  1. Place the oatmeal in a large mixing bowl.

  2. Pour the hot water over the oats.

  3. Let them sit for 10 minutes until fully softened and most of the water is absorbed.


Step 2: Mix Wet Ingredients

  1. Add the eggs to the softened oats and whisk well.

  2. Stir in the yogurt, melted butter (or oil), sweetener, and vanilla essence.

  3. Mix until smooth and well combined.


Step 3: Add Dry Ingredients

  1. Add the chopped walnuts, chopped almonds, toasted sesame seeds, salt, baking powder, and coconut or almond flour.

  2. Stir gently until a thick batter forms.


Step 4: Fold in Berries

  1. Gently fold the berries into the batter using a spatula.

  2. Mix just until evenly distributed. Avoid overmixing to keep the berries intact.


Step 5: Bake

  1. Preheat the oven to 180°C (350°F).

  2. Line a loaf pan with parchment paper or lightly grease it.

  3. Pour the batter into the pan and smooth the top.

  4. Bake for 40–45 minutes, or until the top is golden and a toothpick inserted in the center comes out clean.


Step 6: Cool and Slice

  1. Let the bread cool in the pan for 15 minutes.

  2. Transfer to a cutting board and allow it to cool further before slicing.
    (This bread is moist, so cooling helps it hold its shape.)


Tips for Best Results

  • Toast the sesame seeds: Heat in a dry pan for about 1 minute to enhance flavor.

  • Nut swaps: Use pecans, hazelnuts, or pumpkin seeds instead of walnuts or almonds if desired.

  • Berry options: Fresh or frozen berries both work (do not thaw frozen berries).

  • Storage: Keep in an airtight container in the refrigerator for up to 5 days.

  • Serving idea: Delicious with yogurt, honey, or nut butter.

Creamy Peanut Butter Cookie Dough Dip

Creamy Peanut Butter Cookie Dough Dip

Prep time: 5 minutes | Servings: 2–4


Ingredients

1 cup Greek yogurt (plain or vanilla)


1/3 cup Creamy peanut butter


1–2 tbsp Honey or maple syrup (adjust to your preferred sweetness)


1/2 tsp Vanilla extract


Toppings: Mini semi-sweet chocolate chips and crushed peanuts


Instructions

Mix: In a medium bowl, combine the Greek yogurt, peanut butter, sweetener, and vanilla extract.


Whip: Use a spoon or small whisk to stir vigorously until the mixture is completely smooth and fluffy.


Garnish: Transfer to a serving bowl. Sprinkle the mini chocolate chips and crushed peanuts generously over the top.


Serve: Surround with sliced apples, strawberries, or pretzels for dipping.


Pro-Tips for the Best Dip

For Extra Fluff: If you want it even airier, you can fold in a little bit of whipped topping.


Prevent Apple Browning: Toss your apple slices in a tiny bit of lemon juice or salt water to keep them looking fresh and bright on the platter.


Storage: This keeps well in the fridge for up to 3 days in an airtight container.

Skillet Onion Bread

Skillet Onion Bread

Prep Time: 20–25 minutes (plus 1 hour rising)
Cook Time: 18–22 minutes
Servings: 4–6


Ingredients

For the Dough:

  • 1 egg

  • 200 ml warm milk

  • 1 tsp sugar

  • 1 tsp active dry yeast

  • 1 tbsp vegetable oil

  • 1 tsp salt

  • 250–300 g all-purpose flour (add gradually until dough forms)

For the Onion Filling:

  • 1 large onion, finely diced

  • 2 tbsp butter

  • ½ tsp dried herbs (like oregano or thyme)

  • ¼ cup shredded cheese (optional, for extra richness)

  • Fresh parsley, chopped (for garnish)


Instructions

Step 1: Prepare the Yeast Base

  1. In a large bowl, whisk together warm milk, sugar, and active dry yeast.

  2. Let it sit for 5–10 minutes until the mixture becomes frothy, indicating the yeast is active.


Step 2: Mix the Dough

  1. Add egg, vegetable oil, and salt to the yeast mixture.

  2. Gradually stir in the flour until a soft dough forms.

  3. Knead the dough on a lightly floured surface for 5–8 minutes until smooth and elastic.


Step 3: First Rise

  1. Place the dough in a lightly oiled bowl.

  2. Cover with a clean cloth and let it rise in a warm spot for about 1 hour, or until doubled in size.


Step 4: Prepare the Onion Filling

  1. Melt the butter in a small pan over medium heat.

  2. Sauté the diced onion until soft and translucent.

  3. Stir in dried herbs.

  4. Remove from heat and allow to cool slightly before spreading on the dough.

  5. Optional: Mix in shredded cheese for extra richness.


Step 5: Shape and Fill

  1. Punch down the risen dough.

  2. Roll it out into a large circle or rectangle.

  3. Spread the onion mixture evenly over the dough.

  4. Roll the dough tightly and then coil it into a spiral shape, or gently press it into a disk that fits your skillet.

  5. Optional: Use a knife to make decorative scores on top to let steam escape while cooking.


Step 6: Skillet Cooking

  1. Lightly grease a large, heavy-bottomed skillet (cast iron works best).

  2. Place the shaped dough in the skillet and cover with a lid.

  3. Cook over low heat for 10–12 minutes until the bottom is golden brown.

  4. Carefully flip the bread:

    • Slide the bread onto a large flat plate.

    • Invert the skillet over the plate and flip both together so the other side is down.

  5. Cover again and cook for 8–10 minutes until golden brown and cooked through.


Step 7: Finish and Serve

  1. Brush the top with a little melted butter.

  2. Sprinkle with fresh parsley.

  3. Slice and serve warm.


Tips for Success

  • Keep the heat low: Cooking slowly ensures the center cooks through without burning the outside.

  • Flipping safely: Using a plate to flip prevents the bread from breaking.

  • Filling variations: You can add finely chopped spinach, roasted peppers, or mushrooms for extra flavor.

  • Serving: Best enjoyed fresh, but can be reheated in a skillet or oven

Crunchy Cabbage, Carrot & Apple Salad

Crunchy Cabbage, Carrot & Apple Salad

Prep Time: 10 minutes
Servings: 4


Ingredients

  • 200–400 g cabbage, finely shredded

  • 1 carrot, peeled and grated

  • 1 green apple, cored and thinly sliced or julienned

  • 1–2 spring onions, chopped

  • Fresh dill or parsley, chopped (optional, to taste)

  • Lemon juice, to taste

  • Olive oil, to taste

  • Salt, to taste

  • Optional toppings: sunflower seeds, chopped walnuts, or pumpkin seeds


Instructions

Step 1: Prepare the Cabbage

  1. Remove the outer leaves of the cabbage.

  2. Shred the cabbage as finely as possible using a sharp knife or a mandoline.

  3. Place the shredded cabbage in a large bowl and sprinkle with a pinch of salt.

  4. Lightly massage the cabbage with your hands for 1–2 minutes. This softens the texture and releases some moisture, making it easier to eat.


Step 2: Add the Crunch

  1. Grate the peeled carrot directly into the bowl with the cabbage.

  2. Slice the green apple into thin matchsticks (julienne) or thin slices.

  3. To prevent the apple from browning, toss the slices in a little lemon juice immediately after cutting.


Step 3: Incorporate Herbs and Aromatics

  1. Add the chopped spring onions for a mild onion flavor.

  2. Mix in fresh dill or parsley if using. This adds a bright herbal note to the salad.


Step 4: Dress the Salad

  1. Drizzle olive oil and fresh lemon juice over the vegetables and apple.

  2. Season with additional salt to taste.


Step 5: Toss and Serve

  1. Toss all ingredients thoroughly so the dressing coats every piece of vegetable and fruit.

  2. Let the salad sit for 5–10 minutes before serving. This allows the flavors to meld and the cabbage to soften slightly while retaining crunch.

  3. Optional: Sprinkle sunflower seeds, chopped walnuts, or pumpkin seeds on top for extra texture and a nutty flavor.


Tips for a Perfect Salad

  • Apple Choice: A Granny Smith apple works best due to its tartness, which balances the sweetness of the carrot.

  • Add Protein: For a more filling meal, top the salad with grilled chicken, tofu, or chickpeas.

  • Extra Crunch: Adding seeds or nuts just before serving gives the salad a satisfying texture.

  • Make Ahead: The salad can be prepared 30–60 minutes in advance, but add apples last to prevent browning if storing.

Egg-Carton Shaped Crusty Bread with Brie Dip

Egg-Carton Shaped Crusty Bread with Brie Dip

Prep Time: 20 minutes (plus 1.5 hours rising)
Bake Time: 25–30 minutes
Servings: 1 large loaf


Ingredients

For the Bread:

  • 300 ml warm water

  • 1 tsp salt

  • 7 g (1 packet) active dry yeast

  • 1 tbsp sugar

  • 450–500 g all-purpose flour, added gradually

For the Savory Brie Cheese Sauce:

  • 100 g Brie cheese, chopped (rind optional)

  • 150 g cream cheese

  • 1 small onion, finely diced

  • 2 tbsp green onions, sliced

  • ½ tsp sweet paprika

  • 50 ml beer (optional; adds a malty depth)

  • ½ tsp dill seeds


Instructions

Step 1: Prepare the Dough

  1. In a large bowl or jar, combine warm water, sugar, and yeast. Let it sit for 5 minutes until it becomes foamy, indicating the yeast is active.

  2. Stir in salt.

  3. Gradually add the flour one cup at a time, mixing after each addition.

  4. Knead the dough on a floured surface (or in a large jar) until smooth and elastic—about 8–10 minutes.

  5. Place the dough in a lightly oiled bowl, cover, and let it rise in a warm spot for about 1 hour, or until doubled in size.


Step 2: Prepare the Egg-Carton Formwork

  1. Take a clean cardboard egg carton.

  2. Line it thoroughly with parchment paper or aluminum foil brushed lightly with oil.

    • This ensures the dough does not stick and remains safe for baking.

  3. Place the lined egg carton on a metal baking sheet.


Step 3: Shape and Second Rise

  1. Gently pour or place the risen dough into the lined egg carton.

  2. The dough will naturally settle into the divots, creating the unique “bubbly” bottom shape.

  3. Let the dough rest for 20 minutes while you preheat the oven to 200°C (400°F).


Step 4: Bake the Bread

  1. Bake the bread on the baking sheet for 25–30 minutes, or until the top is golden brown and the bread sounds hollow when tapped.

  2. Remove from the oven and allow it to cool slightly before slicing.


Step 5: Make the Brie Cheese Sauce

  1. In a small saucepan over low heat, combine Brie, cream cheese, and beer.

  2. Stir constantly until fully melted and smooth.

  3. Remove from heat and stir in diced onion, green onions, paprika, and dill seeds.

  4. Keep warm until ready to serve.


Step 6: Serve

  1. Slice the bread to reveal the decorative bottom edge created by the egg carton.

  2. Spread the warm cheese sauce generously over the slices, or serve it on the side as a dipping sauce.


Tips for Success

  • Safety first: Always place the cardboard on a metal baking tray. Do not let cardboard touch the heating elements of the oven.

  • Smooth sauce: Remove the rind from the Brie before melting for a creamier texture.

  • Optional variations: Add herbs like thyme or chives to the cheese sauce for extra flavor.

  • Storage: The bread is best enjoyed fresh. The cheese sauce can be stored in the fridge for up to 2 days and reheated gently.

Sweet Walnut-Filled Bread Rolls

Sweet Walnut-Filled Bread Rolls

Prep Time: 30 minutes (plus 2 hours for rising)
Bake Time: 25–30 minutes
Yields: 2 loaves


Ingredients

For the Dough:

  • 500 g wheat flour

  • 200 ml warm milk

  • 80 g sugar

  • 1 tsp vanilla sugar

  • 6 g (1 tsp) dry yeast

  • 1 egg + 1 egg white (reserve the yolk for egg wash)

  • 40 g butter, softened

  • 20 ml vegetable oil

For the Walnut Filling:

  • 1 ½ cups walnuts, finely ground

  • ½ cup sugar

  • 1 tsp cinnamon

  • 2–3 tbsp milk (to create a thick paste)


Instructions

Step 1: Activate the Yeast

  1. In a large bowl, combine warm milk, sugar, and dry yeast.

  2. Stir lightly and let it sit for 5–10 minutes until it becomes frothy. This indicates the yeast is active.


Step 2: Mix the Dough

  1. Whisk in the egg, egg white, vanilla sugar, and vegetable oil.

  2. Gradually add the flour, mixing until a shaggy dough forms.

  3. Add the softened butter and knead for 8–10 minutes until the dough is smooth, elastic, and no longer sticky.


Step 3: First Rise

  1. Place the dough in a lightly oiled bowl.

  2. Cover with a damp cloth and let it rise in a warm spot for 1–1.5 hours, or until it has doubled in size.


Step 4: Prepare the Walnut Filling

  1. While the dough rises, combine ground walnuts, sugar, and cinnamon in a bowl.

  2. Gradually add 2–3 tablespoons of milk until you have a thick, spreadable paste.


Step 5: Shape the Rolls

  1. Punch down the risen dough and divide it into two equal portions.

  2. On a floured surface, roll each portion into a large rectangle.

  3. Spread the walnut filling evenly over the dough.

  4. Roll the dough tightly into a log.

  5. To achieve a braided look: Slice the log in half lengthwise (leaving one end attached) and twist the two strands over each other.


Step 6: Second Rise

  1. Place the braided loaves into greased loaf pans.

  2. Cover and let rise for 30–45 minutes until slightly puffy.


Step 7: Bake

  1. Preheat your oven to 180°C (350°F).

  2. Brush the tops of the loaves with the reserved egg yolk mixed with a splash of milk for a golden shine.

  3. Bake for 25–30 minutes, or until the bread is deep golden brown and sounds hollow when tapped.


Step 8: Optional Finishing Touch

  • For a professional shine, brush the warm bread with a simple sugar syrup (equal parts sugar and water boiled together) immediately after taking it out of the oven.


Tips for Success

  • Yeast activation: Make sure the milk is warm, not hot, to avoid killing the yeast.

  • Softened butter: Helps make the dough soft and fluffy.

  • Filling consistency: The walnut paste should be thick, not runny, to prevent soggy bread.

  • Rising environment: Keep dough in a warm, draft-free area for consistent rising.

  • Storage: Keep in an airtight container; can last 3–4 days at room temperature or up to a week in the refrigerator.

Savory Stuffed Eggplants

Savory Stuffed Eggplants

Prep Time: 15 minutes
Bake Time: 35–40 minutes
Servings: 2–4


Ingredients

For the Eggplant Base:

  • 2 medium eggplants (approx. 600g total)

  • 2 tbsp olive oil (30ml)

  • ½ tsp salt

  • ¼ tsp black pepper

  • ½ tsp sweet paprika

  • ½ tsp dried oregano

For the Savory Filling:

  • 250g minced meat (beef, turkey, or lamb)

  • 1 small onion, finely chopped

  • 2 cloves garlic, minced

  • 1 red bell pepper, diced

  • 1 cup tomato sauce or crushed tomatoes

  • ½ cup shredded mozzarella or parmesan cheese

  • Fresh parsley for garnish


Instructions

Step 1: Prepare the Eggplants

  1. Wash the eggplants and slice them lengthwise into halves.

  2. Score the flesh in a diamond pattern with a knife, being careful not to cut through the skin. This helps the flavors penetrate.

  3. In a small bowl, mix olive oil, salt, black pepper, sweet paprika, and dried oregano.

  4. Brush the seasoned oil generously over the cut sides of the eggplants.


Step 2: Initial Roast

  1. Preheat the oven to 200°C (400°F).

  2. Place the eggplants on a baking sheet, cut side up, and bake for 20 minutes or until the flesh is soft and lightly browned.


Step 3: Make the Filling

  1. While the eggplants roast, heat a skillet over medium heat.

  2. Add the minced meat and cook until fully browned. Drain any excess fat if necessary.

  3. Add the onion, garlic, and red bell pepper. Sauté for 5 minutes until softened and fragrant.

  4. Stir in the tomato sauce, and let the mixture simmer for a few minutes until it thickens slightly.

  5. Taste and adjust seasoning with additional salt or pepper if needed.

  6. Optional: If the mixture seems too dry, add a splash of water or broth.


Step 4: Stuff the Eggplants

  1. Remove the eggplants from the oven.

  2. Use a spoon to gently press down the centers to create a well for the filling.

  3. Spoon the meat mixture into the centers evenly.

  4. Top each eggplant half with a generous layer of shredded cheese.


Step 5: Final Bake

  1. Return the stuffed eggplants to the oven for 10–15 minutes, or until the cheese is melted, bubbly, and golden brown.


Step 6: Serve

  1. Garnish with fresh parsley before serving.

  2. Serve individually or arrange for a beautiful presentation on a platter.


Tips for Success

  • Consistency: If the filling seems too dry, add a splash of water or broth while simmering.

  • Vegetarian Option: Replace minced meat with cooked lentils or chopped mushrooms for a plant-based version.

  • Flavor Boost: Sprinkle a pinch of smoked paprika or chili flakes for a subtle kick.

  • Presentation: Layering the eggplants slightly or serving with a side of rice or salad makes it a complete meal.

Banana Oat Breakfast Bread

Banana Oat Breakfast Bread

Prep Time: 10 minutes
Bake Time: 35–40 minutes
Servings: 1 loaf (about 8 slices)


Ingredients

  • 2 cups (200g) rolled oats

  • 2 ripe bananas (approx. 200g)

  • 2 eggs

  • ½ cup (70g) dried cranberries

  • ½ cup (75g) raisins

Optional for extra flavor:

  • 1 tsp cinnamon

  • 1 tsp vanilla extract

Optional for texture:

  • 1 tsp baking powder (helps the bread rise slightly)


Instructions

Step 1: Prepare the Pan

  1. Preheat your oven to 180°C (350°F).

  2. Grease a loaf pan with butter or oil, or line it with parchment paper for easy removal after baking.


Step 2: Blend or Mash the Base

Option A – Smooth, cake-like texture:

  1. Place the rolled oats, bananas, and eggs in a blender or food processor.

  2. Blend until smooth and well combined.

Option B – Rustic, hearty texture:

  1. Mash the bananas in a large bowl until they become liquidy.

  2. Stir in the eggs until fully incorporated.

  3. Fold in the rolled oats gently; do not overmix to maintain texture.


Step 3: Add Flavor and Fruit

  1. If using, mix in the cinnamon, vanilla extract, and baking powder.

  2. Gently fold in the dried cranberries and raisins, ensuring they are evenly distributed in the batter.


Step 4: Bake the Bread

  1. Pour the batter into your prepared loaf pan and smooth the top.

  2. Optional: Sprinkle a few extra raisins or cranberries on top for decoration.

  3. Bake in the preheated oven for 35–40 minutes, or until a toothpick inserted into the center comes out clean.


Step 5: Cool and Serve

  1. Let the bread cool in the pan for 10 minutes.

  2. Carefully transfer it to a wire rack to cool completely before slicing.

  3. Optional: Drizzle a small amount of yogurt or honey over slices before serving for extra flavor.


Tips for Success

  • Use very ripe bananas: The riper, the sweeter, and more flavorful the bread will be without any added sugar.

  • Moisture matters: This bread is naturally moist. Store leftovers in an airtight container in the refrigerator for up to 5 days.

  • Customize: Add chopped nuts, seeds, or even a handful of chocolate chips for variety.

  • Texture preference: Blend for smooth bread or fold for rustic, hearty slices.

Pineapple Dream Dessert

Pineapple Dream Dessert

Prep Time: 15 minutes
Chill Time: 4 hours minimum (overnight is ideal)
Servings: 12–15

Ingredients

For the Crust & Topping:

  • 2 ½ cups graham cracker crumbs (divided)

  • ½ cup unsalted butter, melted

For the Creamy Filling:

  • ½ cup unsalted butter, softened to room temperature

  • 2 cups powdered sugar

  • 1 package (8 oz) cream cheese, softened to room temperature

  • 1 can (20 oz) crushed pineapple, well-drained

  • 1 container (8 oz) whipped topping (like Cool Whip) or 2 cups stiffly whipped heavy cream


Instructions

Step 1: Prepare the Crust

  1. Preheat your oven to 350°F (175°C) if you prefer a slightly firmer crust. (Optional: You can skip baking for a softer crust.)

  2. In a medium bowl, combine 2 cups of graham cracker crumbs with the ½ cup melted butter. Mix until the texture resembles wet sand.

  3. Reserve ½ cup of this crumb mixture for the topping later.

  4. Firmly press the remaining crumbs into the bottom of a 9×13 inch baking dish to form an even crust layer.

  5. Optional: Bake for 8–10 minutes for a slightly crisp crust. Let it cool completely before adding the filling.


Step 2: Make the Creamy Base

  1. In a large mixing bowl, add the softened butter and cream cheese. Beat with an electric mixer on medium speed until smooth and creamy (about 2–3 minutes).

  2. Gradually add powdered sugar and continue to beat until the mixture is fluffy and well combined (about 3–5 minutes).


Step 3: Fold in the Pineapple

  1. Drain the crushed pineapple very well. Press through a fine-mesh strainer with a spoon to remove excess juice, which could make the dessert runny.

  2. Gently fold the drained pineapple into the cream cheese mixture using a spatula, ensuring it is evenly distributed.


Step 4: Add the Whipped Topping

  1. Gently fold in the whipped topping or stiffly whipped heavy cream until fully combined.

  2. Be careful not to overmix; you want to keep as much air in the mixture as possible for a light, fluffy texture.


Step 5: Assemble the Dessert

  1. Spread the creamy pineapple filling evenly over the graham cracker crust.

  2. Sprinkle the reserved ½ cup of graham cracker crumbs evenly on top as a finishing touch.


Step 6: Chill

  1. Cover the dish with plastic wrap or a lid.

  2. Refrigerate for at least 4 hours, but for best results, chill overnight. This allows the layers to firm up and the flavors to meld beautifully.


Tips for Perfect Pineapple Dream Dessert

  • Drain the pineapple thoroughly: Use a fine-mesh strainer and press gently with a spoon to remove extra juice.

  • Room temperature ingredients: Make sure your butter and cream cheese are soft before mixing to avoid lumps in the filling.

  • Gentle folding: Folding preserves the air in the whipped topping, keeping the dessert light and airy.

  • Optional garnishes: Top with toasted coconut, chopped nuts, or extra pineapple chunks for a decorative touch.