Cheesy Pull-Apart Bread!

🧀🍞 Cheesy Pull-Apart Bread

Soft, buttery, garlicky, cheesy… and dangerously addictive.


📝 Ingredients (Serves 6–8)

  • 1 round loaf of bread (sourdough or Italian works best)

  • 2 cups shredded cheese

    • mozzarella for stretch

    • cheddar for sharpness

    • or a blend

  • ½ cup butter, melted

  • 3–4 cloves garlic, minced

  • 2 tbsp fresh parsley, chopped

  • ½ tsp salt

  • ½ tsp black pepper

  • Optional add-ins:

    • red pepper flakes

    • cooked bacon bits

    • green onions

    • parmesan cheese


🍳 Instructions

1. Preheat oven

Set oven to 350°F (175°C).


2. Slice the bread

Place the bread on a cutting board.

  • Cut 1-inch slices across the loaf, but do NOT cut all the way through.

  • Rotate the loaf and cut 1-inch slices the other direction.
    You should have a grid pattern of pull-apart cubes.


3. Make the garlic butter

In a bowl, mix:

  • melted butter

  • minced garlic

  • parsley

  • salt & pepper


4. Fill the bread

  • Carefully pull apart each cut and drizzle the garlic butter inside the cracks.

  • Stuff shredded cheese into each gap—don’t be shy!

Add optional toppings inside the crevices for extra flavor.


5. Wrap & bake

  • Wrap the whole loaf in foil.

  • Bake for 15 minutes until cheese is melted.


6. Unwrap & crisp

  • Open the foil to expose the top.

  • Bake 10 more minutes until the top is golden and slightly crispy.


7. Serve

Place on a board and let everyone pull pieces apart.
Best warm and fresh!


💡 Tips & Variations

✔ Use different bread

Try baguette, ciabatta, French bread, or even Hawaiian rolls.

✔ Make it extra garlicky

Add roasted garlic or garlic powder to the butter.

✔ Add protein

Sprinkle cooked bacon, ham, or pepperoni between the slices.

✔ Make it spicy

Add jalapeños, chili flakes, or pepper jack cheese.

✔ Herby version

Mix in basil, oregano, or thyme.


❓ Q&A Section

Q1: Can I prepare it ahead of time?

Yes! Assemble the whole loaf, wrap tightly in foil, and refrigerate up to 24 hours.
Bake when ready.


Q2: Can I freeze it?

Yes—freeze after assembling. Bake from frozen at 350°F for 25–30 minutes.


Q3: Can I use pre-sliced cheese?

Shredded melts better, but sliced cheese torn into pieces works too.


Q4: What cheese melts best?

Mozzarella, Monterey Jack, and Gouda are excellent.
Cheddar adds flavor but doesn’t stretch as much.


Q5: How do I keep it from drying out?

The foil step is important—keeps it soft so the cheese melts before crisping the top.

Egg Salad Sandwich Delicious

Classic Egg Salad Sandwich Recipe
Egg salad sandwiches are a beloved classic in many households, offering a simple yet satisfying meal. This timeless dish can be served at picnics, parties, or as a quick lunch. While it may seem basic, the combination of hard-boiled eggs, creamy mayonnaise, and seasonings creates a rich, flavorful filling that is both comforting and delicious. In this detailed recipe, we’ll walk through everything you need to know to make the perfect egg salad sandwich, including variations, tips, and serving suggestions.

Ingredients
To make a traditional egg salad, you’ll need the following ingredients:

6 large eggs: The heart of the egg salad. The freshness of the eggs plays a crucial role in the final taste and texture.
1/2 cup mayonnaise: This is the binding agent in the salad. You can use full-fat, light, or even vegan mayonnaise depending on your preference.
1 tablespoon Dijon mustard: Adds a mild tang and extra depth of flavor to the egg salad.
1 tablespoon lemon juice: Freshly squeezed lemon juice brightens up the dish with a touch of acidity.
1/4 teaspoon salt: Enhances the flavor and balances out the creaminess of the mayonnaise.
1/4 teaspoon black pepper: Freshly ground black pepper adds a hint of spice.
1 tablespoon fresh dill (optional): Dill complements the eggs with its herbal, slightly tangy flavor.
1/4 cup finely chopped red onion: For some crunch and sharpness.
1/4 cup finely chopped celery: Adds a crunchy texture to the creamy egg salad.
2 slices of whole wheat or white bread (or any bread of your choice): The foundation for your sandwich.
Lettuce leaves (optional): For added texture and a fresh contrast to the creamy salad.
Tomato slices (optional): If you like, you can include tomato for a juicy and refreshing element.
Instructions
Step 1: Boiling the Eggs
The first step in making egg salad is boiling the eggs. Follow these simple steps:

Place the eggs in a pot: Put the eggs in a single layer in a large saucepan. Fill the pan with cold water until the eggs are submerged by about an inch.

Bring to a boil: Over medium-high heat, bring the water to a boil. Once it reaches a rapid boil, cover the pot with a lid and remove it from the heat.

Let the eggs sit: Allow the eggs to sit in the hot water for about 10-12 minutes for hard-boiled eggs. The exact time can vary depending on your stove and the size of your eggs, but 10 minutes should be sufficient for firm yolks.

Cool the eggs: After the eggs have cooked, carefully transfer them to a bowl of ice water or run cold water over them to cool. This stops the cooking process and makes peeling easier.

Peel the eggs: Once cooled, peel the eggs under running cold water, which helps remove the shells without damaging the whites.

Step 2: Preparing the Egg Salad Filling
Chop the eggs: After peeling the eggs, chop them into small pieces. The size of the pieces is entirely up to you—some people like a chunkier texture, while others prefer a smoother filling. Chop them as finely or coarsely as you like.

Mix the ingredients: In a large mixing bowl, combine the chopped eggs, mayonnaise, Dijon mustard, lemon juice, salt, and pepper. Stir until well combined. Adjust the seasonings to taste, adding more salt, pepper, or mustard if desired.

Add the vegetables: To make the egg salad more flavorful and texturally interesting, add finely chopped red onion and celery. These ingredients contribute crunch and a burst of freshness that perfectly balance the creamy filling.

Herbs and seasonings: If you’re using fresh dill, add it to the mixture and stir it in. Dill pairs wonderfully with eggs and adds a bright, herby flavor. You can also experiment with other fresh herbs such as chives or parsley, depending on what you have on hand.

Taste and adjust: Before assembling the sandwich, taste the egg salad and adjust any seasonings to your liking. If you want a creamier texture, add more mayonnaise; for a tangier taste, increase the Dijon mustard or lemon juice.

Step 3: Assembling the Sandwich
Prepare the bread: Start by choosing your bread. Traditional egg salad sandwiches are made with white or whole wheat bread, but you can also use other types like sourdough, rye, or even a croissant for a more decadent option. You can lightly toast the bread if you prefer a crispy texture, but it’s not necessary.

Spread the egg salad: Place a generous amount of the prepared egg salad onto one slice of bread. Use a spatula or spoon to spread it evenly, covering the surface of the bread.

Add extras: If you like, you can layer the sandwich with fresh lettuce leaves or tomato slices for extra flavor and freshness. These ingredients not only enhance the taste but also add a nice crunch and juiciness.

Top and serve: Place the second slice of bread on top, pressing gently to hold the sandwich together. Slice it diagonally or straight, depending on your preference.

Serve immediately: Enjoy your egg salad sandwich right away, or wrap it in parchment paper or plastic wrap for later. If you’re preparing the sandwich in advance, keep the filling separate from the bread to avoid sogginess.

Variations and Tips
Egg salad sandwiches are incredibly versatile, so don’t hesitate to experiment with different ingredients and flavors. Here are some variations to consider:

1. Avocado Egg Salad Sandwich
For a richer, creamier texture, add mashed avocado to the egg salad. This adds healthy fats and a smooth consistency that complements the eggs perfectly.

2. Spicy Egg Salad Sandwich
If you like a little heat, incorporate a teaspoon of sriracha or hot sauce into the egg salad mixture. You can also add finely chopped jalapeños or a sprinkle of cayenne pepper for an extra kick.

3. Bacon and Egg Salad Sandwich
Crispy bacon crumbles add a savory, smoky flavor that pairs wonderfully with the creamy egg salad. Simply cook the bacon, crumble it, and mix it into the salad before assembling the sandwich.

4. Pickled Egg Salad Sandwich
For a tangy twist, add some pickles or relish to the egg salad. Pickled onions, dill pickles, or sweet relish all work great in providing a zesty contrast to the eggs and mayonnaise.

5. Vegan Egg Salad
For a plant-based version, replace the eggs with mashed chickpeas. Combine with vegan mayonnaise, mustard, and seasonings to create a chickpea salad that mimics the texture and taste of traditional egg salad.

6. Herbed Egg Salad Sandwich
If you love fresh herbs, experiment with different combinations such as basil, thyme, or tarragon. Herbs can completely change the flavor profile of the egg salad, making it feel fresh and seasonal.

How to Serve
Egg salad sandwiches are best served fresh, but they can also be enjoyed the next day if stored properly. For the most enjoyable experience, here are a few serving suggestions:

On a platter: Serve the sandwiches on a platter with some additional garnishes, like extra fresh herbs, sliced vegetables, or even some pickled onions for a tangy touch.

As a tea sandwich: If you’re hosting a brunch or afternoon tea, cut the sandwiches into small, bite-sized pieces. This allows guests to enjoy the egg salad in a more delicate, elegant presentation.

With sides: Pair the egg salad sandwich with classic side dishes like potato chips, a light salad, or fruit salad for a complete meal.

Storing Leftovers
If you have leftover egg salad, store it in an airtight container in the refrigerator. It will keep well for up to 3-4 days. However, be sure to avoid storing the sandwich itself once assembled, as the bread may become soggy. Instead, store the egg salad and bread separately, and assemble the sandwich when you’re ready to eat.

Conclusion
The egg salad sandwich is a simple yet satisfying dish that can be adapted to suit a variety of tastes. Whether you prefer it classic or with creative twists, this recipe offers plenty of room for personalization. By following the steps and tips provided, you’ll be able to create the perfect egg salad sandwich every time. It’s the kind of meal that never goes out of style, providing comfort and nourishment in every bite. Whether you’re making it for yourself, friends, or family, you can’t go wrong with this timeless favorite. Enjoy!

Comforting Chicken Soup with Potatoes!

🍲 Comforting Chicken Soup with Potatoes

Servings

6

Total Time

45–55 minutes


🛒 Ingredients

  • 1½ lbs chicken (bone-in thighs or drumsticks; or boneless thighs)

  • 1 tbsp olive oil or butter

  • 1 medium onion, diced

  • 3 carrots, sliced

  • 2 celery stalks, sliced

  • 3 cloves garlic, minced

  • 3 medium potatoes (Yukon Gold or russet), diced

  • 6–7 cups chicken broth (low sodium)

  • 1 bay leaf

  • 1 tsp dried thyme

  • ½ tsp dried rosemary (optional)

  • Salt & black pepper, to taste

  • 2 tbsp fresh parsley, chopped

  • Optional: squeeze of lemon juice


👩‍🍳 Instructions

  1. Sauté the aromatics
    Heat oil/butter in a large pot over medium heat.
    Add onion, carrots, and celery. Cook 5–6 minutes until softened.

  2. Add garlic & herbs
    Stir in garlic, thyme, rosemary, and bay leaf. Cook 30 seconds until fragrant.

  3. Add chicken & broth
    Place chicken in the pot. Pour in broth until just covered.

  4. Simmer
    Bring to a gentle boil, then reduce heat.
    Simmer 20–25 minutes (until chicken is cooked through).

  5. Shred chicken
    Remove chicken, shred, discard bones/skin if needed.
    Return meat to the pot.

  6. Add potatoes
    Stir in diced potatoes. Simmer 12–15 minutes until tender.

  7. Finish
    Season with salt and pepper. Remove bay leaf.
    Add parsley and optional lemon juice.

Serve hot with crusty bread.


❓ Q & A

Q: What potatoes work best?

A: Yukon Gold for creamy texture, russet for heartier soup, red potatoes if you want them to hold shape.


Q: Can I use rotisserie chicken?

A: Yes!

  • Add shredded chicken during the last 10 minutes

  • Simmer potatoes separately or add them earlier


Q: Can I make this in a slow cooker?

A: Absolutely.

  • Add everything except parsley & lemon

  • Cook 6–7 hours on LOW or 3–4 hours on HIGH

  • Shred chicken, then add potatoes for last hour


Q: How do I make it extra comforting?

A:

  • Add a splash of cream or milk

  • Stir in a knob of butter at the end

  • Add egg noodles or rice


Q: Can I freeze this soup?

A: Yes, but potatoes soften after freezing.

  • Freeze up to 3 months

  • For best texture, freeze before adding potatoes


Q: How do I thicken it slightly?

A:

  • Mash a few potatoes in the pot

  • Or add 1 tsp cornstarch mixed with water


Q: What can I serve with it?

A:

  • Crusty bread or biscuits

  • Grilled cheese

  • Simple green salad.

Sub in a Tub (Italian Chopped Salad Style)

Sub in a Tub (Italian Chopped Salad Style) – Full Recipe
All the flavors of an Italian sub, no bread needed 🥗🇮🇹 Perfect for low-carb days or a light, satisfying meal.
Ingredients
• 3 cups chopped romaine lettuce
• 1/2 cup cherry tomatoes, halved
• 1/2 cup sliced cucumber
• 1/4 cup thinly sliced red onion
• 1/3 cup sliced banana peppers
• 1/4 cup sliced black olives
• 1/2 cup chopped pepperoncini or mild pickled peppers
• 1/2 cup diced mozzarella or provolone cheese
• 1/4 cup grated Parmesan cheese
Protein (choose your favorites)
• 1/3 cup sliced salami, chopped
• 1/3 cup sliced pepperoni, chopped
• 1/3 cup sliced ham, chopped
• 1/3 cup sliced turkey or roast beef (optional)
Italian Dressing
• 3 tablespoons olive oil
• 2 tablespoons red wine vinegar
• 1 teaspoon Dijon mustard
• 1/2 teaspoon Italian seasoning
• 1/2 teaspoon dried oregano
• Salt and black pepper, to taste
Instructions
In a large bowl, add romaine lettuce, tomatoes, cucumber, red onion, banana peppers, olives, and pepperoncini.
Add all chopped meats and cheeses to the bowl.
In a small bowl, whisk together olive oil, red wine vinegar, Dijon mustard, Italian seasoning, oregano, salt, and pepper.
Pour dressing over the salad and toss well until everything is evenly coated.
Taste and adjust seasoning if needed.
Finish with extra Parmesan or a drizzle of olive oil if desired.
Serving Tips
• Chill for 10 minutes before serving for best flavor
• Add avocado for extra creaminess
• Serve as a meal or side with grilled chicken or shrimp

Grilled Parmesan Chicken Minis

Grilled Parmesan Chicken Minis
These are juicy, cheesy, and perfect as an appetizer, meal prep protein, or quick dinner 🍗🧀
Ingredients
• 1 lb chicken breast, cut into bite-sized pieces
• 1/3 cup grated Parmesan cheese
• 2 tablespoons olive oil
• 1 teaspoon garlic powder
• 1 teaspoon onion powder
• 1 teaspoon Italian seasoning
• 1/2 teaspoon paprika
• Salt and black pepper, to taste
• Optional garnish: fresh parsley or extra Parmesan
Instructions
In a large bowl, add olive oil, Parmesan cheese, garlic powder, onion powder, Italian seasoning, paprika, salt, and pepper. Mix well.
Add the chicken pieces and toss until fully coated with the Parmesan mixture. Let marinate for 10–15 minutes if you have time (optional but recommended).
Preheat grill pan or outdoor grill to medium-high heat. Lightly oil the grates.
Place chicken pieces on the grill in a single layer.
Grill for 3–4 minutes per side, turning once, until golden, lightly crispy, and cooked through (internal temp 165°F / 74°C).
Remove from grill and let rest for 2 minutes.
Garnish with fresh parsley or extra Parmesan if desired.
Serving Ideas
• Serve with garlic yogurt dip, ranch, or marinara
• Pair with salad, roasted veggies, or low-carb sides
• Great for meal prep bowls or wraps

Blueberry Crumb Pancake Bake: A Deliciously Sweet and Fluffy Morning Treat

Blueberry Crumb Pancake Bake: A Deliciously Sweet and Fluffy Morning Treat

Ingredients
Crumb topping:
½ cup flour
3 tablespoons light brown sugar
2 tablespoons granulated sugar
½ teaspoon cinnamon
¼ teaspoon salt
4 tablespoons unsalted butter, melted
Pancake:
2 ½ cups all-purpose flour
2 tablespoons granulated sugar
½ teaspoon salt
1 teaspoon baking powder
1 teaspoon baking soda
2 large eggs
2 cups buttermilk
½ cup milk (skim milk used)
4 tablespoons unsalted butter, melted
1–2 teaspoons finely grated lemon zest
1 ½ teaspoons pure vanilla extract
1 ⅔ cups blueberries
Maple syrup, for serving

Instructions
Preheat oven to 350°F. Thoroughly grease a 9×13 baking dish and set aside.
In a medium bowl, combine flour, sugars, cinnamon, and salt for the crumb topping. Add melted butter and stir until fully incorporated. Cover and refrigerate while you prepare the pancake batter.
In a large bowl, combine flour, sugar, salt, baking powder, and baking soda.
In a separate bowl, combine eggs, buttermilk, milk, melted butter, lemon zest, and vanilla extract. Whisk until well combined. Add wet ingredients to the dry ingredients and use a rubber spatula to stir until combined. The batter will be lumpy; do not over mix.
Pour the batter into the greased baking dish. Sprinkle the blueberries over the top.
Remove the crumb topping from the fridge and crumble over the top of the blueberries and batter.
Bake for about 35-45 minutes, until puffed and light golden brown (check the center for doneness). Serve warm with maple syrup.

Avocado Smoothie

Avocado Smoothie.

Ingredients (1 tall glass)

  • 1 ripe avocado (scooped, pitted—the usual ritual)

  • 1 cup chilled milk (dairy or almond; each brings its own soft whisper)

  • ½ cup yogurt (plain or vanilla for a gentle sweetness)

  • 1 tablespoon honey or maple syrup

  • 4–5 ice cubes

  • 1 teaspoon lemon juice (optional, like a small bright wink)

  • Pinch of chia seeds or flaxseed (optional, yet noble)

Instructions

  1. Prepare the avocado:
    Slice it open, twist, and scoop out that velvety green. It should yield like a calm handshake.

  2. Blend the base:
    Add avocado, milk, yogurt, honey, and lemon juice to the blender. Let everything sink in like characters gathering before the first chapter begins.

  3. Add ice:
    Drop in the cubes—they’ll bring the cool, quiet hush your smoothie deserves.

  4. Blend until lush:
    Give it 25–30 seconds. The mixture should turn into a pale green ribbon of cream, swirling like a relaxed breeze.

  5. Taste and tweak:
    Need more sweetness? Add a touch more honey.
    Need more lift? Add another splash of milk.

  6. Pour and, if you’re feeling celebratory, sprinkle chia seeds on top.


Q&A Section

Q: Is this smoothie good for weight loss?

Avocado carries healthy fats—more “steady flame” than “raging fire.” It keeps you full longer, helping curb unnecessary snacking. Pair it with mindful meals and it becomes an ally.

Q: Can I make it dairy-free?

Absolutely. Almond, oat, or coconut milk step in gracefully. Use coconut yogurt or skip yogurt entirely for a lighter texture.

Q: Can I add banana?

Yes, banana brings natural sweetness and a softly glowing richness. Your smoothie becomes almost dessert-like, but still noble in purpose.

Q: How long can I store it?

Avocado darkens like a leaf at dusk, so drink it fresh. At most, refrigerate for 3–4 hours in an airtight jar with a squeeze of lemon.

Q: Any extra boosters?

Spinach, matcha, or a spoon of protein powder can join the chorus. Just keep the harmony gentle.

Banana Blueberry Almond Milk Smoothie Recipe

Banana Blueberry Almond Milk Smoothie Recipe

Ingredients:

  • 1 ripe banana (sliced)

  • 1 cup fresh blueberries

  • 1 cup unsweetened almond milk

  • 1 teaspoon honey or maple syrup (optional, for sweetness)

  • 4–5 ice cubes (optional, for a chilled texture)

Instructions:

  1. Peel the banana and cut it into slices.

  2. Rinse the blueberries thoroughly and pat them dry.

  3. Add the banana slices, blueberries, and almond milk into a blender.

  4. Blend on high speed for 1–2 minutes until smooth and creamy.

  5. Taste and, if desired, add honey or maple syrup for extra sweetness.

  6. For a refreshing twist, add ice cubes and blend again until frothy.

  7. Pour the smoothie into a glass and serve immediately.

Nutritional Benefits:

  • Banana: Provides natural sweetness, potassium, and fiber.

  • Blueberries: Packed with antioxidants, vitamins C and K, and support brain health.

  • Almond Milk: A dairy-free alternative, low in calories, and rich in vitamin E.


Q&A Section

Q1: Can I use frozen blueberries instead of fresh?
A: Yes! Frozen blueberries work perfectly and also give the smoothie a thicker, chilled texture without needing ice.

Q2: Is almond milk necessary, or can I replace it?
A: You can replace almond milk with oat milk, soy milk, coconut milk, or even regular dairy milk depending on your preference.

Q3: How can I make this smoothie more filling?
A: Add a tablespoon of peanut butter, almond butter, or a scoop of protein powder for extra protein and creaminess.

Q4: Can I prepare this smoothie ahead of time?
A: It’s best enjoyed fresh, but you can store it in a sealed jar in the refrigerator for up to 24 hours. Shake well before drinking.

Q5: Is this smoothie good for weight loss?
A: Yes, it’s naturally low in calories, high in fiber, and nutrient-rich, making it a healthy choice for weight management.


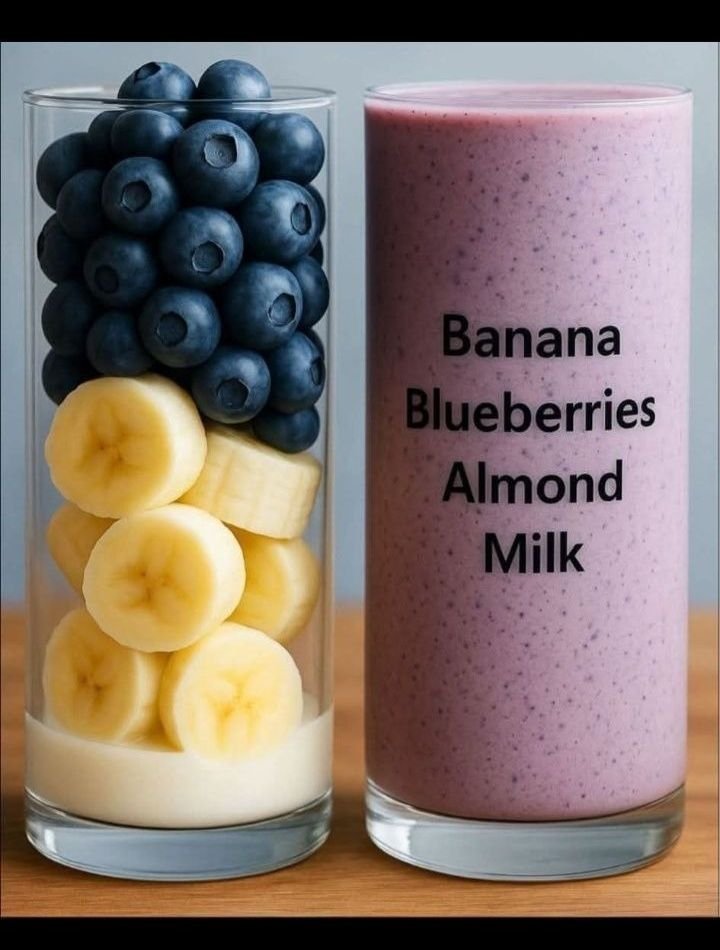
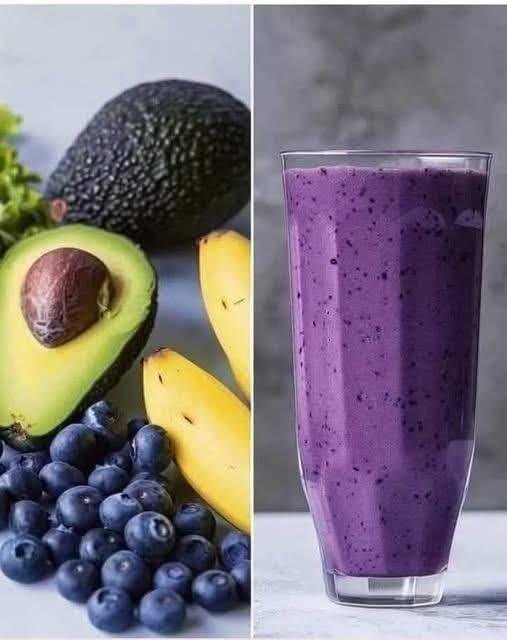
✨ This Banana Blueberry Almond Milk Smoothie is creamy, refreshing, and full of antioxidants, perfect for breakfast or a midday energy boost!

Melt in Your Mouth Chicken

Melt in Your Mouth Chicken

Ingredients:

4 boneless, skinless chicken breasts

1 cup mayonnaise (or plain Greek yogurt for lighter option)

1 cup shredded Parmesan cheese

1 tsp garlic powder

1 tsp onion powder

1/2 tsp paprika

1/2 tsp salt
1/2 tsp black pepper

Directions:

Preheat oven to 375°F (190°C).
Prepare: Pat chicken breasts dry with paper towels. Place in a lightly greased baking dish.
Mix: In a bowl, combine mayonnaise, Parmesan cheese, garlic powder, onion powder, paprika, salt, and pepper until smooth.
Assemble: Spread the mixture evenly over the top of each chicken breast.
Bake for 35–40 minutes, or until chicken is cooked through and topping is golden brown.
Garnish & Serve: Let rest 5 minutes, then serve with steamed veggies or a fresh side salad.

Hamburger Potato Casserole

Recipe Details

Author: tinsuf

Cuisine: American

Category: Main Dish

Keywords: hamburger potato casserole, ground beef casserole, cheesy potato bake

Prep Time: 20 minutes

Cook Time: 70 minutes

Total Time: 90 minutes

Yield: 6 servings

Ingredients

  • 1 ½ pounds ground beef
  • 4 large russet potatoes, peeled and thinly sliced
  • 1 medium onion, chopped
  • 2 cups shredded cheddar cheese
  • 1 can (10.75 oz) condensed cream of mushroom soup
  • ¾ cup milk
  • 1 teaspoon garlic powder
  • 1 teaspoon paprika
  • Salt and pepper, to taste
  • 2 tablespoons olive oil
  • Fresh parsley, chopped, for garnish

Instructions

  1. Preheat the oven to 375°F (190°C). Lightly grease a 9×13-inch baking dish and set aside.
  2. Peel and thinly slice the russet potatoes, keeping the slices as uniform as possible to ensure even cooking. Chop the onion and shred the cheddar cheese if not already prepared.
  3. Heat the olive oil in a large skillet over medium heat. Add the ground beef and chopped onion, cooking until the beef is fully browned and the onion is softened. Drain off any excess fat.
  4. In a small bowl, whisk together the cream of mushroom soup, milk, garlic powder, paprika, salt, and pepper until smooth.
  5. Arrange half of the sliced potatoes in an even layer in the prepared baking dish. Top with half of the cooked ground beef mixture, followed by half of the shredded cheddar cheese.
  6. Repeat the layers using the remaining potatoes, beef, and cheese.
  7. Pour the soup mixture evenly over the entire casserole, making sure it seeps down through the layers.
  8. Cover the dish tightly with aluminum foil and bake for 60 to 70 minutes, or until the potatoes are fork-tender.
  9. Remove the foil and allow the casserole to rest for 5 minutes before garnishing with chopped parsley and serving.

Troubleshooting & Consistency Tips

If the potatoes are not fully tender after baking, re-cover the casserole and continue baking in 10-minute increments. Thin, evenly sliced potatoes are essential for proper cooking.

THE BEST AIR FRYER GRILLED CHEESE SANDWICH

Ingredients

2 slices of bread (thick-cut recommended)

1–2 tbsp butter (softened)

2–3 slices of cheese (cheddar, mozzarella, or a mix)

Optional: shredded chicken, caramelized onions, or tomato slices for extra filling

Instructions

Prepare the Bread

Spread softened butter evenly on one side of each bread slice (the buttered side will face outward).

Assemble the Sandwich

Place one slice butter-side down.

Add cheese (and any extra filling like chicken or tomato).

Top with the second slice, butter-side up.

Preheat the Air Fryer
Preheat to 375°F (190°C) for 3 minutes.
Cook the Sandwich
Place the sandwich in the air fryer basket.
Cook for 5–7 minutes, flipping halfway if needed, until the bread is golden and the cheese is melted.
Serve & Enjoy
Let it cool for a minute before slicing.
Serve with ketchup, soup, or your favorite dip.

Cream-Filled Choux Buns

Cream-Filled Choux Buns

Ingredients

For the choux pastry


• 1 cup water


• ½ cup unsalted butter


• 1 cup all-purpose flour


• 4 large eggs


• 1 tablespoon sugar


• ¼ teaspoon salt


For the cream filling


• 2 cups whole milk


• 3 egg yolks


• ½ cup sugar


• 3 tablespoons cornstarch


• 1 tablespoon butter


• 1 teaspoon vanilla extract

For topping (optional)

• Powdered sugar

Instructions

• Preheat the oven to 200°C (390°F).

• Line a baking tray with parchment paper.

• Prepare all ingredients before starting for smooth workflow.

How to Make

In a saucepan, bring water, butter, sugar, and salt to a boil.

• Add flour all at once and stir quickly until a smooth dough forms and pulls away from the pan.

• Remove from heat and let cool slightly.

• Add eggs one at a time, mixing well after each addition until smooth and glossy.

• Pipe or spoon small rounds onto the baking tray.

Bake for 25–30 minutes until puffed and golden. Do not open the oven early.

• For the cream, heat milk in a saucepan until warm.

• Whisk egg yolks, sugar, and cornstarch until smooth.

• Slowly add warm milk while whisking, then return to heat.

• Cook until thick, remove from heat, add butter and vanilla.

Let cream cool completely.

• Slice buns horizontally and pipe or spoon cream inside.

• Dust with powdered sugar before serving.

Ginger Water Recipe

Full recipe>>>Ginger Water Recipe

Ingredients:

Fresh ginger (about 2-3 inches)

4 cups water

1-2 tablespoons honey (optional)

1 lemon (optional, for added flavor)

Fresh mint leaves (optional, for garnish)

Instructions:

Prepare the Ginger:

Peel and slice the ginger into thin pieces or small chunks.

Boil the Water:

In a medium-sized pot, bring 4 cups of water to a boil.

Add Ginger:

Once the water is boiling, add the sliced ginger and let it simmer for about 10-15 minutes. The longer it simmers, the stronger the flavor.

Optional Additions:

If you like, add honey to sweeten the ginger water. You can also add lemon slices for extra flavor or fresh mint leaves for a refreshing touch.

Strain and Serve:

After simmering, strain the ginger water into a glass or pitcher to remove the ginger pieces.

Serve hot or chill it for a cold, refreshing drink.

Ginger Water Recipe

Ginger Water Recipe

Ingredients:

Fresh ginger (about 2-3 inches)

4 cups water

1-2 tablespoons honey (optional)

1 lemon (optional, for added flavor)

Fresh mint leaves (optional, for garnish)

Instructions:

Prepare the Ginger:

Peel and slice the ginger into thin pieces or small chunks.

Boil the Water:

In a medium-sized pot, bring 4 cups of water to a boil.

Add Ginger:

Once the water is boiling, add the sliced ginger and let it simmer for about 10-15 minutes. The longer it simmers, the stronger the flavor.

Optional Additions:

If you like, add honey to sweeten the ginger water. You can also add lemon slices for extra flavor or fresh mint leaves for a refreshing touch.

Strain and Serve:

After simmering, strain the ginger water into a glass or pitcher to remove the ginger pieces.

Serve hot or chill it for a cold, refreshing drink.

🥤 Creamy Banana, Avocado & Almond Smoothie


🥤 Creamy Banana, Avocado & Almond Smoothie

Prep time: 5 minutes | Servings: 1


Ingredients

1 Ripe Banana (frozen slices work best for a thicker texture)


½ Ripe Avocado (makes it incredibly silky)


1 cup Milk of choice (Almond milk, oat milk, or dairy)


1 tbsp Almond Butter (or a small handful of raw almonds)


1 tsp Honey or Maple Syrup (optional, for extra sweetness)


A pinch of Cinnamon


Ice cubes (if using a fresh banana)


Instructions

Prep: Peel the banana and scoop the avocado flesh out of the skin.


Combine: Place the banana, avocado, milk, almond butter, and sweetener into a high-speed blender.


Blend: Start on a low speed and gradually increase to high. Blend for about 45–60 seconds until the mixture is completely smooth and no almond bits remain.


Serve: Pour into a tall glass. Top with a few whole or crushed almonds and a sprinkle of cinnamon, just like in your picture!


Pro-Tips for the Best Texture

For a colder drink: Use a frozen banana. It gives the smoothie a consistency almost like soft-serve ice cream.


Liquid first: Always pour your milk in first. This helps the blender blades move freely and prevents the thick avocado from getting stuck at the bottom.


Nutrient boost: You can add a scoop of vanilla protein powder or a tablespoon of chia seeds without changing the flavor profile significantly.

Moist Turkey Dinner Loaf

Moist Turkey Dinner Loaf

A healthier, juicy take on the classic meatloaf.

Ingredients

  • The Meat Base: 2 lbs (approx. 900g) Ground Turkey (93% lean is best; avoid 99% fat-free for better moisture)

  • The Aromatics: 1 Large Onion (finely diced), 2 cloves Garlic (minced), 1 Celery stalk (finely diced)

  • The Binder: ¾ cup Panko or Breadcrumbs + ¼ cup Milk

  • The Flavor: 2 Large Eggs, 2 tbsp Worcestershire sauce, 1 tsp dried Thyme, 1 tsp Salt, ½ tsp Black pepper

  • The Glaze: ½ cup Ketchup, 1 tbsp Brown sugar, 1 tsp Dijon mustard


Instructions

  1. Prep the Oven: Preheat your oven to 375°F (190°C). Lightly grease a 9×5 inch loaf pan or line a baking sheet with parchment paper.

  2. Sauté (The Secret Step): Heat a little oil in a pan and sauté the onion, celery, and garlic until soft (about 5 mins). Let them cool slightly. This prevents “crunchy” raw onions and adds moisture.

  3. Soak: In a small bowl, mix the breadcrumbs and milk. Let it sit for 2 minutes until it forms a paste (a panade).

  4. Mix: In a large bowl, combine the ground turkey, sautéed veggies, breadcrumb paste, eggs, Worcestershire sauce, and spices. Do not overmix—use your hands to just combine, or the loaf will become tough.

  5. Shape: Place the mixture into the loaf pan or shape it into a loaf on your baking sheet.

  6. Glaze: Whisk the ketchup, brown sugar, and mustard together. Spread half of it over the top of the loaf.

  7. Bake: Bake for 45 minutes. Spread the remaining glaze on top and bake for another 10–15 minutes (or until the internal temperature reaches 165°F / 74°C).

  8. Rest: Let the loaf rest for 10 minutes before slicing. This keeps the juices inside!

No-Bake Chocolate Peanut Bars

No-Bake Chocolate Peanut Bars

  • Prep time: 10 minutes

  • Chilling time: 2–3 hours

  • Yields: 8–10 bars

Ingredients

The Base:

  • 350g Tea biscuits or Graham crackers (broken into small chunks)

  • 180 ml Milk

  • 85 g Sugar

  • 40 g Unsweetened cocoa powder

  • 60 g Butter (optional, but makes it richer)

  • A pinch of Vanillin or 1 tsp Vanilla extract

The Coating (Ferrero Style):

  • 85 g Crushed peanuts (toasted)

  • 150 g Milk or Dark chocolate (melted)

  • 1 tbsp Vegetable oil (for a glossy finish)


Instructions

  1. Prep the Biscuits: In a large bowl, crush the biscuits by hand into small, pea-sized pieces. You want texture, so don’t turn them into powder.

  2. Make the Syrup: In a small saucepan, combine the milk, sugar, cocoa powder, and vanillin. Heat over medium-low, whisking constantly until the sugar is dissolved and the mixture is smooth and slightly thickened. If using butter, stir it in at the end until melted.

  3. Combine: Pour the hot chocolate mixture over the crushed biscuits. Fold gently with a spatula until every biscuit piece is well coated.

  4. Shape: *Lay out a piece of plastic wrap or parchment paper.

    • Spoon the mixture onto the wrap and roll it into a tight log (like a salami) or press it into a rectangular dish.

    • Freeze for about 30–60 minutes to firm up quickly.

  5. The Chocolate Glaze: Melt the coating chocolate (in the microwave or double boiler). Stir in the vegetable oil and the crushed peanuts.

  6. Finish: Unwrap the chilled log and slice it into bars. Dip each bar into the peanut-chocolate glaze or pour the glaze over the top.

  7. Set: Place them back in the fridge for 15 minutes until the outer shell is snappy.


Pro-Tip

If you want these even crunchier, toast the crushed peanuts in a dry pan for 2 minutes before adding them to the chocolate coating. It brings out a much deeper flavor!

Best Homemade Salsa Ever

Best Homemade Salsa Ever

Every great gathering starts with chips and salsa—and this homemade salsa recipe brings bold, fresh, tangy, and slightly spicy flavors straight to your kitchen. Quick, easy, and endlessly versatile, it’s perfect with chips, tacos, eggs, or grilled meats.


Why You’ll Love This Recipe

  • Ready in just 5 minutes

  • Bursting with bold, fresh tomato flavor

  • Easily customizable to your preferred spice level

  • Better than store-bought and more budget-friendly

  • Perfect for parties, taco nights, or casual snacking


Ingredients

  • 1 (28 oz) can whole tomatoes, with juice

  • 2 (10 oz) cans Rotel (diced tomatoes with green chilies)

  • ¼ cup chopped onion

  • 1 small garlic clove, chopped

  • 1 jalapeño pepper, cut into 4 pieces

  • ¼ tsp sugar

  • ¼ tsp salt

  • ¼ tsp ground cumin

  • ½ cup fresh cilantro (or more to taste)

  • Juice of ½ lime


Instructions

Step 1: Combine Ingredients

In a blender or food processor, add:

  • Whole tomatoes with juice

  • Both cans of Rotel

  • Chopped onion

  • Garlic

  • Jalapeño

  • Sugar, salt, cumin

  • Lime juice

  • Cilantro


Step 2: Blend

Pulse 10–15 times, or until the salsa reaches your preferred consistency: chunky or smooth.


Step 3: Taste and Adjust

Try the salsa with a tortilla chip and adjust:

  • Salt

  • Lime juice

  • Cilantro


Step 4: Chill

Transfer to a container and refrigerate for at least 1 hour to let the flavors meld.


Step 5: Serve

Serve cold with tortilla chips, spoon over tacos, or use as a topping for eggs, grilled meats, or nachos.


Tips for Success

  • For extra heat, add another jalapeño or include the seeds

  • Fresh tomatoes are great in season, but canned works year-round

  • Add more lime or cilantro for a bright, herbaceous punch

  • Store in glass containers to preserve flavor longer


Storage & Reheating

  • Refrigerator: Up to 5 days in an airtight container

  • Freezer: Up to 2 months; thaw in fridge and stir before serving


FAQs

Can I make it spicier?
Yes! Add a second jalapeño, keep the seeds, or toss in a serrano pepper.

What if I don’t have Rotel?
Substitute with diced tomatoes and a small can of green chilies.

Is this salsa chunky or smooth?
Pulse less for chunky, more for smooth—it’s up to you!


Final Thoughts

Once you make this salsa, store-bought versions will feel bland. Bright, balanced, and versatile, it’s a recipe that shines from last-minute gatherings to Taco Tuesdays. You can also tweak it: add mango for sweetness, chipotle for smokiness, or roasted garlic for depth.

Serve it up and watch it disappear in minutes!


Share Your Dip

Whip up a batch? Tag #HomemadeSalsaLove or #SalsaObsession on Instagram to show off your creation!

🍋 Strong Fat-Burning Detox Drink

🍋 Strong Fat-Burning Detox Drink — Full Recipe

Ingredients

  • 1 glass (250–300 ml) cold water

  • Juice of 1 fresh lemon

  • 6–8 mint leaves

  • 1 tablespoon grated ginger (fresh)

  • ½ teaspoon honey (optional)

  • Ice cubes (optional)

  • 2–3 thin lemon slices for extra flavor

  • Instructions

    1. In a glass, squeeze the juice of one fresh lemon.

    2. Add the grated ginger. Let it sit for 3–5 minutes so the flavor releases.

    3. Add mint leaves and gently press them with a spoon to release the aroma.

    4. Pour in cold water and mix well.

    5. Add honey if you prefer a lightly sweet taste.

    6. Drop in ice cubes and lemon slices. Stir and serve immediately.

    How It Works (Healthy Explanation)

    This drink hydrates the body, boosts digestion, increases vitamin C intake, and may support natural metabolism. Lemon supports detoxification, ginger may help digestion, and mint soothes the stomach. It’s not a miracle fat burner, but it can support a healthy routine when paired with a balanced diet.


    💬 Q&A (350 Words Total Including Recipe Above)

    Q1: Does this drink really burn fat?

    It can assist your body by improving hydration, digestion, and metabolism, but no drink alone burns fat dramatically. Sustainable weight loss comes from combining such drinks with healthy eating and activity.

  • Q2: How many times should I drink it?

    Once daily is enough—preferably in the morning on an empty stomach or 30 minutes before breakfast.

    Q3: Can I drink it at night?

    Yes, but ginger may feel stimulating for some people. If you are sensitive, drink it earlier in the day.

    Q4: How long should I use this drink?

    You can safely use it for 2–4 weeks. Take a break afterward if needed.

    Q5: Can it help reduce belly fat?

    It may help reduce bloating and improve digestion. Real belly fat reduction requires a calorie deficit over time.

    Q6: Who should avoid it?

    People with citrus allergies, acid reflux, or stomach ulcers should limit lemon and ginger. Pregnant individuals should moderate ginger.

    Q7: Can I store this drink?

    Fresh is best. But you can prepare a larger batch and refrigerate for up to 24 hours.

    Q8: Can I add cucumber?

    Yes! Cucumber can improve hydration and enhance the detox effect.

If you want, I can also create a stronger versiona warm version, or a 7-day plan.

Homemade Nut and Date Energy Bars

Homemade Nut and Date Energy Bars

Yields: 8–10 bars | Prep time: 15 mins | Chilling time: 1 hour

Ingredients

The Nut & Seed Base:

  • 70 g (1/2 cup) Cashews

  • 70 g (1/2 cup) Walnuts

  • 70 g (1/2 cup) Almonds

  • 70 g (1/2 cup) Hazelnuts

  • 40 g (1/4 cup) Pine nuts

  • 70 g (1/3 cup) Pumpkin seeds

The Natural Binder:

  • 150 g (1 cup) Dates, pitted

  • Cold water (for soaking)


Instructions

1. Prepare the Dates

  • Soak: Place the pitted dates in a small bowl and cover them with cold water. Let them soak for about 15 minutes to soften.

  • Blend: Drain the water and place the softened dates into a food processor. Blend until they form a thick, smooth paste. If the mixture is too dry to move, add 1 tablespoon of the soaking water back in.

2. Toast and Chop the Nuts

  • Toast (Optional but recommended): For a deeper flavor, spread all the nuts and pumpkin seeds on a baking sheet and toast them in a preheated oven at 325°F (160°C) for 8–10 minutes. Watch closely so they don’t burn.

  • Chop: Roughly chop the larger nuts (walnuts, almonds, hazelnuts, cashews) into smaller pieces. You want a variety of sizes to ensure the bars hold together well while still having a great crunch.

3. Combine the Ingredients

  • In a large mixing bowl, combine the chopped nuts, pine nuts, and pumpkin seeds.

  • Add the date paste to the bowl.

  • Mix: Use a sturdy spatula or clean hands to thoroughly mix the ingredients. Ensure every nut and seed is well-coated in the sticky date paste, as this is what prevents the bars from crumbling.

4. Press and Chill

  • Line the Pan: Line a small rectangular baking dish or loaf pan with parchment paper, leaving some overhang on the sides for easy removal.

  • Press: Transfer the mixture into the pan. Use a spatula or the bottom of a heavy glass to press the mixture down as firmly and evenly as possible. The more you compress it, the better the bars will hold their shape.

  • Chill: Place the pan in the refrigerator for at least 1 hour (or 30 minutes in the freezer) to allow the date paste to set firmly.

5. Slice and Serve

  • Use the parchment paper “handles” to lift the block out of the pan.

  • Place it on a cutting board and use a sharp knife to slice it into bars or bite-sized squares.


Storage Tip

Store these bars in an airtight container in the refrigerator for up to two weeks, or in the freezer for up to two months. They are best served chilled.

Fresh and Fruity Jelly Cake

Fresh and Fruity Jelly Cake

A colorful, multi-layered jelly cake filled with fresh fruit, perfect for a light dessert or celebratory treat.

Prep Time: 30 minutes
Chill Time: 4–6 hours (or overnight)
Servings: 6–8


🧺 Ingredients

Jelly Base

  • 3 cups water

  • 1 cup sugar (adjust to taste depending on the sweetness of your fruit)

  • 4 tablespoons (approx. 40 g) unflavored gelatin powder (or use clear agar-agar for a vegan version)

  • 1 tablespoon lemon juice

Fruit Selection

  • 2 kiwis, peeled and sliced into rounds

  • 1 cup strawberries, hulled and sliced

  • 2 bananas, sliced

  • 1 orange or 1 mango, peeled and cut into segments

  • ½ cup pomegranate seeds


👩‍🍳 Instructions

1️⃣ Prepare the Fruit

  1. Wash all fruit thoroughly.

  2. Slice the kiwis, strawberries, bananas, and oranges/mangoes into uniform pieces.

  3. For an attractive presentation, place the visually appealing slices (like kiwi and strawberries) against the sides and bottom of your mold or silicone pan first.


2️⃣ Make the Jelly Mixture

  1. Bloom the Gelatin: In a small bowl, mix the gelatin with ½ cup cold water. Let it sit for 5 minutes until soft.

  2. Dissolve the Sugar: In a saucepan, combine the remaining 3 cups of water and sugar. Heat gently over medium heat until the sugar fully dissolves.

  3. Combine: Remove from heat and stir in the bloomed gelatin until the mixture is fully clear.

  4. Add the lemon juice for brightness.

  5. Cool: Let the mixture reach room temperature. Avoid pouring hot jelly directly over the fruit to prevent softening or cloudiness.


3️⃣ Assemble the Cake

  1. Arrange the prepared fruit in your mold, layering carefully to fill any gaps.

  2. Pour the cooled jelly mixture gently over the fruit until fully covered.

  3. Lightly tap the mold on the counter to release any trapped air bubbles.


4️⃣ Chill and Set

Place the mold in the refrigerator for at least 4–6 hours, or ideally overnight, until the jelly is firm and set.


5️⃣ Unmold and Serve

  1. Briefly dip the bottom of the mold into warm water for 5–10 seconds to loosen the edges.

  2. Place a serving plate over the mold and gently flip it to release the jelly cake.

  3. Slice into wedges with a sharp, warm knife for clean edges.


💡 Tips for Success

  • For a sparkling “jeweled” look, add the pomegranate seeds last so they settle into the smaller gaps between the fruit.

  • Use fruits that are firm and fresh for best results.

  • Serve chilled for a refreshing dessert.

Grandma’s Secret Soft Poppy Seed Bread

Grandma’s Secret Soft Poppy Seed Bread
This soft, fluffy, and lightly sweet bread is speckled with nutty poppy seeds. Perfect for breakfast, sandwiches, or just enjoying with butter and jam.
Servings: 1 loaf (about 12 slices)
Prep Time: 15 minutes
Rise Time: 1–1.5 hours
Bake Time: 30–35 minutes
Ingredients
For the dough:
3 cups all-purpose flour
2 teaspoons instant yeast
2 tablespoons sugar
1 teaspoon salt
1 cup warm milk
2 tablespoons unsalted butter, melted
1 large egg
For the filling/topping:
2 tablespoons poppy seeds
1 tablespoon sugar
1 teaspoon melted butter (optional, for brushing)
Instructions
Prepare the dough:
In a large bowl, combine flour, yeast, sugar, and salt. Add warm milk, melted butter, and egg. Mix until a soft dough forms. Knead for 8–10 minutes until smooth and elastic.
First rise:
Place the dough in a lightly greased bowl, cover, and let rise in a warm place for 1 hour or until doubled in size.
Shape the bread:
Punch down the dough and roll it into a rectangle about 12×8 inches. Sprinkle poppy seeds evenly over the surface. Roll the dough tightly into a log, pinching the seam to seal. Place the log into a greased loaf pan.
Second rise:
Cover the loaf and let it rise for another 30–40 minutes until slightly puffy.
Bake:
Preheat the oven to 180°C (350°F). Brush the top lightly with melted butter and sprinkle a few extra poppy seeds. Bake for 30–35 minutes until golden brown and cooked through. Tap the bottom of the loaf—it should sound hollow.
Cool:
Remove from the pan and let the bread cool on a wire rack before slicing.
Serving ideas:
Toast with butter or cream cheese
Make sandwiches or French toast
Enjoy with honey or jam
Storage:
Store in an airtight container at room temperature for up to 3 days
Freeze for up to 2 months

Soft and Cheesy Stuffed Bread Rolls

Soft and Cheesy Stuffed Bread Rolls

Yields: 8–10 large rolls
Prep Time: 20 minutes
Rest Time: 1 hour 20 minutes
Bake Time: 20–25 minutes

These rolls are soft, fluffy, and filled with melted cheese and colorful vegetables. They are perfect for sharing at meals or serving as a warm snack.


🧺 Ingredients

For the Dough

  • 1 cup warm milk

  • 1 cup warm water

  • 2 tablespoons sugar

  • 1 tablespoon instant yeast

  • 4–5 cups all-purpose flour (added gradually)

  • 1 teaspoon salt

  • ¼ cup vegetable oil

For the Filling

  • 2 cups shredded cheese (mozzarella or cheddar blend)

  • 1 red bell pepper, finely diced

  • 1 yellow bell pepper, finely diced

  • 2 tablespoons fresh parsley or green onions, finely chopped

For the Glaze

  • 1 egg yolk

  • 1 tablespoon milk


👩‍🍳 Instructions

1️⃣ Prepare the Dough

Activate the Yeast
In a large bowl, combine the warm milk, warm water, sugar, and yeast.
Stir gently and let the mixture rest for 5 minutes, until it becomes foamy.

Mix the Dough
Add the vegetable oil and salt to the yeast mixture.
Gradually add the flour, one cup at a time, mixing gently until a soft dough forms.

Work the Dough
Continue mixing and gently shaping the dough for about 8 minutes, until it becomes smooth and flexible.

First Rest
Place the dough in a lightly oiled bowl.
Cover and let it rest in a warm place for about 1 hour, until it has increased in size.


2️⃣ Shape and Fill the Rolls

Lightly dust your work surface with flour and place the dough on it.

Roll the dough into a large, thin rectangle.

Spread the shredded cheese evenly over the surface.
Sprinkle the diced red and yellow peppers and chopped parsley on top of the cheese.

Starting from the long side, gently roll the dough into a long log.

Using a knife or plain dental floss, slice the log into rounds about 1½ to 2 inches thick.


3️⃣ Final Rest and Baking

Arrange the rolls, cut side up, in a greased baking dish or on a parchment-lined tray.

Cover lightly and let them rest for 20 minutes.
While they rest, preheat the oven to 375°F (190°C).

Mix the egg yolk with the milk and gently brush it over the tops and sides of the rolls.

Bake for 20–25 minutes, until the rolls are golden on top and the cheese inside is melted.


🍽️ Serving Ideas

Serve warm so the cheese stays soft and stretchy.
These rolls are delicious with:

  • Marinara sauce

  • Garlic butter

  • Soup or salad

  • As a party or lunch bread


💡 Helpful Tips

✔ Add olives or corn for extra flavor
✔ Use pizza cheese for extra melt
✔ Store leftovers in an airtight container for up to 2 days
✔ Reheat gently in the oven or pan

Healthy Chicken Salad (light, protein-rich, Mediterranean-friendly)

Healthy Chicken Salad (light, protein-rich, Mediterranean-friendly)
Serves: 2–3
Prep time: 15 minutes
Cook time (if chicken not cooked): 12–15 minutes
Ingredients
2 cups cooked chicken breast, shredded or diced
2 cups mixed salad greens (lettuce, arugula, spinach)
1 cup cherry tomatoes, halved
1 small cucumber, diced
¼ red onion, thinly sliced
¼ cup olives (black or green), sliced
¼ avocado, diced (optional)
2 tablespoons feta cheese, crumbled (optional)
For the dressing
2 tablespoons extra virgin olive oil
1 tablespoon fresh lemon juice
1 teaspoon Dijon mustard
1 small garlic clove, minced
Salt to taste
Black pepper to taste
½ teaspoon dried oregano or Italian seasoning
Instructions
If the chicken isn’t cooked, season lightly with salt and pepper and grill, bake, or pan-cook until fully done. Let it cool, then shred or dice.
In a large bowl, add salad greens, tomatoes, cucumber, onion, olives, and avocado.
Add the chicken on top.
In a small bowl, whisk together olive oil, lemon juice, Dijon mustard, garlic, salt, pepper, and oregano.
Pour the dressing over the salad and toss gently to combine.
Sprinkle feta on top if using and serve immediately.
Healthy swaps and tips
• For extra protein, add boiled eggs or chickpeas
• For low-fat, skip feta and avocado
• For meal prep, store dressing separately
• Works great in wraps or pita bread

Avocado Blueberry Smoothie

Avocado Blueberry Smoothie
A creamy, nutrient-packed smoothie loaded with antioxidants, healthy fats, and natural sweetness. Perfect for breakfast or a quick snack.
Servings
2
Time
Prep: 5 minutes
Ingredients
1 ripe avocado
1 cup fresh or frozen blueberries
1 cup milk (dairy or plant-based, e.g., almond, oat, or soy)
1–2 teaspoons honey or maple syrup (optional)
½ teaspoon vanilla extract (optional)
Ice cubes (optional, if you like it chilled/thicker)
Instructions
Cut avocado in half, remove the pit, and scoop the flesh into a blender.
Add blueberries, milk, honey (if using), and vanilla extract.
Blend on high speed until smooth and creamy.
Add ice cubes and blend again if you prefer a chilled smoothie.
Taste and adjust sweetness as needed.
Serving Suggestions
• Serve immediately in glasses, garnished with a few blueberries or a slice of avocado.
• Pair with a handful of nuts or a granola topping for extra texture.
Tips
• Use frozen blueberries for a naturally thicker, chilled smoothie.
• For extra protein, add a scoop of protein powder or Greek yogurt.
• Add a teaspoon of chia or flax seeds for a fiber boost.